Fog of War: BatRep FOW Late-War
By: Benny Christiansen
The typical Dane. Happy-go-lucky with a positive look upon almost everything. Giving you a glimpse of the way the Danes do it.
In these two articles I would like to present the Fog Of War cards used at the event and also, by going through the last game in detail, I try to give you examples of how we play with the V4 rules.
In Denmark we have a concept called “Hygge.” Try to look it up, as the closest translation is probably “Cosy”, but that does not fully cover the meaning.
We try to keep the gaming community active by hosting one-day events, where the main focus is on meeting each other and playing. For this event, the guys in Aarhus (Denmark) had arranged one of those one-day events. The games were two vs two, with 1000 pts lists for each participant. Each game would be determined by Battle Plan Cards and then a dice to see which of the missions in the Battle Plan we would play.
Originally, I was paired with my friend Stephan. We agreed that we would field some fun lists. However, due to last-minute sign-ups, I played as a solo-player with two lists of 1000 points alone. This way we had an equal number of teams on Axis and Allied side.
I ended up with these 2 lists:
When I go to events like this, I enjoy trying out new things. I am one of those people who HAS to try things out in a few games, to support any theories I might have. In this case, I was sure that heavy tanks, like Churchills and IS-2s have no place in V4 without proper support in the form of infantry/gun teams to prevent infantry assaults from taking them out. I realized that the heavy tanks can work in V4, but only if the opponent does not use veteran infantry to counter it. I will go into detail on this in the second part of this article.
I love the Churchill. It looks rough and tough. The IS-2 is a fun tank. In V3, It was awesome to make sure the enemy focused on it, as it could be lethal in close combat. In V4, I have not had the chance to test it properly. In this event, we had the TOs permission to mix allied lists from East/West, so I decided to field the tanks.
I encouraged my fellow participants to make similar testing-lists/funny lists. This resulted in more Super Pershings and Pershings on the field than I have ever seen in one place before. I believe we ended up with all lists on the allied side except mine, had either Pershing or Super Pershings. One guy fielded one Super Pershing and three Pershings in his two lists.
IS2 Platoon moving towards the objectiveFirst Game
My first game was against German Volkssturm. My opponents were two nice guys, who enjoy painting and talking just about as much as they enjoy gaming. I enjoy games with this kind of opponent, as it is a 100% guarantee of entertainment with a mix of history and good old “Hygge”.
We ended up playing Breakthrough, where I was the attacker. The table had a village in the center and forest on one side. I decided to attack towards the forests, to avoid giving my opponent’s bulletproof cover (there were some of that in the table quarter, where I deployed). My challenge in the game was to be able to kill enough of my opponent’s force.
In the aftermath of the battle, I realized that it would have been better to put one of the IS2 platoons in reserve, along with the platoon of Churchills. Trying to get past all the Volkssturm infantry proved extremely hard and time-consuming, which delayed me to the point where I, in the last turn of the game, had to make an all-out assault with my IS2 platoon in order to get through to the objective.
This was in part necessary as my opponents had a Kleinpanzer Wanze platoon with two vehicles in ambush. They revealed their ambush in the last round, and shot two Churchills and thereby destroyed both Churchills that was contesting the objective. My assault with my IS2 platoon ended up being just outside the 20 cm and, because we were in turn seven, the game ended.
Just outside 20 cm!Second Game
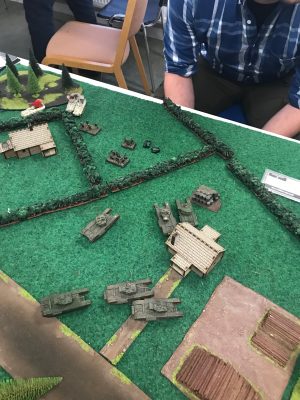
Game Two was against another two entertaining guys. I’ll go through this game, turn by turn in the next article. This way I hope you will be able to get a feeling of how the Fog Of War cards affect the game. My opponents had never tried it before, but they were up to the challenge. Their lists consisted of Panzer Grenadiers and Panzer IV list from Desperate Measures.
Deployment – with no objectives (No, it’s not Annihilation!)First Game
We played a meeting engagement, with the Fog Of War cards. For those of you, who have not tried these cards, allow me to encourage you to try them at your next meeting engagement game. In my experience the meeting engagement mission often consists of hide’n’seek and I find them hard to make action-packed. With Fog Of War cards, it is always entertaining and a challenge. In our match-up, my opponents felt it also meant that they had a fair chance. Their lists had only 1-2 choices, that could break through my front armor, so they felt a shoot-out would be in my favor.
Turn 1
They drew a hidden card. My opponents dashed their half-tracks with trained panzer grenadiers to my side of the table, obviously wanting to claim the forest. I drew Secure Major Objective, and they put it at their table edge, with a Panzer IV platoon and HQ to defend it. The card I drew forced me to make a rush towards the enemy. Remember that you draw 3 cards at the beginning of the turn and then choose 1 of them, and put the other 2 in the bottom of the deck.
Why would they dash all the way to the bottom of my deployment zone?Turn 2
They played an objective card with four turn counters and placed it in their own deployment zone at the table edge. They claimed the forest and gain one point due to the “Hidden Intelligence” card (the one they drew in turn 1).
In my second turn, I drew the card “Spread Disorder” that can be used to remove one of the enemies revealed objectives. I moved up my Churchills, to start going for the Secure Major Objective card. It was worth five points, and we played for eight points to win.
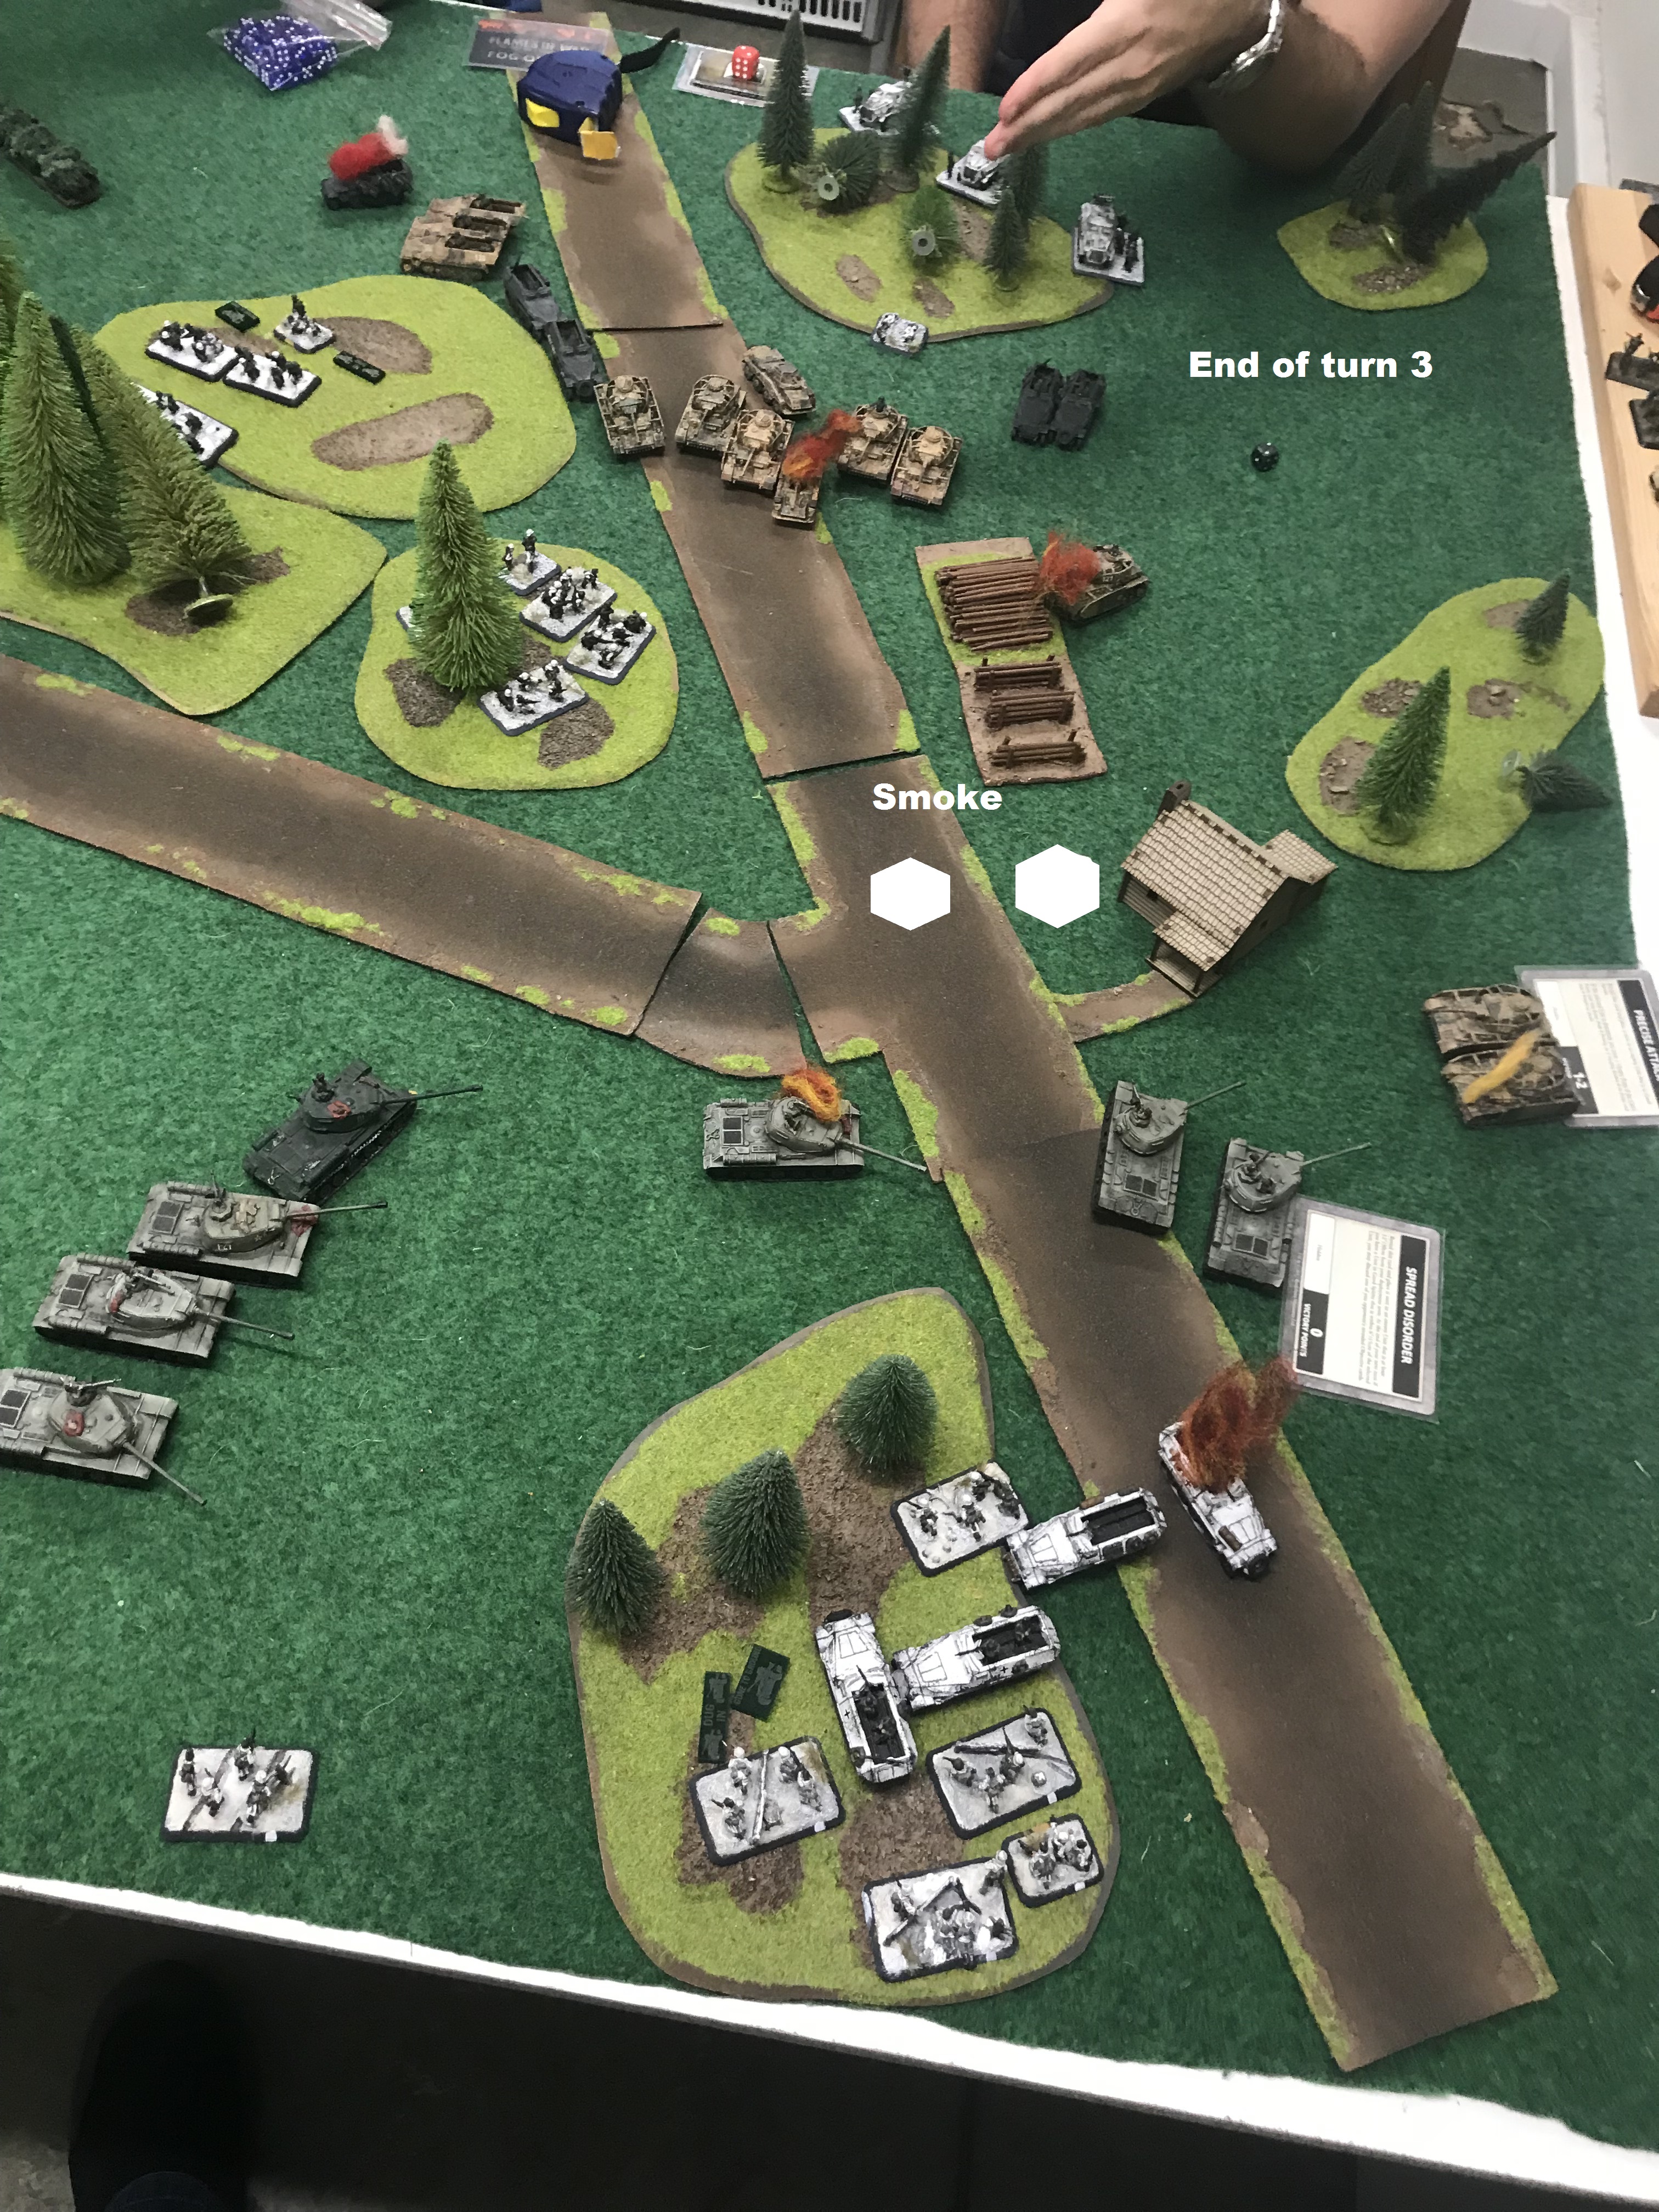
The two arrows points to the hiding Panzer IV platoon, and the objective with turn counter on it.Turn 3
This turn was rather uneventful, as their Pak40-wagon misses the Blitz move. They dropped smoke in front of my IS2 platoon, which had two tanks left. I drew the card that gives me two points if I eliminate a unit (placing the card next to it while it is in good spirits). I chose the Panzer IV platoon that had lost one tank. I shot at that Panzer IV and took out another. They managed the Last Stand test. I played Spread Disorder in their turn and removed the objective with turn counters on their table edge.
Turn 4
My opponents played Spread Disorder to remove the Secure Major Objective. In my turn, I played Secure The Objective (I place it in their deployment zone, but it’s “only” worth three points). I take out the remaining Panzer IV and gain two points because the platoon costs more than 135 points.
Turn 5
My opponents put Secure Objective on my table edge. I realized I had to rush down with my IS-2 platoon, in order to contest it.
They tried to shoot at my Churchills that were close to the objective in their deployment area, but no effect. I subsequently claimed the Secure Objective for three points in their deployment zone. They were clearly under pressure here, and I
It’s a stretch, but I can make it to the objective!suspect they could have made better use of their infantry, instead of letting it stay in place for several rounds. I bombarded it regularly (spotting with my HQ). This removed a team now and then. I moved my IS-2 platoon down to contest the objective but failed the “follow me” order.
At my objective in their deployment area, they used a Follow Me order with part of the infantry platoon in the middle of the table, in an attempt to contest the objective. That failed, so only the command team was within 10 cm of the objective.
I prepared to take out their veteran infantry platoon, that had stayed in the same spot the entire game, luckily for me. I draw the card that would give me one point if I kill the platoon. I played “Secure Minor Objective,” and placed it next to the veteran platoon. This way, if I get the platoon AND the objective, I would be at eight points and win. We were also running low on time at this point.
If I can kill 3 infantry teams, I can win!Turn 6
They played Forward HQ to make the building near my deployment zone an important building. But it is too late, as there is no time for another full turn.
Remember that you cannot win until you are at the “Check Victory Conditions” (nr. 5 in the Starting Step). Their infantry HQ can make it into the building, but would not gain points until turn 7. They move out of the forest to assault my IS2 platoon at their objective at the forest, and manages to kill one tank, bail the other, and secure the minor objective they had there.
1 IS2 dead and the other one bailed out and then dead in the assault phase. Deadly trained infantry!As I begin my turn 6, due to lack of time, we agree that there is nothing to do on the IS-2 side of the board. Instead, we focus on the veteran squad vs the Churchills. I shoot and assault with my platoon of three Churchills. I get one bailed and one dead Churchill as a result of their fantastic Defensive Fire.
The other platoon of Churchills only has one tank in range. I assaulted with it, and managed to get the objective. But their infantry survived and retreated 15cm away from me, leaving me with seven points and them with five points in a Draw.
2 assaults with Churchills, the last one getting through defensive fire, but they managed to run away, denying me 1 point.Fog of War
One of the really great things about Fog Of War cards is that you can actually “sacrifice” a unit on an objective and not lose a point. The idea of being able to sacrifice a unit to complete a “higher purpose” seems very much like the real deal during WW2.
The Fog Of War cards are very good at making the Meeting Engagement missions full of action. If you prefer a more competitive game, you can choose ten cards to match your list, and draw from that every round. It makes the mission very challenging as it allows you to choose your objective cards, based on what way you prefer to play your list.
Next time I’ll have a detailed report from the last game of the day, where I play vs two players from the Danish ETC team.
I’ve played in one of the Aarhus doubles tournaments. Had a great time. The emphasis is on having fun with the guys not who wins or loses. At lunch time we all went down the street for some really good pizza, but that was at the old club house.
Hi Rob.
I’m happy to hear you also have experienced that “fun” is the main purpose of meeting, and I hope to meet you one day 🙂
I think FOW cards are perfect for tournaments. It allows players of each game a chance to rack up points even if they lost. Also, it is a deterrent for slow playing because you will rob your self of points, win or lose.
Well put! It forces the gamers to be active and to use the ability of their forces to the maximum. 🙂