Painting Guide for US Armor circa 1990
by R. Elliott “122nd NYVI” on the NDNG forum
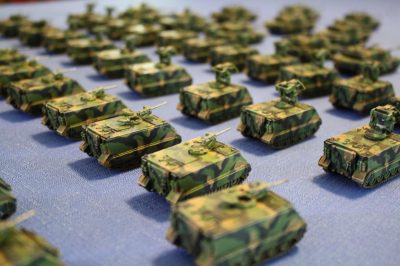
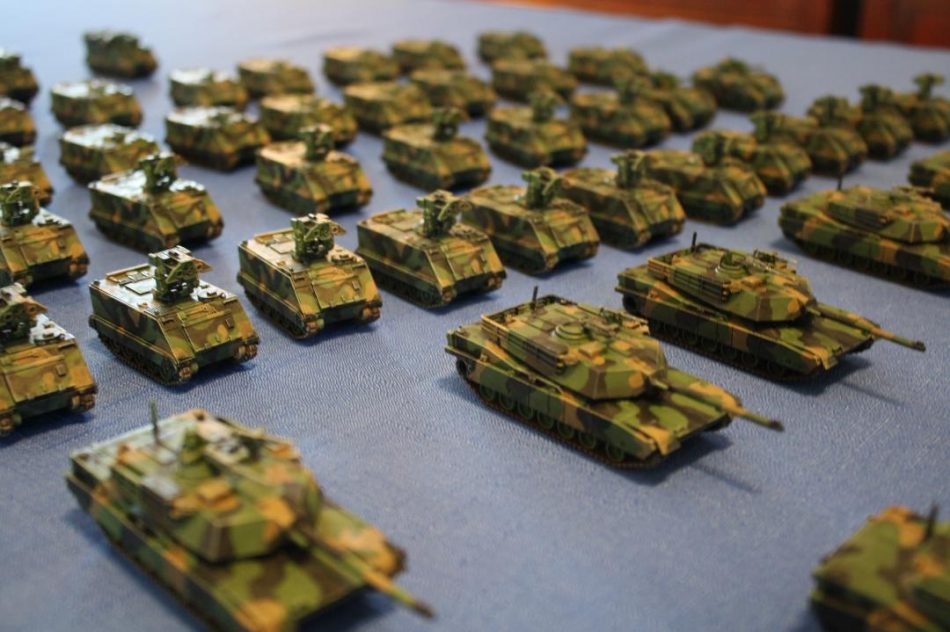
Recently I was commissioned to paint up my buddy, Marc Densmore’s, Team Yankee, US vehicle collection. The horde included 40, M113 variants, two, M577s and 13, M1 Abrams’ variants. A little research indicated that the pattern was factory applied, which meant that it was going to have to be consistent on every vehicle… This was going to be challenging.
My first question was whether or not there were any painting guides available for that specific pattern? I knew from my own service in a mech infantry unit, back in the early ‘80’s, that there were probably guides out there somewhere. Back in the day, one of my duties as a young PFC was to paint our section’s 113. My section sergeant handed me the painting guide and told me to get to work.
I recall being amazed at the diagram. It was basically a paint-by-number picture of a 113!
I started looking around and was disappointed that I couldn’t find anything useful in the Team Yankee rules or on their site. I did, however, come across a forum posting where someone had cited the FM for the period. I did a web search (Unfortunately, I cannot recall the exact FM.) and discovered that our tax dollars, in the form of the FM, were available as a free download! I downloaded the manual and proceeded to wade through the pages of material until I found the painting guides for the M1s and M113s.
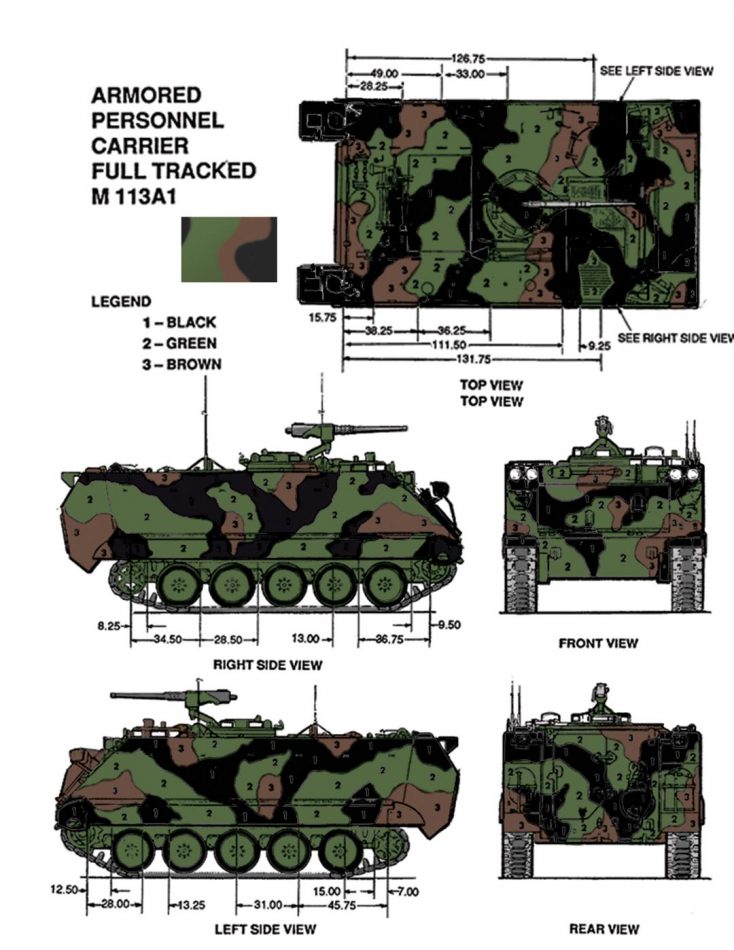 I wanted a simple, one-page reference, that I could look at while painting. It had to have all the necessary views – front, back, right side, left side and top.
I took the appropriate views and placed them into a new Photoshop document. This was necessary as the FM had one view per page. Photoshop is a graphics program that would allow me to resize and color the diagrams.
The next step was to refine the downloaded diagrams. The PDF that I found was a low-resolution document so I had to clean-up the line drawings. This involved refining some edges and filling in some lines so that the coloring step would be easier.
Once these tasks were completed, I then sampled the colors from the TY site – I think – and set about coloring the diagrams. In the 113 guide, I left the color numbers, but I removed them from the M1 guide.
Each image was broken down into three different colors – black, brown or green. I made the tracks and .50cals gray. I made the trackpads a darker gray, but if you want to paint them, black or Worn Rubber would be more appropriate.
This took me a few days to accomplish, but once it was finished, it was exactly what I wanted – a single page reference with every view of the vehicle!
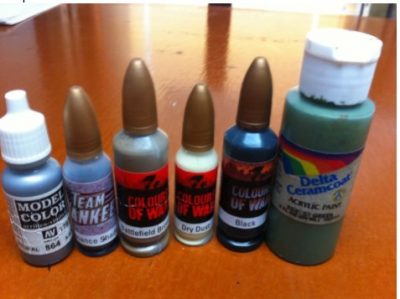
The next step was to get to the actual painting. A word about the colors is in order. I sprayed the vehicles with the TY Yankee Green that Marc had given me. This was just too bright for my eye. I also didn’t like the way that thin paint washes were repelled by the paint.
Even with the Ordnance Shade over the top, the color didn’t ring true to me. Looking over my paints I spied Forest Green, from Delta Ceramcoat. This looked like it would do the trick for me. I grabbed my ¾” flat brush and quickly covered a 113 with a thin coat of this color. It “looked right” to my mind’s eye. My unit had some solid green 113s and that color, at scale with the washing and weathering, seemed to match the Delta color very closely. I did try the Battlefront Yankee Green, but it was too watery and didn’t cover well enough for me. I would run with the Delta color for the base coat. The Battlefront Black, Battlefield Brown, Dry Dust & Ordnance Shade colors, on the other hand, were really nice to work with. I used them throughout the project.
After I finished the project, I contacted Tom Burgess offering to donate the guides to the TY community. That’s where this article came from.
Below are the paints, brushes, and painting guide in document protectors as a desk-side reference used to paint this collection:

The painting process was as follows:
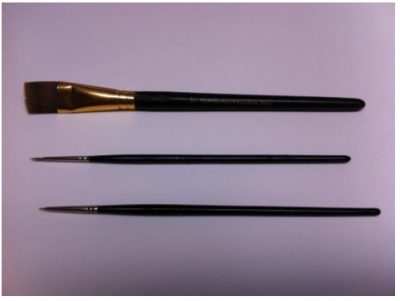
I first painted one vehicle completely to use as a reference for the others. I then painted the M113s in groups of five and the M1s in groups of threes. 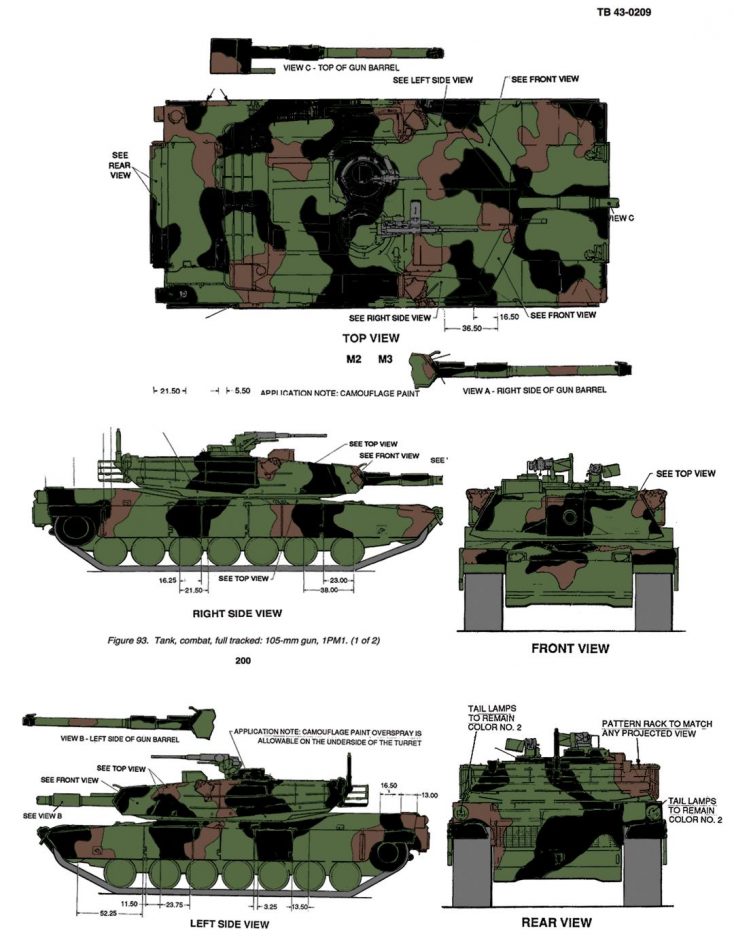 Step One: I based the vehicles in the Forest Green. I use a ¾” flat brush for this step. The large brush allows me to cover a lot of area quickly. I use fairly thin paint. The Delta paint is a bit thick and typically, I thinned it down a bit to make it flow better.
Step Two: Using a small sable watercolor brush – 3/0 or smaller – I outlined the black shapes, one face at a time. I usually started with one side and painted the outlines on all the vehicles in the group. Once the outlines were done in the group, I filled them in. I repeated this process for each of the five facings.
Step Three: Repeat Step Two using brown paint.
Step Four: Paint the MG with Natural Steel. Leave the ammo box green.
Step Five: Paint the tracks with Raw Umber. I didn’t bother with the rubber edges on the road wheels. Under normal game lighting, the tracks are pretty much invisible. On most of my WWII tanks, I don’t paint the road wheels and suspension the vehicle’s color. Instead, I paint them with a dark brown and then highlight over that. If I feel that some additional color is called for, I spot paint some into the area.
Step Six: Using a large, soft brush paint the entire vehicle with Ordnance Shade and let dry. This creates a convincing “dirty” look. Do not worry about pooling or streaking. It looks convincing and adds visual variety.
Step Seven: Using that large, flat brush, I drybrush the vehicle with Dry Dust. This should be very dry. You want to pick out the edges and that’s really it. Too much will make it too light. It may take a couple tries to get this step right.
I was really impressed with the way the colors all worked together. The final product really did remind me of the real thing!
A final note on this process. As I understand it, the NATO scheme was factory applied, which means that every vehicle looked exactly the same. I’m good, but I am not a machine. My goal was to create a collection of vehicles that would clearly read the same way on the table top. Having a similar shape and color located in the same place on every vehicle really creates the impression that I was looking for. Using these guides and following this process should help you to replicate the results in your own collections. Unfortunately, I could not find guides for the M577 so I distorted the 113 pattern and extended it upward. The ITVs were the same. I extended the pattern upward and carried that through consistently on all of those vehicles. If anyone is heading to Historicon, my buddy, Marc Densmore will have the army with him and you can check it out in person for a better look-see. Good luck!
Nice post! I did a similar post for WWPD just over two years ago, but focused on 6mm…
http://www.wwpd.net/2016/03/nato-tri-color-camo-in-6mm.html
Allen
Hey Allen!
Great minds think alike! Luckily I’m an artist that uses Photoshop a lot. It made the job a lot easier for me. I liked your 6s! They looked great. I hear TY plays really well in that scale. Glad you enjoyed the post.
Randy