IPB Part II Attacking
In the last article, we discussed how a player can use the military technique of Intelligence Preparation of the Battlefield (IPB) to enhance his chances of winning in Flames of War as the defender. This article continues that discussion by applying those same principles to the mission of an attacking player.
For those who have not read it, Intelligence Preparation of the Battlefield is a task the planning staff of a unit performs immediately upon receiving a mission from their higher headquarters. It defines the size and scope of the battlefield, how the terrain and weather will affect the unit’s ability to perform their assigned mission, and what the enemy’s most likely and most dangerous courses of action will be.
For today’s example, we will have a Polish T-72M battalion attacking against a West German Mechanized Formation and Panzer Formation.
Polish T-72M Battalion
HQ
4 x T-72M
5 x T-72M
6 x T-55M
2 x BRDM
4 x SA-9 Gaskin
Full BMP-2 Company w/SA7
6 x 2S1
Support:
3 x BM21
BMP OP
West German Mechanized Battalion
HQ
Marder Platoon
Marder Platoon
PanzerMorser platoon
2 x Gepard
Panzer Battalion
1 x Leopard 2 HQ
3 x Leo 2
2 x Leo 2
Support:
2 x Tornado
The questions the attacker must answer are much the same as those of the defender:
1. Which part of the battlefield should I choose? (Breakthrough, Counterattack) And to a lesser extent, which side should I weight my attack on in other attack scenarios?
2. Where is the best place for my objectives?
3. If I have them, how do I utilize my obstacles?
4. If I have them, how do I utilize my “ranged in” markers?
5. What should I have in Reserve?
6. Where are the best places for his ambush and how can I counter them?
7. What is the most likely enemy course of action?
8. What is the most dangerous enemy course of action?
9. How can I array my forces to counter both those enemy COAs?
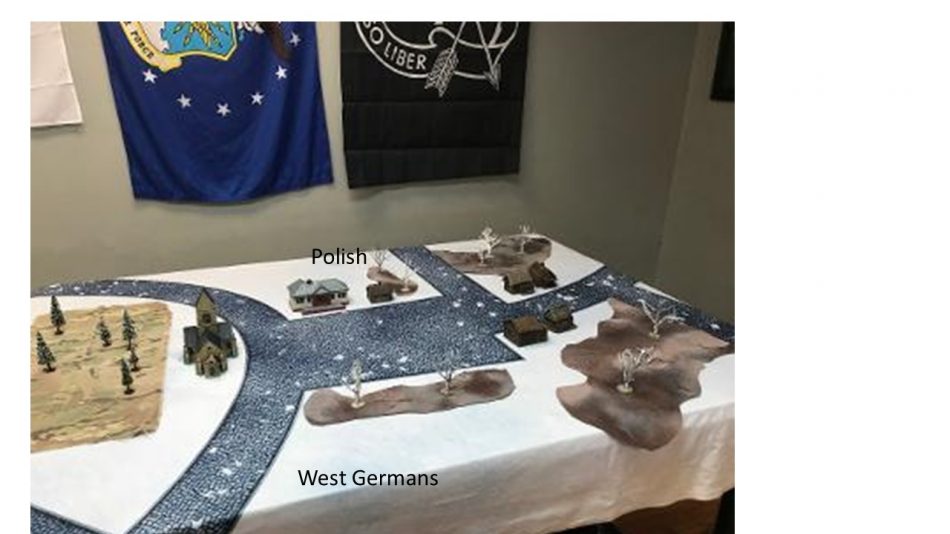
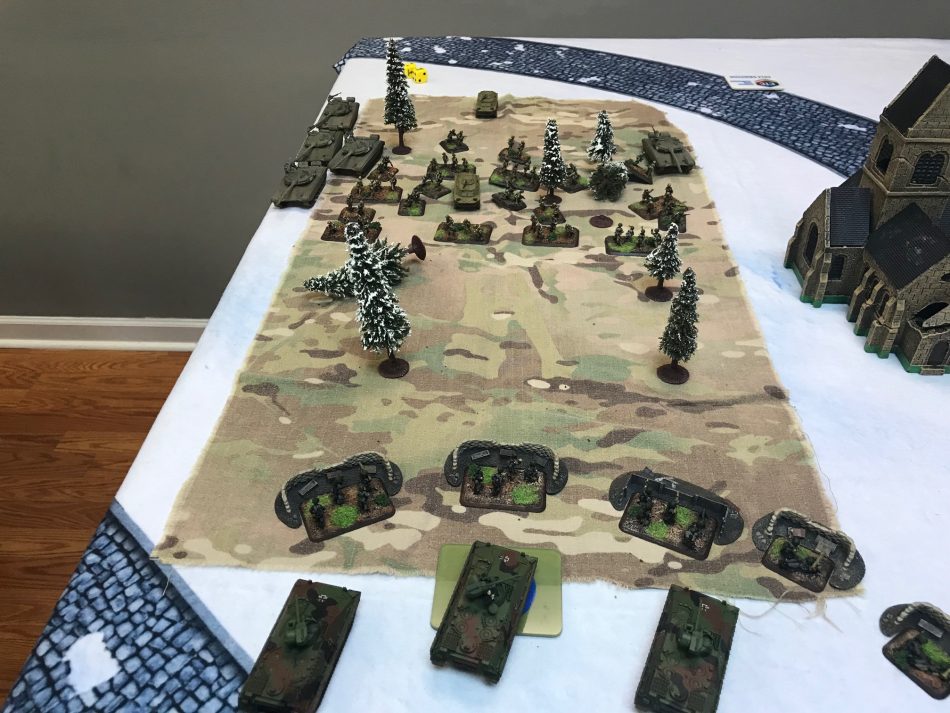
The battlefield had a large woods running down into the defender’s left flank and buildings which could be used to maneuver into the right flank. The center of the board was wide open. The Mission was Contact, and the defender chose to defend from the near side. Figure 1
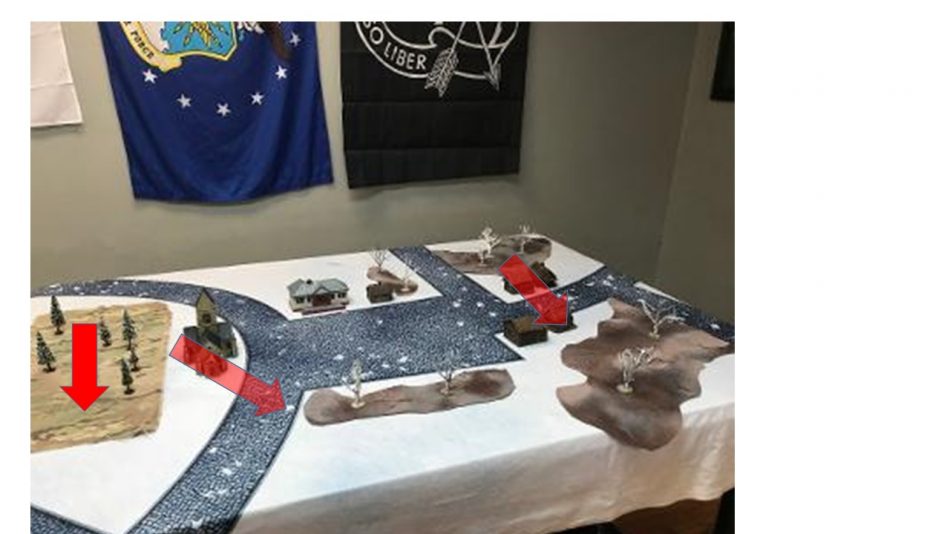
Again, the first things to look for are what are the best avenues of approach. The woods, using the buildings and using the church to get to the middle section as shown by the arrows in Figure 2.
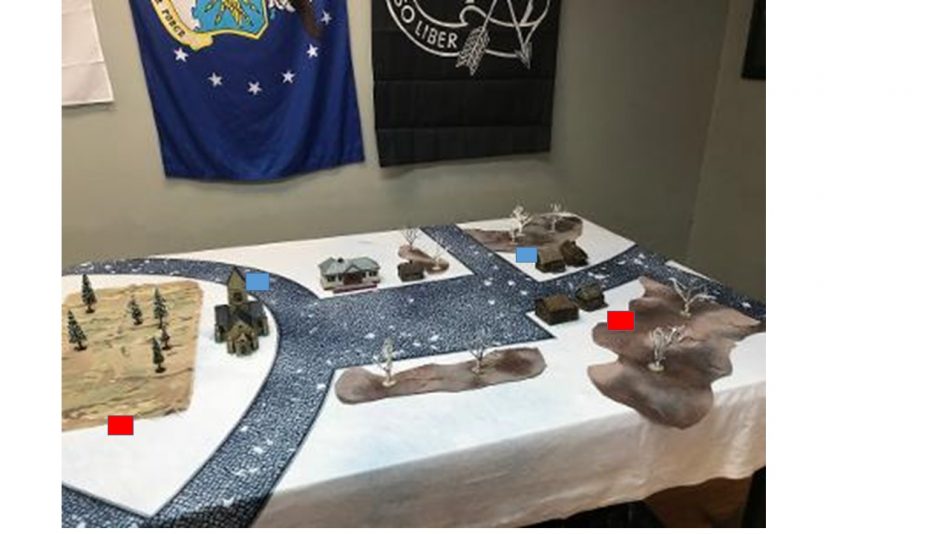
Since the enemy has already chosen the side to defend from, there is no need to worry about the other way. If he is mounting a counterattack, I am probably already combat ineffective. I place my objectives as close as I can to my deployment area on the avenues of approach I identified. Figure 3
In this mission as the attacker, I have no obstacles to place, but were I an American or WG player with minelets as a selected option for my artillery, I could plan to deploy them to make reinforcing the side where my main thrust is going or drop it on top of a unit I don’t want repositioning or to deny a key ambush location.
Ranged in markers are used in much the same way. Deny prime ambush locations, Deny prime initial deployment locations, but they can also be laced as to provide a guaranteed initial smoke barrage to cover the critical movement of your main effort.
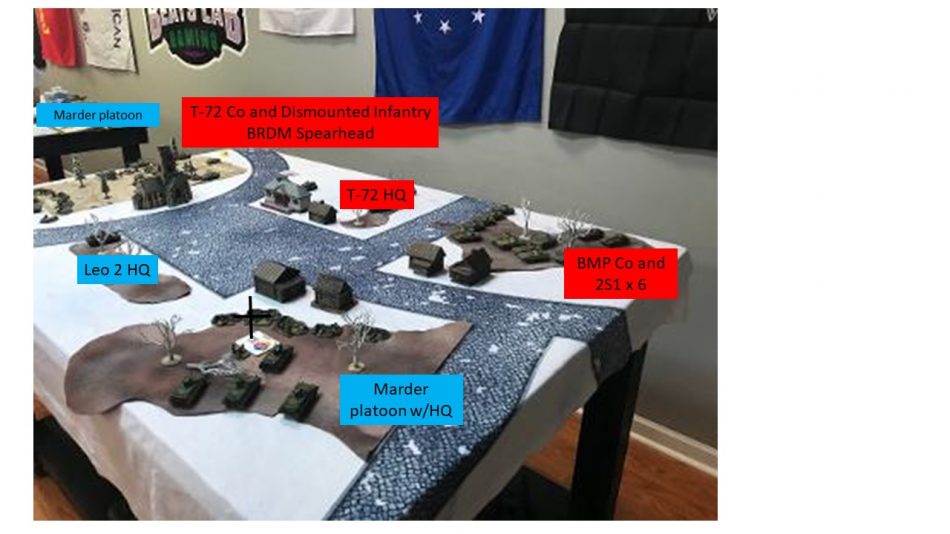
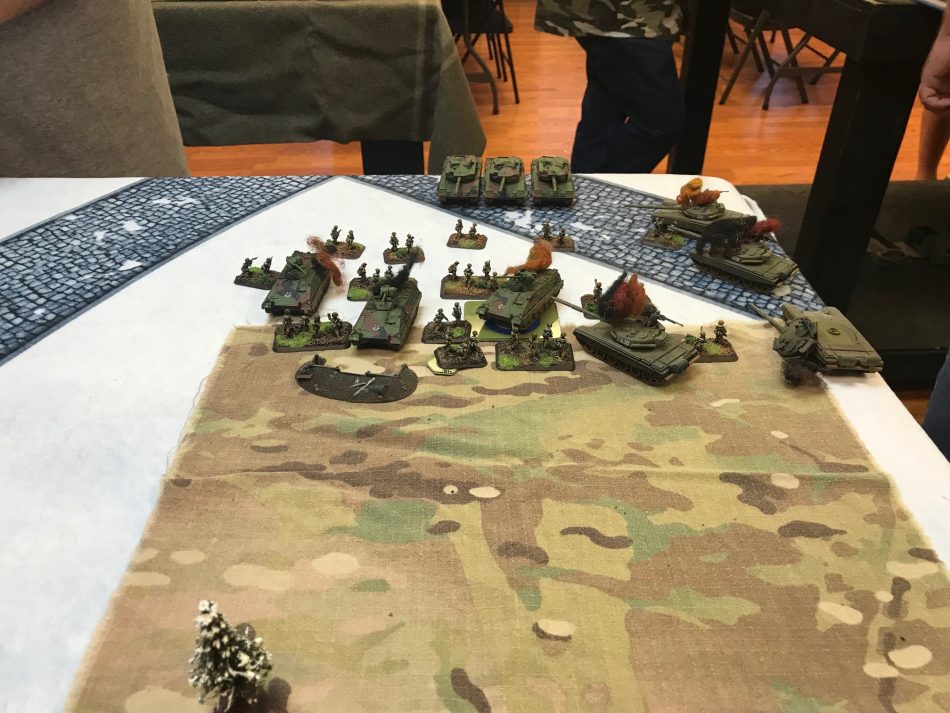
In my Polish attack against the West Germans, I plan to conduct a spearhead with the BRDMs, deploy my infantry and one tank company around the spearhead. Support the operation from the other side with a BMP support by fire position and artillery park. .
My plan of attack just about selects my on-board force for me. I need the recon and infantry company for sure. I want to support with the large T-72 force. That’s 3 out of my four selected already. Now, I have to decide whether I want my ADA, artillery, or more tanks. Since starting with a ranged in marker helps with forcing his troops where I want them to go, I selected my artillery battery.
He chooses both infantry platoons and his large Leo 2 platoon to be on board. He has deployed both infantry platoons to cover the objectives, with the large Leo 2 platoon in ambush and the HQ in the center. So far I have accomplished exactly what I have set out to do. He has two separate fights he will have to wage, neither side can support the other, and his one maneuver force will be forced to choose which side to engage on leaving the other side unsupported. Figure 4
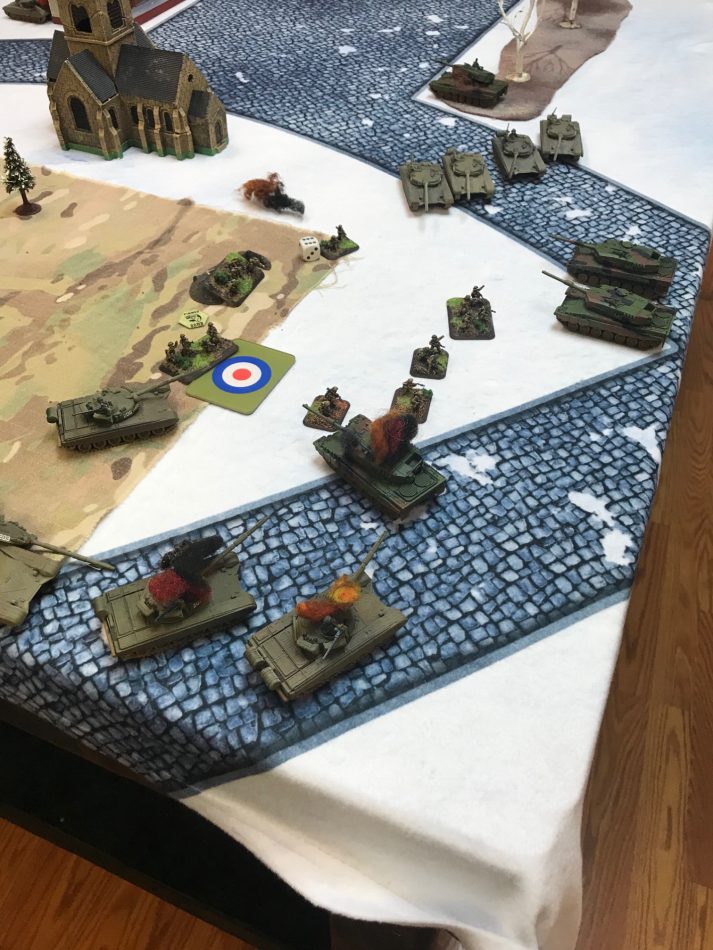
Now with both deployments revealed and play about to start, we can evaluate for most likely and most dangerous. In this case, they are one and the same. My opponent weathers the first turn of shooting reveals his ambush in the woods or just behind them in support of the panzergrenadiers on his left flank. Five v three is terrible odds for T-72Ms vs Leo2s. In addition, the added 12 shots of defensive fire would stop any assaults by the infantry cold. My only way to mitigate it was to press forward with the motor rifles and T-72 so that any attempt to do so could be immediately flanked. Plan B would be to shift the main effort to the reserves and have them take the other objective.
The plan worked quite adequately. My motor rifles and T-72s advanced to within assault range and killed one of the panzergrenadiers, and pinning them. The BMPs scored a hit on the HQ Leo but failed to penetrate, and the artillery pinned the second panzergrenadier platoon. I also received the second T-72 platoon from reserves. On his turn, his Leo HQ killed my T-72 HQ who failed to jump to another tank. He unpinned his infantry and shot away a few stands of Poles. In turn 2, my Poles unpinned and went wild. Pinned the infantry, killed two and bailed the third Marder and conducted a successful assault which left a single Milan stand in the platoon. That studly bastard then proceeded to throw the entire company of Poles out of his position. The BMPs threw more missiles, hit on 5s this time and killed the Leo 2 HQ, and two companies of tanks fired 8 shots at the Leo2 Platoon, scratching a lot of paint.
It took two more turns, and a lot more dead Poles before the Leos got pushed off the objective for good, but they were, Meanwhile the T-55s came on and were preparing to assault the other objective, just in case. Final result: 6-1 Almost lost the motor rifles, BMP2 transports, and had the main T-72 Co down to a single tank, but everyone who needed to take a check passed. Big company rule meant I could ignore losing the CO.
Great stuff, Chris! I’m gonna use these articles to make me a check list; I know that I will be a better player thanks to your essays! Can’t thank you enough!! Please keep them coming!!
Great Stuff Chris!! Thanks for the posting.