Battlegroup NORTHAG – First play through
By Tom Gall
This is the 3rd in our series of articles on Battlegroup: NORTHAG a set of Cold War gone hot rules set in 1983 published by the and written by Warwick Kinrade. In the prior two articles, and then . In this one, we’re going to play a game and see how it goes.

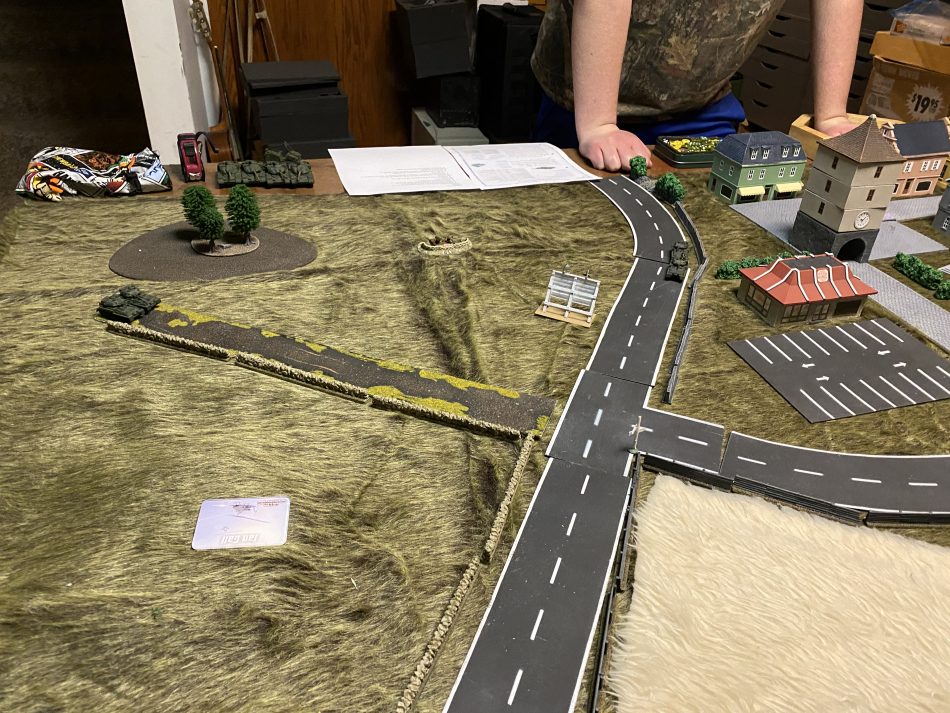
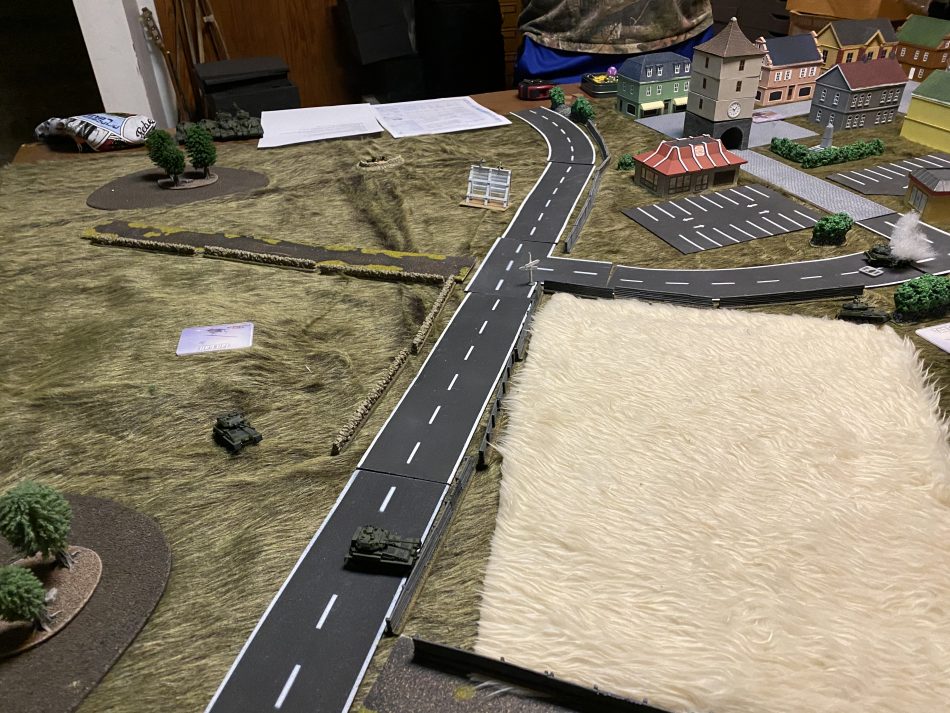
This is the British list. () The units to the top of the picture above the road are the forward elements. The Chieftains are the Vanguard unit and the rest is the Main Column. I still have some work to do making this look at pretty but world events seem to be helping me on that goal.
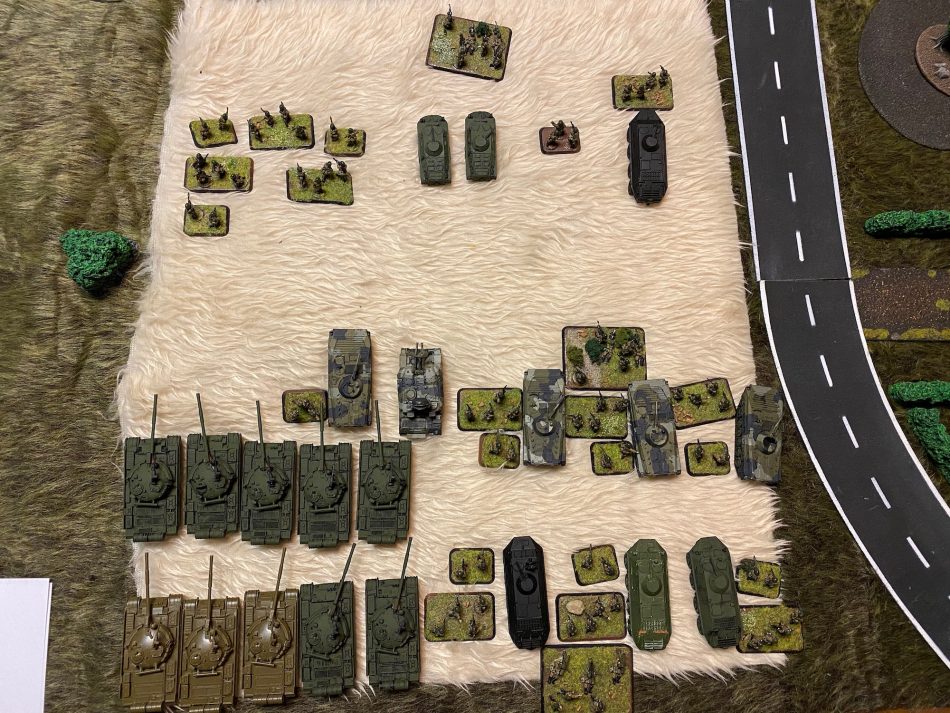
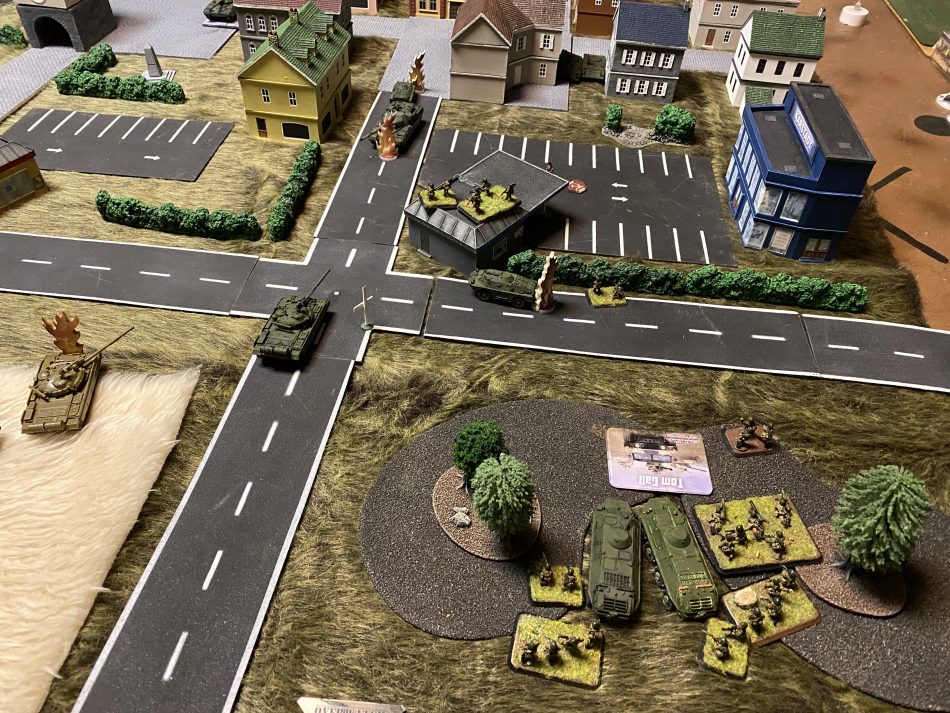
Here’s the Soviet army ready to go. The elements at the top of the picture are the Forward Screen. The 10-T62s are the Vanguard unit and the rest is the Main Column. Ah yes, the shame of unpainted lead-er plastic.
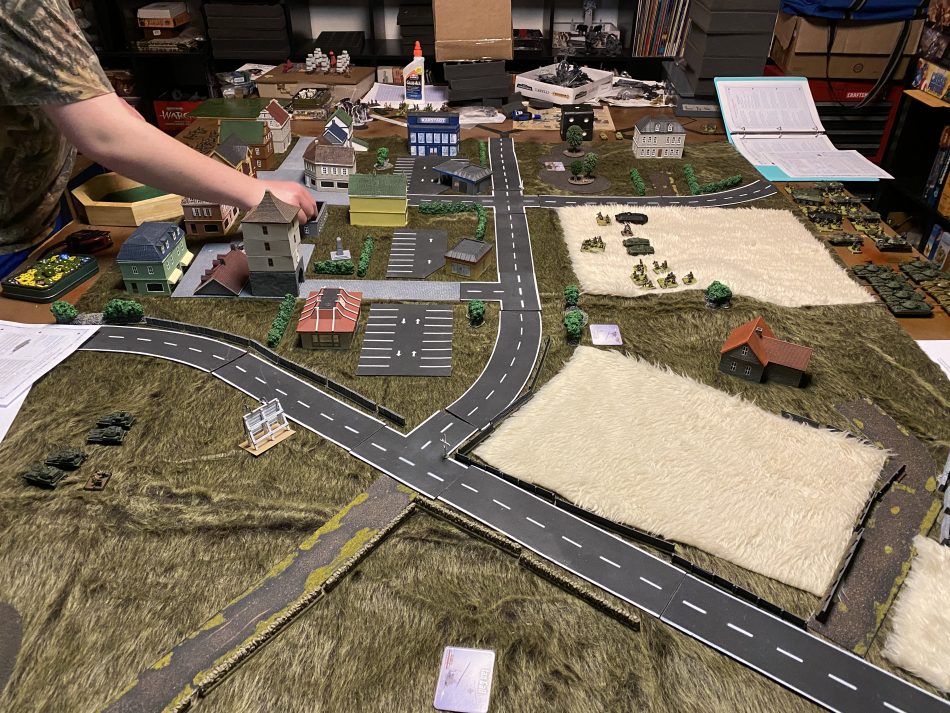
As we’re locked down like everyone else, my son and I are the two enjoined in battle. Ian likes to wargame, he’s played quite a bit of Team Yankee and as such makes a good test subject for picking up the rules. The . I have hills under the mat in several spots which you can’t do with a rubber mouse pad style mat. . We’re playing in 15mm to utilize my existing hardware.
We ruled that the “green” grass area is open terrain. The fields were cover.
We have exactly the same number of forward screen units so we rolled off to see who would deploy objectives and forces first. This was the first error in the game. It should have been based on the units within the Forward Screen that have the Scout keyword! It won’t be our last error.
For this game, we placed 4 objectives. The battlefield is split into 4 quadrants and each side has a 15″ deployment zone from their respective edges. We each place two objectives, one per quadrant. Three objectives ended up in no-mans land and the 4th was in the town within Ian’s deployment zone. When an objective is taken the opposite side draws 1 counter if the objective is in your own deployment zone, 2 counters if it is in no-mans land and 3 counters if it’s in the enemy deployment zone.
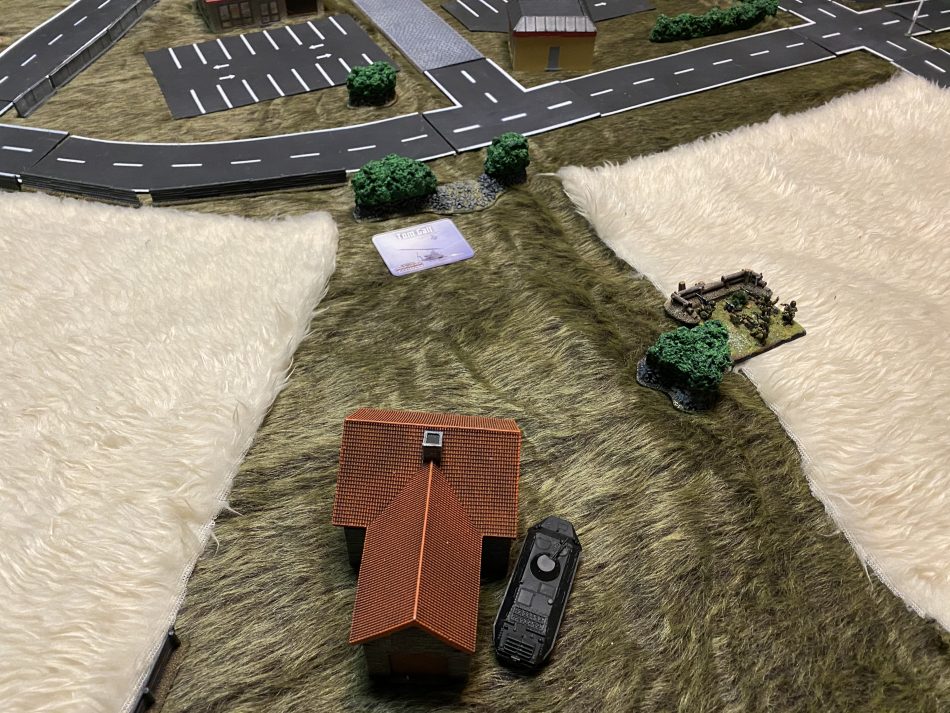
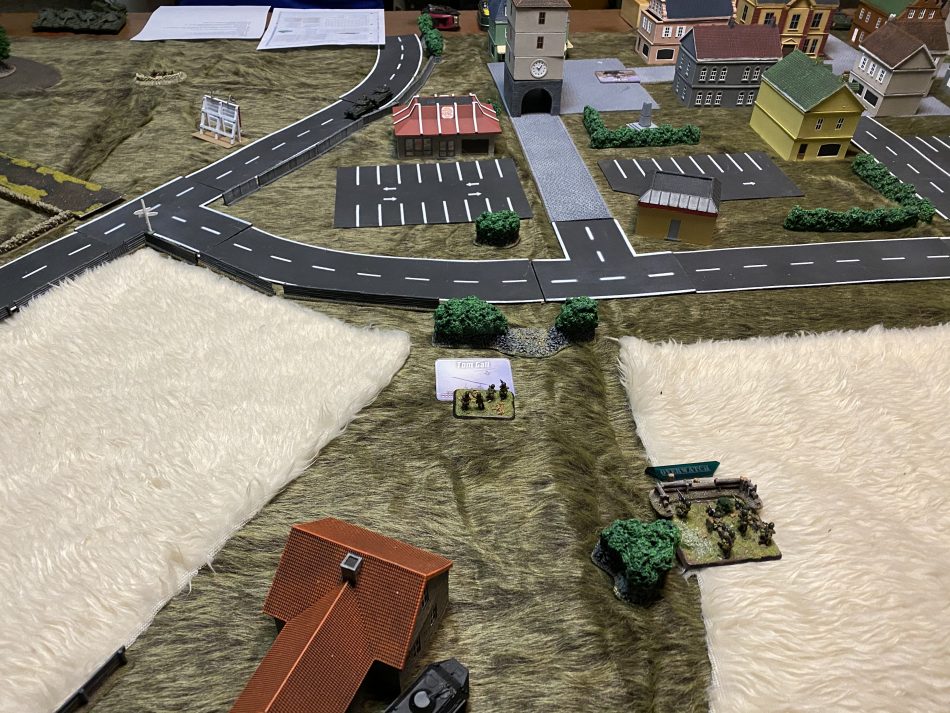
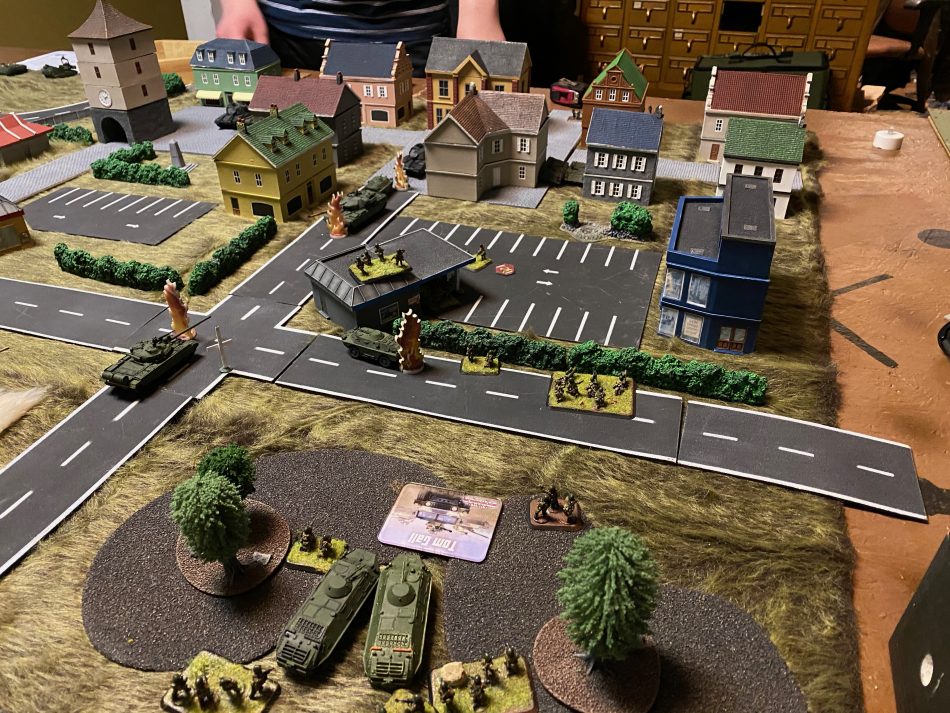
For my deployment, I put my PKM Machine Gun Team on top of the hill overlooking an objective in no man’s land. Great view, and thankfully dug in should they attract lots of attention. Down the hill, I positioned an Armoured Recon Patrol. I put the infantry team on the patrol in the house and their ride outside. This sort of raises the interesting question when infantry teams dismount, should their ride stick around? Given their role on the battlefield I figured that it made sense to stay around.
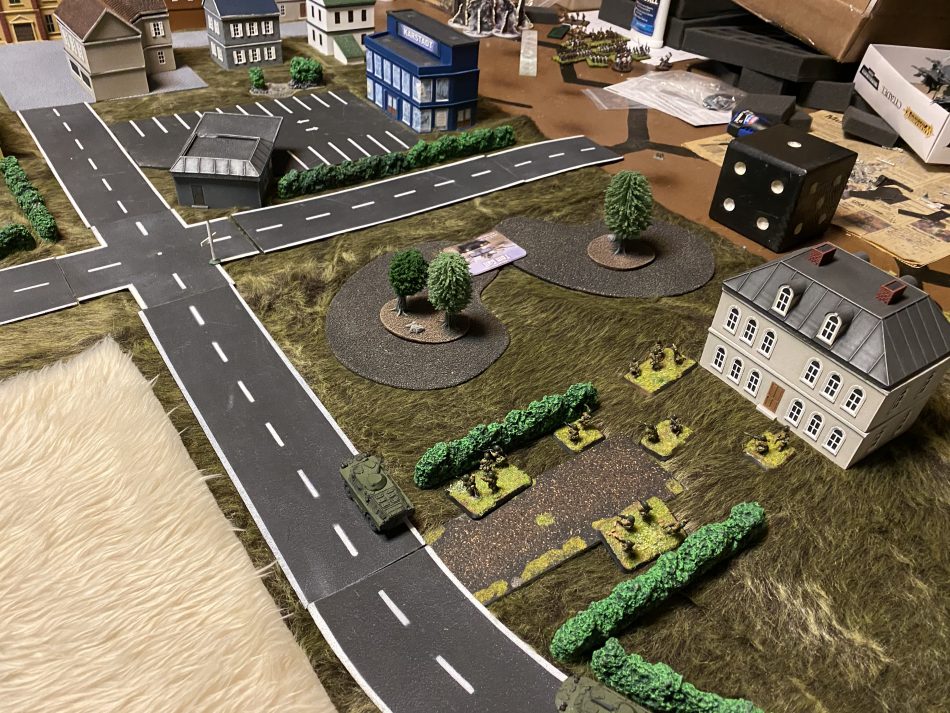
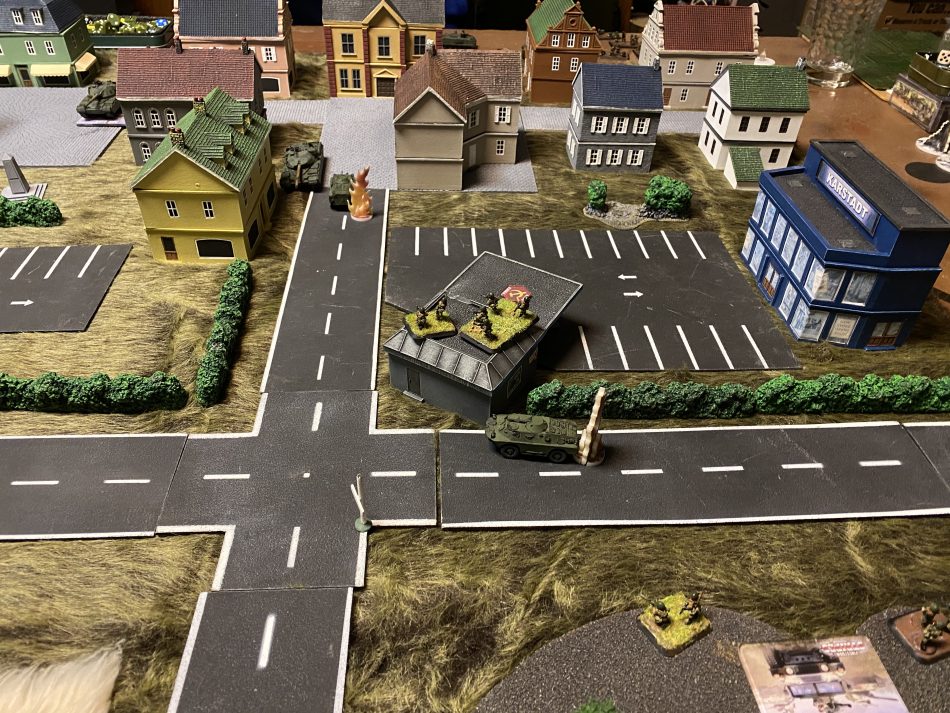
Over on the Russian right flank, a BRDM-2 patrol was on the road and a dismounted motor rifle platoon stands ready to push forward. There are British infantry in the town, so an approach under cover was the plan going from building to building. With luck, we could hook around and take the objective in the town.
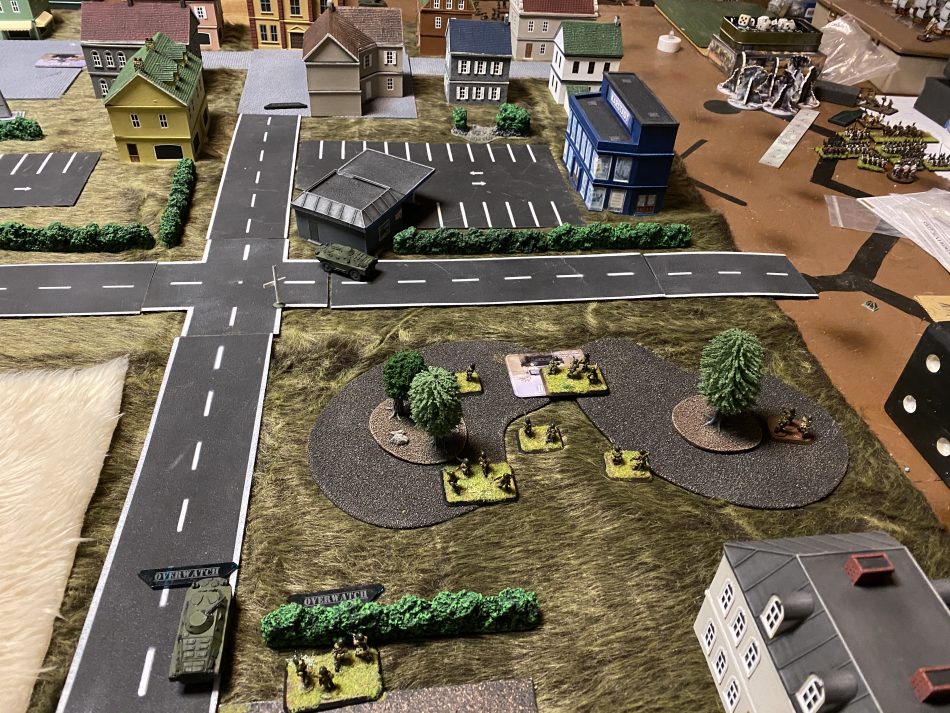
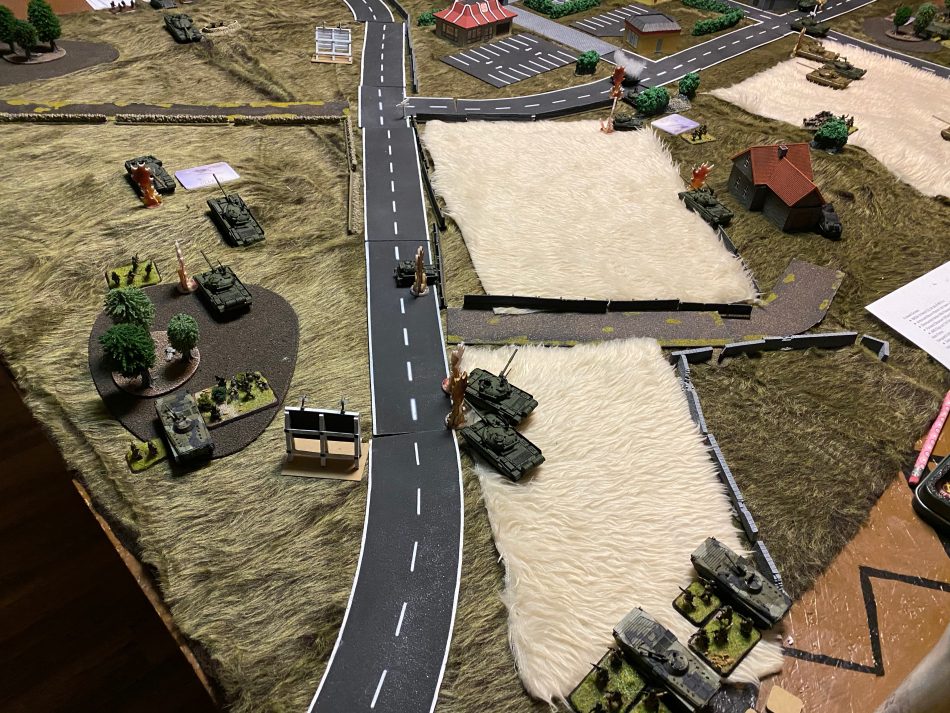
Ian deployed his recon tank units of two Scorpions and two Scimitars on my left flank. Up on the hill is a dug-in Milan team.
 Turn 1
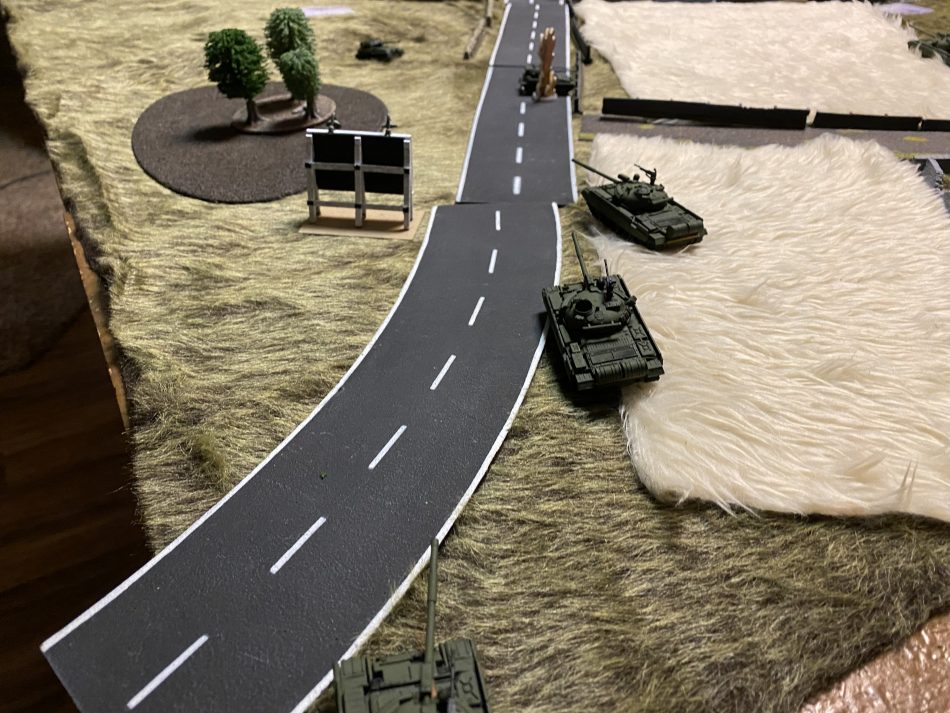
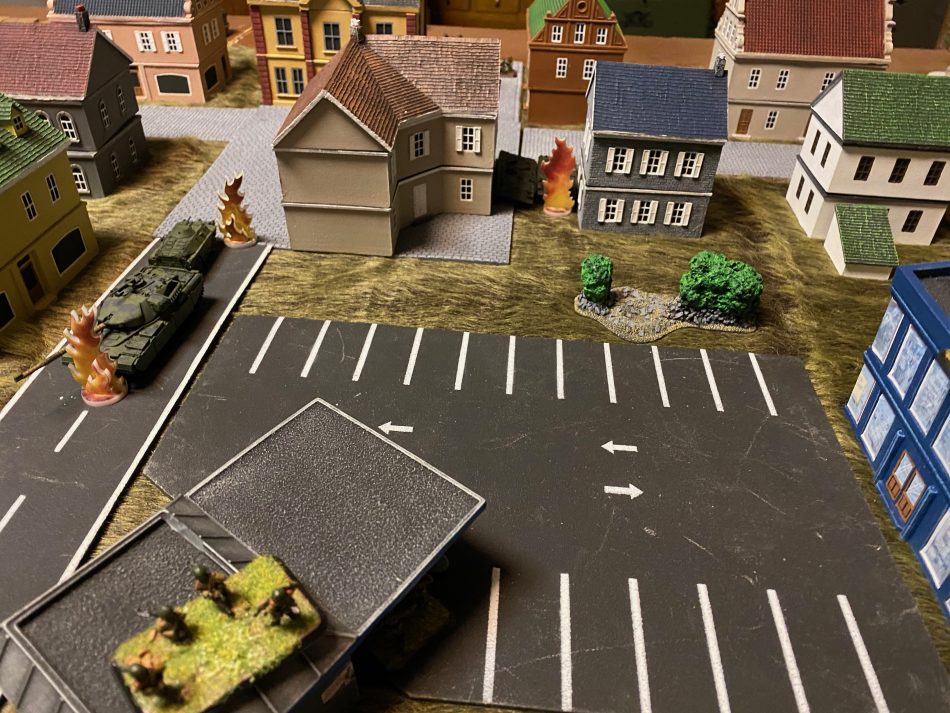
I pushed my recon infantry forward to score an objective right from the git-go. A little bit of cover but not a great place to be with British infantry in the clock tower and those British Recon tanks off in the distance. The PKM Machine Gun team was placed on overwatch as part of the D3 overwatch orders given out prior to the start of Turn 1. As the Soviet player, I know I’ve got the weaker of the forces until turn three when my Vanguard unit of T-62s would arrive. OTOH, sitzkrieg wasn’t the orders of the day. This unit would book back into the house at the start of my Turn 2.
On my right flank, the BRDM-2 patrol moves up to support the infantry fire teams and anti-tank teams moving forward to put pressure on the town. Another objective taken; the day is going well.
Bottom of Turn 2, my infantry that had taken the objective has already moved back into the house, knowing these guys were coming. Ian easily takes the objective. My Anti-tank assets at this point of the game aren’t much. The teams carrying RPGs are all over on my right flank moving into town.
As a result of Ian taking the objective, I pull two counters, one of which is a breakdown, which I play on one of the Recce tanks. Ian rolls a six and the tank is completely busted, the crew abandons the vehicle. Bad luck!
Over on my left flank, in the bottom of turn 2, Ian’s already taken the objective over here. With the loss of the two objectives I was holding about 10 pts in counters. The Soviet battle rating was a 66 so nothing to worry about comrade!
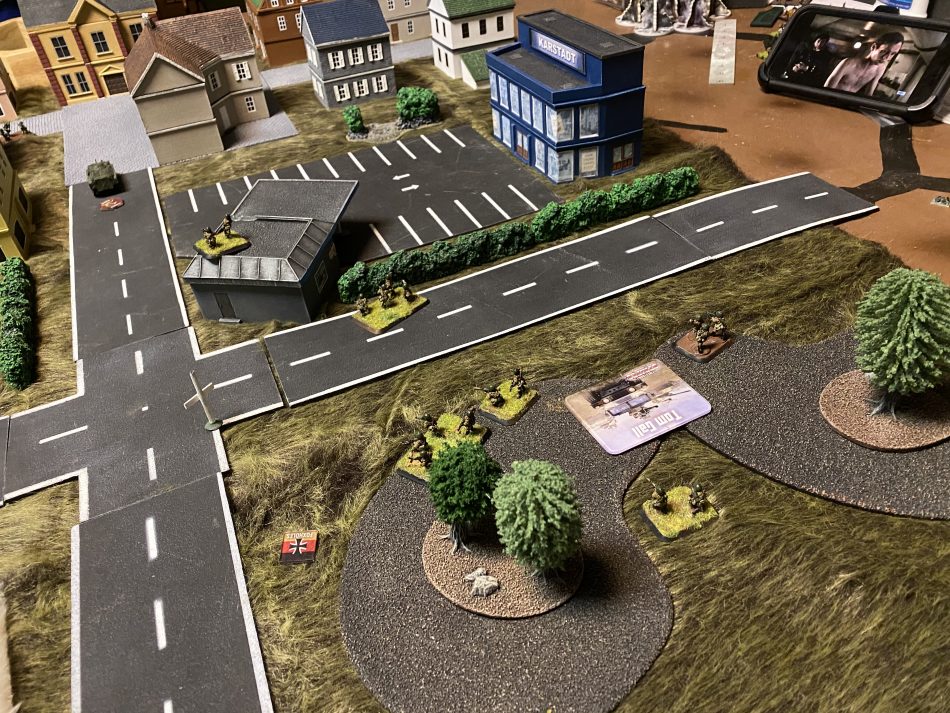
Over on the Soviet right flank, the Brits had come out with small arms against the BRDM-2 and managed to pin it. They needed to roll a 6 to do so, ballsy and it worked. Ian also wanted to bring down artillery but unfortunately ran out of orders to do so. We walked through the system how to bring down fire, regardless, thus the German marker on the table.
 Turn 3
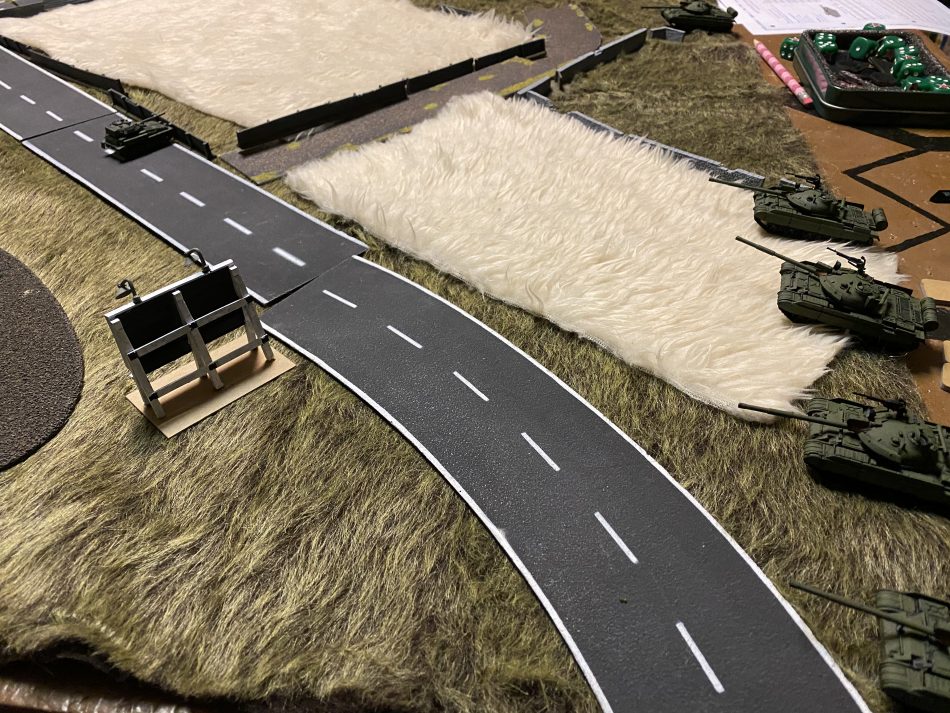
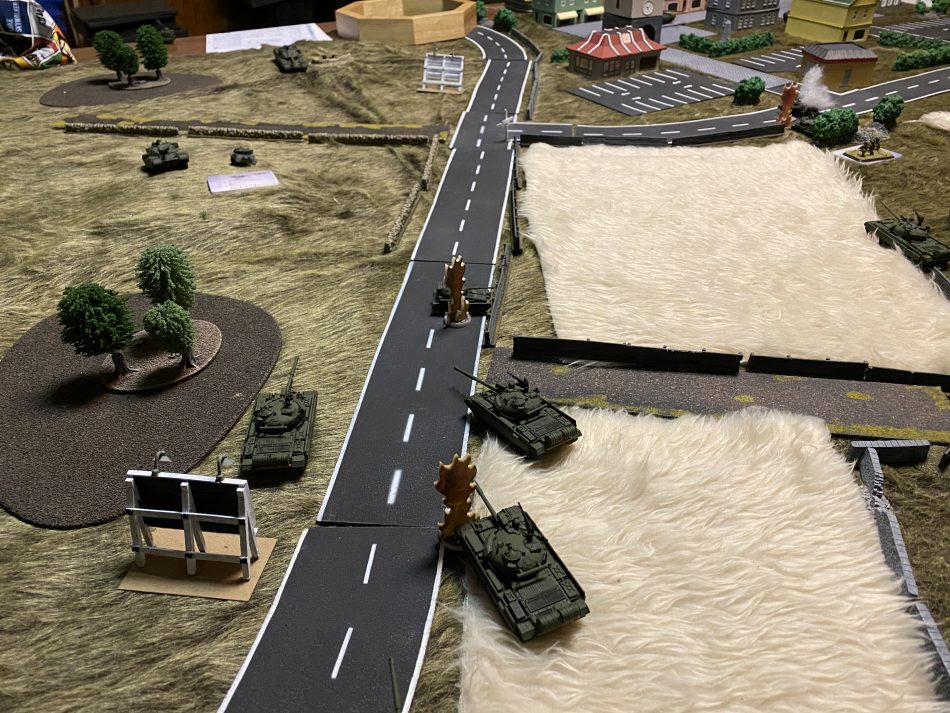
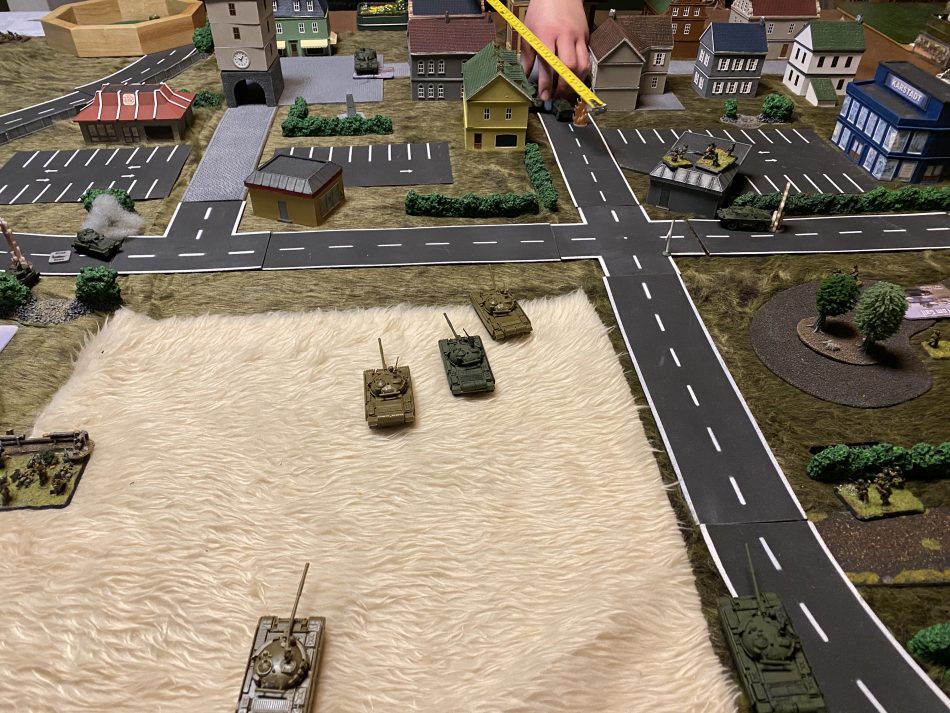
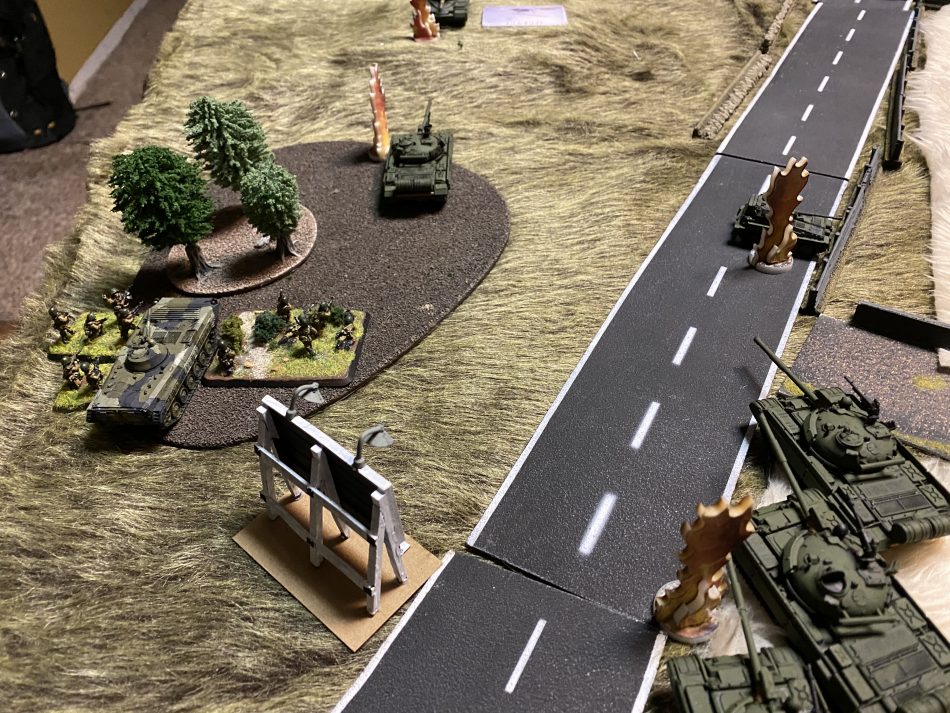
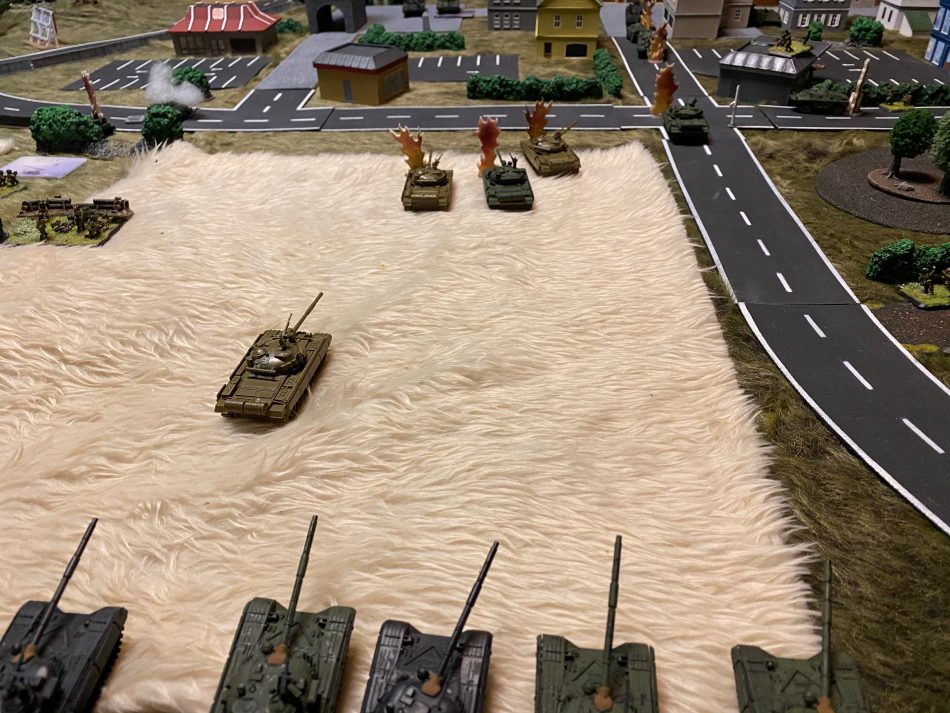
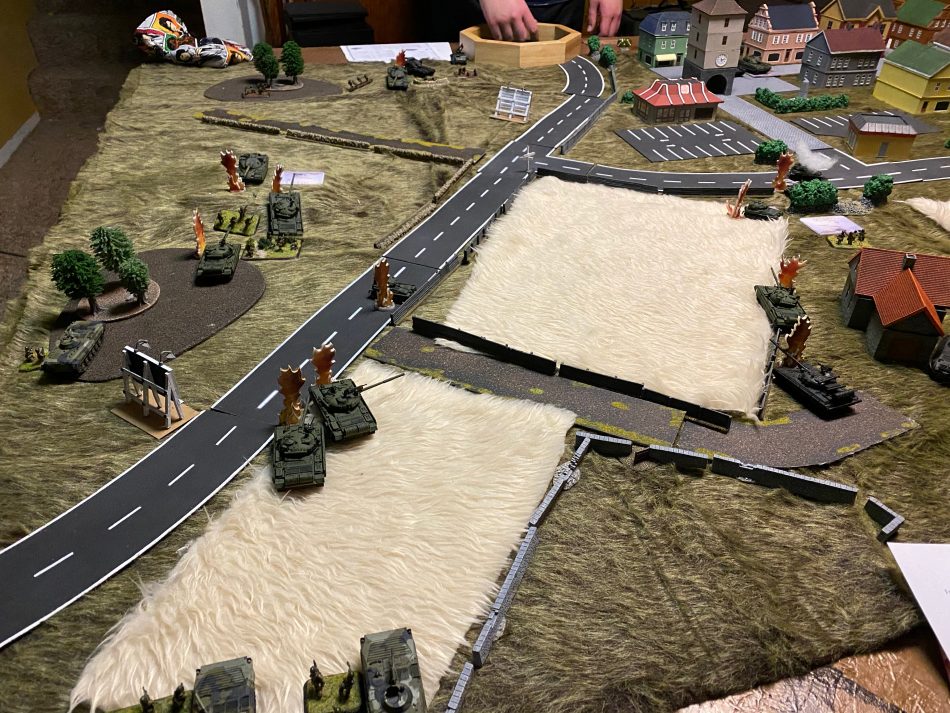
The Soviet Vanguard arrives, 10 T-62s to push matters, tho the British force of Chieftains would be arriving next. One unclear item was where the arrival of reinforcements needed to be besides from the back edge. This isn’t Team Yankee where you have to stay within some command distance the rules allow for period tactics, spread out! For the Soviets, I decided that a line of battle was best with a group of four tanks, some space and then the remaining group of 6 tanks, all in all, taking advantage of the terrain.
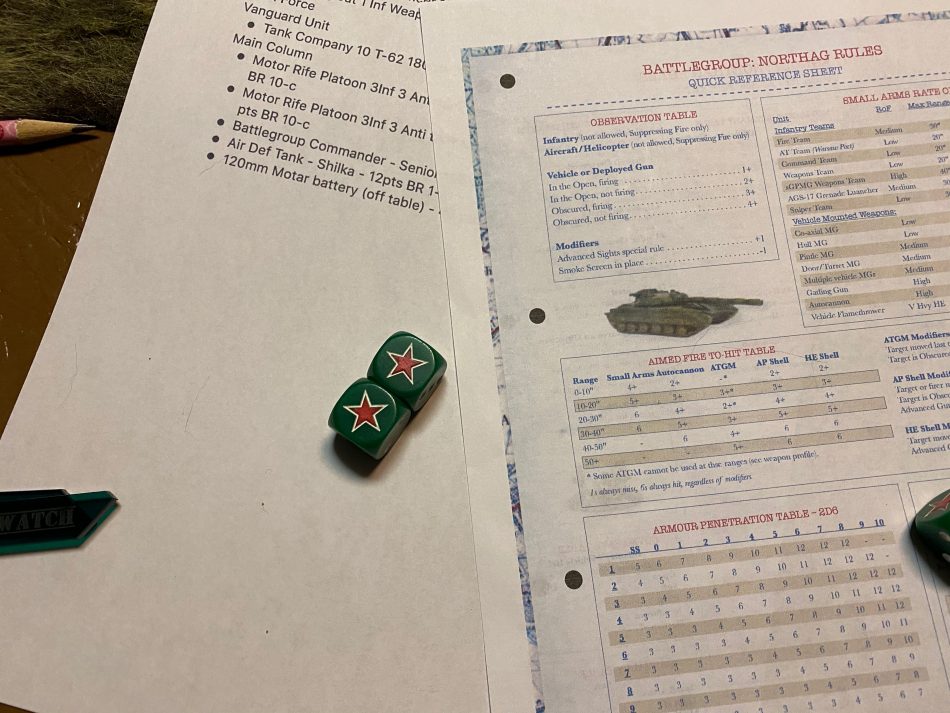
This was when we made the second error in the rules. When firing AP direct fire, you take a -1 modifier for the target moving. The quick reference sheet reads “Target or firer moved last turn -1”, we stacked the modifiers for a -2, since both sides had moved. Add in another -1 for target is obscured and for Soviet T-62s that is a -3 modifier. You’d have to be within 10-20″ to be rolling for a 6 to hit!
In retrospect, it probably should be just a -1 for either target or firer moving. A few turns later we switched to that interpretation of the rules.
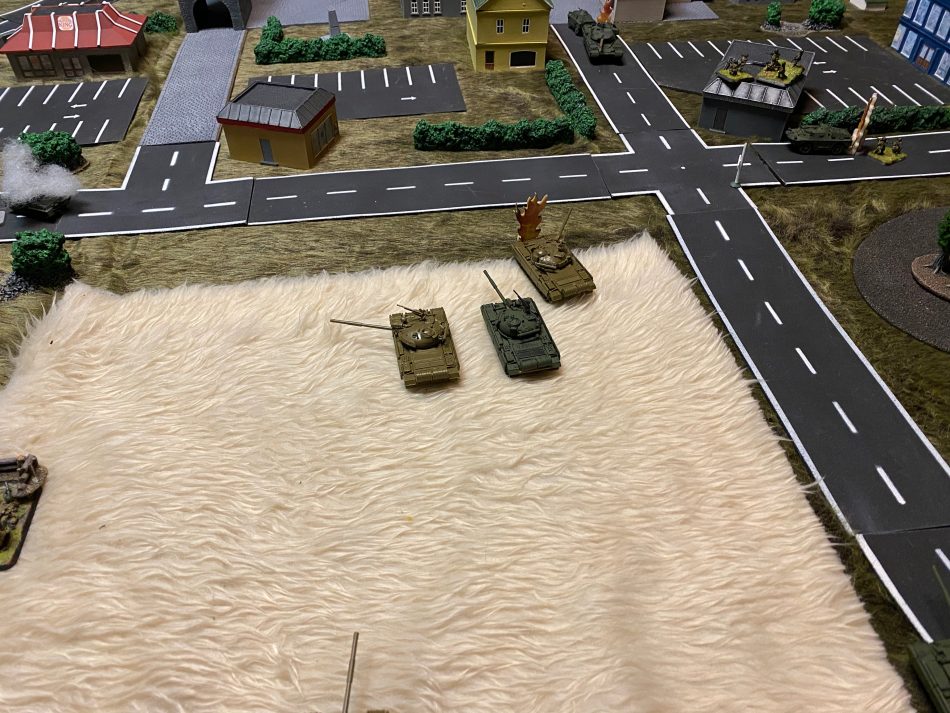
Regardless with a clear shot, the British Recce paid the price but otherwise Soviet shooting was poor this turn. And over to the British for bottom of Turn 3.
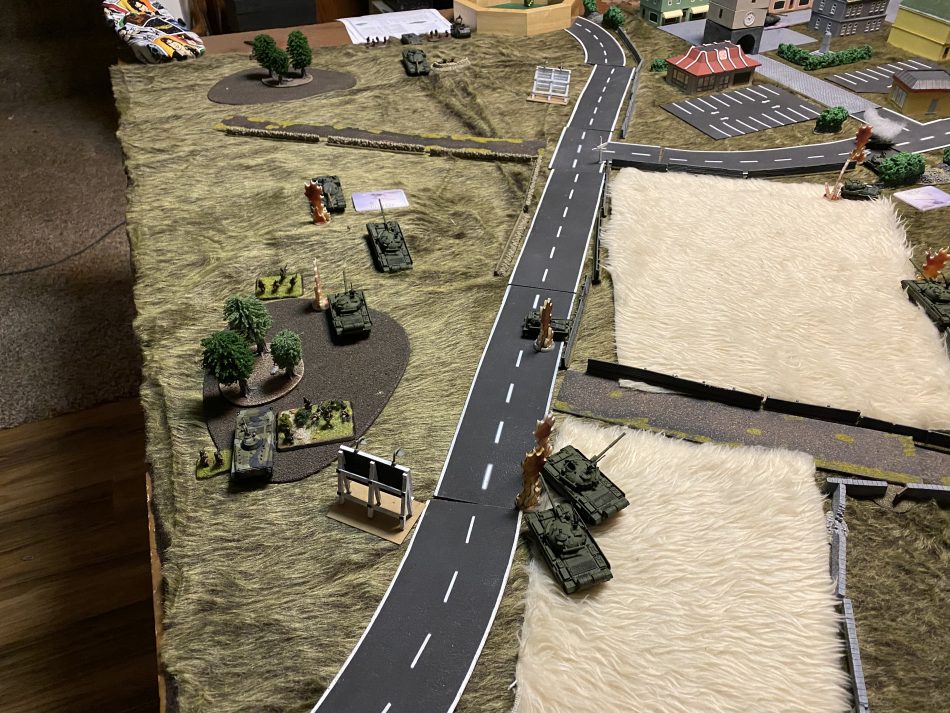
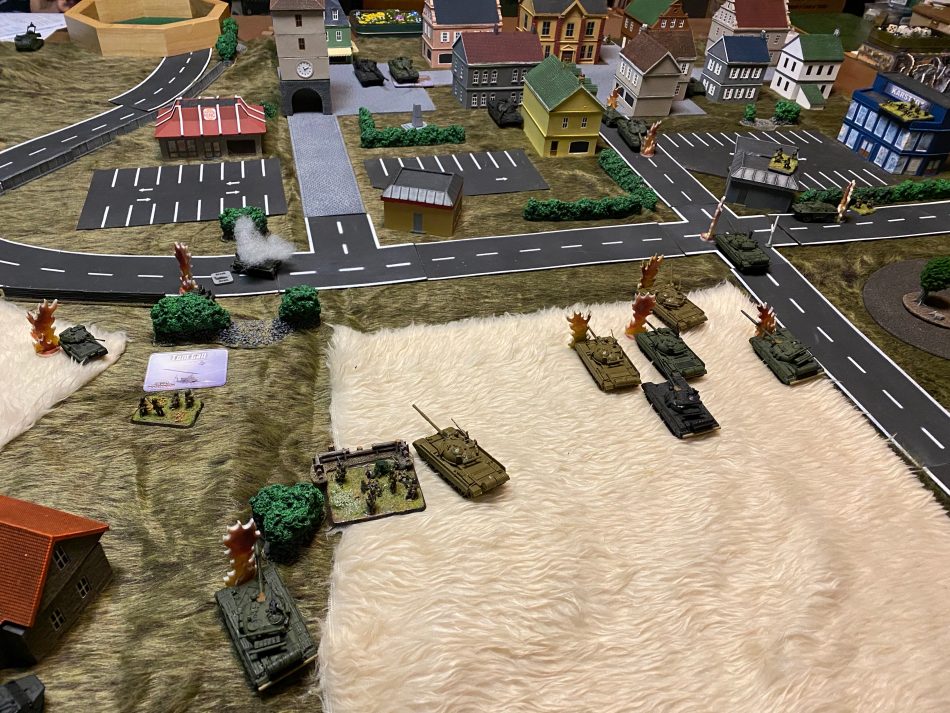
The British Chieftains arrive, four of them all total. Two in the town and two on the Soviet left flank. Ian decided to bring down artillery, his 81mm Mortars came down successfully destroying one BRDM-2 with a direct hit and successful penetration roll, while one of the Infantry teams goes pinned.
Over on the left Soviet left flank between the Chieftains and the Milan team, a T-62 is destroyed and the battle for the objective heats up. With the Chieftains having both advanced optics and gunnery (+1 to spotting and +1 to shooting) they clearly have the advantage. Additionally for penetration rolls presuming they are able to hit a T-62, they are looking for a 3 or 4 (on 2D6) to pin above a 3 to destroy a T-62 generally.
The frontal armor on a T-62 is a 4 while the penetration value of the British Chieftain guns are a 9 at close range and 6 at super long range. NorthAG has five range bands which is awesome. One cross references the penetration table to determine what you need to roll on 2D6 to pin, destroy or otherwise leave undamaged your target.
From the British point of view, if they can blunt the Soviet attack and push the flank that could win the day. Two Chieftains and a Milan team vs 5 T-62s is pretty good odds.
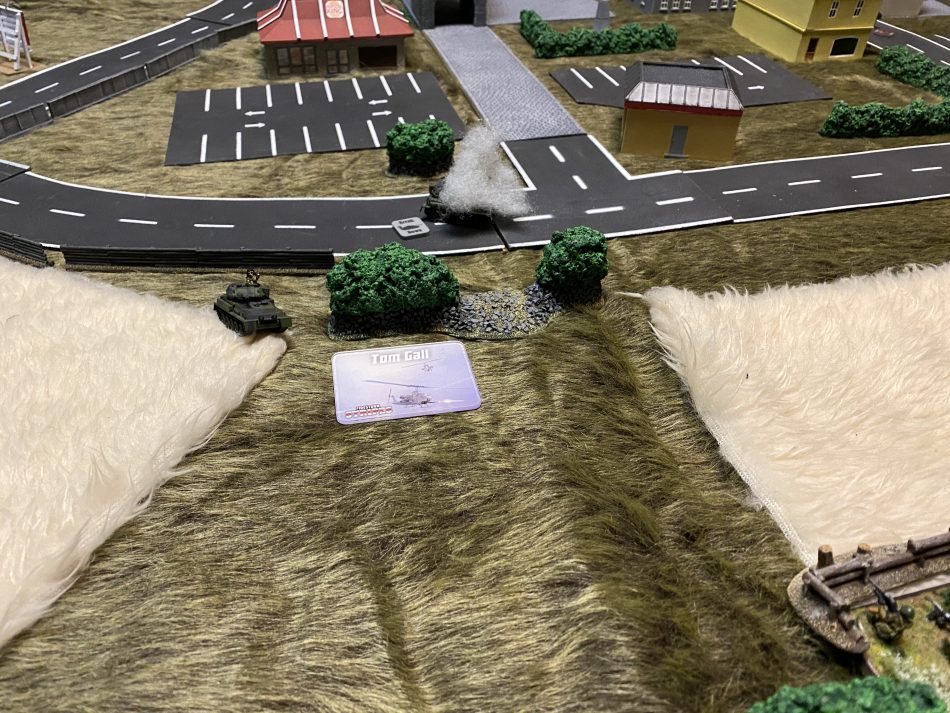
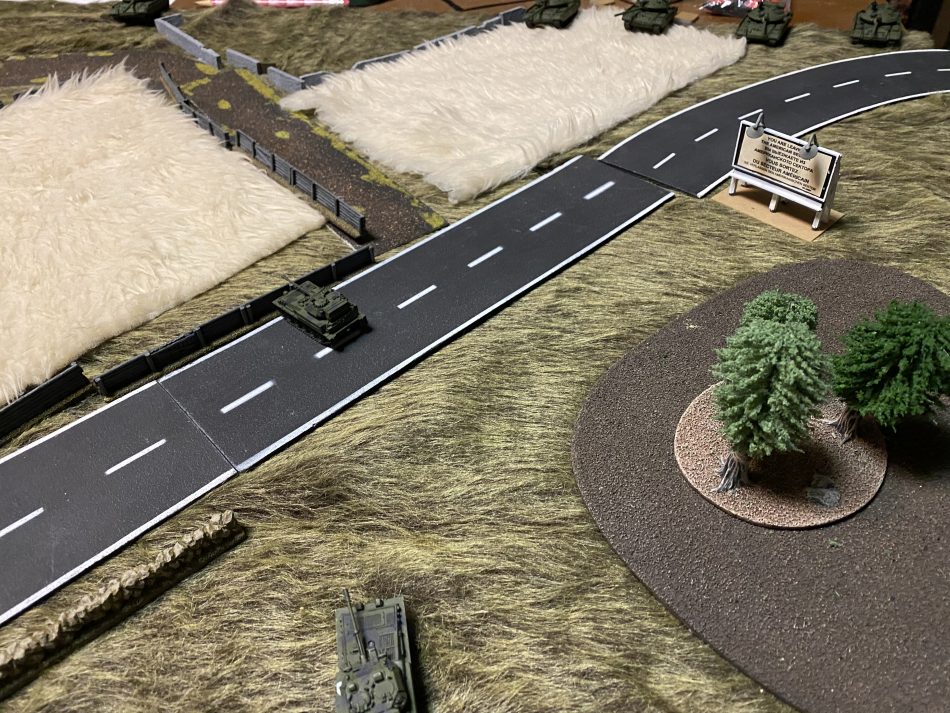
Meanwhile, on the Soviet right flank, the T-62s had pushed forward and the Chieftains were moving up to meet them. The Chieftain on the far right of the picture made very quick work of the pinned BRDM-2.
 Turn 4
One of the Soviet Anti-tank teams decides to try and earn his paycheck firing his RPG at very close range. The Chieftain side armor is a 5 vs the penetration value of the RPG-7 at 3. If a side shot, need a 9 to pin 10+ to blow it up, and vs the front an 11 to pin and 12 to blow up.
Hero of the Soviet Union!
And while that was a great result, the remaining Chieftains at the bottom of turn 4 would score another T-62.
 Turn 5
The Soviet main column starts to show up. I decide to push more resources towards the town in hopes I can capture the objective there. Given this force the infantry already starting to cross the road into town I should have some decent numbers. Unfortunately, I probably picked the wrong unit as the Spigot team wouldn’t likely be very useful. I would learn in a later turn the minimum 20″ shoot range doesn’t make for a great use case in close-in situations like a town battle. Who knew? O wait, right, Soviets are Conscripts. We would make a mistake like that.

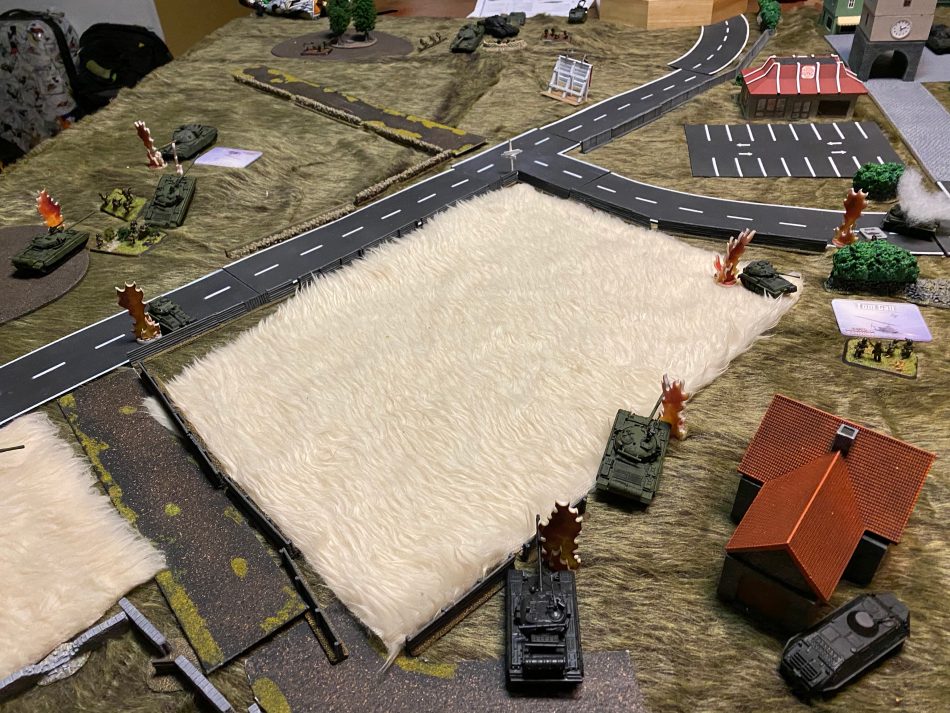
The T-62s continued to push forward with optimistic hope of taking the objective on the hill. Just need to take out that Chieftain first, hey Vladimir, drive through those wood for a close-up shot, we’ll cover you.

Bottom of Turn 5, the British Main Column would start to arrive and oops, sorry Vlad! Better luck next time? Ian would start to bring on his infantry, bringing them and their FV432s into the town to match my force.
 Turn 6
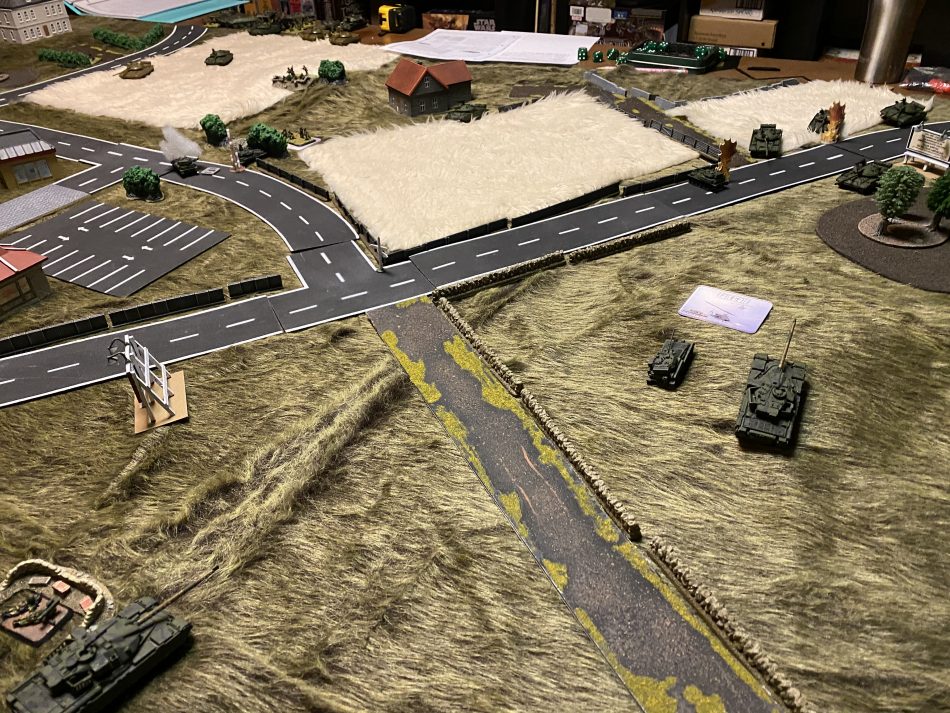
The remaining Soviet Main Column arrives. I bring on the BMP-1 Motor Rifle Platoon on the Soviet left flank. Between them and the tanks, they ought to be able to press the issue for the objective on the hill. As luck would have it, good shooting by a T-62 and a good penetration roll resulted in another Chieftain being blown up. Tough loss for the British.
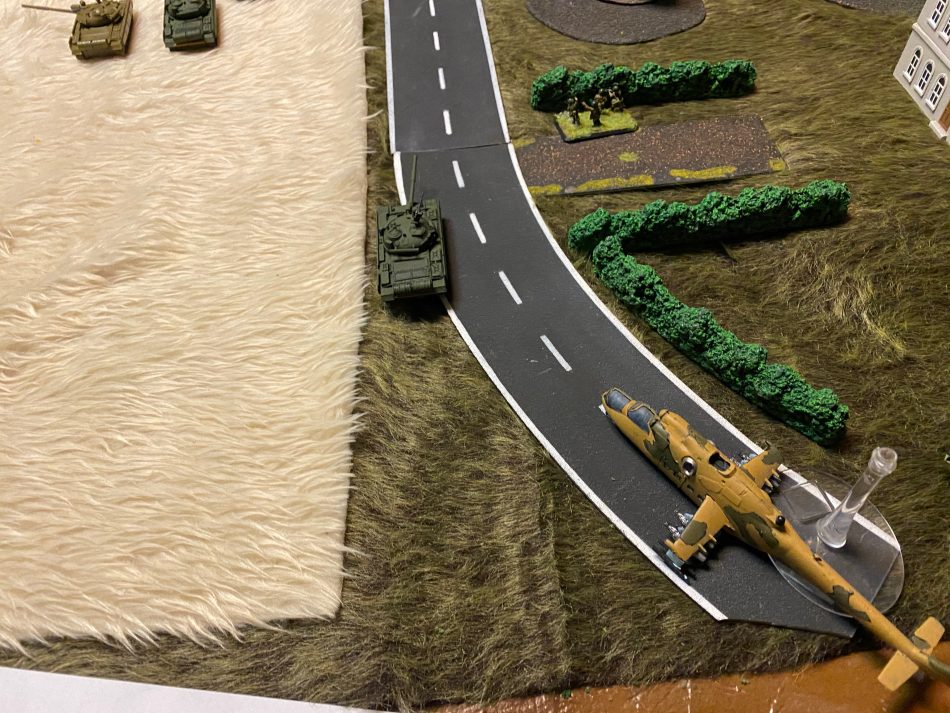
Another bit of fortune for the Soviets, a gunship counter drawn the prior turn results in a Hind coming on to table…. which after taking one shot was promptly shot down on Turn 6 by a Tracked Rapier. Resolving this was a bit confusing as page 47 in the rules state “All fire at helicopters is treated as suppressing fire,” yet the Hind has armor, a 1 frontal no less. Likewise, the Rapier is a missile, which is rated as HE heavy. On the suppressive fire table, this yields a 4+ to hit, and then since the shot was over some buildings, we gave the Hind soft cover per the rules.
Ian rolled a hit, the Hind failed the cover save, now what? This is where we applied the penetration factor of 5 for the missile vs the 1 armor of the Hind. Going back to the rules on page 47 though, suggests a casualty check indicating the helicopters are unarmored instead which for that value of HE would be a 5+. Tho in the stats, the Hind has an armor value… we followed the armor penetration process which resulted in the Hind being shot down. Right, wrong, time to post a question to the .
The Soviets continue to rumble forward and take the objective. this time with infantry not far behind. The last Chieftain on the far hill needs to be taken care of and quick.
Ian with his remaining Main Column decides to use his FV432s to try and machine gun down the anti-tank team, he manages to pin them.
 Turn 7
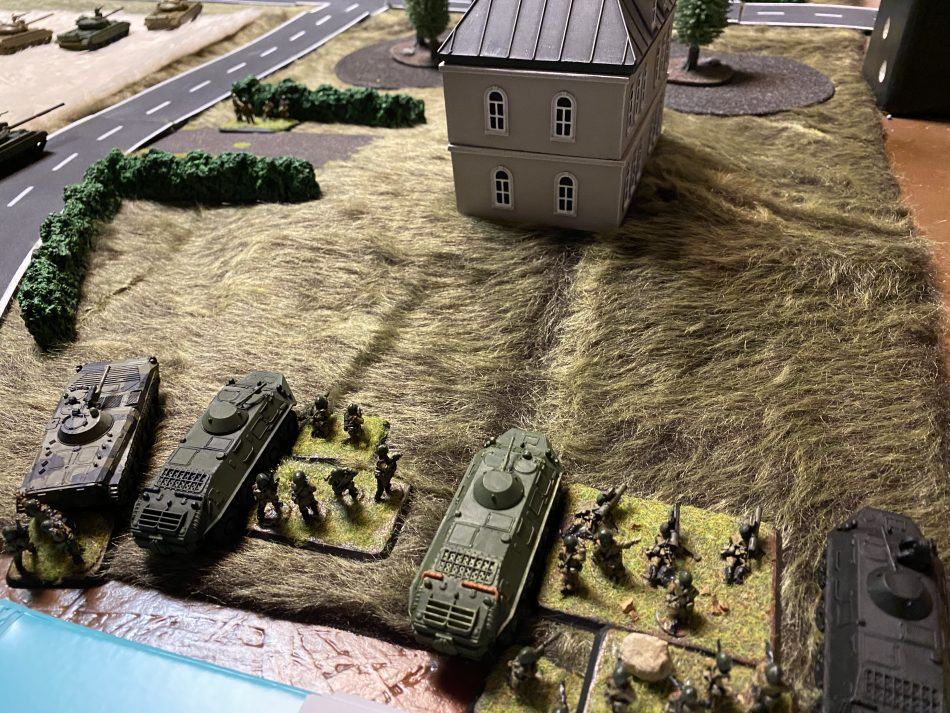
The Soviet BTR-60s drive up to drop off their infantry. between RPG teams and infantry teams, we should have a very effective push. I elect not to make my one reinforcement roll as I figure the British situation with few remaining Chieftains and the counter total has to be fairly dire. I was in the 30-40 range with tokens at this point. Not great, but still an effective fighting force.
The last remaining British recce tank has made a run to retake the center objective. A T-62 round put a stop to that, as well as the Soviet recon once again got out of the house and moved up. Occasional British machine gun fire out of the town wasn’t getting much accomplished. This gave the Soviets a bit more bravery, or maybe that was the Vodka.
Bottom of turn 7, Ian decides to go for armored British reinforcements and scores with a 5+, bringing on 3 more Chieftains. Top of turn 8, I decided to burn my reinforcement roll and likewise also come up lucky, this time bringing on 10 T-64As.
Unfortunately, the British shoot started to pick up. Newly arriving T64As and the remaining T-62s were taking a fair amount of hits. While the T-64 has a better gun and a little better armor, it’s not a tank that can stand up 1×1 with a Chieftain. The T-64As also don’t have advanced optics nor advanced gunnery for pluses to spot or pluses for shooting.
The T-64As newly arrived seeing now 3 Chieftains on the right flank to deal with. It was at this point I decided that while I could exchange fire here, pushing into town to take the objective wasn’t going to happen. My best bet was trying to do well on the left flank.
With two anti-tank stands wielding RPGs I fired away at the FV432s, with little armor just need to roll a 5+ and it should be quick work. Should be quick work. SHOULD BE … dice are you paying attention?
Likewise, another Chieftain coming down the road, where is that Spigot? O… minimum range of 20″ to arm the missile, too close to fire at the FV432 and if the Chieftain moves up, likely too close to shoot at them.
Ian’s turn, another T62 goes down, but two stands of infantry are covering the objective, not much to hold. On my next turn time to see how well those Sagger missiles on the BMP-1s can do. Just a single shot each and then we’re out, but worth a try? The minimum range on the weapons system is 30″. An armor penetration value of a 5 while I hit once, against the 7 frontal of a Chieftain needing a 9 to pin and 10+ was long odds and unsuccessful.
On the right flank, ~turn 9, I’m down to a single remaining T-62 and the T-64As are starting to take losses. It’s hard to divide my 8 orders to turn, neither Ian or I had trusted fate and tried to roll for a number of orders instead of taking the flat 8 orders for Soviet and 9 if British. We also were not taking advantage of Platoon or Company orders.
I was sitting very close to 50 in counters at this point with all the scrap metal building up. Fire was exchanged, or in some cases spotting rolls were failing so the guns fell silent and then the next turn spotting rolls were more difficult.
I’ll note that spotting rolls for direct fire AP do not count movement. Just obstruction and if the target fired or not. With a D6 used for spotting having yet another modifier would make spotting rolls even harder and a bit more complicated, so in the end, I think this was the right design trade-off.
 Turn 10
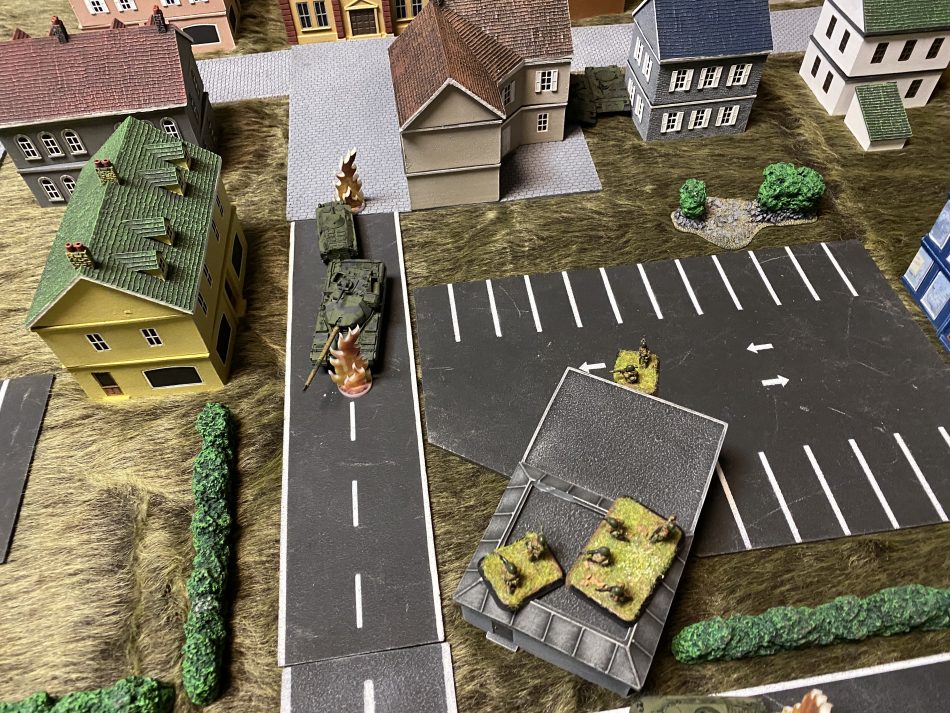
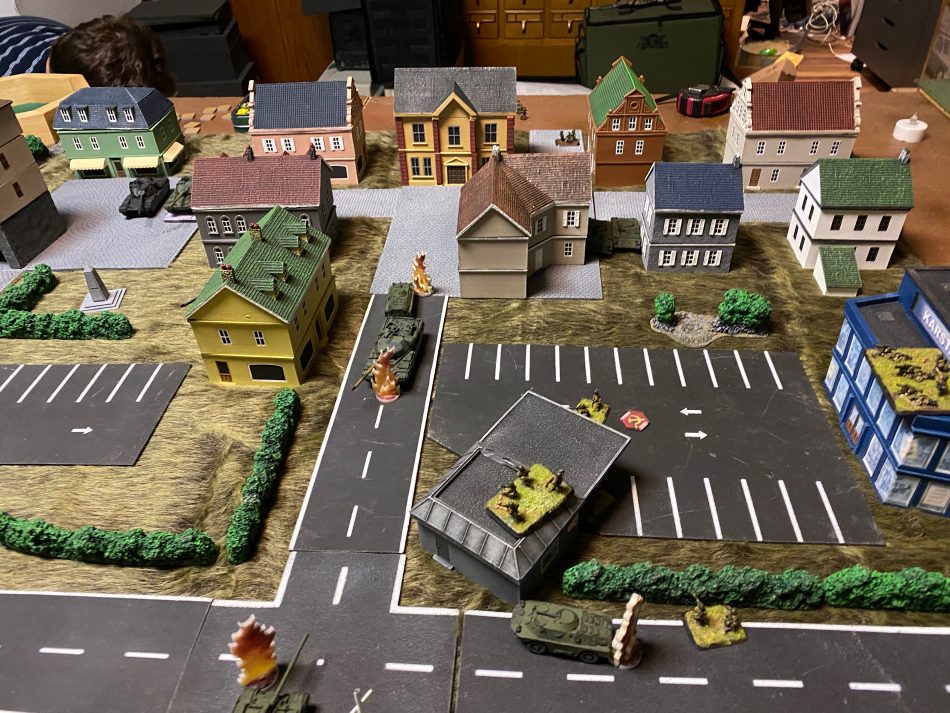
The RPG teams continue to try and snipe away at the FV432s who otherwise have gone mostly silent depending on order availability. The tank battles and maneuvering were sucking away orders to more high priority action. I moved the Spigot to the top of the building in hopes that a flank shot might present itself. (It didn’t.) The Chieftain on the road retired and decided the move over by the monument using the yellow building for cover.
An RPG team finally got lucky, however, their pinned comrades that were out in the middle of the parking lot rolled a 1 on their morale and disappeared, routing from the action.
With the loss of the FV432 the counter total pushed Ian over the edge and the Soviets would barely win the day. I had approx 60 some in counters. With the T-64 reinforcements that added 10 to my Battle Rating taking it up to 76. Without the T-64As the day would have been lost.
Conclusions
I’ll be going back and re-read the rule book cover to cover again now that the experience of the first game is past. I’m sure there will be other errors uncovered. Overall, the game played really well. Russian tanks while numerous were brittle. British armor with better sights and better gunnery was largely successful however their numbers mean their kill ratio has to be a good 3:1.
There are quite a number of list options to explore yet. Electronic warfare, for instance, has my curiosity up and other unit goodies that will make the game quite replayable until CENTAG or more online lists arrive. The many unit options in the book also means the arms race needs to heat up again just to be able to field all the variety. Least we all have plenty of time to paint!
I was happy I could reuse my Team Yankee hardware. I can see the wisdom in 10mm which would make the table feel larger. Even 6mm would be quite fun.
Last and most importantly, we had fun. That’s what we all look for.
Interesting AAR Tom, this set of rules really deserves study as it seems better feared towards modern warfare than WW III TM Y
Sorry: geared towards, …..
Excellent AAR, reads like a good game. Glad you had fun.
I am a bit concerned about the reserve roll.
Getting 10 MBT’s and 10 BR with a single die rollf of 5+ seems very random and powerful. On the other hand, I really like what was done with the objectives, making them more important for the outcome game. In Battlegroup, it often made more sense to ignore the objectives and focus on killing the enemy.
Remember you’ll have but one roll unless you spend point for more. The reinforcement roll doesn’t start until turn 7. For Russians, yes you’re right 10 MBTs isn’t a bad deal at all, OTOH, the British should they go for armor get 3 more themselves so you’re right, that reinforcement roll can really save the day if you get it and your opponent doesn’t.