Setting Sail with Oak and Iron – Battle Report
Like many I received my kickstarter copy of Oak and Iron by Firelock games and been beyond eager to get some games on the table top. Enter a slight case of the flu which added just enough delay so I could get some ships painted. Weigh anchor! Sound the drums! Load the cannon and roll out the guns!
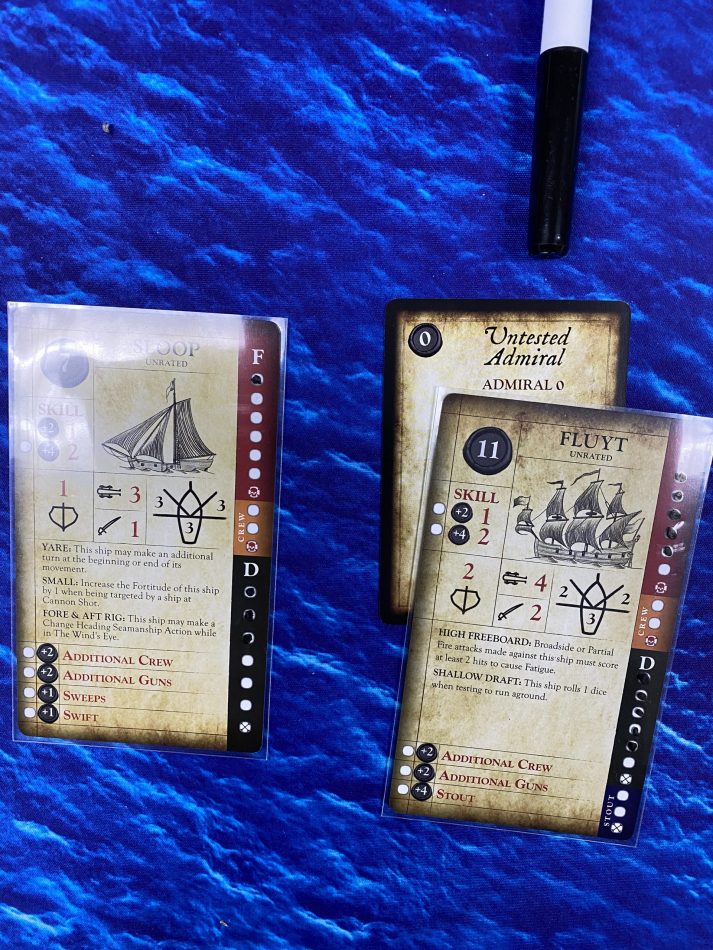
We setup the demo game as found in the book, no terrain, but with a slight twist. I a paired up the Fluyt and the Sloop while on the other side the Petite Fregate and Corvette were matched. We didn’t add any upgrades but at this point we noticed that the core game box comes with just one untested admiral card.
The Sloop and Fluyt would have the Down!, Careful Aim, Rolling Broadsides, Effective Fire, Adjut Position cards while the Petite Fregate and Corvette would have Fire as She Bears, Take Courage, Fleet Maneuver, Reload and Favorable Wind cards.
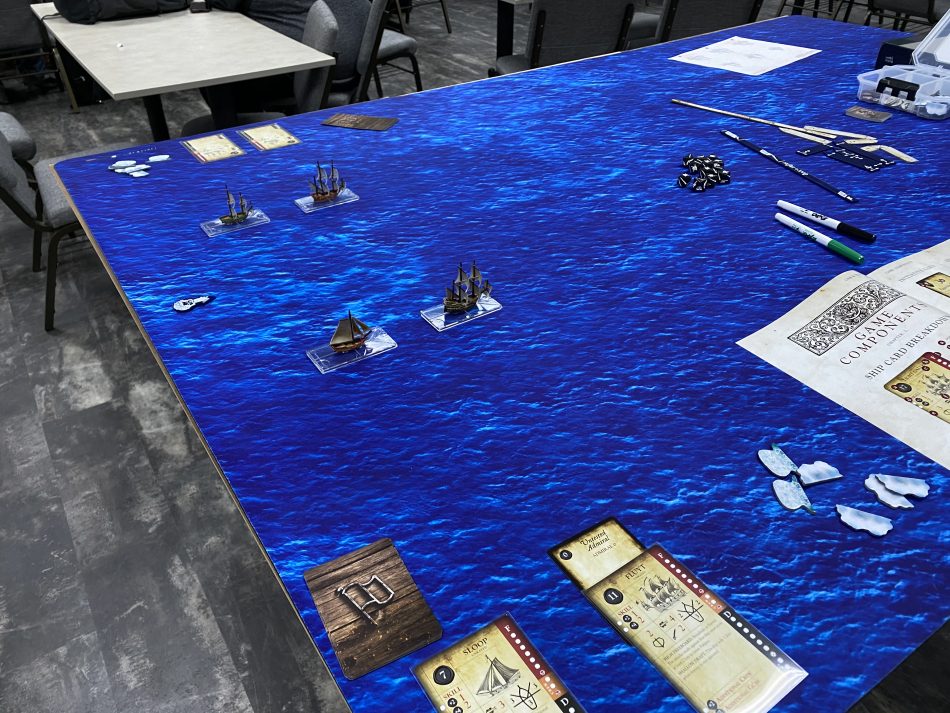
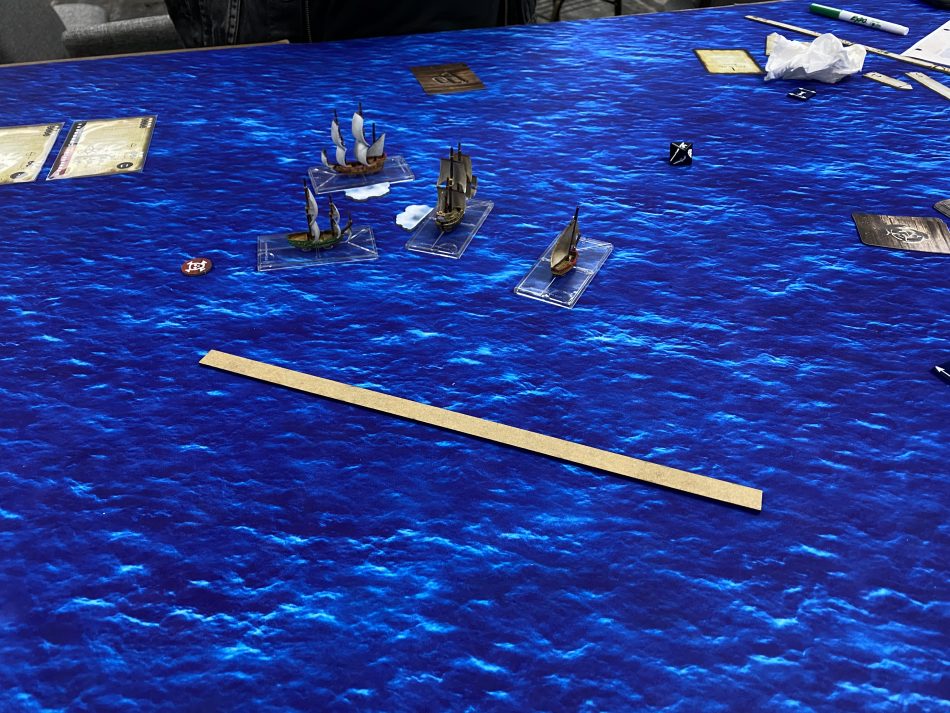
For both games I set a 6×4 table tho in both cases the action easily stayed within approximately a 4×4 area.

For the first turn I thought I’d try out the Adjust Position card, doing an initial turn in towards the enemy fleet and then during activation move and last use my one free “turn” to get back into line.
Kyle went with a similar thought playing Fleet Maneuver which immediately makes the turn prior to any activations.

We traded some ineffective fire at range. Both the Sloop and Corvettes on each side enjoying their “small” status that makes them a bit harder to hit at long range since their fortitude jumps to a 2 when at “cannon” range.
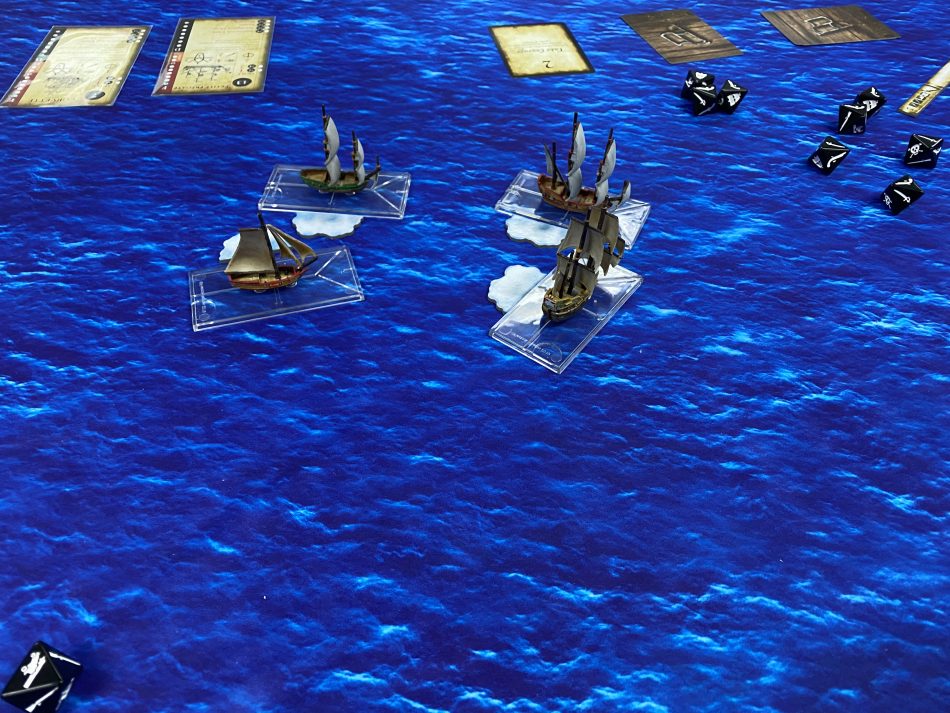
It was at this point where one starts to learn the importance of sailing in formation. When firing in formation you gain an extra die when shooting. Also a number of the Initiative cards only work when you’re in formation, so in this case the ships closer to the picture aren’t in formation while the ones on the opposite side are. You’re in formation if there is a friendly ship directly in front of you and likewise a friendly ship astern. It takes a minimum of two ships.
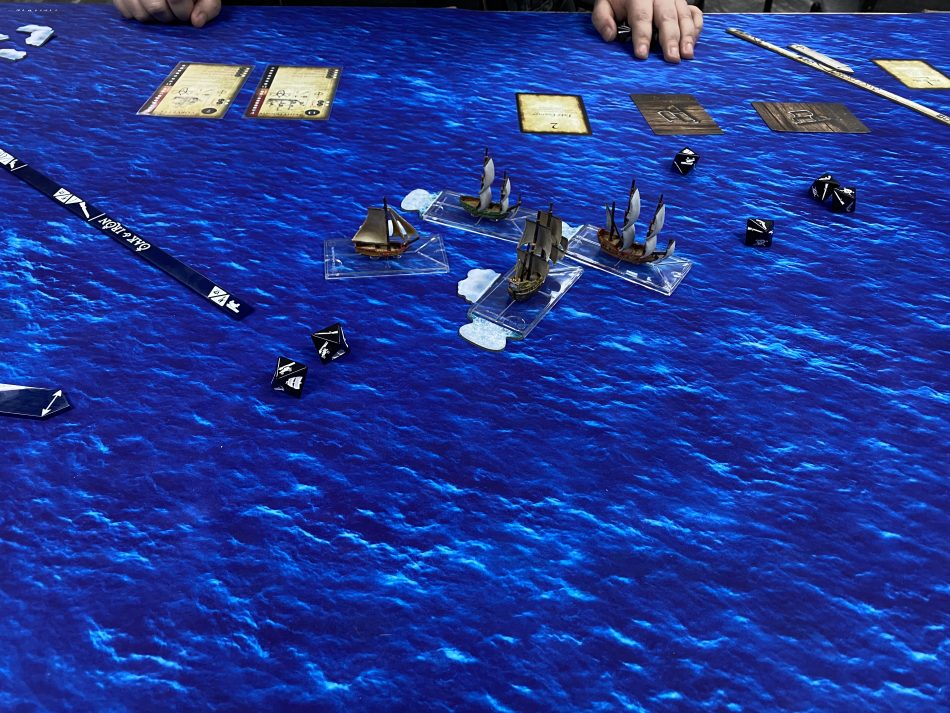
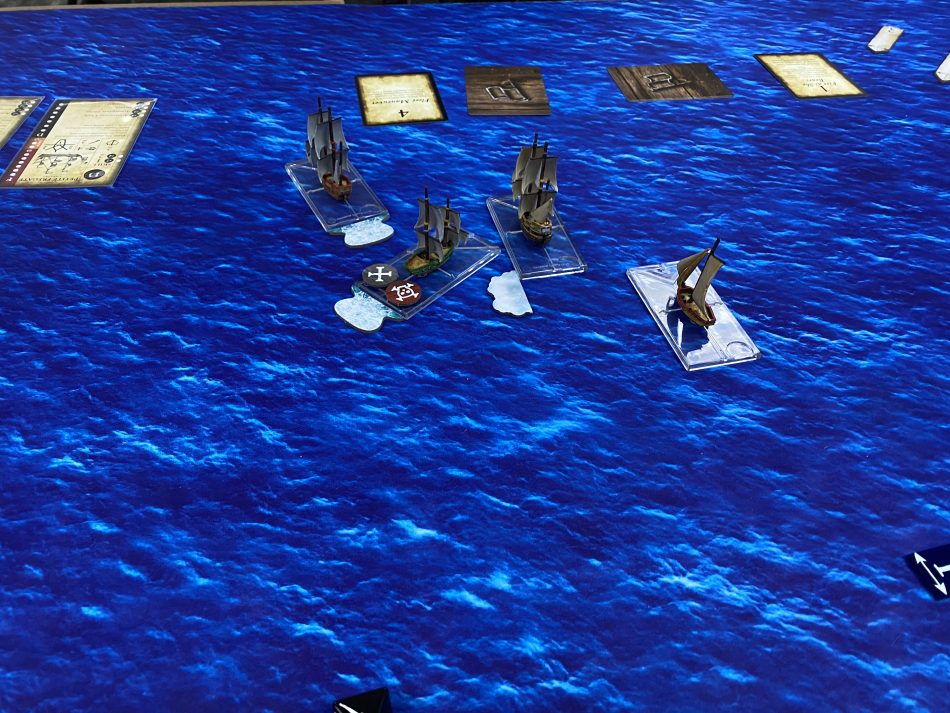
Another important tactic is keeping an enemy ship in your broadsides, otherwise your only other option is with a partial fire shot where you only role a number of dice equal to your crew value minus your current fatigue down to 1 die at a minimum. You also have to be in a minimum of musket range on the ruler. Here’s two “hits” on the clock due to partial fire. My Fluyt was sailing with the intent of trying to board the Corvette, unfortunately this also meant the poor Sloop was in a bit of a spot with few places to sail. Those admirals, getting in the way, just what are they thinking?
I rolled for collision which generally gives damage to the ship which is doing the ramming and can also result of fowled rigging. Thankfully neither happened this turn.
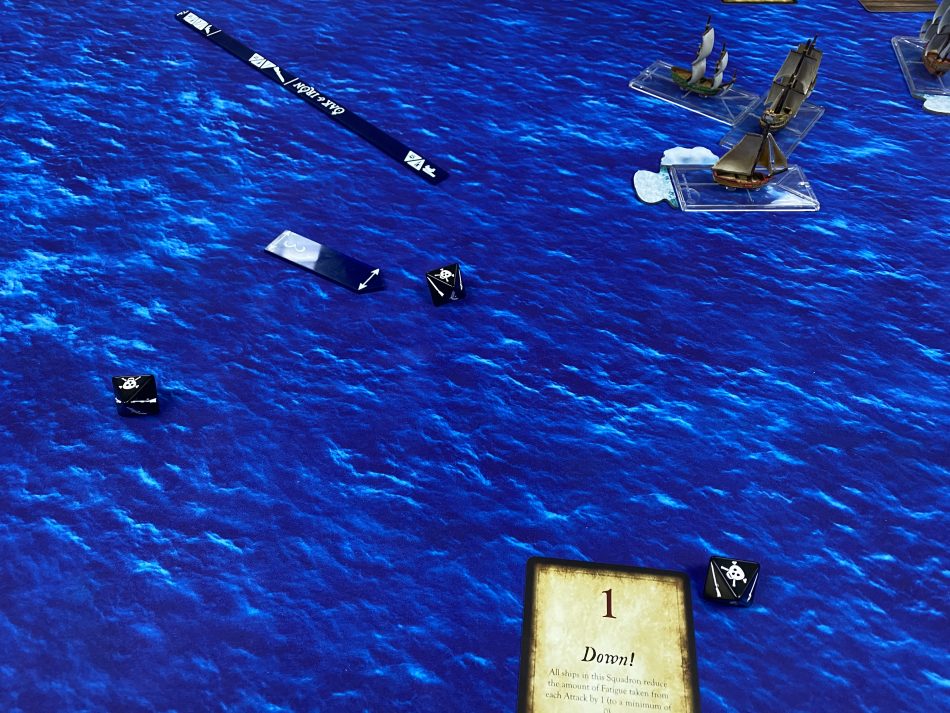
On the following turn with the Down! initiative card played which means for hits that give Fatigue they would be reduced by 1. While a great card, at initiative 1, it also means the chances are your opponent will go first that turn since higher initiative is better.
Fatigue is really important in this game as for broadsides, partial fire, boarding parties, skill tests etc, you lose 1 die for each point of fatigue you have. If you take a hit, you take a point of fatigue. Three skulls rolled on the broadside, which means not only 3 hits but 3 critical hit chances. It was a nice result given that my Flyrt had tried to grapple the Corvette but failed. If it had been successful I wouldn’t have been able to fire the broadside from the Sloop.
Rolling forward to the next turn my hopes to board and take the Corvette with the Flyrt were looking mighty bleak, but I could park my fat butt in front of the Corvette and hope he not only rams into my ship but also ends up entangled and thus I would be able to board. AR!
The fate of the poor Corvette was looking pretty bad at this point with 7 damage putting it into a crippled state. That’s the red token behind the Corvette on the table.
And the final shot of the game the Corvette takes another broadside and the crew goes Shaken as well given both states it is now Out of Action and thus due to strike points, the Petite Fregate will sail away.
Here is the state of my fleet at the end of the game. Note that the Fluyt had been the object of Kyle’s affection for a good portion of the game, 2 more fatigue and 2 more damage and she would have struck her colors.
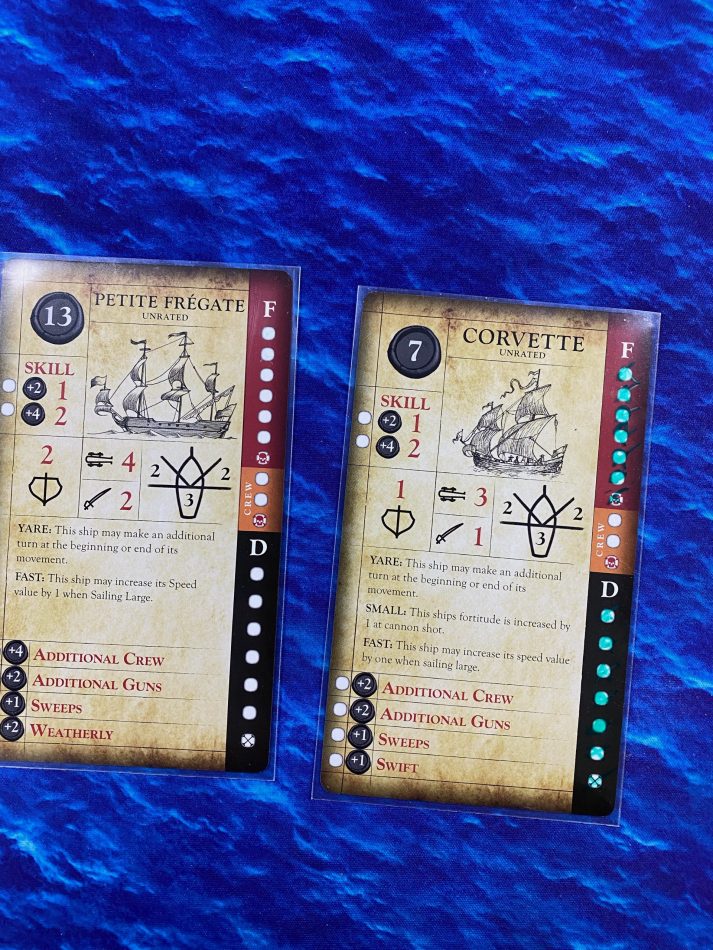
Kyle’s fleet, the Corvette having taken much of the damage. The Corvette and Sloop are great fast little boards but are quite crunchy and historically didn’t like to mix it up if they could avoid it.
I recommend Tarot sized card sleeves for the ship cards which allows for dry erase markers to be used.
With a first game under our belts we’re all quite eager to get more games in, and especially start to explore the various Initiative cards, upgrades and other additions to the game. With the point costing system, upgrades can give you better admirals, crew quality that then gives you re-rolls, upgraded guns and of course other ships. In this scenario 4 ships from the core box are used, leaving two as of yet unplayed with. Next time!