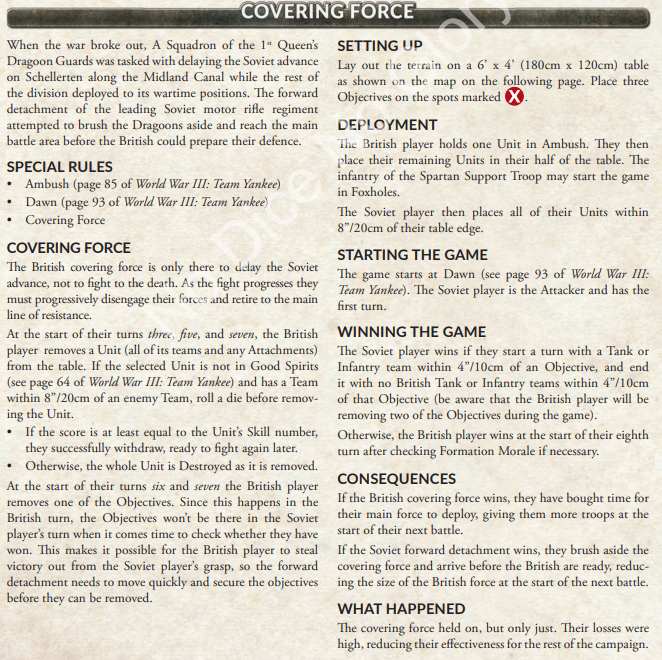
Covering Force – Narrative Scenario Play in World War Three Team Yankee
By Tom Burgess
 One aspect of playing World War Three Team Yankee that many people enjoy is list building. Trying to design the most perfect list to take on all opponents in all mission is almost a hobby withing itself. However commanders through history rarely ever get to “design” their force.
Instead, Commanders are generally are assigned units to accomplish a specified task. As much fun as it is to design a force and test it, it also can be very enjoyable to see how well you can do with a set force challenged to contest with specific historical conditions.
We are talking about playing historical scenarios rather than playing generated missions with designed forces.
Though World War Three Team Yankee is set in a fictional World War Three setting, Battlefront has done a great job including “historical” scenarios from this hypothetical war in their World War Three Team Yankee books.
This is something I wish they would also return to with their World War Two Flames of War books. Well at least for World War Two, Battlefront does publish historical scenarios on their website, but I would love to see them publish a hard copy scenario compendium.
A good example of scenario gaming occurred recently when my friend Charles Christy and I played the Covering Force scenario from the World War Three Team Yankee British book. Charles rolled out his British while I played my trusty Soviets. What follows is an AAR from that game.
Situation
The scenario from the book is posted below. It is basically a modified Rearguard mission.
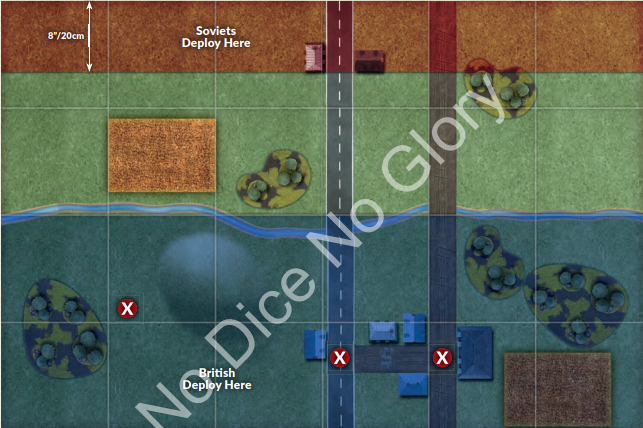
 The Map
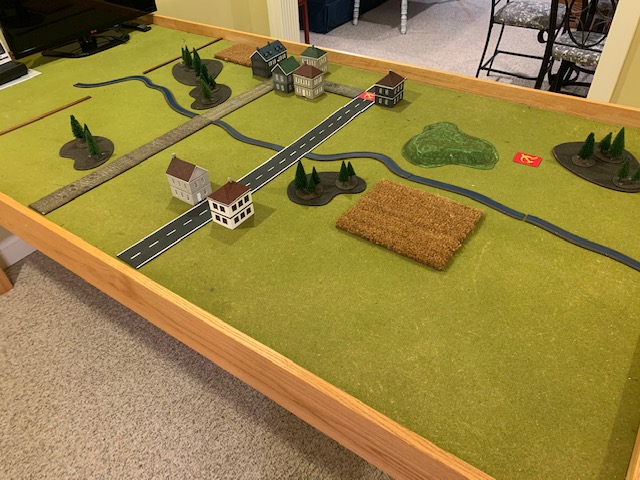
Here is the provided scenario map.
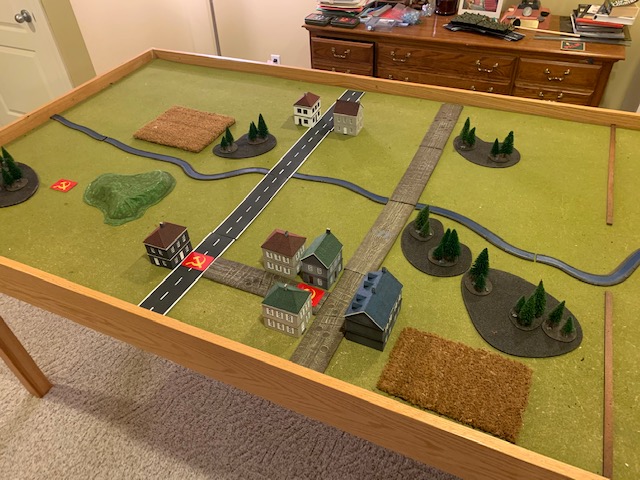
And here is our table recreation of that map.
The only thing Charles and I were not sure about on the map was how to rate the water feature that bisected the battle area. If it was just a simple “brook,” it would only be a slight impediment. If it was meant to be a “stream or shallow river” then it would require cross checks and be much more troublesome for the Soviets. We rolled it off and the water feature ended up rated as a steam requiring cross checks. This was going to have a significant impact on my battle plan as the Soviet player.
The Forces
I love that this scenario is based on a delaying action conducted by the Queen’s Dragoon Guards aka the “Bays.” I have “Bays” forces for Flames of War in both Early and Mid War. Knowing what specific unit you are playing in a scenario really helps to provide some character to your gaming.
The Soviets are a bit more “generic,” but if you read some of the “history” in the earlier pages of the World War Three Team Yankee British you will see that this is the Forward Detachment from the organic Tank Battalion in the 207th Motorized Rifle Division (MRD). Though nothing compares to the history and lineage of the British army units, it is nice for us Soviet players to occasionally be fielding something more explicit than faceless “communist hordes.”
You’ll note in Charles’s force above that he had to proxy two of his Scorpion troops, one with Scimitar and one with Australian FSVs. The point here is don’t let not having the exact kit keep you from trying a published scenario. Proxying is fine and Charles was very happy to get his FSVs on the table which had not seen the light of day for quite some time. Charles also did not bother to field his Spartan APCs thinking they would not have any purpose in this battle. This may have been a mistake as they might have been able to help stop Soviet infantry moving in the open.
The “Forward Detachment” is not actually a formation from Red Thunder. In this scenario it’s basically a reinforced Tank Company with an extra Combat Reconnaissance Patrol (CRP) i.e. BMP-2 recon platoon. This would be a “legal” force in World War Three Team Yankee, but one of the two BMP-2 recon units would have been support. In this scenario, the whole force seems to be a single formation.
Deployment
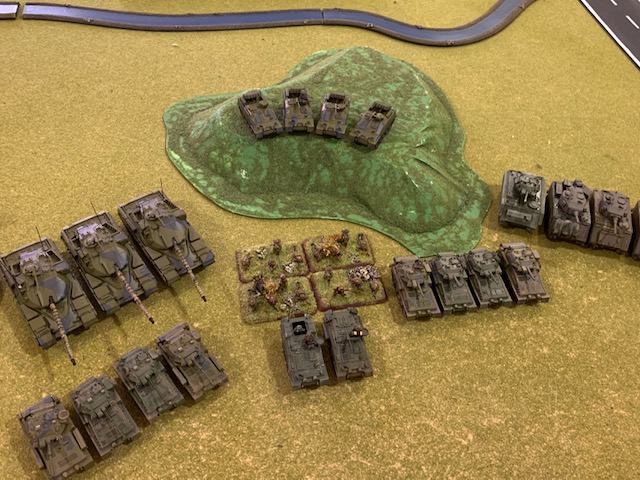
Charles set two of his Scorpion Platoons on his left.
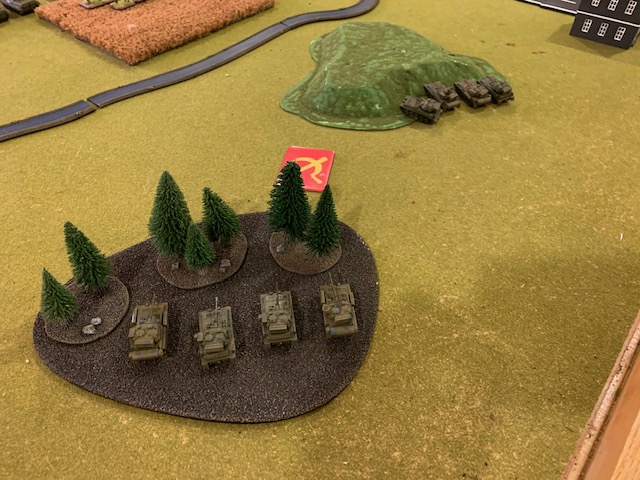
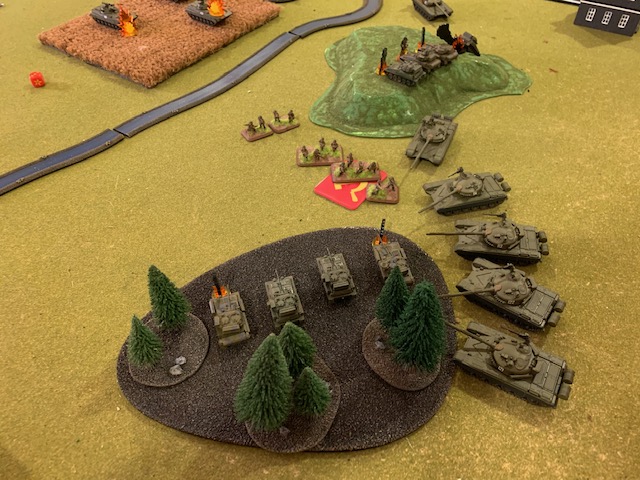
On his right he placed his third Scorpion troop and his Chieftains. His small infantry platoon deployed in the town while his Striker platoon went into ambush. Charles was perhaps a bit too loss averse on his deployment. He set up most of his Scorpions in positions where they would have try to blitz or move with cross checks into line of sight to shoot. This would cause him trouble later. With all of troops concealed and gone to ground and given that it was a dawn battle, I thought with me needing 6’s or 7s to hit him he’d have been pretty safe just setting up with good lines of sight.
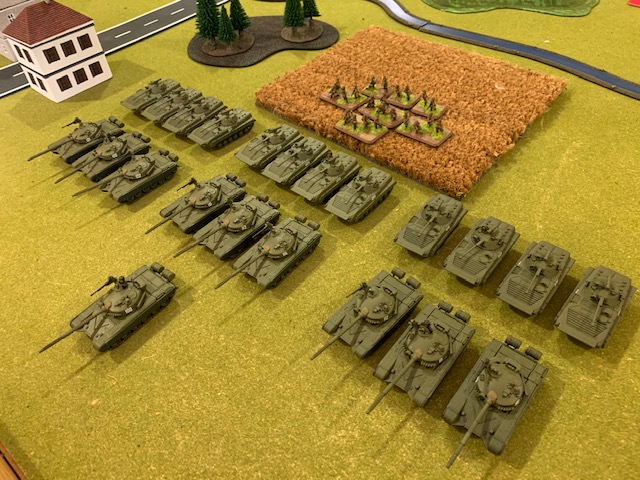
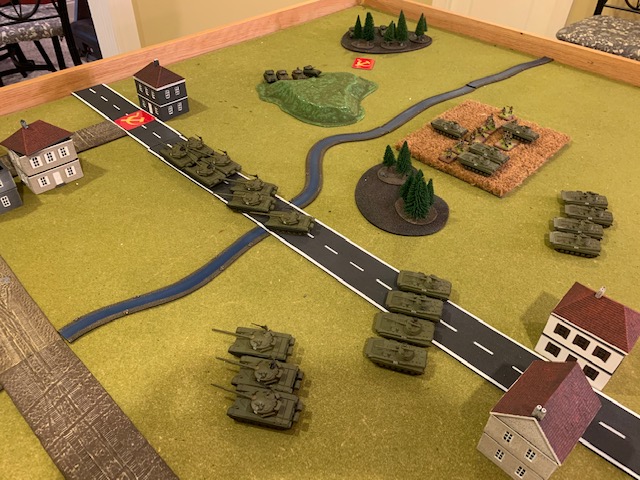
For my deployment, the stream requiring cross checks precluded me from doing what I normally like to do; mass all on one flank. With the Chieftains on his right, I still wanted to mass against Charles’ left. But the fastest way to get there was going to be by dashing straight down the road in the thinly held center. There even was an open objective on the center road I might be able to take with my T-72s before Charles could shift to secure it.
I was praying on poor visibility rolls from Charles so that the darkness would protect the open flanks of my T-72s. My infantry would advance dismounted with their transport BMP-2s following in support. My two recon BMP-2 units would be my support by fire element and provide long-range AT-5 over-watch fires.

Turn 1
My Soviets advance without firing to maximize their stealth and minimize British return fire later. Most of the tanks made dash moves and then attempted Follow Me orders.
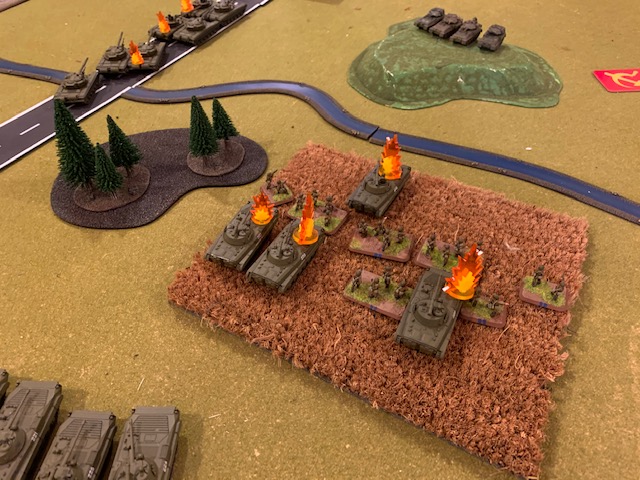
The British turn one had mixed results. On their left, one Scorpion Troop Blitzed up on the hill and earned eight hits from eight shots against my BMP-2 transports. Charles’ Chieftains are able to see far enough with their passive IR sights and take out three T-72s, one of them the Soviet formation commander. It could have been worse though.
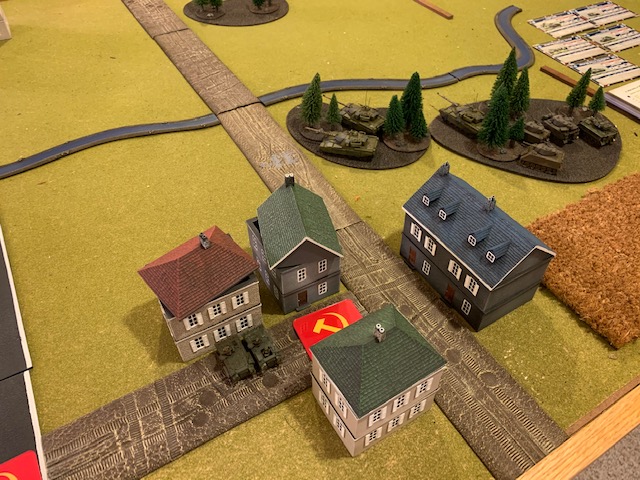
Charles’ Strikers came out of ambush on his right near the Chieftains, but they miss every shot from their first volley. The Scorpion troop on his right also managed to fail every cross check trying to pull out of the woods in their initial position. Charles also repositioned his small infantry unit in the town to cover the center open objective. With no infantry nearby to clear the buildings, I would now have to concentrate on my initial objective, the British left.
Turn 2
Losing nearly 1/3rd (7 of 22) of my vehicles on turn one was a little unsettling, but it could have been worse. The British Strikers whiffing was a big help. Now I had tanks that were through the gauntlet and could now turn to roll up the British left from the center, where the town would screen the rear of my tanks from Charles’ heavy hitters.
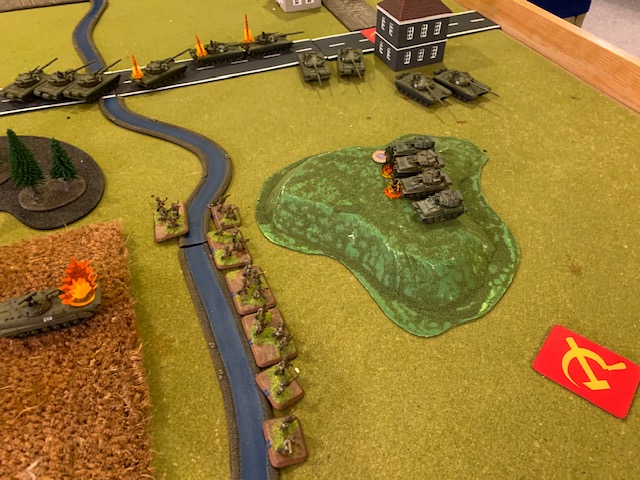
In turn two, the Soviets were able to land some hits. On the hill, two Scorpions were knocked out and one bailed out. More importantly, on the British right, one Chieftain was knocked out and one bailed out. In the following British turn, the bailed Chieftain failed to remount and the unit failed its Poor Spirits test. A huge and unexpected break for the Soviets.
The British Strikers continue to shoot poorly and only manage to kill one and bail one T-72 in turn 2. Meanwhile, the Scorpions on the British left concentrate on the Soviet Infantry. Even though they are facing Brutal gun hits from the Scorpions, the Soviet infantry platoon only loses two teams.
Turn 3
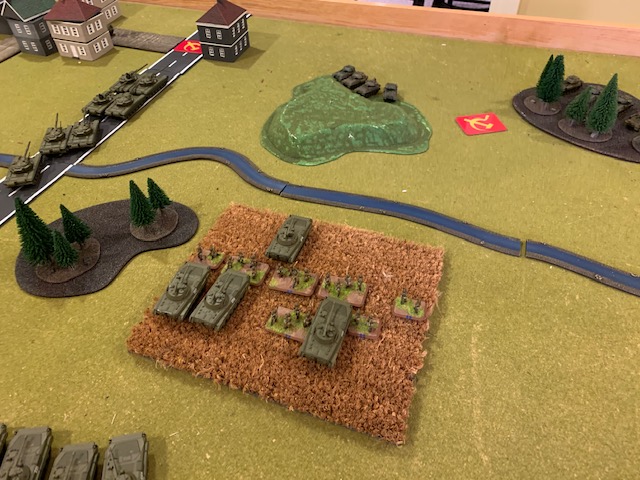
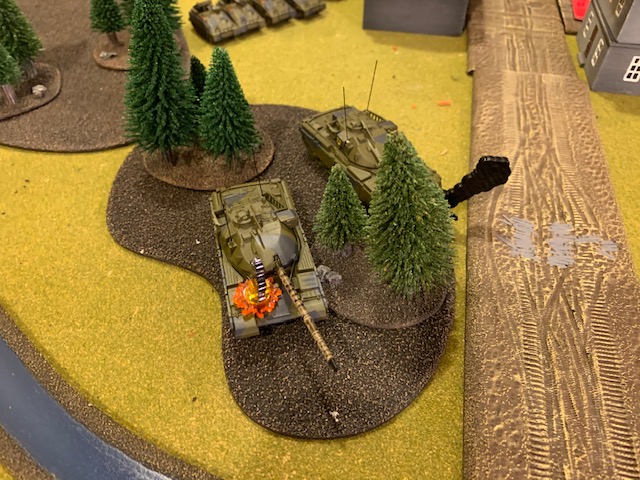
In turn 3, the Soviets continue to throw everything at the British left objective and away from the British main strength on their right. They will finish off the Scorpions from the hill and the Soviet infantry advance to contest the objective on the British left. Long-range AT-5 missiles from the BMP-2 recon units will knock out half of the other Scorpion troop on the British left.

The British Strikers knock out one more T-72. This is the last tank the Soviets will lose.
The British by the end of turn 3 are reduced to just two Scorpions holding their left.
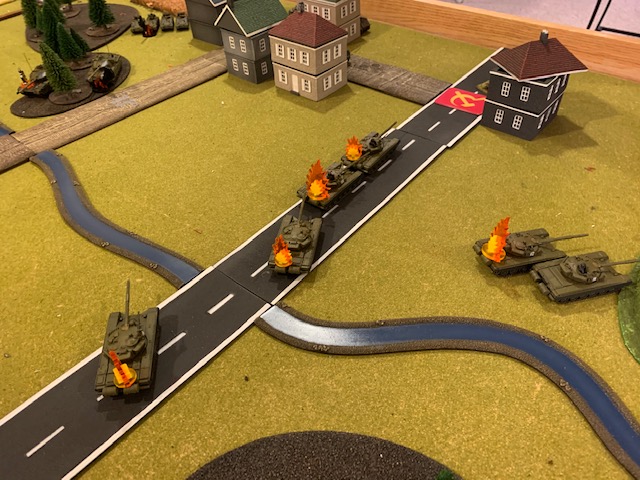
Turn 4
In turn 4, the Soviets close the noose on the British left. Unable to be supported by Striker fire from the British right, their left has only two Scorpions desperately trying to hold on. The Soviets are able to land more than enough hits to destroy these last two Scorpions on the British left.
Battle Results
The game would end as a 7-2 Soviet victory with the loss of the Motor Rifle Platoon’s transports and the Formation Command T-72 being lost. But a strong win does not mean the Soviet losses were light. The British had destroyed five of ten tanks, five of twelve BMP-2s, and three of seven infantry team.
The British technically only lost one Chieftain, though the failed Poor Spirits took out the whole platoon. They lost no infantry and only one of four Strikers. But the British loss was all eight Scorpions on their left was critical.
If the Strikers had an even average opening volley and if the Chieftains had not fled, the balance might have tipped back towards the British. In such a small game (60 points or so in this scenario) a single bad roll can have a very disproportionate effect.
Conclusions
This was an exciting game where luck favored the Soviets. But the results were not too far off those from the “historical” scenario posted here. I am sure if were to fight it again, the game would be even closer.
I hope this after-action review encourages more people to try gaming set scenarios. I have often heard the term “narrative” gaming used for this king of game play. I feel Battlefront has provided an interesting narrative framework for us to play these scenarios in. It’s certainly a refreshing break from points-based listing competitive play.
Charles and I look forward to continuing the narrative with the World War Three Team Yankee British book. There are two more single scenarios for us to play and then there is a mega scenario that combines all three scenarios into a single large multiplayer scenario that would make a great club project. Lord knows I have more than enough Soviets to do any scenario in any of the World War Three Team Yankee books.
Next up, The Death and Glory Boys try to “Hold the Line” at Shellerten. I hope we enjoy that as much as we enjoyed “Covering Force.”