How to Paint a ‘NAM Local Forces Formation
By Howard West
 Background – a group of us at Legions Games in Pittsburgh, PA have been playing Flames of War for many years and Team Yankee since it was released. Several of us wanted to start playing something different but not that far away for our passion for Flames and Team Yankee.
A smaller group of us had already started assembling NAM armies in the Winter of 2018/2019 and several of the Flames guys thought NAM would be a good 2nd game for them vs TY or Fate of the Nation. So now we are off to the races. As I was completing several of my units for my NAM force several of our folks asked me how did I paint the completed units.
So, this is the story of how I painted my NAM Army, it is intended to be a step by step painting guide that can provide you a baseline to help you build your PVAN army. Our original goal was to be able to have a NAM tournament in the spring of 2020 but that has been delayed due to the Covid-19 issue.
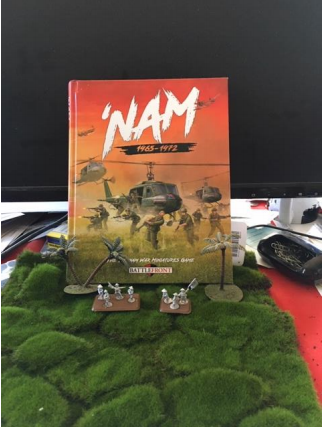
So, in the beginning, you have un-painted figures and a set of rules. On page 206 of the NAM book, it has a nice painting guide that provides a good basis on how to paint your PVAN infantry, support units, and armored units. Also, thru out the PAVN section, there are pictures with painted local force figures in them.
What is missing is any information on how to paint PVAN Local Forces. One note is that the colors that are recommended on page 206 for you to use are the older TY and Flames colors of wars paints. You might already have them or you still might be able to find them but as of today, they are hard to find.
You can find a conversion chart in several locations, the one that I use is on the No Dice No Glory Web Site under the Team Yankee Section you will find the PAINT COLOR CONVERSIONS FOR TY topic. This conversion doc provides you a good understanding of what is the closest color to match one of these older paint colors listed on page 206. I have enclosed the link to that article .
Step #1 Flash and Glue figures to Bases
I like using the BattleFront (BF) bases with figure holes, I think they make flocking of the bases easier than the flat bases. I would mount the Local Forces Company and Heavy Machine Gun teams on flat bases, then plug the holes that remain open with the plugs provided by Battlefront. This enables you to get the machine gun loader and the machine gun closer to the operator. For the Local Forces, all of the troops are mounted on medium bases, except the company and formation command stands which are mounted on a small base.
I like having my commanders mounted on small bases, this really helps when playing the game and determining what stands are in command range. For the support weapons platoons, I like to have one of the stands with an officer looking figure to be command stand for that unit. This little bit of work done at this time of gluing the figures to the bases saves a lot of game time later in determining who is in command when playing the game.
Step #2 Priming and Base coat of the figures
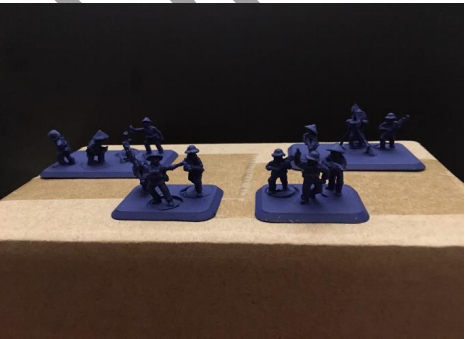
When selecting my primer or base coat, I usually want to use one of the commercial sprays from Vallejo, Army Painter or Citadel Miniatures. Also, when picking a spray to use, I also try to get one that has a non-spray available in the same color for the final touch up of the figures. I would like my base coat for the PVAN Local Forces to be a very dark Blue/Black. I did not want it to end up pure black-looking, but a dark blue tint to them. The spray that I found to match was Citadel Macragge Blue and after the base coat is thoroughly dry. I normally inspect the figures after spraying to see if I missed anything.
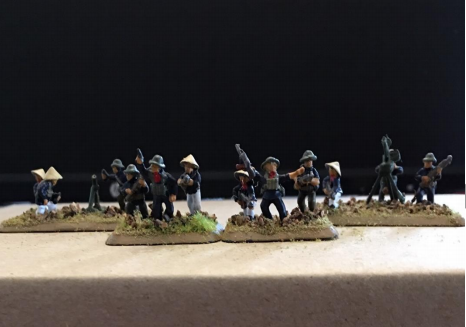
Any missed areas I use Vallejo brush on the surface primer. I then touch up the areas with the primer and use the bottled Macragge Blue and paint over the dried primer. After the touch up has dried, I then started putting coats of Citadel Nuln Oil onto the figures. The figures will also get slightly darker after I spray them with a sealer in the final step. Just a note the figures on the left are an 82mm mortar stand, the two in the middle are the formation HQ platoon and the one on the right is a 12.7mm AA MG stand.
Step #3 Basecoat for the bases
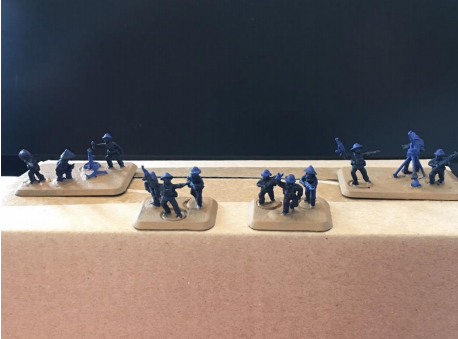
Next, I want to put a brown base coat onto the bases, I usually do this before I start doing any of the detail painting of the figures. I picked brown because I have already selected what my flocking color for the bases will be. I usually try and match the base coat that is close to the color of the flocking. In this case, it could be any shade of brown, just make sure you have enough of it, a Local Forces Formation could get rather large. Also take in consideration the color you would want the edges of the bases to be, when the bases are finished. If you paint the edges of the bases a different color for each unit now would be a good time to do that, after the base coat for the bases has been painted.
Step #4 Painting the Heavy Weapons and Pants

Since I’m painting the support platoons, I will next paint the HMG, AAMG and the Mortars on each of the stands. I will use Vallejo 890 Reflective Green; I have used this to paint my Flames Soviets and Team Yankee WPAC heavy weapons in the past and like how the color fits in with rest of the painted figures. Also, in step #3 I want to paint the pants on some of the figures, I used the following colors:
Any Vendors White, Vallejo-921 English Uniform, 830 German Field Grey and 816 Luftwaffe Uniform. I had these 3 bottles of paint out on my table from recent use on other projects and just used them. I wanted to get these support units to have a non-regular look to them so varying the pants colors will help with this. You could just paint your Local Forces formation in the dark blue and omit this step.
Step #5 Painting the AK’s, Rifles, backpacks, various bags, water bottles, and shoes or boots
During this step, I normally want to get the rest of the figures completed, except for the webbing, rifle slings, backpacks, bags, final detail on the AK’s and rifles, and hats. I’m going to start with the AK’s and rifles, shoes, boots, water bottles, and finally the faces and hands.
I used an Asian skin tone paint for the faces and hands from Howard Hues. I used Firefly Green for the water bottles this is out of the TY Yankee Colours of War line. You can use any black or brown for the Ak’s, rifles, boots, and shoes. I used Vallejo950 Black, 873 US Field Drab, and 866 Grey Green for the rolled-up blankets on several of the figures. For the boots and shoes, I varied the black and brown shoes or boots on each figure. Again, trying again to give them a non-regular look.
Step #6 Finish the Figures: hats, web gear, packs, bags, final detail on the Ak’s and rifles, and the red neckerchief. Matte finish Spray coat
During this step, I wanted to continue working on the figures having an irregular look. I started with the hats, I used Vallejo-847 Dark Sand for the straw hat, on the soft hats I used Firefly Green and Vallejo-988 Khaki. You can use any silver or gunmetal for the barrels of the rifles. I used Vallejo-301 Light Rust for the magazines for the AK-47s, the WPAC mags had a dull rust look to them. This color is out of their Panzer Aces line of paints.
For the web gear, packs and bags I alternated using Khaki and the Firefly green on the various items on the figures. I used Vallejo-871 Leather Brown for the rifle slings. Any vendor Red could be used for the red neckerchief. After the figures dried, I inspected them to see if I missed anything or if any touch up was required. Then I sprayed the completed figures with Matt Finish to protect the figures, I will give them a 2nd coat after I flock the bases.
Step #7 Flock the stands and then the 2nd matte finish spray coat
During this step I have already pre-made a container of brown Acrylic paint mixed 50/50 with a white glue and keep adding the base color in this case brown or more white glue to attain the color I want to use for my painting the bases. This mix will be used to glue the flocking to the bases. I paint one base at a time and then dip them into my flocking mix, which consists of: Rocky Basing Grit and Dirt Flock Foundation from GaleForce Nine, Brown Battleground and Battlefield Rocks from Army Painter, Earth Blend Blended Turf Woodland Scenics. As the mix runs low, I add something that looks close to what I have been using and mix it together.
I leave the recently flocked bases covered in my flocking mix in the container that I store the flocking mix in. I want them to thoroughly dry. After drying I take and shake off the excess flocking mix back into my storage container and then take a large brush and gently remove any flocking from the figures and the base. If you notice any spots that did not get covered, just get the paint/glue mix and touch up the spot and dip them back into the flocking mix.
The next step in the flocking process is to add some additional items to dress up the bases. I like to add rocks, pieces of dried up tree twigs, bushes, small trees, etc… I good source for these is at a local craft store that also may have a train section or a dollhouse section. You never know what kind of goodies you can find these places to make your bases look great.
The bush on the Mortar Stand and the tall palm looking thing on the AA mg stand are from JTT Scenery Products. I also use Medium Green Foliage Clusters
from Woodland Scenics. The gravel rocks are from my driveway. Next, I added tufts from Army Painter and Huge Miniatures.
I use some sort of instant glue to attach the trees, shrubs, and tufts to the flocked bases. You may need to use a quick set spray to hold them in the location that you want them to remain in. One last thing I need to do is to go back to the base edges and paint over any instant glue runs from attaching the trees, shrubs and tufts that I just added.
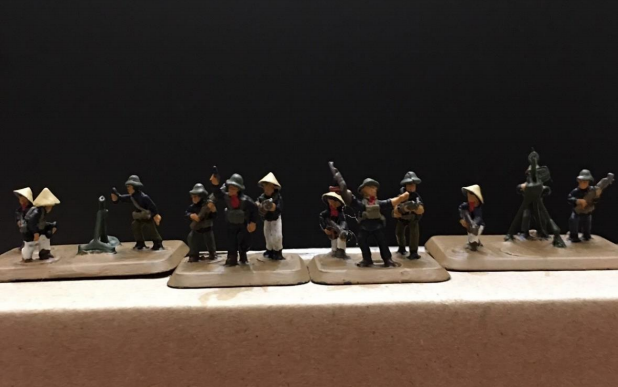
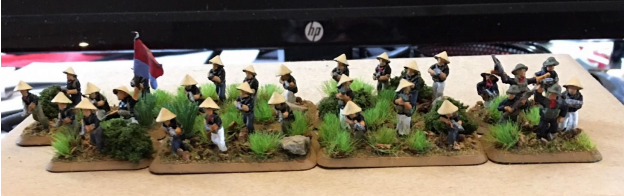
Below is the final picture of the support platoons for a NAM Local Forces Formation. The unit on the left was done about 9 months previously and has become the template for how to do the rest of the support platoons.

So that is it. A pretty simple how-to guide that walks you step by step on how to paint a NAM Local Force Formation and gives you some ideas on how to build your formation. I hope you enjoyed this how-to painting guide.
Bibliography
Yates, Phil and Haught, Mike NAM 1965-1972 The Vietnam War Miniatures Game Osprey Games 2018 The 3 books below from Osprey Publishing and can provide some additional painting ideas and additional historical background on the PAVN.
Rottman, Gordon L North Vietnamese Army Solider 1958-1975 Warrior Series #135 Osprey Publishing Ltd 2009
Rottman, Gordon L Viet Cong Fighter Warrior Series #116 Osprey Publishing Ltd 2007
Rottman, Gordon L Viet Cong Fighter Elite Series #38 Osprey Publishing Ltd 1992/2009