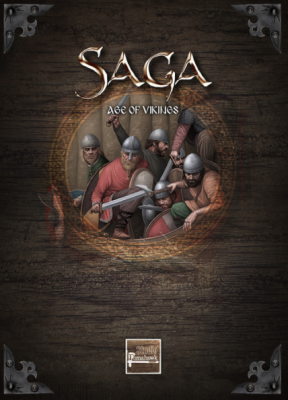
Saga battle report: Vikings Axes Vs Anglo-Saxon shieldwall
 By Paolo Paglianti
is a fast 28mm skirmish game very easy to catch on. Let’s see how it works with a battle report between a Viking raiding party and an Anglo-Saxon army sent to stop the havoc from the Scandinavian invaders. Will you side for the ravaging Axe or roof for the defending levies?
Saga takes a different approach from games like Warhammer – with specific army books for each army, such as Skaven or High Elves. This forces Warhammer players to study a wide variety of books and army lists to know what their opponent can bring to the table during a game.
Saga has a really different concept: all armies can choose between three units – that’s it. Doesn’t matter if you play Dark Age Arabs, Crusaders in the Holy Land, Vikings, or Hannibal’s army crossing the Alps: you can choose between Hearthguard (the elite), Warriors (the average good fighter), and Levies (the guys that will probably flee or die before the end of the day).
Each army can have a “special” unit – like Vikings Berserkers or Byzantine Varangians or the Moor Tuareg Riders – but each army list takes up only a couple of pages in the book. Some armies can have mounted units – they move faster but are more vulnerable – and others can swap the ubiquitous sword and shield for a two-handed weapon, deadlier troops, but easier to kill due to the lack of protection. In five lines, you have anything you need to know for each army.
The heart of your army, and the brilliant idea behind Saga, is the Army Battle board. Each army has its own Battle Board, with specific abilities defining how Vikings are different from Irish or Crusaders are different from Republic Romans. directly from the Studio Tomahawk site for the American Indians that could have met Vikings raiders before Colombo. A very easy to learn and play game: so, let’s see how the Saga ruleset works following a battle between Vikings and Anglo – Saxon.
Rule explained: How does the Battle Board work?
A Battle Board has a top row with some basic abilities for movement and combat bonuses. You place as many dice here as you want, for you can use them multiple times in the same round. The lower, bigger half of the BB has the powerful Special Abilities.
These abilities shape the behavior of each army, giving unique edges and strong points. For example, Vikings can activate Heimdall ability, reducing their own armor in favor of a much stronger attack. Anglo Saxon can unleash Valiant Hearts, virtually increasing their numbers, while The Last Romans can order Mass Volley, to instantly shoot will all units with ranged weapons.
There is a lot of variety and creativity in these Battle Boards. For example, JomsVikings, a specific “clan” from Norway, have a unique board: they can’t have Levies and almost all their abilities can be “blocked” by the opponent. The opponent indeed can choose to stop almost their abilities, but doing so they “reward” the JomsViking player with “Rage” counters, that he can use for other, more powerful, activations, creating gameplay with lots of interaction between the two players.
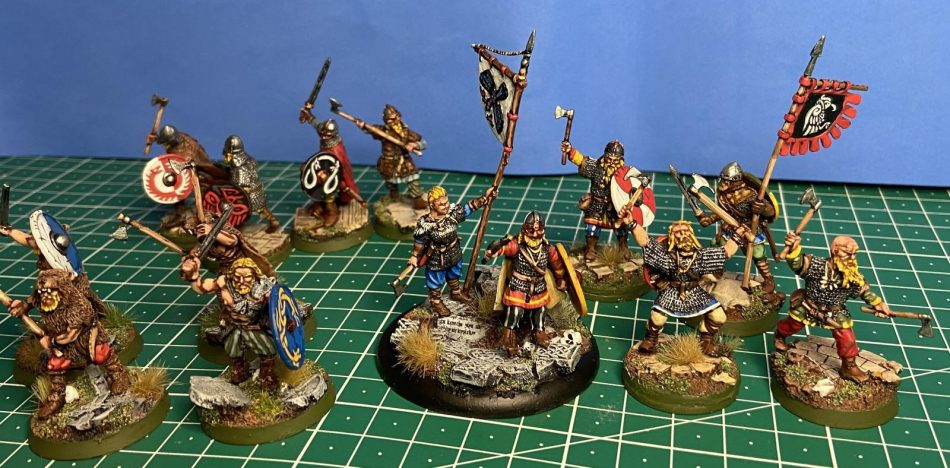
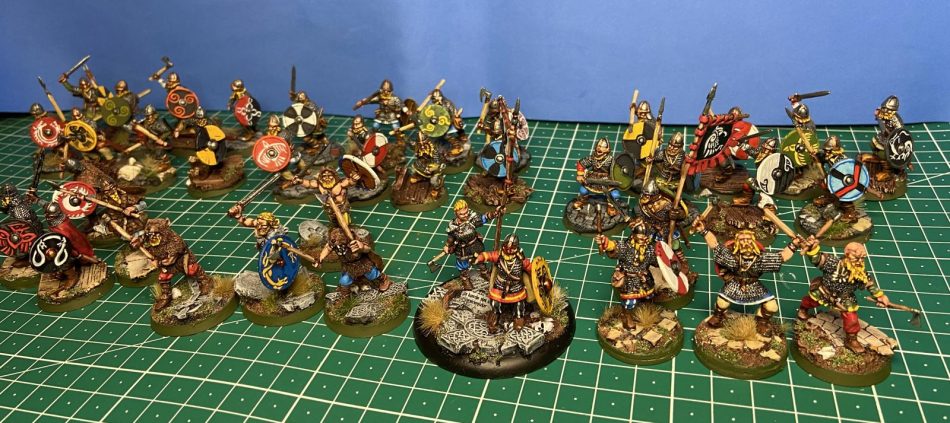 My Viking army ready for action. The miniatures are from Warlords and V&V.
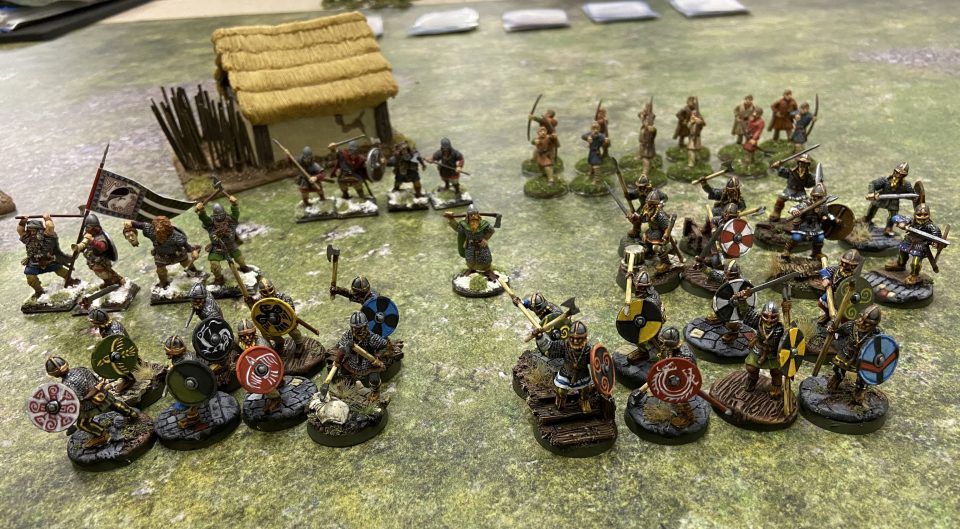
The facing armies
My army is the Viking horde (blue on the map). The Vikings can’t choose mounted troops, so they are slower than most of the opponents they will face. However, they are true professionals when it comes to hand to hand combat.
When you form your Saga army, you have 6 points in total. Each point can be spent to “buy” 4 Hearthguards, 8 Warriors, or 12 Levies – the Warlord is always free, so you can theoretically have a Vikings army of 72 levy warriors or 24 Elites or anything in that range. You’ve read just a few lines and are ready to design your Saga army!
I chose a balanced army, so I had two Hearthguards units, three Warriors units, and one of Levy. Before the game, you can divide the same troop soldiers as you prefer: my 24 warriors can be formed in three units of 8, or two units of 12. More troops mean more resilient units, but it’s vital to have a number of units to generate the command Saga dice (more on this later). I decided to have two Hearthguards units (four each), and three Warriors units (8 each). One of the Hearthguard units is of Berserker, one of the few unique units we’ve mentioned earlier. Naked and fanatic, they are true killers among the killers, ready to sacrifice them to bring havoc thru enemy lines.
My opponent, Alberto Moggi, leads an Anglo-Saxon army. It’s a list with very good defensive abilities, and able to artificially boost the number of soldiers, “your eight soldiers fight like they were 12”. Also, the Battle Board’s most powerful ability allows the player to have all Levies fight as they were Warriors for the entire turn. So, no surprise Alberto took two mounted Hearthguards points and four Levies, fielding 48 tramps that can be turned into true Warriors at the right moment.
The Battlefield
The game is played on a 120 x 80 cm table. Each player chooses some terrain elements and places them alternatively on the table. Basically, you can choose between good hills (allow to shoot over your troops, for example), difficult terrains (giving protection to troops inside them in hand to hand and if shot at), and Rough terrains (protection only when shot). Difficult and Rough terrains also slow down troops. Since Vikings don’t have mounted or fast troops and Alberto has just one mounted unit, we both selected some difficult grounds on the sides. A single rough terrain (a crop field) dominated the very center of the battle site, and could be helpful to protect archers. After placing the third element, Alberto decided to use his “turn” to move a terrain instead of placing another feature, ending the table generation.
The Scenario
Every Saga game is different thanks to the “book of Battles”, a supplement with scenarios you can choose from to have games with objectives or special rules. Tomahawk went further, creating a card system to generate random scenarios: . These cards form five decks of six cards each, and you take one card from each deck (so a total of 7.000 different combinations). The first deck is about the deployment, the second determines the game length, the third ha special rules, and so on.
These were the cards we drew:

So our scenario divided the table on one of the diagonals, and we had to deploy the army in “our” triangle. We would have played for 5-7 turns, and the points would have been awarded for surviving troops and for controlling the corners of the table. Hurt the enemy, but without losing too many troops!
Deployment
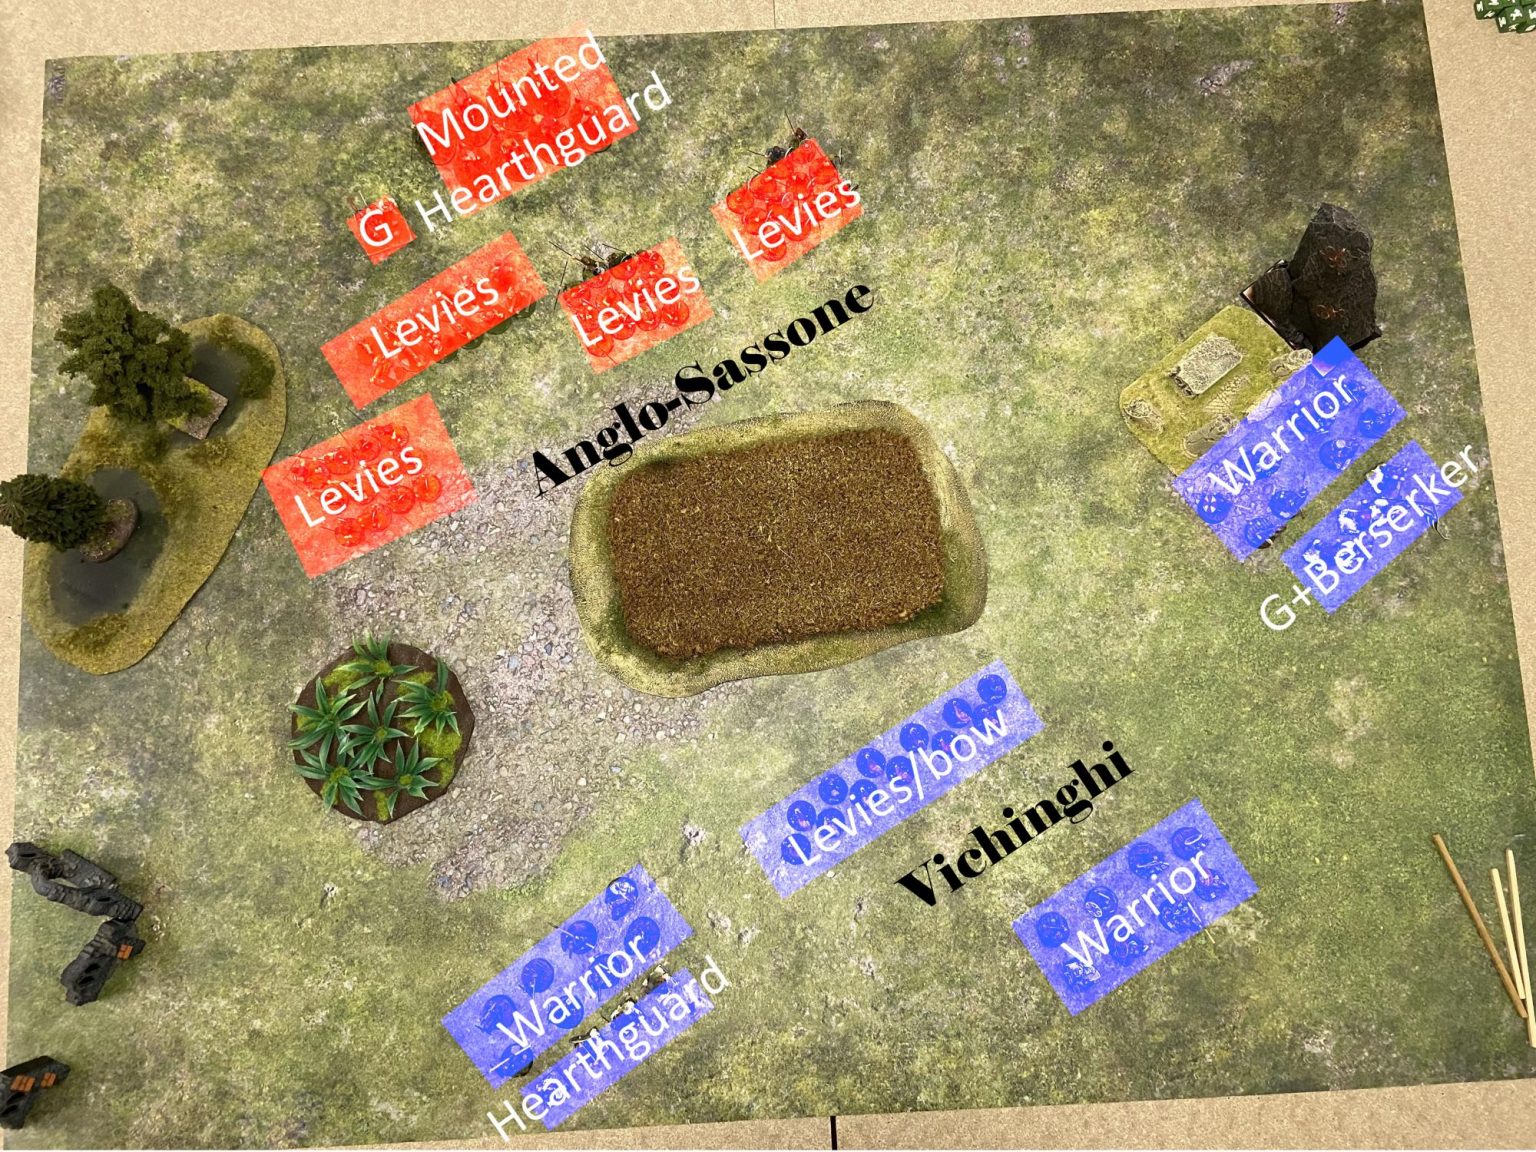
Here is the deployment. The Viking units are the blue ones in the lower right corner, the Anglo-Saxon troops are the reds in the opposing corner. My plan was to avoid the combat in the center of the table and moving on the flanks with one Warrior and one Hearthguard unit on each side. Alberto would then had to choose where to send the single mounted elite reserve, leaving one side unprotected and at the mercy of my better warriors. At least, that was the plan!
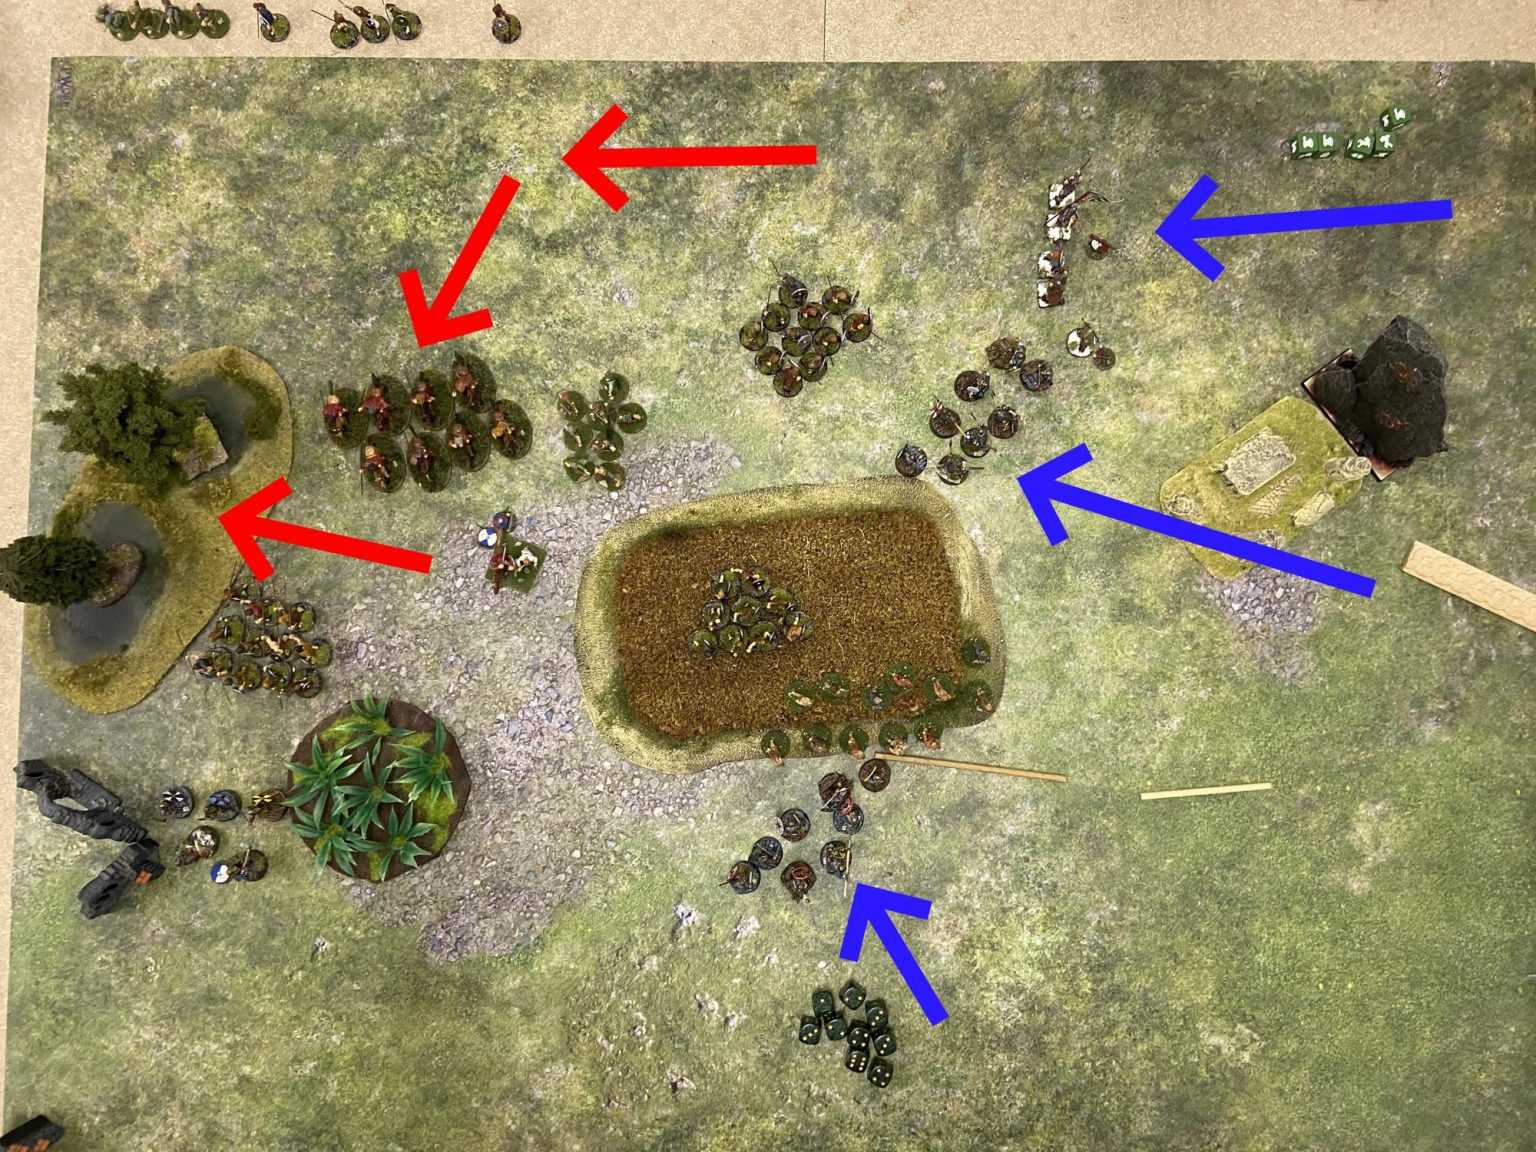
First Rounds
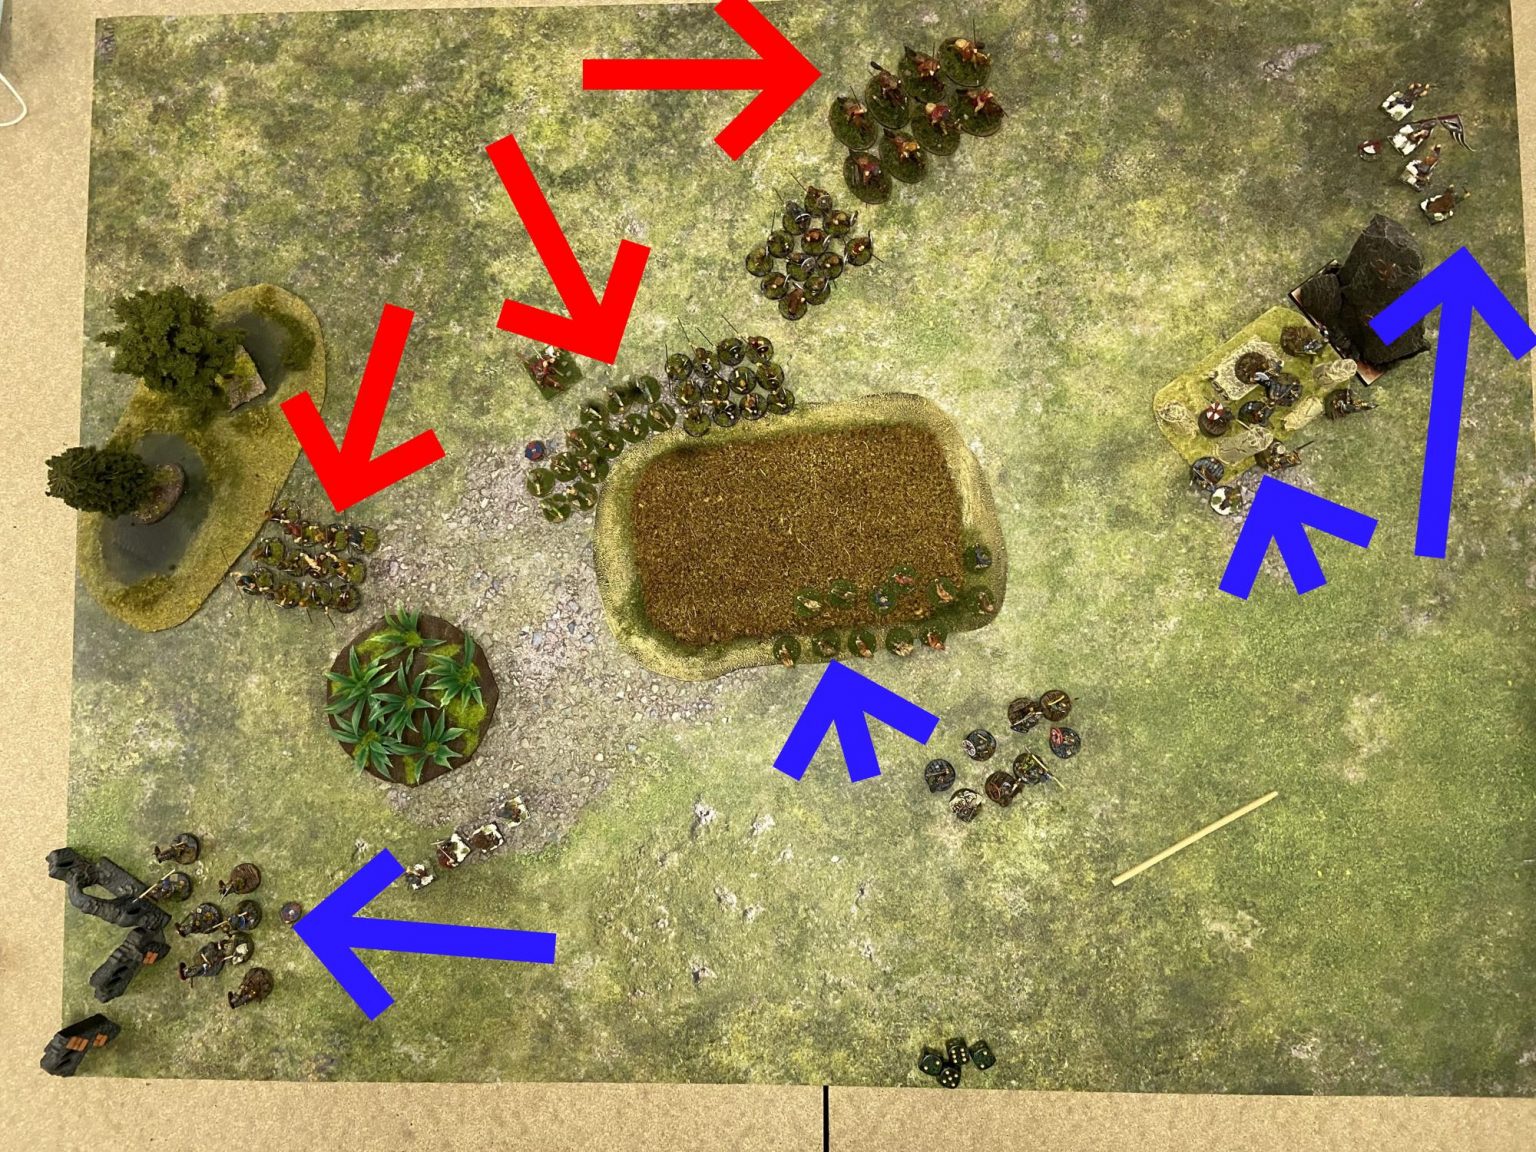 The first two rounds: Anglo-Saxon (red) advance in a solid line to keep the flanks covered. Vikings try to outsmart them on the flanks, avoiding the arrows from the central archer unit.
I moved the Berserker on the far right, at the furthest distance from the archers. The Berkerker are deadly, but unprotected and vulnerable to shooting. I also moved the rightmost Warrior unit inside the small temple (difficult going) to cover them in case of shooting or mounted charge.
On the left I moved in a similar way: Warriors on the left and Hearthguards into the difficult swamp area to benefit some cover in case of shooting. In the centre, my Levies moved just to reach the outskirts of the corn field, ready to shoot some volleys on the Anglo-Saxon lines. Alberto reacted as expected: he moved the single Heartguard unit on the right, to counter the Berserker advance, and had to use his General and some Levies to stop the left clamp movement.
Rule explained: How does the movement work
 All infantry units move the “M” stick (15 cm). All units in terrains move as the “S” Stick (10 cm). Mounted units move twice the M sticks, and can divide the movement into two segments (for example, to avoid terrains). No other movement can include a bend or wheel or non-linear movement. The final stick, “VS”, 6 cm, is for unit coherency: no soldier from the same unit can’t be farther than 6cm each other.
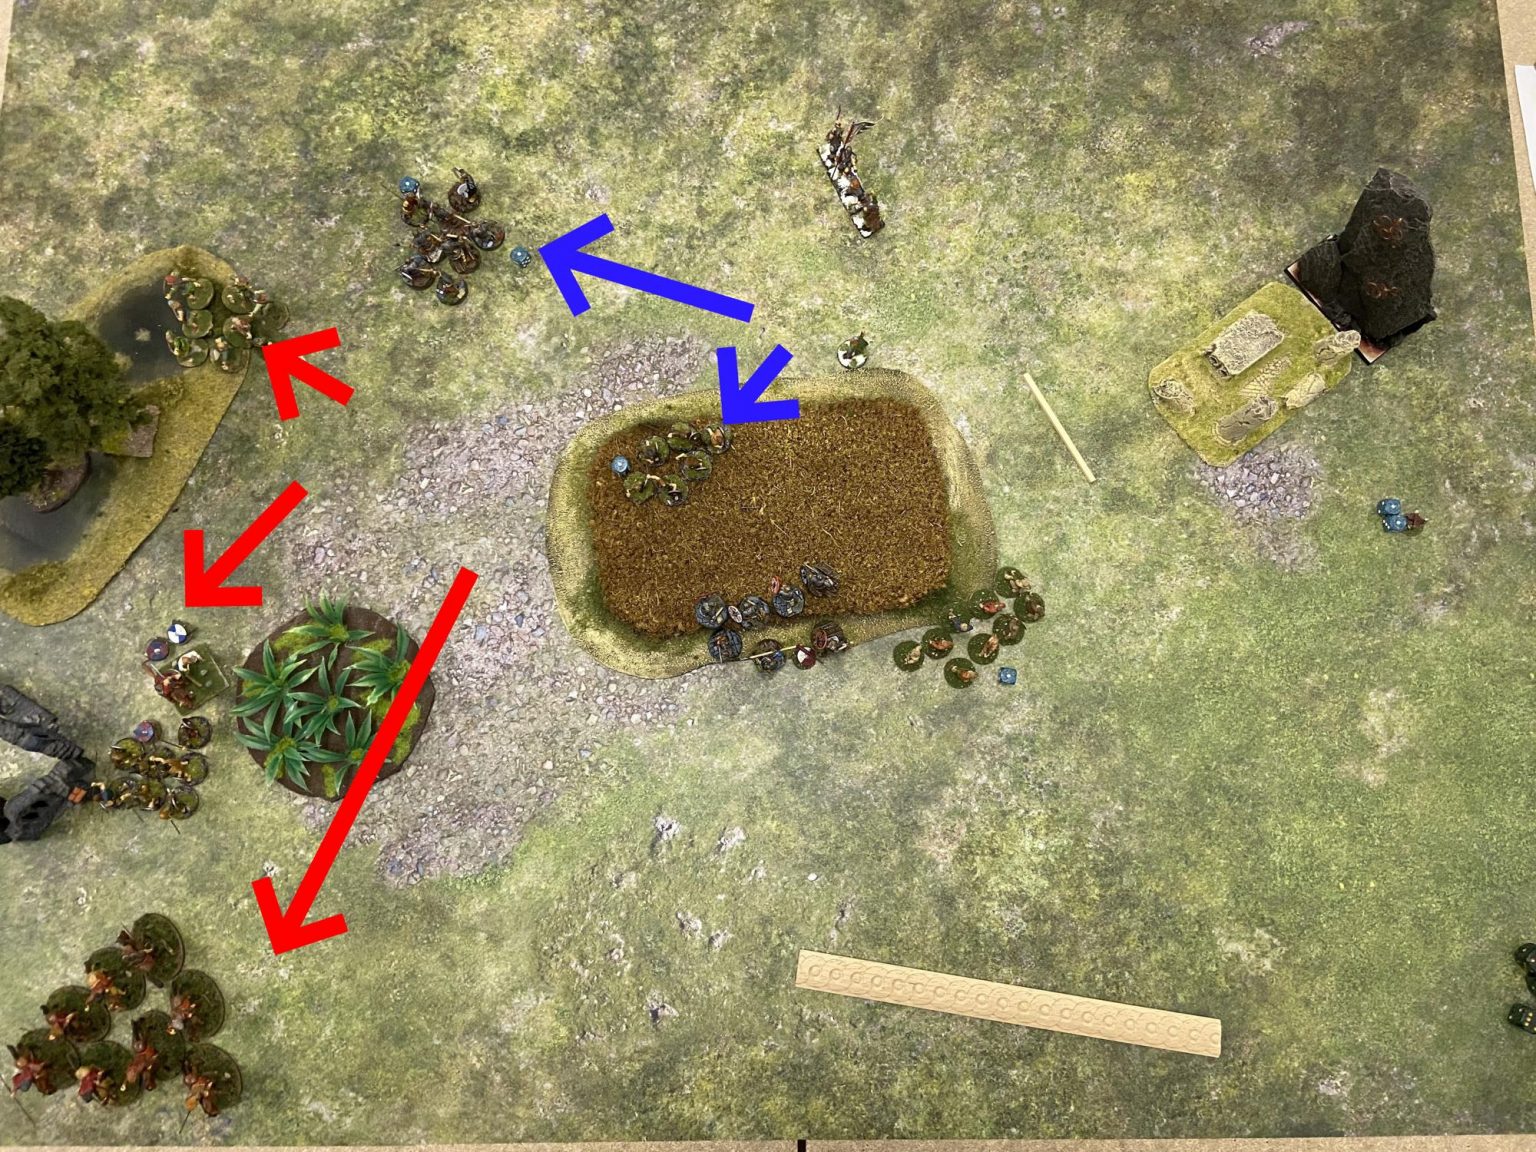
First blood: the armies clash into each other
Feeling a bit surrounded, Alberto chose the right way out: charge! He assaulted my Warriors on the far left, and the close Hearthguard with the General. A daring move, losing the general is never advisable!
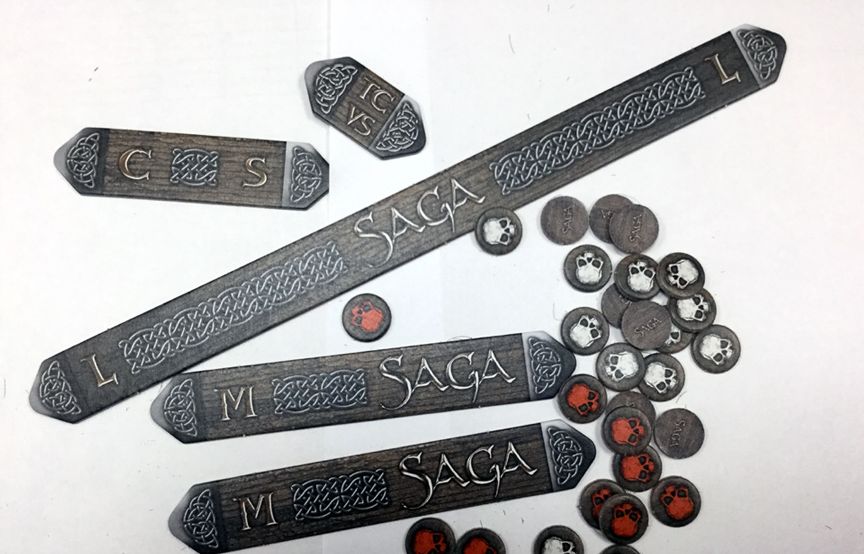
Rule explained: How are the Saga dice generated?
Each legal unit of Saga generates one Saga die, with a maximum of 8. This is the reason why players try to have multiple smaller units: if you have five big units, you have a more solid army but you have only five dice per turn; on the contrary, seven small units plus the general generate full 8 dice.
Each army has a different set of dice: actually, they are a bit expensive (a set costs around $15). However, you can create your own dice buying some much cheaper dice () and applying the icons on them – Studio Tomahawk guys are so kind free for all.
A Saga dice has a “common” icon (three of six faces), an “uncommon” icon (2/6) and a “rare” one (1/6). Once you roll the Saga dice, you need to allocate them on the board. This is the real genius behind Saga: the player needs to linger on what he wants to do, and adapting his strategy to the dice he rolled.
 Alberto counter my advance on the right charging with Levies-now-Warriors and the Warlord. My attack is stopped and I retreat to lick my wounds.
Alberto did this since he was ready to unleash the most powerful ability on the Anglo Saxon Battle Board: Call To Arm, transforming all Levies in Warriors for a full round. With this Activation, he can charge my Warriors with his Levies on equal terms, inflicting huge damages thanks to more hands in the combat.
Rule explained: How does the Combat System work?
The hand to hand combat starts as soon as two opposing units make contact. The first step is to “generate” the combat dice: now you use ordinary D6, not the special Saga ones, that need to stay on the board. Each Hearthguard normally generates two attack D6, while a Warrior only 1. The poorer Levies one D6 for every three figures. This immediately explains how better are the Elites.
After creating the two dice pools, the players begin to activate their Abilities. You can use only Abilities on your Board where you allocated the Saga dice at the beginning of your turn, and this explains how tactical the game can be. You need, once you roll the Saga dice, to imagine and understand which abilities can be helpful not only in your round but also in the opponent one, when the other player will attack and you’ll need some good boost for your troops.
Some abilities can be game-changer if they are activated at the right moment: Irish have Wail of Banshee to improve their defense, while Normans can Charge and inflict even more wounds.
After all abilities have been activated, both players roll the attacking dice. The combat is simultaneous, so there is no “I attack first, you respond with surviving men”. In general, when you roll your attack dice, you hit enemy Hearthguards on 5+/D6, Warriors on 4/D6, and Levies on 3/D6. So, better troops mean harder to hit. Each hit needs to be saved by the opponent: all human beings in Saga save on 5+, no difference from Hearthguard to Levies. For each fail, a dead.
Countering Alberto’s attack
With the combat Viking Warriors Vs AngloSaxon “Levies who believe they are Warriors” going very well for Alberto, he decides to attack my left Hearthguard unit with his Warlord. The Warlord is a tough nut to crack, delivering 8 attacks at once. No surprise he manages to wipe out my 4 Hearthguard unit single-handed, but they cross the Valhalla Gates in true Viking style inflicting three wounds on the opposing General. Every Saga Warlord has a special rule: he can “absorb” hits as to up to three Fatigue markers. The fourth hit kills him. For this reason, Alberto’s General is dangerously close to meeting his ancestors.
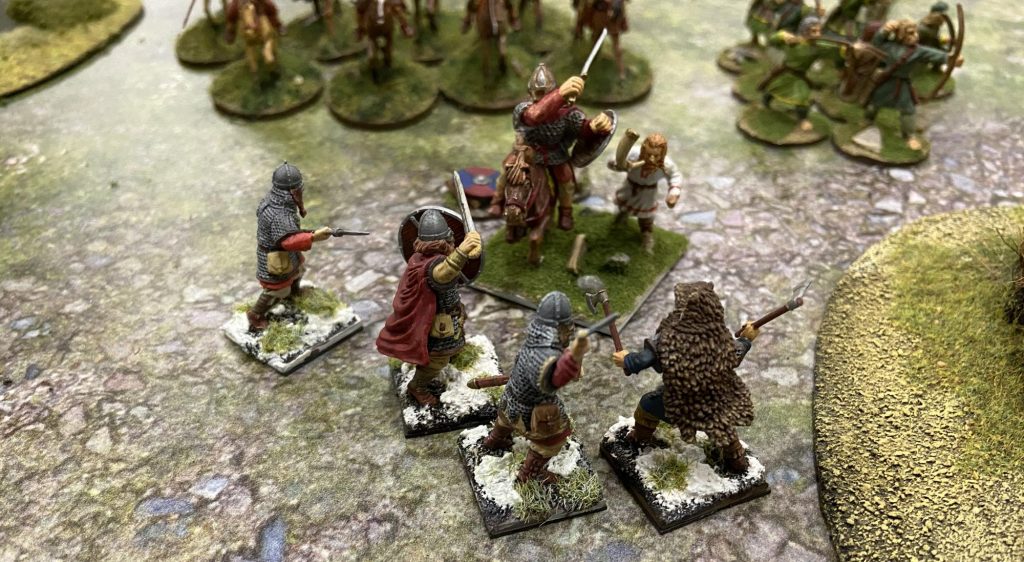 The Anglo-Saxon Warlord fights the Viking Hearthguards: they will lose the battle, but their passage to Valhalla is granted for they almost kill the opposing general!
I start my fourth turn with a left-wing totally vaporized and having inflicted, apparently, very few blows. Never lose heart! I concentrate my Saga Dice on the right, untouched wing and move my Warriors, Warlord, and Berserkers towards the soft center of the Anglo Saxon deployment. I can move my units multiple times, removing Fatigue thanks to the Njord ability (I can remove three makers for free near my Warlord General).
Rule explained: How does the Fatigue work?
Each time you move, shoot or fight, your unit loses some stamina. Saga simulates the progressive exhaustion of the troops with Fatigue markers the players place near the unit after a movement or a round of combat. You can’t have more than three markers per unit, and a unit in this state can only rest – no action is allowed. When you shoot or fight a unit with a fatigue marker, you can take advantage of its state, “using” a marker to improve your armor (the exhausted unit is tired and lands less powerful blows) or to lower the opposing unit armor (they are so tired it’s easier for you to hit them).
 Some fatigue markers I did with some Warhammer 25mm bases and spare Viking shields. Let’s hope 10 will be enough!
Alberto’s turn: he has the Warlord exhausted – with three Fatigues, he can do anything too aggressive. Alberto has to rest the Warlord and move him away from my units. It’s very difficult for a Warrior to hit a General, and ever more difficult for a Levy to hit him with an arrow, but Alberto can’t take any risk. He also needs to move his only Hearthguard unit near the General: another special rule allows the Warlord to move his hits to nearby Hearthguards. This situation effectively removes from play the two most powerful units in Alberto’s army, leaving the poor Levies to face Viking furious charge.
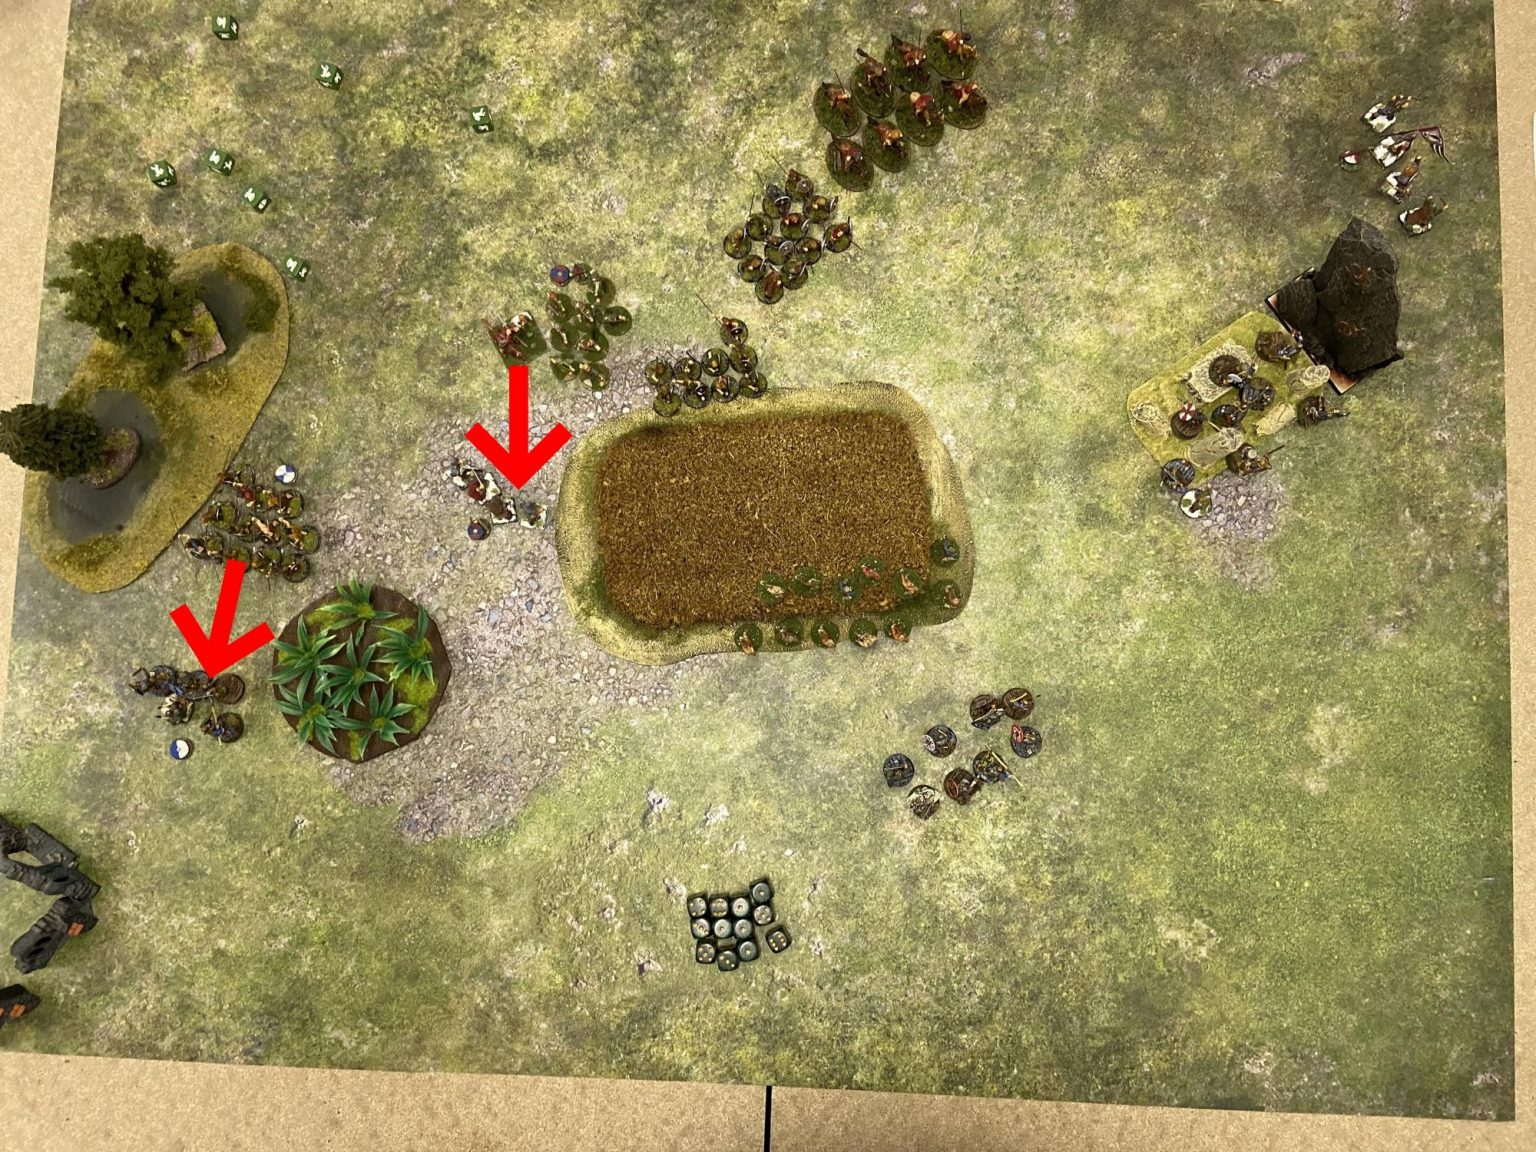
 With the left flank wiped out and the best Saxon units fleeing to protect the wounded Warlord, the Vikings attack on the center aiming for the easy prey: three Levies units with no protection and no Saga abilities loaded.
And actually, in my next round, it’s time to chop Saxons with axes. My Warlord and my Berserker furiously charge the center of Alberto’s army. Berserkers roll four dice per figure, and Alberto used all his Saga dice and allocated abilities to move his Hearthguards and protect the Warlords. Levies are without any protection: in two combat phases, four Alberto units are decimated.
Alberto, watching the collapse of the center and still having a wounded Warlord, decides to end the game: the scenario allows each player to invoke the end of the game after turn 5. He moves the Hearthguards further away with the surviving levies on my left, and in my last round I just manage to kill some more fleeing Anglo-Saxon.
 With the general situation going badly south, Anglo Saxon army flees from the furious Viking charge and hides away on the right side, with no honor but saving their lives.
When the dust sets down, we count the survivors. Alberto wins 21-19, so a close match where I paid for my mistakes in the first rounds, and Alberto his conservative tactics in the second half of the game. Next time, I will use bigger units: 8 Warriors and 4 Hearthguards are the minimum sizes you can deploy at the start of the battle, but probably would be better to have two units with 12 Warriors (three points of the initial budget) and a single 8 strong Hearthguard. For the axe!
What miniatures you can use for Saga
 The Hearthguard on the right and the Berserker on the left are from V&V Miniatures, while the Vikings in the background are plastic Warlord miniatures. Bases from , while the shields and banners all hand-painted.
Let’s see which figures you can use for your next Saga army. Gripping Beast is the official distributor and miniature producer for Saga, and you can buy miniatures in blocks of 8 or 12, “ad hoc” for Saga armies. But you can use other producers’ miniatures.
. Being the official Saga dealer, they have almost all ranges you would need, and with specific “Deals” to buy exactly what you would need for your army, like this 4 points Viking army. The plastic miniatures are really detailed and allow multiple poses, the metal ones are a bit more expensive.
Perry Miniatures. The Perry Twins sculpted some of the best Warhammer ranges in the 90ies, and now they work on their own historical miniatures. They have really good Crusaders and Arab ranges.
. They have really interesting packs with 40+ plastic foot models and lots of spare parts. My Viking Warriors are from these sets.
. For Dark Age, they only have AngloSaxon and Vikings, but they are awesome. Plastic and resin.
. Probably, my favorite. My Hearthguards are from these ranges, as they do specifically the 4 – unit Berserker pack. A bit expensive, but worthwhile if you want super detailed miniatures.
I love Saga. We play Age of Vikings with 1/72 Miniatures. Very cheap. For our old dust collecting Warhammer, Chronopia and Confrontation Minis we use Saga Age of Magic.
same idea 🙂 I’m resuming an old Wood Elf army!
This is a terrific intro to the game, well done, and thanks!
Thanks a lot 🙂