Assembling Battlefront’s 10.5cm Railway AA Gun
 By Richard Steer
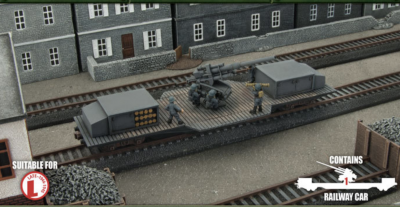
Trains are great. I’m sure I’m not alone in saying that I’ve loved trains for as long as I can remember. It’s no surprise, therefore, that when Flames of War allows you to stick a giant anti-aircraft gun onto the back of a railway wagon, I’m going to jump at the opportunity.
To this end, I recently purchased four 10.5cm FlaK39 Railway Cars to add to my Late-War German collection. Unfortunately, there are no assembly instructions either included with the kit or on the web, so I’ve written up the assembly process I used in the hope that it will help others.
Railway Guns In The Game
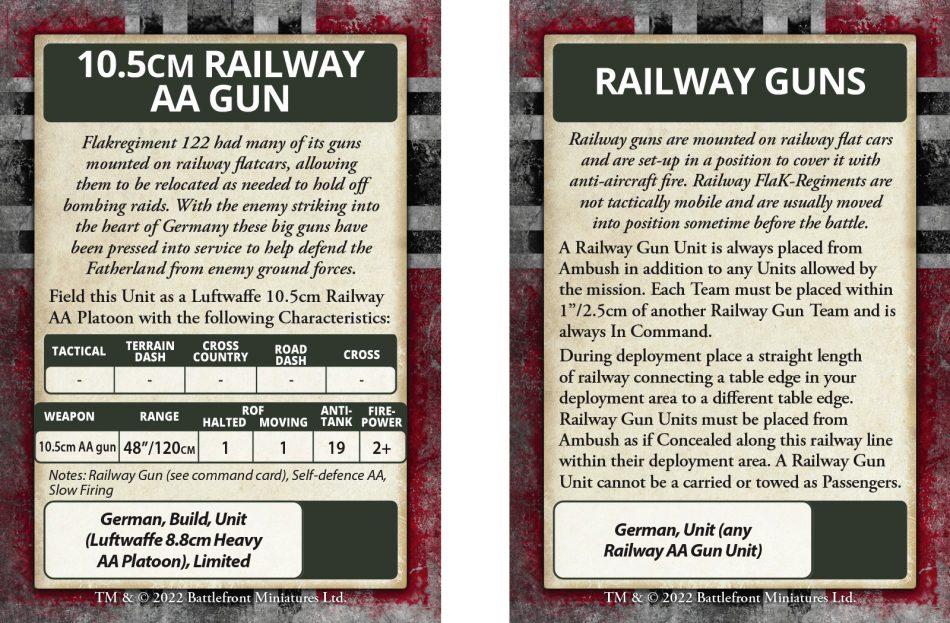
Railway AA Guns are a Command Card unit for Berlin: German. They come in two flavors: the 10.5cm Railway AA Gun and the Twin 8.8cm Railway AA Gun. These cards modify the Luftwaffe 8.8cm Heavy AA Platoon, with one railway wagon replacing each Gun Team in the unit. A third card, Railway Guns, has additional rules relating to their use in the game.
Reading through the wording of the cards in detail:
- The card only changes the movement and weapon characteristics of the unit, so the unit remains Reluctant, Aggressive, and Trained.
- The card does not change the type of team, so Railway Cars are Gun Teams with a 4+ Gun Save.
- As Gun Teams, and without any exception being given to the normal rules, Railway Cars count as having Foxholes when they deploy.
- The card does not remove the Large Gun rule from the unit.
Note that this summary reflects the current rules as written. This interpretation could change in the future if the Railway Guns card is updated by Lessons From The Front.
The deployment rules for the Railway Cars are different from those for normal units. A straight railway line is placed in your deployment area during the Deployment Step of setting up the mission. This length of the railway line does not count as a unit: the unit is the Railway Cars themselves, which are held off-table using the Ambush rule. As such, placing the railway line does not “use up” the placement of a unit during alternating deployment.
The card does not specify when exactly during deployment the railway line gets placed, however, I recommend placing it at the start of your deployment. Placing it after units have been deployed might mean needing to move teams that you have already placed, in order to make it fit.
The Railway Cars themselves are placed on the railway line using the Ambush rules: during the Starting Step of one of your turns. This is in addition to any Ambush units allowed by the mission. Retaining the Large Gun rule means that when they deploy cannot be placed within 16″/40cm of any enemy teams (irrespective of whether they are in line of sight), and the words on the card about this being “as if Concealed” have no effect.
Enough with the rules. Let’s now look at the kit itself.
The Model
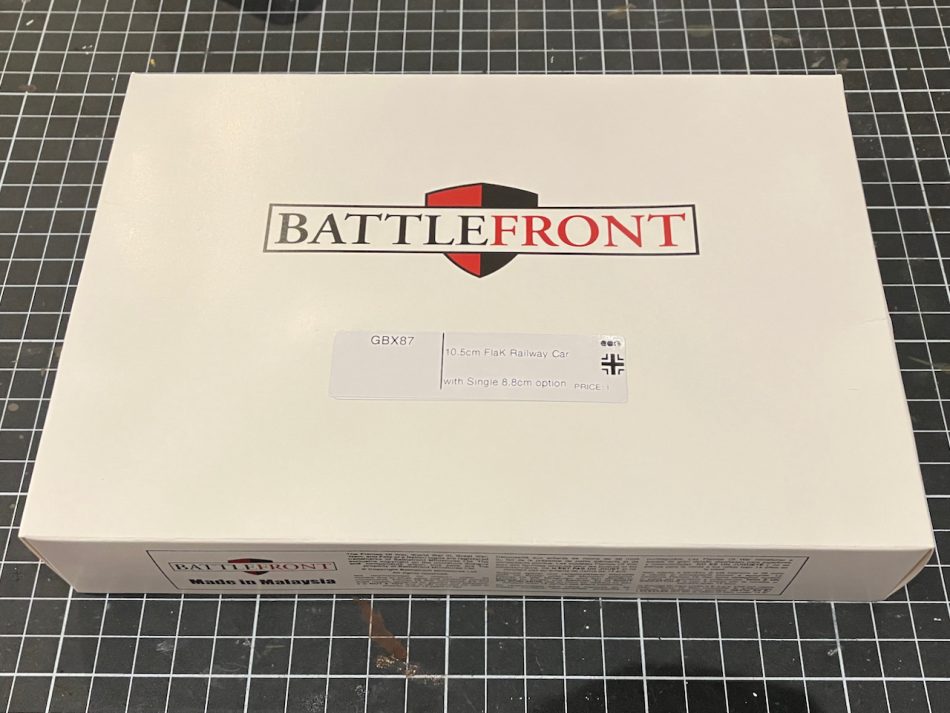
The Railway Cars are special order items, and thus available through the Flames of War online store rather than on the shelves of retail stores. The model arrives in a generic white box, with its resin and metal components wrapped in bubble wrap.
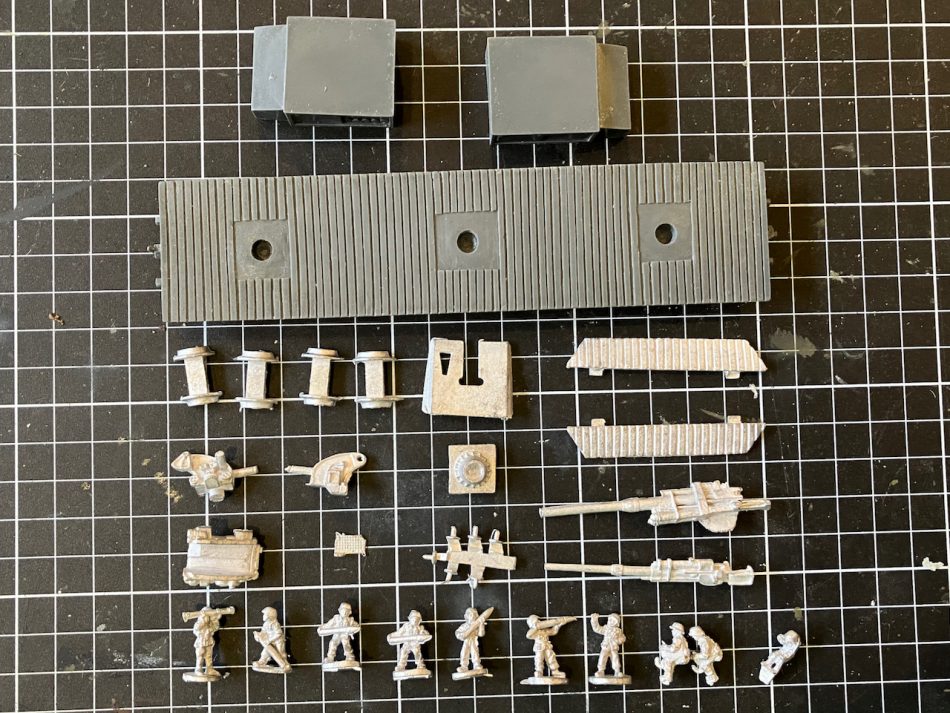
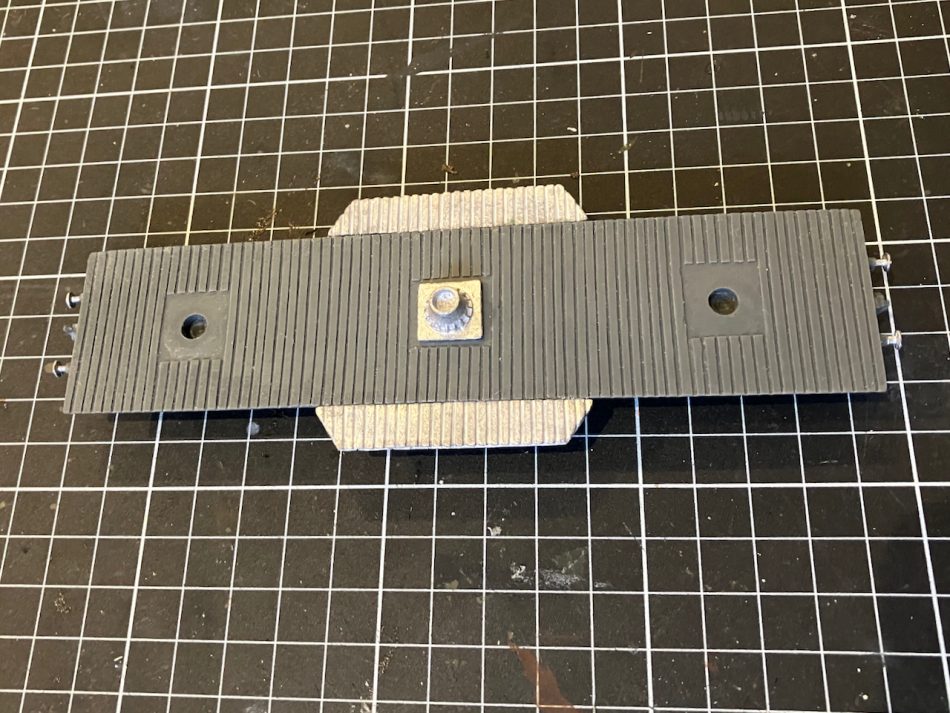
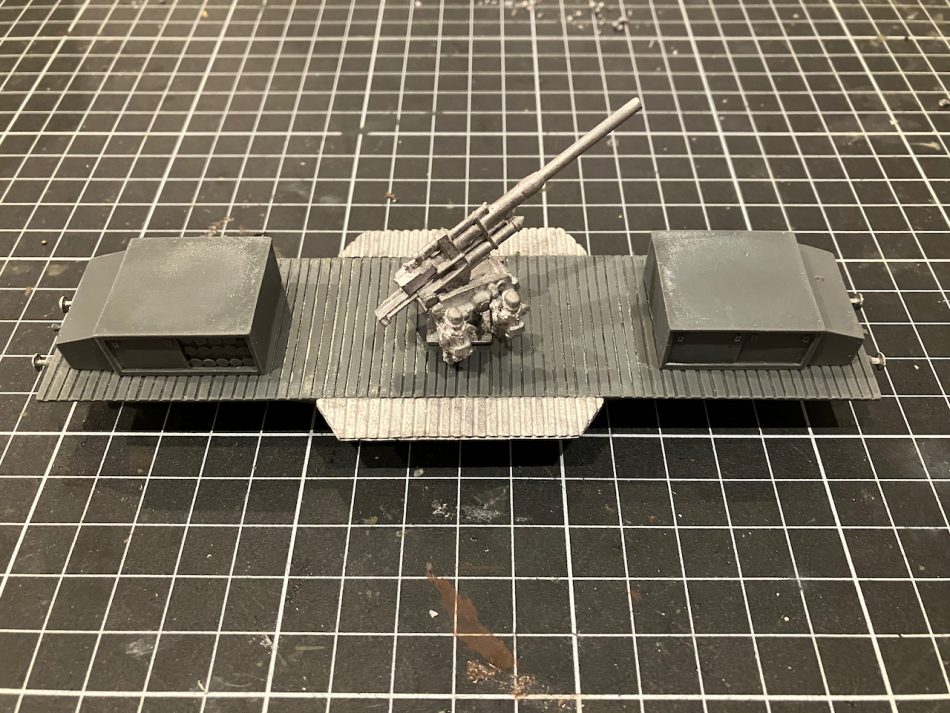
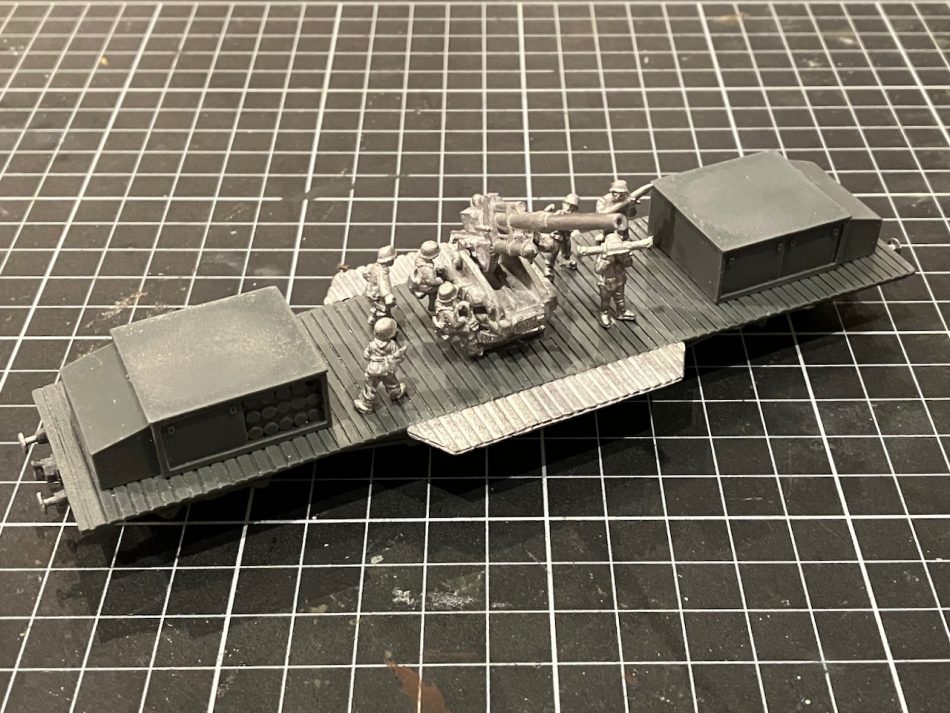
The kit contains one wagon, 10 crew figures, and options to assemble it with either one 10.5cm gun or one 8.8cm gun.
I initially used super glue gel to attach the wheelsets, however, the wheels didn’t sit flat on the rails and the wagon rocked. On my second attempt, I used a multipurpose adhesive instead. This allowed for more drying time to get the alignment right.
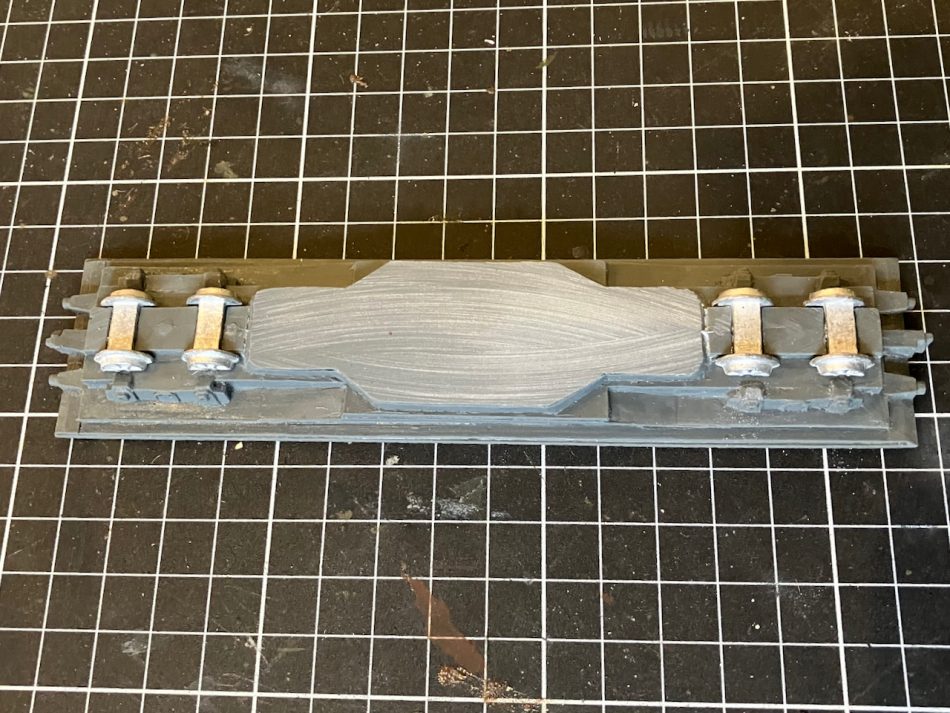
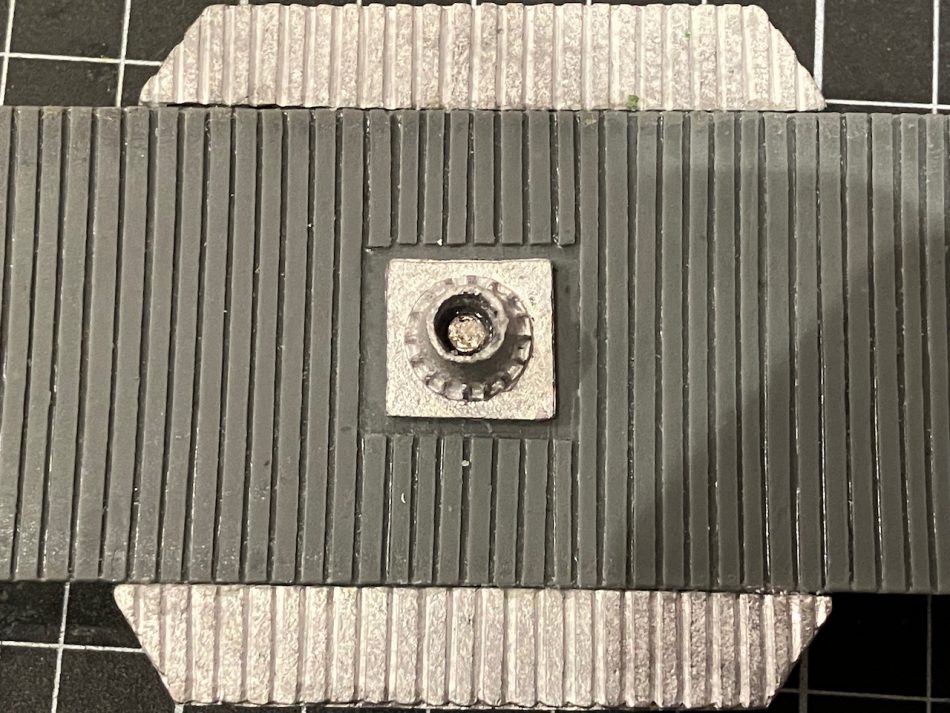
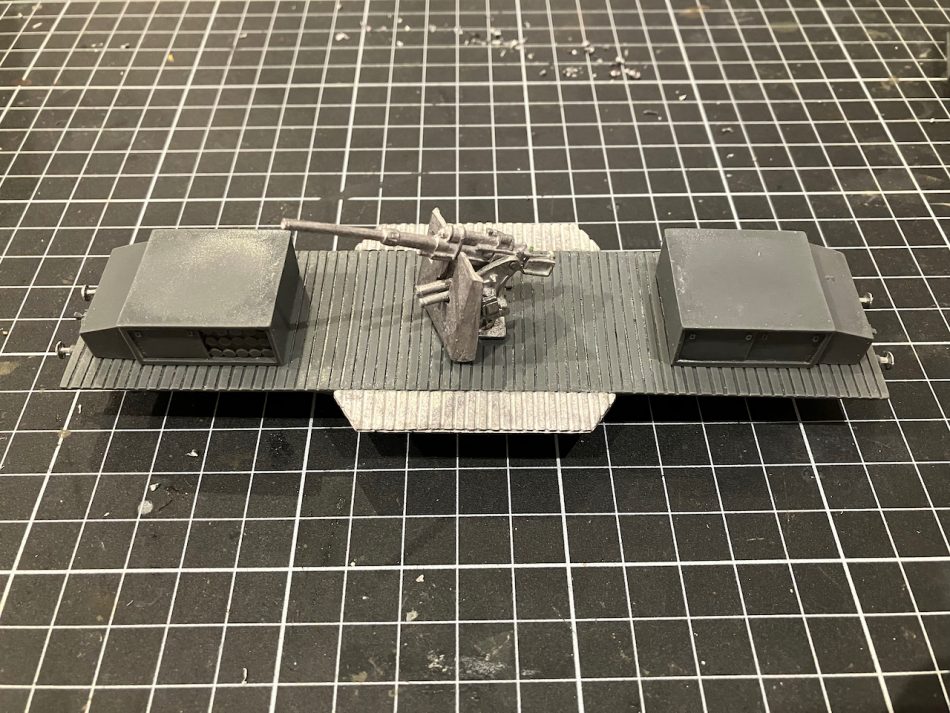
There are two platforms that provide space for the crew to serve the gun. There are no notches in the wagon to guide the placement of these platforms, and the planking on the platforms does not align with that on the wagon, so placing them is a matter of judgment.
There is a sprue of six components that don’t appear in any of the photos of the model, but it is most likely that they are buffers for the wagon.
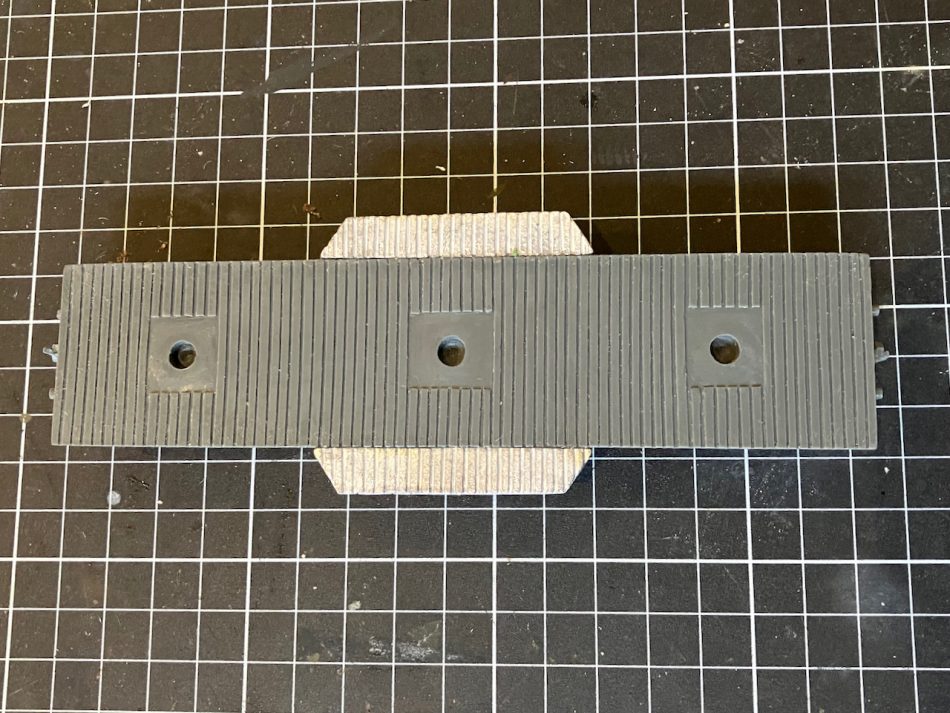
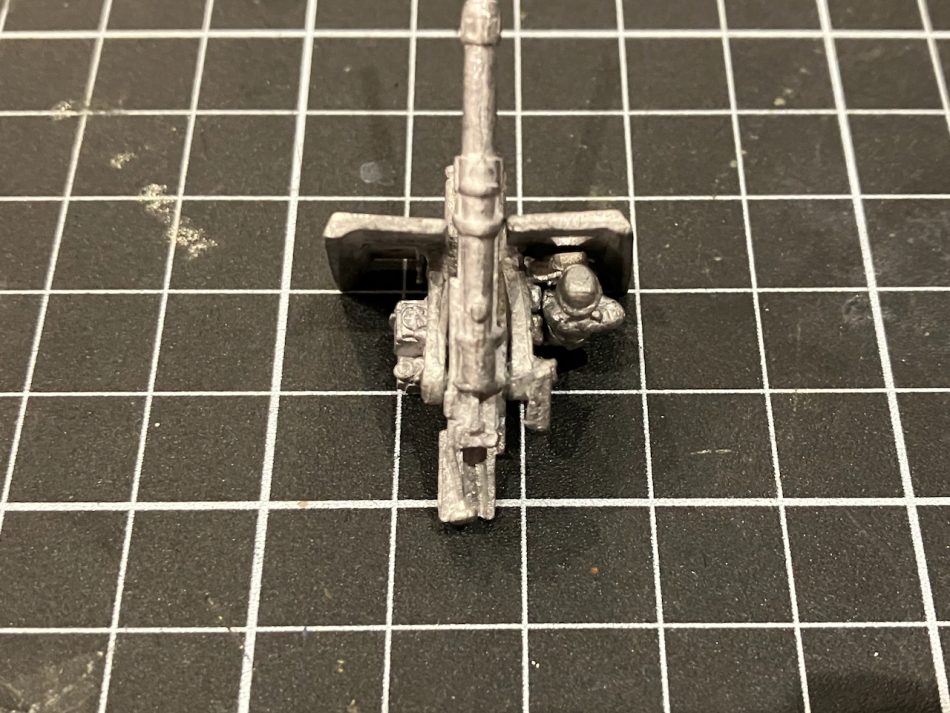
The mounting for the gun drops into the center hole in the wagon deck.
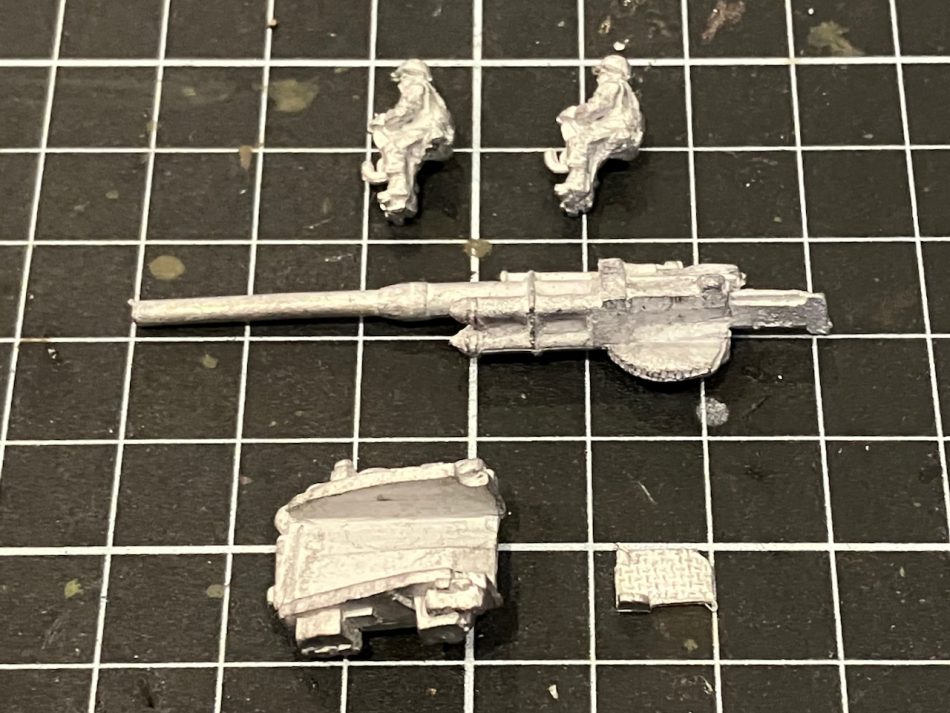
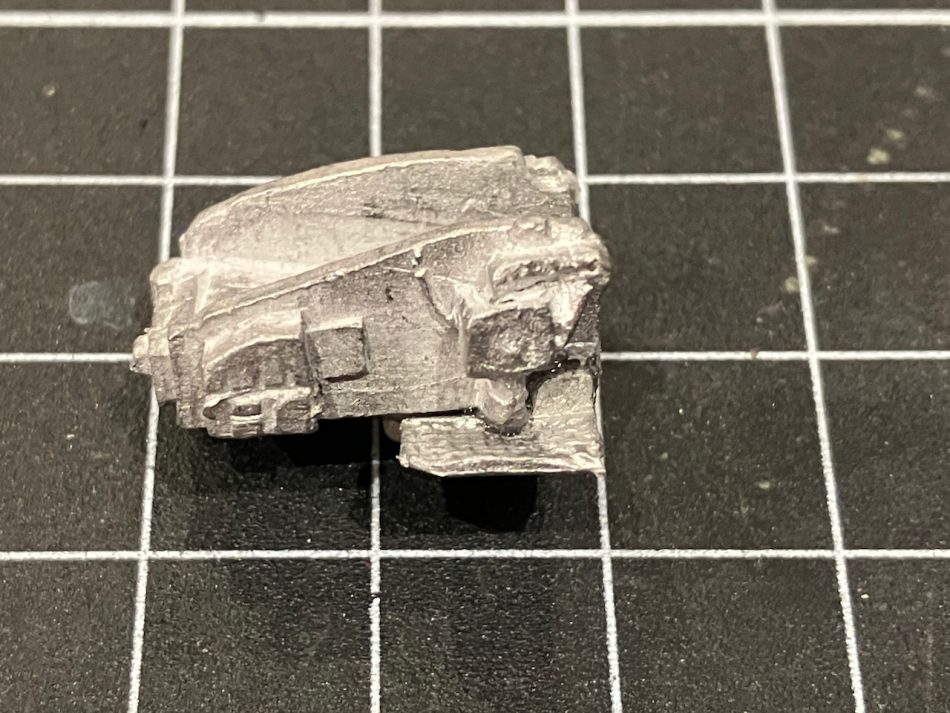
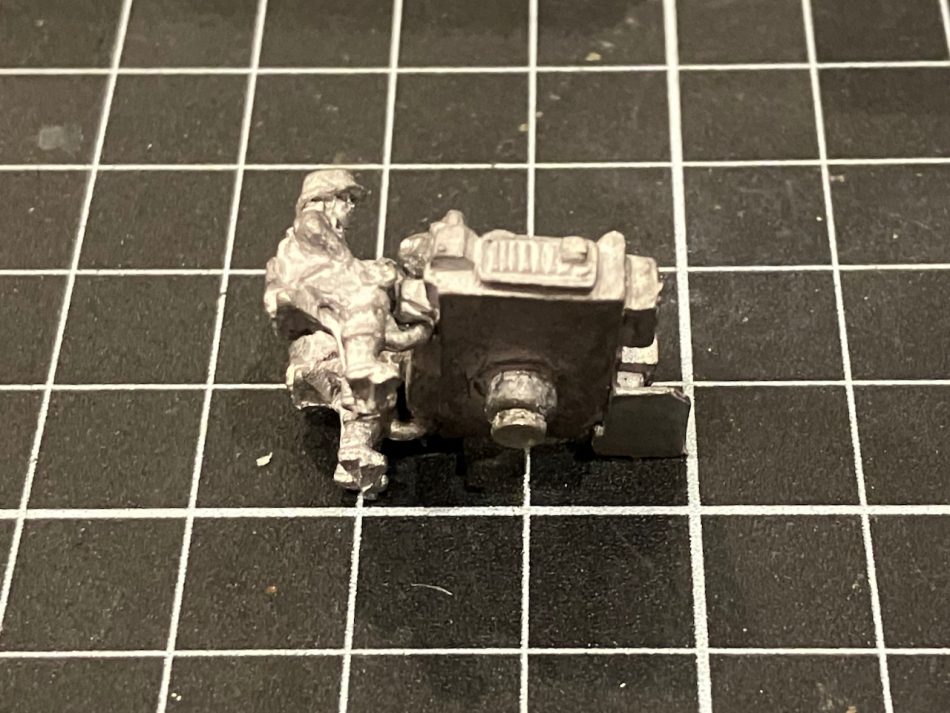
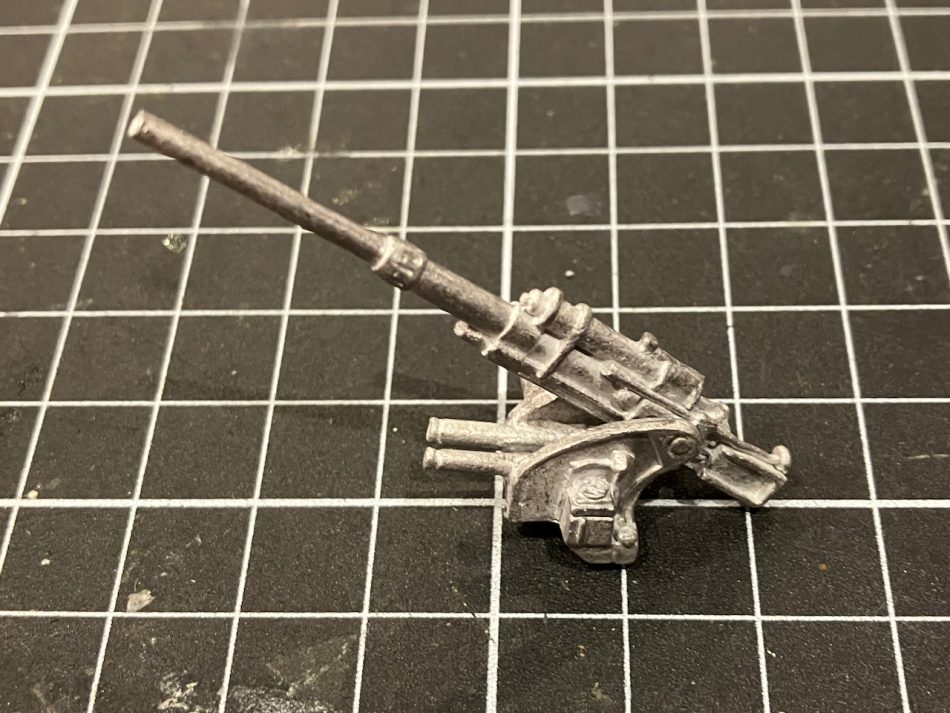
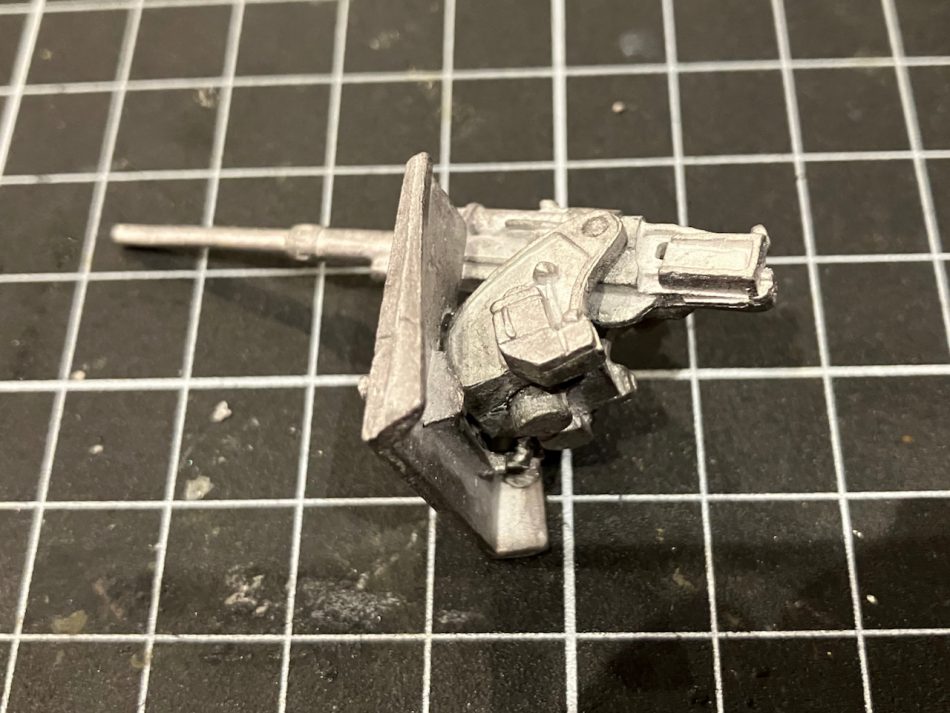
The 10.5cm gun comes in five parts: a cradle, the barrel, a small platform, and two seated crew figures.
The gun cradle can sit loose on the mount, however, I wanted to make it more secure by magnetizing it with 3mm x 1mm magnets (not supplied). To do this I drilled out the center of the mounting on the wagon using a 4mm drill bit.
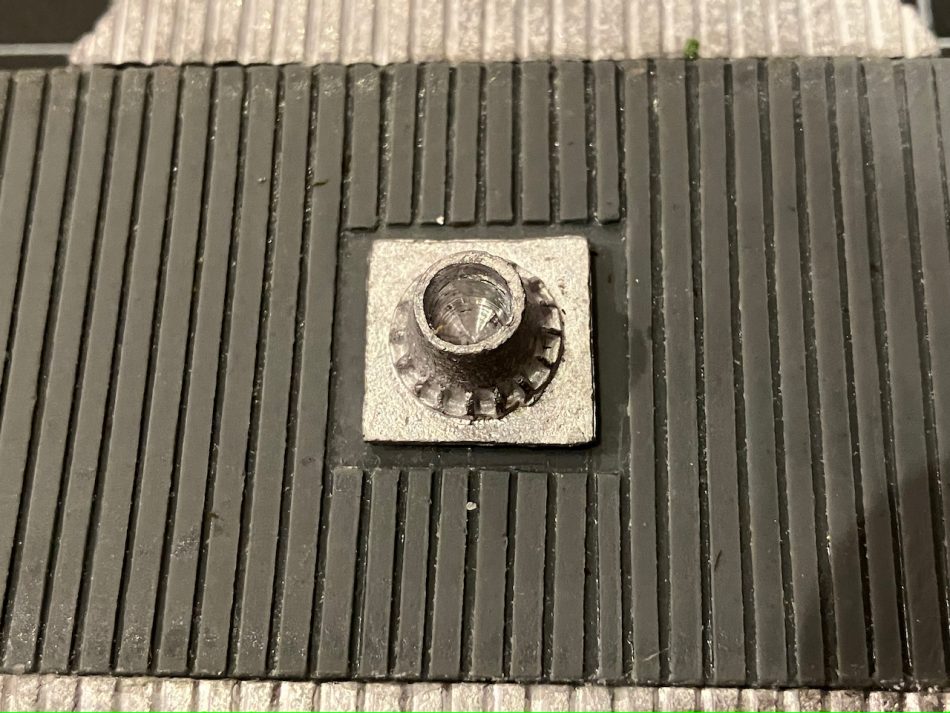
I glued a corresponding 3mm x 1mm onto the stem on the bottom of the gun cradle, then assembled the rest of the gun.
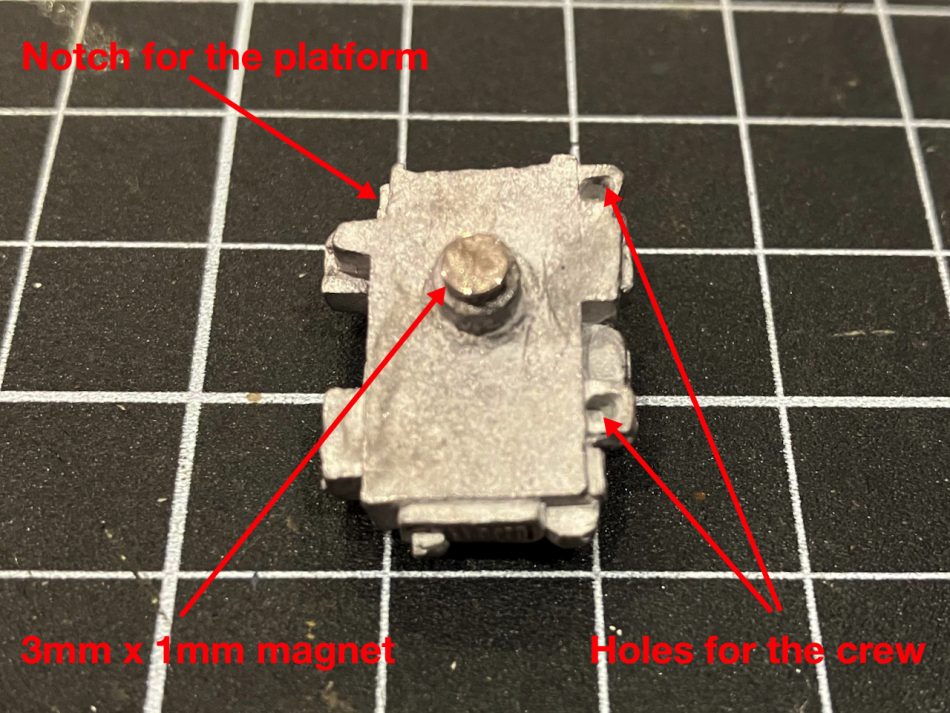
The small platform fits into a notch on one side of the gun cradle.
Two seated crew have hooks that fit into the holes in the bottom of the gun cradle.
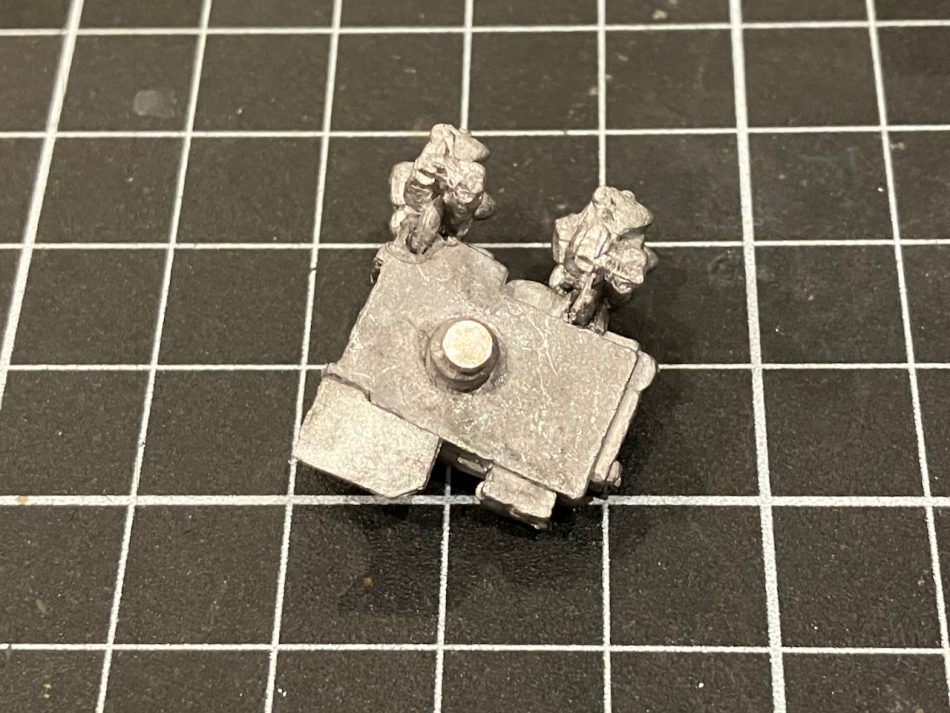
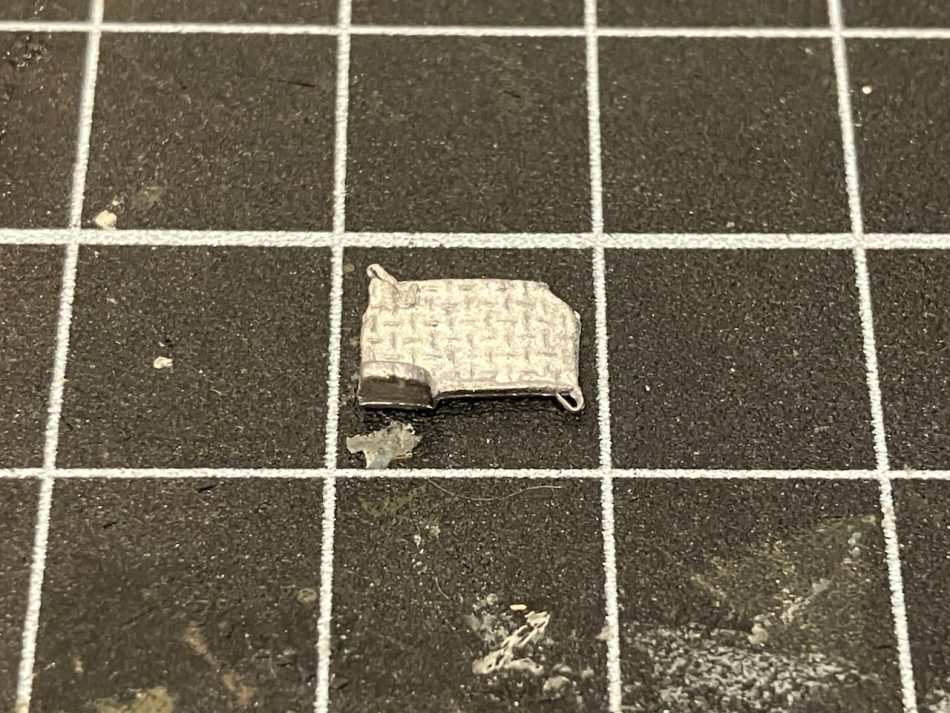
The 10.5cm gun barrel drops into position on top of the cradle and can be set at any angle you like. Glue the two ammunition boxes into place at each end of the wagon, and the model is complete.
The 8.8cm Option
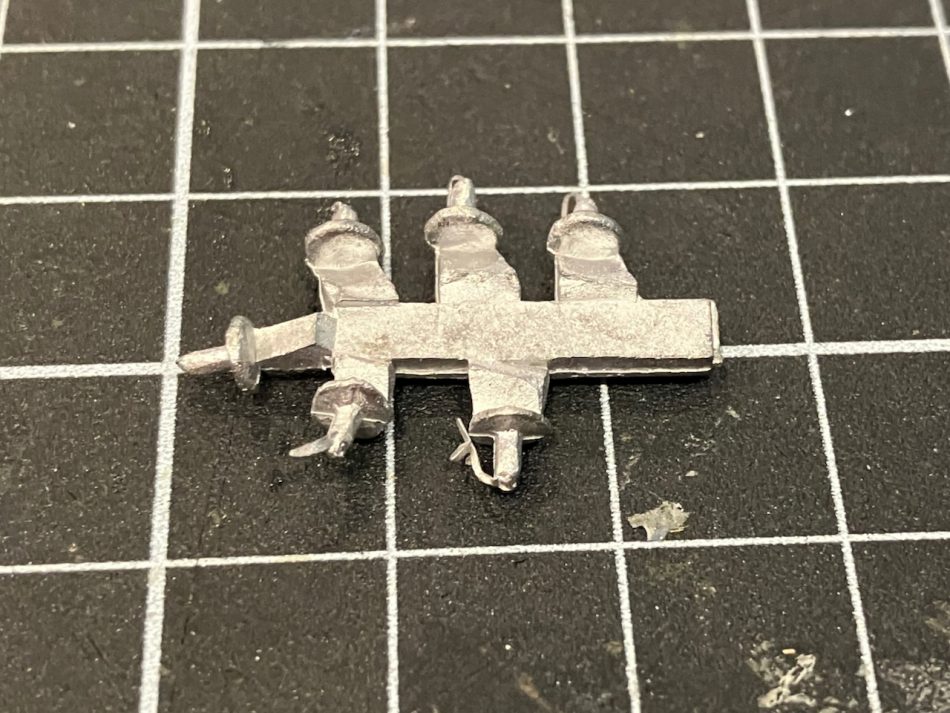
The 8.8cm gun has five parts: the cradle that comes in two halves, the gun barrel, the gun shield, and a seated crew figure.
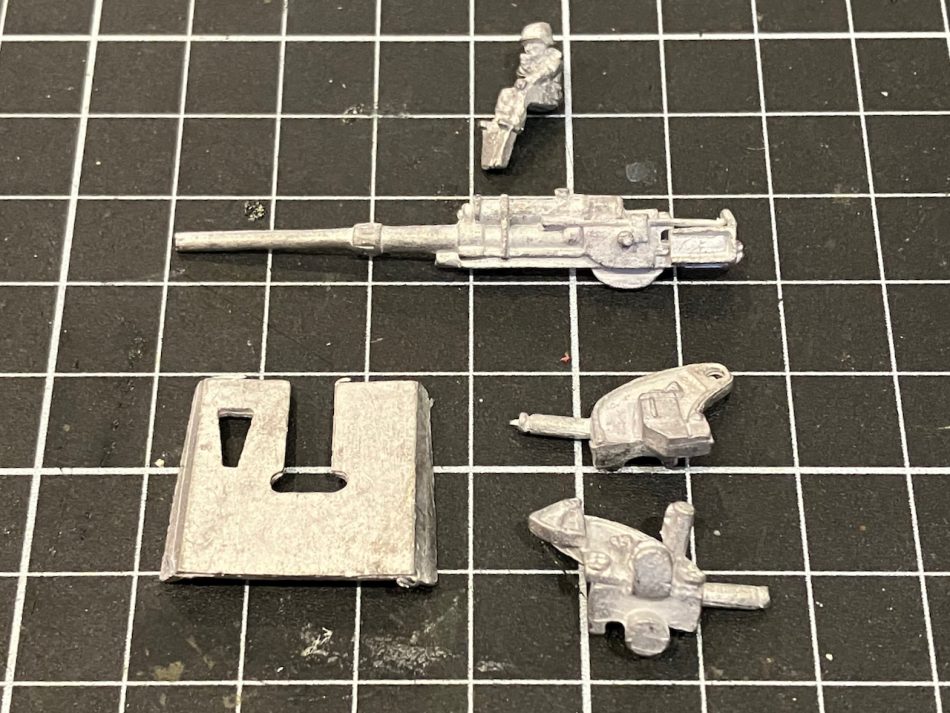
The cradle for the 8.8cm gun is split into two parts, with the barrel sitting between them.
The crew figure sits on a seat to the right of the gun, and the shield attaches to the front of the cradle.
With a 3mm x 1mm magnet attached to the bottom of the stem, the 8.8cm gun can be swapped for the 10.5cm as needed.
The Crew
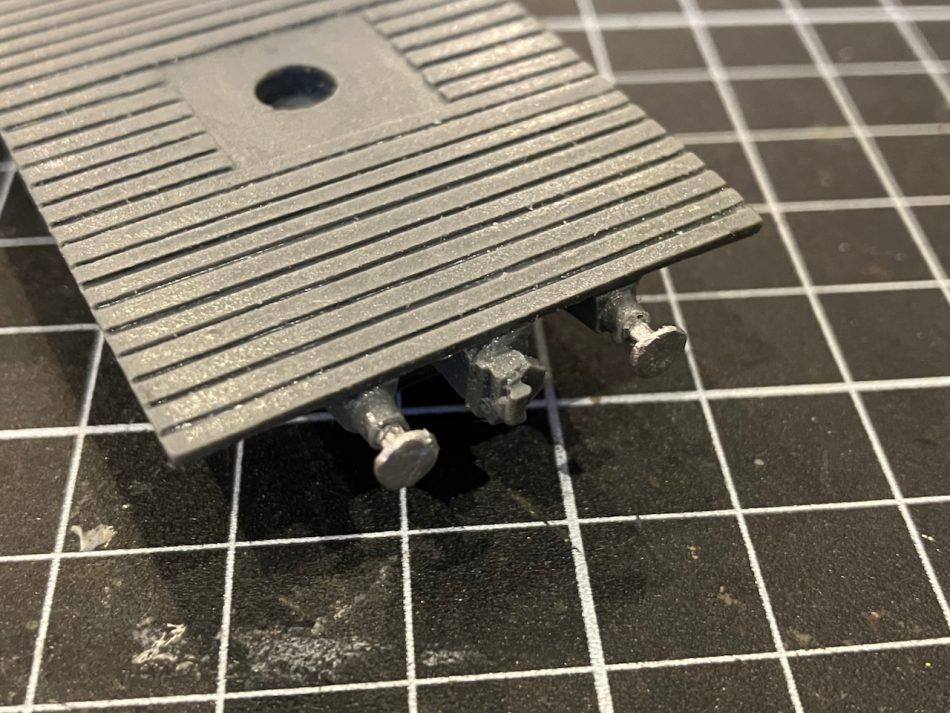
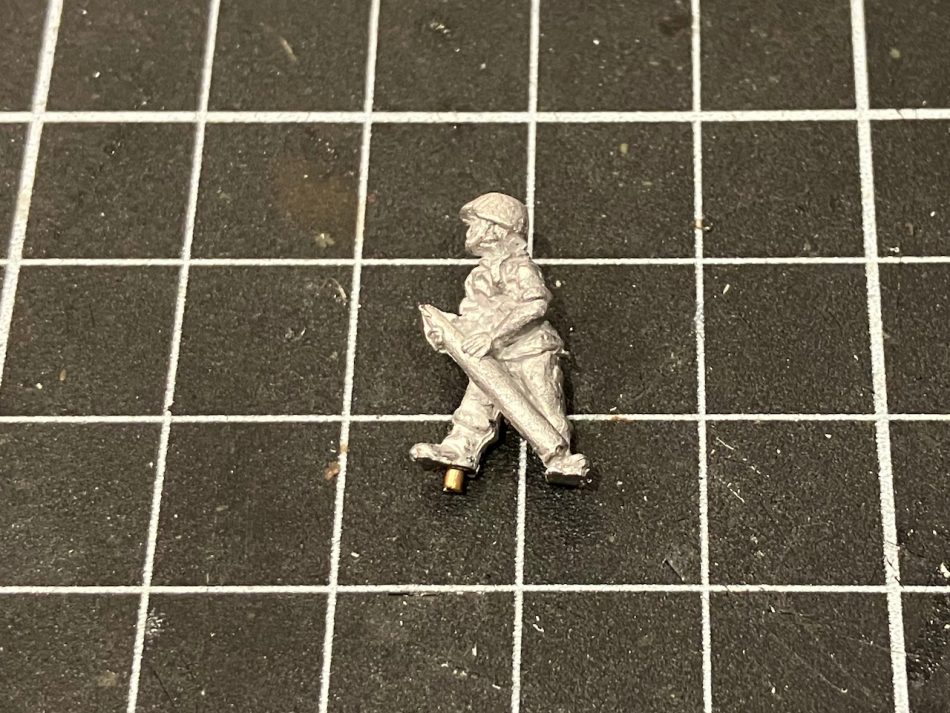
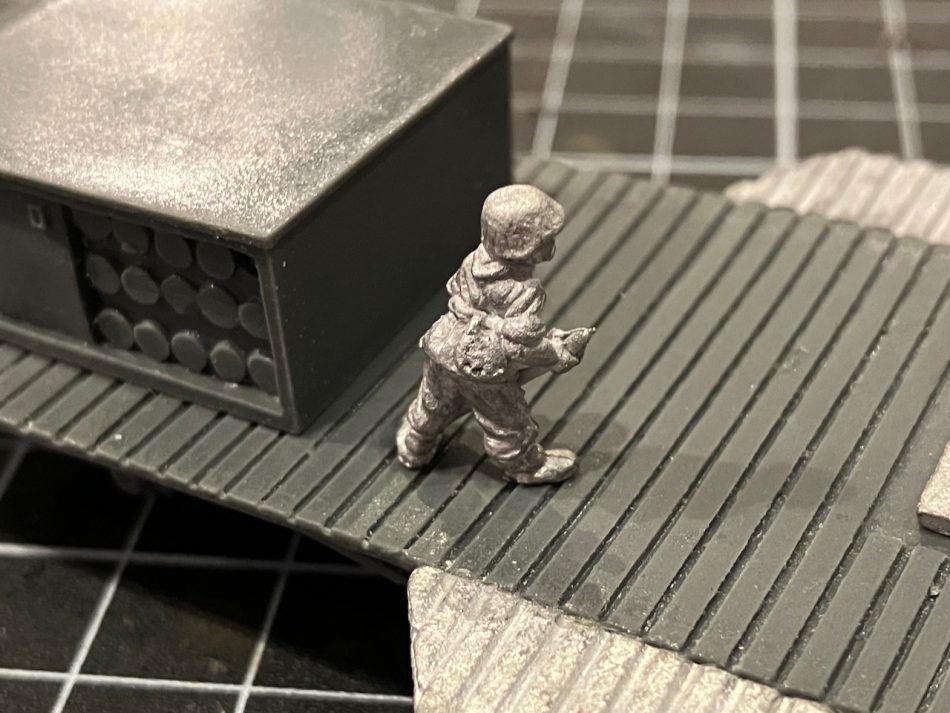
The standing crew supplied with the model are normal FOW metal figures with bases. This base needs to be removed for them to be used, and in addition, I recommend pinning the figures in position. A metal pin inserted into one foot of each figure makes for a much stronger bond, reducing the chance of accidentally knocking the crew off when handling the model.
To remove the base from the figure, I recommend filing the base down from underneath until it is as thin as you can get it, then trimming what’s left away from the feet with a scalpel. With a 1mm drill bit, drill a hole in the heel of one of the figure’s feet to insert a short length of brass rod.
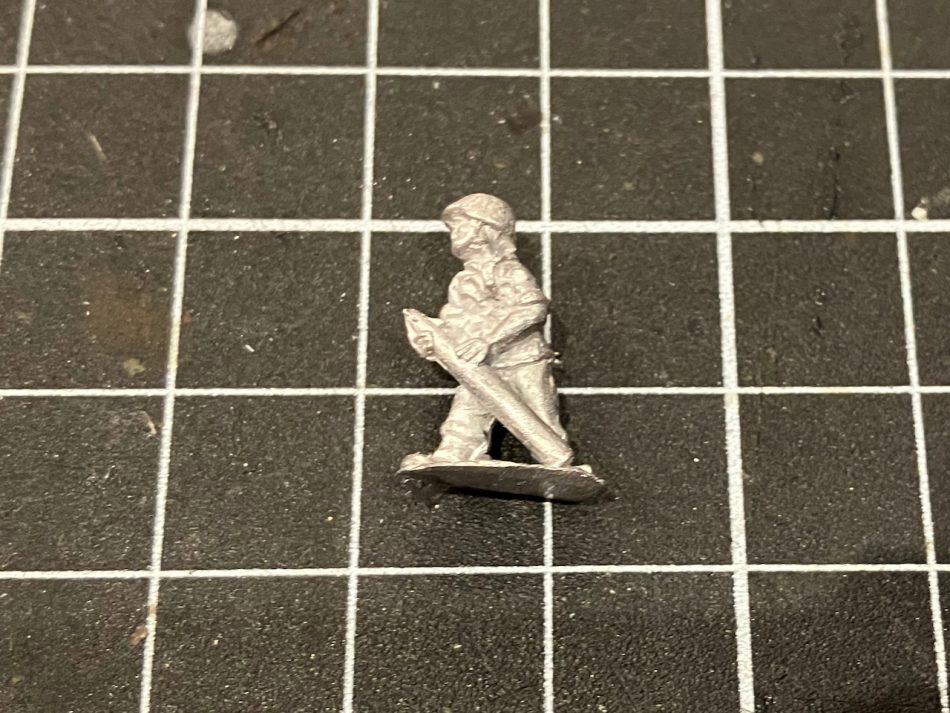
Once each figure has a pin, it’s simply a matter of drilling corresponding holes in the deck of the wagon where you want each figure to be placed. Make sure to not drill too close to the edge of the wagon, as the resin could break, and not too close to the gun where they could prevent it rotating.
With this model completed, I’m now off to assemble three more, aiming to get them painted up in time for our next tournament in July.
Great overview. With the 88mm, is it possible to use a plastic version instead – either in part or in total?
Also, slightly disappointed, but not entirely surprised, that there are no instructions with the model 😐.
Thanks Andy. I don’t have the plastic 88, but looking at the sprue I don’t think it would work without making significant changes. On this model the gun sits inside a hole in the mounting, but on the plastic kit the gun has the hole and sits on top of the mounting.