Painting BEF Infantry for Flames of War
By Richard Steer
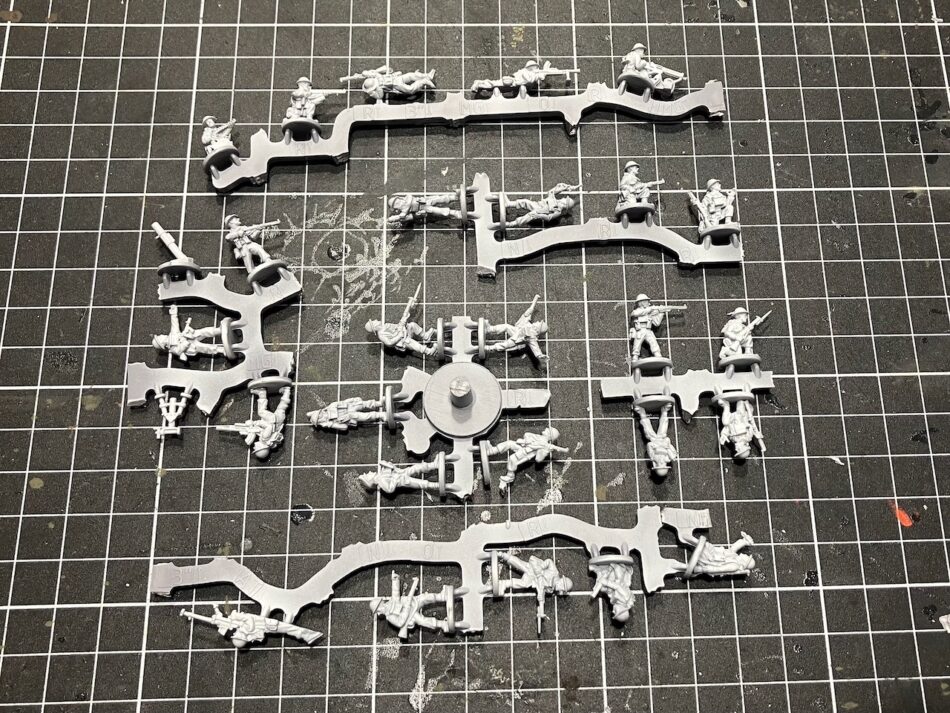
I’ve jumped into the Early-War period of Flames of War, and am in the middle of building the British half of the Dunkirk two-player starter set. I recently took a look at what is in the box, and now I’m painting the infantry.
The purpose of this article is to step through my process for painting FOW infantry, in the hope that this may be of use to players who are just getting into FOW and looking to paint their first figures.
The Principles
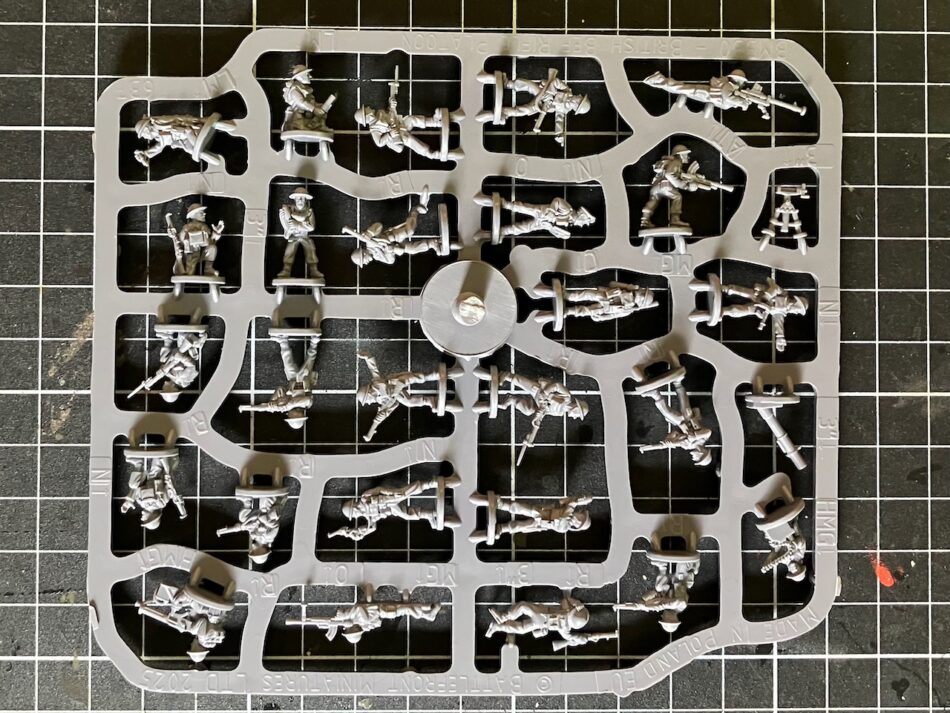
The Early-War British Expeditionary Force (BEF) Rifle Platoon is molded in hard plastic and is nicely detailed. I am aiming for a paint job that will reveal that molded detail on close inspection, but I also want to be able to make quick progress without spending too long on each figure.
The key to making detail visible on 1/100 scale figures is high contrast, with the final result needing to have much stronger shadows than you would see in real life.
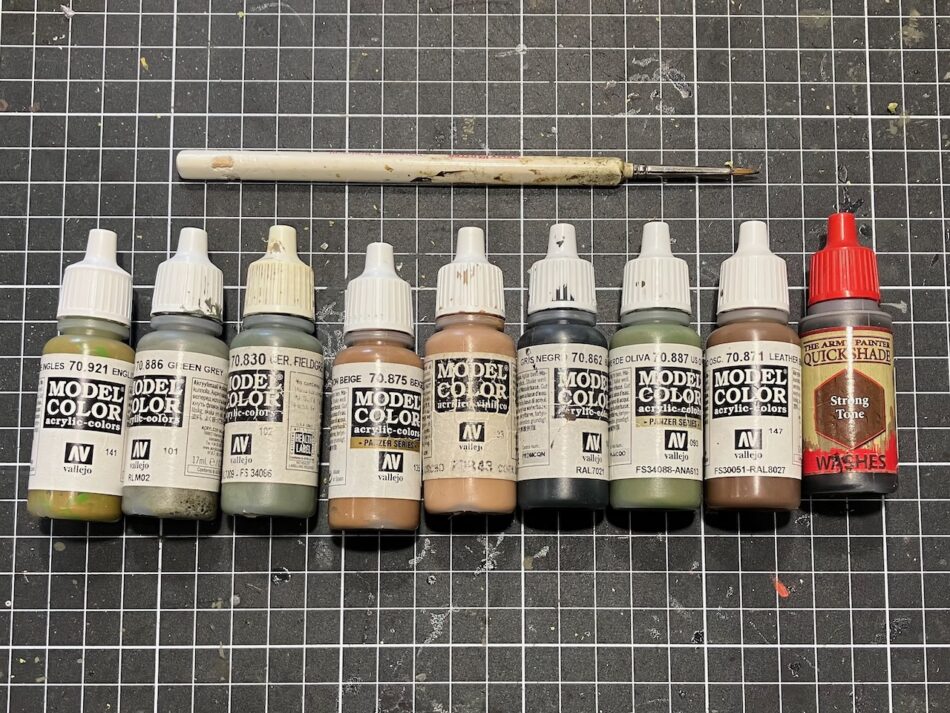
The Paints
The paints I am using are from the Vallejo Model Color range, and I will be sticking reasonably close to the recommendations in the British painting guide in Blitzkrieg. I am using an Army Painter Regiment paintbrush for everything.
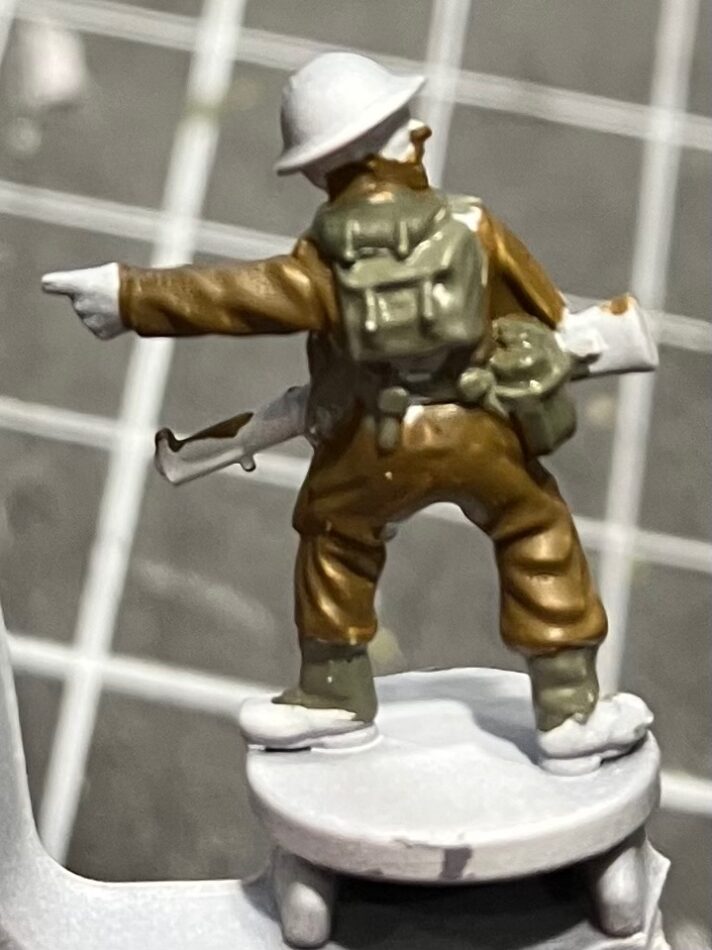
Undercoat
I have undercoated the figures white and then cut the sprue into sections. This gives me full access around each figure, while also avoiding having to attach the figures to something else to hold them while they’re being painted.
Everyone has their own personal preference for undercoat color – for example, some people like to use black, to start with shadow and build up towards the highlights, while others start with something close to the color of the figure’s uniform to eliminate a step in the painting process.
I prefer white, as a light base color makes it easier for me to see the detail of the figure. Painting colors over white also gives me a lighter figure that I then add shadows to, rather than the alternative of a darker figure that gets highlighted.
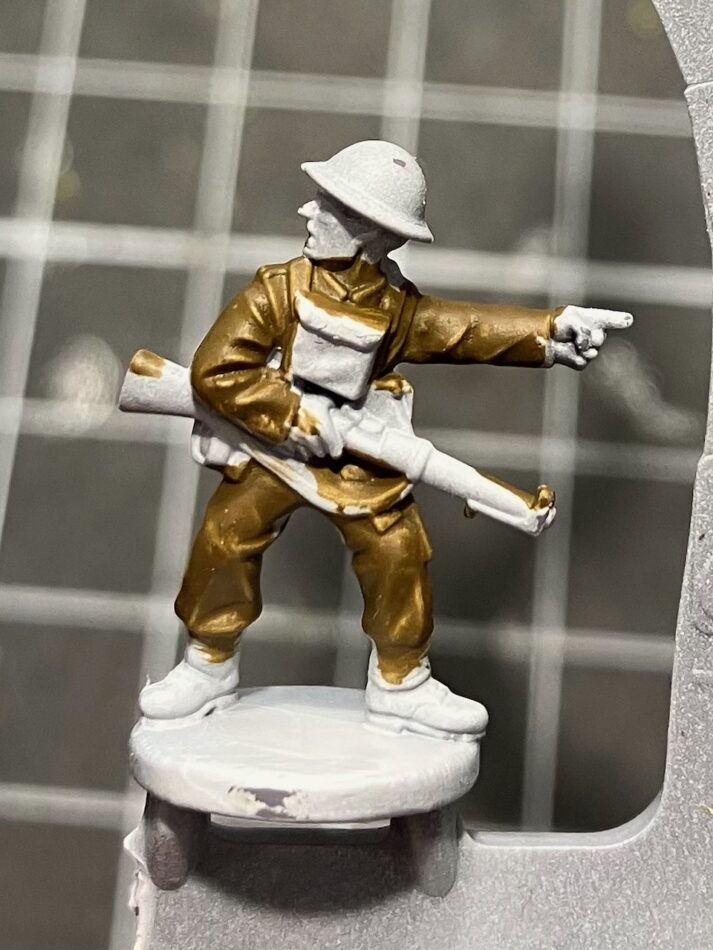
Base Uniform Color
I start by roughly blocking in the uniform with a thin coat of 921 English Uniform. This is aiming for quick coverage of the uniform, and I’m not concerned about going over the lines. The subsequent colors will progressively tidy up the figure as they go on.
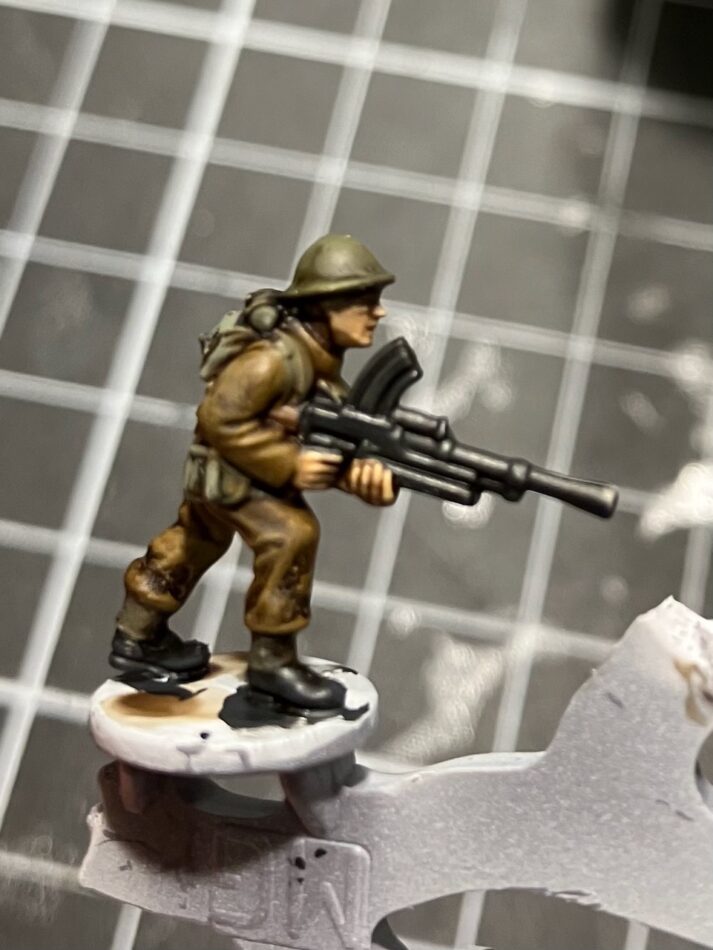
While I’m only showing one figure in these photos, I’m always working on multiple figures at a time. The size of batches can vary depending on my mood and how much time I have available, but 8-10 figures at a time seems to be a good balance between efficiency and avoiding boredom. By the time I’ve completed a step on the last figure in the batch, the first figure is dry and ready for the next step.
Filling in the Details
Layer two is webbing. British webbing was colored with a product called Blanco, which came in colors ranging from buff to dark green. I have followed Battlefront’s recommendation and used 886 Green Grey on the webbing, backpack, gas mask bag on his chest, gaiters, and rifle sling.
Next is the gas cape on top of the backpack. Battlefront recommends 888 Olive Grey, but I don’t have that color, so I used 830 German Fieldgrey for this and the canteen on his right hip.
I’m being more careful now to make sure I get the paint in the right places, but I’m not worried if I mess up a bit because I can fix it later. It looks terrible, but trust me, it’ll come right in the end.
Continuing to work outwards, next is his Lee Enfield rifle. I always search up a picture of a weapon before painting it, to double-check which parts are wood, what is bare metal, and whether there are any other colors on it. Here, I’ve painted the whole weapon 875 Beige Brown, and will do the metal details soon.

Next is skin. Again, skin color is very much a personal preference, and I have used 843 Cork Brown.
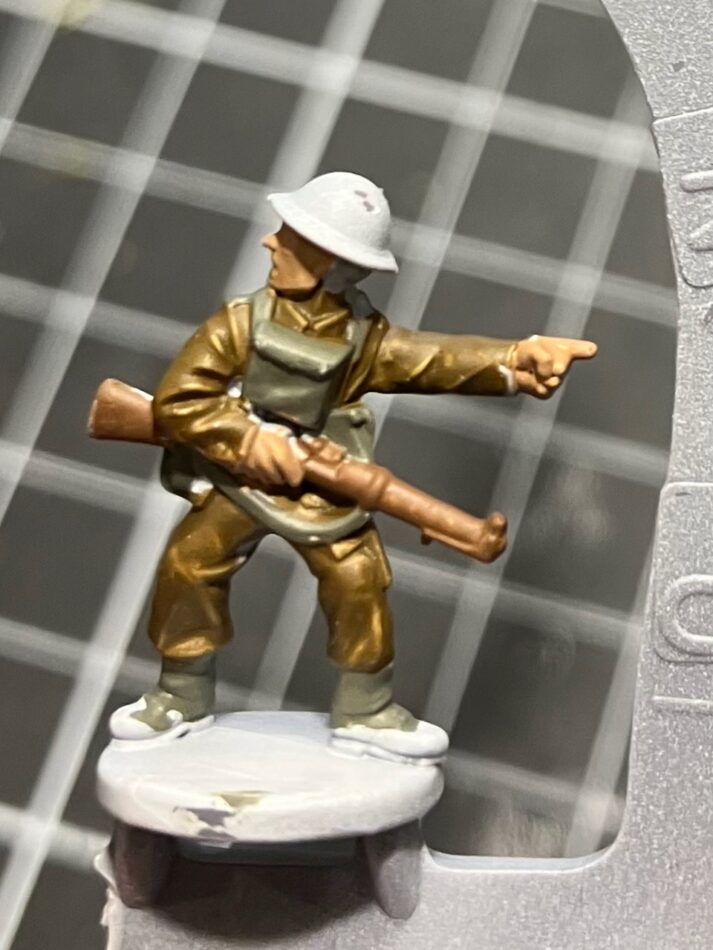
I generally don’t like using metallic paints on figures of this scale as I find the metallic effect too strong, so the metal components of the rifle are painted black, along with the figure’s boots. When painting black, I prefer 862 Black Grey instead of pure black.

The final item still needing paint is the helmet, which is 887 US Olive Drab. I make sure to paint under the rim of the helmet as well.
Tidying Up
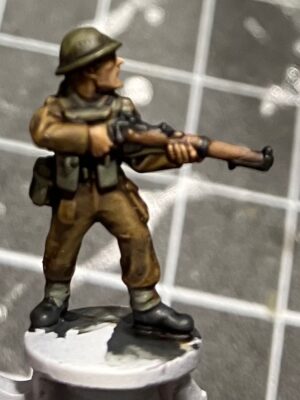
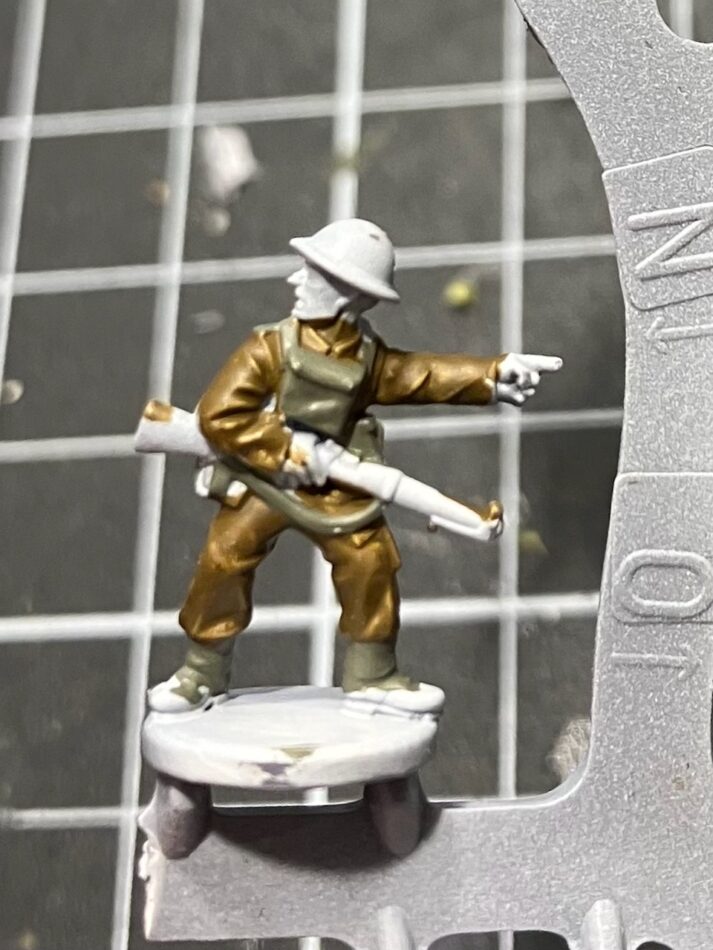
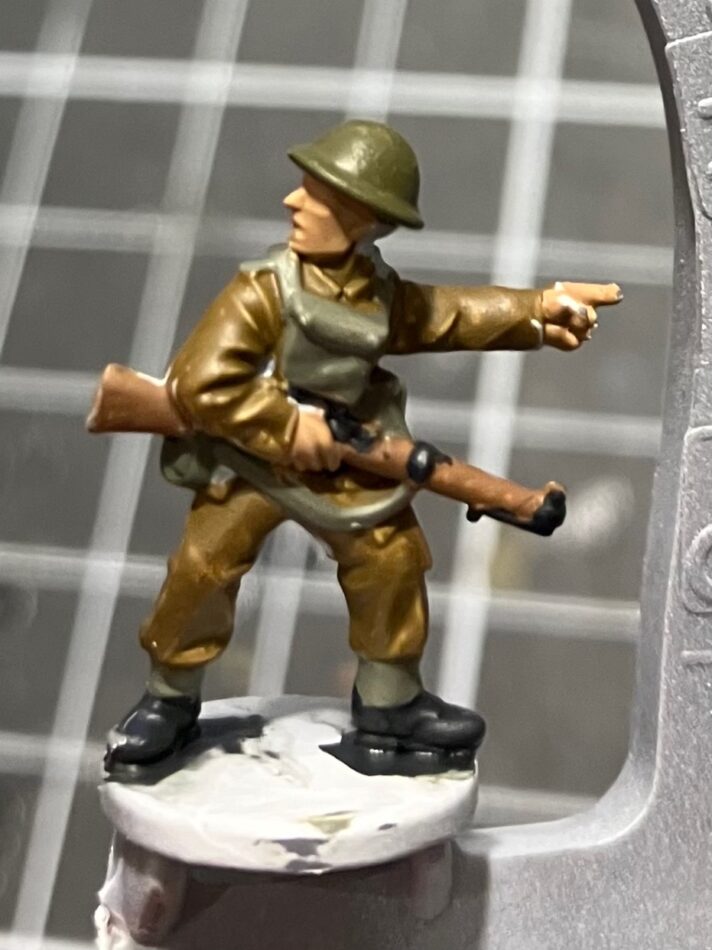
The next step is to grab the 921 English Uniform again and apply a careful second coat to the uniform, which tidies up the borders with the neighboring colors. If any obvious places need tidying up, I’ll do spot fixes with those colors. I find it is overall much quicker to do a targeted clean-up at this point than to try to take that extra care during the first coat.
You can’t see it on this figure, but I’ve also used 871 Leather Brown for the leather jerkin if the figure is wearing one, and for any hair that’s visible.
It will usually have taken me about an hour to get a batch of figures from primed to this point.
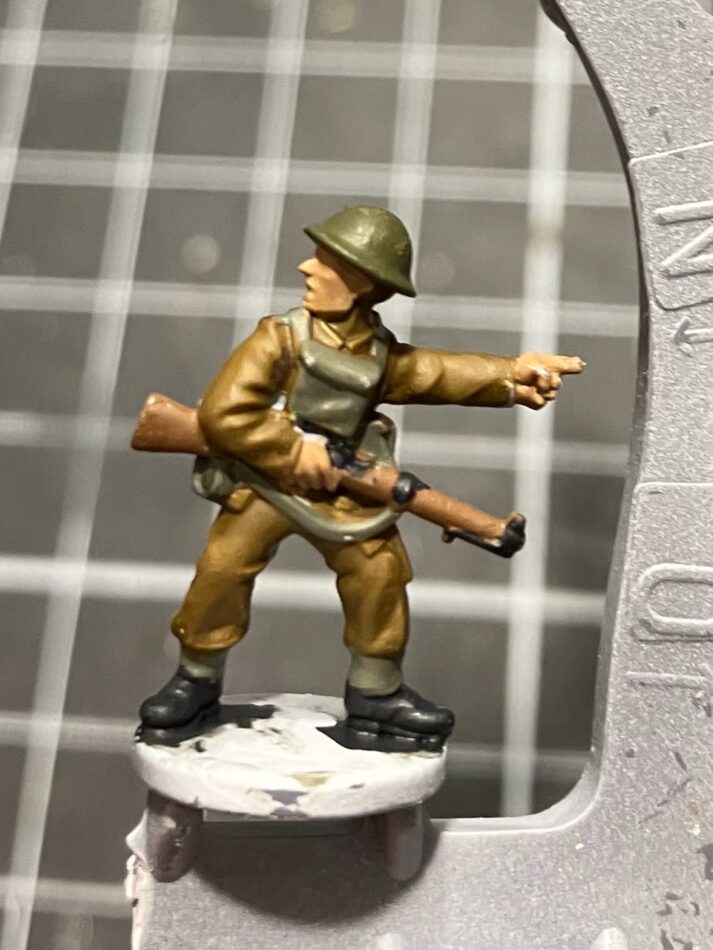
Shading
With all the colors now in place, I apply a generous coat of Army Painter Strong Shade. I’m not trying to drown the figure in it, but wanting to make sure that it’s well covered with shade in all the details.
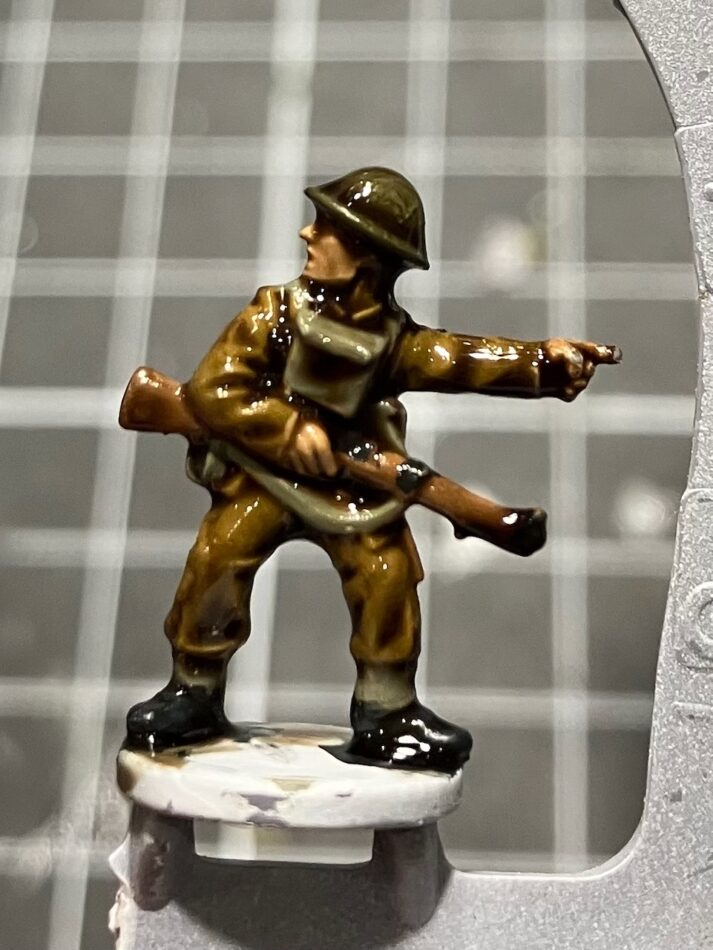
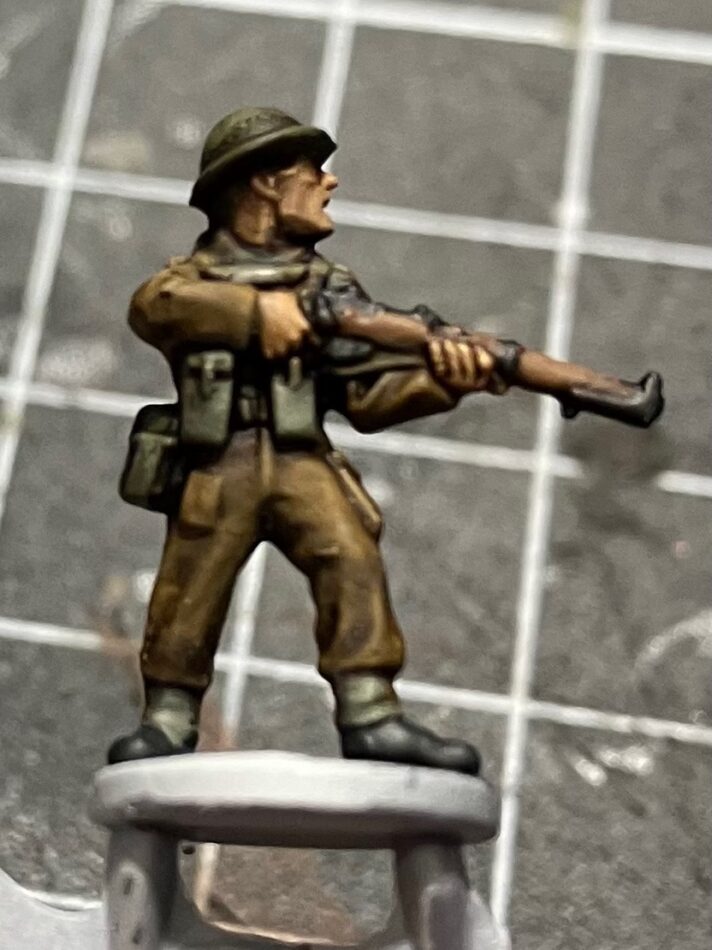
The shade dries into the crevices, creating a shadow effect that reveals all of the details of the figure. Strong Shade is a bit of a magic bullet in my opinion, that immediately improves the appearance of the figure by hiding minor imperfections and concealing the edges between each of the colors. The shadows are unrealistically heavy, but this exaggeration provides the contrast that is necessary in this scale to allow the details of the figure to be seen.

Highlighting
The final step is a highlight to further increase the contrast. Here I have used a careful drybrush of each of the colours to highlight the outer surfaces and any edges, being careful not to cover the shadows created by the shade. If I were adding any other tiny details like unit flashes or rank badges, this is when I would paint those.
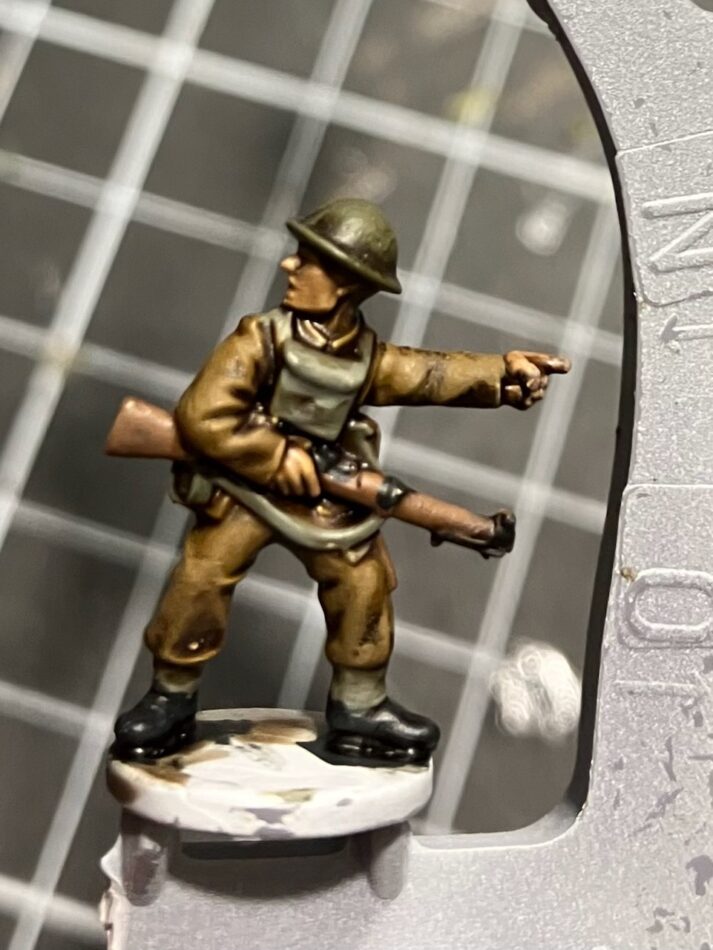
This figure is now finished, apart from a coat of matt varnish to protect the paint and to remove any shininess left by the shade. I have a couple more batches to do before I can move on to basing the platoon, ready for their first game.