TY: The British Army of The Rhine Part 1
By Paolo Paglianti
Photos by the author
1985, West Germany. The British Army is there to defend all Europe from the Red Tide. With good tanks and excellent infantry, the BAOR can stand any Russian formation and counterattack at the right moment.
In September 2017, I decided to paint a new “modern” army for . This is a report about my experience and my “ideas” after a full year of tournaments in North Italy and a campaign at my club.
Assemble and painting
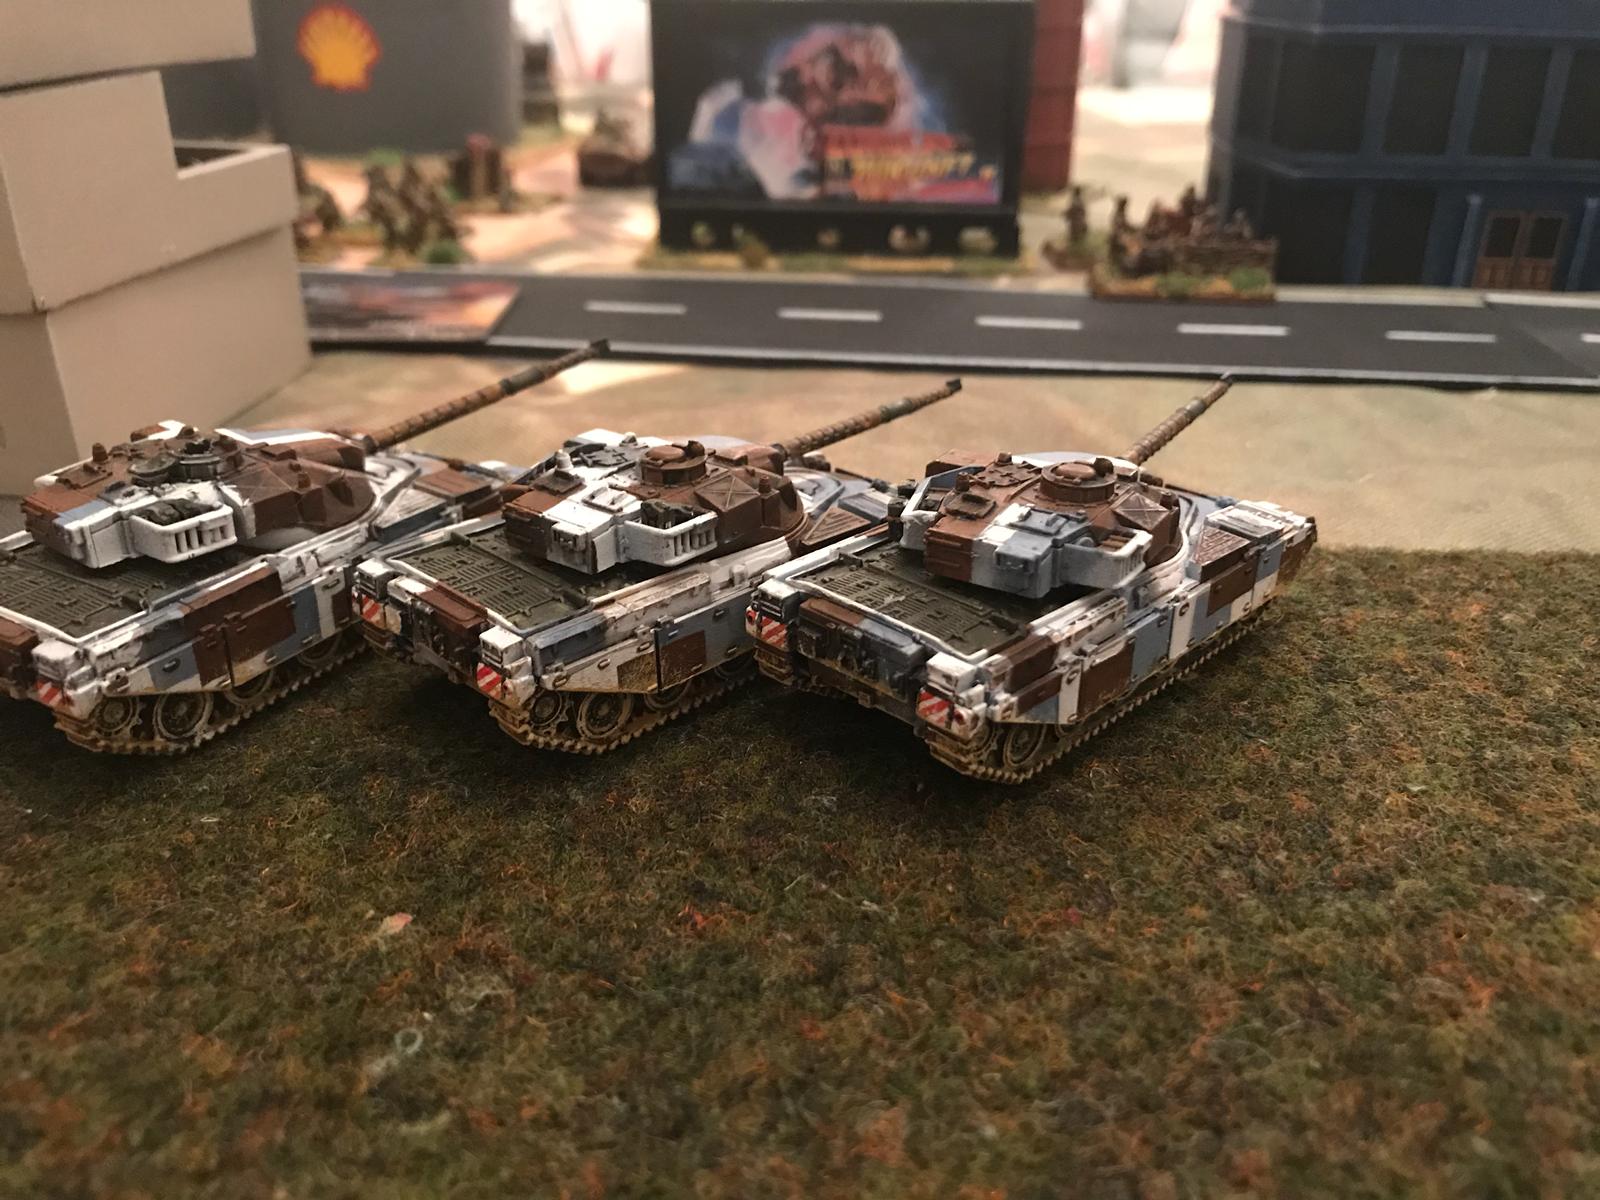
Western Cold War-era armies are usually solid NATO dark green: British BAOR formations are slightly different because they have dark grey stripes on the armour. It’s really easy to paint even a huge formation: you just need to assemble the models and give a first black basecoat. After the basecoat is dry, drybrush all the surface with a darkish grey. Just use a 2/3 flat head brush and it will be really fast.
For the green stripes, you need to cover some areas with a modelling compound. I use Play-Doh: it’s cheap and you can find almost everywhere, but be advised it’s a bit “greasy”. Place thin stripes on the vehicles, using the pattern you can see on the BG books or searching on the Internet. This masks the area you don’t want to paint.
From left to right: Black with grey drybrush; the same step with PlayDoh; sprayed with green; dry brushed with soft green; final result
When the “masks” are ready, just spray with a military NATO green (BattleFront has the right colour, Chieftain green spray). Leave to dry for some hours, and – with the compound/Play-Doh still in place on your vehicles – drybrush with a lighter green (I use NATO Green + Vallejo Green Pastel).
The compound will keep the black and the green apart. With these two steps done, your force is already in a good shape to go on the field. You can add some details, like the machine guns, the leaders and other “things” on the tanks/vehicles. You can find some good stuff on the same BattleFront sprues, like boxes and oil tanks, or buy some specific parts .
British Force, however, can be pretty unique if you choose the Berlin Brigade pattern. As BattleFront book explains (more details, as usual, can be easily found on the Internet, ), the British force in Berlin painted tanks and vehicles in a white/reddish/grey urban livery. I think it’s a good way to vary platoons and distinguish them in the heat of the battle, so I painted one Chieftain troop and one FV432 platoon in this unique pattern. You can paint it by hand, or you can use the model tape they use for bigger scale planes.
The British army, a scalable force
When I began to build my British force, I planned to play Italian tournaments (85, 75 or 64 points) and a campaign at our club (100 points). The good news is British Team Yankee army is a scalable force: while West Germany armies suffer if you play at 64 or 75 (since Leopard 2, their best weapon, is so costly) and Russian are often too big if you play at 100 points, British can be effective at any Army points threshold. The bad news is that the same weapon system is mounted on a different chassis if you choose the Tank or the scout Formation, so British army is a bit expensive when you buy it.
Basically, you can have four different Formations. The first one is the Tank formation, with at least eight Chieftains. Theoretically speaking, you could get units of two tanks and HQ with a single tank, but it would be crazy: since morale tests are triggered when there is only one tank in a platoon, only a fool would have platoons with two vehicles, with the constant Damocles’ sword of testing as soon as the first tank is destroyed or even just bailed out. And with a moral of 4+, British troops are easily driven off-table for these tests, so you will want the biggest platoon you can field.
Chieftains are really good tanks: they have the same mighty cannon you can find on the Leo 2, with AT 22, but with an overall cost on only 6 points per tank – a real bargain, if you think that a US Abrams costs 8 points with a lesser weapon (AT 20) and the Leo 2 costs almost the double (11 points). The downsides are that Chieftains have ROF 2 only if stationary, and they have paper thin flanks you can tear apart with anything from a can opener.
So, you will need to keep your tanks far from the enemy line, because if you engage them too close, they will easily go on your sides and destroy in detail. Also, you need to carefully place your tank platoons in a good position in the opening moves, since when the battle gets hot you need to keep them stationary, or to move them with Blitz moves, to exploit the ROF 2.
A good tactic is to place them in ambush, if available, so to make them appear where they are in this good position – away from flankers and in cover. The Chieftain can be upgraded for 1 point each for an even better frontal armour but at the cost of a cross value loss. Since you will want to move your tanks out of the wood you need, I think it’s better to keep the basic value.
With the Tank Platoon, you can field the cheap but absurdly effective Swingfire (mounted on the FV432 chassis. These weapons are a must in any British army since with AT 23 they can frontally knock out any armoured vehicles, even the mightiest German tanks. Also, they are really difficult to be spotted and killed, if you keep them in cover since they always count as “gone to ground” even if they shoot.
Other two essential units are the Scout Scorpion section (four tanks) and an Infantry detachment (more on this in part 2, next week). As we’ll see later, Infantry in Team Yankee is a powerful weapon so you don’t want to miss it.
In Part 2 of this article, I’ll look at the third Force in my list and my overall strategy on how I use it.