Do-it-yourself Hills: how to create good looking hills for your tabletop games
If you play 3d wargames, you will want to have awesome battlefields. And which scenario could happen without some hills? The ones made by producers like Battlefront or Games Workshop are wonderful, but if you need a number they can become quite expensive. So, here is how we can do easy, scenic, beautiful hills with very affordable costs.
With my t only a few weeks away, and with already 26 players coming, I need to enhance and enrich my tables. One of the weak spots were the hills since I had only a couple of them. For this reason, I decided to build six new hills: they are meant for 15mm, but the technique is the same if you want to build 28mm Bolt Action/WH hills, or any other scale. Just remember you will need to deploy units and soldiers on your hills, so try to have some flat areas to be sure your tanks, fantasy warriors or biblical chariots can climb and stay there.
First step: the materials you will need.
– Some foam sheets. I know in US the “high density” foam is pink or blue, in Italy is blue. The difference between the ordinary foam and the “HD” is the latter is more compressed and is not built with the “small balls” – better for cutting, but both are good for this work. I paid $2 each, 1 x 1 meter, 3 cm high of the low density foam.
– Plaster, in powder. You can find the “fine” or “artist” plaster, it’s just a bit finer. I purchased 2 Kg for $1.50.
– A wooden base. You can buy a 1 x 1 meter, 5 mm high, plywood for less then 5 Dollars. You can also use hard cardboard.
– Tools: a saw to cut the wooden base. A cutter for the foam. Total: around 10 Euros, but probably you’ll have them already at home.
– Some paper tissue. Anything from toilet paper, napkins or tissues will work. One 30 cm/1 Ft hill needs 10 sheets.
– Sand and small stones. You can buy them in hobby shops (and pay a lot!), or in shops for aquarium, and pay considerably less. Or you can go to any building site with a biscuit box, and ask to collect some medium grain sand.
– Bark cork. Again, you can collect in the nearest wood for free, or you can buy on Amazon or hobby shops for 15 dollars. The cork one is better for cutting, but you will want something with a really rough surface.
– Paint: Light brown water-based color, flat or matte finish. You will not want to use your precious Vallejo paints for the hills, you will need too much of them.
– Flock grass. $5 for a bucket, but I bet you already have for your miniatures’ bases. Better if you have two different greens, with a good color contrast.
– Water PVA based glue. A lot.
– A sheet of sandpaper, hard grit.
– Plastic gloves (vinyl or medical). In Europe you can find them for free in food supermarkets, where you get the fruits.
Second Step. Where to work.
You will need free space to work. You’ll probably have a painting corner, but believe me, for this task it’s really better to have a garage or a basement. Your partner/wife/spouse will get terribly upset if you will do these hills in house.
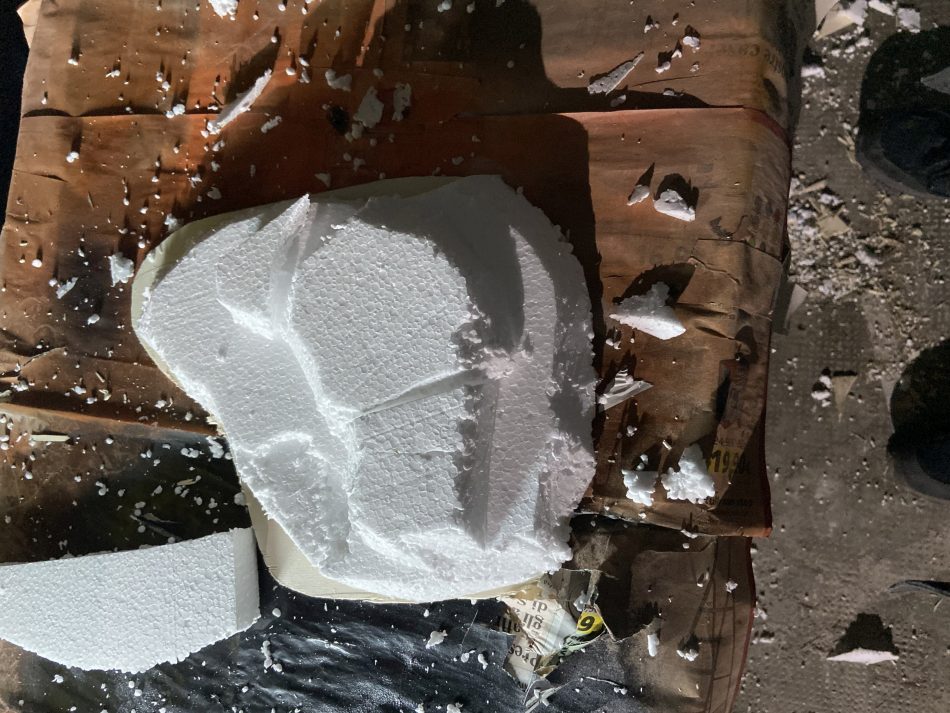 This is the mess you will create, just for start. And we did’nt even use the plaster.
Third Step. The base and the hill.
Get your wooden base and draw the desidered shape of the hill/hills. Then cut it with the saw – I’m not going to tell you enough times to cut AWAY from you and your fingers.
The basic shape for a hill is oval, but you can do “L” shaped or even use the corners of the wooden sheet to do “angle” hills to be deployed on the tabletop corners. Remember, nature is never straight but always a bit random, so try to have some realistic shapes.
Once you have the base, you can cut the foam. I normally prefer to have two level-hills: they are good both for Flames of War 15 mm and Warhammer style 28 mm games, with two levels for the archers/shooters. The first level should have the same shape as the wooden base, the second one a bit smaller. Once cut with cutter (same advice of before, cut *away* from your fingers and body and nobody gets hurt), just create the slopes. If you have ordinary foam, you will notice sometimes the “bubbles” will not be cut easily, while with the HD pink/blue foam it’s easier. No worries, we will soon cover everything.
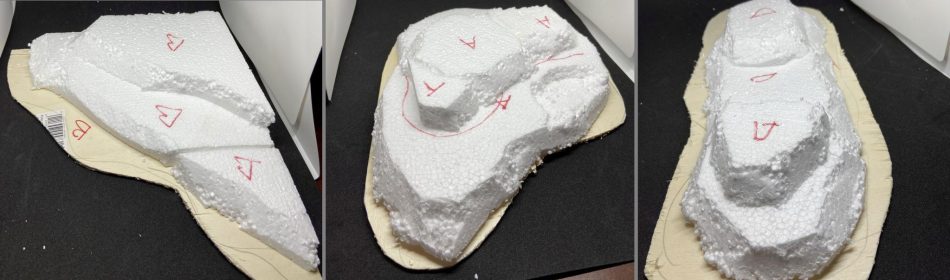
Some of my hills after the cut. Note I write on them a letter, to avoid mess between different pieces/hills.
Fourth step. Features on the hills.
If you look at real-world hills or mountains, you will notice they don’t have only easy slopes with green fields and nice sheep and goats. They have rocks. In game terms, these parts are generally impassable and create interesting tactical issues for the players, so it’s good to have them well marked.
To create rock sides, I use bark cork. It’s easy to cut it with the same saw or cutter you already used for wood and foam, and you can have a section adapting on one side of the hill in few minutes.
Now, it’s time to assemble everything with the PVA glue. You can water down the glue a bit to spread it better. You can use an old brush (however, you will need to throw it away after this task), or a cotton bud stick (you can collect from the bath with some stealth operation under your wife’s nose). Don’t worry if there is some space between the foam sheets and the cork. Let it get dry for one night/12 hours.
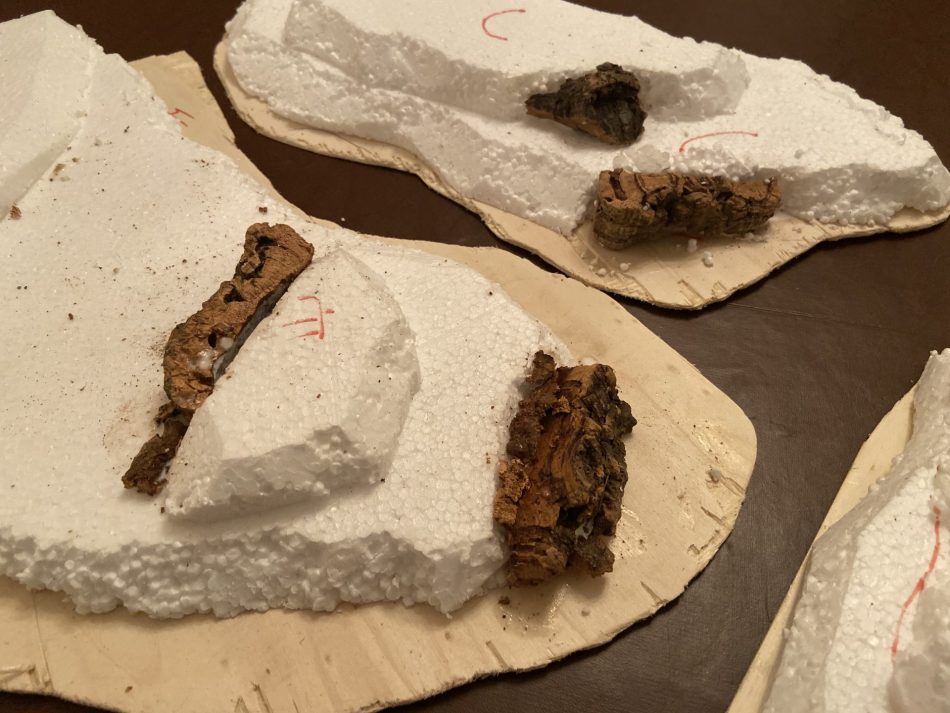 You can place the cork on the sides of the hills, to create some “rocky” slopes, normally impassable. Don’t worry if any gaps are still there between the cork and the foam.
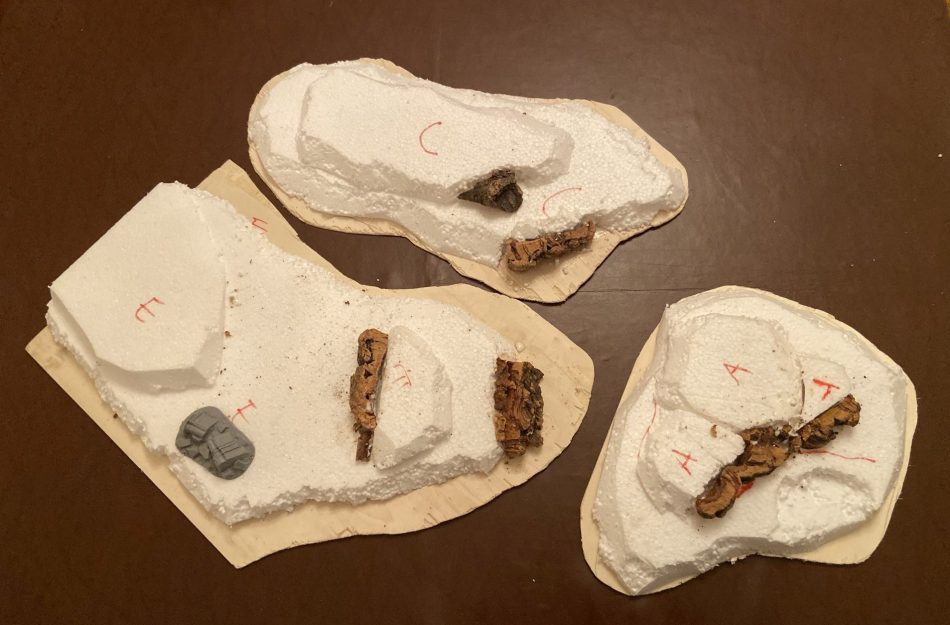
You can add also other features: I found a ruined column from an old Warhammer box, and I glued it on a flat surface, creating a very good cover!
Fifth step. The slopes.
If you think you caused a disaster with the foam, you will be surprised how much you can mess up with the plaster. In case you never used it, the plaster is very easy: just grab a small bucket (I used the empty family size box of the ice cream) and fill it with 250 gr/8 Oz of plaster powder. Add some water – about 100 mil/3 Oz. I recommend that you wear plastic gloves. This will be messy.
You need to create a mixture where you can dip a single sheet of paper (toilette, napkin, Kleenex). Once it gets soaked by the plaster mixture, you can place it on the hill foam. After you covered all the hill, you can use the rest of the mix to fill any residual hole. The plaster dries really fast: in 10 minutes, it’s normally already too mushy and pasty to be modeled again. Before it dries, you need to finish all sides of the hill and flatten them with your fingers.
Obviously, you will need to avoid any feature you placed for the “hard rock” look, like the bark cork sides.
If you are going to do a large hill, or a couple of hills, it’s better to use mix the plaster in small batches, to avoid it drying too fast in the bucket, forcing you to throw it away. Once finished, you will need to give the plaster time to dry, about 12-16 hours.
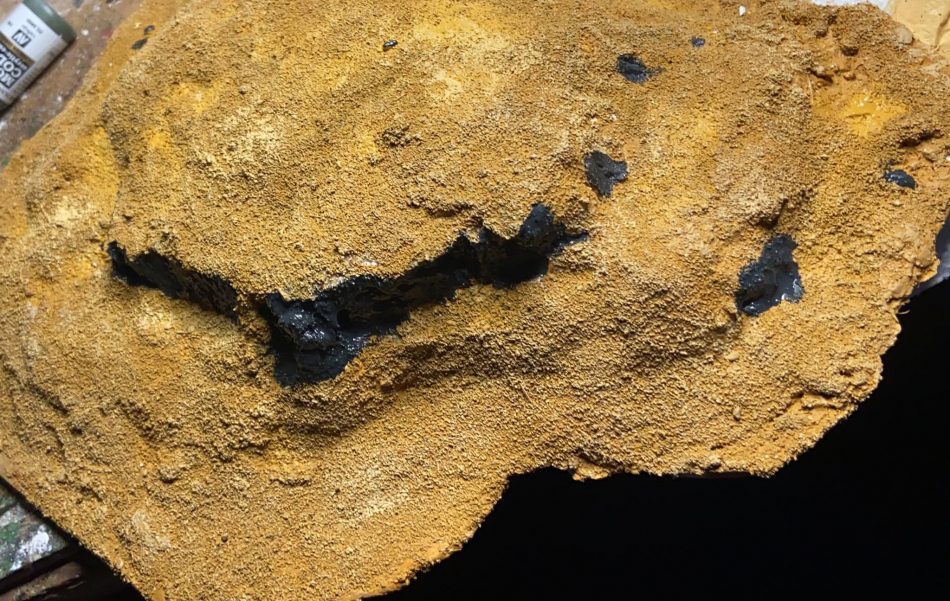
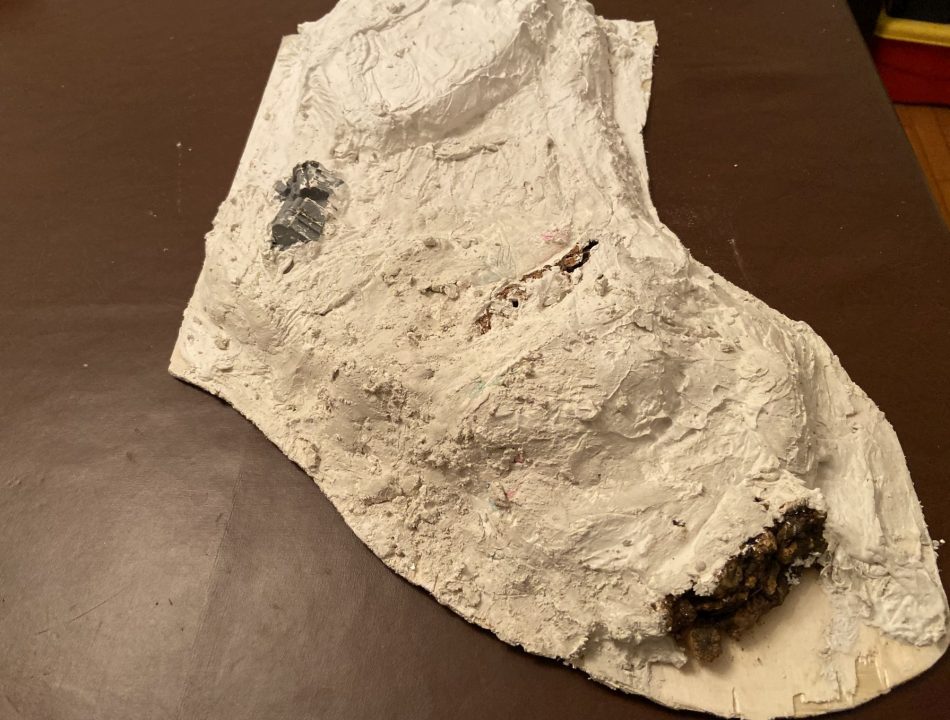 The same hill, with the plaster. Avoid covering any features like the cork. Don’t worry if you don’t cover all flat surfaces. We will cover them later with the sand.
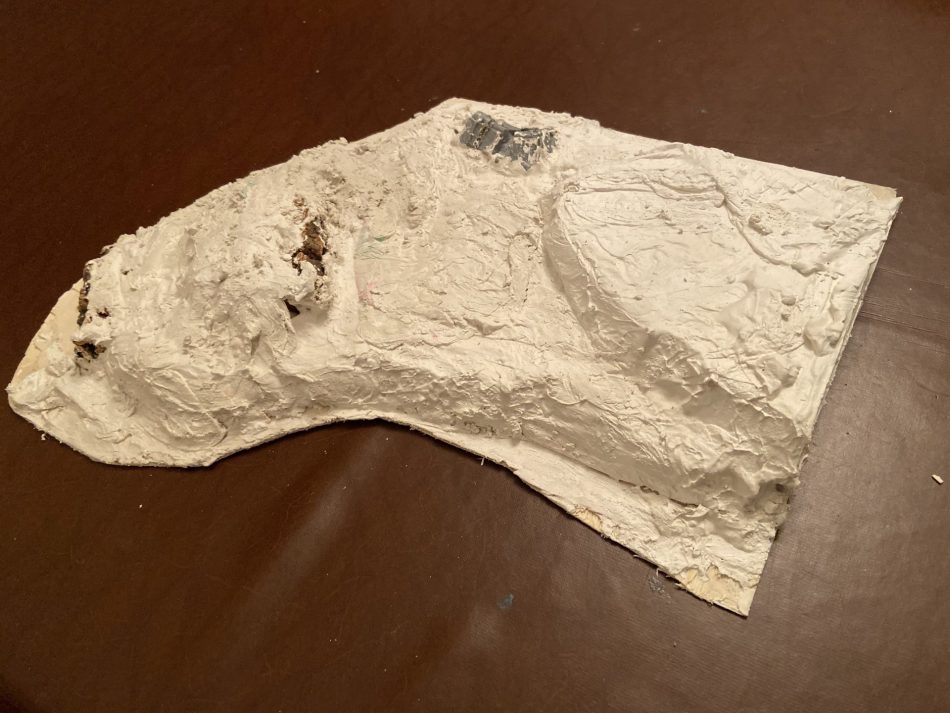 The other side of the hill; remember to have flat surfaces, because you are crafting hills to deploy miniatures.
Sixth Step. The sand.
Now you have one or more hills with a flat surface. If you want very simple hills, you can just paint it brown or green, and they are ready to be used.
If you want a more realistic final look, you will need to cover them with sand, which you probably already have for your miniature’s bases. Grab the PVA glue, cover the surface of the hill (again, avoiding the cork rough surfaces), and spread or scatter sand all over the hill. You can add small stones or bigger grain sand in spots, just because Mother Nature loves diversity and acts randomly. This time, you just need to wait for a few hours (4-5) to have the glue totally dry.
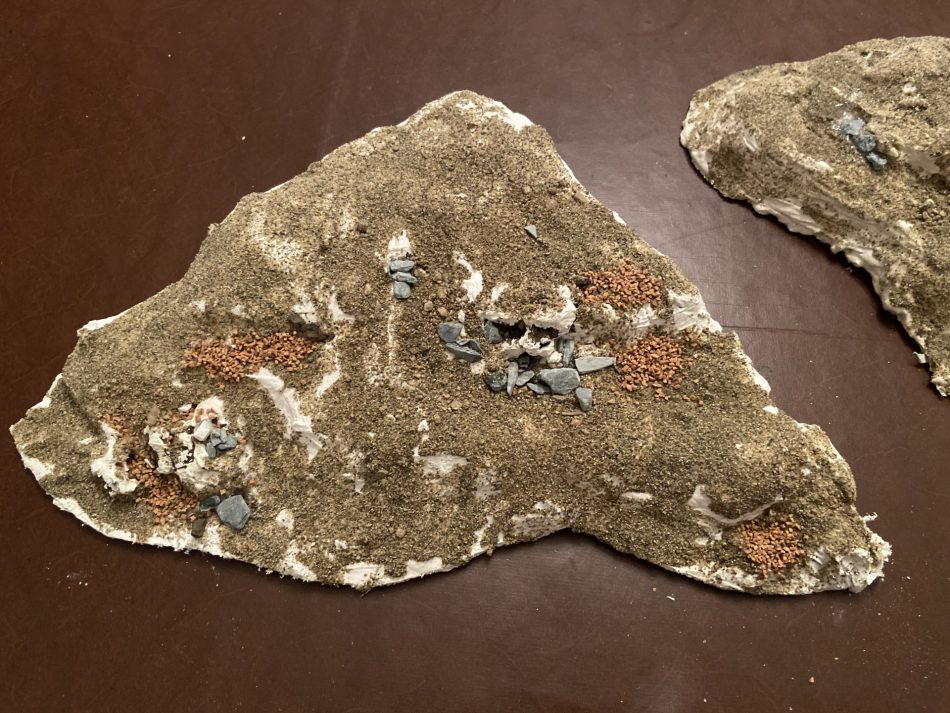 For this “corner” hill I used some flat stones and some larger grain sands to create some “rocky spots”. As you will see in the real world, these parts normally appear in recesses and on sides.
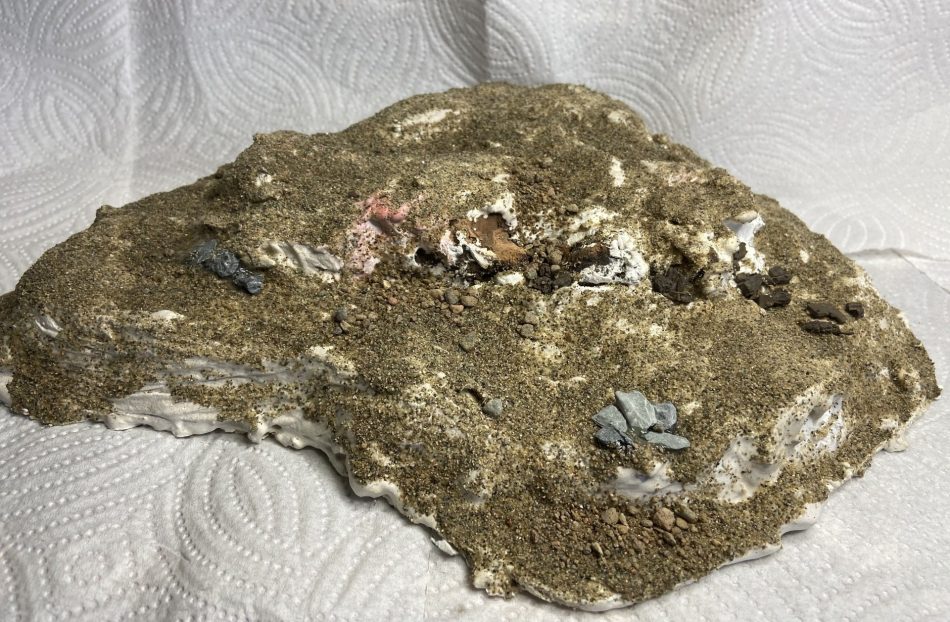 Another hill filled with sand, rocks and surfacing cork. Just always remember you need to leave some spaces for your miniatures.
Seventh Step. Colors and grass.
[Editor note: I’ve found that a coat of spray-on matte sealer works to keep the paint from softening the PVA glue when you move to the painting parts. But it isn’t necessary if you are careful with your paint application.]
Once it’s all set and dry, you can color your hill. If you want, you can use an airbrush, but it’s much easier and faster to use a large cheap brush and paint. You will probably want to use some water paints you can easily buy in the nearest DIY shop, or steal them from your kids. It’s really important their final look will be matt, or you will have “flu” hills. So test the color in a corner of your hill and see how it looks when it will get dry before using on the whole hill.
 This is the look of a painted hill, with sand base color and two drybrush passages.
You will see in the following photo I used a dark green, two browns and a light “desert” sand brown on my hills. The “green solution” is faster, because once you paint it, the hill is finished. In other situations, I added the flock grass, so more realistic but a bit more time-consuming.
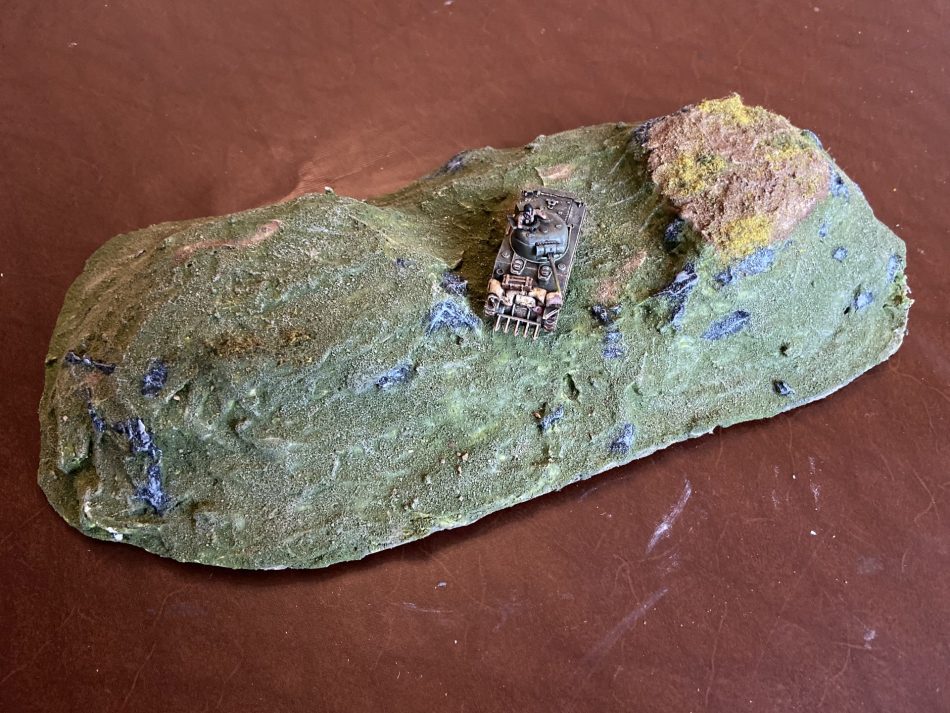 A lonely 15mm Sherman lurks on the hilltop. There is no flock on the green part of the hill, just sand painted dark green and drybrushed with lighter/yellowish green. After completing the green, I went for the rocks.
Whatever color you will use, you will need to have a second drybrush passage with the same color but considerably lighter. Once you painted the dark green, just add some yellow to the original color, use the dry brush technique (dip the brush in the color, scrub it on a paper until you remove almost all the paint, and then use it on the hill). Drybrushing, you will color with the lighter paint only the tips of the sand grains, and it will give a fabulous realistic look. Try with a lighter paint, and you will see how good is it.
For the browns, you can use some pink color, or a lighter tone of brown. For sand, you can use the white.
Use the same technique for the “rocks”. Paint them with a base black/dark grey, then drybrush with at least two levels of lighter greys, using a smaller brush. The final look is terrific! You can also pinpoint the bigger stones and color them the same.
Finally, use some PVA glue to create “spots” of grass, and spread on them the grass flocks. If you use a dark green and light green, the effect will be much better.
Some photos of my finished hills.
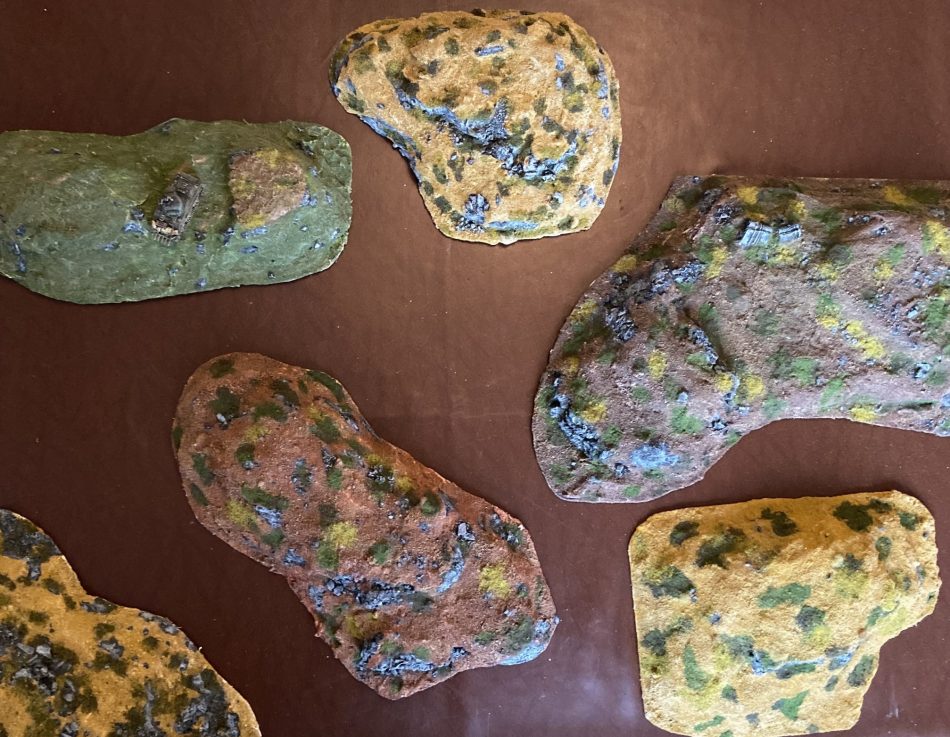 Six hills ready for my tournament. I used different base ground colors for variety.
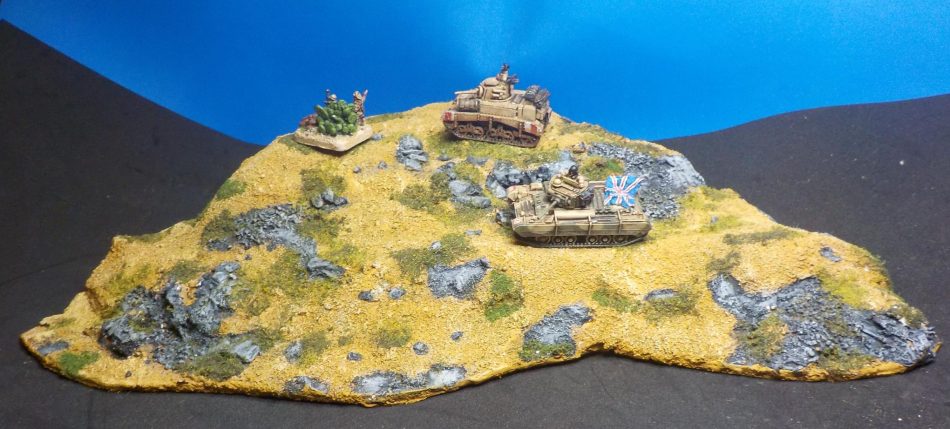 A desert hill conquered by some British Desert Rats. You can see the final effect of the rocks.
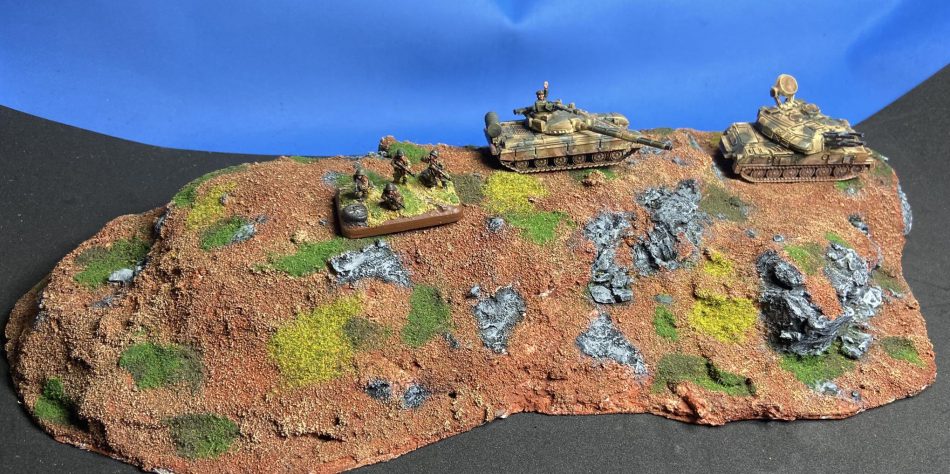 Some URSS troops travel on hilltop in central Europe. Again, the contrast between the two flocks (two shades of green), the base brown color drybrushed and the rock works very well.
 A top view of a darker hill with some BOAR Berlin Brigade British units. You can see also the final effect on the “column ruin” I placed on this hill.
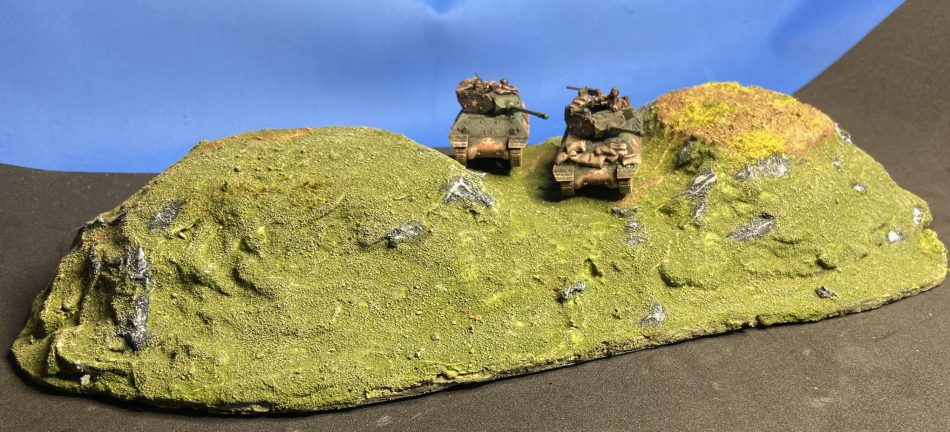 Two M10s wait in ambush behind this two-crested hill. Using the green base with drybrush, I didn’ need to add any flock.
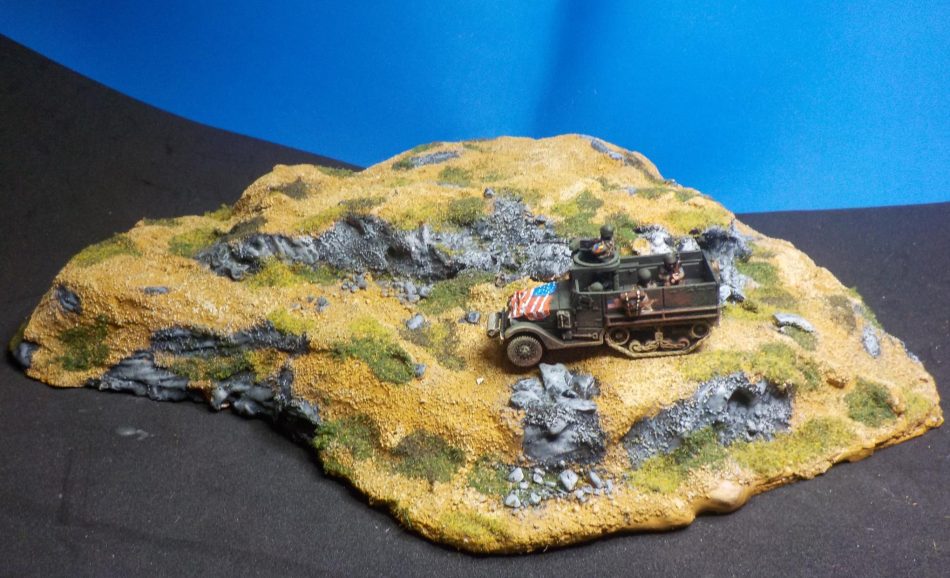 Elements of the US Motor Rifles advance on a small hill in Tuscany. These sandhills work both for desert and south Europe.