Battle Report “D-Day +2” D-Day British vs Germans, Free-For-All, 100pts
by Matt Varnish
Here we go, myself and fellow No Dice No Glory contributor Scott ‘Obsidian23’ Roach, get in a game using the new British D-Day book. As always, the video of the game is linked at the end of the article.
We actually debated using the special D-Day missions in the book but they were either on 4ft by 4ft tables or Airlanding, so we opted to use the normal Battle Planner.. and wound up with Free-For-All. We WERE using the new Bocage rules, however, Bocage Hedgerows are Tall Terrain and provide Bulletproof Cover to gun and infantry teams shot through them. Looking at the above table Scott laid out, you can see that Line of Sight would be an issue for things like Achilles, 88s and Panthers.
D-Day +2, Monty’s forces have pushed past the beachheads and are heading towards Caen. In their way lies a German Recon Coy sitting in an outskirt called Herouville-St-Clair.
Lists:
The Recon company allows Pumas and sdkfz 251/9 7.5cm gun halftracks as formation assets, one of the infantry platoons had halftracks, both infantry had Fausts. He took 88s, StuHs, and Panthers as support.
I took Desert Rat Rifle Coy, which means they are all Reluctant, but cheaper, which actually allowed me enough points to still take three Crocodiles, four Achilles, two Typhoons and a unit of Cromwells. I also had the Lucky card… I usually need this for a critical Morale roll, doubly so now that my formation has worse Morale.
Deployment
A lot of folks nay-say Free-For-All but one thing I like about it is, it forces a few decisions on you that other missions don’t. Are you going to go first? If so, you are not going to be using Artillery or Planes and all your stuff counts as moving when Shooting.
Alternating deployments, its a chess match sometimes trying to get the other guy to commit a resource you need to worry about. In my case, my Crocodiles were worried about where his Panthers were going to be.
I figured I’d put up a threat, he would deploy his Panthers, and then I could plan around it. I placed my Cromwells with Firefly on my extreme left, but he countered instead with 3x PaK-40s in a treeline. He had more units than I did, so I was never going to be able to place the Crocodiles away from the Panthers.
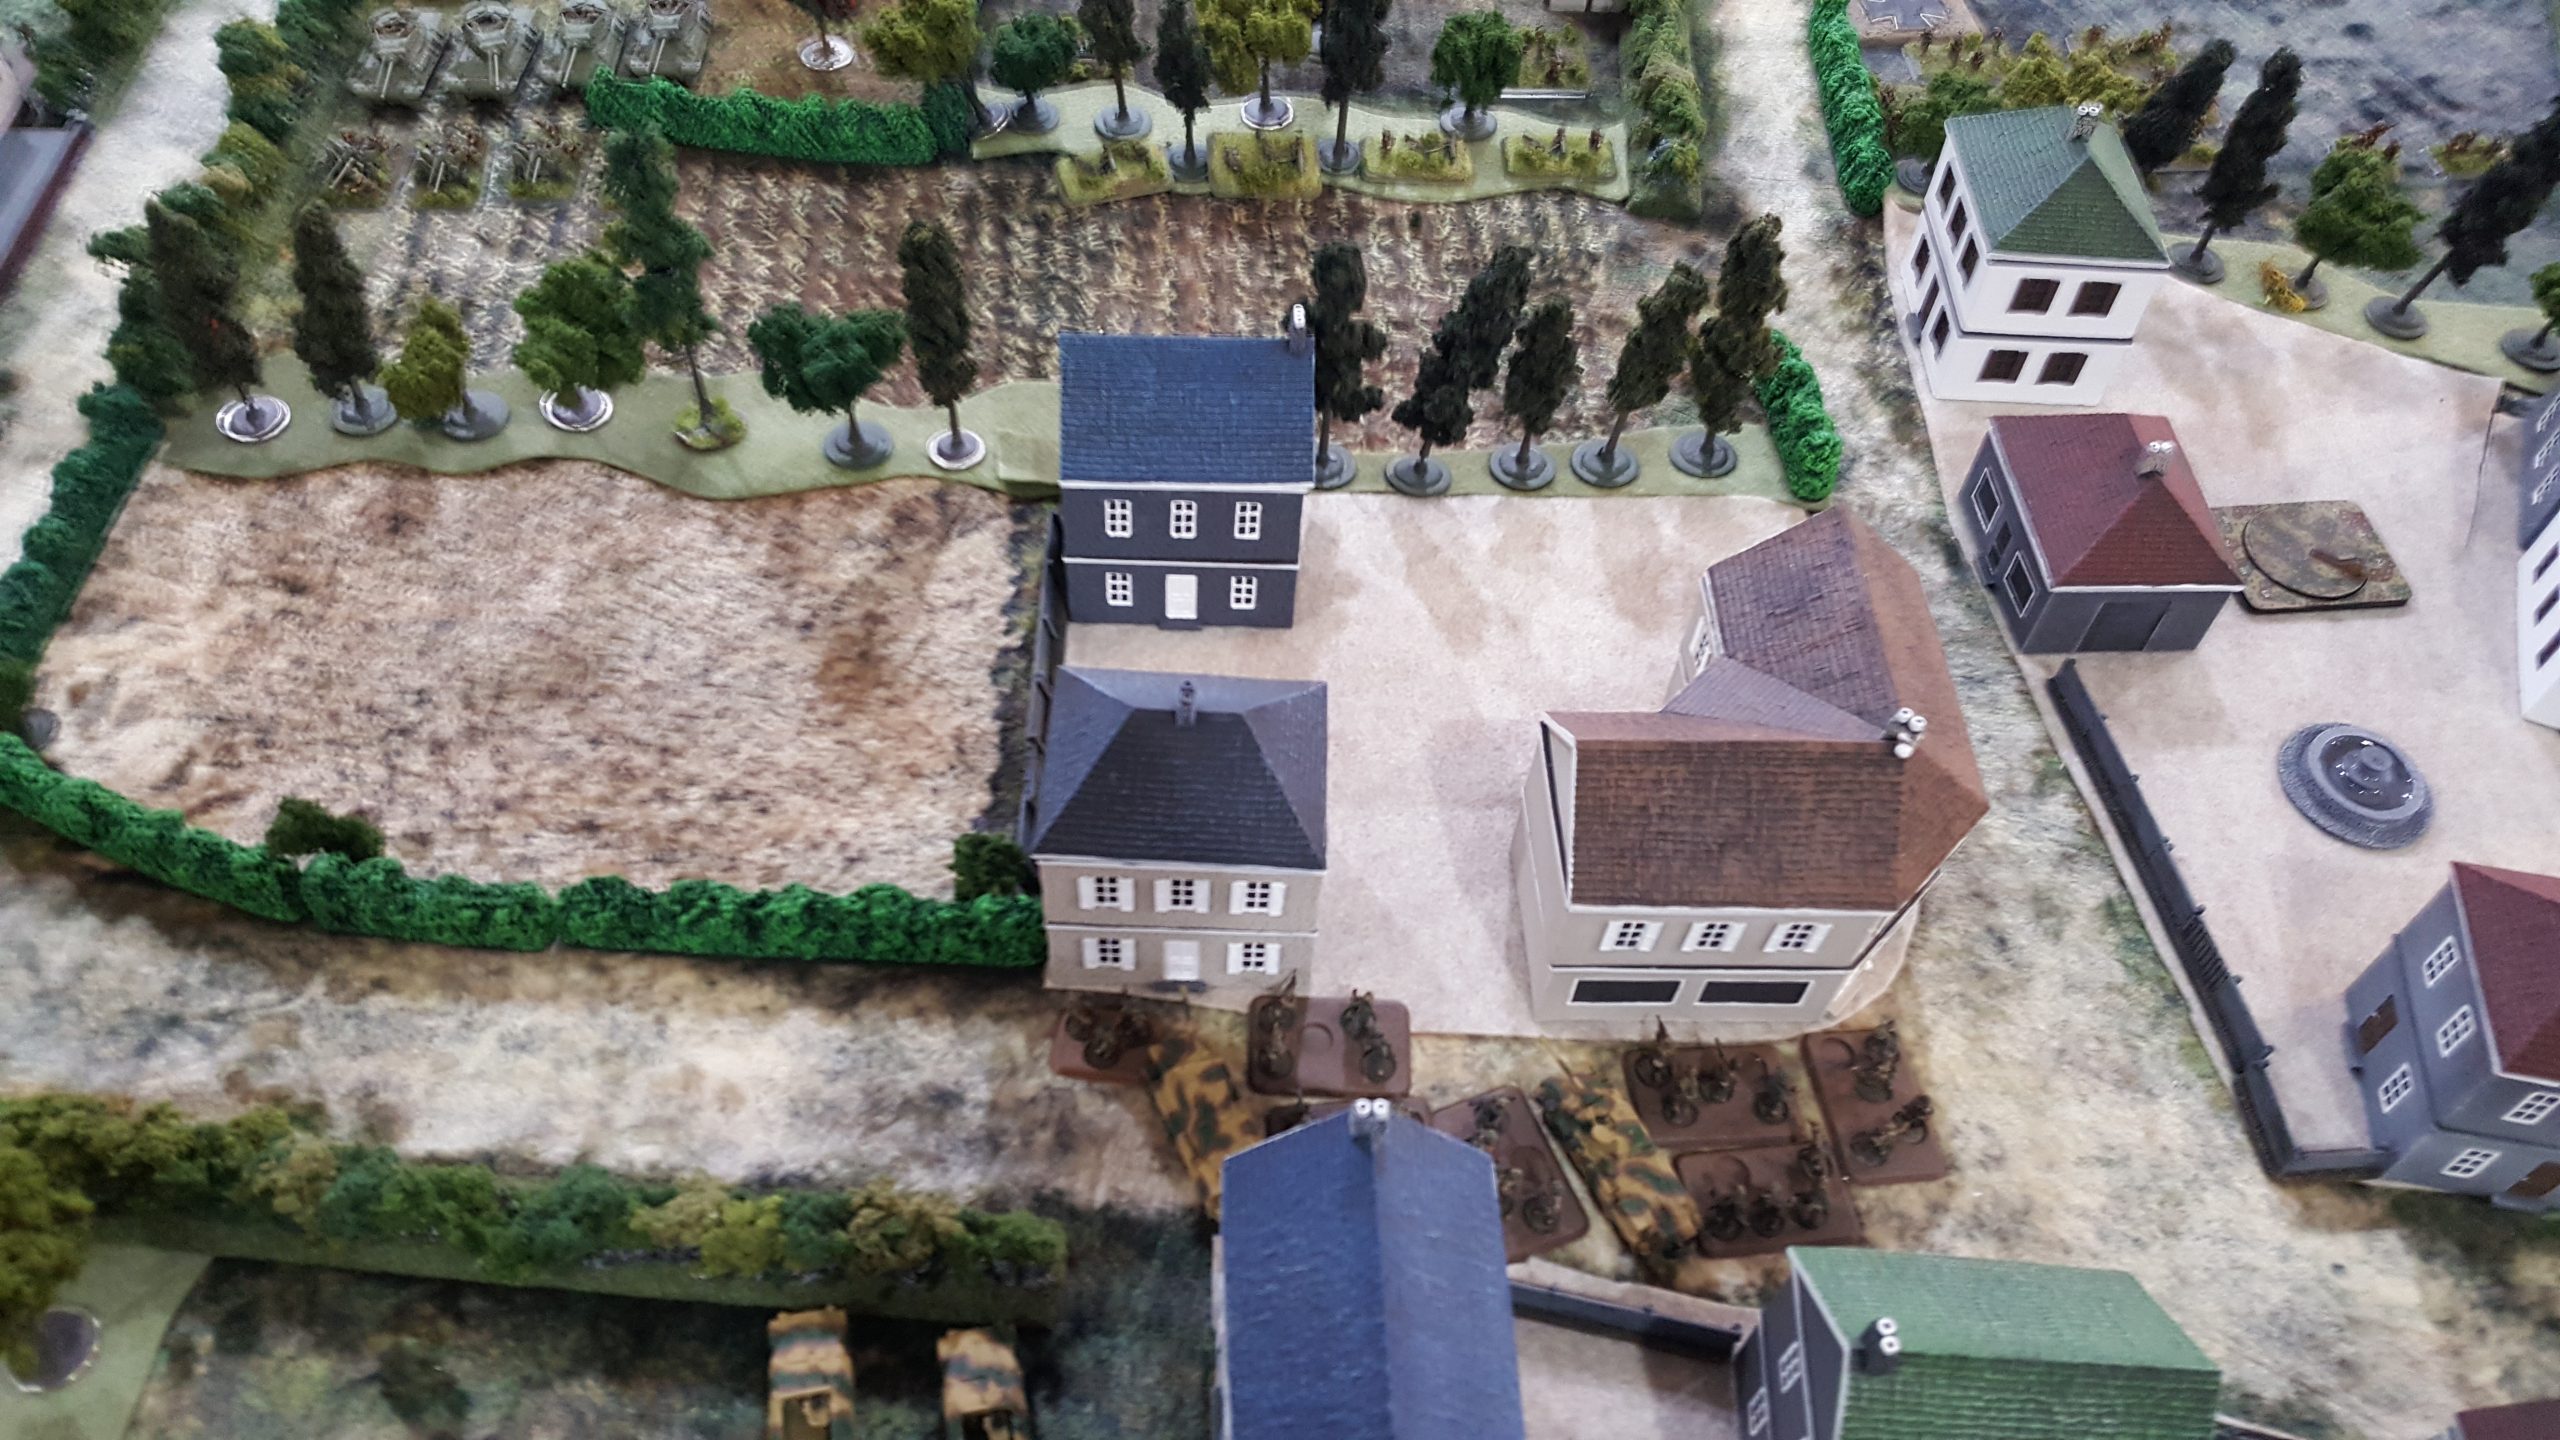
Instead, I placed my Croc’s on the extreme right, threatening the below unit of panzergrenadiers (objective is under the top-most half-track).
Horsa Glider is there for show only. Flat objective under the top half-track beside the BocageScott’s gorgeous Panthers from a prior NDNG article.
Desired outcome: Scott places his Panthers in the very next field, away from the hedgerows, to pounce on my Crocodiles.
I was then able to place my Achilles where they could threaten the flanks of the Panthers if they turn to flank my Crocs. Scott then Spearheaded the Pumas into the village, in order to let the foot Grenadiers deploy in the buildings. (above)
Scott put his ’88s in the best spot he could on a Bocage table. Guarding the two main roads into the village, and next to the HQ.
TURN 1
I got Turn 1, so no Mortar fire into his ’88s or any chance of the RAF coming in to threaten the Panthers. I advance my Desert Rat Rifles towards the village.
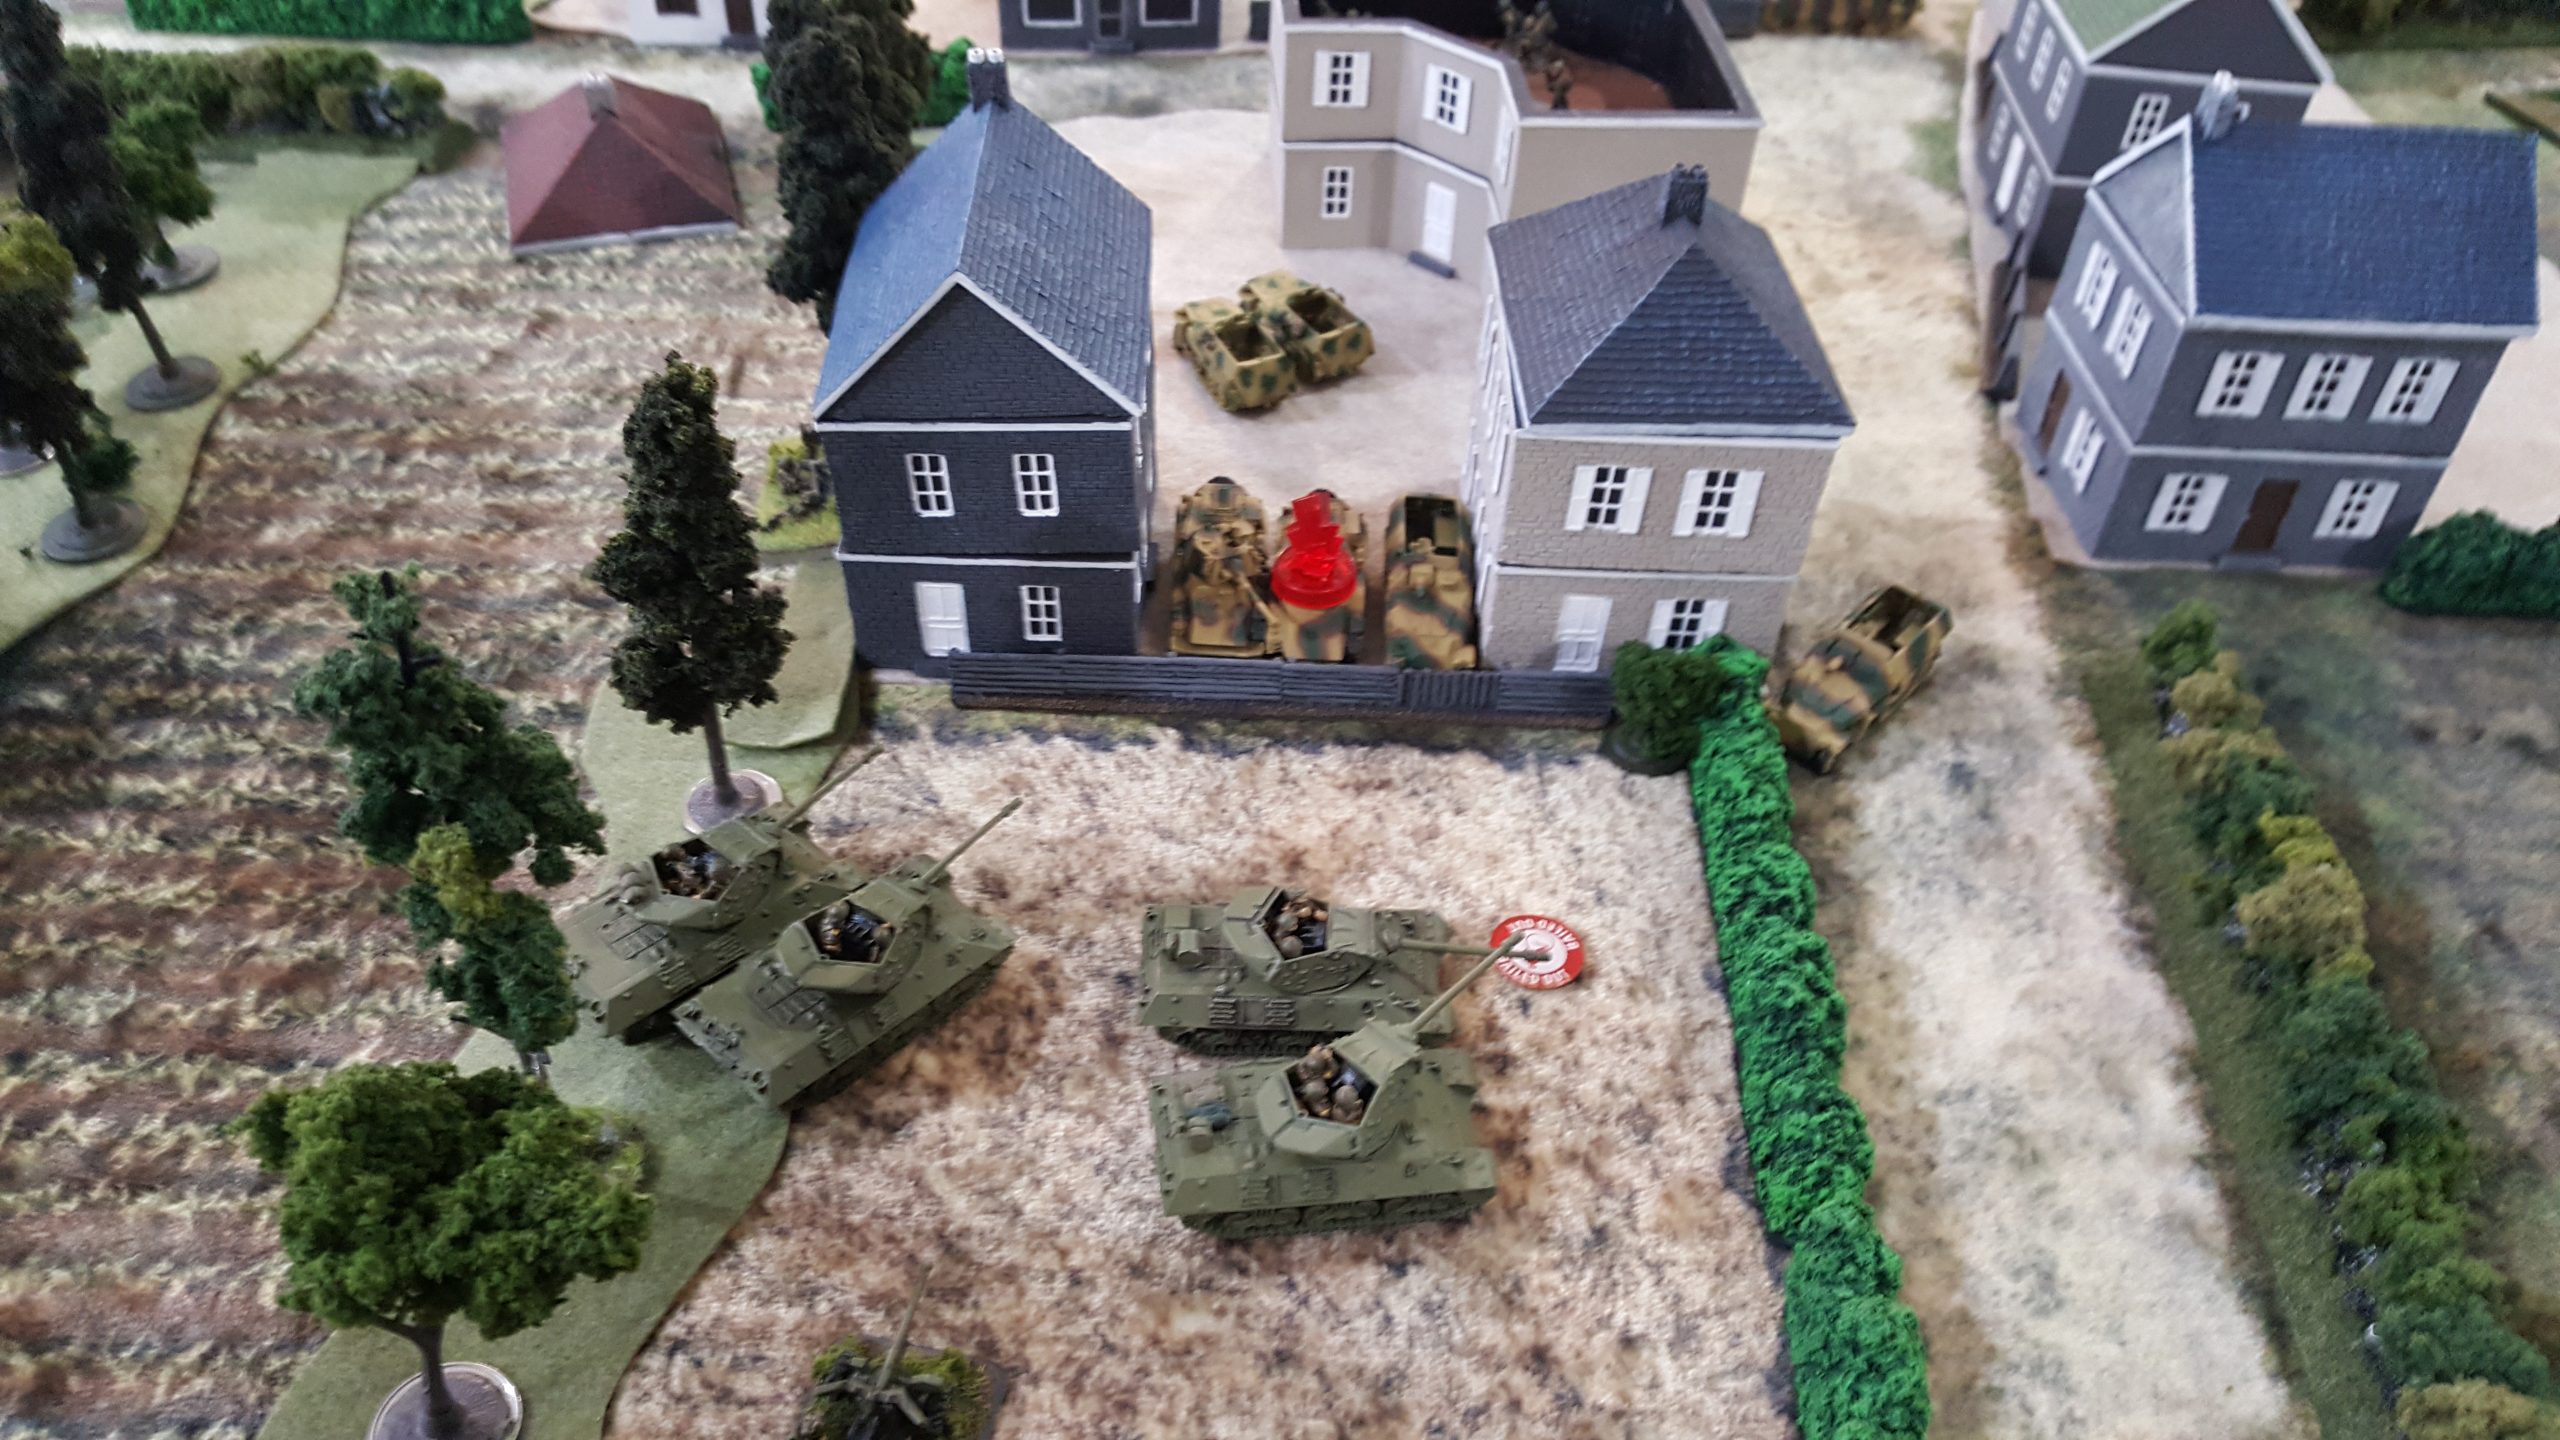
..while my 6pdrs and Achilles advance up and try and cross that treeline to threaten the Panthers (just visible top right) Not shown, my Cromwells advance using Bocage to get close to the objective guarded by PaK-40s but keeping out of sight. I need my Mortars to dig the guns out.
Scott’s Turn 1 was uneventful, he moved his Panthers forward a bit, his infantry took position across multiple buildings, and re-positioned his StuH’s to cover the village and infantry.
“Was is los?”.. Panther commander in the open hatch, straining to hear the oncoming aircraft: “Achtung! Achtung!! Spitfeuer!”
TURN 2
My turn 2, I got the Typhoons in, the ’88s did not hit them in Defensive AA, I ranged in on the first attempt on a 5+ (template touching the woods) and still popped 2 Panthers, huzzah! One thing to note, the Typhoon rockets have a 14-inch range…..
I advanced through two rows of Bocage with my Crocodiles (only one bogged down) to engage his halftracks, bailing both. My infantry assaulted the lone half-track (with the 3.7cm on it) and force it back, capturing 2 halftracks. No more walking for the lads!
Scott’s second turn, the lone Panther passes its Motivation and stays on the board, shoots but fails to damage the 2 Crocodiles. His infantry manages to kill 2x HMGs, and his StuHs MG a few of my infantry in the open. Today, the dice are in my favour and certainly not in his (watch the video at the end, for more reaction)
Pumas and 251/9 halftracks engage my Achilles in the flank via the village square, and only manage a bailout.
TURN 3, I got my Typhoons in again
Scott’s reaction, when I get my Typhoons on the board again for Turn 3In the center, my bailed out Achilles stays bailed out, and I can only blow up one Puma with my return fire, but we’re really here to find out about those Typhoons, aren’t we?
“Flight Leader, Tally Ho, Rolling In” On the right flank, YES I rolled a 4+ to get Typhoons, YES I make my save vs the 88 defensive fire, and YES I range in on the first attempt by rolling a 6, and YES, 2 StuHs are brewed up. Dejected, the last remaining StuH would retreat from the Front despite the exhortations of the Formation HQ
Meanwhile, my Crocodiles advance up, hit 6 times on 18 dice, killing 5 of his 6 infantry. My infantry assault the last Panther, and though my PIAT didn’t hit, a grenade from a Rifle/MG Team bails it out, and I capture the Panther. That’s 3 vehicles captured for this unit. Who is is paying the tab at the Pub later, the Infantry or the RAF? At this point, Scott, peeved that he rolled a 1 on 3 close combat saves on the top armour of his Panther, would call a Mulligan, and break open a fresh tin of Adam Brooker of Diceofwar.au, and rerolled. This new attempt yielded two 1s for top armour saves vs my Grenades… It just wasn’t meant to be, no matter what dice were used, Scotty!
After capturing the Panther, I consolidate forwards, contesting his objective that has 1 SMG team on it (lower right of above pic) and while Scott would try for a few platoon kills on his Turn 3, its all over but the crying/drinking. To add more misery, he wanted to bring his remaining halftracks up and 2 of 3 bogged down, unable to contest.
Man of the Match: Scott’s bad dice.. a close second is the Typhoons whose AT5 rockets killed 2 Panthers and 2 StuHs, forcing the StuH platoon to break. 3rd I guess are my Desert Rat infantry, driving back to base in a Panther and 2 halftracks they managed to capture.
Aftermath
7-2 victory for the British. In a way, its really a shame Scott’s dice failed him, and mine were so good (for once) because it really robbed us of a good game. We discussed (after breaking out the Bourbon) what changes he would make to his list, and it would be to cut the 88s, cut the Panthers, add Tigers (same gun as 88, more mobile, better side, and top armour stats) and he could still have the 2cm AA gun unit.
Me, I would find a way to get some Recce in there, maybe swap out the 4x HMG teams for some Universal Carriers.
The clock strikes noon, so we crack open the bourbon and have a literal fireside chat about lists and bad dice luck, its more in-depth in the video below<<< Video of the battle
Matt Varnish, AKA Dennis Campbell, plays Team Yankee, Flames of War, and Black Powder and now Ancients in the frozen wastes of Canadia. Check out my youtube channel for hundreds of Battle Reports if you like here:
Nice battle rep there! No surprise there… what 2 platoona did he kill tough? To get the 7-2 score?
Video is from a different game!
Thanks for the heads up ive just changed it. Youtube has been doing stupid stuff lately…..
HMGs and I honestly forget the 2nd..
Enemy aircraft in the skies? Don’t bunch up!
He honestly thought it would be no issue, because of my past horrendous luck with Dice (A/C coming on, then ranging in, then hitting) but it all came together on this day 🙂 Monty must have yelled at the Wing Commander to get his best lads on the case!