One of the coolest parts of is the ships you get to use in the game. Firelock knocked it out of the park with their line of ships, even beyond just making a game where incorporating ships into gameplay is as seamless as possible. But to add to all of that they took the ships they make kits for and then added even more ships to the game based on those hulls. The difference is that the extra ships are simply rigged differently. While they point out that it isn’t necessary to actually change the rigging on your vessel, the modelers among us enjoy tinkering and making those variants.
For those not familiar with the age of sail, there were several factors that determined the qualities of a ship. The hull obviously plays a large part, as they can be long, wide, narrow, tall, short, etc. All of those things contribute in various ways to the handling of a ship. However, the sail plan of a ship is arguably more important, and is primarily how a ship is classified. In western sailing there are two rigs we see most often. The first is two or three masts with large banks of square sails across the line of the hull known as a “square rig”. The second is a “fore and aft rig”, which is the triangular or quadrilateral shaped sails which are usually in line with the hull. As ship design advanced through the centuries ships of either sail plan began to mix minor sails. Sometimes they would mix major sails, leading to a hybrid rig.
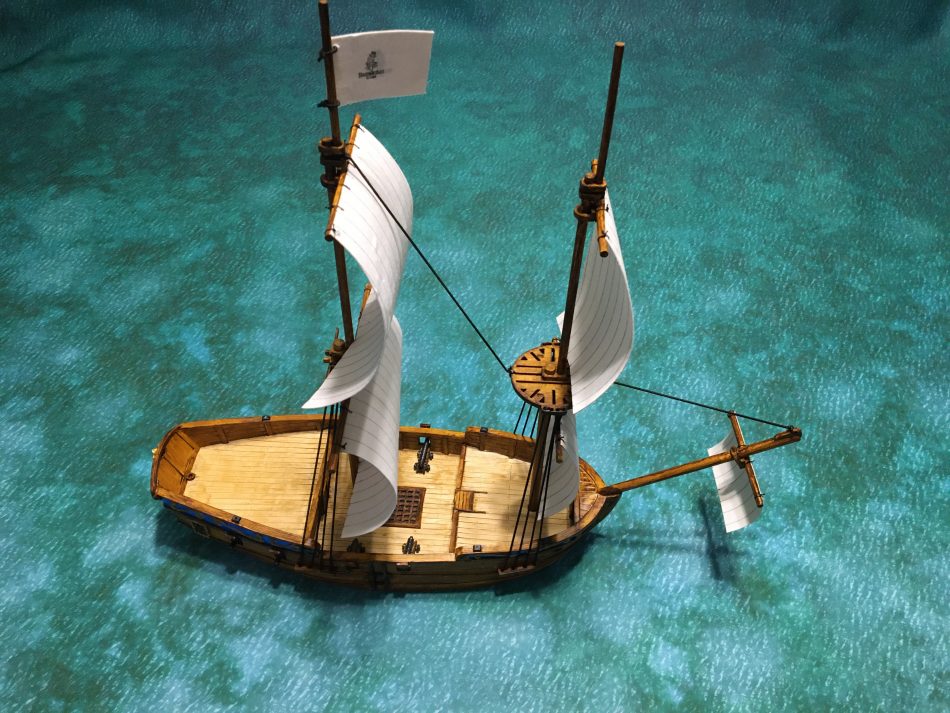
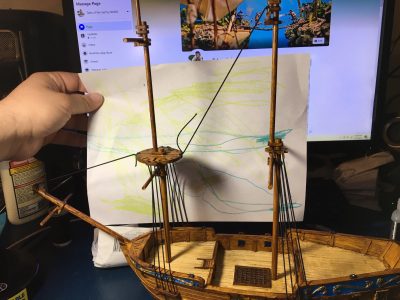
I already have a brigantine with a “proper” brigantine hybrid rigging. That means it has a foremast with square rigged sails, and a mainmast with a gaff-rigged mainsail – a huge quadrilateral sail on two gaffs extending to the rear of the ship (the aft part of fore and aft). With a second brigantine hull I was able to get along the way, I decided that instead of doing another hybrid rig I would do the alternate square rigged vessel: The Sloop of War. This would mean two square rigged masts and a bowsprit sail (aka spritsail).
To start off I already had the brigantine hull. I then purchased the frigate rigging components kit from . This kit is technically for the light frigate, but it would serve my purposes here because it has the spritsail, the square rigged fore and main masts, and a lateen rigged mizzen mast (you’ll see what I did with the mizzen mast in my next article). The kit also comes with a laser cut rigging components set, 4 yards of elastic rigging string, and all the metal bits needed for the ship like light cannons and gunport covers.
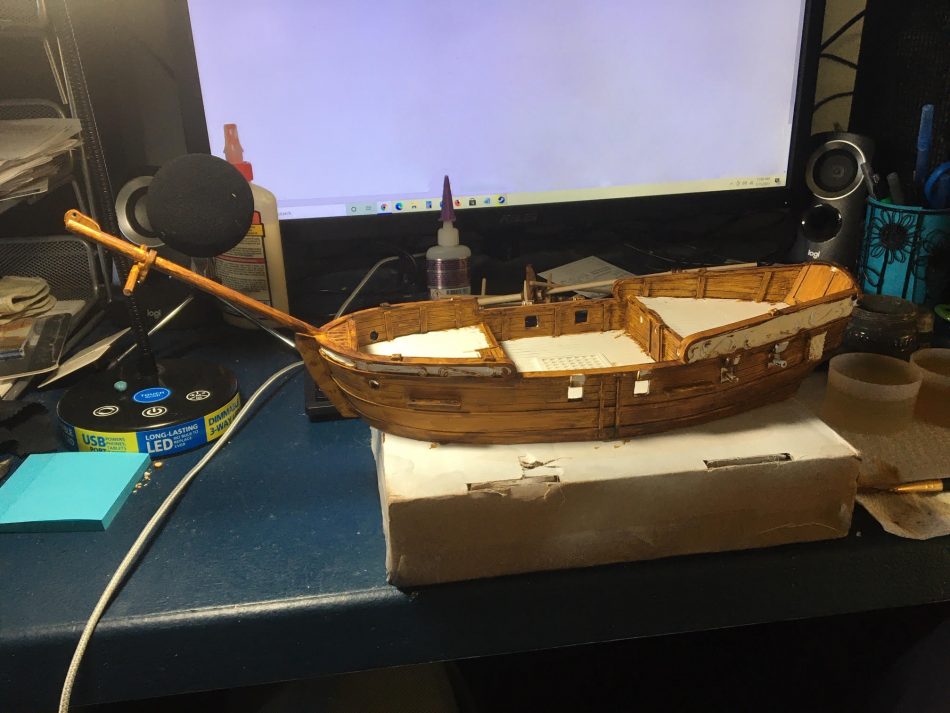
Just like the rest of the Firelock ship range, the hull is made of resin. I began by washing it in warm soapy water and gently scrubbing with a toothbrush I keep just for cleaning minis. Once dry, I carefully cut out any excess resin in the gunports and carefully trimmed and sanded the bottom of the hull. Firelock usually sands the bottom of the ship, but sometimes it needs a bit of re-sanding to be flat. There is also occasionally a lip around the footprint of the model, which can be cut and trimmed for a smooth transition. If the edge is left the ship won’t glide as easily over neoprene or other fabric playing surfaces. I then trimmed and cleaned all the metal components, and assembled the light cannons.
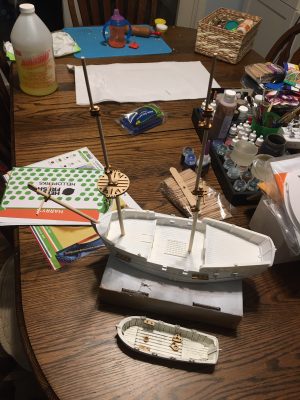
The ship ready to prime, and with it my next conversion piece.
Once the cleaning and sanding was done I began gluing the partial cannon barrels into the ports on the brigantine. I left the full-carriage guns for the deck loose to be paintedseparately. They can be changed for medium guns between games. The gunport covers I glued on to the hull as well, though many prefer to leave them off for easier painting. I glue them as far open as possible so they’re attached to the hull at multiple points. I also glue in the chain plates at this point. Chainplates are the rigging components that go into the side of the ship and hold the shrouds leading to the masts. I use the elastic rigging to allow the masts to be pulled up and laid down so that the ship can be shorter for transport. Some modelers leave the chainplates unglued as they are often snug enough to hold themselves in. This allows for the masts and rigging to be removed completely for transport.
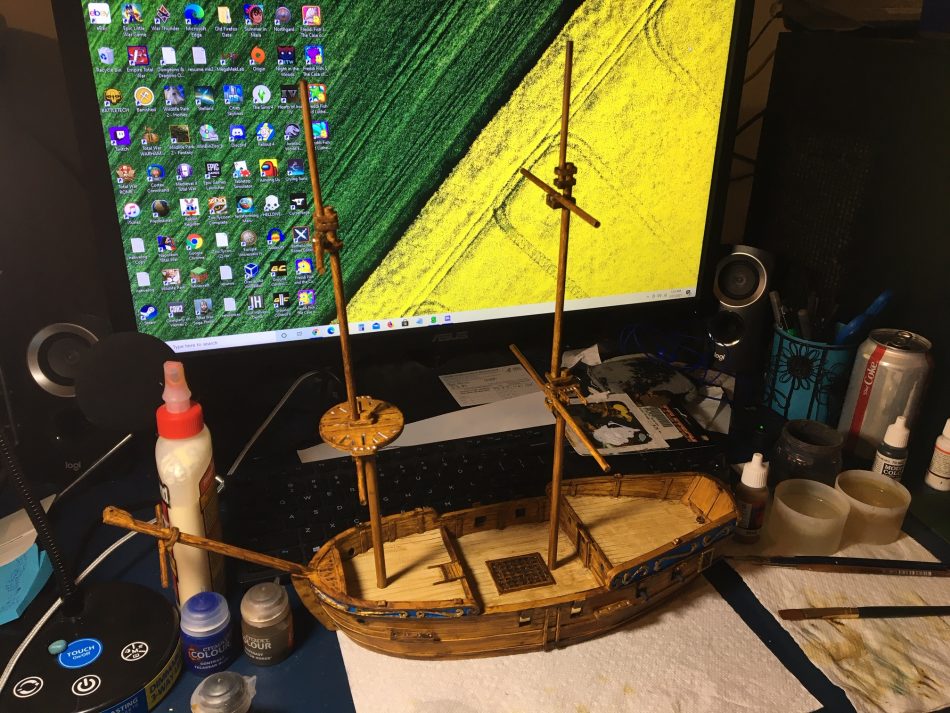
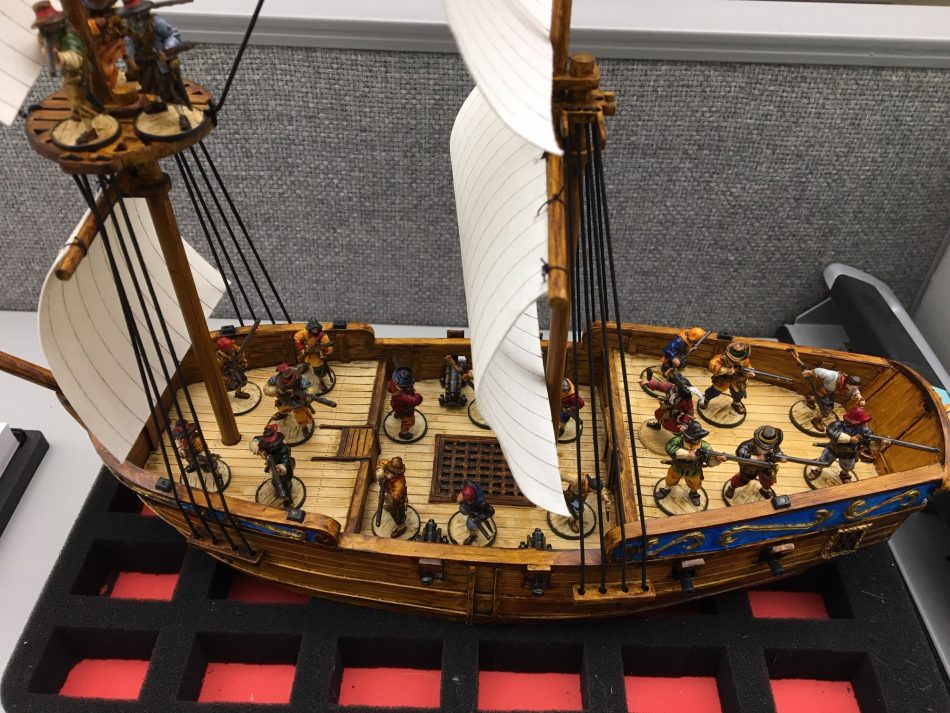
Next came assembling all of the masts for the ship. The bowsprit can be glued in or left loose to be removable – I glued mine. While assembling the bowsprit, the frigate kit comes with a piece to extend a flag mast from the lead of the bowsprit. I modified this piece by cutting and sanding it down to exclude the flag mast mount, but keep the tie point for a forward stay. I assembled the foremast and mainmast from the frigate kit according to the on the Firelock Games website. When assembling these masts, the player has the option of replacing the crosstrees pieces with fighting tops. These allow models to fire down at opposing forces usually removing their cover saves. As I originally misunderstood how many can be included, I only did a fighting top on the foremast, so you can see the difference between crosstrees and a fighting top. The fighting tops are made modular to fit over already-built mast sections, so I may add another sometime in the future.
After everything had been glued in I primed the ship white. I intended to paint it with contrast paints and a white undercoat really allows the colors to pop brightly. Light or dark grey undercoats will change the hue of the contrast paints, with darker undercoats leading to an overall darker scheme.
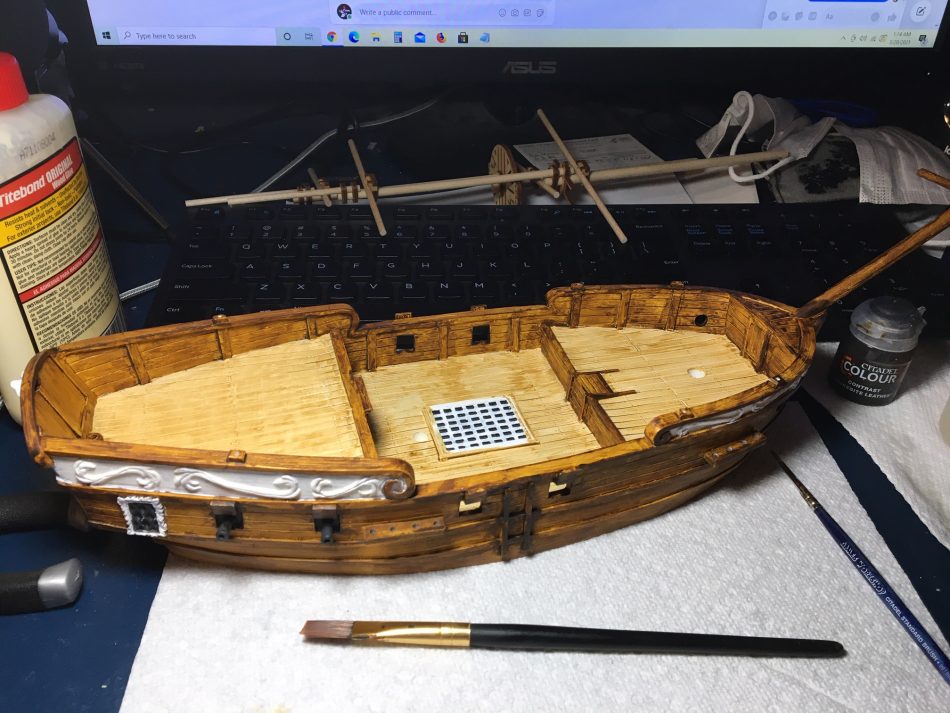
With the undercoating complete, I painted the hull, masts, and yards with Snakebite Leather contrast paint. The decking was done in Skeleton Horde contrast, to provide a nice light holly-stoned wood look. For the cargo hatch grating I used an old brush to get some Vallejo black-grey paint into all the little holes and recesses, and then repainted the cross pieces in white. This allowed me to paint them in Snakebite Leather contrast, making it stand out from the rest of the deck. This same technique was used again later for the cabin windows.
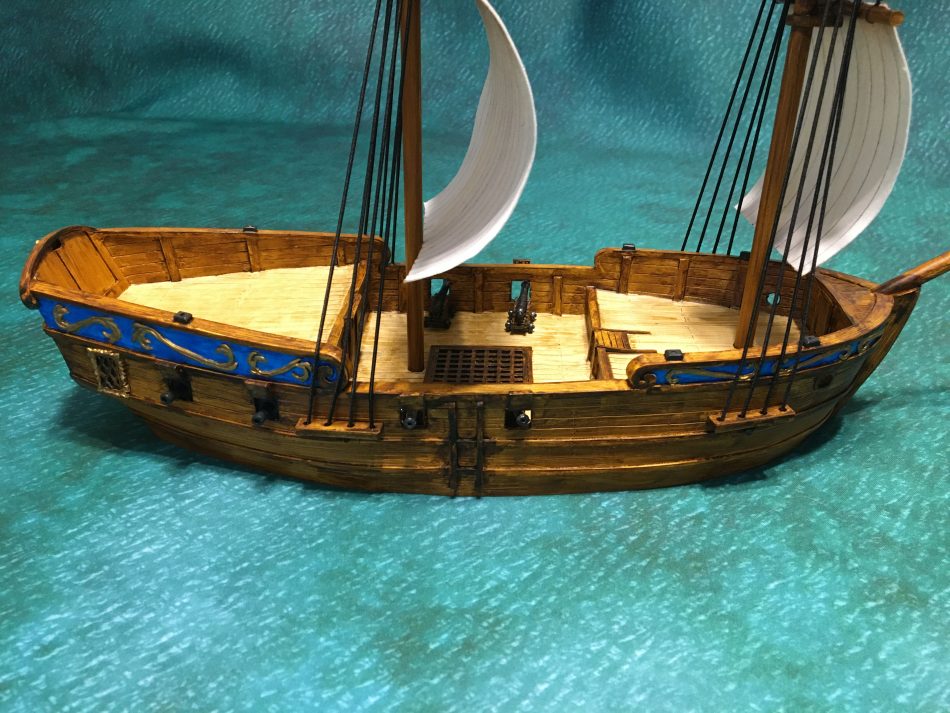
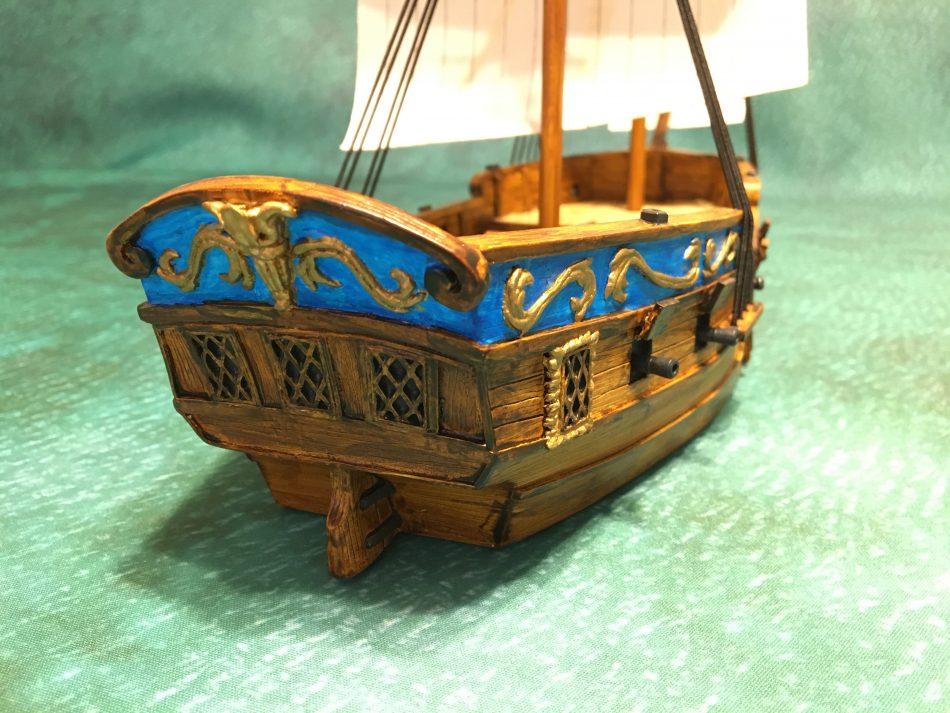
The background of the upper hull I painted Talassar Blue mostly for the shade of blue than for any real detail value the contrast would add here. The detailing in this area I wanted to paint gold, but as the paint wasn’t showing up well I opted for brass (Vallejo) instead. I blocked in the area behind the gun barrels with Vallejo black-grey, and painted the gun barrels likewise. All the metal details visible on the gun hatch covers were painted black-grey as well.
The darkened recesses of the cargo hatch lattice are visible here.
The cannons and swivel guns I had also primed white. I painted the gun carriages with Snakebite Leather, and the barrels and other metal details with Vallejo black-grey. Gun carriages are a great way to add another splash of color to a ship. I have carriages in the typical brown, red, and even a few in green to match a particular ship hull. I considered painting these cannons in Talassar Blue as well, but opted for the subdued brown. The swivels were paintedentirely in black-grey.
Firelock ships contain excellent detail work on the stern and around the cabin.
After painting I made sure to give the hull, masts and yards a couple coats of matte varnish. This way the minis being placed on the decks and moved about would not cause the paint to wear away. The guns and swivels also received a few coats each of matte varnish. they could otherwise also be treated as you would treat any other model because they are effectively figures on deck just like any of the crew.
With everything else done, it was time for rigging. This often seems a lot harder and more daunting than it needs to be. Firelock ships tend to use a more simplified rigging scheme than a real ship would. I began by erecting the foremast in place and measuring some of the elastic thread from the kit to run from the chains to the masthead and back twice – to use the whole chainplate. Cutting the line there, I used that section to measure an identical section for the other side of the ship. This is important – if you measure each side independently, or do it after one side has been tied in, then the cord lengths will be different. This difference in tension will pull the mast to one side of the ship or the other, instead of keeping it centered upright.
After you have the shroud lines measured, run them up and down between the chainplates and masthead until you have them in an M shape. The line ends should be coming through to the bottom on either side of the chainplate. Pull the lines until they are suitably taught and then tie them together below the chainplates. This should form a loop that looks like M in total. Repeat this process for the mainmast.
Once the two masts and shrouds are in place, the mast should lean backwards from the tension of the shrouds. A stay can be added from the mainmast to the foremast, to keep them vertical in the forward/backward direction. I tied the stay on the mainmast between the flag mast braces and ran it to the back of the fighting top. It should go under the fighting top to the mast braces where the crosstrees should be, but it’s cramped under the fighting top and I didn’t want to mess with that. Another stay can be run from the same point out forward to the end of the bowsprit. Again I just used the front of the fighting top. This line is the one that actually pulls all the masts into the upright position since they’re all connected. With everything tied off, I go through and put a dab of superglue on each knot to ensure they don’t come apart or slip, and then trim any excess threads.
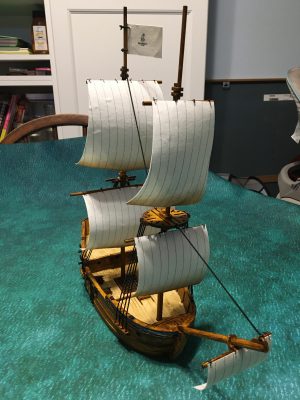
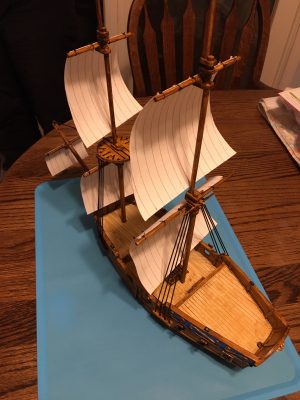
After all the shrouds and stays were done, I used plain black thread to attach sails that I got from . I personally find that the easiest method of doing this was to secure one of the more central mount points to each yard, and then go to the opposite end and work back across. I use triple knots to make sure they stay tied, but that might be overkill. For removable things such as a Steamkraken flag that the owner was kind enough to include in the kit, I used more of the elastic thread so that it could be removed from the flag mast and replaced with a flag more appropriate to whichever fleet or nationality I want to use.
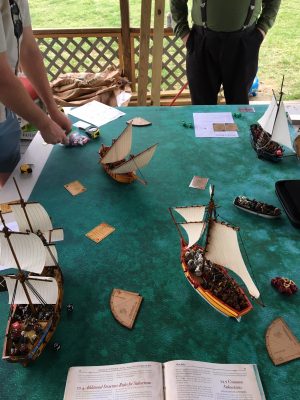
The Sophie (lower left) engages the sloop La Rosa Dorada (lower right) at range.