Achtung Panzer! Getting a demo game in
By Troy Hill
A lot of interest is brewing about Warlord’s impending new arrival, the Achtung Panzer game. And rightly so.
I had the opportunity to lead members of our local gaming group through a (very) basic game this weekend. Reviews were positive from the players, post-game.
Rather than give a blow-by-blow of the battle, I’d like to look back at some of the rules, what we kept looking up, and how the game rules functioned as the players challenged my memory (like a rusty steel trap with a broken spring) and kept me looking up rules.
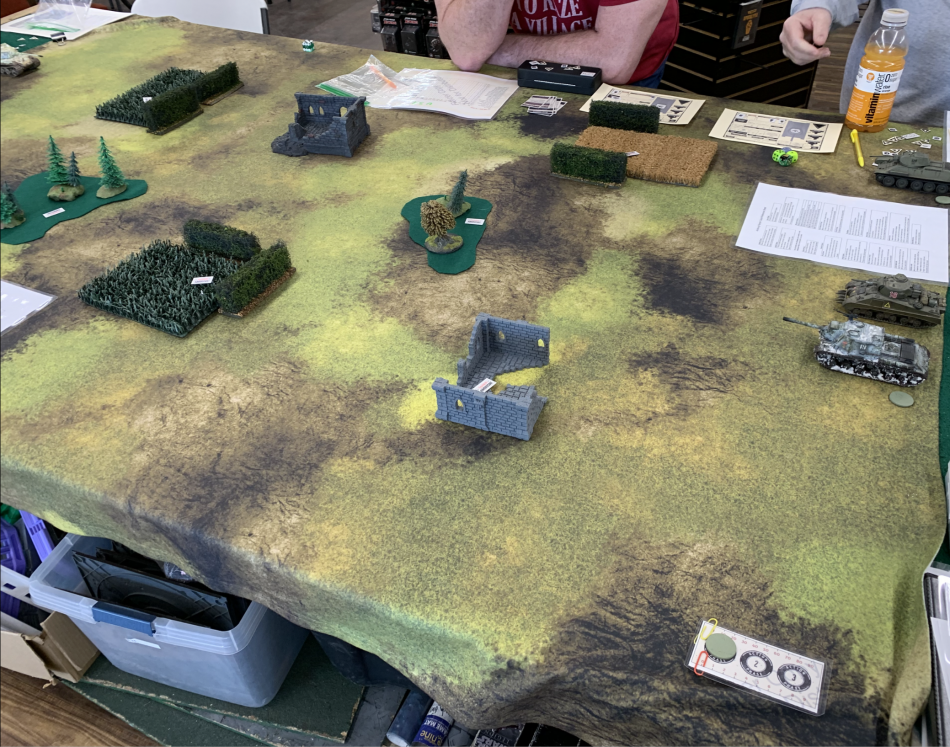
First up, what tanks did we field?
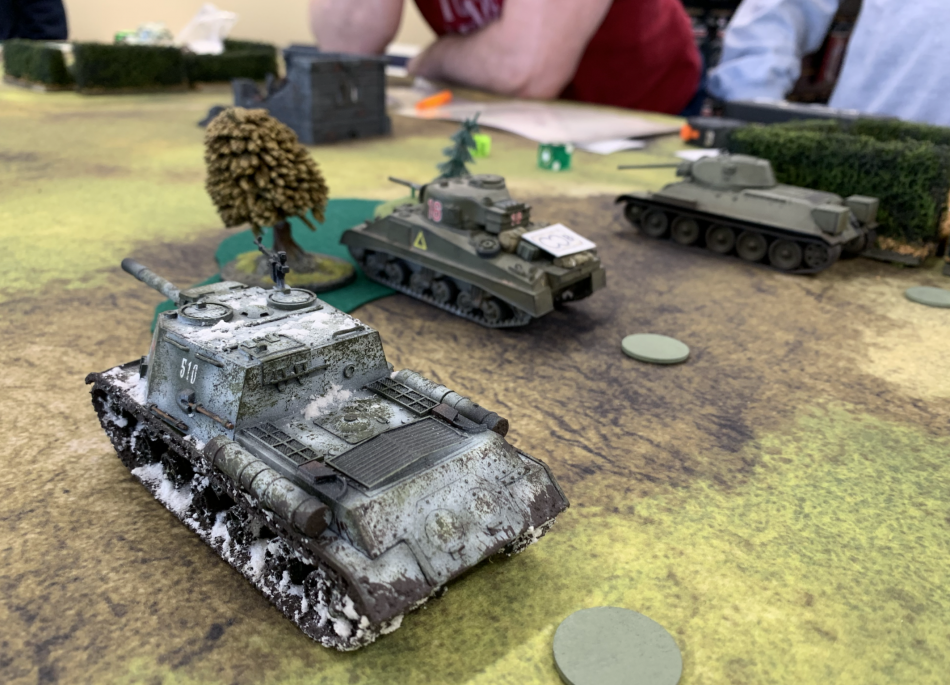
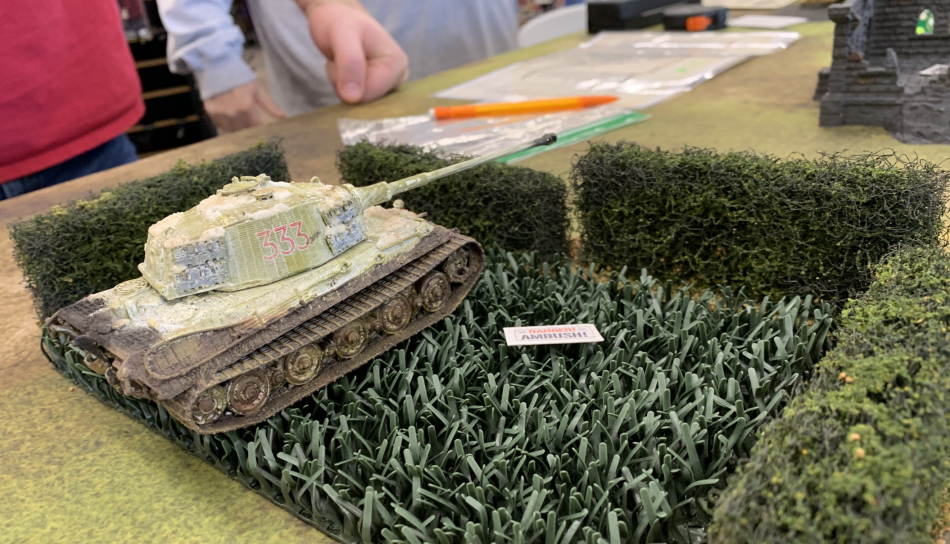
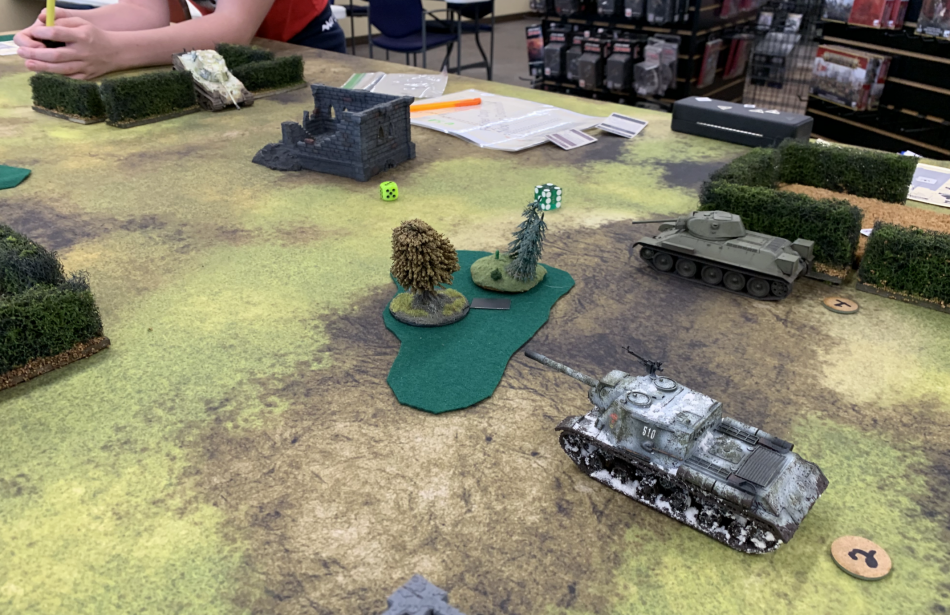
The Allies brought in a T-34/85 (front armor 10), a lone American with a Sherman (front armor 10), and some of Stalin’s best guns with an ISU-152 (front armor 12). The German force managed to field a STuG (front armor 9), and a King Tiger (front armor 20, side 9). They discovered how much of a point-sink good German steel is. The KT is priced at 34 to 44 points based on the quality of the crew. While the ISU-152 runs 17 to 23 points.
We played mission one as a basic tank battle. For a learning game, getting the maneuver, fire, and peculiarities of the various tank types was the idea. Once the players gain experience in those, playing more advanced scenarios, and running a campaign is desirable.
On its surface, Achtung Panzer seems simple, but there is a lot of depth to how the various tanks perform.
Turret(less)
Fortunately, when I put out the call for players with painted tanks to show up, some of our more skilled painters with a variety of vehicles answered the call. This included both real tanks, as well as assault guns like the STuG and the ISU-152.
When a tank begins or ends its movement order, it may rotate its turret to any facing. It may also rotate its turret with Aim at Target, and Fire Main Gun tactical orders. Of course, to Fire Main Gun, the target must have been spotted and be within the front arc of the main gun/turret.
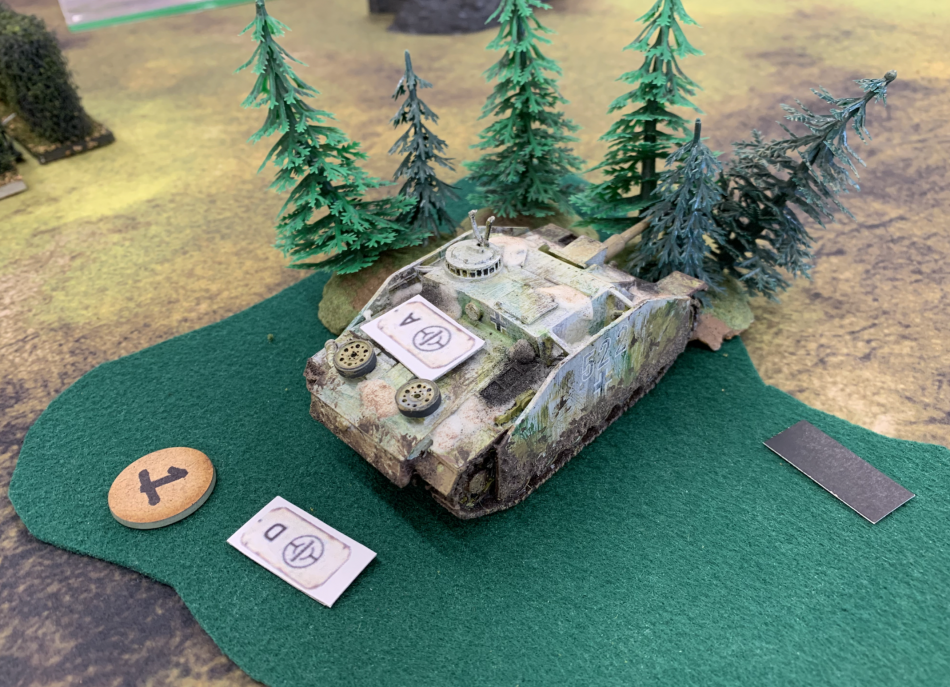
Turretless guns have to work a little harder to keep their main gun facing at the target, but the rules allow for it to happen. The Turretless special rule. Like the tanks with turrets, it may “rotate” by making an extra pivot during Aim, Fire, and Clear Ambush Terrain. You might recall from my previous story that a pivot is a tactical action move of the vehicle, where it may slightly change its facing. Normally a driver crew check is required to make a pivot. Turretless vehicles get to make them without the check at any of the instances listed above.
In addition, when receiving damage tokens after a hit that doesn’t brew up the tank, a turretless vehicle takes damage to its hull if it would have been a turret hit.
But wait! The game works on the idea that a tank can be knocked out by receiving two damage tokens to either its hull zone or to its turret. One hit to each, combined leaves it operational. Two damage markers on one zone (turret or hull) knocks the vehicle out.
But if the turretless vehicle takes two hits that aren’t to the running gear, does that destroy it outright? Not quite. A second hull damage token to a turretless vehicle gets a roll to stay in the game. A simple 50% roll is needed (low or high on 1d6). It takes but ignores the second hull damage token if it makes the roll. Even then, a third damage token knocks the tank out.
We also discovered that weapons with heavy-duty HE shells like the ISU 152 have a lower penetration value (5) for the HE than the AP round (12) but it doesn’t suffer the range penalty on penetration as does the AP round. (Edited) HQ has clarified that HE rounds use the normal Spot and Aim values for number of dice to roll when targeting enemy tanks with HE rounds, and use the HE value for penetration value.
Shooting and Brewing Up
No, I’m not speaking of the British need to have a cuppa with their afternoon barrage. But the shooting process isn’t as simple as Warlord’s other game, Bolt Action, would have us remember.
In Achtung Panzer!, the tank commander must SPOT the enemy. He then communicates the target to the Gunner and driver, who work to position the main gun in the right spot, as well as load the weapon. As I mentioned in my last piece, loading the main gun is usually a two-step process, each taking a tactical action. But, our players learned that it doesn’t hurt to try a Force Load tactical action on Medium guns. Even if they failed the Gunner’s test to slam a round in fast, the shell was in the loading box and could be moved to the ready-to-fire box next phase.
Our ISU-152 commander tried that as well with his Very Heavy gun. Because of the size of the gun, a failed attempt at Force Load leaves the ammo in the rack, and it still takes two additional action phases to reload. In addition, the ISU has the Cumbersome special rule. That means it can only fire if it has a HALT movement order on it. Note that pivots and scoots don’t count against the cumbersome rule.
Shooting once loaded is also a multi-step process. The command spots, the gunner/driver aims the weapon, and then they fire.
Each tank has a number of dice to roll when they fire the main gun. This is usually 1d6 if you’ve only spotted the target, or 2d6 if you’ve aimed the main gun. The number of dice is reduced by one if any movement order other than HALT has been given to the shooter that phase. If the number of dice drops below 1d6, the shot is resolved with a special snap fire rule. Roll 2d6, and BOTH dice have to equal or exceed the hit value.
The to-hit number is based on the type of gun. Most tanks need to roll a 5 or 6 to hit the enemy. So a T-34 76 rolls 2 dice, and needs 5s to hit at either long or short range.
However, if the tank doesn’t have a Halt order for this phase, it reduces the number of dice rolled by one. If it gets even one 5, it has hit.
Unless the shooter declares a high or low shot prior to rolling, there is a chance that the round could strike one of three zones: Running Gear, Hull, or Turret. Shots fired against the front arc of the tank have a 1-in-6 chance of hitting the running gear. But from a side arc, that evens out, with a 1-2 hitting the running gear, 3-4 hitting the hull, etc.
The King Tiger’s running gear has an armor value of 7, so it can be damaged by most guns out there. It was only when the KT came out of ambush terrain, that helped protect its lower portion, did the allies have any success in scoring damage on it. Terrain and maneuver seemed to matter a lot in the game.
Once a shot hits and the location is determined, the shooting player rolls a d6 and adds the weapon’s penetration value. Each sector of the tank has its own armor value. For example, a T-34/76 has an armor of 9 in front on both hull and turret, but 7 to the side of each. Its running gear armor value is 5. If the d6 + penetration roll equals the armor value, the target takes a damage token. If the roll exceeds the armor value by 1, 2, or 3, there is another roll to see if the tank brews up! Any shot that penetrates by 4 or more over the armor value causes the tank to brew up.
Brewing up vs. being knocked out from damage tokens matters in campaign rules. Knocked-out tanks can be recovered and crews can continue to advance in the campaign. A brewed-up tank is a flaming wreck. But in a basic scenario, both count the same for win or lose.

Our Battle
Fortunately, the players this weekend were experienced wargamers willing to be daring to see what the rules could do. They advanced toward the other force, using terrain to block the line of sight where possible. They learned that being in Ambus terrain could cancel shots that ended up against the running gear. That caused players to start declaring they wanted to target high. That eliminated shooting on the move in such cases since they had to have the halt order to declare high or low shots.
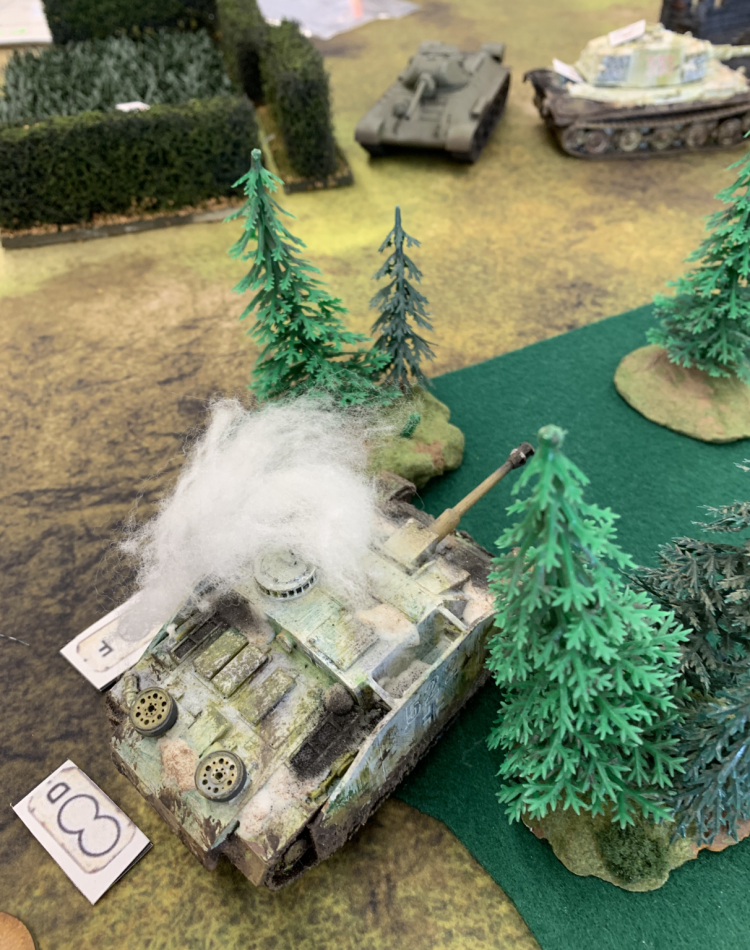
Since we had a King Tiger on the table, Allied players tried to stay out of its line of fire. The German STuG received most of the incoming shots while the Allies figured out how to maneuver to get a flank shot on the KT.
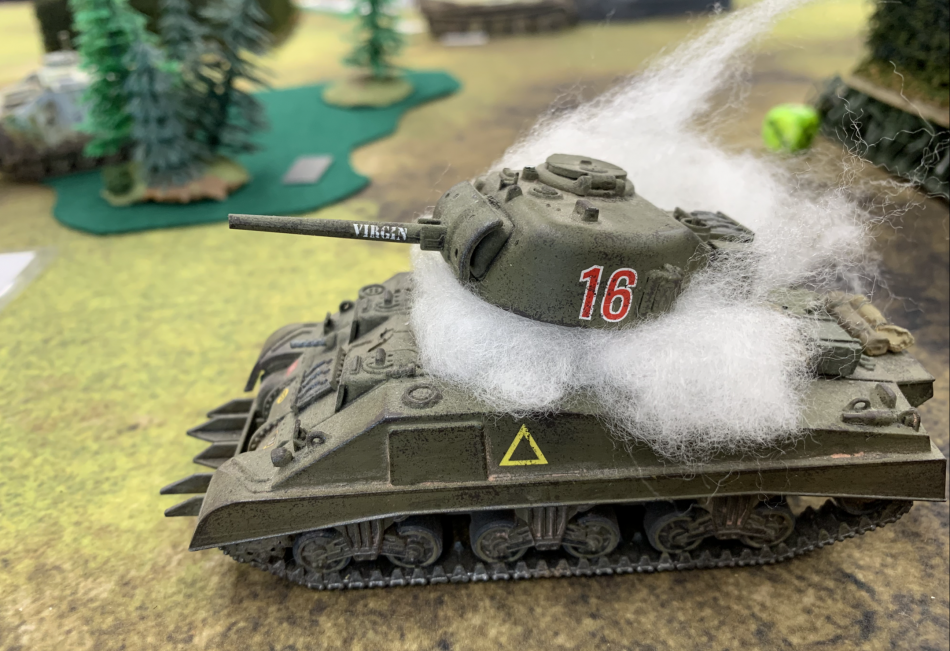
Damage was done, with the Sherman brewing up first. Then the King Tiger, and finally the STuG.
Our players were Bolt Action Veterans and declared the initial game a fun effort. Books and/or starter sets have been ordered by several of the players.
I predict that our friendly local game store will start seeing some tank action on the weekends once the game hits the store shelves.