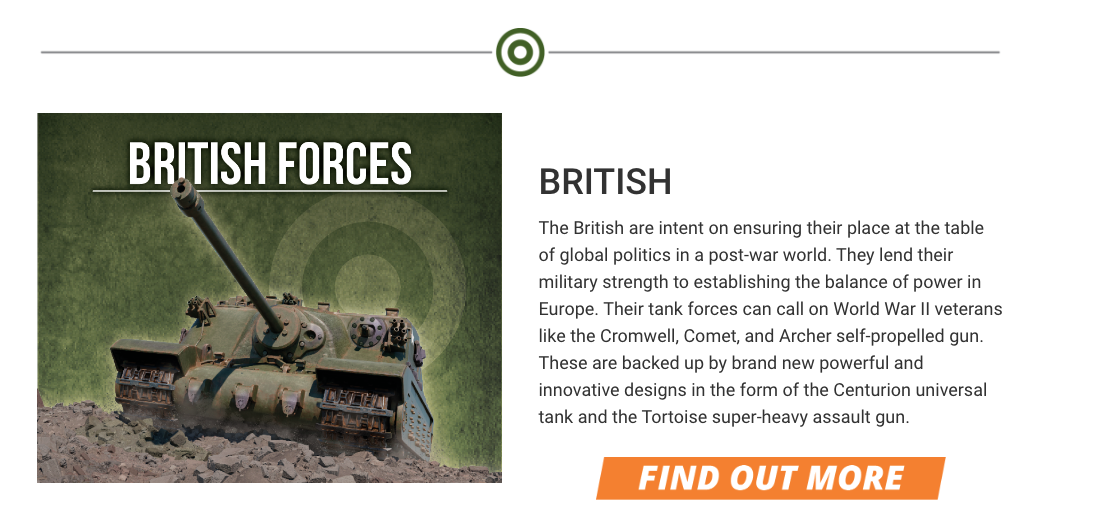
Clash of Steel: BIG TANKS slamming into other EVEN BIGGER TANKS

By Philip Gurtler and Mike Rafferty
It’s 1948. Another War to End All Wars is over… or is it? Soviet aggression is on the rise.
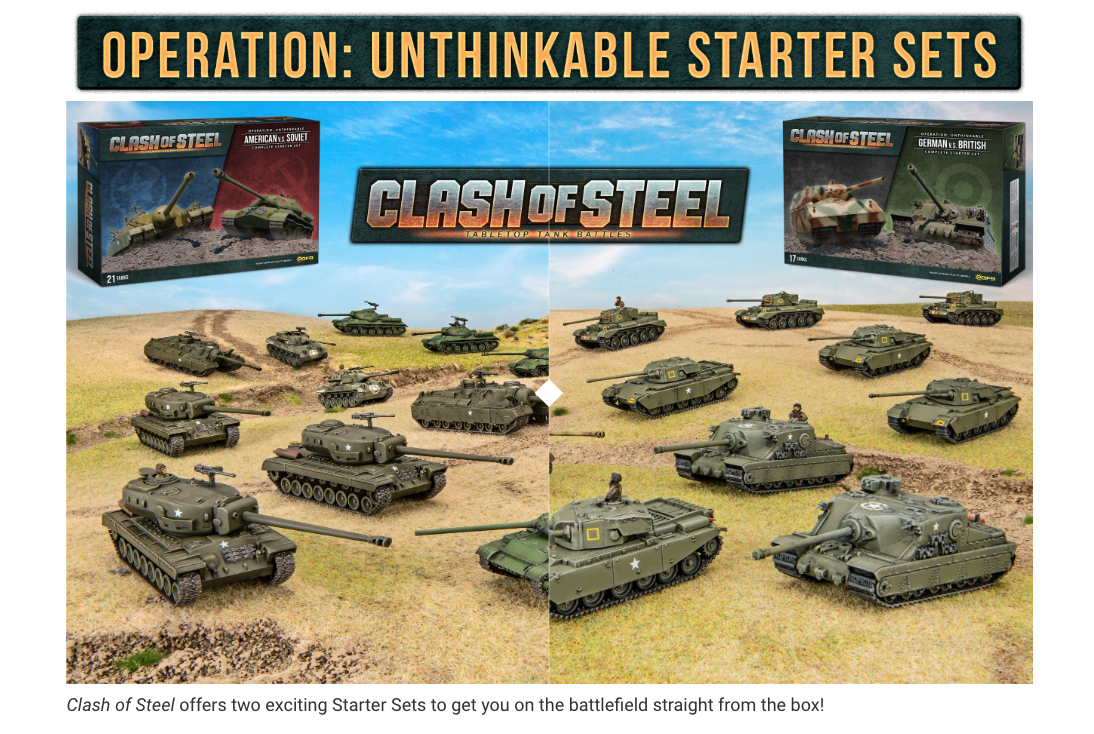
Clash of Steel! Gale Force Nine’s newest game is about using the models from World of Tanks and Flames of War to enact the great tank battles in the fields of eastern Europe should Operation: Unthinkable (The Invasion of Soviet Union post WWII) have come to pass!
Watch the promo video fro GF9 here.
Players engage in armored duels using designs that vary from seeing mass production during WW2 like the T44 and Pershing, to designs with functioning prototypes like the American heavy tanks, Tortoise and ISU130, to the Centurion 3 and T54 being late to the party but seeing service in 1948.
(The Panther 8.8cm is a notable exception, being the only vehicle in the initial release without anything more than some cocktail napkin drawings. However, there were plans to begin mass production by the end of ’45… seems a little like putting the cart before the horse, but when did that ever stop German engineers!)
 Ignoring the “frothier” of the comments about this game on social media, it is a simplified Flames of War spin-off style of game that is all about one thing: BIG TANKS slamming into other EVEN BIGGER TANKS. It also benefits from using models already in production by GF9 for Flames of War and World of Tanks.
While there is very much an argument to be made against the “dumbing down” of a combined arms game like Flames of War into a simplified demolition derby, Clash of Steel has some tricks up its sleeves to keep it interesting.
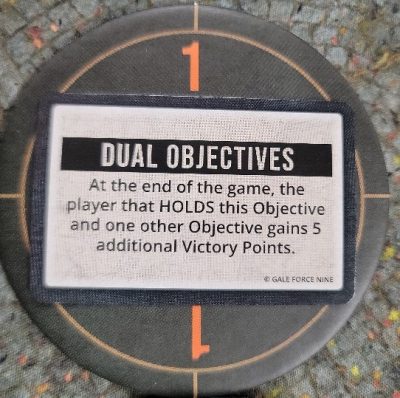
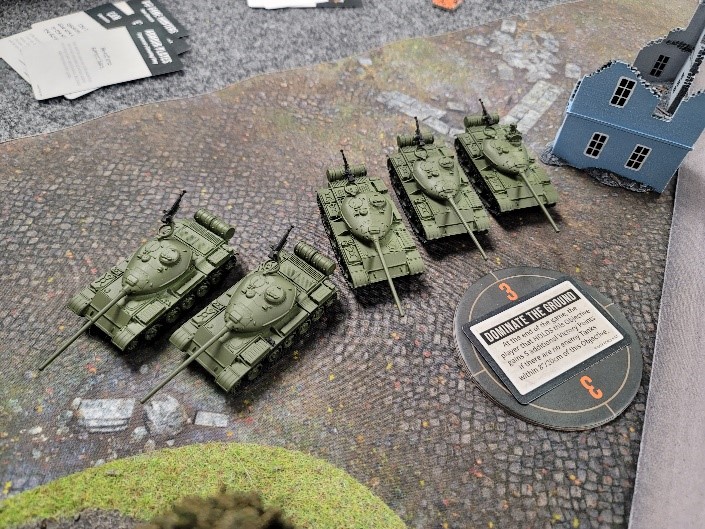
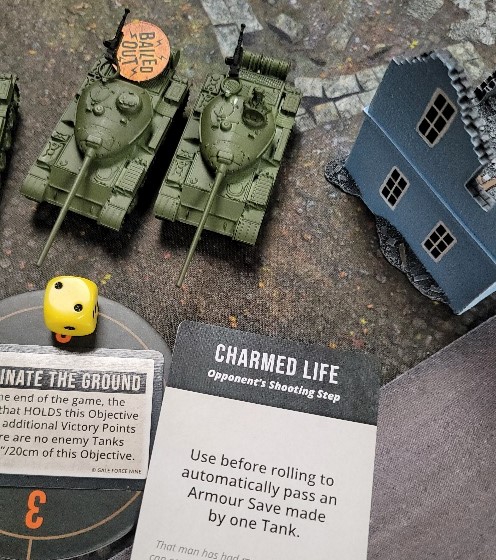
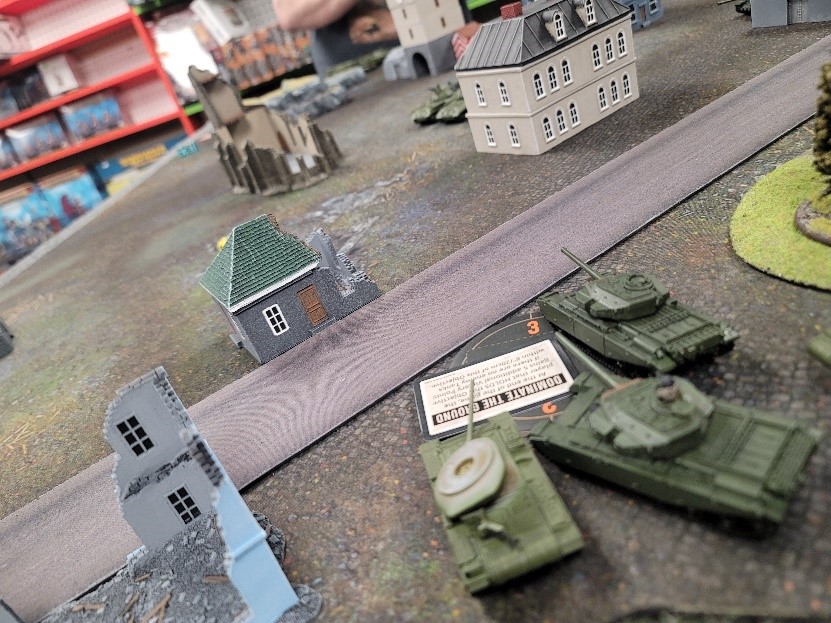
First, there is the mission generation. There is a set six different missions, which vary up the deployment and objective placement. Then, you draw a modifier card which can add things like immediate reserves and vary game length. This provides some mission variety. Then each objective gets an objective card, which can vary up how many points they generate or provide other positives or negatives.
One card gave the player holding it at the end of the game five extra points. Another created a swamp around the objective, forcing cross checks. Objectives also generate a lot of points. Being within four inches of an objective gives one point, however each additional turn your unit is there it generates three points.
The game box provides a nice point counter. Killing a unit generates three points, but the primary point generation remains the objectives. This does encourage a player to bring the big, tough tanks to hold objectives, but that is what we want to see, anyways. The player with the most points at the end of the game wins. Now we had to try the game out.
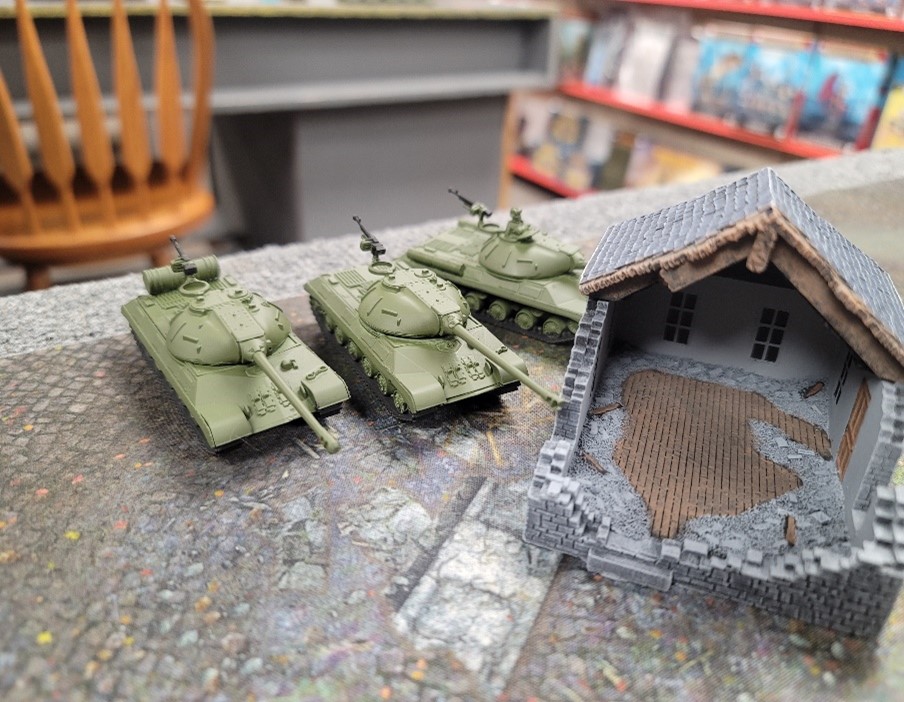
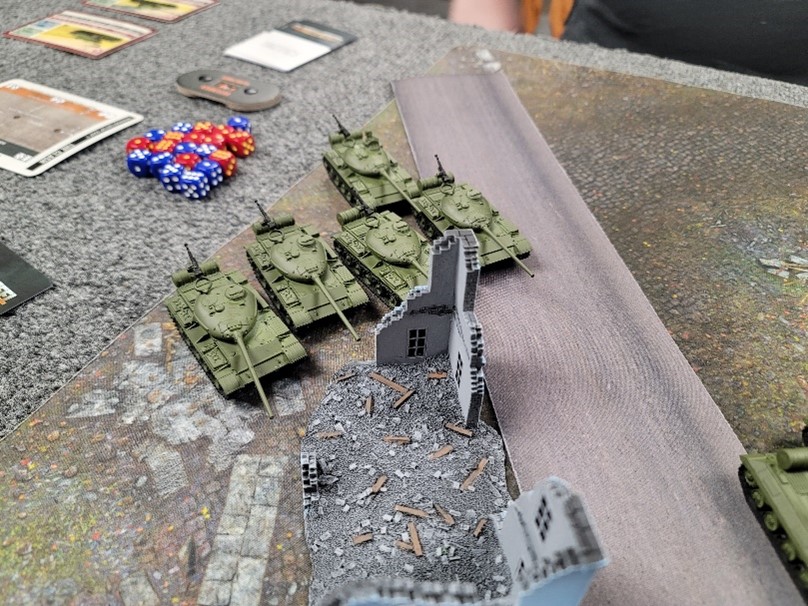
To that end, some of the Nerds of War crew got together and played a few rounds last weekend at the Toledo Game Room. For our first game, Mike was playing a list comprising of all the models in the Russian starter set and totaled 45pts. Meanwhile, I rejoiced that a portion of my pre-existing, and frankly obscenely large, pile of Centurions got to see play outside of Fate of a Nation.
For Mike, his list consisted of an HQ and a platoon of T54-1’s: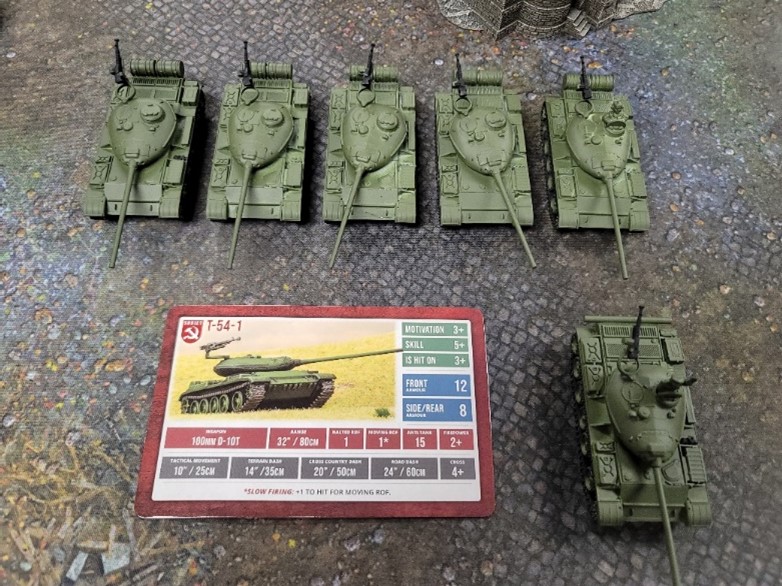
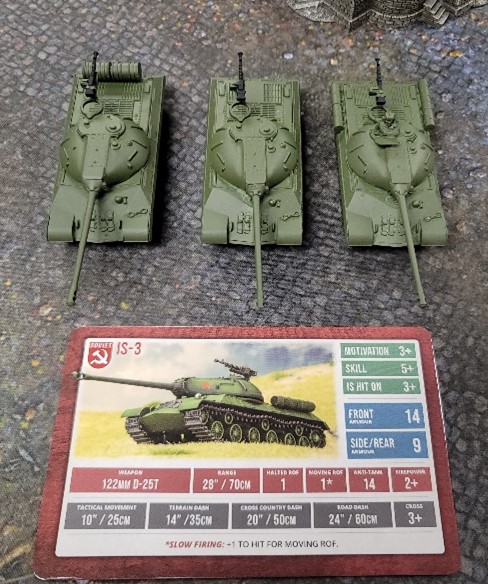
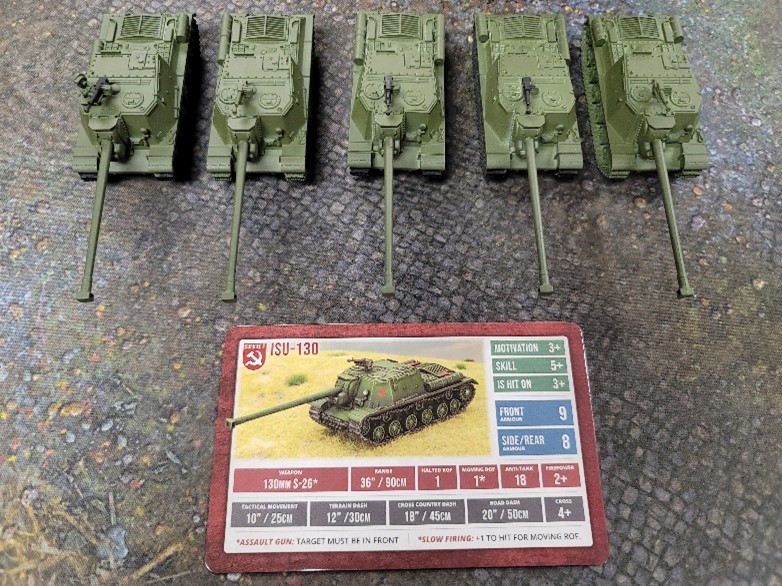
In support of his T54’s, Mike also had a trio of IS-3’s to slug it out with their front armor 14 and a battery of ISU130’s for heavy fire support with anti-tank 18.
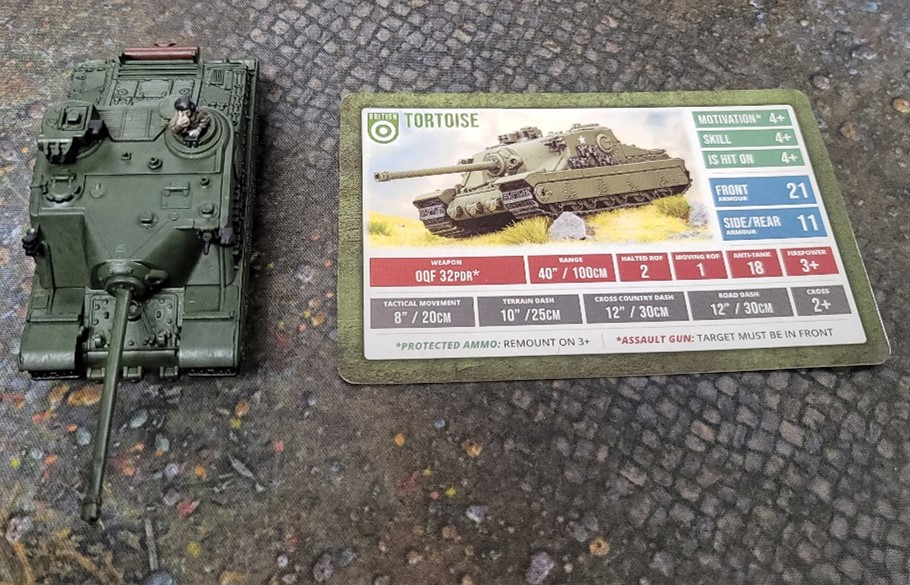
To counter this soviet threat, I deployed with a single Tortoise as my HQ to act as my anchor unit. Its FA21 making it impervious to every cannon in the game currently. I also deployed a unit of 3 Comets with the speed necessary for those sweet, sweet flanking shots.

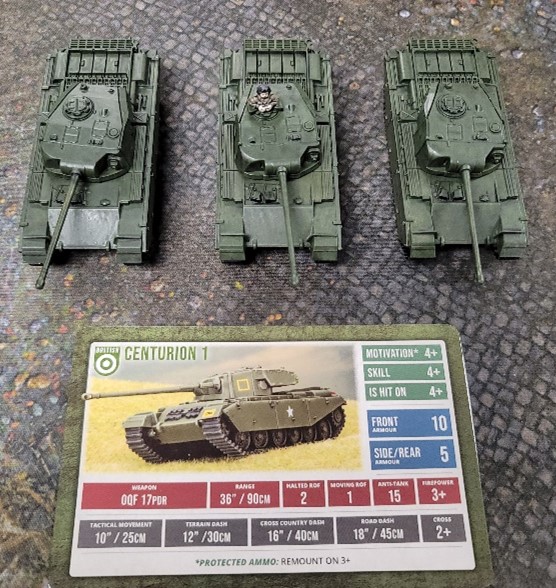
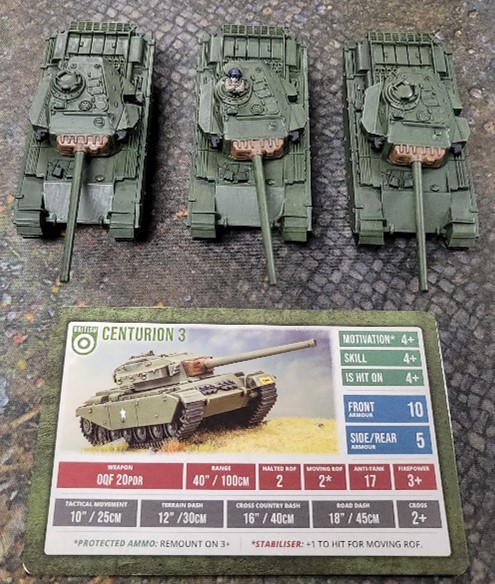
Finally, the meat of my list consisted of a platoon each of Centurion 1’s and 3’s.
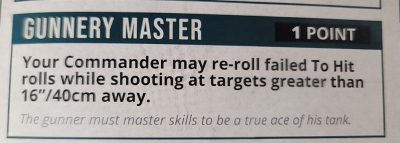
However, this was where the first departure from standard FoW occurred as my list was only 44pts. To remedy this, I opted to give my formation commander an upgrade from the list available. These upgrades function similarly to the Hero Command Cards from FoW but can be stacked, and only apply to the formation HQ. With only a single point to spare, and the understanding that my Tortoise HQ was going to be my anchor, I gave him the ability to reroll misses outside of 16in.
Our forces thusly assemble, it was time to do great battle! But first… what were we supposed to be doing?
The two starter boxes contain everything need to get in and start playing (sans measuring tool). Inside the box are some additional card decks that modify how the game is set up, runs, and even ends. To start, you draw 1one mission set up card and one mission rules card. This combination is what decided what our game actually was:
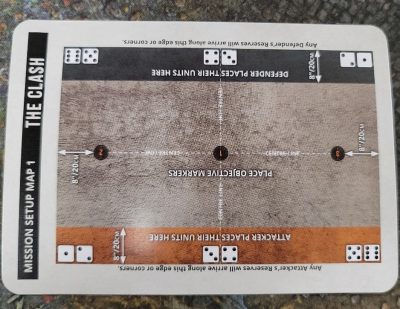
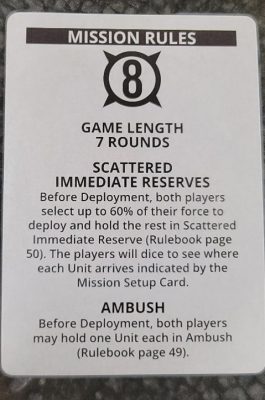
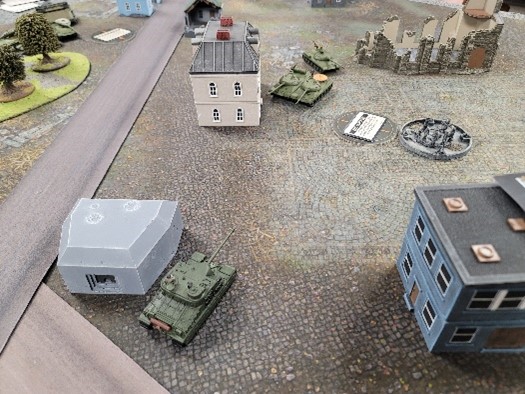
It was a simple game board and a simple mission for the first of our jousts. Both sides had to deal with reserves and an opposing ambush unit. Additionally, each objective had a modifier card drawn and placed on the marker face down.
After an analysis of the board and the opposing force, the soviets placed their T54s in reserve and ISU’s in ambush while I withheld my Centurion 3s and deployed the Comets as a counter ambush to the ISUs.
Deployment was also a simple, alternating affair, but was limited by the small size of our armies.
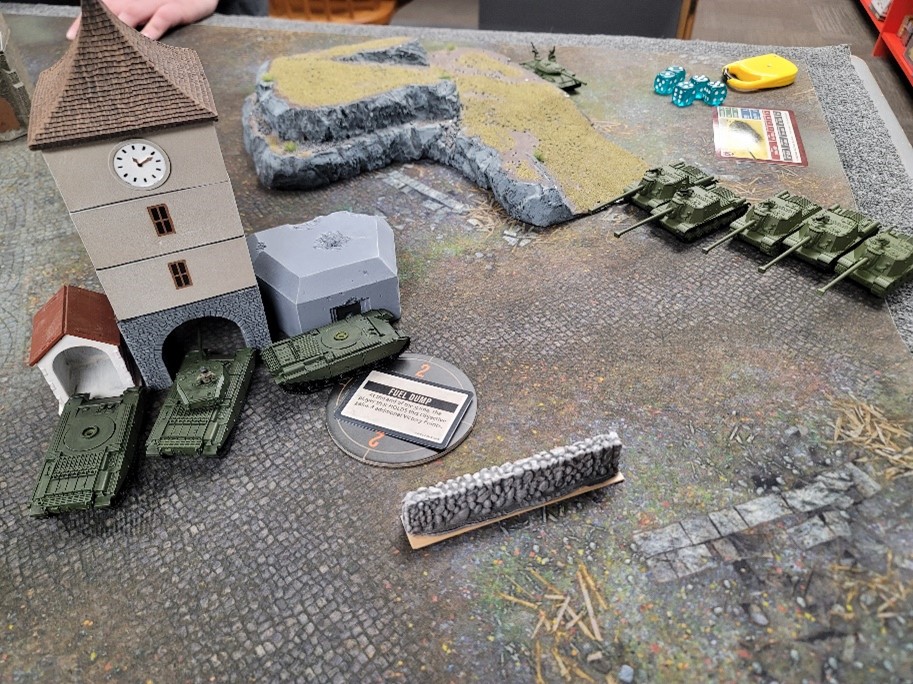
First deployment, the command T54 was placed behind a large hill.
Confident in the invulnerability of the Tortoise, I deployed it directly in the center.
Soviets then deployed their IS3s in cover across from my Tortoise.
And finally, I deployed my Centurion 1’s on the right flank hoping that the buildings would provide ample cover as they approached objective 2.
The stage finally set; the dice began to roll! And after a brief roll off to see who got to go first, the British amour rolled forward
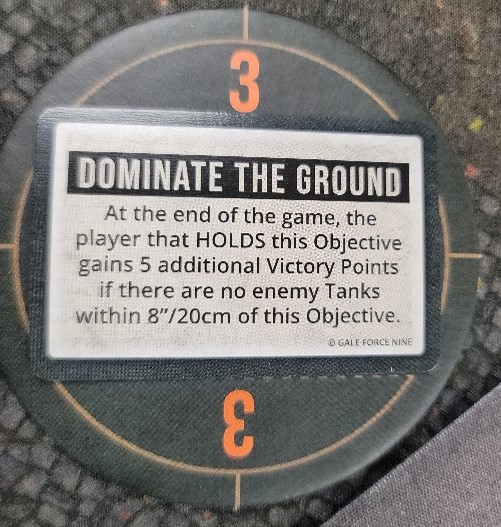
At the start of each round, the objective modifier for the corresponding objective is revealed to both players; obj 1 on round 1 and so on. Objective 1 offered an extra five Victory Points but had no immediate impact on turn 1.
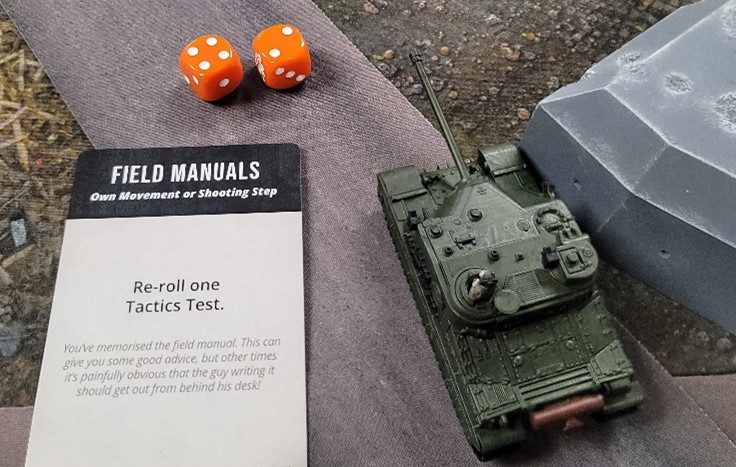
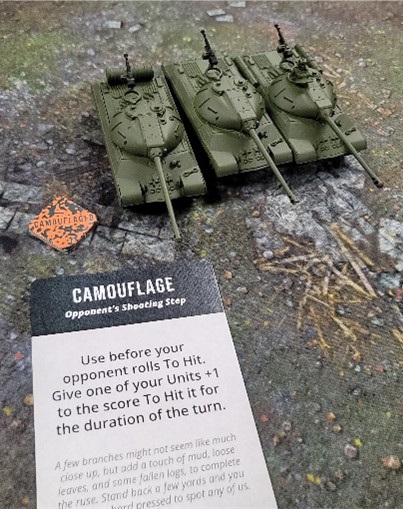
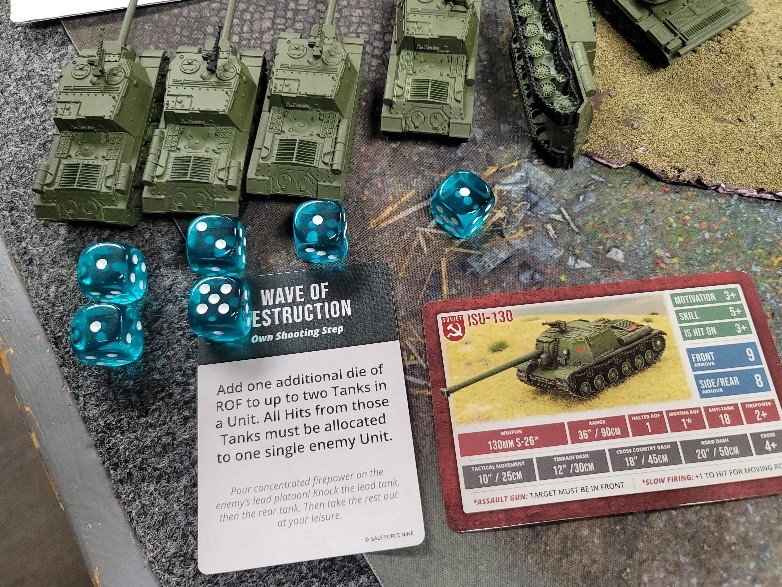
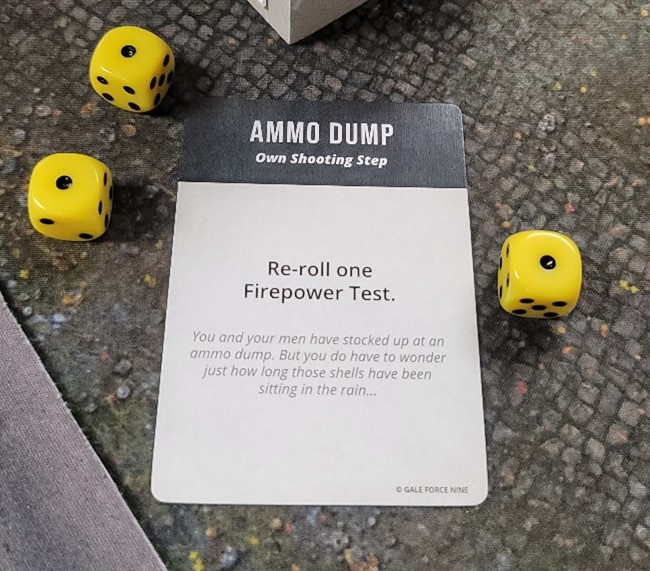
Additionally, at the start of each turn, that player gets to draw a single tactics card and discard any number before drawing that same number. These tactics cards are my favorite part and will be relevant later.
A failed reserve roll later, and with nothing on the board able to be threatened by revealing my ambushing comets (AT14 vs IS3’s FA14), my Centurion 1’s diligently moved onto objective 2 as the Tortoise attempted a blitz move to preserve its RoF. Failing the first of MANY rolls that day.
With objective 2 secured and a missed wild shot against the IS3’s (even with a reroll), we moved onto the scoring and the biggest change from FoW. Counting of Victory Points! Scoring is done at the end of EACH TURN, not just the end of the round. It is relatively simple in CoS: 3vp for killing a unit (including for morale breaks), 3vp if you started the turn in control of an objective, and 1vp for driving onto an objective with a tactical move (but not with a dash mover) plus any points for the modified objectives.
With no kills but my Centurions having moved onto the objective, it meant 1 point for me at the end of my turn 1.
The start of the soviet turn saw the T54 swarm hit the opposite corner of the board!
Fortunately, even the might 100mm was powerless against the might of the tortoise as the swarm moved forward to support the IS3’s slow march to the center objective.
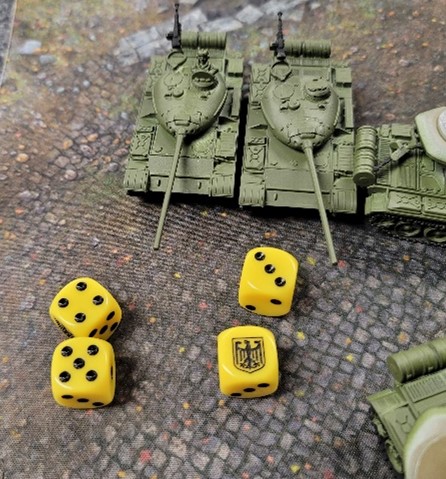
Sensing weakness, the ISU’s were awakened from their slumber! Even with having to maneuver around cover to draw the line of sight and incurring the penalties of wielding such a large artillery piece in such a small vehicle, 2 of my 3 Centurions were slain! With no hope for an armor save and a 2+ Firepower, they didn’t stand a chance!
Shooting complete, we moved into the morale phase, which occurs at the end of each turn. During the morale phase, the non-active player (the one who just suffered casualties) must roll morale. Fortunately, my brave British Bulldogs chose to stick around! Scoring at the end of soviet turn 1 was: Good Guys: 4, bad guys: 0.
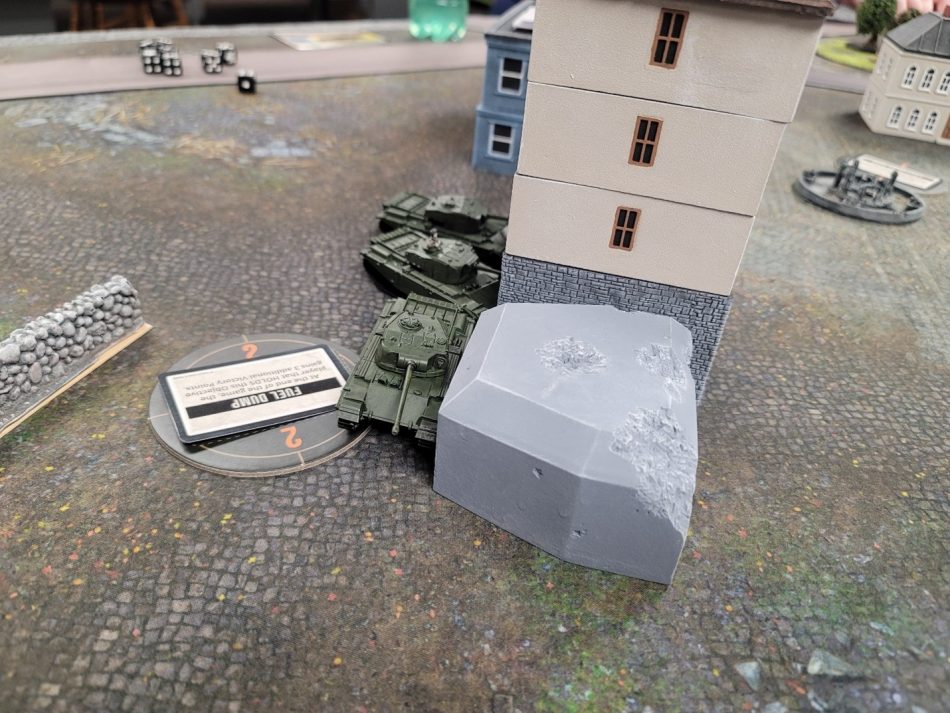
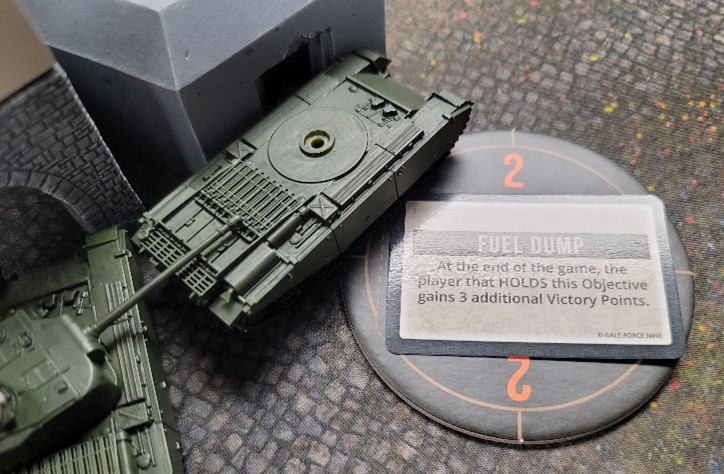
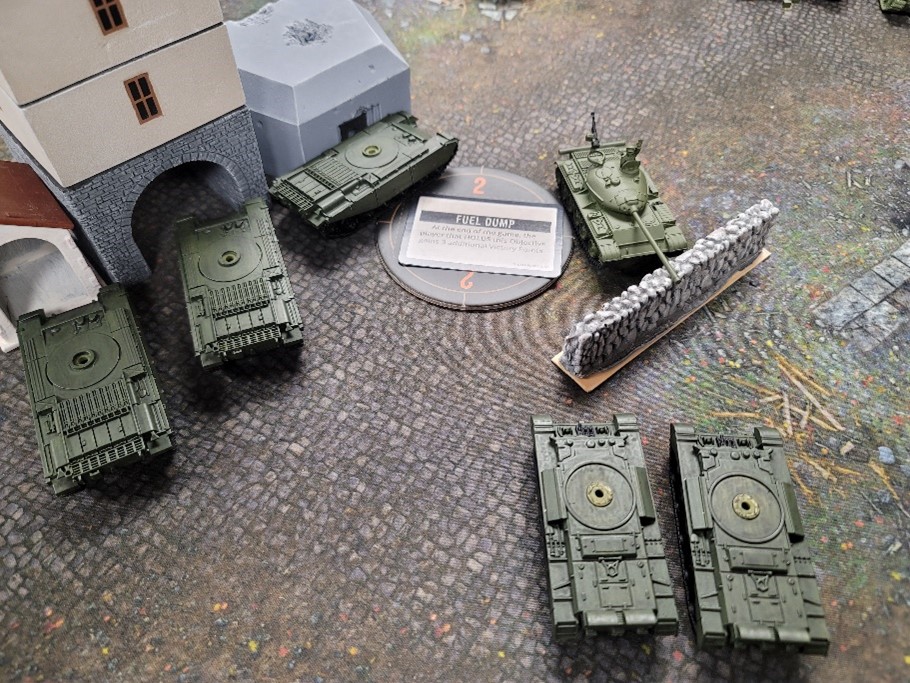
Another turn, another objective modifier. Objective 2 turned out to be a fuel dump and was worth extra VP at the end of the game.
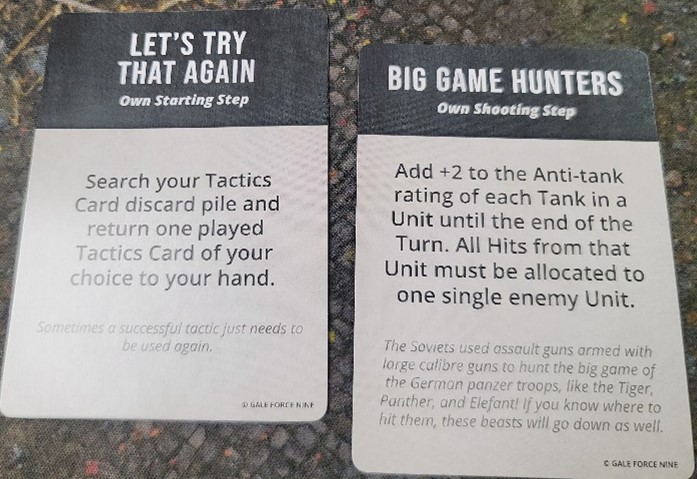
After drawing my tactics card for the turn, I discarded my entire hand to redraw 4 new cards.
Starting to wonder if I would even make it to the end of the game, I decided to pop my ambush to counter the ISU’s.
After a failed reinforcement roll but the first successful Blitz move for my commander (with only a little help), I deployed my comets across the open courtyard from the ISU’s. Confident in their ability to destroy the hit on 3’s, FA9 vehicles with their RoF 2, AT14 77mm cannons…
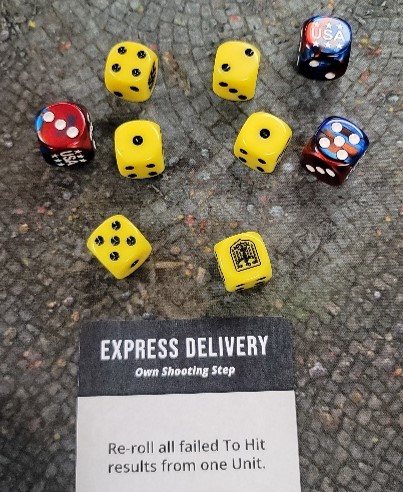
To support my ambushing Comets, my surviving Centurion returned fire with all the fury it could muster! For no hits… that’s ok! I have a tactics card for that! 1 hit that succeeded in bailing 1 of the 5 ISU’s…
Disappointing, but no matter! The Comets where there to clean up and landed 4/6 of my shots! Unfortunately, Mike also had some tricks ready…
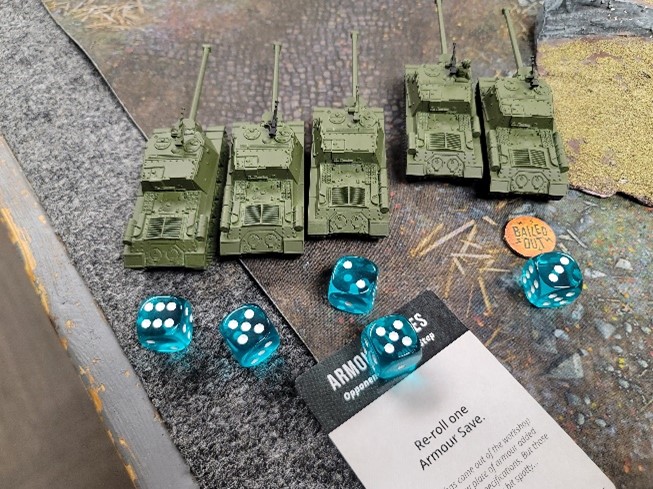
He managed to save three of his four ISU’s (after a reroll) while the previously bailed vehicle finally caved to the repeated hits.
My disappointment was immeasurable as I moved to the center of the board where I was confident my luck was about to change!
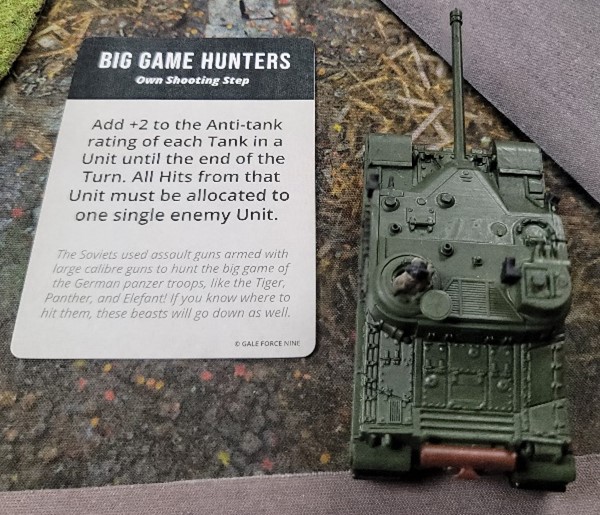
After the successful blitz, my Tortoise readied its main gun to fire upon the IS3’s! So confident was I that I would hit with my rerolls, I activated a second tactics card to add +2 to the AT rating of my 32pr, going from 18 to 20 against the FA14 (15 with range) of the IS’s…
Sensing danger, Mike activated his own tactics card to counter my move and forcing me to waste 2 tactics cards only for both shots to miss the 5’s to hit, even with rerolls!
Having suffered only a single casualty, Mike was able to avoid the morale checks and we went to counting vp. Good Guys: 7, bad guys: 0, wad effectively blown.
Bottom half of round 2 and Mike draws his tactics card. He makes the sound decision of moving his HQ forward while rotating his ISU’s to return fire unto my surviving Centurion and the Comets while he continued to maneuver his IS3’s forward and his T54’s onto the third objective while trying to flank my tortoise, the only thing standing in the way of a total rout.
Understanding the weakness of the ISU RoF, Mike activated his first offensive tactics card to double the RoF of 2 of his IS’s.
Despite the extra shots from the tactics card and the extra shot from the HQ; only 1 of the Comets was bailed along with the Centurion. However, the Centurion Commanders nerves finally gave, and he fled. 3vp for the soviets.
In addition to the 3vp for the unit kill, soviets scored 2vp for controlling objective 1 and 3. 7:5 good guys.
The top of turn 3 and the final objective card is overturned. Not terribly helpful to me in the current situation…
But what was helpful was returning the +2AT tactics card from the discard pile back into my hand, the remounting of my Comet at the end of Mike’s turn and the arrival of Centurion 3’s to counter the enemy’s T54’s!
With their powerful 20pr’s and stabilizers giving them RoF 2 on the move (with a +1 to hit) they should easily turn the tide!
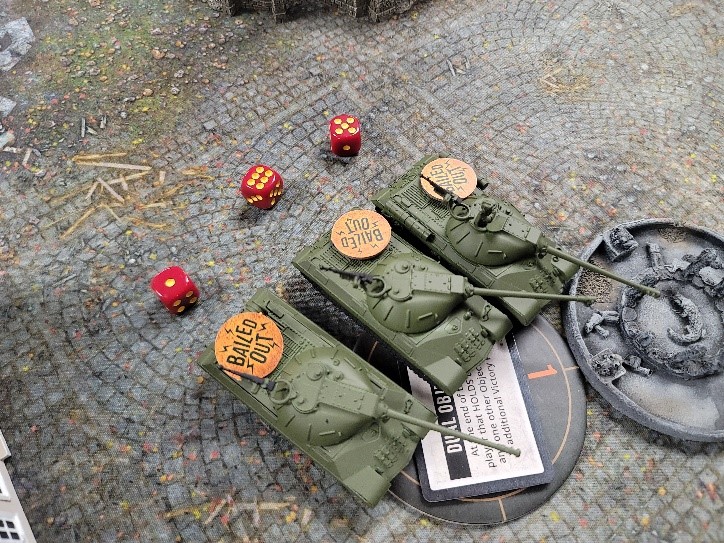
A mighty fine showing after some rerolls! 5/6 hits means that every one of the T54’s was hit! Three of them were hit on the side, which means no saves from armor
Or so I thought… final results of my shooting left one T54 untouched and one bailed.
My tortoise continued to battle the IS3’s and even with the +2 to AT, they only managed to hit and bail one of them as they had closed within 16in to deny my commander his long range rerolls.
On the right flank, my Comets attempted to trade shots with the ISU’s one final time. Sacrificing the potential protection offered by movement for maximum firepower! Their shots leaving 1 more ISU as a wreck, 2 vehicles bailed and 1 left undamaged. This was my chance. A couple of failed morale checks and the game would be in the bag. Or so I hoped before almost every vehicle remounted with a 3+. No points for me this round and 6vp for Mike, 7:11 soviets.
Mike began his turn, drew his tactic card and pushed his formation commander onto objective 2 while his ISU’s volleyed back at the Comets. His two surviving T54’s moved off the objective to fight the Centurion 3’s while the IS3’s and the Tortoise continued to glare menacingly at each other.
The ISU’s and T54’s were able to claim 1 Comet and 1 Centurion respectively while scoring 6vp for the objectives. 7:17 bad guys.
Back to me with dim prospects… Mikes commander was on the objective and my AT14 Comet wasn’t going to beat FA12 on the front of his T54… maybe a blitz to get a 16in tactical move to get on the side??? Failed. Ok, new plan, contest the object with the Comets while trying to destroy as many of the ISU’s as possible… Missed both shots but prevented Mike from scoring on that objective. Small victories.
Blitz the Centurions for Tactical 14in to capture the objective? Failed. Ok, shoot off the T54’s and move onto the objective next turn. Mission accomplished.
Tortoise! Keep doing Tortoise things to keep the IS’s busy. 3vp for both Mike and I. 10:20 soviets.
It’s the bottom of round 4 and the game has more or less been decided. Mike destroys the last of my Comets as my flank deteriorates under the ISU’s constant fire as it is joined in by the IS3’s… 3vp for the kill, plus 6 more for the objectives. 10:29 soviets.
But in doing so, mike makes a critical error! He has exposed the flanks of his IS3’s to my Centurions moving up the flank.
It’s the last desperate gasp for my Brits as I draw what is likely my final tactics card and move my Centurions into position behind 2 of the IS3’s…
Finally, all is ready. My Tortoise takes its shot and manages to bail the IS3 that can’t be seen by the Centurions.
WE CAN DO THIS!
Four shots from the Centurions and two hits with no chance for an armour save! This is it!!! Onto the firepower test! I just need to roll two 3s!
Welp. That’s how she goes sometimes…
At this point, we go to the morale phase to see if the three bailed IS3’s can remount and stay on the board: With two active IS3s, I concede to Mike after a battle honorably fought.
Final thoughts:
Clash of Steel is a very fun and engaging game despite the loss of the combined arms aspect from Flames of War. The tactics cards and objective modifiers really do changeup the way that the game plays at every phase (even if all 3 of objective modifier cards we drew only mattered at the end of the game).
I also enjoyed that we finished two full games in under three hours with this being my third time playing and Mike’s first.
My only real critiques of the game would be:
- More points = more fun! The first game at 45pts was fun but limited our ability to maneuver. The second game we played at 100pts was even more fun.
- Lots of terrain! Lots of Line of Sight blocking terrain prevents the game from becoming just trading volleys like it’s the early 1800’s. We added more terrain in the second game, and it encouraged more movement and better positioning. Adding hedgerows and tree lines would help a lot as well.
- Take two tactics decks and combine them while cutting out a lot of the “filler cards”. There are too many cards that reshuffle the objective modifiers and those are inherently less impactful in the moment-to-moment gameplay. They also get discarded anyways (I threw away four cards in one turn to redraw). Once you make the new deck, I would also limit the discard ability to one card a turn.
- Soviets could do with a super heavy anchor unit like the Tortoise/T28/Maus. The IS3 is good and FA14 will protect you from most enemies, but being able to lock down an area and force your opponent to react is very helpful. That being said, an army of IS3’s would be terrifying to face hoping that you can cause enough damage before they engulf you. Just like in Flames, if you are trying to stay stationery and trade shots while using soviet armor, you are probably going to have a bad time.
At the end of the day, this is a fun game using models that are already in production and that many players already have. It’s a simpler game overall than Flames of War but is more dynamic in the moment-to-moment gameplay. It would make for a good demo game for players looking at getting into Flames of War. The tactics deck adds some nice interaction during the turns and gives some variety.
It caters to the large parts of the community that wanted a game that lets them play with swarms of Tigers, Panthers, IS2’s and Centurions while adding vehicles like the Maus and T28. It’s not for everyone and that’s fine, but I highly recommend it to new and veteran players alike.