Conquest: Flying Dinos!
by Troy Hill
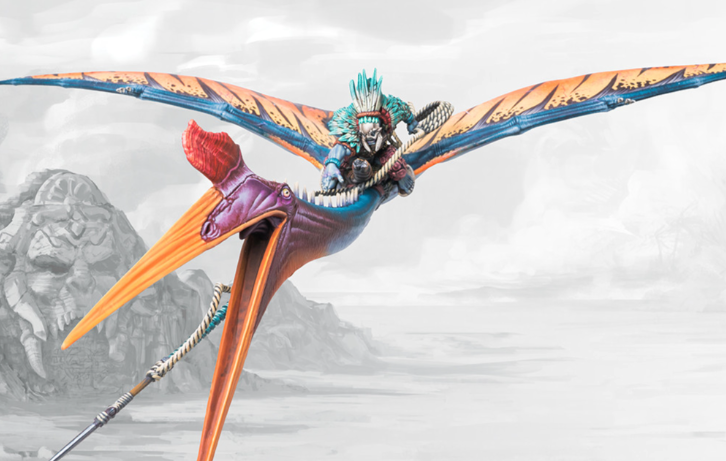
I’ve been diving into Conquest: The Last Argument of Kings lately, trying to split my time working on two different armies. The designers at Para Bellum Games came up with what was missing from the W’adhrun. A flying dinosaur.
I recently split a two-player starter box with another player who wanted the Yoroni half of the set, so I got my very own Quatl! I’ll cover how I assembled it, and some of the decisions I had to make along the way.
First up, there are three sprues to the beast. I figured with those huge wings, this would be an easy build. Knock it out in half-an-hour… Well, it was double that plus some.
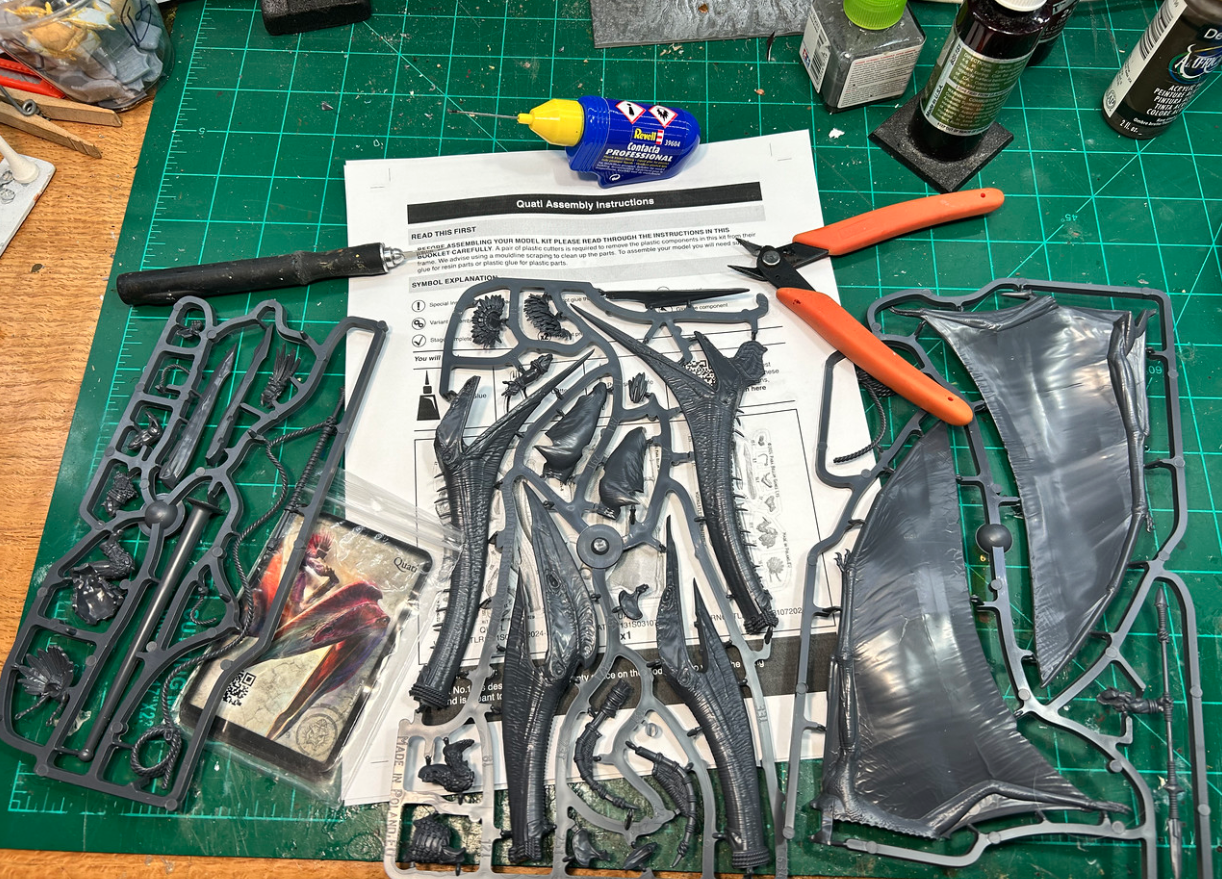
First, snip out the wings, and clean up the nubbins. The instructions say to glue these together. I recommend NOT doing that yet. Where to glue them wasn’t exactly clear, but was more understandable once I had the torso and the head & neck assembled. They made a lot more sense which went where at what angle once I could test fit the sections.
I accidently skipped building the body next, and moved onto the head. Should have checked each step off, but I thought this would be an easy build.
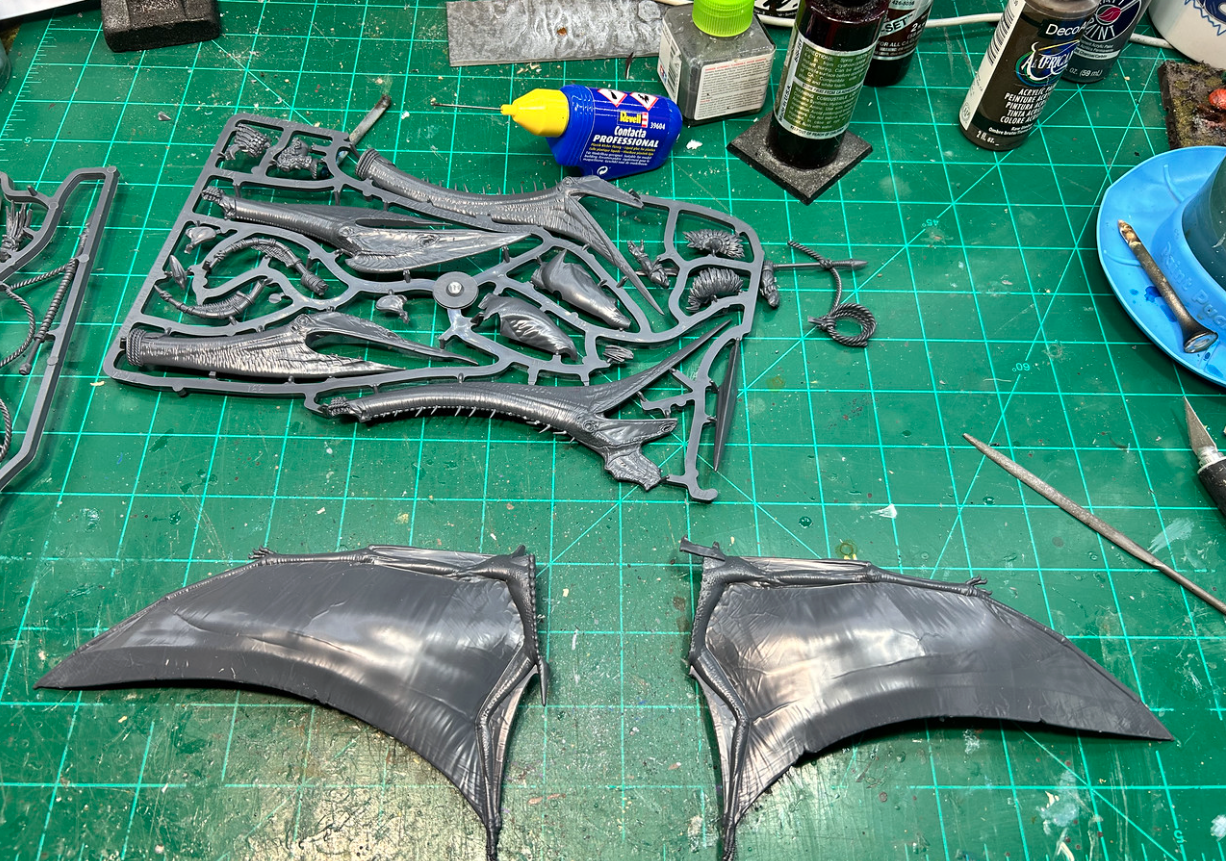
Note how the spine’s spikey bits are a bit damaged on the lower head piece. That’s about what I expect from the multiple units in one giant box packing that most companies are producing today. That was fine, because there are two head options on the sprue, and I prefer the non-stabby non-spikey one.
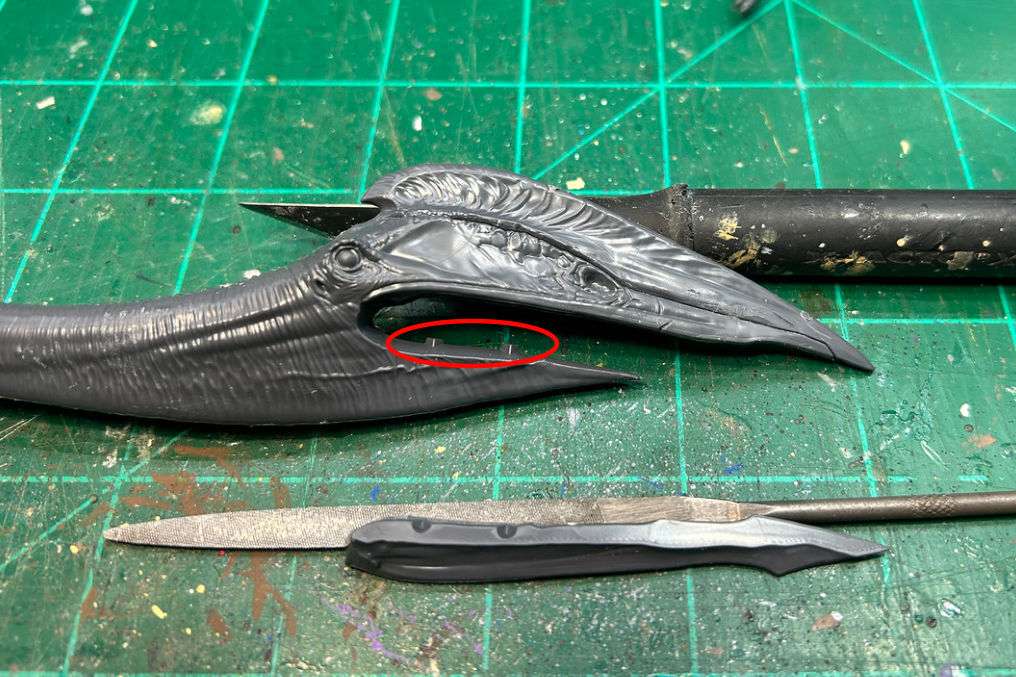
When assembling, do not trim the parts circled in red here:
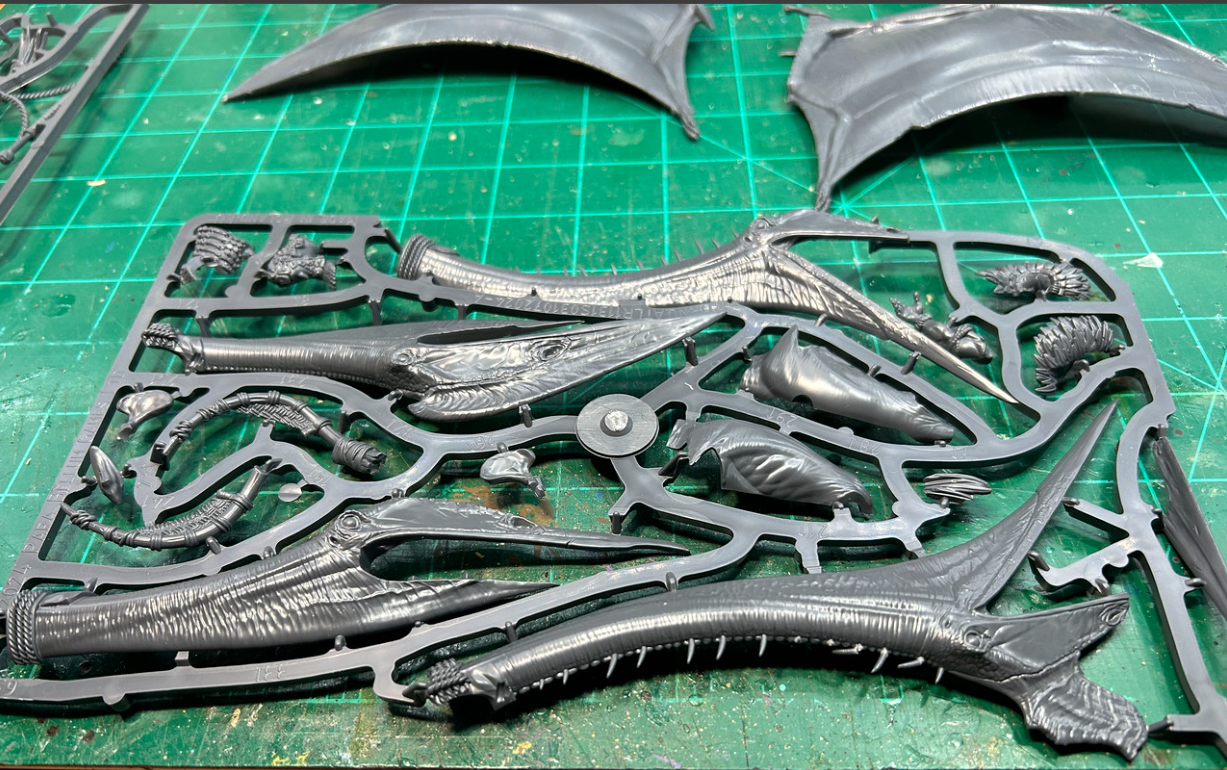
And now onto the body construction. Two torso pieces fit together nicely. You can see all four of the main sections below, ready to assemble the flying dino.

The body and wings went together well. I made sure to use my needle-tipped plastic glue applicator through most of the assembly. Occasionally, I had to break out the sprue-goo. I’m not very good with sprue goo. I may need to mix up a fresh batch.
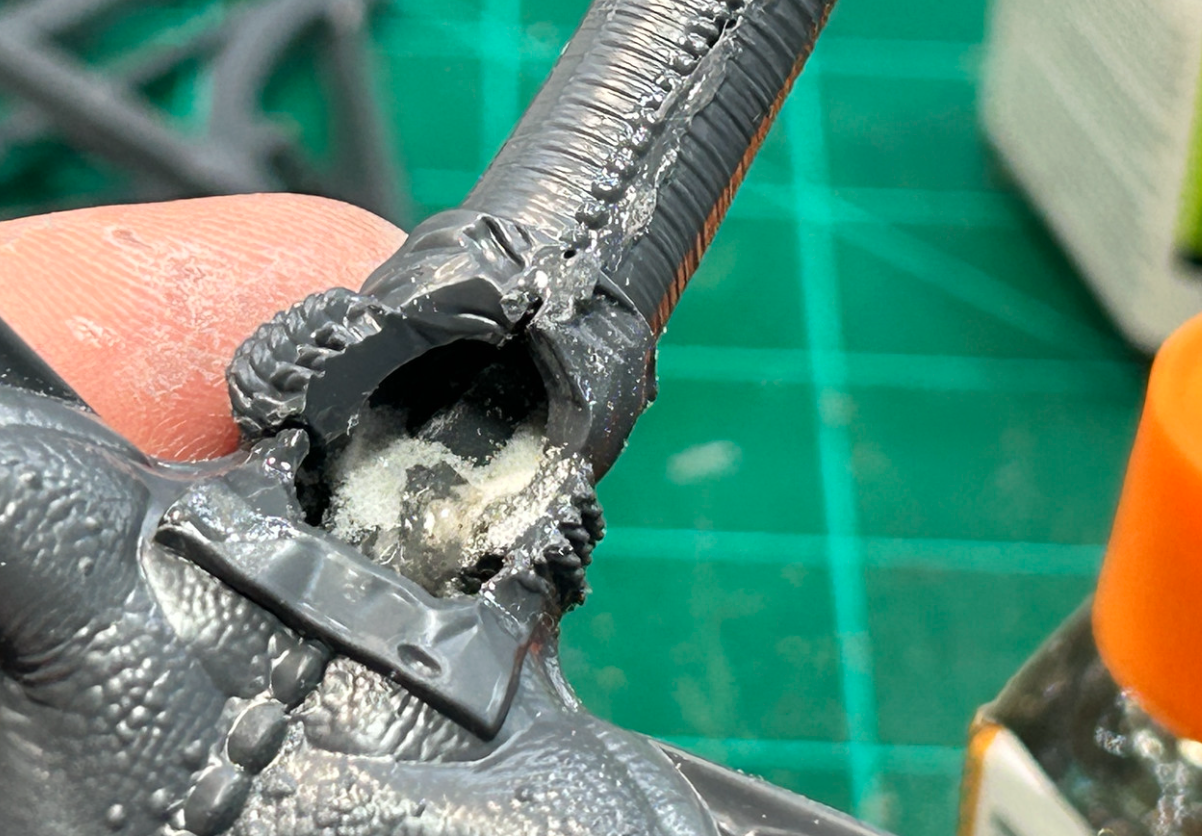
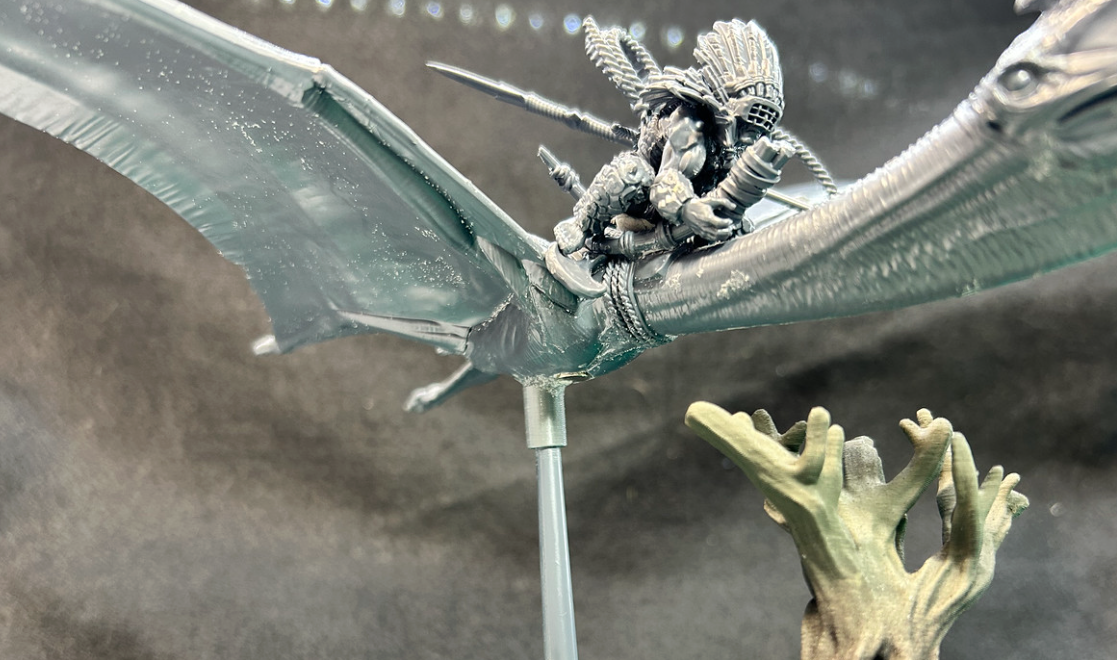
But, when assembling the head and neck onto the body and wing section, I noticed the head was a large part of the model’s overall weight. That made me worry about snapping the neck off the body.
CA glue, baking soda, and piece of sprue to the rescue! I had to nip a V into the sprue piece to make it bend to the right angle for the support. Then I used plastic glue and set into the neck to torso join (there is a hole where the saddle will set.) Once it set up, I added CA glue, then dribbled in some baking soda. In the process I smudged the sprue-goo on the neck.
Next up is assembling the Chieftain that rides the Quatl. He has some options as well. First is the head. I went for the one with the facemask.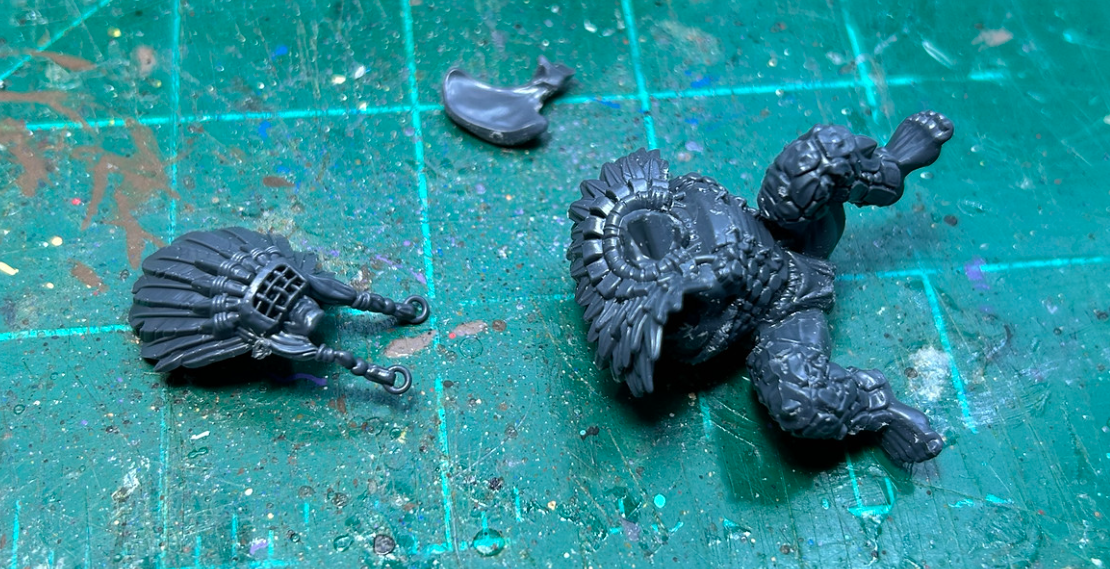
Then you have to decide between the holding the spear arm set. or the already thrown the spear arm set.
I know me, and I’d break the thrown-spear and rope on the first outing. So we went with the holding the spear arm.
Again, not everything is super understandable in the instruction sheet, so make sure you test fit. I originally glued the arm on so the spear was closer to the body and pointed down more. It looked like it fit, but when I test fit the Chieftain onto the saddle, he wouldn’t line up due to the spear fouling in the wing.
So, pulled the arm off and reset it.
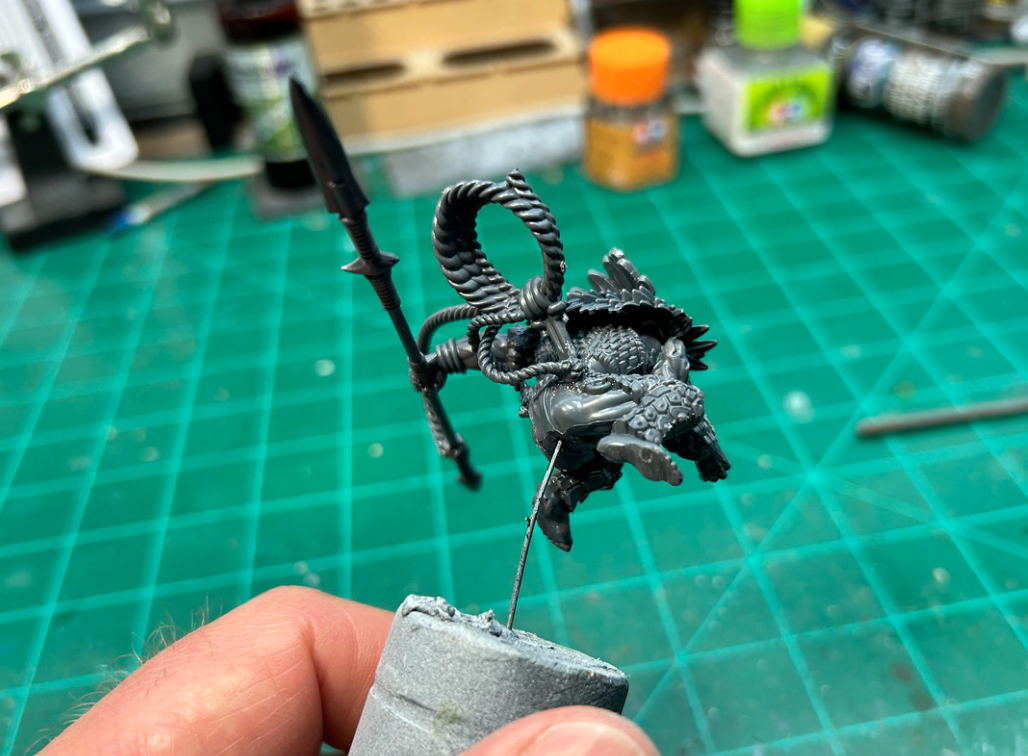
There are two bony foot-plates that attach to the saddle. Again, I found it easier to leave them off until I could use some poster putty to mount the corrected Chieftain in the saddle. Then I could position the foot plate thingies in the correct spot. You can see one of them in the next photo behind his foot.
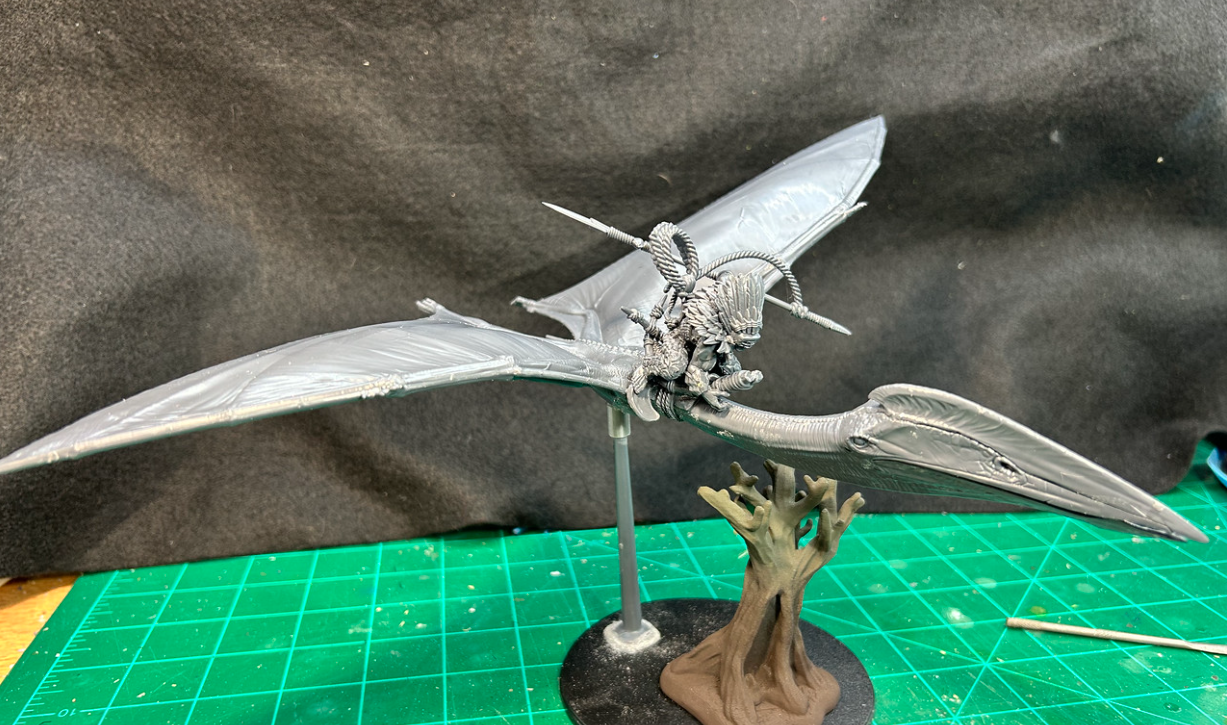
The final question I faced was how to mount the critter to the stand so I could remove it for transport. I tried magnets on the post and in the belly of the beast. My magnets were not strong enough and he tilted forward before crashing to the table (I caught him). then I tried to use the tree as a neck support. That looked wonky.
Then I remembered the sleeve add-on (probably from the 40K world) that a lot of Blood Red Skies players 3D print up to mount their planes to the plastic based. I started doing that two years ago. Fortunately, I still have several of the sleeves in a drawer. I drilled a hole in the belly, glued in the sleeve, and added a bit of poster putty in the sleeve. That keep it anchored, but removable.
This model is fairly easy to assemble, if one takes their time, and reads a few steps ahead. Making the changes I suggest above should make assembly a breeze. I can’t wait to get Quizzy the Quatl on the table. It’s already in the spray booth. Next up, painting!