Achtung Panzer – New Plastic Kit from Battlefront
Thanks to Mitch Reed, I was very fortunate to have the opportunity to build and review a box of the new . My German vehicles are all resin and metal to date. This is my first delve into doing any of the new plastic kits. Okay so let’s get going.
What’s in the Box?
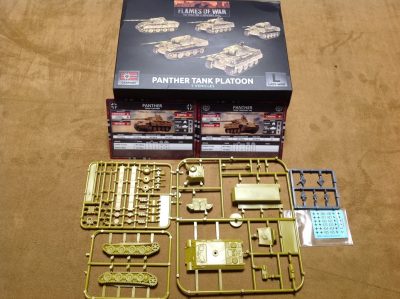
Opening the box there are three Sprues per vehicle. The main sprue with the hull and turret components less the gun. Second Sprue has the gun, side skirts, hatch, and a few spare pieces. There are also components for the Jagdpanther model which are not required. The last sprue is the tracks. So a total of 15 sprues to make up the platoon of 5 vehicles. Additionally, there are 3 small plastic bags, one for each of the data cards, decal sheet and vehicle crew.
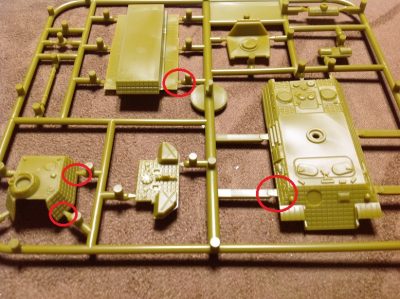 The parts are very well detailed and super clean. There are no mould lines on the major components that required cleaning. The gun sprue and skirts sprue required some cleaning but this was simple to do. It should be noted that care had to be taken when cutting these areas. They have to be cut at an angle and as the are joined to parts that will be visible later on I found a sharp hobby knife did the trick. Again, I had to note the angle of the cut.
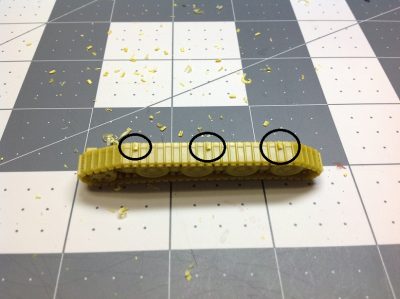
The track sprue also was clean, however, once clipped some care had to be taken when removing the excess plastic between the tracks.
The Assembly line….
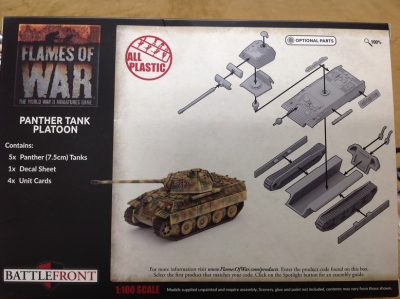
The assembly instructions are on the back of the box and are very straight forward and easy to follow. I removed all the parts for each vehicle and did any necessary cleaning. I then placed all the parts for each vehicle in individual piles. I then assemble the same parts five times. As an example, the hull bottom and both tracks, then the next hull and tracks etc. By the time the last set is done the first is dry enough to move onto the next step. It took me about an hour and a half to separate, clean and assemble the 5 vehicles.
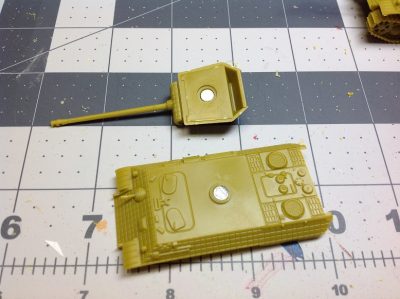 With all my vehicles no matter the size, I magnetise the turrets. I was a little disappointed that the magnets where not included as they have done in the past for some vehicle platoon box sets. However, as I buy them 500 at a time for less than $20USD it’s a small thing.
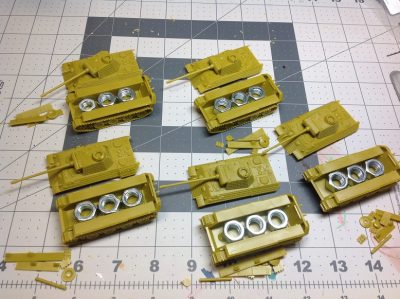
I assembled the hull and tracks first. Then using some nuts from the local hardware to add some weight I CA glued them into the hulls. I placed these in loose, however, to test the hull fit with the top and bottom to make sure the nuts don’t affect assembly.
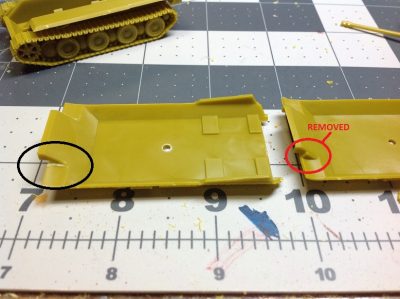
While the nuts didn’t affect the fit, I did notice that the front two hull sections wouldn’t close tight against each other. After a little test and adjust I realised that the moulded lip inside the upper hull was preventing this (Red circled area above). So I removed them (black circle) and got a nice flush fit of the front upper and lower hull sections.
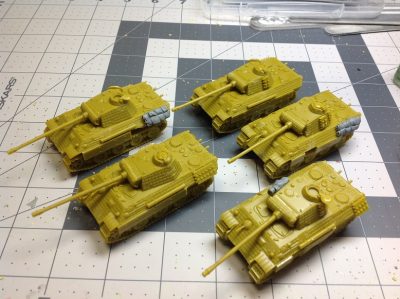
The final step for the assembly was to add the side skirts (which I cut and modified), spare tracks links, cleaning tubs and some resin stowage I had in my bits box. I wanted to keep them fairly well intact and add just a bit of character to them.
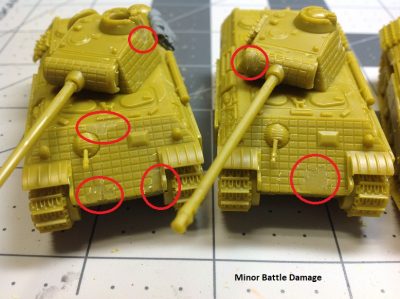
This included some minor battle and combat damage to the Zimmerit, again I just wanted to add a little bit of character to the platoon but not go overboard. I also drilled out the barrels and scratched up the front track guards and side skirts.
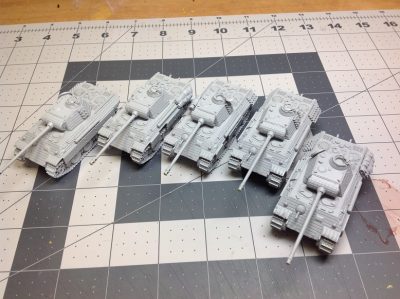
Once the assembly and a little character added to each vehicle, this step was finished and it was time to do the primer.
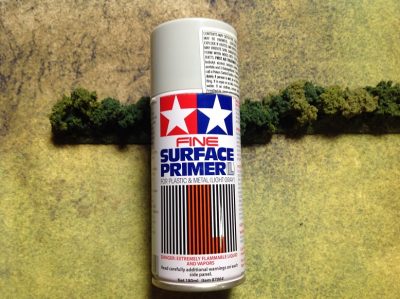
I Prime in grey using Tamiya fine Surface Primer, as it is especially good for plastics and provides a very good adhesive coat for acrylic paints and doesn’t decrease any of the vehicle details.
Let the Painting Begin!
When determining what paint scheme I will do, I look at the theatre of battle and choose an appropriate unit that fought in that area. As the panthers are for late war and with the launch of the D-Day book. I thought it appropriate to choose a valiant German unit that was in France on D-Day.
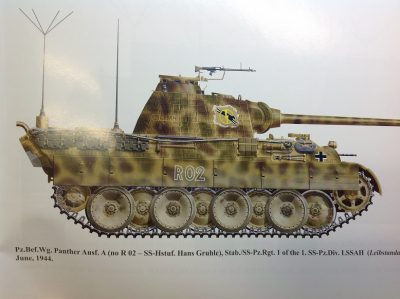
Amongst my many books and resources is one on Panthers. So lucky for me I found this beautiful spotted cat from the 1st SS Panzer Regiment, Liebstandarter Adolph Hitler operating in France during June 1944. I really like the scheme and as it had a Zimmerit coat it was perfect to do as a platoon from the Regiment. The picture above is of the Regimental Commanders Vehicle.
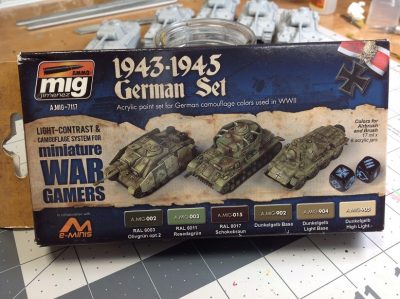
Next the paints. I like to use some of my specialty paint sets for certain projects and the set above was ideal. Notice the Tiger Ace dice in the bottom right? This set was designed for small scale wargaming vehicles and I believe the vehicles pictured are from Battlefront.
Sorry guys, this where I screwed up! Can I write that? Anyway, I forgot to take pictures of the painting process, but as its not a painting tutorial, I hope you wont mind.
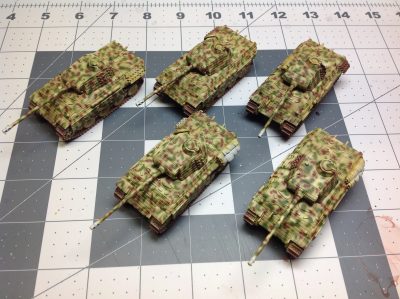
In the first stage I airbrushed the tracks using a red brown/mahogany. This was done before I painted the base panzer yellow including some highlights. This was followed by the green and brown camouflage pattern. I then went and painted the stowage, MGs, Barrel ends in flat black and spare track links. Once this was done I coated each vehicle in a Gloss varnish. I then left it to dry for 24 hours.
Once the Gloss is dry, I then add the decals. I didn’t use the decals in the set as they didn’t match the unit I was painting. Again, going to my bits box of decals, I found the Battlefront 1st SS Regiment and numbers decals sheets I needed to do the correct vehicle markings. Next came the pin wash using an enamel base wash from Mig, which has a black and a brown wash. As the base colour is panzer yellow I used the brown pin wash. Once the wash is done, I use a cotton bud and brush to tidy up the wash. This brings back the underlying paint scheme and leaves definition between panels and raised detail. I used the black wash on the tracks.

I used dark brown to highlight the missing panels of Zimmerit. In most cases, it would have panzer yellow under the Zimmerit as well, but I wanted them to stand out and at this scale, for me it seems to work. The final stage was to do a small amount of weathering to represent scratches and chips around the turret, the hull and the top side of the barrel. I then use a highlight ochre yellow and buff mix to outline the broken Zimmerit, scratches and chips. A light drybrush of gunmetal to bring out the wear on the tracks.

Once the vehicle was finished I then went and painted the Platoon Commander and his 2IC. They were then fitted to the vehicle. The last stage is a matt varnish and then add a little bit of brush foliage for camouflage. Again, I didn’t want to overdo this as I wanted the paint scheme, battle damage and chipping to stand out.
Finished platoon ready for the table
Ok some final shots of the finished platoon, enjoy and catch you later.
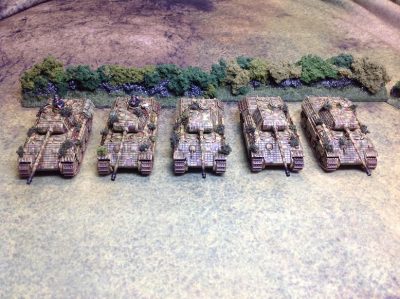
The Platoon
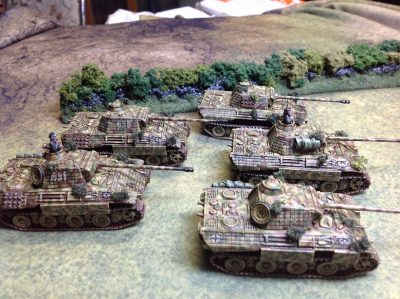
Note – The Balken Cruz are at the back as the tools don’t permit them to be fitted suitably at the front. But as they were placed in both locations I used builders licence.
Vehicle Numbering – 431 – 5, 4th Company, 3rd Platoon, Vehicles 1 to 5.
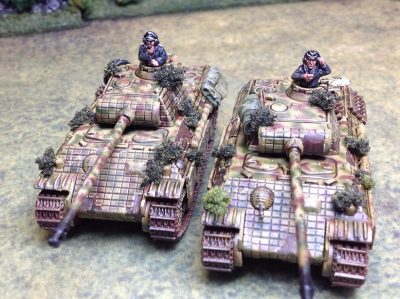
Commander (431) and 2IC (432)
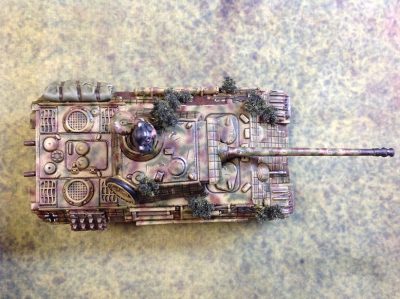
Top View Commander
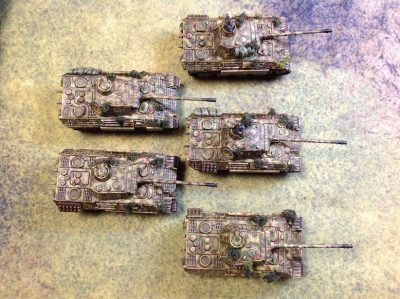
Platoon Top view
Conclusion and final thoughts.
Start to finish took a total of six hours to clean, assemble and paint, plus 24 hours of drying time between the different varnish coats. The vehicles are straight forward to assemble and with a little extra time a bit of character can be added to each. The detail on the vehicles is up to Battlefronts usual high standard and I was surprised at the small amount of flash and therefore clean up I had to do. Overall a great box set that produces an excellent result.

That idea about gluing the nuts inside of the model during assembly is awesome and something I am definitely stealing for my wee plastic tanks… Looks great!
Hi Paul, yep feel free to steal whatever ideas you need. My way of dealing with moving from resin/metal to plastic.