Battlegroup NorthAG – Jumping in 10mm Scale with 3D printing to the rescue
By Tom Gall
This article is about how to make your game table bigger, by fearlessly going to a smaller scale. In my case, I’ve been gaming in 15mm for Team Yankee and Battlegroup NorthAG, but want to convert to 10mm to get more gaming space for the same sized table. 3-D printing is a major portion of my success getting into another scale.
With NorthAG, the Plastic Soldier Company has a good line of models that continues to expand. Other companies of course can scratch the 10mm itch as well. The great thing about a 15mm to 10mm conversion is the smaller vehicles, infantry, and so on paint a lot faster. You’ll get to the table sooner and not have to invest tons of time in detail.
The major hang-up I had with a smaller scale is the terrain. I have plenty invested in 15mm. Besides model rail roading there aren’t many 10mm manufacturers of terrain. We’d all like to keep costs modest, especially when committing to a new scale. Until the manufacturers of building products catch up with the new market, what are we gamers to do? Enter 3-D printing.
The first question you’ll be presented with should you want to follow the same path is what kind of printing technology should you get into? Resin printers for instance are great at making smaller things, able to print good details with the cost of a more complicated setup involving chemicals which can be off-putting. Resin printers are also more expensive to run since the materials they use are more expensive. For me, since I don’t have a dedicated area where I can be working with less than safe chemicals, resin it out for the time being.
Fused Deposition Modeling (FDM) type printers are quite cost-effective. Over the lifetime of the printer, with each building you make you’re amortizing out the cost. Discounting the cost of material such as PLA, printing 50 buildings, with a printer costing $500, back of the envelope math brings you to ~$10/building. Keep printing, and the amortized cost continues to go down. Have other games you play? Print that fort! Print that tower!
Printers
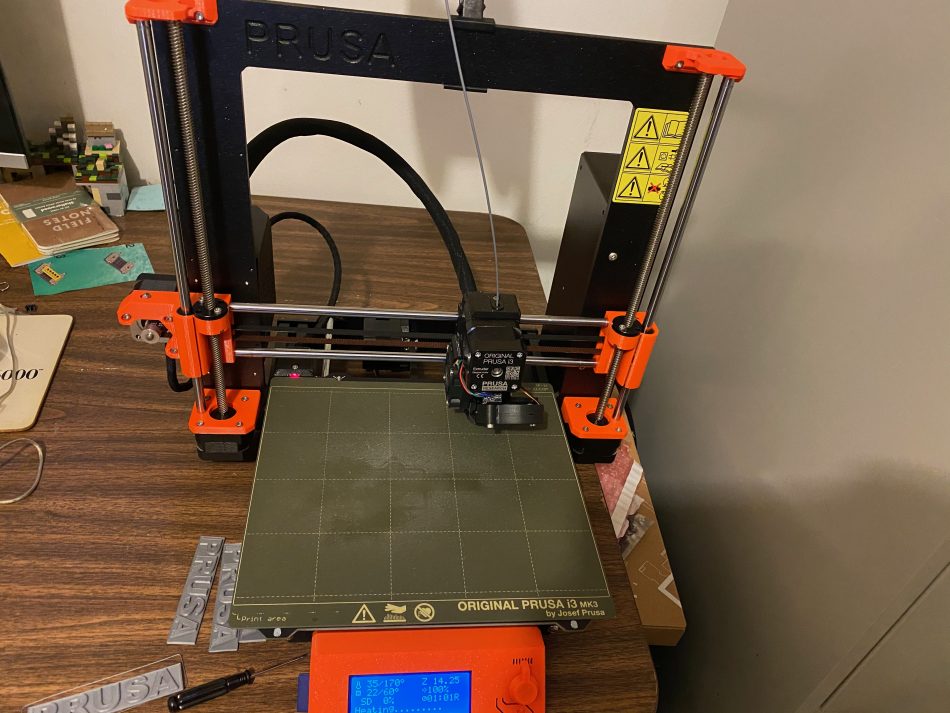
I went with a Prusa https://www.prusa3d.com – an I3 MK3S and further selected the fully assembled option. The benefit of doing so was a printer that arrived, calibrated, pretty much plug in, and go out of the box.
A good shopping guide for potential printers that is updated frequently can be found on . Like anything 3d printing technology is constantly evolving, you might have some specific ideas you’re optimizing for with your printing.
Some of the characteristics I looked for were:
- Auto bed leveling – this makes sure that the bed is level
- Print head calibration – auto-setup prior to the print so the head will position filament correctly on the bed
- Reasonably sized bed so good-sized prints would be possible
Materials
Let’s look at cost of materials. PLA is one material you can choose from to print with. You’ll need spools which generally go for about $20-$30 for a 1kg spool. Warning some brands are better than others! Low quality PLA can be poorly wound where you can hit a knot. PLA needs to be bone dry and is best in an environment with low humidity.
Common Issues
The premise thus far is to buy a 3-D printer, hit that print button a number of times and you’ll end up with fantastic results every time you can just drop onto the table top. I hate to be the bearer of bad news. Unfortunately, that’s not quite a reality.
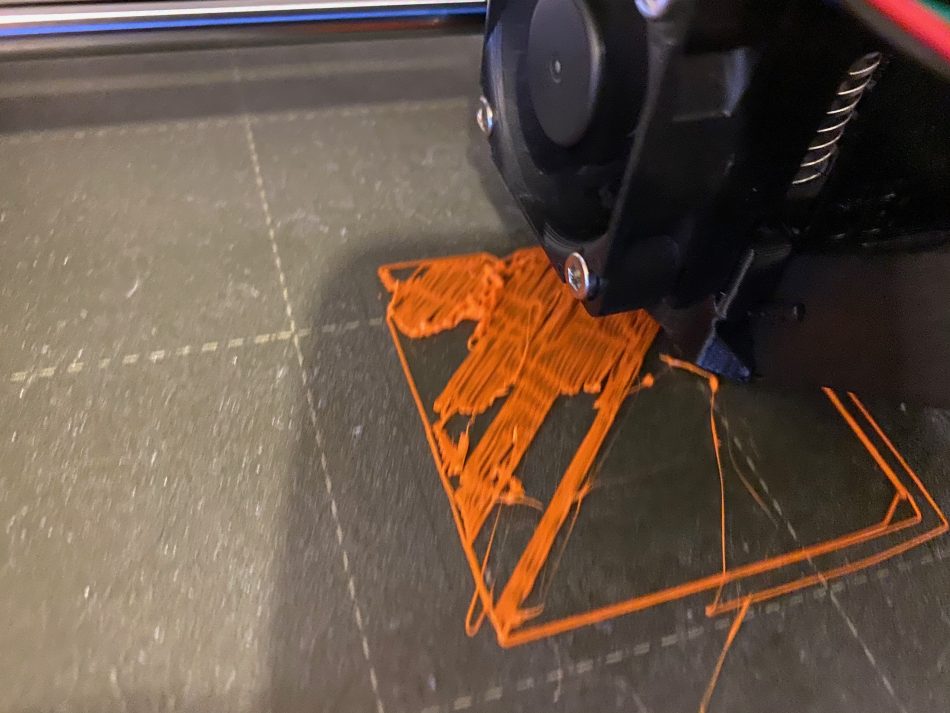
Adhesion issues are one of the most comment problems you might face.
Adhesion to the bed is printing the first layer and having it stick can be a major challenge for those new to the hobby. There are a number of causes which all lead to a failed print. Is the print surface clean? Oils from your hands will keep material from sticking. Is the bed level? Is the print head at the right height? Too low, it’ll nick filament out of place, too high and it won’t stick. When your printer is dialed in, consistently getting that first layer down is a great feeling.
More expensive printers can effectively dial in for you, contributing to a more push button experience. This accomplish this by having a set of sensors and make measurements prior to starting a print. It increases the cost of the printer, however the reduction of frustration especially if you are new to 3D printing can be well worth it. In the past I owned a CR-10S where I needed to level the bed by hand as well as adjust the print head. I did learn a great deal. However, my error rate for prints through the lifetime of that printer was an expensive lesson. Prusa, and others, which have “auto” features, are worth their additional cost, in my opinion.
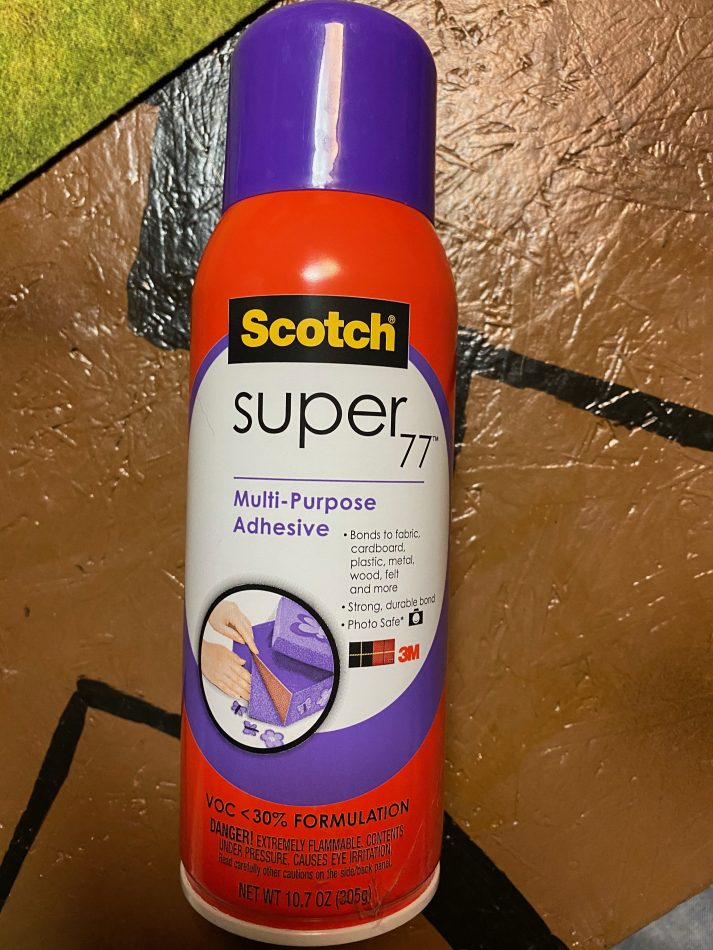
This brings me an important tip I’ve learned of, a bottle of spray tack. A light layer on the print bed helps the first layer stick and stay stuck during printing. It can be argued that it’s not necessary but I’m a belt and suspenders kind of guy!
STL Files
Thus far we focused mostly on the technology to make a thing, but what about the thing that you want to print?
STL files are the thing which are you going to print. STL stands for “Standard Triangle Language” and “Standard Language”, importantly it is a computer file format that describes a 3D object.
Where to find STL files? There are a number of places, some free such as Thingiverse, some at cost. For NorthAG I wanted more modern buildings, ideally with a European feel. The sites I have turned to are :
There are certainly more companies and web sites out there, these are just some that I’ve turned to.
STL to G-Code
You’ll need a piece of software to translate the STL to G-code which is the instructions that drive the printer. , and are two examples of this software. You load up an STL model, save it as G-Code on SD card media, insert that card into the printer, and away you print. If the 3D printer you purchase recommends a particular set of software, I suggest you follow that guidance, especially as you get started. Learn the basics before you head out on your own.
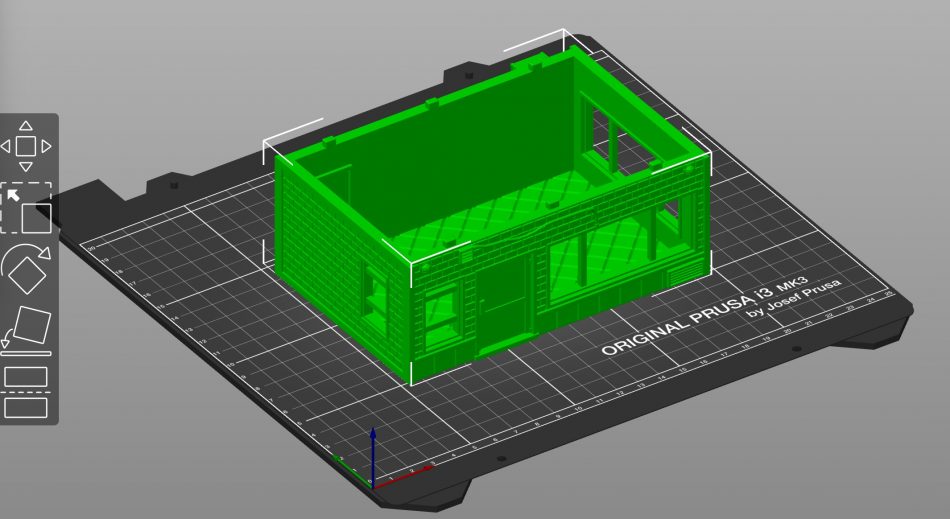
The workflow is as simple as load STL file, slice, export to g-code. Some pieces of software such as Cura can drive your 3-D printer directly. Other printers have an SD-card interface, so you export the G-Code to the SD-card and then plug that into your printer. The advantage to SD-Cards is this frees up your computer and allows your printer to be located anywhere.
Scale
When you download an STL file from whichever source, an important attribute to pay attention to is what scale was the model created for? Bad news, most things are not created for a 10mm scale! What do we do?
The great thing about STL files is they can be scaled before you print. This means you can obtain something and fit it to the scale that most interests you! See a 28mm building you like, no problem. We’ll convert it to 10mm before we print. Find something 15mm (1/100)? Again, no problem!
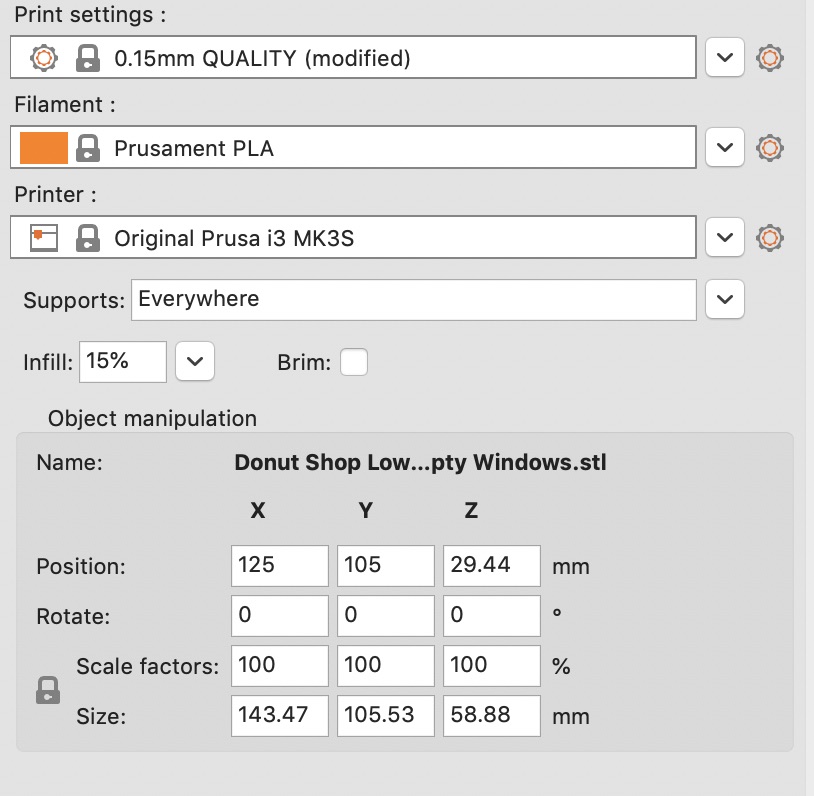
In most software packages this is done by adjusting the scale values. At 100% scale factor the object will be printed in whatever scale the creator designed it for. If that is 28mm to convert to 10mm we need to scale it down.
Some common scaling factors are:
- 28mm (1:56) to 15mm (1:100) 56%
- 15mm (1:100) to 28mm (1:56) 178%
- 28mm (1:56) to 10mm (1:144) 39%
- HOWEVER PSC 10mm is perhaps a bit closer to 12mm as such I print my buildings a little larger using 50%. At this size, this also fits better with how I’ve based my figures
- 15mm (1:100) to 10mm (1:144) 69.4%
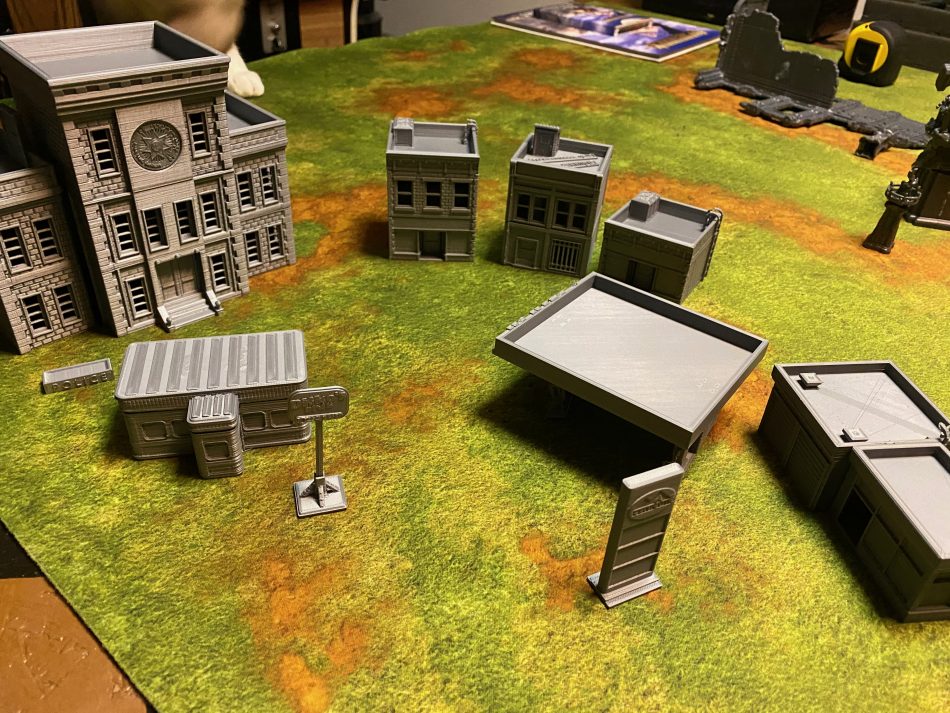
These buildings are all from Corvus Games Terrain and were modeled in 28mm. I scaled them to 50% after a couple of test prints. This does underscore one of the great things about 3D printing, you can scale up/down to what looks best to you.
Results
How well does it paint up? Priming is important, and then paint as you traditionally would. Contrast paints can go a very long way to make a one layer experience without having to invest much time and effort. This will get you to the tabletop sooner!
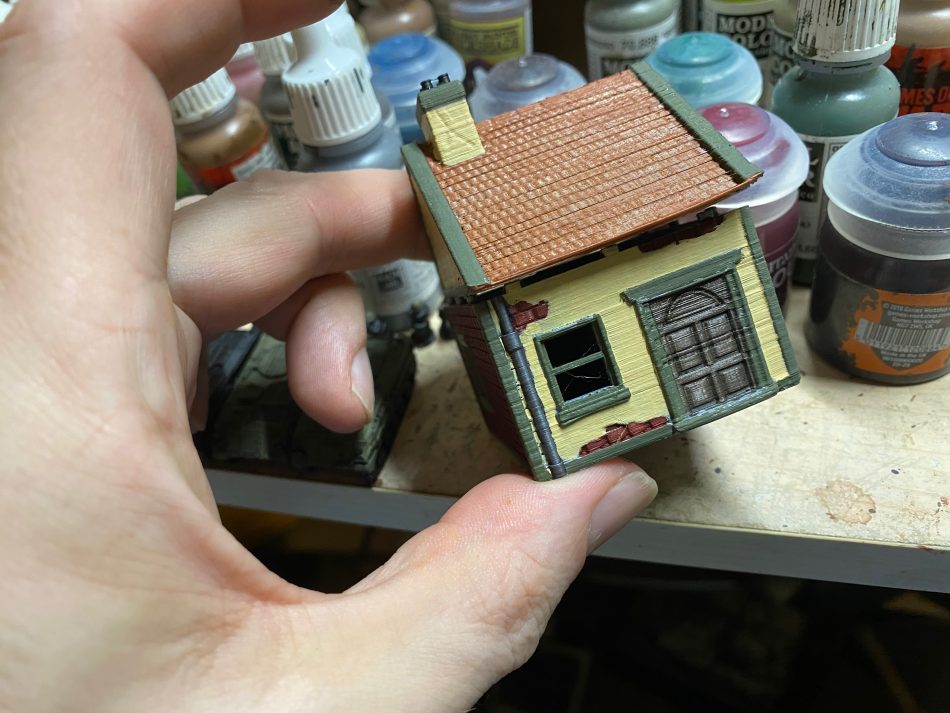
The shingles on the roof, the bricks, and the door are contrast paints. The rest of the colors are Vallejo. With a smaller scale, a building like this paints up in approx an hour.
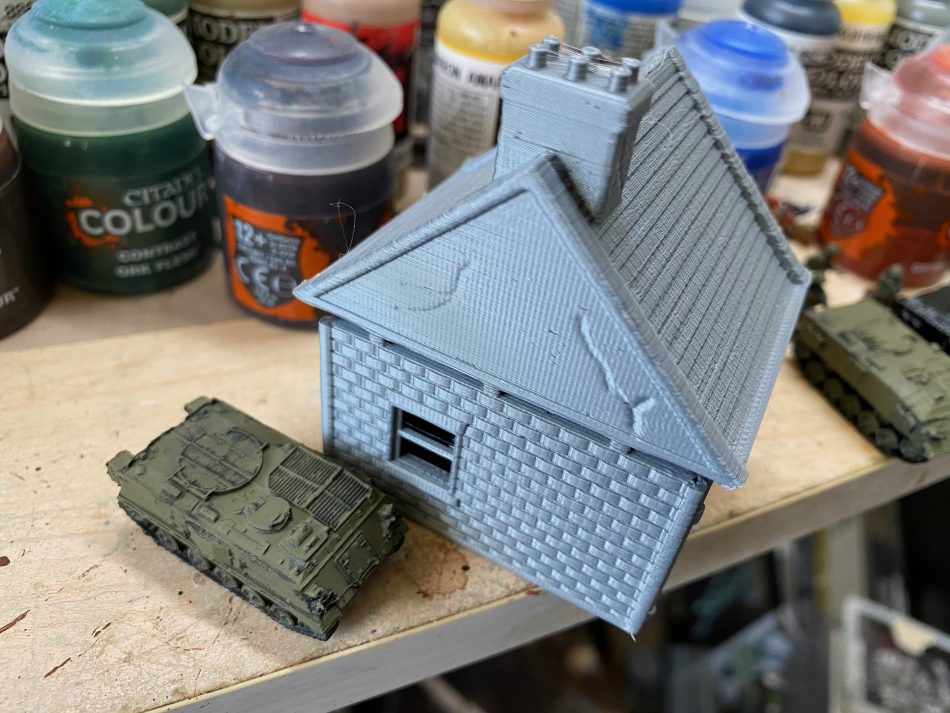
Same building, prior to painting and next to a PSC FV432 model.
Summary
Going to a new scale especially when you’re heavily invested in other scales can be painful. Costs in models and terrain to get a great gaming experience can take their toll. The great benefit is your game table allows for more tactical maneuvering room.
Mixing in a 3D printer to make terrain is a great option. Not only can you print out the terrain on demand and in numbers you desire, but you can also do so at pretty much any scale. If you want 5-row houses, print 5-row houses. The technology isn’t perfect. You’ll likely have some learning to do, but it can be very rewarding.
Given the state of technology, I continue to strongly recommend buying figures from companies like the Plastic Soldier Company, or , and the other great manufacturers of games we play. Those figures and rule books you buy are funding current and future games. We want the hobby to survive and this is one of the most important ways you can help.
Finding STL files either for a nominal cost or for free requires an investment in your time. While there are many STL files out there, sometimes the selection can be limited and it is quite possible what you have in mind just might not have been created yet. Making a model takes time. You can certainly try your hand, but remember people who are making models that you then download are investing their time. Tip that artist! Buy some STLs. Just as we should support game companies for rules like Battlegroup NorthAG, miniatures to put on the tabletop, those that create STLs need support too.
3D printing gives you a great amount of freedom to print what you want and empower you to get into new scales faster and easier. It is not however free in price, and it is not without frustration.

I’m into 3D printing as well. Here’s a link that I use frequently when resizing from one scale to another: https://docs.google.com/spreadsheets/d/1alEfxiv892l5EpIEleaxYnzgbHEg-d_0M_hrkjCKSHs/edit#gid=0
Cheers
Luggs