LW: British vs German – Ho Ho Ho, now I have Firefly! And also Achilles
After two years of mid-war battles and tournaments, we’re all pretty excited for the release of Fortress Europe: new lists, more powerful vehicles and new stats to give a new flavour to FOW V4. Now that the book is only a couple of weeks from hitting the shelves, it’s time to have battle with the new forces – and we can’t wait to see how the “new” games taste.
With my friend Stefano Grombi, a veteran both for FOW and wargaming in general, we had our first battle with Fortress Europe lists. Reading the book it’s one thing, playing a game with the new lists is another.
We decide to do a classic Red vs Blue match: 109 points, since we’re using the same points as US tournaments right now, with a British force confronting a German one. I’d play the Brits, while Stefano deployed his Germans.
The British Force
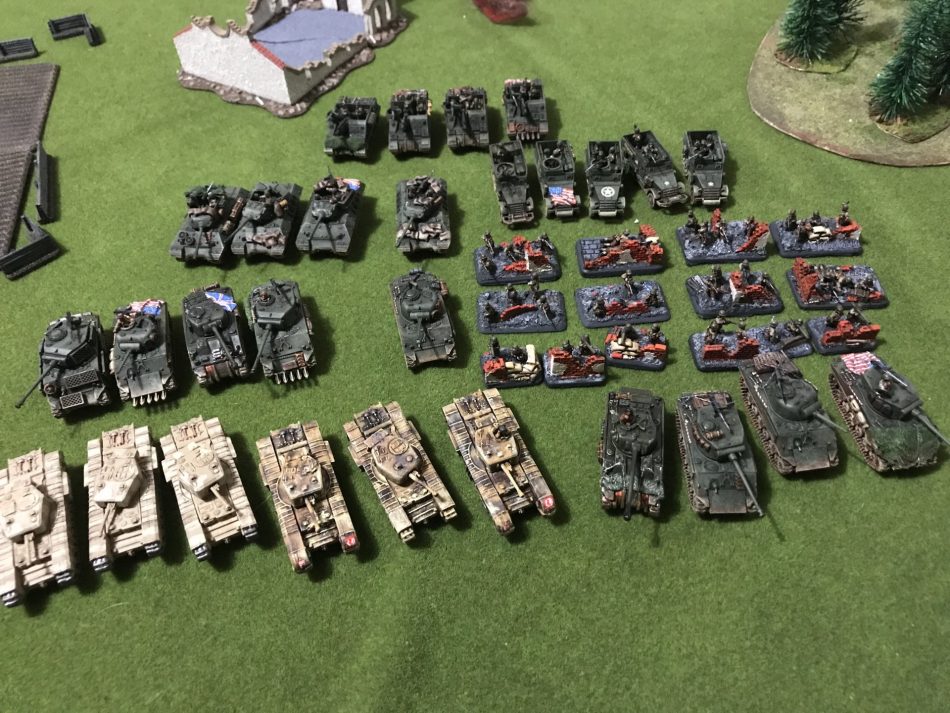
I did a list really close to the one with some small differences.
Churchill Italy Armoured Squadron
HQ – Churchill 6 Pdr Plt (3 tanks)
Churchill 6 Pdr Plt (3 tanks)
Sherman Plt (4 tanks, one of which is a Firefly)
Sherman Plt (4 tanks, one of which is a Firefly)
Support
M 10 SP AT Plt (4 tanks, upg to 17 Pdr)
Sherman Op Post (1 tank)
Priest Field Troop (4 tanks)
Allied Support
US Motor Company (full Platoon)
 “Ho Ho Ho, now I have lots of PDR 17!” – Captain MacPaglianti, moving his force towards Berlin
In mid-war tournaments, campaigns or friendly game I never dared to deploy a full heavy tank Squadron. In midwar, four platoons of Churchills and Shermans would have cost 138 points (considering the cost of a Sherman as 9-points). This list in total would have been more than 200 points!
Now I have 6 tanks in the force with AT 14, something every Allied player begrudged in Mid. Time for Germans to get a taste of their own medicine!
I chose the US infantry for their marvelous five bazookas: if I had 12 tanks, how many could be fielded by Panzercommander Stefano? I also selected a Priest Field Troop to have a good artillery barrage, in case some Grenadier would try to show his face around, and an Observer on a cannon-less Sherman to round the points up to 109.
The German Force
Stefano, contrary to expectations, went for an infantry force. He lingered on a mixed tank company, but he realized it would cost too many points. He wanted to use some serious tank force, but having the HQ and a single platoon with Panzer IV, with a Tiger and a Panther Platoon, he would spend more than 80 points, since you can’t get a single Tiger or less than three Panthers.
 Grenadier Company
HQ
Grenadier Platoon (17 bases) + Panzerfaust
Grenadier Platoon (5 bases) + Panzerfaust
Mortar Platoon (4 bases)
Support
10.5 cm Art Battery (4 guns)
Pak 40 7.5 Platoon (3 guns)
Panzer IV Platoon (3 tanks)
Panther Platoon (3 tanks)
Stuka with 3.7 guns
Panzer II Observer
He built his force around a full Grenadier Company, adding a Panther platoon, a Panzer IV platoon, some Pak 40 and a 10.5 artillery battery. A flexible force, a bit fragile for you can kill the three infantry platoon and force the Germans go home with a Company collapse. For the sake of comparison, this force would have cost around 160 points with Mid war books.
Table and mission selection
“Fog is everywhere. Back home in Epsom they say Italy is the country of the sun, but they probably have never been here, just outside the Appennini mountains. Our Company is part of the Eighth Army, and our veterans conquered Libya and went up all the Italian boot to the Gothic Line. After Operation Olive, our Captain told us the worst was behind us, but was not true. The Germans are still stubborn in defending their southern border, and even more angry since Italians left them to join the Allies. Our mission was simple. Recover a Spitfire pilot downed around Monte Castello. We know he is here around, and we hoped to find the village empty. No luck: our scouts identified elements of the German 14th Army, and also some panzers. We moved fast with our Chruchills and Shermans Company, and our Yankee friends joined the party with a Motor infantry platoon, as their M3s were fast enough to keep our pace. As the fog rose, we face German well prepared position. Spitfire pilot, keep the head down as we are coming, and be worth of our sacrifice”.
We created a North-Italy countryside battlefield (basically, where we actually live): two small villages with a destroyed church and single factory, with some vineyards and woods around. The central section is pretty open, but on the sides, you can hide and ambush easily. Stefano selected “defend” and I chose “attack”, so we ended up with Bridgehead scenario. I placed the two objectives in the usual Bridgehead position, one close to my forces and the other farthest away from both of his deployment areas. Stefano placed his 5 minefields to cover the frontage of the crop field.

Deployment
Stefano hid his Pak 40 battery in ambush, and kept the Panthers, the mortar platoon and the smaller infantry platoon in reserve (deep, immediate and scattered). He placed the bigger infantry platoon on the left (from the British perspective), and the Panzer IV platoon on the right to cover the other objective. The 7.5 Battery was well beyond the village, ready to unleash some barrages on my troops, using the advanced deployed HQ and the Panzer II Observer to spot enemy positions.
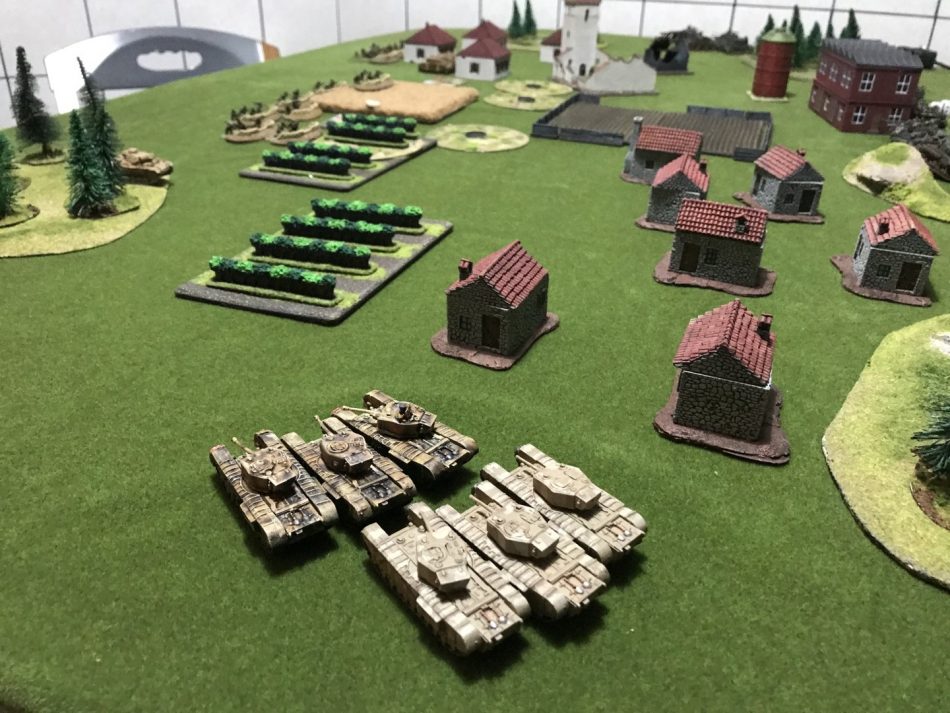
I deployed the two Churchill platoons on the left, targeting the deployed infantry. Their top armour value of 2 meant they could not be simply touched by ordinary infantry in close combat. The two Sherman platoon were on the other side, to keep busy Stefano on that flank. In the centre, I deployed the US infantry on their M3s, the Priest (hidden behind the factory) and the M10, in position to shoot both on left and right. This way, I tried to use Stefano’s own minefields on my own advantage – they would prevent a “sortie” towards my M10s and Priest. Thanks, Stefano!
 The positions after the deployment: the 5 minefields cover the full frontage of the central rough going (even if we had only 4, so we considered also the spot in their centre as mined).
First turns
I advanced on both sides: the vineyard on the left covered the Churchills’ advance, while the wood on the right helped to hid the Shermans. Actually, I’m not used to moving so many tanks, and I ended up in traffic jams. The Shermans were elbow one to each other.
The M10s used the central vineyard to cover them and got ready to shoot, while the US charged for the Church. I tried to shoot but did not achieve anything, due to lower ROF for movement and German being gone to ground.
Stefano’s first round proved really successful. The Stuka arrived and strafed the Shermans, bailing out a couple of them. Panthers entered immediately from reserve and also moved towards Sherman, destroying one of them. The worst was yet to come on US M3s: the Panzer IV jumped out with the Blitz move and managed to destroy half of them, and half of the infantry platoon too! My mistake, I forgot how easy they are hit. Finally, the Pak 40 appeared from ambush in front of my Churchill, disabling one of them. The Artillery tried to shoot over my M10s, but lucky they totally missed.
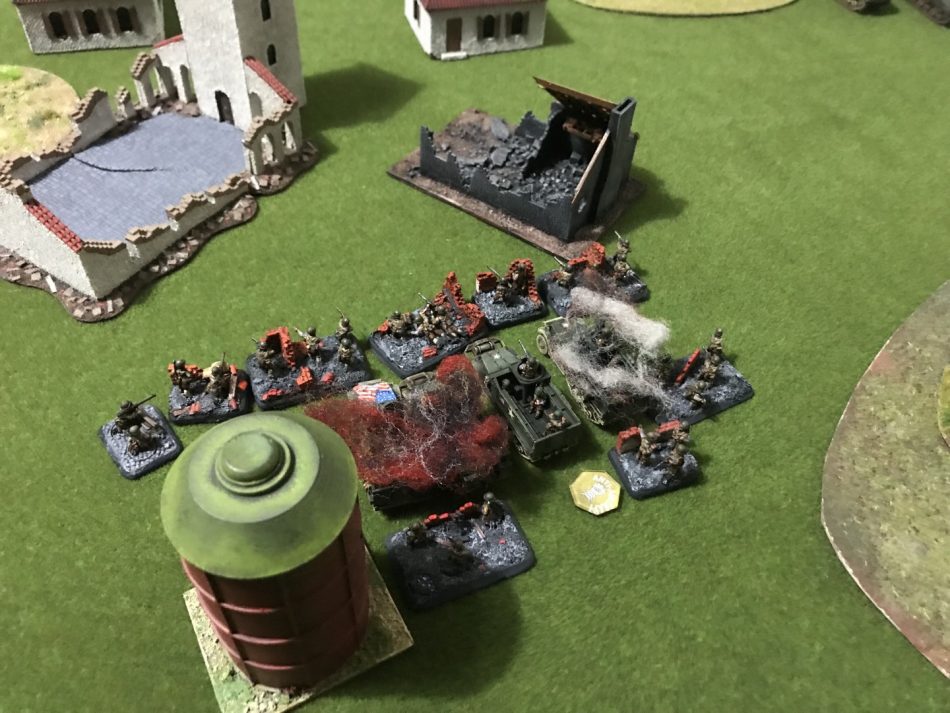 Numerous but easy to target: US troops get mauled right from the start.
In the next bound, the British moved the Shermans in the wood to have some cover from air and Panther commanders. However, the Firefly stuck, being bogged down, and stayed out in the clear. From the wood, they shoot to the Panzer IVs, killing two of them.
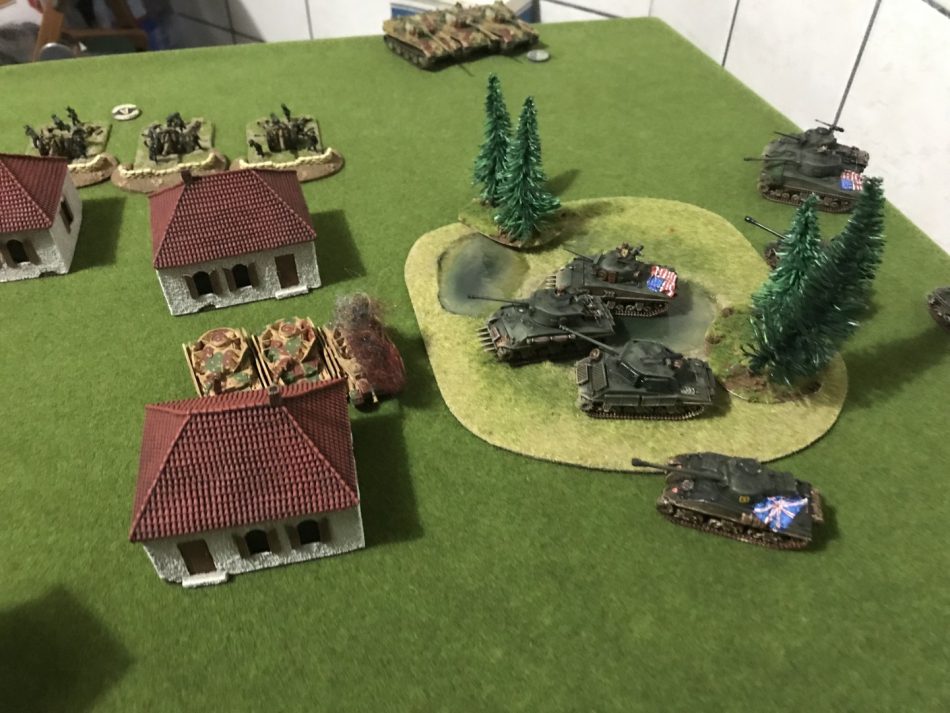 The Shermans shot from the cover of the wood and killed two Panzer IVs, while the Firefly hit some tree and stayed out in the clear – an inviting target for the Stukas.
The US infantry recovered from the shock and moved inside the destroyed church, to have some solid cover from the panzers machine guns. They tried to shoot with the remaining bazookas, but failed miserably. The Churchill troop moved like unstoppable titans toward the infantry: they shot the Pak 40 battery killing one gun.
 “Captain, I’m sure I’ve seen some guns over there”
“MacPaglianti, don’t be ridiculous, over there are just some good Morellino di Scansano vineyard!” – BOOM!
The Priest mauled the same spot but managed to kill only a single infantry base – a bit disappointing. M10s moved slightly to the left of the vineyard, to have a clear shot on the Panthers, and bailed out one of them. Nothing conclusive, but the encirclement maneuver proved to be a success: Stefano had to keep the Panthers on my right to check the Sherman advance, leaving the left side a bit too weak.
In his bound, Stefano managed to bail some Churchills out, but with a remount of 3+ and the closeness of the HQ I wasn’t worried. The Stukas arrived again and destroyed one of the Sherman – an easier job since the Firefly was out of the wood in full sight. Finally, a new artillery barrage proved more successful killing one of my precious M10s.
 Inside the building, the German HQ is spotting the M10s for the artillery, so I charged it with US troops. Eight vs two? Not enough, for the German HQ managed to pin them down and kill half of them.
In the next round, I tried to charge with the remaining seven bases against the German infantry HQ, which was alone in one of the white houses. That was a very bad idea: with his ROF 3, he managed to pin down and kill almost half of them.
The US infantry decided was too much, so I mounted them in the next bound on their remaining transports and moved them away. The combined shots from the Fireflies and the M10s managed to kill one Panther and bail another one out, while the Churchills arrived close enough to the infantry.
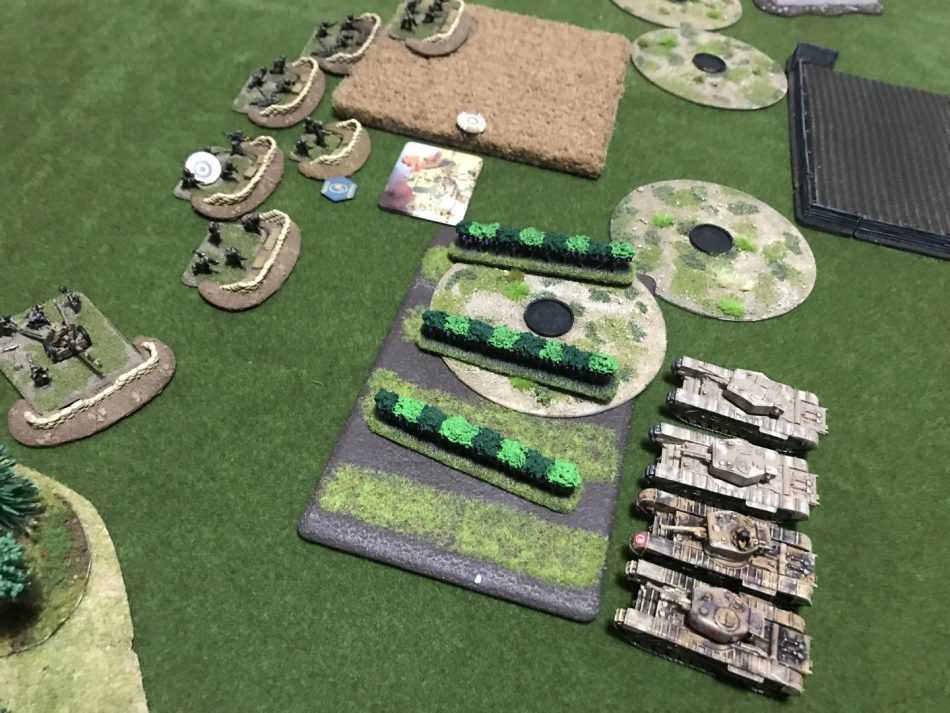 The Churchills move in position to charge the infantry and the surviving Pqk40; with an imposing cross of +2, I passed thru the second vineyard with no surprises.
They charged both this platoon and the single surviving Pak40. After a fierce fight, during which I lost one tank for each platoon due to the “jumping” Panzerfaust, I managed to force them back and win the game, since I was alone around the objective.

Final consideration
Long story short: the battle was amazing! After months of frustrating games against unbeatable Ferdinands and Tigers in mid-war, the game was much more balanced. I didn’t have that uncomfortable feeling of being the mouse fleeing from the cat (the Tigers, actually). And having tons of tanks – 16, counting the M10s – is in my opinion much closer to the spirit of this game.
With so many tanks, late-war battles will probably be more on maneuver. Stefano moved his Panthers around on the baseline to counter my advance, and I used the natural obstacles like hinges on his flanks. I could also charge his battery on the flank, near the end of the game, so he had to move the Panthers to cover them (leaving the soon-to-be-charged infantry on the other side unguarded).
Don’t get me wrong – the Germans are still a really strong force. When they shoot, they hit really hard. They have the finest airplane, the best tanks, and a really respectable infantry. However, now the German players will have to choose. They can’t have the cake and eat it too.
If they go for the heavy tank squadron, it will be a lonely force, and they will need to attack because if they have to keep 40 points outside it will be really a small party. No more “unkillable” elements: the Ferdys can’t still be destroyed frontally, but with so many Shermans around, they will not be able to cover their fragile flanks.
For example, the new rules for the Panzerfaust is really mighty – if a platoon has it, the player can choose in every shooting or assaulting phase which base actually uses it, so it’s not possible to “kill” it as you do with PIAT or Bazooka bases, and you will seldom be out of range.
I also think we will see more “armoured” lists since medium and heavy tanks got a huge discount from mid-war pointing – from half points to a third, in the case of the Churchills. Since infantry stayed almost the same prices, it’s much more tempting to use full tank squadrons and a single infantry platoon as support to keep an objective.
About my list, I did two horrible mistakes. The US infantry is an amazing force to defend an objective, but I prefer to attack, so I’ll swap it for a British Rifle infantry. Even if they have a single PIAT, they perform much better on the charge, since they kill better in the charge and they are hit with more difficulties. Also – I need to remember to COVER CHARGES with smoke!
With the points I’m going to save, I’ll add a Bofors battery. The Stukas are too nasty, and in this battle, they did a lot of damage. Another good addition would be a small Stuart platoon to the Churchill formation to boost the morale, keeping them near the artillery out of sight.
Anyway, a very good and enjoyable start for next season’s Late battles and tournaments!

Wouldn’t Stefano have a chance to contest the objective in his turn, unless he failed to motivate his infantry?
I think that if I start the bound within 10 cm and end it within the 10 cm with no enemy, the game ends.
From the picture it looked like you were further back from the objective. The same thing has happened to me in several games.
Thank you for the battle report. I can’t wait to get the book and start building lists.
Great battle report!!! I can’t wait to get my hands on the new book…..The Red Tide will roll again. 🙂
thanks 🙂
Your Terrain is really boring.
I started reading this AAR but when I got to the pictures of the battlefield I stopped.
Where are the roads, walls and hedges?
This looks as if is just randomly scattered terrain. There is no story, why are they fighting here?
http://www.youtube.com/watch?v=vUzaW6-Ve0g
Hi Morten, thanks for the advice. We had to do the battle in “super secret” since the book was not yet out, and we did it at home and not at our club where we usually play and have lots of stuff. Also, we wanted to try the new lists on a cleaner table, to understand how effective could be tan companies.
Very Nice AAR. I enjoyed reading it. Hope to see some another in the near future.
Thanls a lot, Soren 🙂