Painting and Modelling Team Yankee Danish Vehicles

By Morten
In Morten’s previous article he showed us how to paint Team Yankee Danish infantry. Now he will show us how to paint their vehicles.
In 1980, the Danish Army decided to paint all their operational vehicles in a two-tone camouflage pattern. Prior to this, all the vehicles was just painted green.
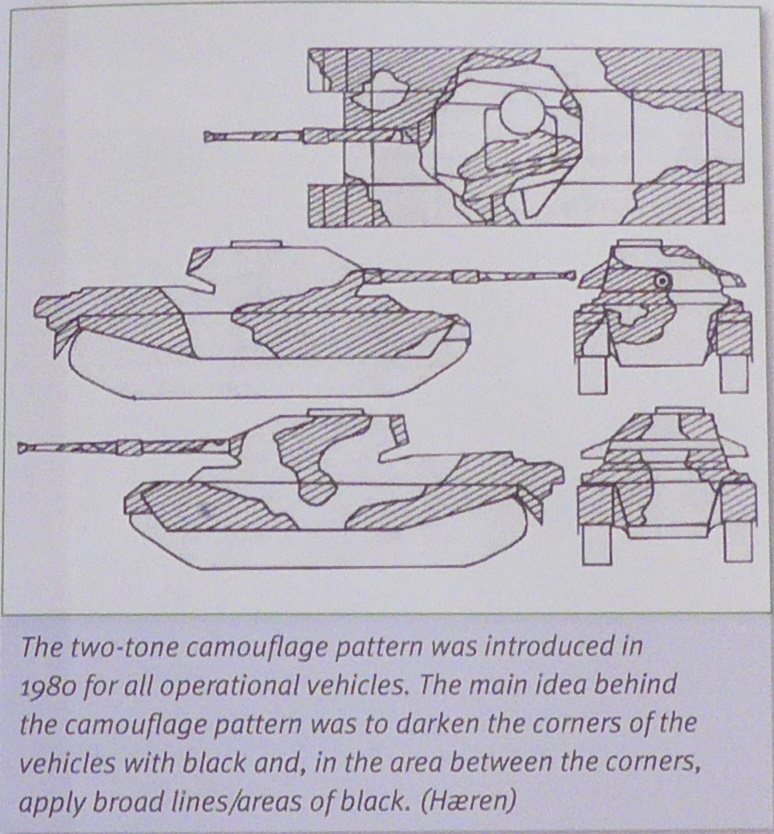
Source: The Leopard 1 in Danish service
This camouflage pattern was a concept and a guide, more than an actual rule and most vehicles was painted locally by the units or the mechanic’s on base. There was a lot of freedom in how this was applied to the vehicle, as long as the corners were black.
In general most vehicles had a roughly 1:2 to 3:2 ratio between the black and green, where most had more green than black, but the opposite have been seen as well.
This camouflage pattern is still in use today.
So the following is how I go about painting my Danish vehicles, in this example, it’s a Centurion Mk.V2 DK.
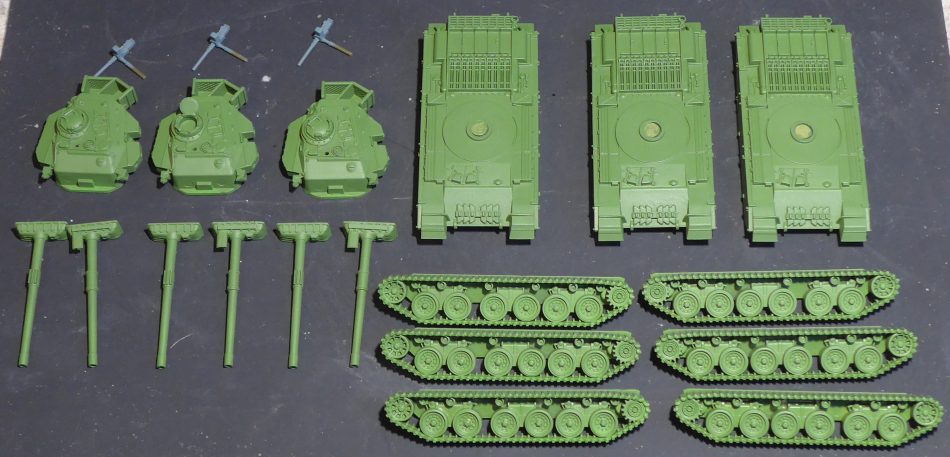
For vehicles I start out priming the models with Goblin Green spray (Vallejo), and as you can see, I have kept the tracks separate, for easier painting later. For this particular centurion, the gun is separate as well, as I have magnetized it, for swapping out the barrel for a 20pdr, so I can field it as a Centurion Tank Hunter platoon. More on this and the other modifications, in another article.
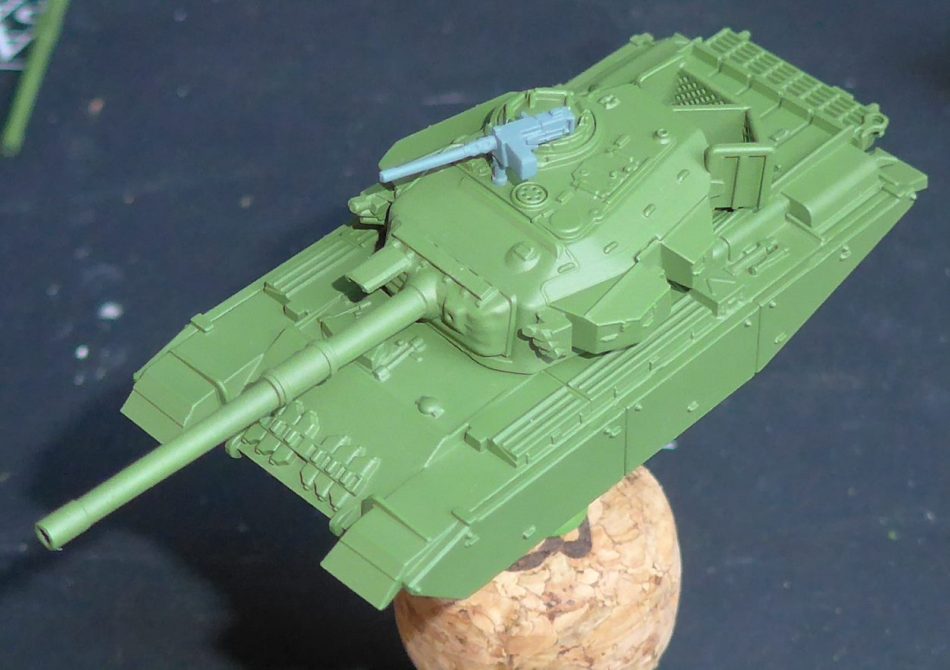
Once the primer is completely dry, it’s time for a basecoat.
Battlefronts recommendation is Golden Olive( Vallejo) but this is simply way too bright, so I have mixed up my own base colour with 2 parts Golden Olive (Vallejo) and 1 part Refractive Green (Vallejo). This mix is still a bit on the light side, but it works really well in this scale and does darken down a bit once wash is applied.
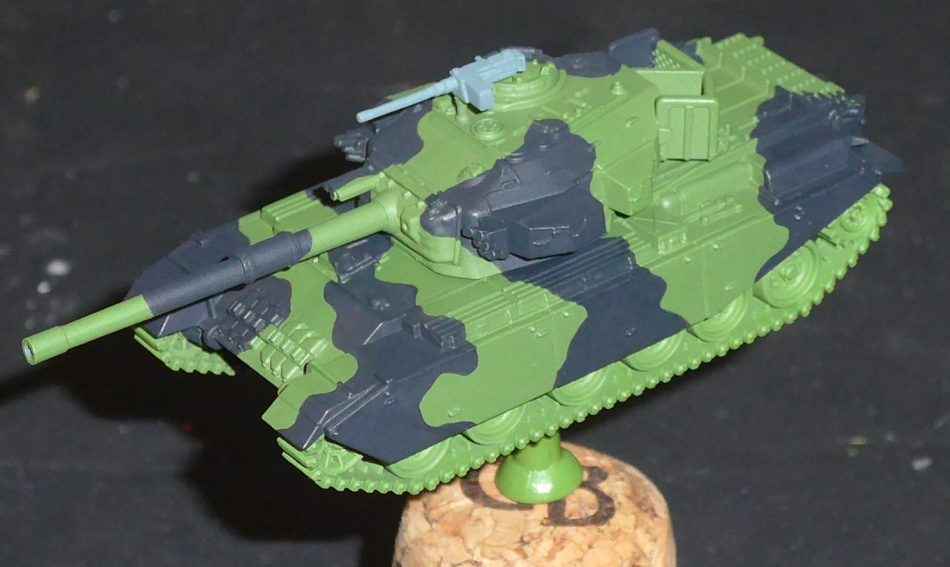
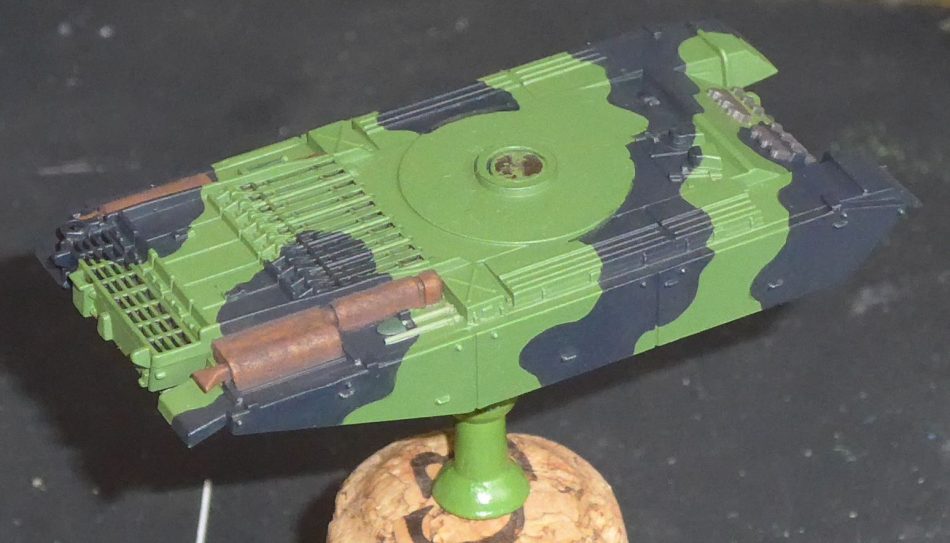
Next up is the black camouflage pattern. Here I have made a mix of German Grey (Vallejo) with Abbadon Black (Citadel), to make a very dark black-grey as it takes the wash better, than just plain black.
There are of course plenty of black-grey colors available, but I didn’t have any on hand, so I just mixed my own.
After the camo was applied, it’s time for the exhaust. The exhausts on the Danish Centurions got extremely hot during operation and the paint on them would quickly peel off exposing the exhausts to the environment and therefore they would quickly become rusty.
To try and achieve this rust effect I started out by stippling on Bloodreaver Flesh (Citadel) leaving a few bits of the camo pattern visible.
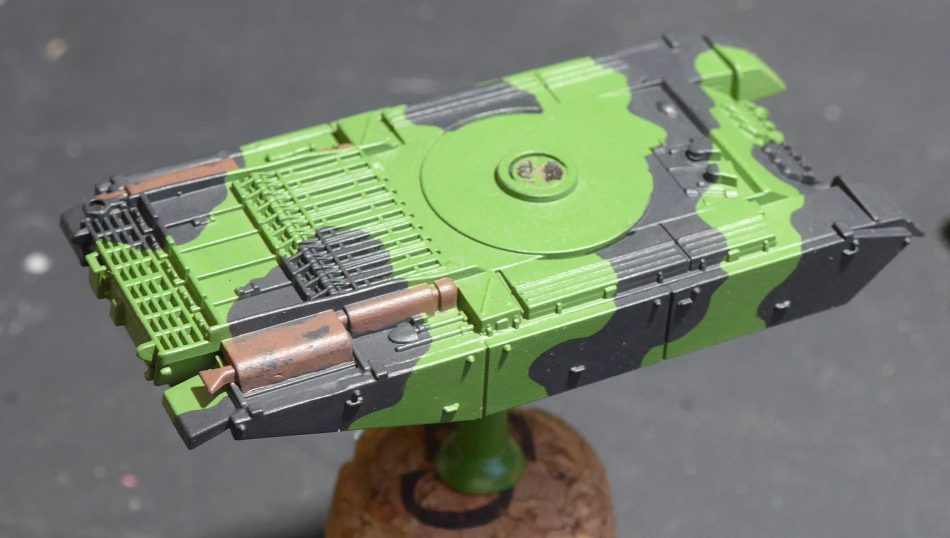
Following was another stippling of Skrag Brown (Citadel), again making sure to leave some of the previous color showing.
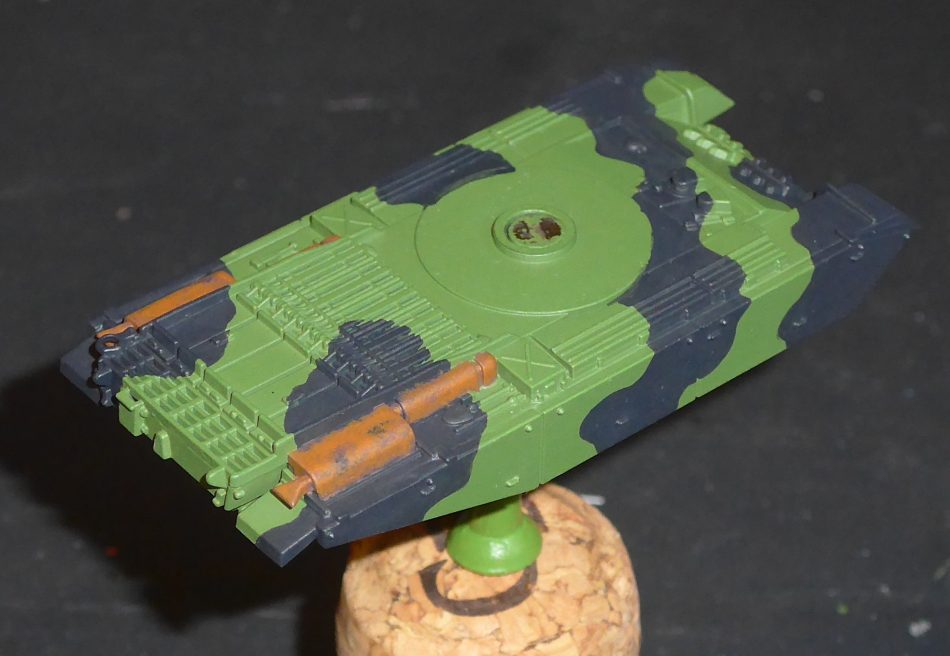
Lastly, a tiny bit of XV-88 (Citadel) was stippled on, again following the previous method.
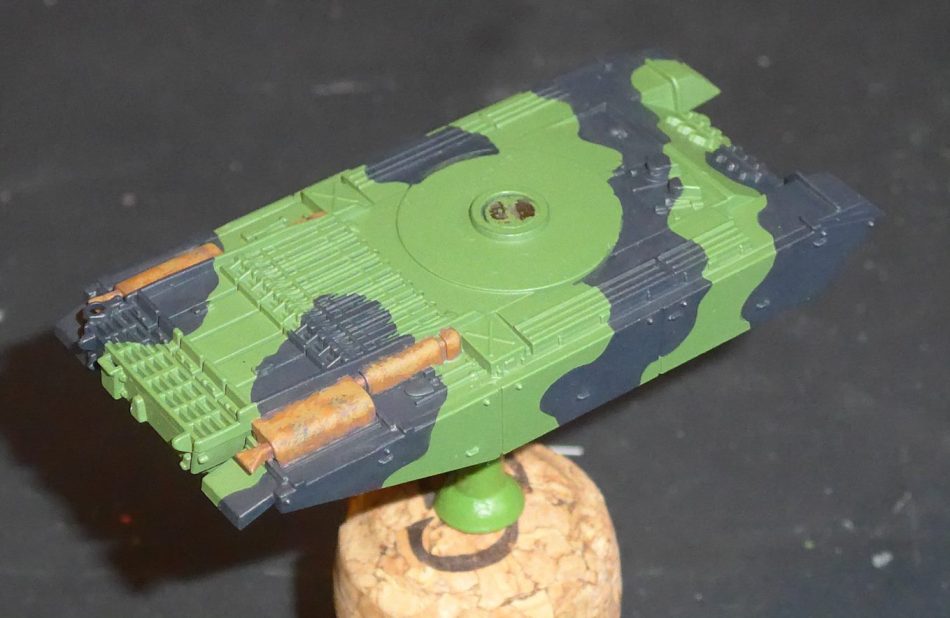
To tie it all together, I watered down some Typhus Corrosion (Citadel) and used it as a wash on the exhaust, to tie all the rust together.
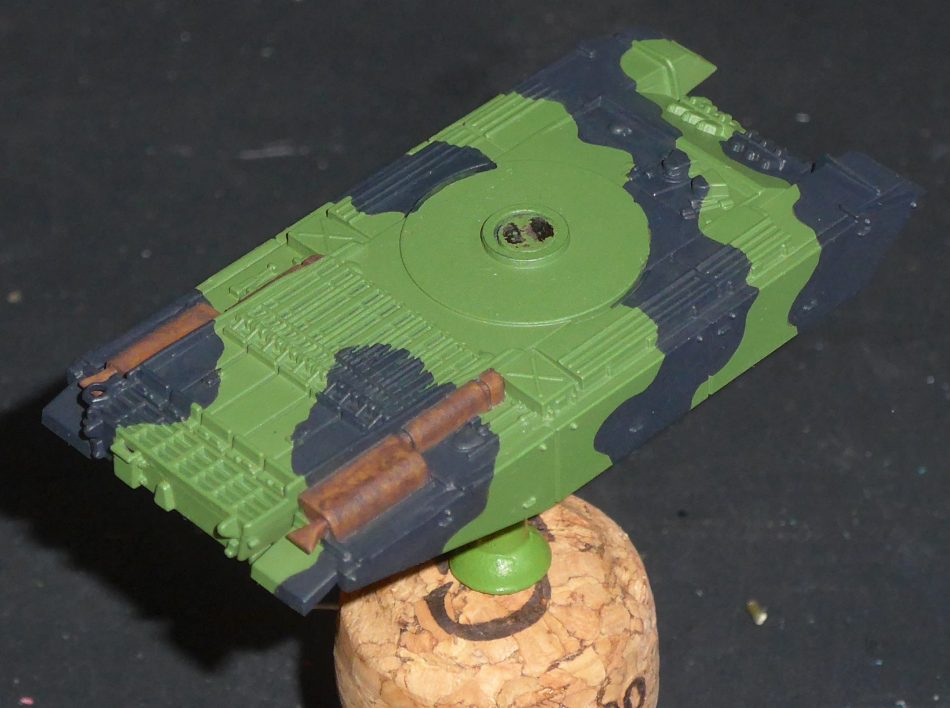
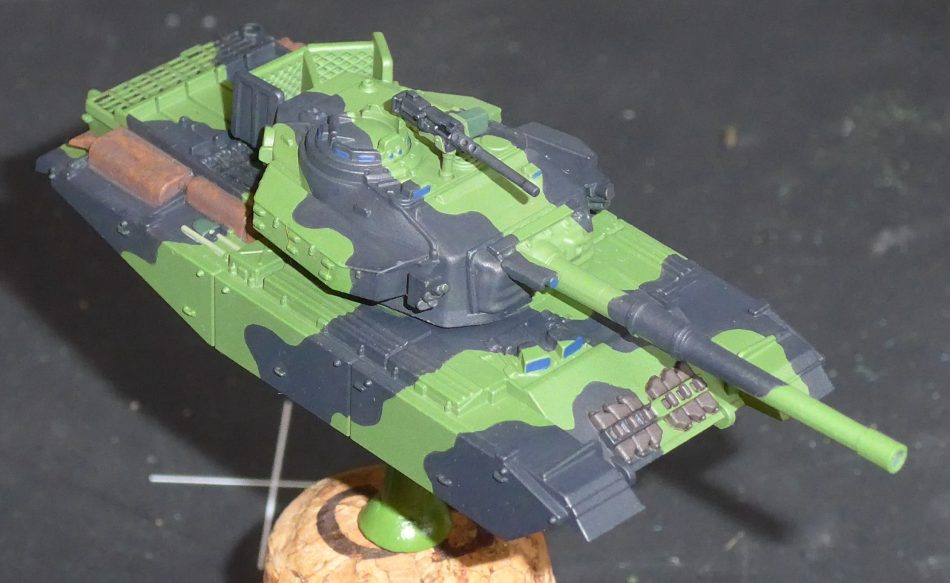
Time for some details. The spare tracks on the front glacis I painted in Dryad bark, taking care to avoid the track holders.
You could skip this step, as the tracks would often be left on the vehicle during painting, but I like to pick them out, because it makes the tank more interesting to look at. The tools, unlike the tracks, would often not be on the tank when painting it so I pick these out as well. For anything that’s made of wood I paint them with Straken Green (Citadel) and the metal parts Vulkan Green (Citadel), avoiding the straps/clamps for the tools.
Now, BF somehow forgot that the Danish centurions had 50.Cal AA MG’s mounted in front of the Commanders cupola. I remedied this by mounting a spare 50.Cal I had lying around from some FOW US Airborne Jeeps. The mounting is painted in the same green as the tank itself, the gun is painted German Grey (Vallejo) followed by a Nuln Oil wash (Citadel) to darken it down. The ammo box is painted with Vulkan Green (Citadel). The periscopes around on the tank were painted with Kantor Blue (Citadel).
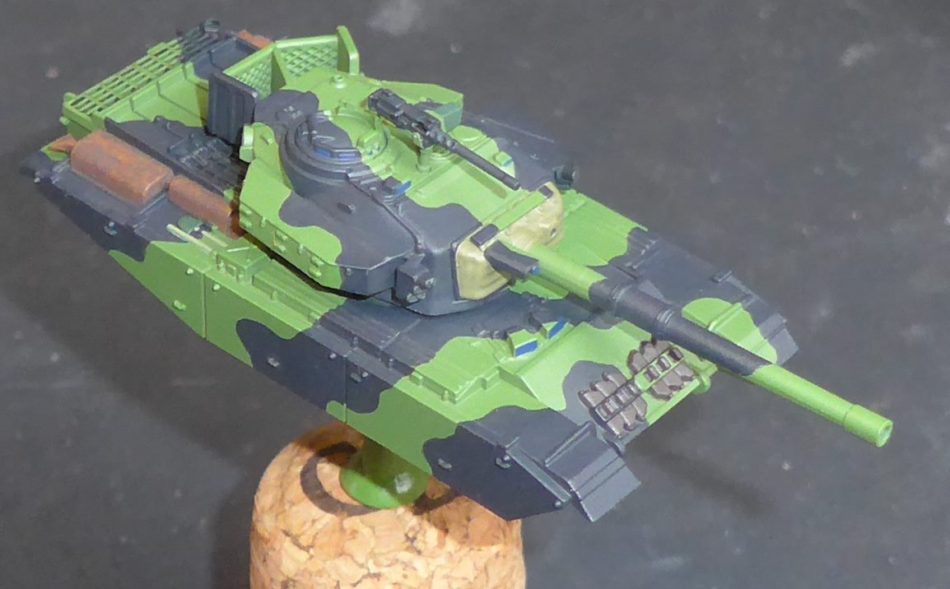
The next step is again completely optional, but I did it again for the sake of interest on the model. The gun mantle canvas cover would normally just be painted along with the entire tank, but I like to pick it out. For this I simply just gave it a coat of Deathguard Green (Citadel).
With that done, the Tank itself is ready for a Wash. Here I use Agrax Earthshade (Citadel) that has been thinned down a lot, with Glaze Medium (Vallejo). I apply this liberally for the entire model. Then the wash is completely dry, the entire tank receives a light drybrush with Tallarn Sand (Citadel).
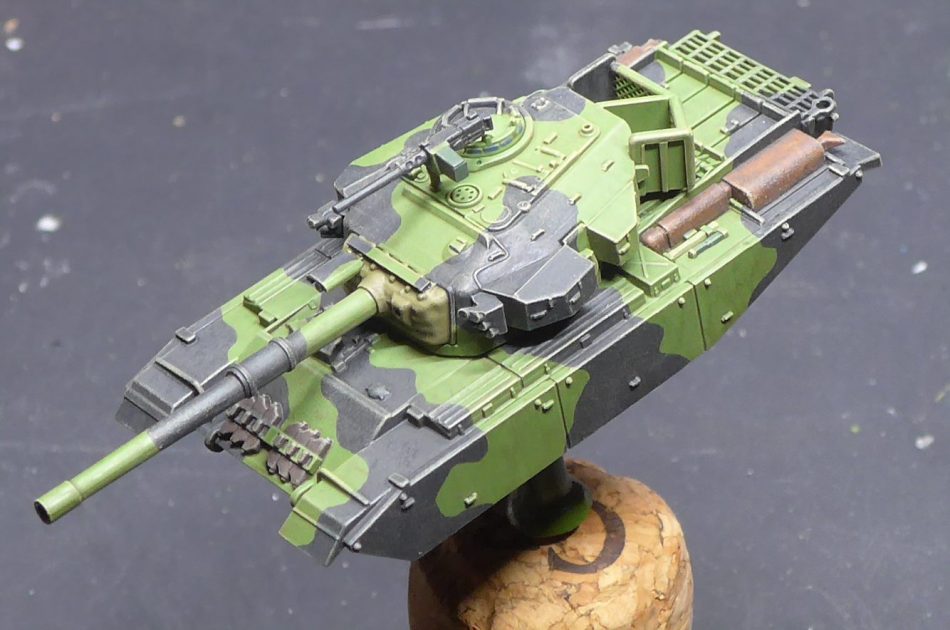
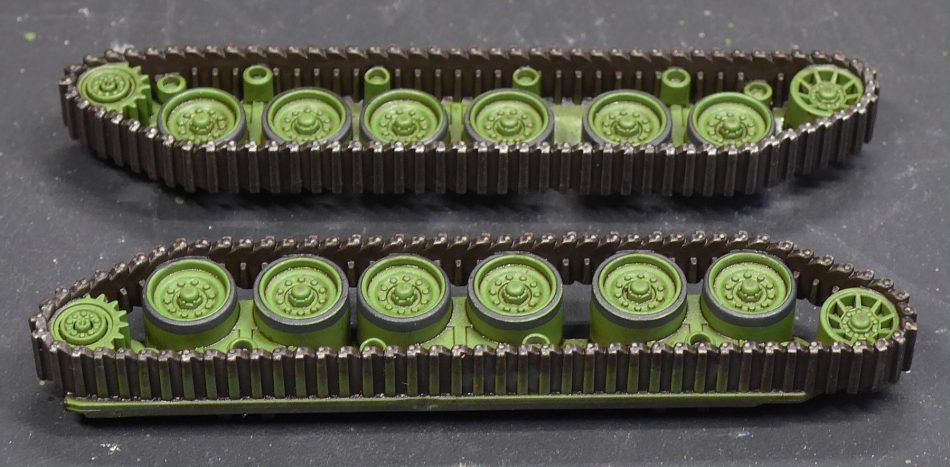
And that’s it for the tank itself, and all that is left, is the tracks. I tend to go a bit overboard and do details that really aren’t necessary, but I like to know they are there and I can see them, when picking up and inspecting the model, so here we go. First up, all the tracks parts are painted with Dryad Bark (Citadel).
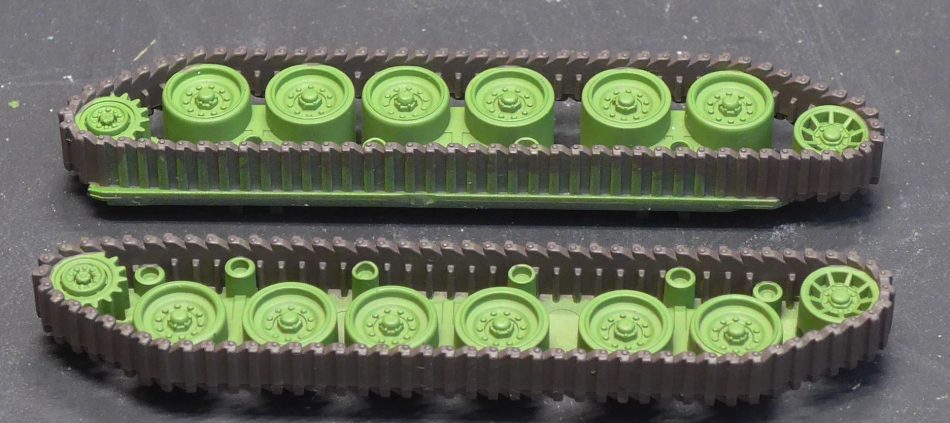
After this I pick out the trim of the road wheels with Worn Rubber (Vallejo).
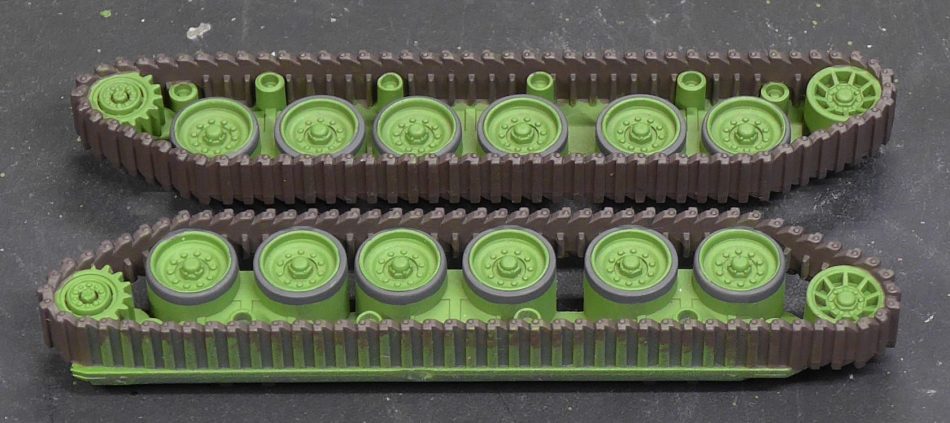
Next, the tracks get a wash of Agrax Earthshade (Citadel) undiluted straight from the pot.
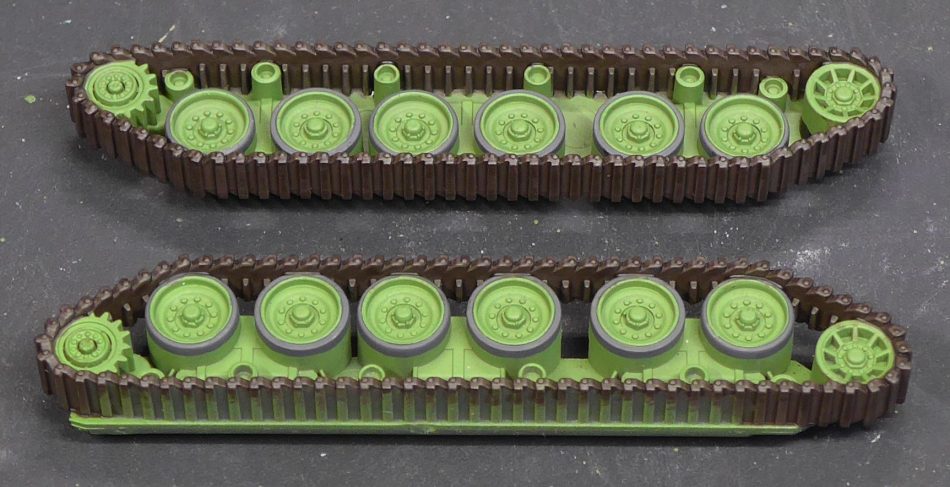
Once the wash is dry I give the outside of the tracks a drybrush with Leadbelcher (Citadel). NOTE: I skip this step on any vehicle where the tracks have rubber pads, like the Leopard or M113.
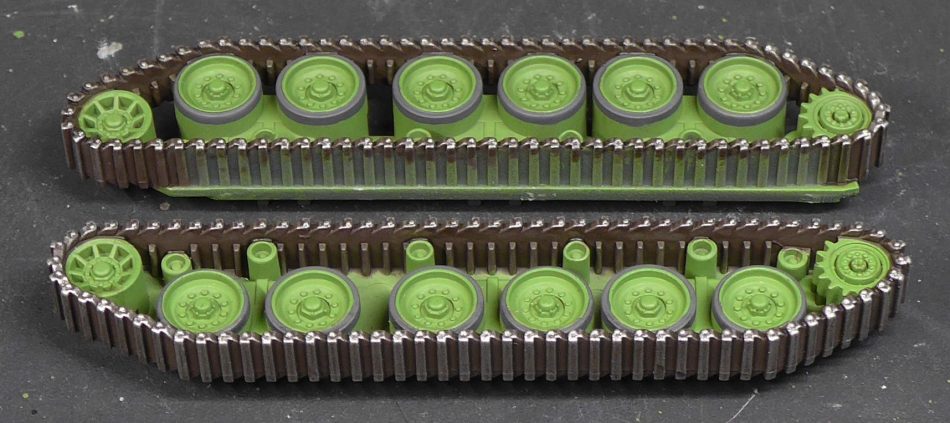
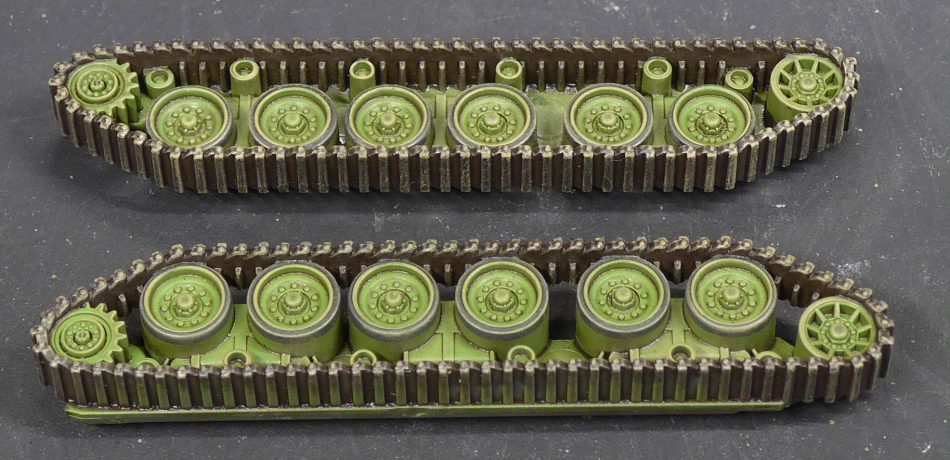
Then all the tracks and road wheels gets the same diluted wash of Agrax Earthshade (Citadel) and Glaze medium (Vallejo)
After drying they are treated to the same drybrush as the tank, with Tallarn Sand (Citadel)
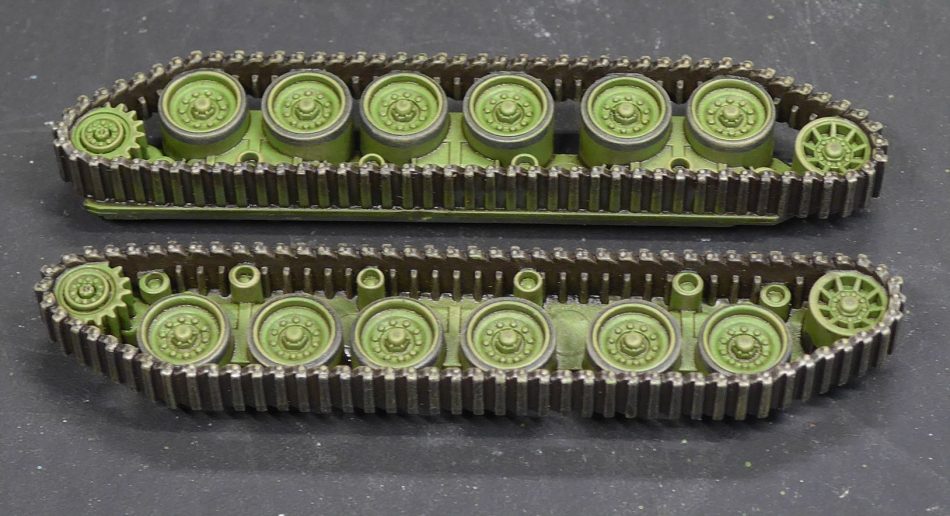
I noticed that after the wash and drybrush, the Leadbelcher was hardly visible anymore, so I gave the tracks a careful drybrush again, with Leadbelcher (Citadel).
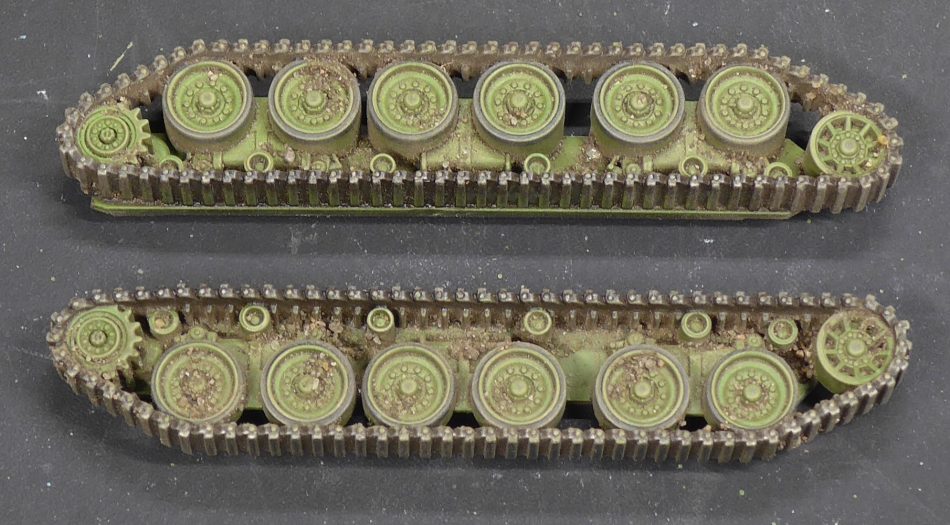
Lastly, I use an old brush to stipple on some PVA glue here and there, focusing on where dirt would be collecting and then sprinkle on some dirt from my garden.
And that’s it. All that’s left is to attach the tracks to the tank and its done. I also always give my models a coat of Vallejo Matt Varnish spray, and this normally works really well and gives a nice flat matt finish, but I think my last can have been mislabeled and it came out with a bit of a Satin finish. I will give this another go, when my FLGS get more in stock.
But here is the finished model.
NOTE: I added an antennae to the turret, by drilling a small hole in the antennae mount and inserting an antennae I had clipped of from an old dishwashing brush.
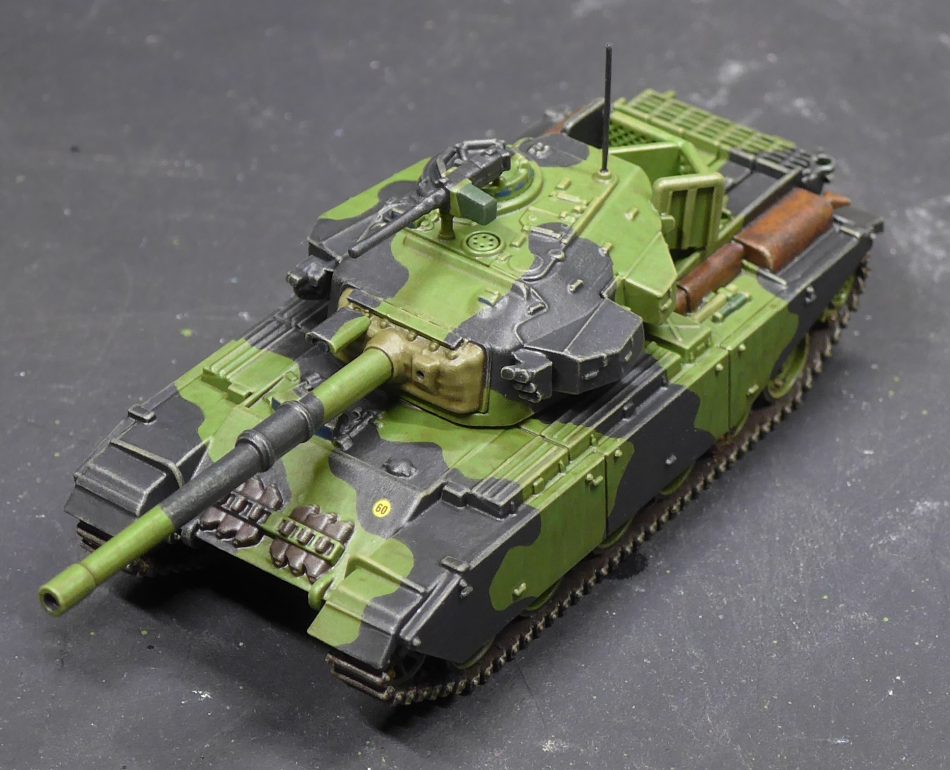
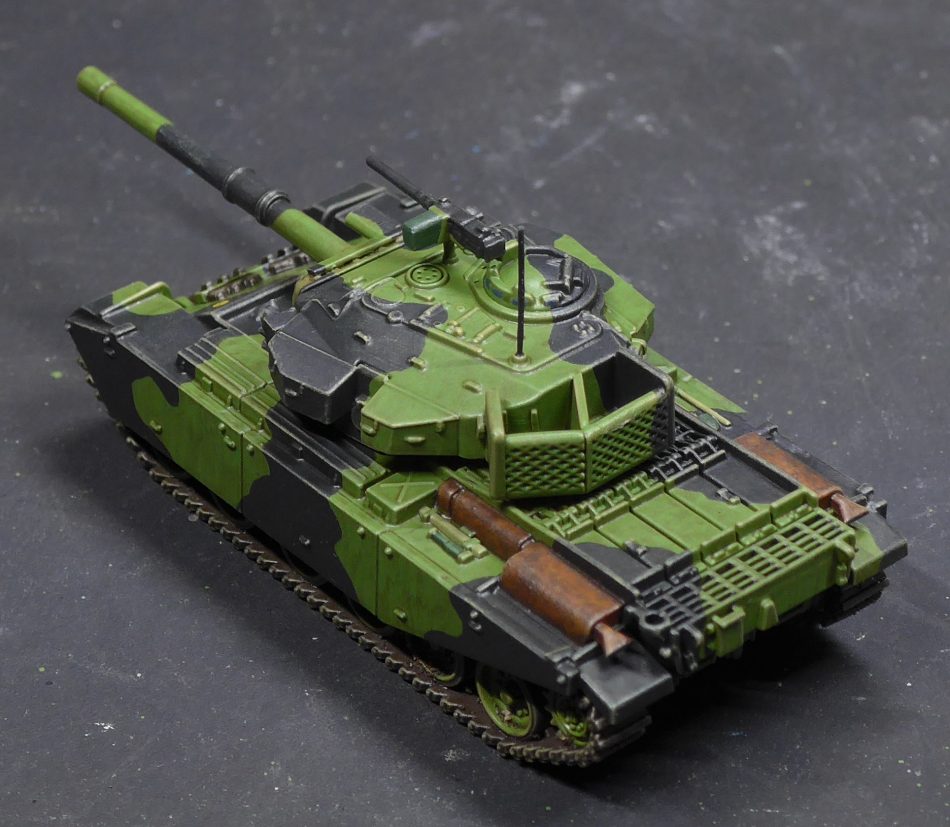
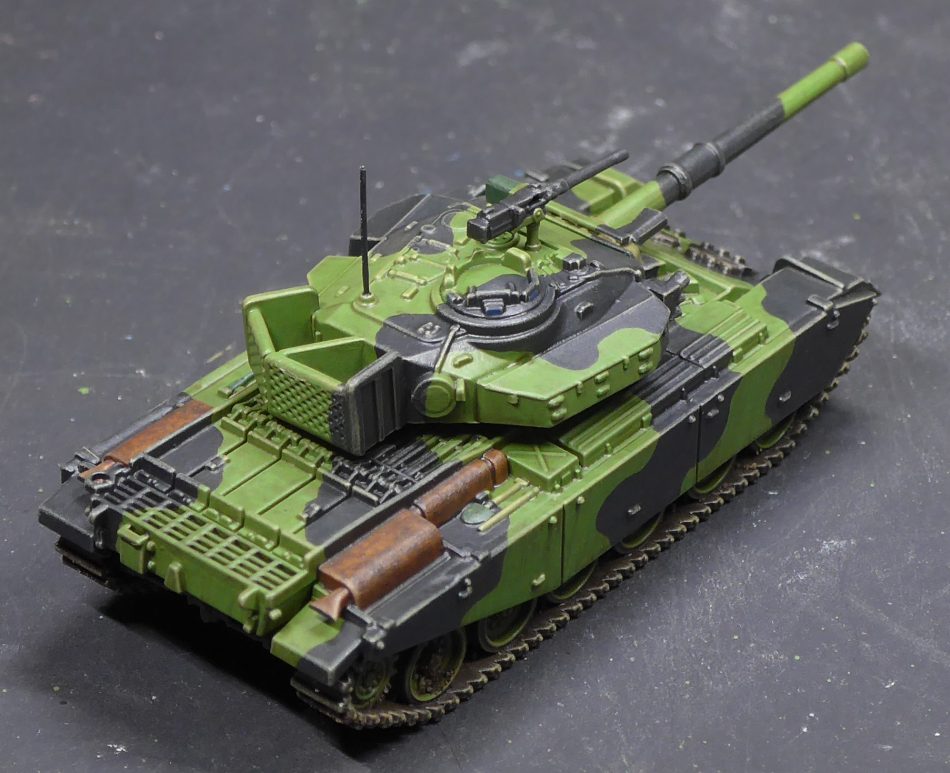
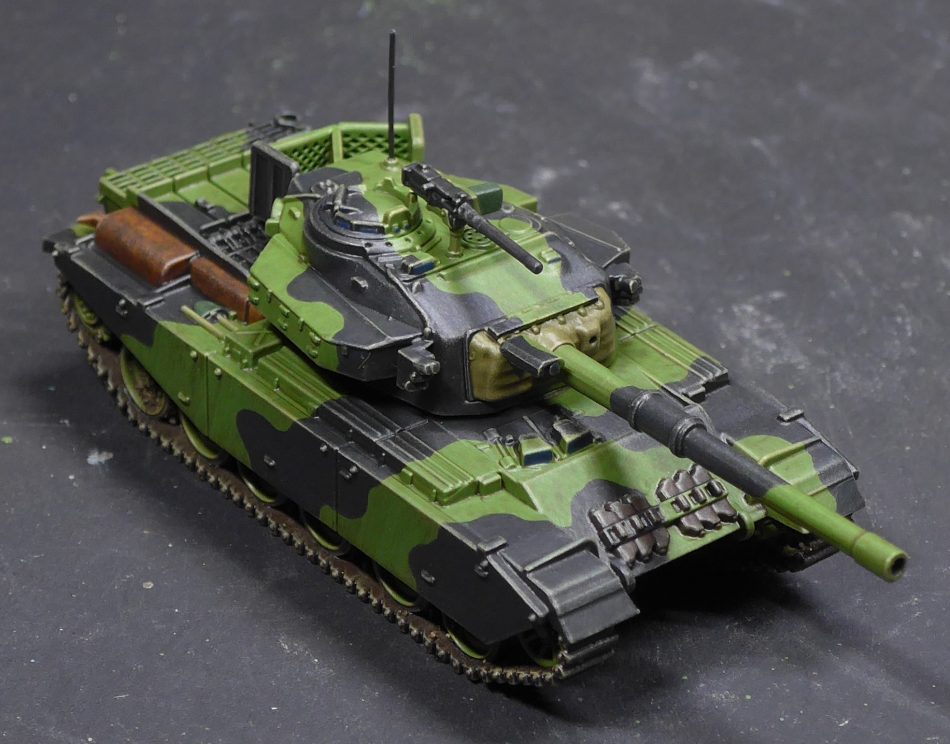
Here it is alongside a Leopard 1A3 and an M113. Notice how flat matt they are in comparison.
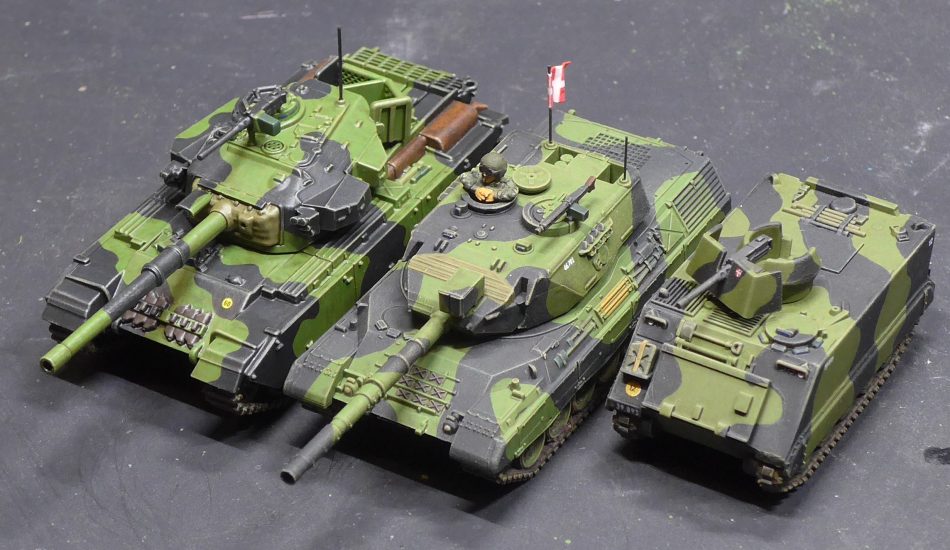
I tried using the decals from BF to add the license plate and weight specification, but they were badly aligned so I opted to skip them (although I did end up finding a weight classification from a WG sheet). For my Leopard’s and M113’s I had some custom decals made that works way better than the BF decals. Basically, in my opinion, the Danish decals from BF are useless, although I had my hopes up for the Centurion decals.
Morten has been a soldier in the Danish Army since 2005, with seven deployments to Kosovo, Afghanistan, Iraq, and the seas around Africa . In addition to playing Team Yankee, he plays Star Wars Legion and is a member of the 501st Legion Costuming Group. Everyone that he plays with locally are either former or current colleagues, with the exception of Denni who is in the Danish Home Guard. He lives in Kolding.

Update on the Vallejo problem.
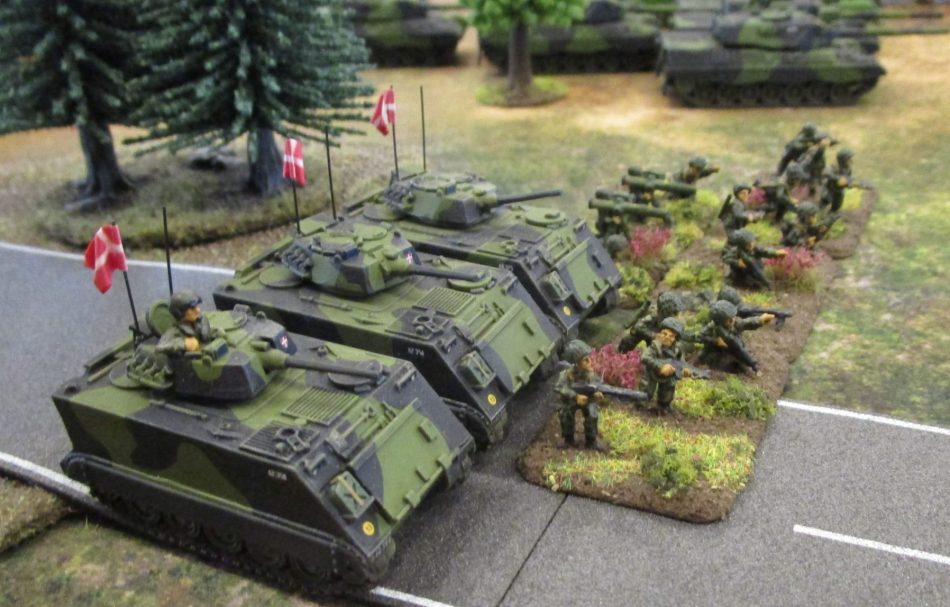
I was recommended giving the model a coat of Matt Varnish from Winsor Newton Professional, and the Centurion is now the same dull matt finish, as the Leopard and M113 🙂
I’m am also talking with Vallejo about their Matt Varnish, as I have now tried three different cans of their new Matt and two have come out Satin and one Gloss!
They responded to me on FB and I am currently waiting for them to reply by Email.
So for the time being, I have to recommend that people DONT use Vallejo Matt and if they do and end up with a Satin/Gloss finish, give them a coat with Winsor & Newton 🙂