BatRep FOW LW (Part 2)
By Benny Christiansen
The typical Dane. Happy-go-lucky with a positive look at almost everything. Giving you a glimpse of the way the Danes do it.
In the first article, I focused on the Fog Of War cards in the game. In this article, I try to give you examples of how we play with the Flames of War (FOW) V4 rules.
The Third Game of the day
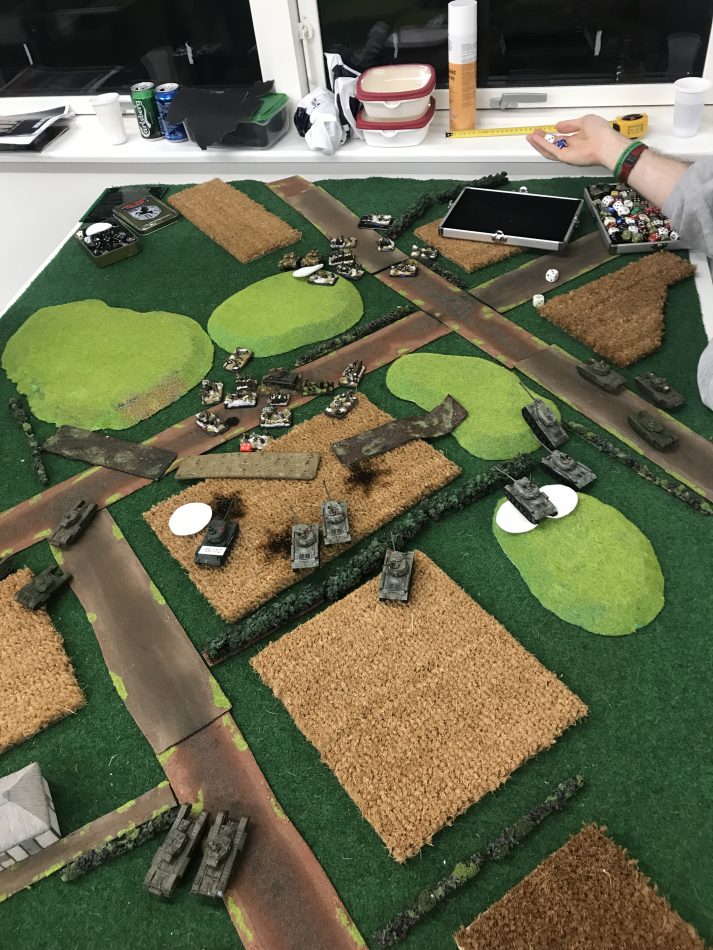
Notice the minefields in the middle of the table. I wanted to ignore themIn the final game, I had the privilege to play against two of my dear friends, Helge and Lynge, who some of the ETC community may know. Helge is the Captain of the Danish FOW team and also a person who is involved in the ETC community for FOW. Lynge is a regular on the Danish ETC Team, and I see him as one of the best players in a tournament, as he never knows how to give up or give in.
Our games were to be two vs two players. In order to keep the number of players even and an equal number of Axis vs Allies, I had agreed to run two forces at a time. Against these two, I knew I was in for a challenge. I rarely win in games against Helge, and to play against Lynge and Helge at the same time… well… I decided that I would do my best, at least to give them as good a challenge as possible.
We play No Retreat, with me as the attacker.
They field a Fallshirmjäger list with HQ (and lots of AT assets), two combat platoons and a veteran StuG platoon, with an Ausbildung list. The trained rating means they have a lot of tanks. They put Sturhmpanzer in Ambush.
I plan to put my IS2 platoons in the middle and stand at the minefields. One IS2 platoon and the HQ will be shooting, while the other platoon will move to close on the objective at turn 5. I was certain that the game would not be over quickly, and I needed to have a solid plan.
My two Churchill platoons are divided, one on each side of the table. One is going to try and smoke the Panthers, while the other will make a run for the rear objective. My hope was that I could have enough AT 15 shots, to be able to take out the Panther HQ. Naturally, my opponents had ways to counter my plans, as you will see.
Turn 1
I use Dash and Follow Me to get the Churchills moving full speed ahead. The HQ arty ranges in on the infantry (I forgot to put down the “Ranged in” marker in starting phase) at the nearest objective.
They smoke my IS platoon and IS2 platoon with direct smoke from mortars after their Panthers fail to do anything. Panthers fail Shoot’n’Scoot.
Turn 2
The Churchills on my right flank dash. The IS2 platoon shoots with no effect. Churchills manage to smoke one Panther. HQ Arty takes out one team from the HQ at the objective. My opponents get Hetzers from reserves. Their Panthers kill one IS2 and bail out two more. They manage to Shoot’n’Scoot.
Fallschirmjägers at the objective to protect and Panthers to take out my heavy tanks. Hetzers in reserve. Not what I had counted on happening. One Dead and two Bailed Out IS2 in one round. Was my tactic wrong?Turn 3
My IS2s shoot and kill a Hetzer. HQ Arty fires, and pins the platoon, but nothing else. Churchills to the right move up further. They are closing and may be able to flank the Panthers. My Churchills’ LOS prevents Sturhmpanzers from making an ambush in the side of the IS2. They get in StuGs, that drives up towards the Churchills to shoot them in the side. They hit, but I made lucky rolls and manage to save. The Hetzers try to take out my Churchills on the left flank but have no effect. Panthers also shot at my IS2, with no effect.
The plan of flanking with the Churchill platoon seems to go well. And then the darn Stugs came in.My tanks shoot. The enemy tanks are trained, but hard to kill. The IS2 platoon behind the hill is ready to move in and stay within 20cm of the objective in turn 5.
Turn 4
The Churchills dash on the left flank but fail a Follow Me. I want to flank the very annoying Panthers with both Churchill platoons. My opponent manages to Blitz every time I get some smoke up there, so the plan I had at the beginning needs to change.
The Churchills on the right Blitz and get side shots. They take out two StuGs.
My opponents reveal their ambush, and the Sturhmpanzers shoot at the Churchills on the left side. They take out one of the 6 pdr Churchills, and bail another. They get two more StuGs in from reserve. Their Panthers hit both IS2s in the platoon with two IS2 left. They kill one, and now the platoon has to make a Last Stand test. Fortunately, the CiC is nearby. Their Hetzers shoot, and bail one Churchill.
So far this Churchill Platoon has managed to survive. Soon I will make my push. Their reserves contain only things that can do me no harm. I just need to kill that Stug.
Turn 5
Last Stand – check. Remount – check.
Churchills on left flank manage a Blitz and shoot. But they only bail two Hetzers. The IS2 CiC takes out a Sturhmpanzer. The IS2 platoon with three tanks, move within 20cm of the objective and takes out another Sturhmpanzer. That platoon will have to take Last Stand tests. Churchills to the right take out one of the StuGgs (that came in from reserve) as well as the last veteran StuG.
The Hetzer crews remount. In reserve, they get the Flak and the Luchs. Panthers would have killed the last IS2 and make the entire formation run away, but a lucky roll of my dice prevented it. The Hetzers try to Blitz in order to get side shots on the Churchills, but fail the Blitz.
Those annoying Panthers. So close to taking them out, and yet so far away. Two flanking Churchills. Going for the Panthers, but soon they would have a far more important task.Turn 6
Churchills are in position for shots on the Panthers. To hit I only need 3+.
I rolled 1, 1, 2. Critical timing for a miss.
I had smoked the Panthers in the beginning of the shooting, hoping it will prevent them from shooting. But I positioned the smoke too close to the tanks. CiC IS2 and solo IS2 both hit the HQ Panthers, but they place my hits onto the Hetzer platoon. Even so, I fail to roll 2+, so I only bail the Hetzers.
I placed the smoke too close to them. They can Blitz through it. Big mistake! I move the IS2 Platoon inside the 20 cm zone. My opponents choose not to assault them. If they had, and if they had won, I would have been outside 20 cm of an objective in turn 6 at the end of their turn, and they could have won. Maybe the Churchill platoon prevented them from using their rear inf platoon, but I think they could have had great benefit from moving them out to assault the Churchills earlier, with the Stugs
The Hetzers remount with no problem. They put direct smoke on the IS2 platoon and one infantry team crosses the minefield without problems. The infantry team is going to shoot and assault CiC IS2 in the side. However, the Panthers hits IS2 CiC and one hit goes to the IS2 solo platoon. CiC dies, failing warrior save. The IS2 platoon is bailed. The PanzerShrek from the infantry team at the bailed IS2 misses, and the tank is too far away to assault.
A simple Blitz move is enough to go far enough to be able to shoot out of the smoke, with no problems. IS2 platoon assaults, but I forget to consolidate them, eager to assault with the Churchill.
Turn 7
I go all in, and prepare to make an assault on the infantry at the front objective. The Fallshirmjäger HQ is decimated by artillery, and they move away the one infantry team to assault the IS2. That leaves a platoon commander and CiC with AT weapons.
I move up the full IS2 platoon, into assault range. Both the Churchill platoons move to see if I can add supporting fire, and potentially assault the units. I had some important luck here, as theFallshirmjäger CiC fails a machinegun save, and I manage to kill it with an FP test of 6+. IS2 platoon assaults the infantry platoon at the objective along with the HQ. They only take out only one team of the two remaining, but the infantry withdraws.
My left flank Churchills, who move towards the center, fail a Follow Me. That leaves only the platoon leader to assault the remaining four teams. The command Churchill gets through defensive fire but fails to kill anyone. The infantry again withdraw from the combat. Earlier I forgot to consolidate with the IS2s, but I remember to do it with the Churchills. I now have IS2 and Churchills within 10 cm of the objective.
The trained StuG manages another Last Stand test, then tries to take out the Churchills. The Hetzers try as well, getting side shots, but to no effect. The Luchs drive in to contest the objective and support the infantry. The Panthers manage another Blitz and shoot the lone IS2, killing it. The IS2 formation is now destroyed. They move up most of the infantry platoon from the other objective to assault the Churchill platoon from the rear.
Assault by the rear infantry platoon. The Top Armor of the Churchill tank is vulnerable. I save the one hit that is of interest, and they withdraw.The Panzershrek hits, but I save. I want to slug it out with them, so I am happy to see my 3+ counterattack roll succeed. After I hit, however, they retreat. I found out after the game, that the Fallshirmjäger formation would also have to go, if they lost that unit, as the HQ and Stugs had gone.
Two Churchill platoons gathering at the center. Will they survive long enough or do the German players have too many things too close to the objective? Everything is going for the center. Even my Churchill HQ at the bottom of the picture.Turn 8
After the IS2 leaves the battle, the two platoons of Churchills divide their fire between the Luchs and the infantry. The Luchs die to the fire from the Churchills, but the infantry manage to stay alive. I decide to assault with the lone Churchill. I wanted to avoid making assault number 2 from the big Churchill platoon under Defensive Fire from the Panther. It was the right choice. I survived Defensive Fire from the Panzershrek and killed off the platoon commander. They failed their 3+ moral check, and then had to move away, so they were more than 10 cm from the objective. Thus leaving me as the winner of the game, 6-3. A Close and intense game.
The final assault. I used the 10 cm the Churchill can move to get in contact with the command team. It survives the Defensive Fire and on 3+ it takes out the team. That caused the infantry platoon to loses its AT weapon. Luck favors the bold. They fail a 3+ roll and since the HQ was gone from the game, no reroll. They have retreat 15 cm away from my tank, making it so I could end the turn with no enemy units within 10 cm.
Conclusion
For me, it was a game where I had a plan, and I managed to follow my plan. In a rematch, I strongly doubt the result would be the same. I was lucky that my opponents were more used to V3 than V4. I believe that had they been more aggressive in their use of the infantry (especially the platoon at the rear objective) that would have changed the game.
The use of the Mistaken Target rule by my opponents made it impossible for me to take out their HQ units. In turn 6, they could have assaulted the IS2 platoon within 20cm with 1-2 AT infantry in the side, and either killed or made them go away, and thus ending their turn with me outside 20cm of an objective. It would be worth the risk of losing 1-2 infantry teams, even if they came from the platoon at the forward objective. Also, notice how often we use the orders.
I believe the movement orders are very important in making a unit work efficiently in V4. I was very impressed with IS2s and Churchill’s skill tests for Shoot’n’Scoot or Blitz. It is my experience that the movement phase is probably the most important phase in your turn, and along with that, your ability to use your orders to the maximum. Find out when to use them, and when not to use them.