ARVN vs. PAVN in “Standup Fight” – a “Nam AAR
By Tom Burgess
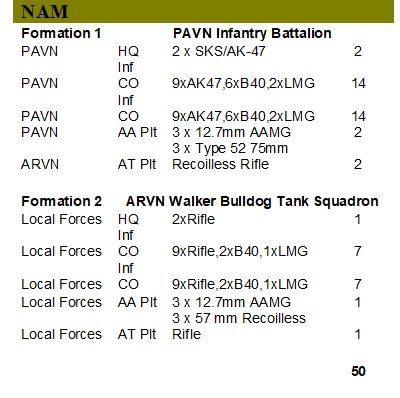
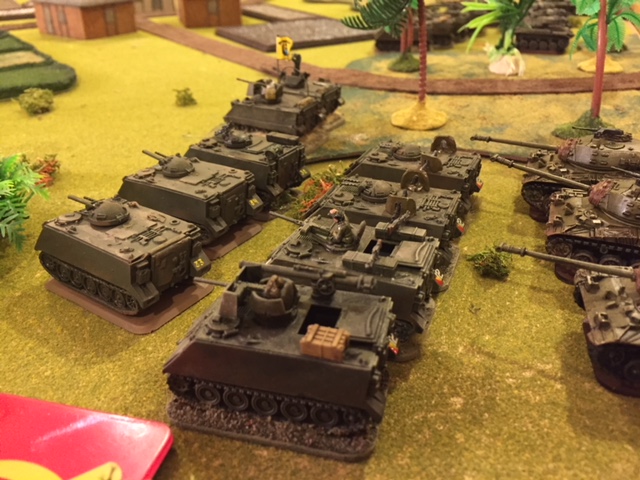
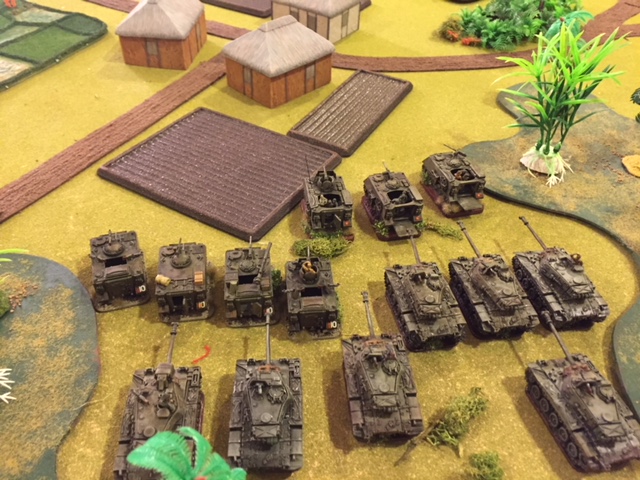
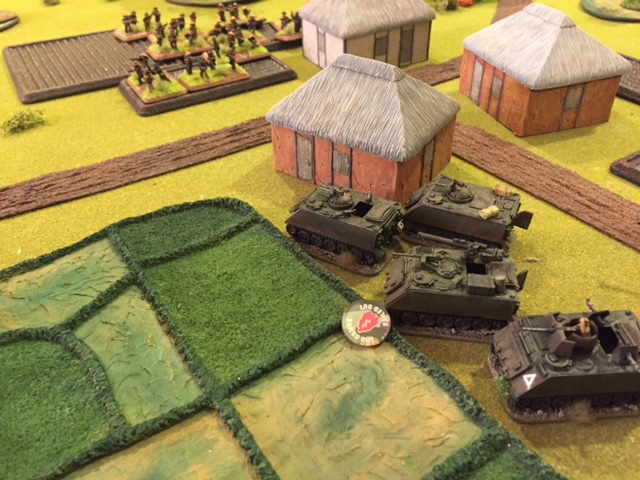
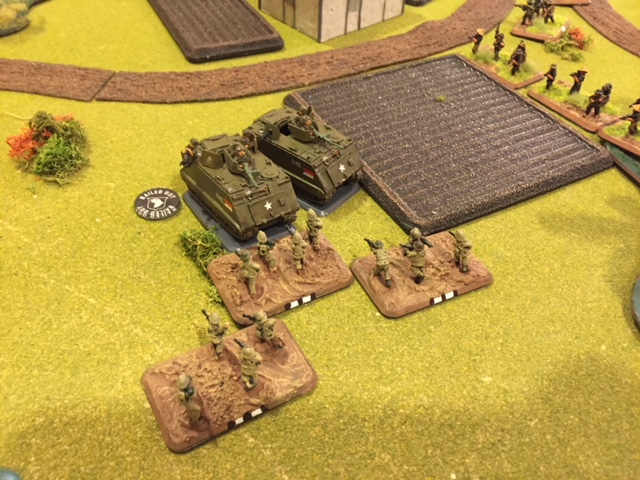
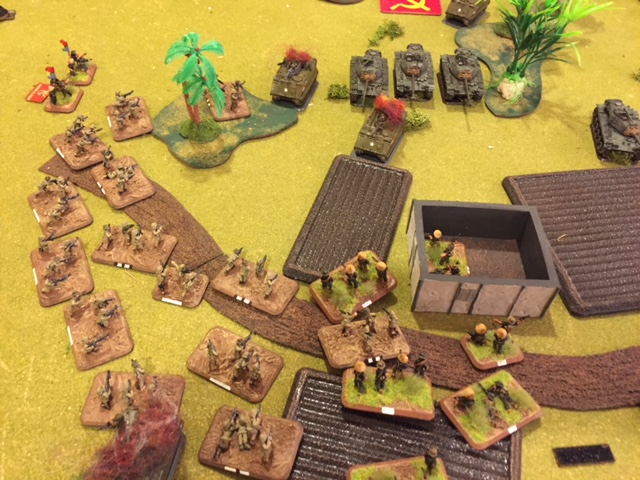
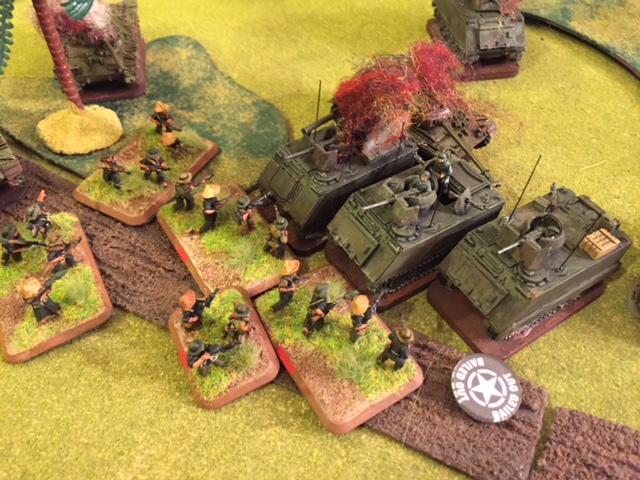
Excited to try out the new ‘Nam rules, my primary opponent for jungle rumbles, Charles Christy, and I were able to coordinate a test game. We immediately went to our old “go to’s.” For Charles, this would be his ARVN Cavalry Squadron, decked out with more M113s than anybody I know has. Due to the lower unit costs and new formation rules he was also bringing an M41 Walker Bulldog Tank Battalion. He had an amazing amount of tracks for just 50 points.
The new ‘Nam points levels and multi formation rules benefited my forces, as well as I, was able to get both a PAVN Battalion and a Local Forces Battalion in at 50 pts along with battalion weapons units like Recoilless Rifles and Anti-air machineguns.
Forces used


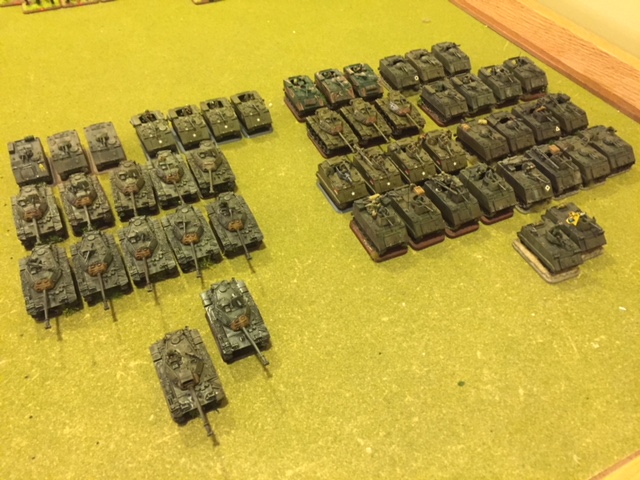
The Game Table
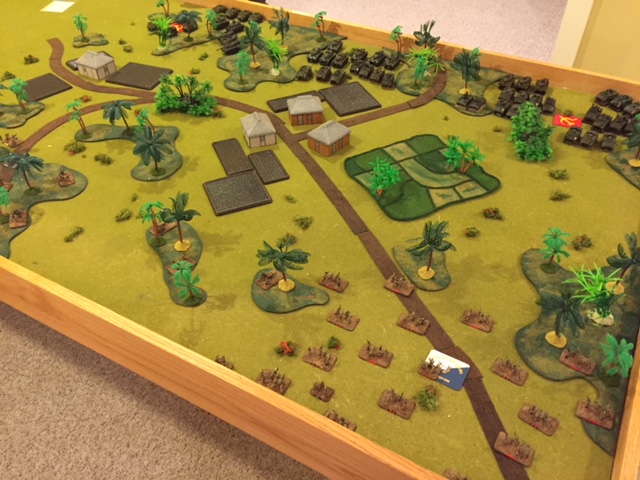
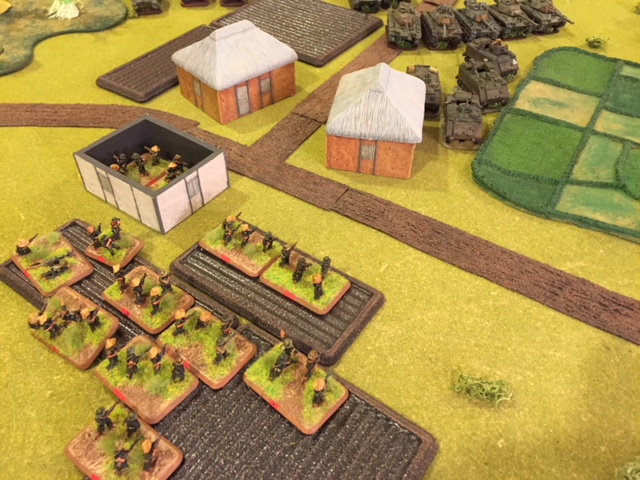
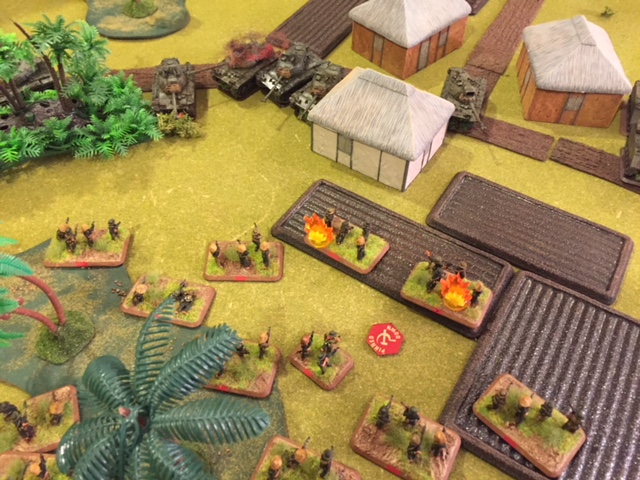
Our battlefield was jungle, rice paddies, and some small hamlets with a few connect tracks. The question was “what will the in-between spaces consist of?” We rolled on the Elephant Grass Table (page 21) for the spaces between jungle/woods.
The result was High Grass reducing visibility to just 6″ between gun and infantry teams and providing concealment to and from vehicles at any range. We may not have played this right. We thought this meant that infantry and gun teams could not be targeted beyond 6″ but vehicles could. We also thought that line of sight for ranging, since it goes to a point of terrain not a team, was not limited though would still have the +1 modifier for ranging in on short/tall terrain. We felt that this was going to favor the Nationalist forces.
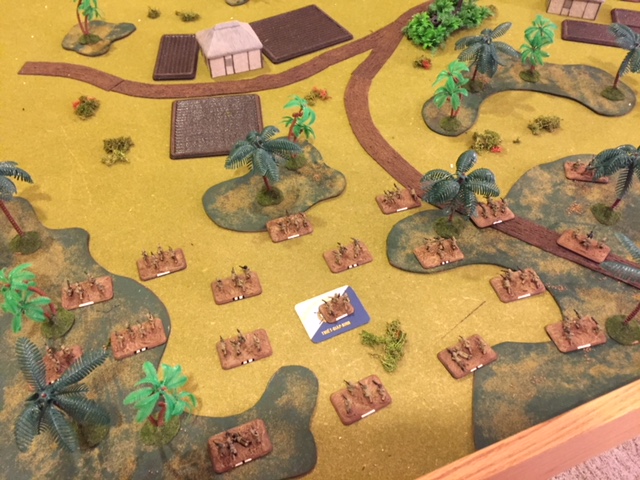
Deployment
We rolled up Stand Up Fight for our missions.
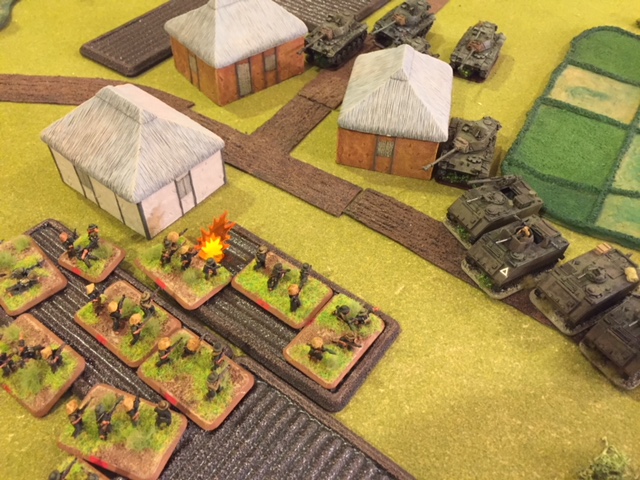
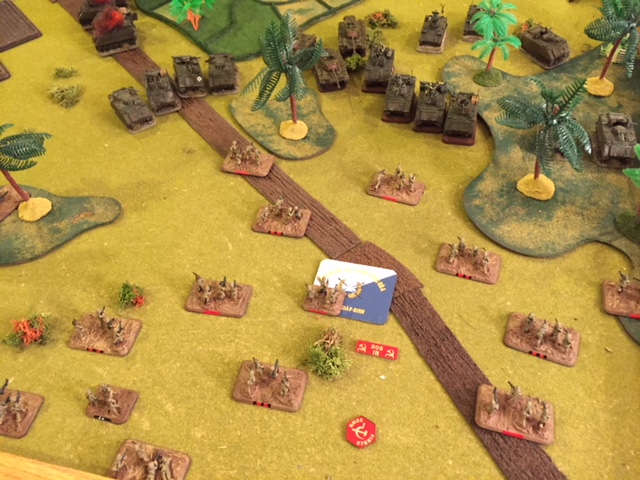
For my deployment, I chose to initially protect both objectives each with one of the PAVN Infantry Companies. I felt I needed a solid backstop and could not rely on Guerilla Fighter rules to get enough of a force between Charles’ mobile hordes.
 Turn 1 – Battle Points (ARVN 0/PAVN 0)
My PAVN force “won” first move. There really was nothing for me to do, so I just rolled for an immediate reserve (failed) and passed.
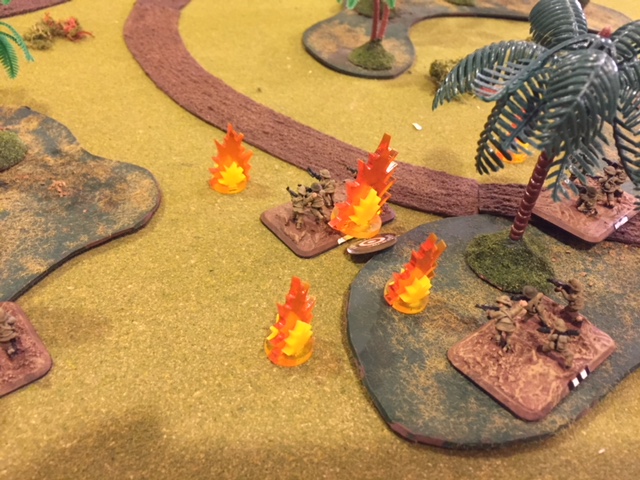
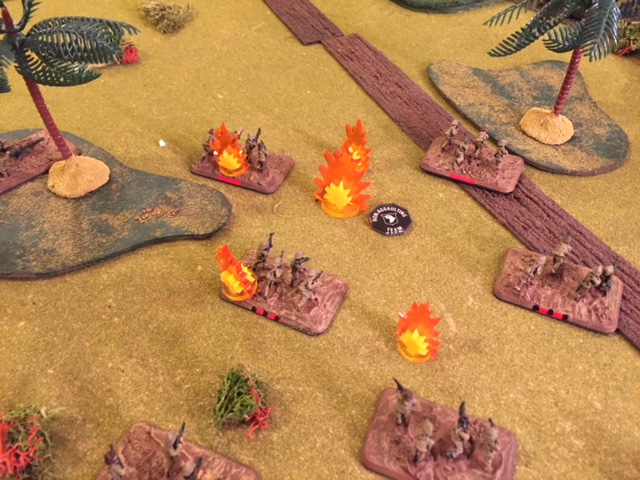
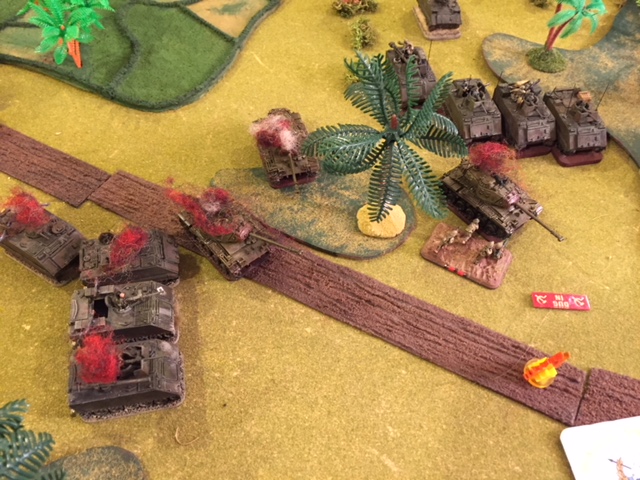
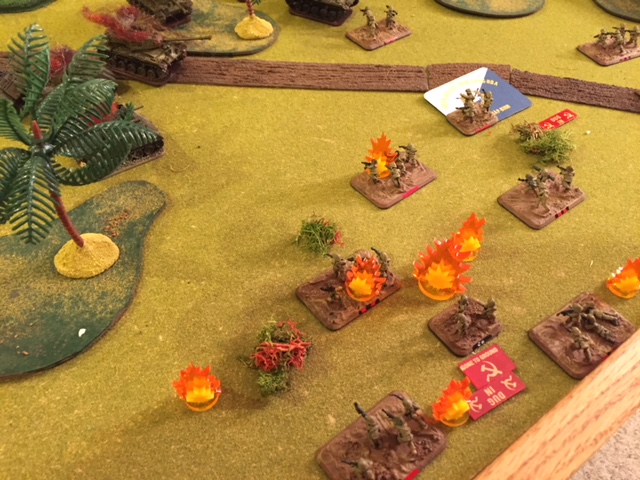
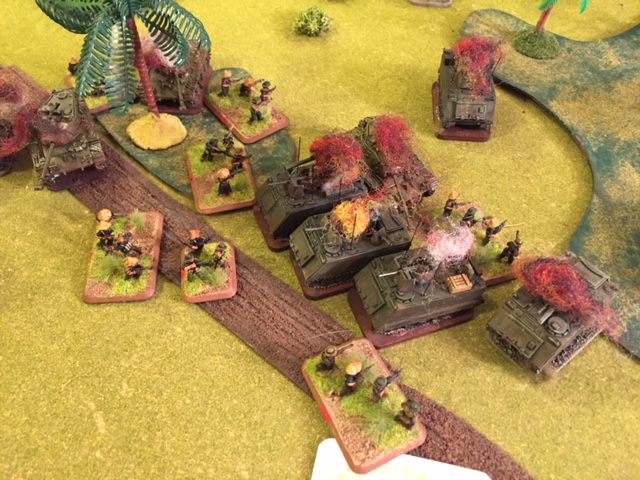
Charles then began his general advance. He could not close enough to get direct fire from his vehicles. Because artillery now ranges on a spot rather than a team, Charles was able to get two of his three mortar platoons ranged it. Needing a “6” to range in (5 Kill and +1 due to terrain) he beat the odds getting two units ranged in.


Turn 2 – Battle Points (ARVN 0/PAVN 0)
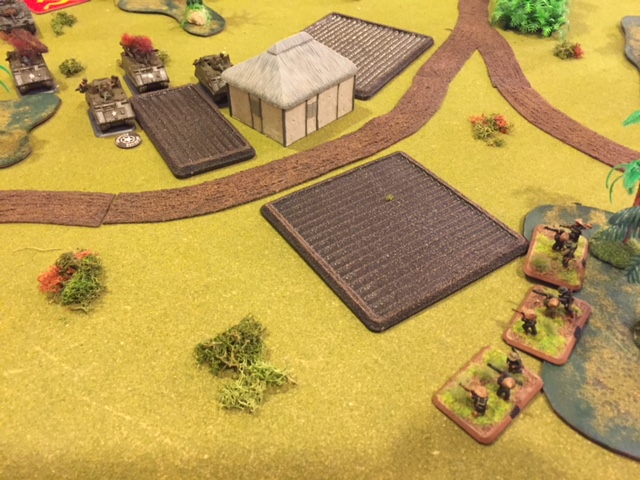
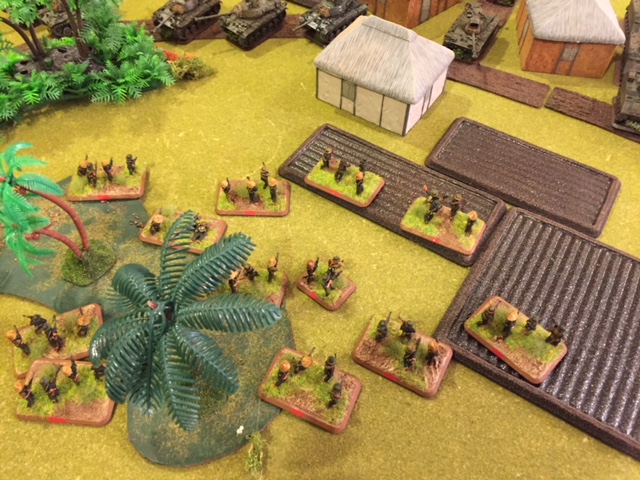
In turn two I rolled up a reserve unit and selected one of my Local Forces Companies. I wanted to deploy these on Charles’ deployment area so they could harass one of his mortar platoons and threaten one of his objectives. But because the ARVN had so many vehicles, I could not, and never would in the rest of the game, find enough space to deploy behind Charles’ mainline.
My next best option for the Guerilla fighters was to deploy them in my center font and the try to throw them into the main hamlet. My hope was that Charles would feel like he had to secure the hamlet and would divert attention away from my two objectives.
Turn 3 – Battle Points (ARVN 0/PAVN 0)
In turn three the Nationalist roll up another unit from reserve. The Local Forces 57mm Recoilless Rifle unit is selected and ends up going in on the Nationalist left.


Turn 4 – Battle Points (ARVN 2/PAVN 1)
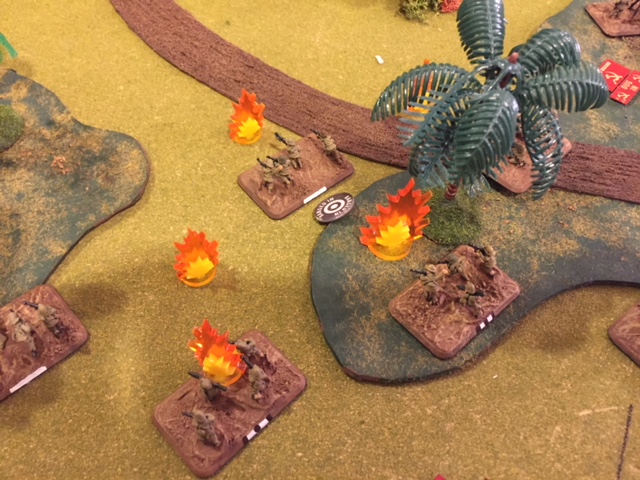
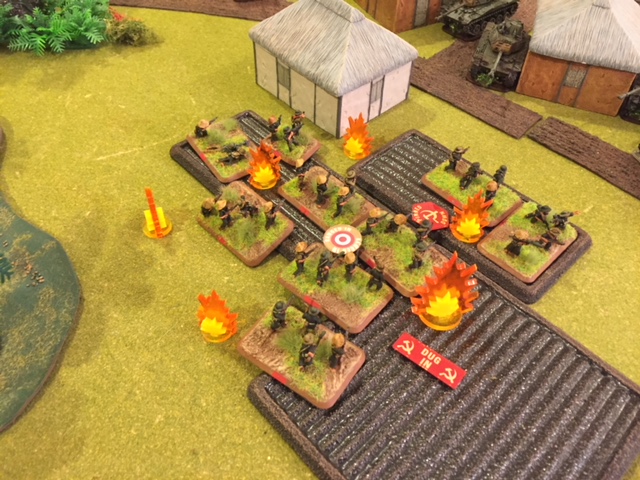
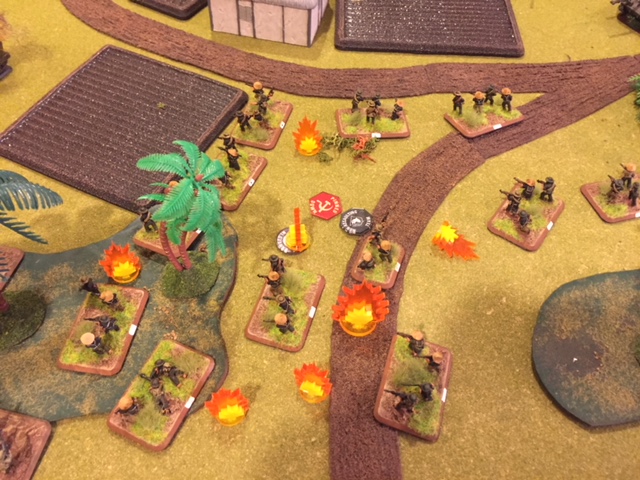
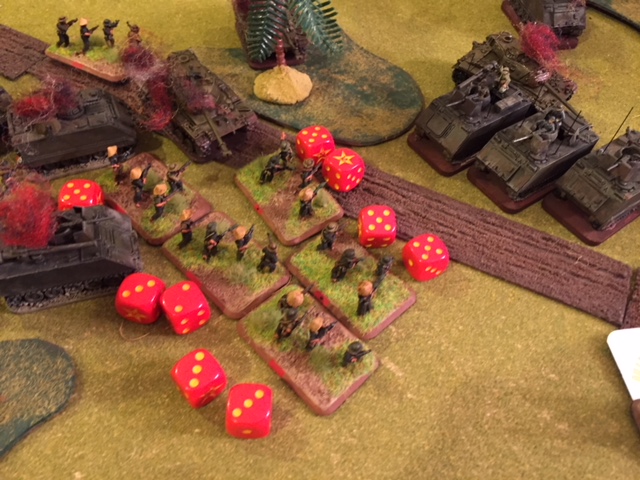
As turn fours started, the ARVN had destroyed a Local Forces Recoilless Rifle unit and I chose to Voluntarily Wiredraw the local Forces Company in the center. Though this decision would automatically give Charles a Battle Point, the company had lost both of its B40 RPGs had two mortar units ranged in on it and could be easily assaulted. So its days as a “speed bump” where over.
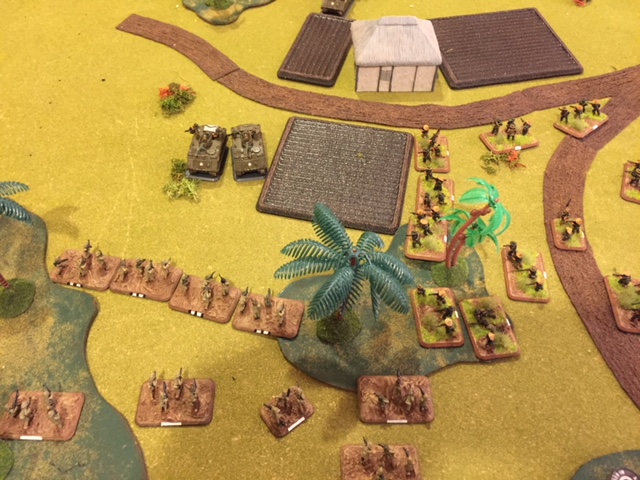
Charles had really not pushed much against my left yet, so when my other Local Forces Company comes in from reserve on my left, I have the PAVN Infantry Company there move out of its foxholes and join their southern brothers in a push against Charles’ right.
The big ARVN push would come against the PAVN right in this turn. I was very concerned because I had only the one depleted PAVN Infantry Company there. If Charles could break that unit, then there’s no way I could get in Guerilla Fighters as reserves to try to contest there.


Turn 5 – Battle Points (ARVN 2/PAVN 5)
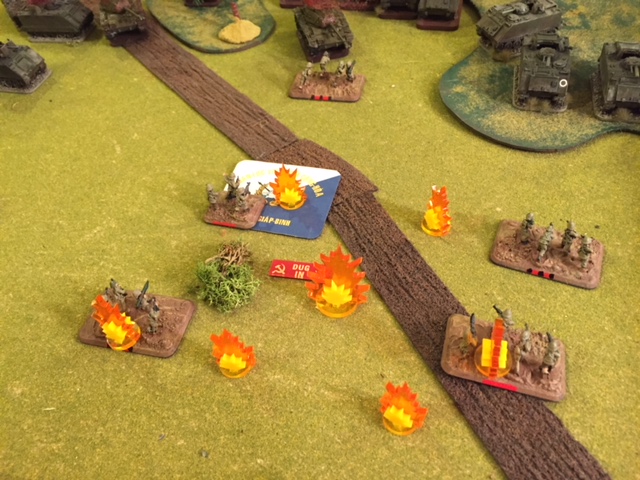
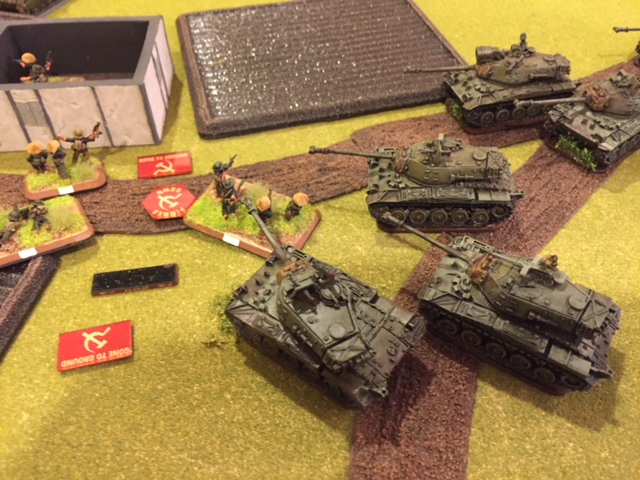
Having destroyed five tank teams and two platoons while defending on the right, helped the PAVN surge ahead to 5 Battle Points over the ARVN 2 Battle Points.
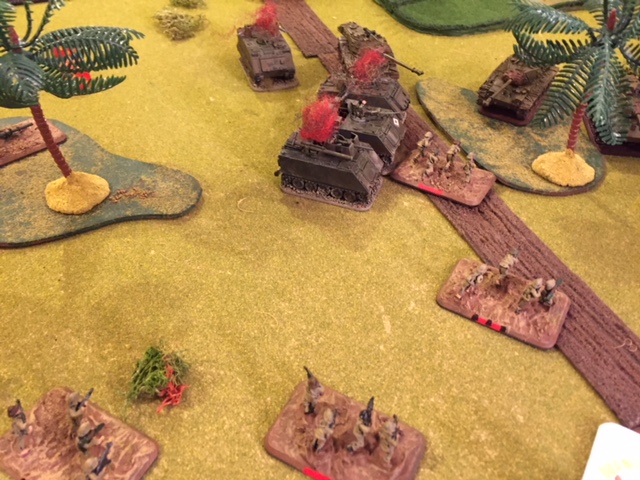
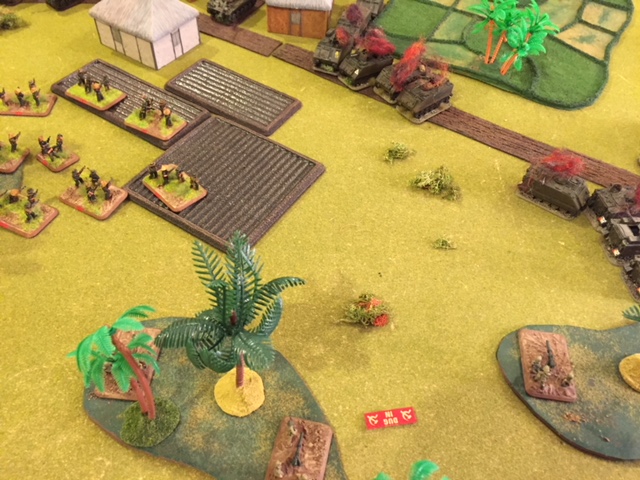
Charles’ onslaught on my right had been repulsed, but he had a second wave coming. His mortars could whittle down the PAVN Infantry Company there and meanwhile flex center and right towards the exposed infantry units on my left.
I just wanted to continue to draw attention away from, my right and even left my left objective a bit exposed hoping to entice Charles to make a rush at it exposing his vehicles flanks to B40 fire. I brought back in the previously withdrawn Local Forces Company in the center to try to retake the hamlet.


Turn 6 – Battle Points (ARVN 3/PAVN 7)
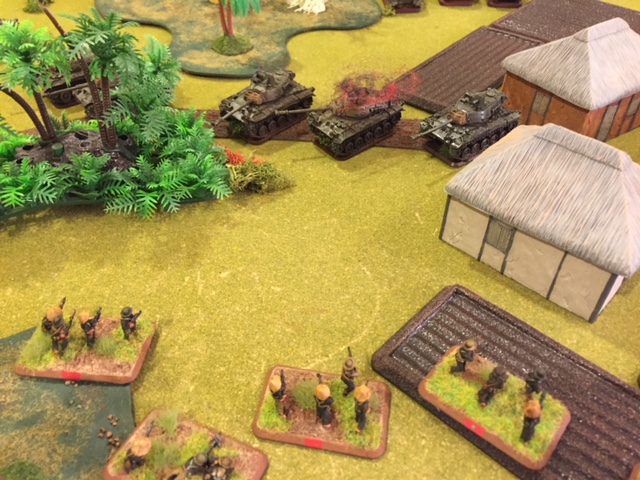
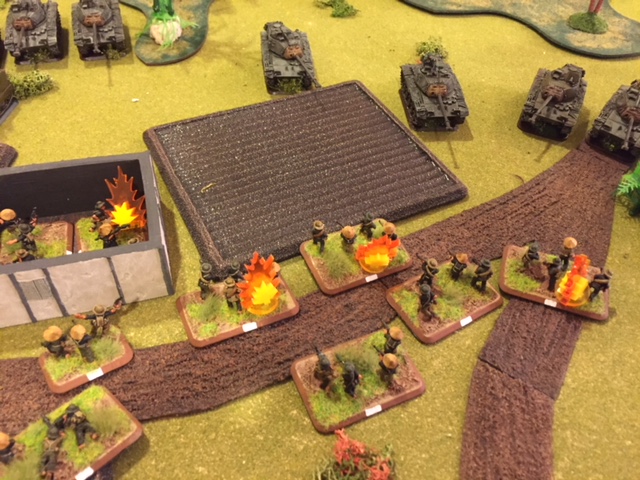
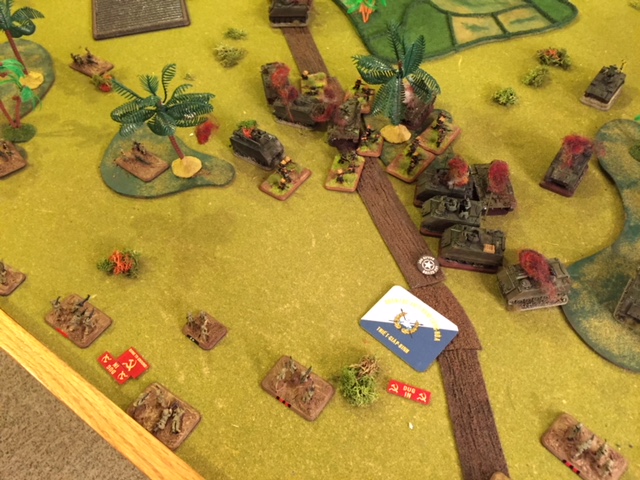
Knocking off one of the two ARVN M113 Zippo platoons and a spare M41 had put the PAV up by five Battle Points, one more would secure a Political Victory no matter what else happened on the ground. The PAVN were on the verge of doing that, but they were also still close to losing the right.
The Right PAVN Infantry Company was down to just five teams and the ARVN were still threatening with an M113 platoon and a full M113 Zippo Team there. It was going to be close call either way. Thought it would give up another Battle Point, I again had to withdraw the neutered Local Forces Company in the center to try to keep my right from collapsing.


Turn 7 – Battle Points (ARVN 3/PAVN 7)
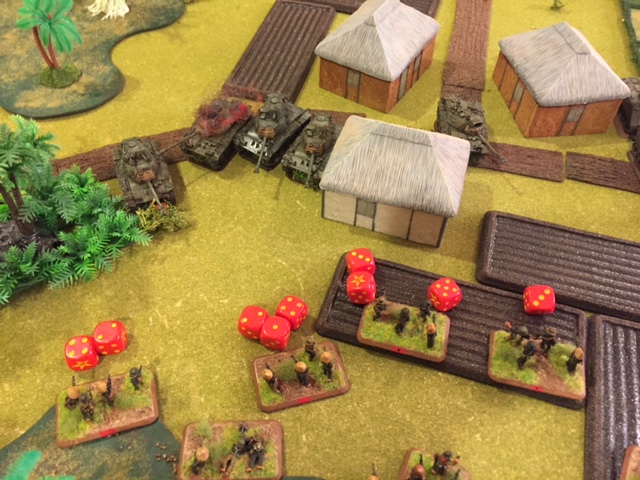
The PAVN forces did not manage to get that last elusive Battle Point during turn six. Fortunately for the Nationals, both the shoot up Local Forces Company and PAVN Infantry Company on the right rallied. If the PAVN troops could just knock out the M113 ACAVs or ZIPPOs on the right, they would achieve a political victory!
The Nationals now have nine Battle Points to the ARVN’s three. The ARVN forces must destroy a PAVN unit somewhere in Turn 6 to avoid a Political Defeat at the start of their turn seven.

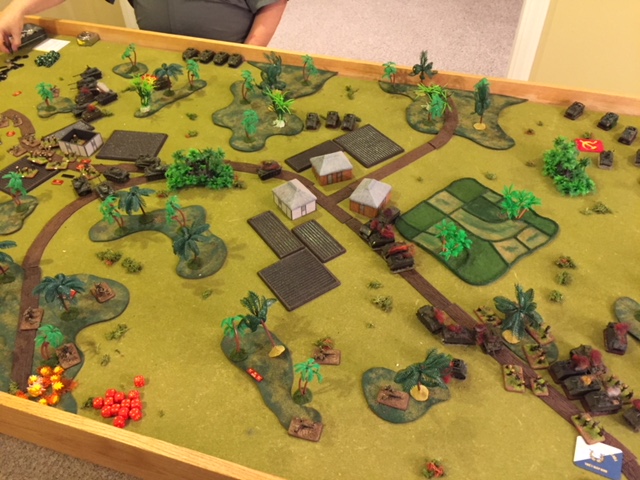
Conclusions
Well, it was awesome to get the Vietnam miniatures and terrain out again. With so many easily killable units it was very hard for Charles’ ARVN formations to not bleed points badly contributing to a PAVN Political Victory. This was especially compounded by the fact that terrain rules (hope we got them right) forced him to get in close, within the 8″ B40 RPG range.
Still, I thought he had about had me on the right. I feel that if he just placed all three mortar bombardment templates there and just left them in place, that he could have easily decoyed that PAVN Company on my right and used his swarms of tracks to isolate that quadrant of the battlefield.
So what did we learn about playing the new ‘Nam? The V4 artillery rules are going to make things very hard on the Nationalist player. Charles got great effects from his mortars and if they were concentrated he might have been able to push my right, and all the while he needed a six to range in. He got those sixes soon enough and when he did they really have a huge effect on teams that get hit on a 3+ and then have to reroll saves. I shudder to think about facing US artillery which will range in much more consistently.
Move orders really were not a factor for either of our forces. Low skill levels and the whole board counting at least as Elephant Grass and worst dense jungle terrain. I tried a few Blitz moves with Local Forces Companies coming out of Guerilla Reserve, it never worked. Follow Me, would have been a good order for the Nationalist, but as this game had them basically on the defensive, it really was not needed.
The rule about tanks not shooting main guns and machineguns together was forgotten. If we had remembered it this would have slightly hurt the ARVN forces but it would have really sped up shooting resolution.
Most importantly the game was a lot of fun and we are both looking forward to our next throw down. We will try some Riverine and Airmobile operations in the future. Why not tell us what kind of Vietnam battle you’d like us to play on our forum? We literally can play any force in the ‘Nam book except for the newly added USMC.
Those forces are “yuge”! Is the newer version of ‘Nam typically played at a lower points level or are these just two hoard armies?
I know when I played vs a friend of mine, 100pts goes by QUICK when you run T-55s and the opponent runs Centurions!! Fantastic report Tom, thanks for that! I find it odd that the player named Charles wasn’t running ‘Victor Charles’ 🙂
Nice AAR, good to see the Boby Count points put a limit into the spawn of light armored vehicules.
If the result for elephant Grass was a 4/5 you play it wrongly since it specifically says in the Nam RB (page 21) that Vehicules can see and be seen the limit to 15cm visibility is only between infantry and gun teams.
Thank you for posting this. It’s very helpful, I’m figuring out forces and tactics while I get everything painted up. One thing I often forget to use is the “Cross Here” movement order that is very handy when moving wheeled and tracked vehicle across difficult going. That reduction in cross number is super useful!!
Yea but if you are like me, you roll 1s anyways 🙂