Review: PSC 15mm Valentines
Plastic Soldier Company has released their and 20mm scales. They were kind enough to send NDNG a set of 15mm for review.
Out of the box, the 15mm sprues are impressive, yet daunting. Two hull tops are included – one with side skirts, one without. The instructions list the side-skirt hull as the Valentine III and IX model.
These tanks are a welcome addition, with both Flames of War and BattleGroup focussing on Desert War in North Africa right now. Players of any 15mm WWII game with an eye toward North Africa, or even the Eastern Front with Valentines as Lend-Lease can make good use of this set.
The instruction sheet is detailed and usable but could use a bit more specifics. I struggled to get the correct orientation on several parts (see below). Unfortunately, the photos on the instruction page print rather muddy at their small scale, and noting orientation of wee-little parts is difficult. This is one area I’d love to see PSC improve. Perhaps a note to visit their website for more detailed assembly instructions – and a page with lots of close up photos in tight detail would be helpful?
Also, the actual sprue had been re-arranged since the layout for the instruction sheets was sent to the printers. The actual parts shifted around in a few sections, but are easy to find despite the discrepancies.
Two sets of tracks are included, so a mix and match for either of the three main varieties or the Lend-Lease Soviet varieties where mud flaps and side skirts proved to be not the best idea in muddy Mother Russia.
If I had one wish for assembly, it would be that the front and back plates were molded as part of either the hull top or bottom. Those two parts proved to be the most meddlesome to glue in place due to their small size, fat gamer fingers, and definite orientation. The front plate was the most meddlesome since I had to make sure I didn’t let the hull top drift back and leave a gap between it and the front plate.
One design feature I do like is the detail on the bottom of the hull. Too often we gamers overlook detail on the underside of our models, especially at 15mm scale. This piece from PSC includes beveled edges and other details that will make me pay extra attention in the painting phase.
Assembly:
For the lower hull and tracks, you’ll need to figure out the orientation. Again the instruction sheet tells you to assemble them but doesn’t give the left to right orientation of the tracks.
However, the lower hull has both pins and slots. Be careful when removing the lower hull to not trim away the protruding pins. One is long, and one is short. A quick glance at the two recesses for them in the track section will show one deeper than the other, and help orient them. Also, the distances are different between the front pin to the first slot on the lower hull, and that of the back pin up to the rear slot. So the tracks do orient only one way.
To install the front and back plates, be careful of the orientation. For the front, you just need to remember that the fully flat side faces down, while the side with the two bevels faces up.
These two pieces are one area to watch for excess plastic cement. I had several times that I was quickly dabbing away extra glue, even though I used a bottle with a needle applicator.
Turret Assembly
There are lots of fiddly bits for the turrets. And, there are three different turrets on the sprue. Two versions of the 2-pounder, and the 75mm guns each have their own turret. One reader has suggested cutting the muzzle break off the 75mm to simulate the 6-pounder gun which is absent from the sprue.
Unfortunately, at the 15mm scale, the smaller guns are very fragile. I broke two of the 6-pounder guns trying to file away flash, and cracked another that broke off while I sprayed it with primer.
Also, the turret to body connection is PSC’s version of what I call drop-slot and twist. No magnets

needed. But the molding process may leave the holes on the hull too tight to take the turret once painted. The first of the models I assembled (the Mark II) had to be adjusted with sandpaper and file before the unpainted turret would drop into place.
After that, I learned to use the sandpaper wrapped around a pencil method to widen the holes on the hulls before I clipped them from the sprues. After priming, only one body needed a little extra widening. A file is also handy to widen the holes where the pegs on the turret bottom drop into the hull.
The three turret variationsExtras and Accessories
The tool boxes have a slope to them, and a quick glance at online photos of Valentines from the period show the proper orientation. There is also a rack of water jugs, and a spare piece of track that can be used for stowage on the hulls.
The rack with water jugs took me the longest to research, and I finally found a photo online of a Valentine with an empty rack at the far rear of the hull. By that time, though, I had already added one of the racks to the back of the turret.
Commander figures are also included for both British and Russian. But I didn’t want to take the time to research which is which. The instruction sheet details them only as “Commander A” through C. Commander C, however, is a two-piece model that you can assemble so he’s holding binoculars up to his eyes.
Comparisons
The only other models I have to compare this set to are old BattleFront (BF) resin and metal Valentines. The hull details are slightly different, but the size of both models is very similar. The PSC are 2mm wider and 1.5 mm longer than the BF resin models.
When I retrieved my BF models, I discovered that the gun barrels were all bent with paint cracked and chipped away at the bend. But, they were still attached. That’s the primary difference, other than weight between the resin and plastic variants.
In the photos below, the PSC version is the lighter colored model. I primed the PSC models so that I wasn’t comparing a raw model to a finished one. Overall, I found the PSC version as well detailed as the resin ones, if I allowed for wear on the molds that produced the resign and metal parts. I do prefer plastic models for their cleaner and sharper detail lines. I’ll leave the readers to judge for themselves with the photos below, but my preference edges slightly toward the PSC models for details, even though their version lacked tools on one of the larger storage boxes.
Rating
Overall: 4.5 out of 5
Downsides: the front and back plates for the hull could have been cast as part of either the upper or lower hull sections and saved a bit of fiddly assembly. Also, when there are fiddly bits like front and back plates, as well as toolboxes, commanders from different nations etc, an online assembly guide would be a wonderful addition, with a link printed on the enclosed assembly sheet or on the box.
I didn’t ding PSC for the fragile nature of the guns, because at the 15mm scale, the guns are either going to appear out of proportion if they are fattened up for strength, or they’ll be fragile. That flaw is inherent in the scale of the models and there is little a manufacturer can do to alter it.
I’ll be running a demo game based on PSC’s newest BattleGroup book: Torch at a local convention in another month. These Valentines will definitely see action on the table at that event.
PSC (Left) and BF Resin (right) Front view PSC (Left) and BF Resin (right) back view PSC (Left) and BF Resin (right) side view PSC (Left) and BF Resin (right) top view. – The PSC hulls do measure 2mm wider than the BF resin models. PSC (Left) and BF Resin (right) rear view that shows some of the lower hull detailing on the PSC model PSC (left) and BF Resin (right) Front view with lower hull detail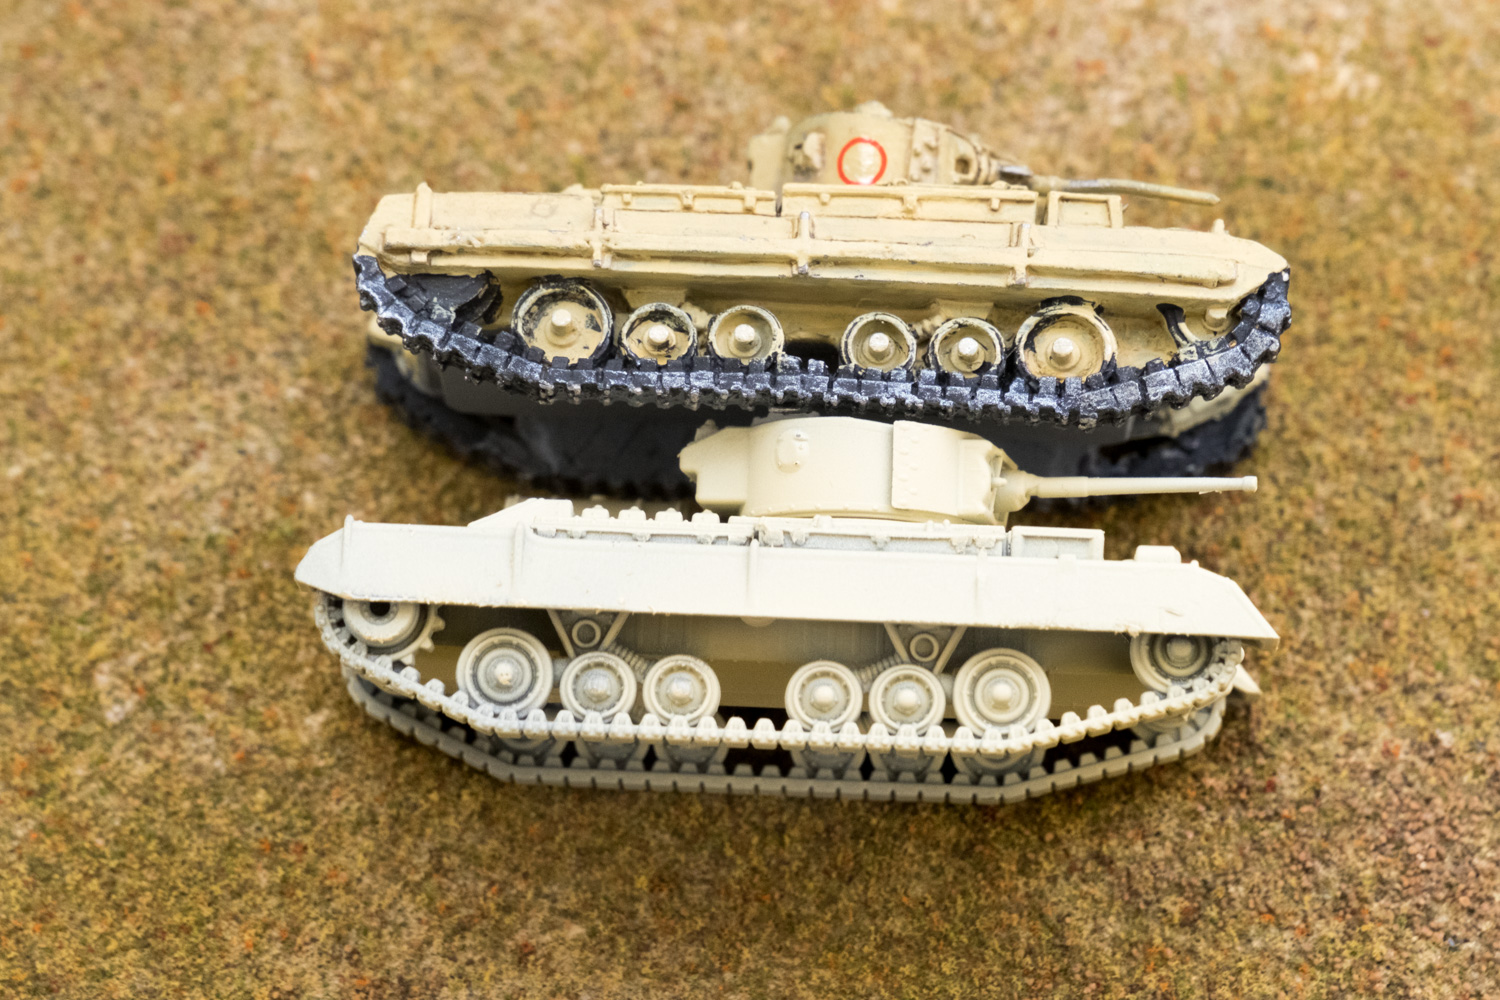
Troy is a long time gamer and the author of the medieval fantasy series. He’s also the dude who strives to keep the typos under control on No Dice No Glory.
Quick note, the Valentine III turret holds a 2-pdr, not a 6-pdr. The Valentine VIII is what you’re thinking, and is the same 3-man turret as the III, but with the upgraded 6-pdr. The VIII does not appear to be an explicit option in the PSC kit, but using the Valentine IX turret and cutting off the muzzle break seems to do the job.
Updated the story. Thanks.
those look a lot nicer than the battlefront ones, usually it’s the other way around, if I played Brits I would be investing in a set or two of those! But they make better targets to me, Heeeheehee!
Very quick note that might push these to a complete 5/5, but with a bit of plasticard and modeling it is completely possible to build two tanks from each sprue!