How to make your own Hills – a tutorial
By Tom “Chairborne” Mullane
I conducted some of my first large scale terrain experiments earlier last year while building a series of terrain display boards for my 15mm FOW armies. The basic elements I used were pretty effective and I had plans to make some more this winter and spring.
Some of the boards I made:
 Materials
(For the construction Process)
-Lightweight Spackle or Patch and Prime
-Kitty Litter/Crushed Sea Shells/Playground Sand
-MDX board (like the backing for a bulletin board or a picture frame)
-Pink Insulation Foam + Foam Cutter (any type, including a good serrated Knife)
-Hot Glue Gun
-Pine Wood Chips (pine bark)
(For the Decoration Process)
-Black Spray Paint
-Brown Spray Paint
-Light brown craft paint (cheap)
-Nice light Grey or very light brown
-Rubber Cement
-White PVA Glue (Elmer’s is fine if you water it down)
-Flock of your Choice
Lay down some Newspaper first!
Step #1 – Cutting
Using a jigsaw or a small handsaw, cut the MDX board into a series of irregular but circular shapes. These are the bases of your hills. So try to create the footprint and shape/size you want. After that, it’s a good idea to sand the edges to avoid them being too sharp. Using a foam cutter or knife, cut your pink foam into a square that will fit comfortably on the shapes you’ve cut. You can also cut multiple smaller pieces and arrange them so they fit on the MDX piece. Use the hot glue gun to attach the foam to the MDX. (note: there is a rough side and a smooth side to the MDX. For the sake of letting your terrain piece more firmly adhere to the table, leave the rough part face down, so it grips any felt it would be placed on slightly.)
Step #2 – Sculpting
Once the Pink Foam has been fastened to the MDX, use a foam cutter or other gadget to slice slopes into the pink foam at the corners, or edges. This will create the inclines and paths people would take to get to the tops.
Feel Free to leave some sides flat, as not all parts of a hill will have an access point. It also will give you some surface area to do some decoration. Once you have a good shape to work on, use the hot glue gun to fasten pieces of the pine bark so they stick out at odd angles, These will be your rocks. Don’t worry about their bases, because you’ll cover up any goofs or odd looks in a second.
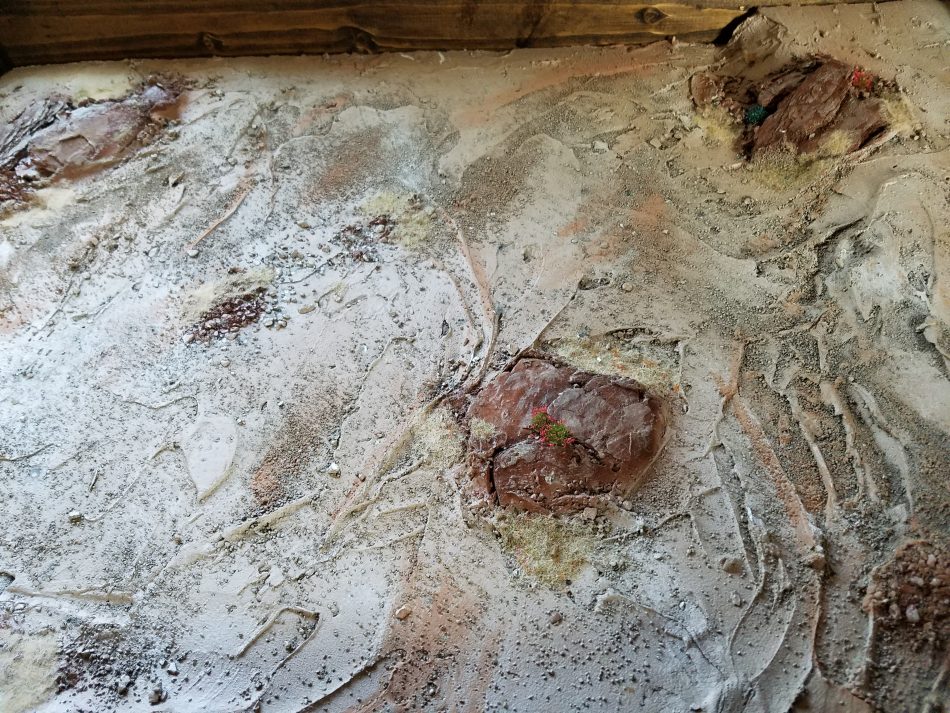
Finally, take the Spackle/Patch and Prime and ice the whole piece like a cake. smooth it all out with a plastic knife or a Popsicle stick. No Brushes, they just get sticky. While the Patch is still wet, dust your hills with the seashells (along paths) the kitty litter all about, and the sand on everything. Push it all down to make sure some of it sticks into your hills. Wait for it to Dry
Step #3 – Painting
Now that you have a fully formed hill, its time to start making it look good. Terrain looks best when layered with increasingly lighter shades. Start Dark and build it up. I spray paint all of them black to start, then a dark brown, and finally a lighter brown. You can use a medium-sized junky brush to make dabs and splotches of the lighter brown and to give the ground variation. Finally, pick a grey, or light bone color to do a dry brush (dry dust is great, as are some of the GW colors) For the Pine Bark, start with a dark Grey, move onto a medium, and then drybrush with a light color.
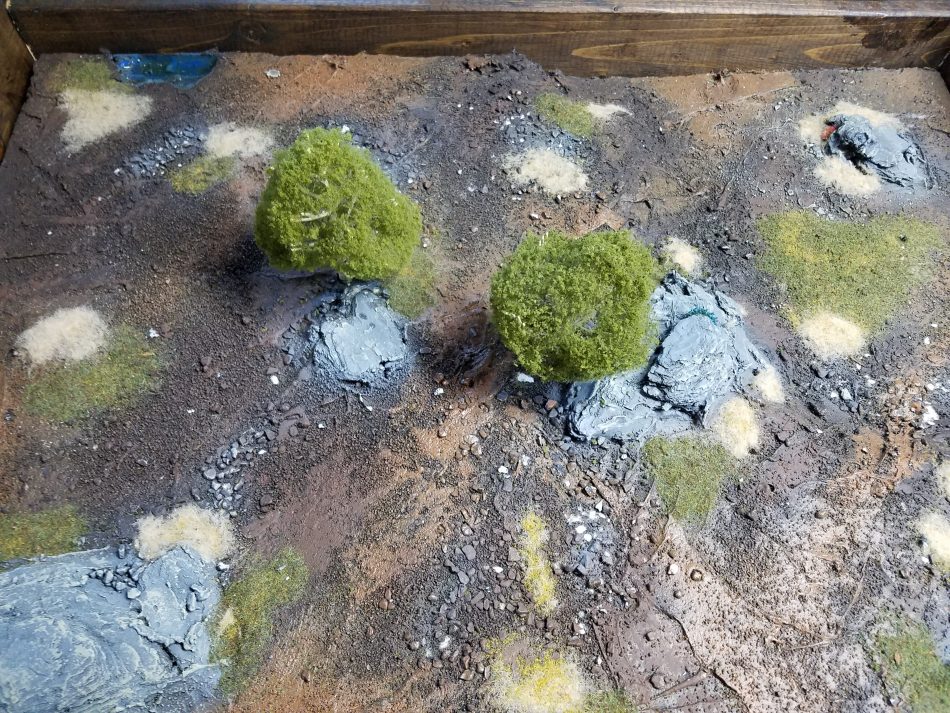
Step #4 – Flocking
Try to leave grass off of the main travel paths on your hill, but put a few splotches of it to create the impression of ruts for vehicles. I also used different colors and types of flock to represent different seasons. So in these examples, I made some standard spring and summer hills, desert hills, and winter hills. You can change these flavors as you wish.
The Final Product.
Feel Free to ask me any questions in the comments, or send me an email directly, I’m happy to clarify anything or provide some alternative methods. This is a bit messy and time-consuming, but I am happy with the overall result. Happy Painting!
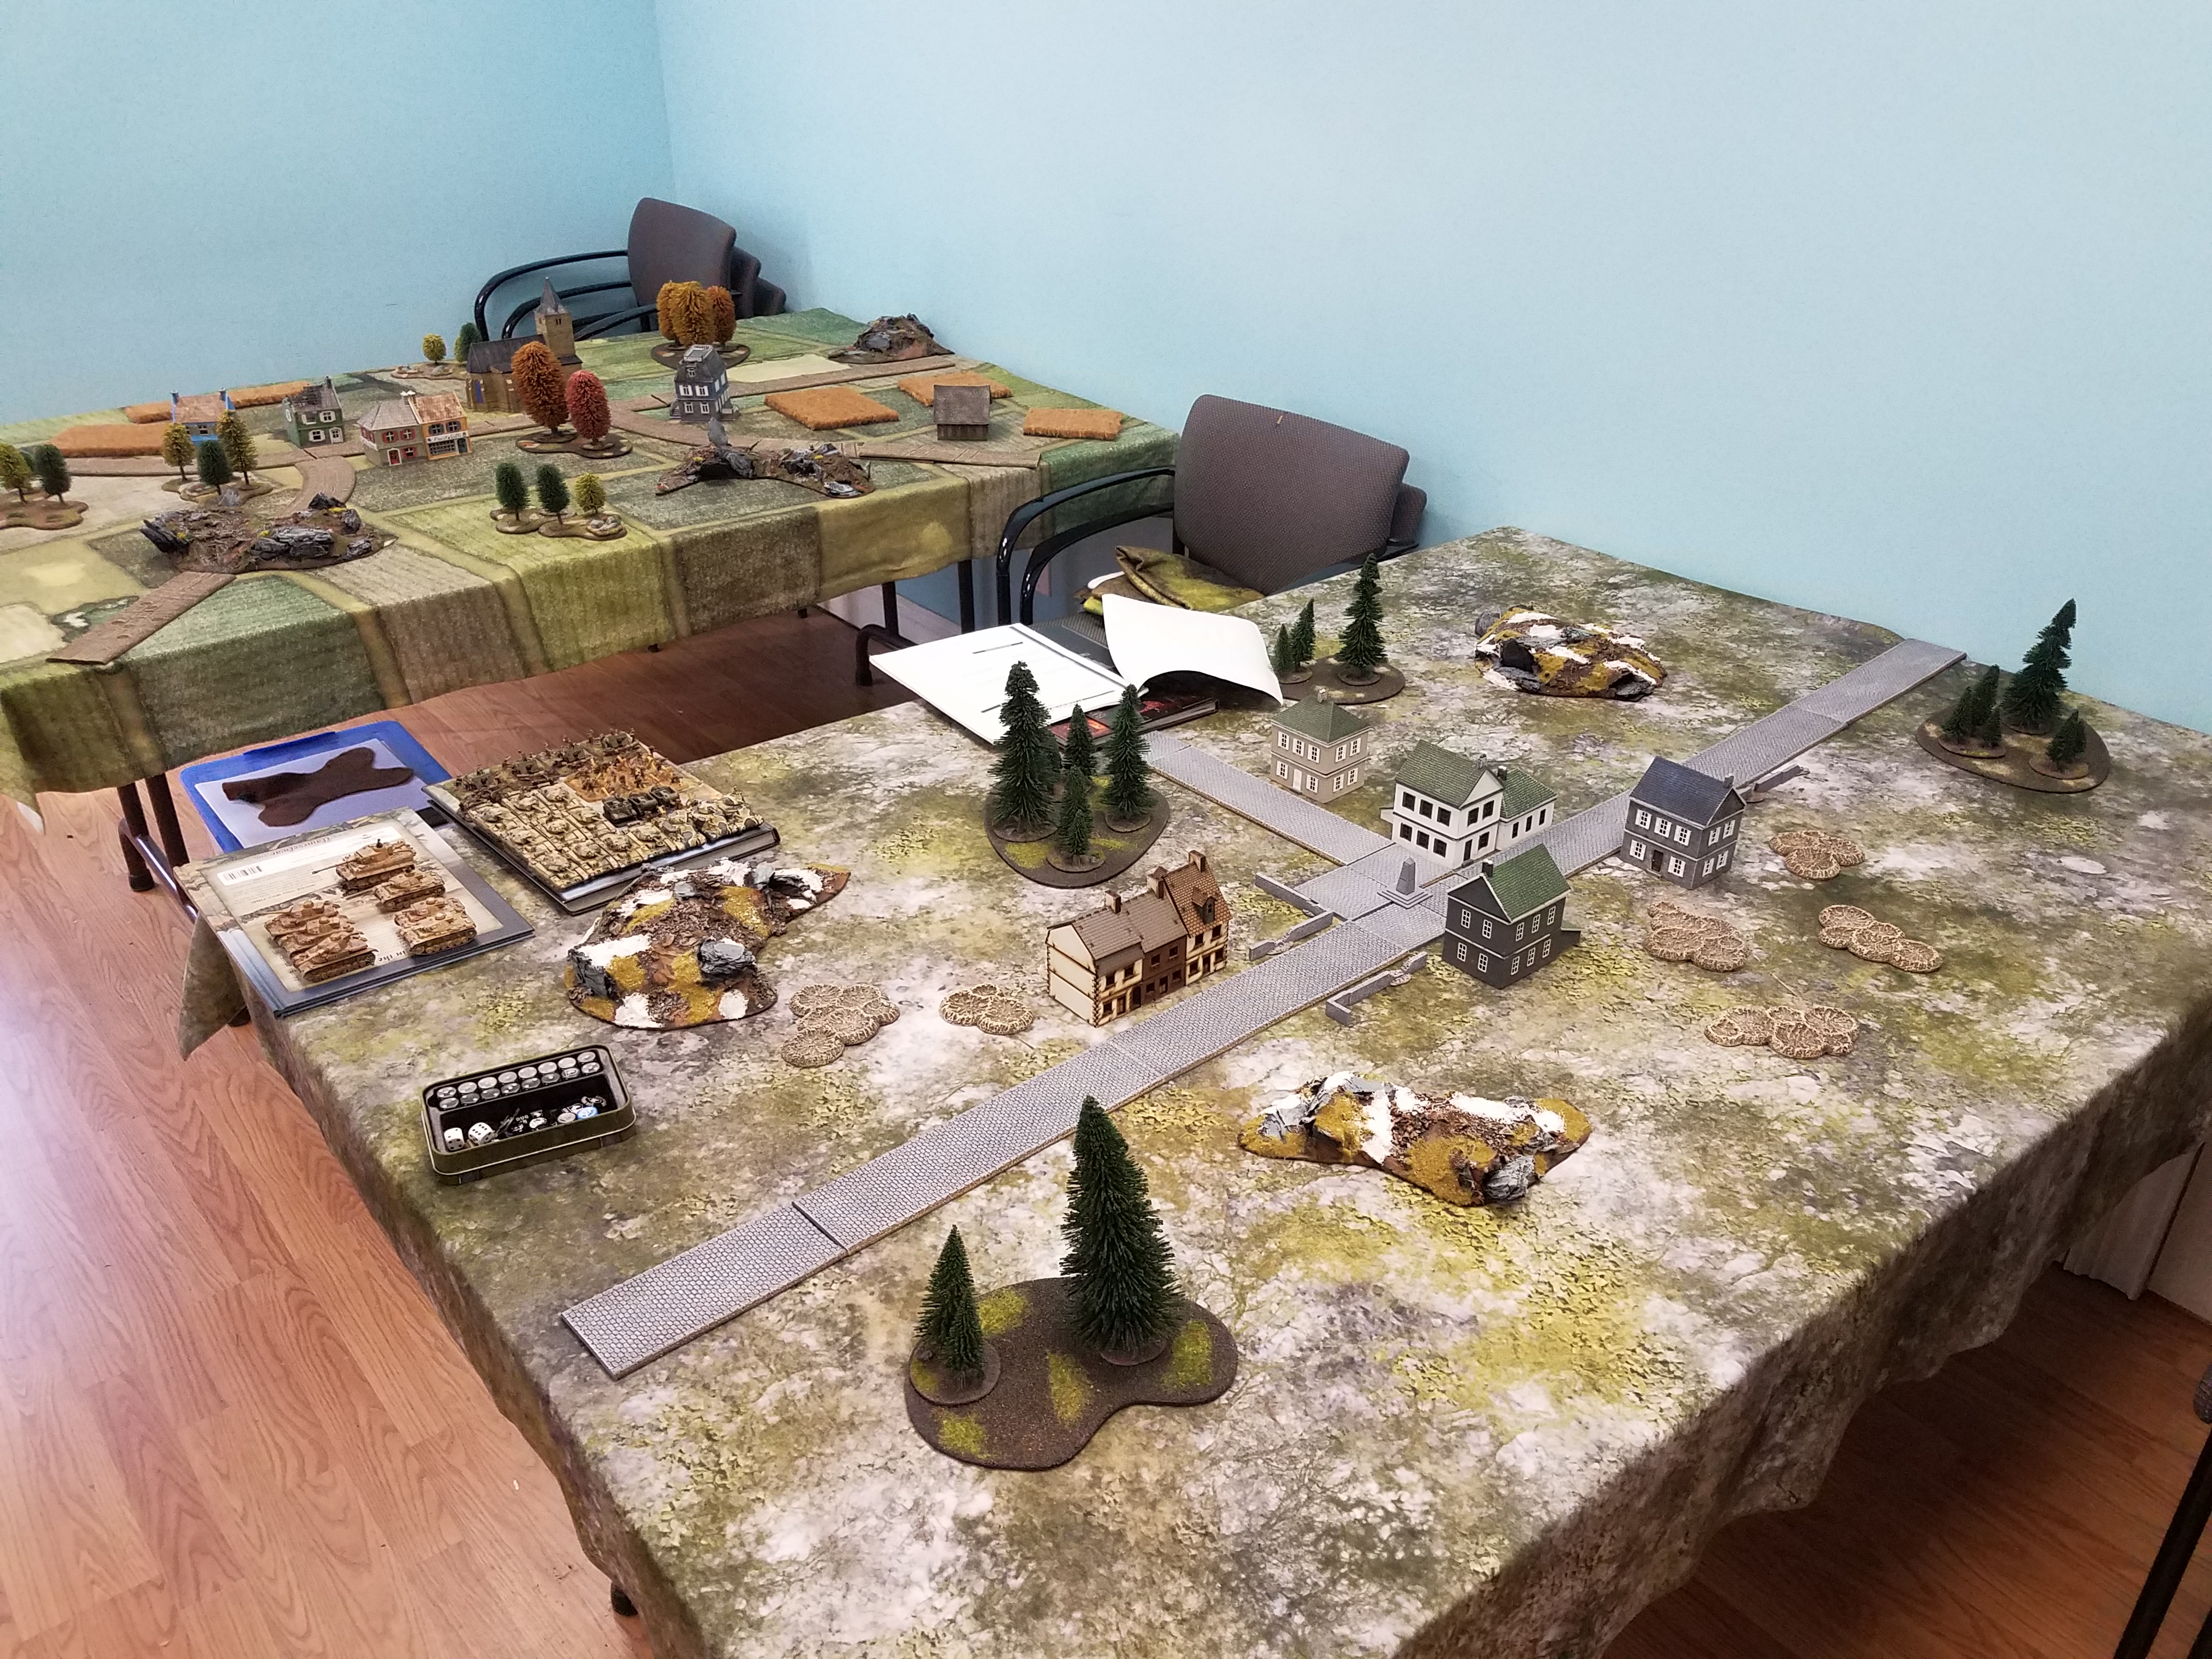
Here they are on a Cigar Box Mat with some other terrain.
Thanks for reading!
Tom “Chairborne” Mullane has been a writer and contributor to No Dice No Glory since its inception and has been playing Flames of War since 2011. He is a teacher in Brewster, NY and plays regularly around the area. If you are in Western CT or the Hudson Valley in NY, drop him a line and get a game in.
If you can, use an angled cut on the MDF with the jigsaw. Then the base and the foam will both have a slope. It looks like you may have done this…but I did not see it in your instructions. Also, in lieu of spackle, we used regular latex paint. Coat rather heavy. Optionally you can add sand at this point as well. Then second coat when dry over the sand. Cheers.