Ready to invade the Reich – Lake Garda Flames of War Tourney
By Paolo Paglianti
After years of Mid-War tournaments, finally we have some change. Thanks to the books Battlefront published this summer we can play Late War with full V4 rules and point system. Since I like to play with Allied forces, Mid War tournaments have always been on the “stay low” profile: with too many Tigers and Ferdies around (in Italy we saw the infamous list with 5 Ferdinands and the Italian L6 ally), Mid War US and British forces constantly faced tanks they can’t beat head to head, almost invulnerable armour that can only be avoided. In Late War, as we foresaw, things are going to change.
The Italian FOW championship starts with a bang in early September. The first tournament was held at Torbole, on the north tip of the world-famous and wonderful Lake Garda. September 7th is still almost summer here. How could I ever miss a tournament with such a view?
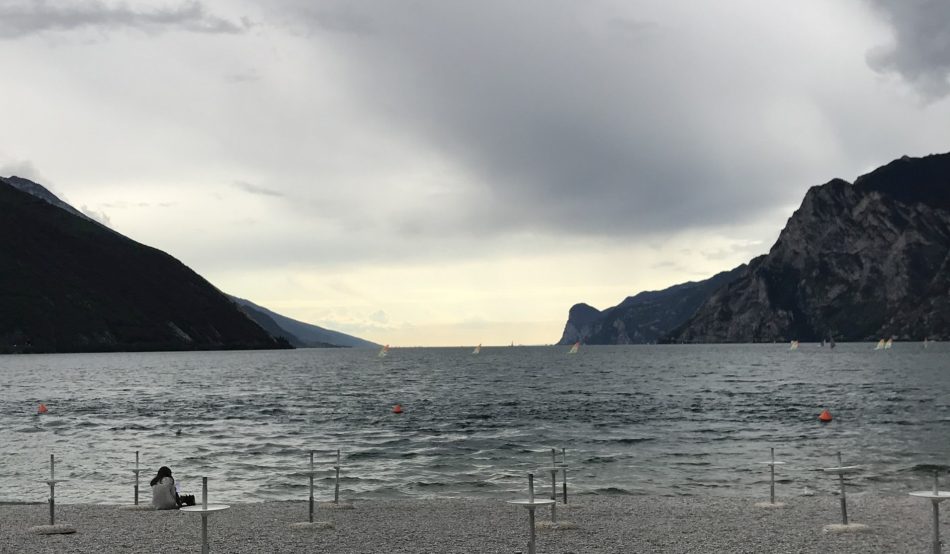 You could choose to play the tournament or stay on the lakeshore – it was just across the road!
Even better, the Tournament, sponsored by NoDiceNoGlory.com and organized by Flaviano Maggioni – a Major of the Italian Army and a really good chap – was inside a . We played little “tin soldiers” inside a museum full of “tin soldiers” . Also, we were really close to the William O. Darby’s monument, since the famous Ranger leader was sadly killed during the Italian liberation campaign in ’45 in the same city.
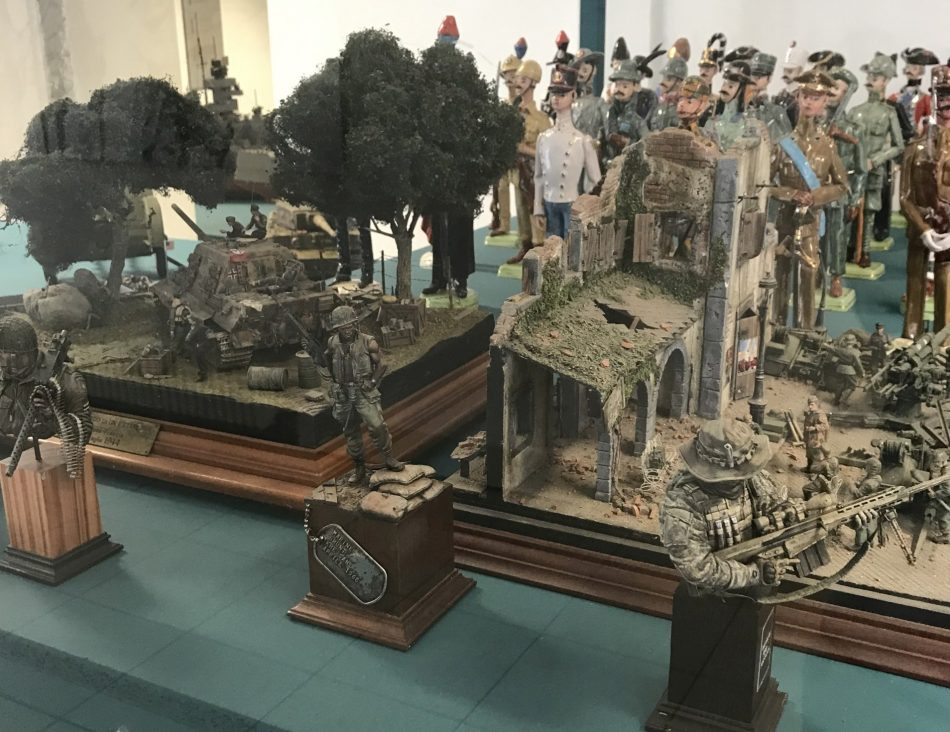 Lots of miniatures around the tables, from WW1 to modern warfare – and a full parade of WW2 tanks
My list
I already , but let’s sum up the basic ideas. After so many tournaments where my weapons seemed blunted against the Mid War German Tanks, I really wanted something able to punch thru the enemy. I built my list with plenty of AT 14 guns.
The Formation is a Churchill tank company, with two Churchill troops I will use against dug in infantry, two Sherman troops with three 75mm tanks and one powerful Firefly, and a small Stuart Recce troop to boost the Formation morale and add a unit with Spearhead. In Support of this formation I added the crucial M10 17 PDR platoon, some artillery with the Priest battery and what I consider the best AA of the game, the mighty Bofors – three of them are enough to strike fear in any opposing flying object.
Finally, to assault or defend an objective there is nothing better than a Rifle Platoon. One that in Late War UK list came already equipped with a PIAT AT 10. Tigers, I’m coming!
First Game, Andrea Daldo with URSS
If you don’t have powerful guns, bring a lot of guns: this is the philosophy of Andrea’s URSS army. His is an endless list of infantry and guns, plus some nasty Churchills and T34s. My army, counting the models, was less than half the number of models Andrea fielded, so I needed to attack and concentrate my entire force on a single weak point.
I opted for Attack. Andrea wanted to sit back and dig in, as his army was designed for just that, so he chose Defend and we ended up with the Rearguard mission. The table was pretty filled up with houses and woods, with a huge hill in the centre, and Andrea placed his five minefields on the left, totally closing the flank. He deployed the Churchills on the same side, infantries and guns in the centre, mortars and artilleries (4 in total) behind. Also, behind the infantry line, Andrea placed the Tank Killer battery, keeping a Su-85 platoon in ambush.
 Almost all British army was on the right flank, protected by the smokescreen. The infantry advanced to conquer the broken factory.
I placed most of my army on my right flank, knowing I would have the first turn so no need to keep the models out of sight. A lonely Churchill troop kept the right flank, preventing Andrea from totally leaving the objective uncovered.
The first move was a “total advance”. My Shermans led the charge, and with a Blitz move plus tactical they managed to move enough to shoot to the BA-10s Andrea left as an advance guard and some of the guns waiting for me. Also, to avoid unwanted attention from the Napoleonic line of artillery, I shot a smokescreen to shield the tanks. With this move, almost all of my tanks were on the flank of the gun and infantry line, so most of Andrea’s AT fire was masked by his own guns.
Andrea countered in the best way available to him. In his turn, he placed the SU-85s in front of the Sherman platoon, using my own smoke to deploy his ambush closer to my tanks. However, they didn’t shoot that well (basic score 5+) so my Shermans were untouched. He also began to slowly shift his troops towards the attacked flank – thereby leaving the safety of the dig-in positions. This made me happy.
My second bound was the decisive step. I’m strongly convinced FOW battles, especially in Late War period, are decided by good positioning. This game was not an exception. He had to drive into the fire of my M10s. The M10s began to shoot to the approaching tanks, killing a good number of Churchills and T34s. I basically just needed to hit, their armour was totally ineffective.
Artillery focused on the infantry and the guns in the centre: since Andrea had to move them, they were out of the holes, and so no firepower was needed. For the same reason, I moved the Churchill HQ in position to shoot with machine guns on the infantry, killing lots of them. The Shermans began to shoot to the Su-85s, wiping them out in a single bound, and using their wrecks as a shield to cover their advance. Really rude, but effective. Who says you can only have one smokescreen per game?
In the final turns, Andrea tried to maneuver the guns to receive my Sherman charge frontally. However, in doing that, he exposed the guns’ flanks to my Churchills. My tanks were attacking with a classic pincer movement, on the long side the Shermans with their greater mobility forced the URSS forces to redeploy to deal with their threatened flank attack, and that forced them to expose another flank to the Churchills (and also some Stuarts, helping with the machine guns). The URSS’ tank killers had to expose the flank, and without the protection of being dug in nor the frontal shield, was really easy to cut thru them like a hot knife in the butter. In the end, I charged the unsupported infantry on the objective, winning the charge and the game, 8-1.
Second game, with Luca Papisca with his US army
Luca is a close friend and I really like to play with him. Even the most challenging and competitive game is fun with him, since he has the right spirit: play for fun! He deployed a really good US list with Glider rifle – effective like the paratroopers, but cheaper. He also had lots of Shermans – same as mine, but with the upgraded 76mm platoon!
The table was a battered field full of trenches and artillery holes: a “behind the line” training between His Majesty veteran troops and the US green units just arrived across the Atlantic? Let’s see if we are “underpowered and underpaid”!
 The US deployment left a huge gap on the flank: I run into it with my Stuarts to deploy everything on the exposed flank, and then moved the light armoured scout platoon well away from enemy sight.
Again, the same problem as facing the URSS army: Luca’s army was almost twice the size of mine. Luca chose to defend and – for the same reasons of the first battle – I wanted to attack to focus the full British force on a single side. We ended up with the Bridgehead mission. Luca placed the majority of the minefields on my left side, and deployed all his army in the centre: infantry in the front covering the objective with a line of bazooka-equipped G.I.s, and guns behind. He also placed almost all his tanks on the right flank.
Since I feared the confrontation Sherman vs Sherman (he had 5 AT12, I had 2 AT 14), I preferred to face the impervious side with the minefields. Luca left some space on the extreme left, so I used the Spearhead trait to push forward with the Stuart and deploy the slow Churchills right on his flank, where they would hurt from the start. A trench right behind the minefields was a very good spot to place my M10s, with a full view of all Luca’s deployment, while the huge hill in the centre-left was a perfect situation for my infantry, since some bunkers (we considered them like ordinary buildings) could help to cover the foot soldiers.
 Once the US Shermans were diverted to the central hill, almost nothing could stop the Churchill troops.
As before, I charged at full speed: Luca had almost half of his army out of the table, so I tried to force the issue and attack while US troops were still inferior in numbers. The Churchills were almost invulnerable to the infantry (their best weapon, the Bazooka, doesn’t often do that damage against Armour 8), while M10s and Shermans shot from the distance hitting the artillery on sight. Even if in cover, they generally hit on 4+ or 5+, so I had some chance to do some damage – indeed, I had some luck and killed a fair amount of vehicles, mortars and artillery.
Luca understood the error from the gap between the flank and the minefields, so had to move the infantry out of their dig-in positions, to redeploy them in a better position. Doing that, he had one turn where the infantry was totally vulnerable. I charged at full speed with all tanks and shot them with machine guns. With some luck, I managed to kill a lot of them, leaving a horrible hole on Luca’s flank. He managed to redeploy some of his Shermans on the opposing flank, but was too late. The Churchill advanced on the exposed objective, charged the already mauled infantry and won the game. 8-1, with – to be honest – a lot of luck.
Third game – Maurizio Cisotto’s German army
Maurizio is another good friend of mine, and we have faced each other many times on DBMM tables. He was one of my “teachers” who introduced me to FOW and Team Yankee rulesets, and I had to swallow a number of lost games with him – but it’s when you lose a game that you learn the most.
He fielded a standard German Heavy army: some good infantry, three Tigers and a Ferdinand. In Mid War, it would be totally unstoppable by a British force. Thanks to His Majesty and Lend Lease, we now have some M10s capable of punching the Ferdinand. Maurizio will need to be much more cautious. Being both aggressive players, we both asked to attack, so we ended up with Dust Up for our mission.
 Again, the scouting Stuarts managed to advance and deploy from the start M10s, Bofor guns and Churchills in a position where they manaced immediately the exposed opponent’s flank.
The table had a small town in the centre, some rough terrain on the right and woods on the left. Maurizio could choose the side, so he placed his quarter on the woods sector, deploying infantry and the antitank guns to protect it. To cover the whole right sector, he placed his lonely Ferdinand, knowing its frontal armour is invulnerable to anything, another Ferdy included. He kept the Tigers, one infantry and the Panzer IVs in reserve.
I placed all my army on the right: I sent my Stuarts ahead with Spearhead, conquering the sector in front of my deployment, and placed the Bofors to cover the more advanced objective, while the infantry covered the closer one inside a house. I also deployed my M10s in front of the Ferdinand, but covered by a wood – we won’t be sitting ducks. In reserve, all Shermans and the Churchill HQ.
In the first turns, I was tempted to rush forward with a combined attack of infantry, Churchills, M10s and Stuarts. The single Ferdinand was a good target, since it can only shoot twice per turn, and I had a lot of vehicles to get on its flank and destroy it. However, with the looming menace of the Tigers entering on that sector, I preferred to stay and defend. Maurizio moved his infantry to cover the Ferdinand flank – he is a good player, I told you! – and used the single Stug platoon to try to attack my Objective covered by Infantry, knocking out half of my Priest battery.
With him pushing and me holding, the race was on for the reserves. My Shermans entered before turn 5, and destroyed the Stug platoon. The Tigers arrived but couldn’t kill the M10 troop fast enough, so they were stopped for a couple of turns in the rough terrain. The M10s and Tigers simply unable to hit each other with a 5+ score to hit. So, the race was mine. I managed to clear the sector and rush forward to the objective, defended only by three Antitank guns and some infantry without Panzerfaust.
The guns are good, but they can only shoot six times per turn, and I was advancing with three Churchills and 8 Shermans, so it was mathematically impossible to stop me. I also managed to kill a couple of guns. The final charge was from the flank (ie, no defensive fire since they can only shoot frontally). By the way, I was sure all my Shermans suffered for the “No HE” trait when shooting to the guns, but Maurizio – he is a good player – told me I was wrong. Kudos to players so honest!
The Shermans crushed the guns and won the day. 8-1, losing only the valiant M10 troop, who alone stopped the Tigers and the Panzer IVs (killing one of each in the action).
Lessons from the front
What I’ve learned from these games. Late War is going to be a more mobile game. With lots of vehicles, you can literally jump to the jugular, if you are a good player and can spot a weak spot in the enemy deployment. Many players forget Flames of War is a game where you need to conquer objectives, not simply kill the opponent.
If you are playing competitively, and need to win games 8-1 to win the tournament, you need to mitigate risk as much as possible, use terrain, smoke and enemy teams to block enemy shots and minimize return fire. Use terrain and direct fire smoke and range to make your own units harder to hit. Force Protection, keeping your own troops alive is key. You need to fight only where it’s necessary. Also, be ready to withdraw a platoon when they lose too many elements. In two games, I managed to win 8-1 only because the single surviving M10 and (in the other game) the single Priest fled out of enemy sight, and close to the HQ, allowing me to reroll any morale test. And, most importantly, take at least one platoon with scout/spearhead: they can literally change the game.
In Flames of War the Late period is a game for heavies. You still need some infantry to guard an objective, or to charge other infantries in buildings, but tanks just work better, especially if you are – like me – an aggressive player.
Finally, and above all, Late period is really fun! I will use the same list on the Milan Tournament I’m organizing this weekend, but I’ll probably switch to Veteran US for the next tournament, – you are all invited!
Good job on the article Paolo.
thanks a lot 🙂
Great Bro’!!!
thanks man 🙂