The British strikes back: Milan Late War Tournament report
The new Late War books sparkled lots of interest here in Italy: old players from V3 dusted their armies buried at home and began to play back, while Mid War veterans found a reason to expand their WW2 legions. on NDNG, the new “balance” with tank costs almost halved creates a more mobile metagame, with lots of armoured vehicles going around on the wargaming table.
As a result, we’re going to have . The first one happened on October 6th and saw almost 20 players coming from all Northern Italy (and one from Switzerland!), while we are already accepting entries for the second one, on December 15th (99 points Late War Tournament).
First good news: we had exactly half of the players with an Allied army and the other half with Germans, so we decided to have all Blue Vs Red games in the first random draw. A good sign the game is balanced, while in the later tournaments of the Mid we saw 90% of players using Axis.
I played the British list I finally finished to paint (you can see my and ). I already used it in with very good results, so why change a winning team? The main difference between Lake Garda tournament and the Milan one was the D-Day German book: new options for the Axis players – and with the BF clarification (now available officially ) allowing the German players to be able to mix up D-Day German and Fortress Europe formations/supports. !
You can find all lists of all players here
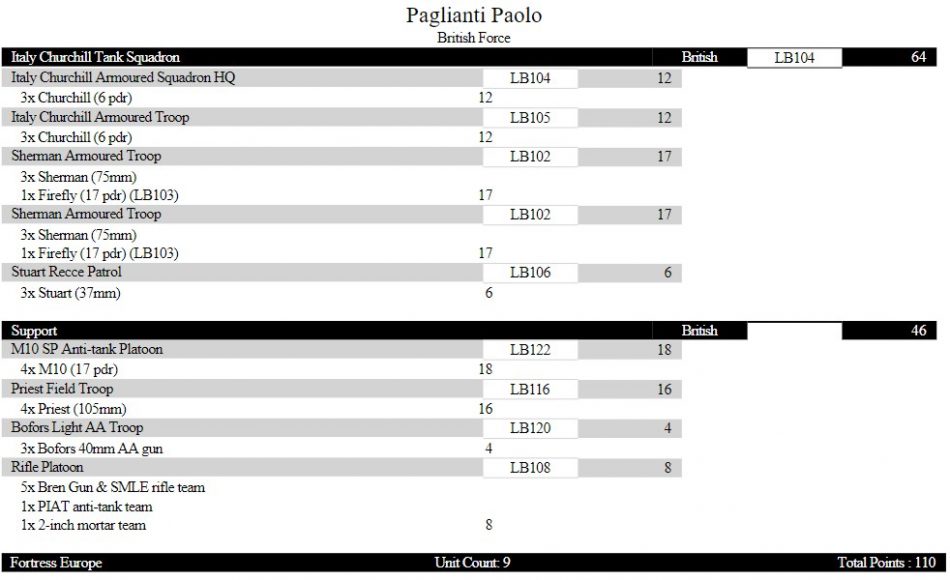
My list
First game, Davide Ranzani and his German army
Davide is a very nice and kind club mate from Milan, and he came to the tournament with a Panzer III/IV mixed company. An avalanche of Teutonic steel, with 6 Panzer IVs, 6 Panzer IIIs and 3 Tigers, supported by a fair amount of scouts.
The table featured a usual French countryside, with rows of trees along the roads and a medium size village on the left. As usual, I attacked while Davide chose to defend: we ended up with a Breakthruscenario. Davide decided to keep almost all the Panzer IVs and IIIs in reserve, keeping the HQ, a single Panzer IVs platoon and Tigers to defend the objectives.
A risky choice: with Immediate Reserves, he bet his Panzers would emerge pretty quickly from my back, but he had to defend the objectives with few powerful units. Knowing the nightmare would arrive soon, I rushed with all my tanks towards the closer target, leaving behind only the Priests and the M10s, positioned in the centre of the table to be able to shoot on all the German deployment zone: Davide didn’t have any infantry, so my single infantry platoon aimed to the group of houses near the objective knowing it could be almost invulnerable once behind the safe wall: with only five tanks visible, Germans would have gone to a great deal of trouble to kill all of them dug in the houses.
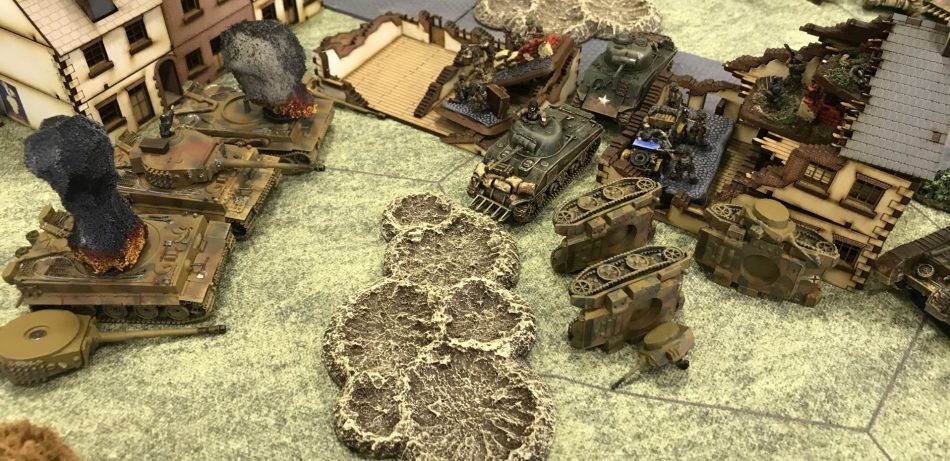
Davide sent almost his army to the objective: the scouts to counter the infantry, the Tigers to kill off all the Allied tanks: during WW2, US army considered “good” to lose 5 Shermans to kill a single Tiger, so the statistics were favorable for Davide. The Tigers are perfect to Blitz out, shoot two precise 88 shells to my Shermans, and run to cover at the end of the turn.
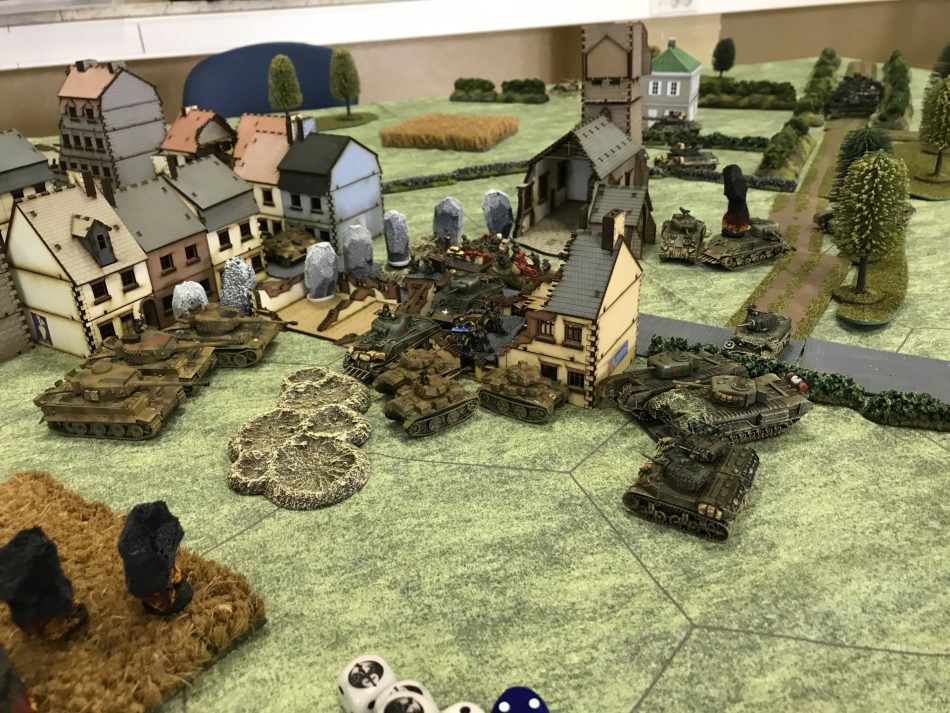 The final fight for the German objective. Davide tried to shield his Tigers with some smoke, but the combined British force was powerful enough to knock them out.
To avoid a losing long-range shoot out, I covered my advance with a smoke barrage from my Priests. Once arrived near the village, the Shermans took care of the scouts and the Panzer IVs, while the Fireflies shot to the Tigers. When the smoke settled down, I lost a couple of Shermans, but Davide lost almost all his tanks except the Tigers.
Some Panzer IVs emerged from the flank but had to slow down and confront the Churchills I left behind to protect my flank/back. Davide was forced to move the Tigers out of the comfort zone of the city square to keep the objective guarded, but doing this he allowed my M10s to shoot on the Tigers from where they were deployed. He managed to kill some other Shermans, but in the end, was wiped out by the combined shooting of Fireflies and M10s. 8-1 losing a single Sherman platoon.
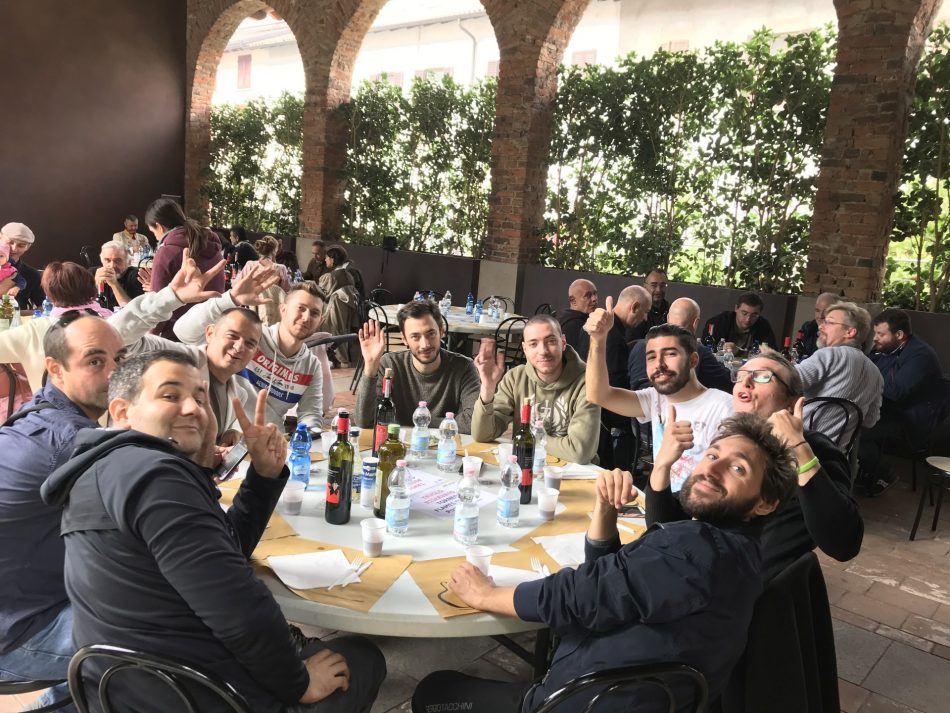 Some Italian food between the first and the second game, with all players complaining for bad luck as all gamers should do!
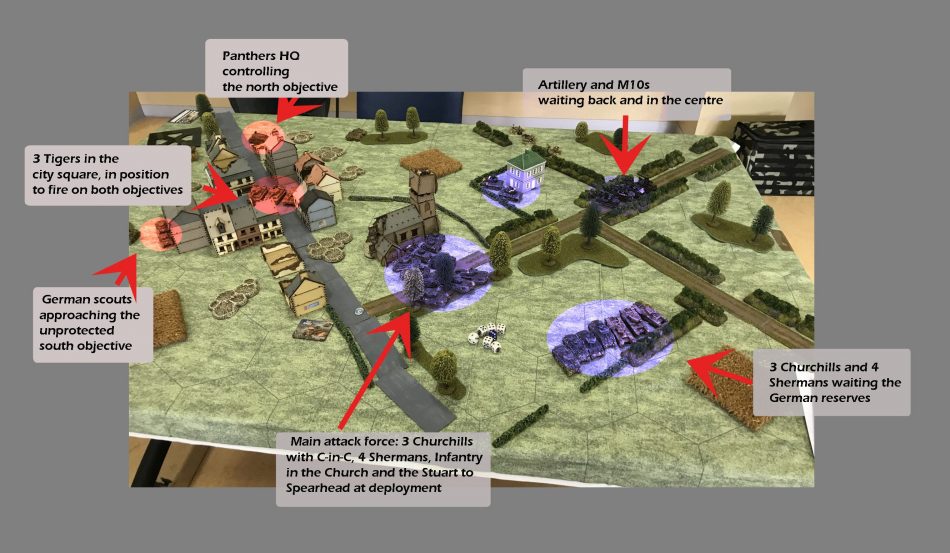
Second Game, Giorgio Bendotti’s Germans
Giorgio is another good friend from Milan, and also an exceptional painter. He is a solid player – he ended up second at the end of the tournaments. He deployed a Beach Defence Company with Marders and Tigers as support. , the Beach Defence Company is a formidable choice for the Axis player, allowing the deployment of really cheap infantry – but they are still Germans so the shoot as hell anyway!
We both planned to attack and had a Free for All scenario. Seeing Giorgio deployment was simply distressing: 26 infantry bases, 11 guns (of which 3 8.8 guns!), three Marders to cover a flank, three Tigers securing the centre, and Stukas over my head! Large as Russian, but still shooting as a German.
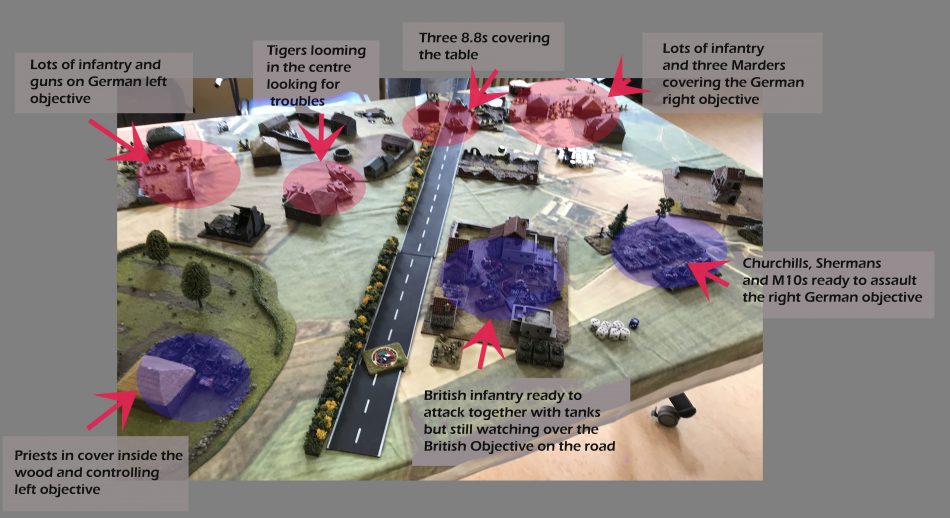 Giorgio’s army had a single weakness: he could attack only with three Tigers. Moving out of the holes his infantry could be a suicide, with their hit on 3+ and morale of 5+. For this reason, I could mass all my tanks on the right and try to charge one half of the Germans with all my British Army, leaving only the artillery to defend my left flank.
I spent my first rounds trying to kill out the 8.8 guns: Giorgio wisely placed them in the centre of the table, allowing them to cover all my line. It was simply too dangerous to charge them since with a single lucky volley they could wipe out one of my tank platoons: British armour is like butter against these guns. I managed to kill two of them and do some damage to the infantry on my front with artillery barrages.
With his flank weakened, Giorgio tried to exploit the other side and moved his untouched infantry towards the almost undefended British flank, with the help of the three Tigers. In Mid War, they would be simply frontally invulnerable, but in the Late War period, that changed. I moved my M10s, left behind to counter exactly this kind of threat from the German front, and killed two of them. The single Tiger retired back home, near his C-in-C, to have a better chance in the next morale tests.
Seeing the German infantry out of their holes was simply too tempting. I fast moved the surviving Churchills to the left, re-deploying them. They moved easily through the wood thanks to their Cross factor (2+). Giorgio tried to dig in the infantry but failed (skill 5). With machine gun fire from Stuart and Shermans, they were simply wiped out.
Finally, I moved to the extreme left corner to use the small town as a shield from the surviving German guns and charged them on the flank to avoid the reaction to my charge. They were cut to pieces on the spot, leaving the objective to the British troops. 7-2.
 The tournament location: the tournament has been sponsored by , and . We will do , and Milan is awesome for the ladies’ shopping while you’ll play.
Third Game, Blue Vs Blue with Diego Pozzi
Diego is a really strong player from Bergamo, and he used a British list really similar to mine. He swapped the Artillery with the Kittyhawks and had a stronger infantry with a full Rifle Company. We both attacked and had a Free for All scenario.
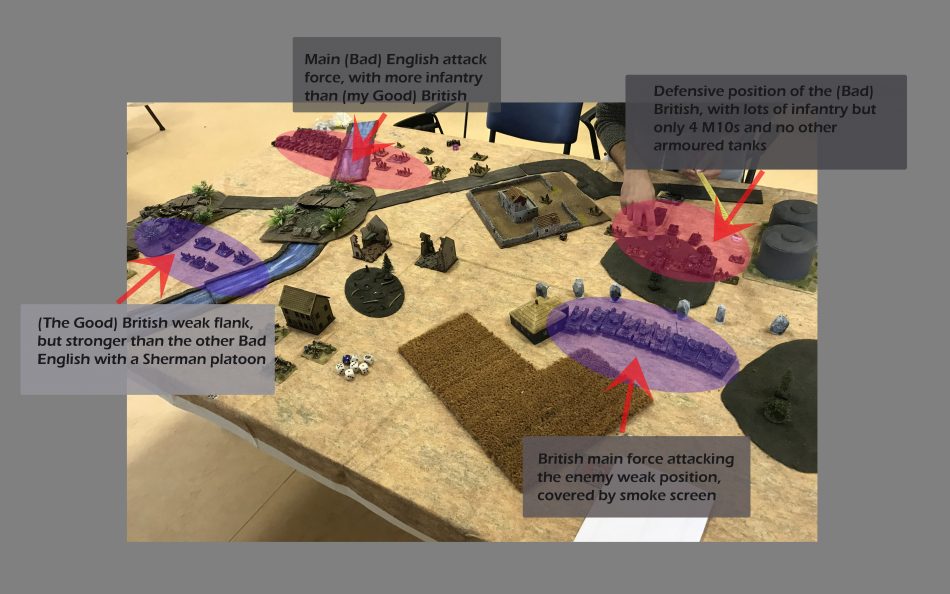
Still, during the deployment, I noticed we were going for the same deployment strategy. On my right, I massed my tanks (Churchills and Shermans), while on the left I placed Artillery, M10s and Infantry to cover the weak side. Diego did exactly the same, with his Churchills and Shermans in front of my infantry/artillery, and his artillery/infantry in front of my tanks. The only difference was I left a single Sherman platoon on the weak side, to strengthen it.
It was a race against the time: I fast charged with my tanks, using some smoke barrage from my Priests to cover the advance. Diego did the same on the other side. Both of us used the M10s as a sacrifice to slow down the opposing tank charge. On my side, Diego managed to kill all M10s, losing some Churchills and one of the two Sherman Platoons.
The Priest bravely behaved as they were tanks, and killed some more Shermans, while the objective was defended by the harmless Stuarts and the single Sherman platoon I left over there – they shielded behind their comrades’ wrecks like a small Alamo.
However on my winning flank, once I destroyed Diego’s M10s, nothing stood to defend the objective other than the infantry: so I charged Diego Rifles with my Churchills. On the second charge, the Rifles lost their morale and fled away, leaving the objective to my troops. 7-2
Lessons from the front.
The first game went exactly as I planned: German tanks in Late War are still superior but vastly outnumbered. They can’t defend without a solid infantry, with their line far too short. Davide’s weakness was also amped up by the 40% points he had to send as reserves out of the table. The Tigers are formidable opponents, but they can still shoot only twice per tank so they can mathematically stop 17 tanks.
Giorgio deployed one of the most dangerous lists of the Late war. Beach Defence can have a very strong support since the last FAQ, and are extremely good in – well – defense but can’t actively attack the enemy. This game shows how important is to exploit any chance given by a single opponent mistake, and how fast you can redeploy your line to attack on a different part of the table. I suggested to Giorgio to add a single Fallschirmjäger platoon, to have a solid chance to attack in a single spot of the table.
The game with Diego was the most challenging and risky: as always, in any wargame, facing your same army is the ultimate test, where luck and skill count more. I think Diego was a bit unlucky in the shooting exchanges, but I will never thank enough the single Sherman platoon I left on the “defending” flank. God save the King!
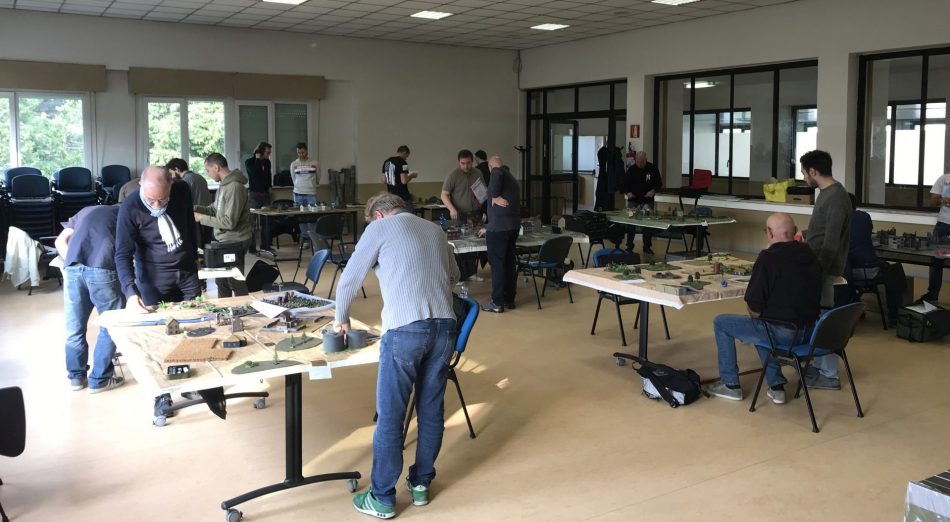
Some photos from the tables
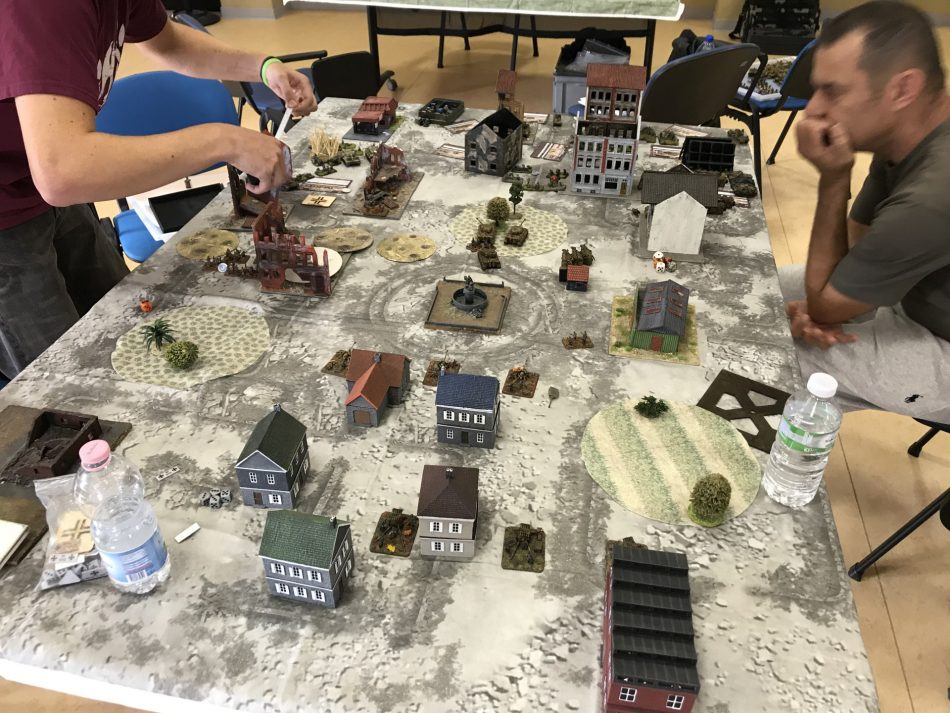 Flaviano Maggioni, one of the best Italian players (and “real world” military serving in the Esercito Italiano) pondering on the next moves for his army.
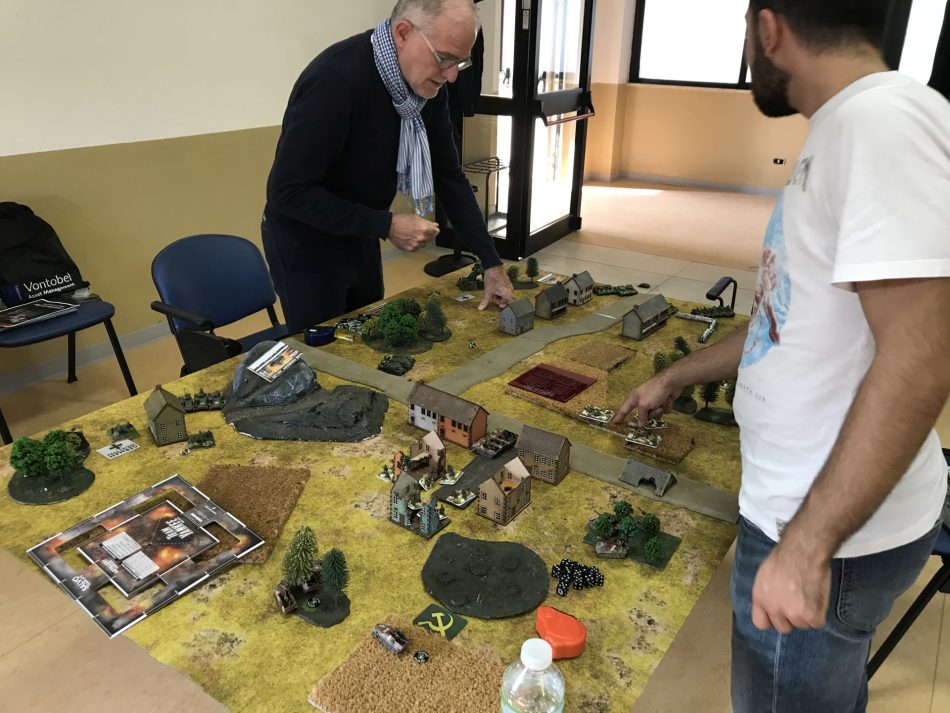
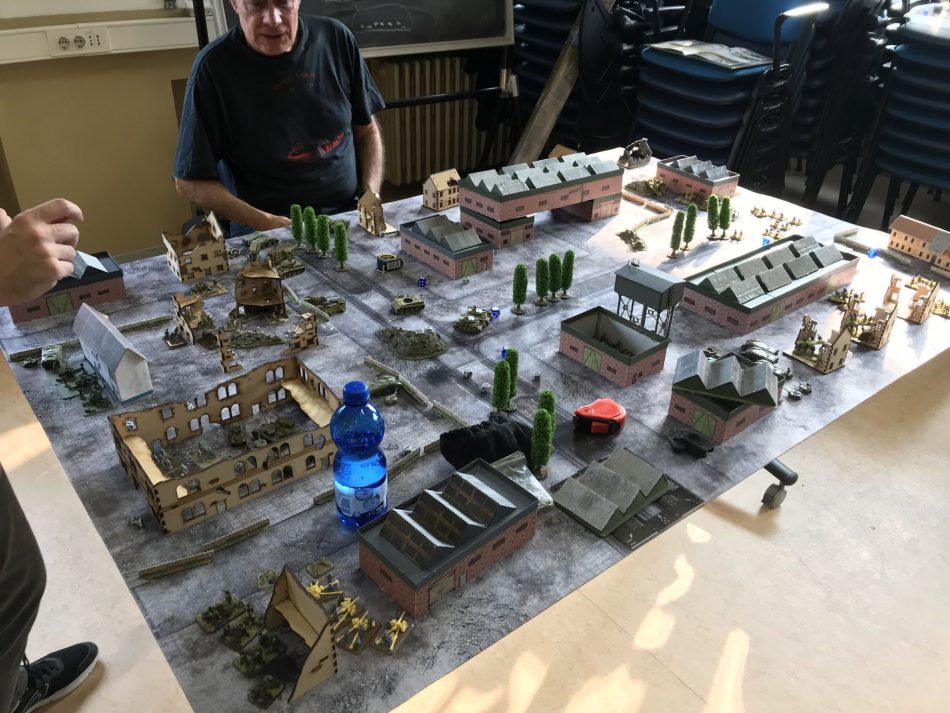 The “Stalingrad” table with lots of factories and buildings. If you don’t have infantry and meet this table, it will be a tough battle!
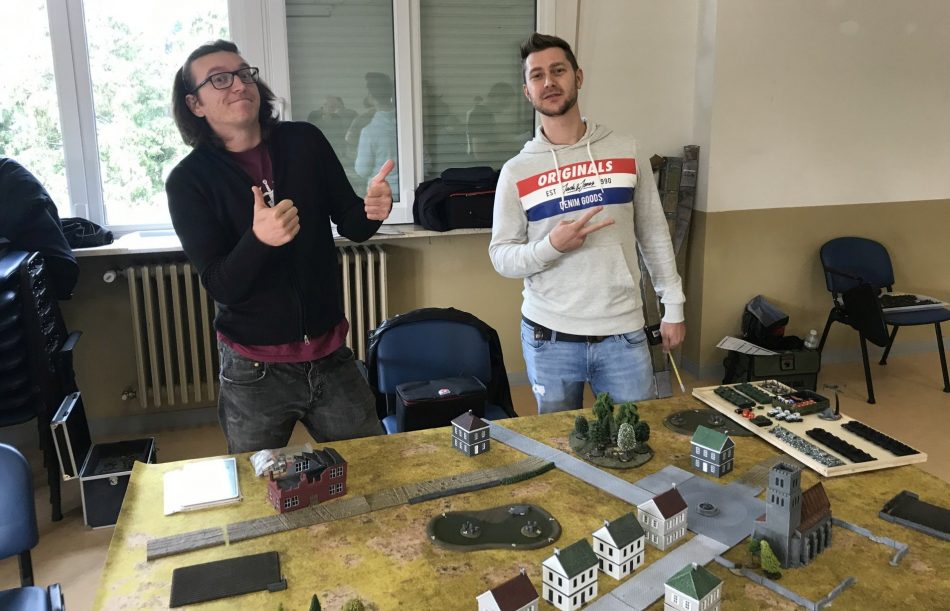 Two very good Italian players: Paolo Martiniello from Turin (my personal nemesis on Team Yankee tables!) and Diego Pozzi: I played the final game with him.
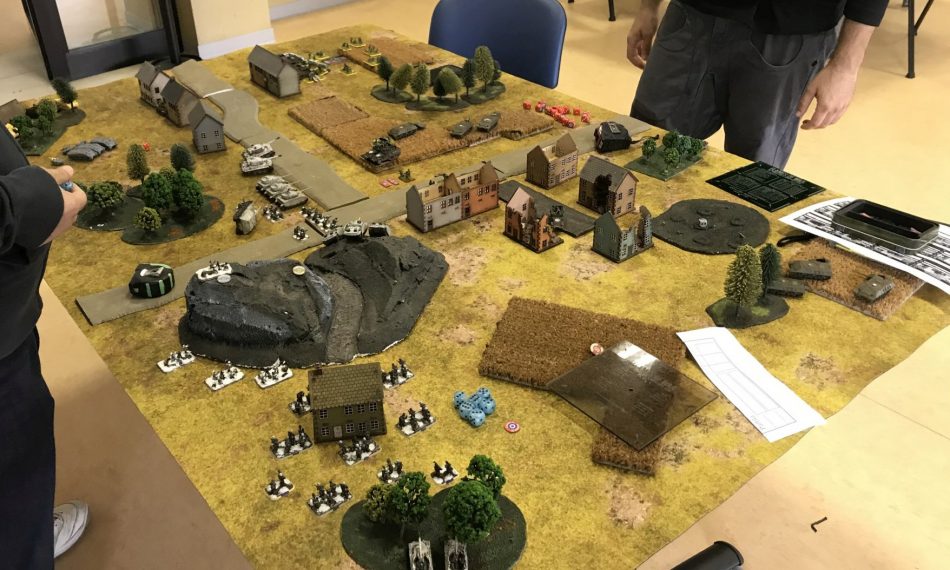
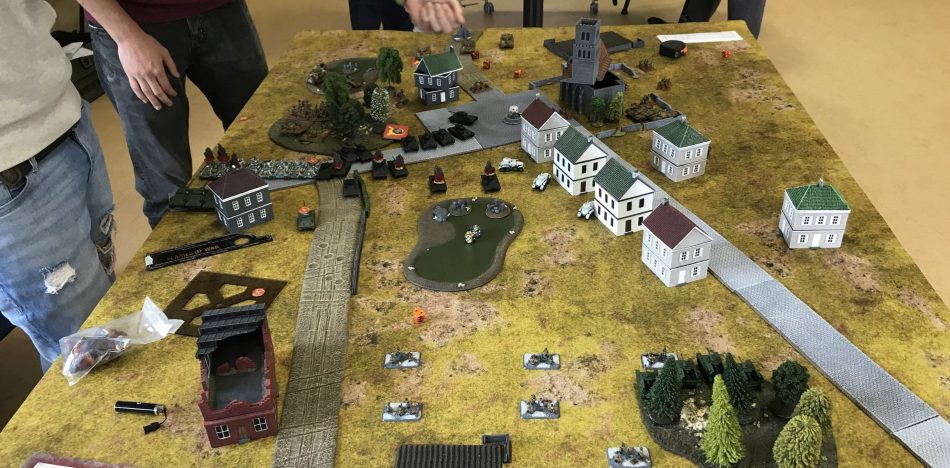 We tried to have half of the table with good moving spaces – good for tank formations, and the other half with buildings and woods – good for the infantry ones.
 We also had a special prize for the best-painted army, won by Michele Filippini US army.
 The umpire and list checker, Mattia Sandrini, greatly helped the Milan FOW tournament organization: smooth games and he also played with the last-in-the-classification.
Sounds like good fun all the way.
a lot, indeed 🙂
Wow that is one way of presenting your plans and deployment! Great AARs!!
Thanks 🙂