Black Seas: Painting the British Fleet
By Igor “Tadcaster” Torgeson
Choosing your Colours
After Matt Varnish’s , I’ve been tasked with British painting. Warlord’s new line of ships from the Age of Sail is close to my heart, as I spent some time as crew aboard HMS Rose, a replica of the British frigate from the Revolutionary war. Many of you will be familiar with HMS Rose, as she was purchased by 20th Century Fox and renamed Surprise for the film Master and Commander.
When it comes to painting British ships, I have good news and bad news. The good news is by the time of the Napoleonic wars, the colours of ships in the Royal Navy were mostly standardized. The bad news is I said “mostly.” Royal Navy captains had great latitude in the painting and upkeep of their ships, whether it was the hull, the sticks (masts and yards), or the brightwork (decoration).
The most widely-used scheme was often called the Nelson chequer. Inspired by Nelson’s use, this scheme is generally a black hull with yellow stripes along each row of gunports. Sometimes the gunports were yellow so that when the guns had been run out, the open gunports would be a clear sign of belligerence; sometimes the ports were black, to obscure whether the ship was ready for action. Either way, Geoff Hunt’s excellent painting of HMS Renown illustrates this nicely.
Painting by Geoff Hunt. Buy here:Most gamers will choose this scheme as it’s striking and classic. It’s also what I used for HMS Naiad in the pictures below.
However, hulls were also traditionally oiled to protect the wood, so any type of dark wood-grain could also be seen, with older ships essentially being darker. Early in the war, the Admiralty ordered (in vain) that ships should be black or yellow. Buff was also acceptable, and in many cases, whether the paint was buff or yellow was more an argument of degree. Finally, decorative parts of the hull, including panels, headrails, figureheads, and scrollwork could be any colour. The most wealthy captains paid for gold leaf.
With a bewildering array of choices, I’ve decided to give you some basic patterns. Feel free to mix and match. Pretty much any combination of the colours mentioned could and probably did exist on some ship in the Royal navy. I’ve used a plan of a Lively-class frigate as a template and given some examples with Vallejo paints. The first template, with natural wood sides, I arbitrarily chose Tan Earth. You can try whatever you like that looks oaky. Everything from Deck Tan through Beige Brown can work, just remember if you plan to brown wash that your base colour should be a bit lighter than you want for the finished product.
The last template is a variation of the Nelson Chequer. Feel free to fancy up the topsides as much as your patience and manual dexterity allows. I have little of either so I’m mostly just going to do a yellow stripe at the top of the bulwarks and a blue roof over the windows.
Almost universally, the insides of the bulwarks were red. In the Royal Navy, decks were sanded (holystoned) daily, so they should have a nice pale, fresh wood look. Some folks like buff, but I think 986 Deck Tan is the way to go. Once you wash it, it’s a nice medium/light wood colour.
For the masts and yards, there’s again good news and bad news. The good news: yards (the horizontal ones) are almost always black. If you want to be really fancy, you could do white tips on the ends of the yards, to help your tiny imaginary sailors from shimmying off the yards in the dead of night. I suggest 820 Off-white for this, and for anything else white on the ship, for that matter.
The bad news is the masts (the vertical ones) have a bewildering amount of variation. Each mast is actually made up of two to four parts. In our models, we only go to three, but an ambitious scratch builder could get to the fourth.
The bottom part is called, quite practically, the mast. So, for example, toward the front of the ship, the first mast we have is the foremast. At the top of the foremast is what folks colloquially refer to as the crow’s nest, but by this time in history, it has evolved into a platform that both supports the rigging and serves as a fighting position. It’s called the top. Just above the top, the foremast overlaps with the next mast, the fore-topsail mast.
Then, above that, we have the crosstrees (again rigging support) and a slight crossover leading to the fore topgallant mast (if you ever have to say this out loud make sure to pronounce it the t’gallant mast or sailors will laugh at you). This arrangement is repeated on the main mast and the mizzen mast as well. On our models, at the front, we have the bowsprit closest to the ship, and the jibboom beyond that. Oh, and see that little spike sticking off the bottom of the bowsprit? That’s the dolphin-striker, which I always find amusing.
The lower masts were usually made of multiple trees laminated together, and the upper masts were cut from single trees. That’s why you see those bands on the lower masts—they’re gammoning to improve the strength of the laminated mast. What that also means is lower masts are usually painted and upper masts are not.
However, the areas where masts crossover were also usually painted because they saw a lot of wear and traffic. And just to confuse things more, there were some captains, especially of small raiding ships, like brigs and frigates, that painted upper masts black so that they wouldn’t stand out against the background when the ship was seen next to shore.
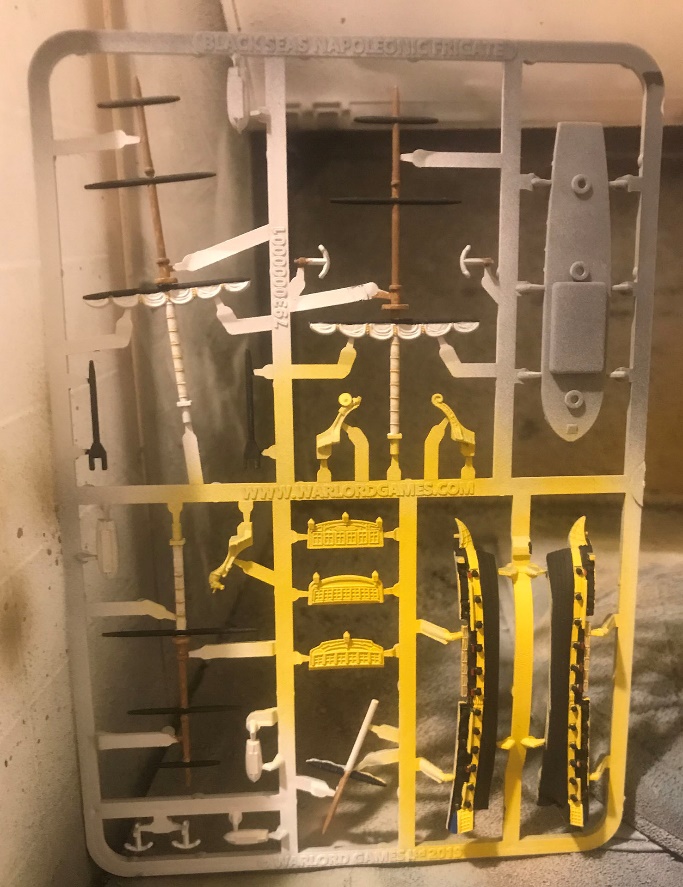
Okay, so now you have your plan for painting, how do you to it? The first thing to remember is that these models are SMALL. Even if you’re used to painting 15mm models, this is even smaller. One false move and you’ve made five guns yellow. After racking my brains on this, I decided to do two strange things. One: I’m doing most of the painting on the sprue, and two: I’m going to airbrush the hull yellow.
Painting on the sprue gives me something to hold on to and allows me to get colour on parts before they are put together and hard to get to. This is especially important for decks and the insides of bulkheads, and once I get to the 3rd Rates, there are even more decks to deal with. The drawback to this, of course, is that once the pieces are removed from the sprue I have to clean up and repaint the connection points, but I’m willing to make that sacrifice.
The decision to put yellow on first comes from a couple of different factors. First, yellow notoriously difficult to paint without multiple coats. If I airbrush it over the white primer, I’ll probably only need two coats. Next, the yellow band goes in between the guns, which is an irregular, tiny, annoying space. Trying to get yellow in there over multiple coats would be rage-inducing.
Finally, the model being very detailed, the areas that need to be black are clearly defined, but have so many details they’re going to be nearly impossible to mask off. So, yellow first, brush on the black after. The added benefit to this is that blacking in the recess of the gunports allows sloppiness, as the only thing I’m slopping on is the guns, which are black.
With primer and yellow applied, I started by giving the deck a coat of Deck Tan. Then, I went to my chosen wood colour for this ship, Tan Earth, and painted the upper masts, the deck furniture, and the catheads.
On the frigate, note that the deck furniture includes the pin rails around the masts, the capstan, and wheel—aft of the wheel is the skylight, which is usually painted in bulwark or trim colour. Red was painted on the inside of the bulwarks and yellow on the top of the skylight.
I then applied Black Grey to everything that is supposed to be black, including the deck guns. Finally, everything white was painted with Off-White: the hammocks amidships, and the clewed-up sails on the bowsprit, fore, and main.
For the lower masts, I had a bit of a conundrum. How do I paint the tiny tiny tiny whippings with my giant stone-based hands? What I tried, and I’m not sure I’m sold on, is slopping black around the whipping, then coming back and putting the off-white onto the mast in between. Since I was using the special metal stem and stern pieces I held off on those until after assembly.
Once everything dried, pieces were removed from the sprue, cleaned up and touched-up. Hull was assembled, and then the stem and stern were painted as above.
All my trim I made yellow but again you can really be creative if you like. For my gallery windows, I painted them black and then dry brushed yellow for the window frames, but now I really wish I had done them the way Matt Varnish did.
The windows are TINY, so anything you do will ruin whatever you did before. I think next time I’ll paint them white, then do a bluewash and then try a light drybrush of yellow for the frames. Knowing that the ship’s name and scrollwork were going to be a pain, I did the whole stern-gallery in yellow and then filled in the black. It was still a pain.
The scrollwork looked terrible so I painted it all black and then went back over it with Old Gold. Now it looks slightly less terrible. The last detail is the figurehead. Time to be really creative. Also, have a magnifier or the eyes of a teenager. I recommend a dull cote before you wash anything that needs washing, like the deck and the sails on the yards.
I also think it’s easier to attach the cardstock sails before stepping the masts. To help me with this, I made a mast jig, which is just a piece of wood with holes drilled to store the masts during this work. Prepping the sails takes a lot of careful curling.
Mast jig. Now with 50% more old math!In most sailing conditions, the bulge should be nearer to the bottom of the sail, but if you want something more dynamic put more curl on the top. Super glue is probably the easiest way to attach these to the yards, just be careful as there will be no second chances. PVA can also work, albeit with a longer drying time.
You can try to attach the bottom ends of the sail to the yard below, but it’ll just break, especially when you start rigging. Glue the bottoms of the sail if your frustration level isn’t yet high enough to curse me, Warlord Games and the Admiral Lord Nelson.
With the sails placed, you’re ready to put the masts in the hull. Before stepping the masts, please dry-fit and sand as necessary. You don’t want to figure the mast is just plastic, so a little force will get it in and then break the mast and then have to glue it and then have a crooked mast. If you were to do that you’ll be really frustrated. Speculatively speaking, of course. Step the masts, and you’re ready for the next step, rigging!
Or as ship modelers like to call it, insanity!
HMS Naiad, ready for rigging
On a recent visit to Portsmouth, the black/yellow had been largely debunked as a later Victorian invention. The colours according to the Navy were closer to a pink/grey. (Shocked me too)
Now that’s interesting. We tend to make our yellows more saturated than they actually were, and I can see buff fading to a pinkish. And the blacking came from lamp black and tar, so fading there is to be expected as well. I’ll be sure to check with the recent writings/scholarship!
Great article Igor. Helped me make progress on my first three HMS ships tonight.
Huzzah, sir!
Great article and beautiful ships!