Some ideas to base your next 28mm army
The 28mm size, if you ask me, is the perfect balance between playability and modeling/painting. You can buy and assemble pretty good armies for any ruleset from ancient warfare to sci-fi skirmishing without investing too much money or time to paint them, with striking results. So, even if I prefer 15mm when it comes to competitive games and recreating full-scale battles, I often spend some time to paint and play 28mm miniatures.
However, on gaming tables, I equally often see very good painted miniatures with anonymous green bases. I think bases are so significant for the final look of an army (by the way, here are for Team Yankee, and ).
One of my next projects is a Viking army for Saga, and this was a wonderful excuse to show off some ideas the next 28mm army’s bases – not only for my berserkers but for any army for Bolt Action, Star Wars Legion, Warhammer or anything in the 28mm range you could do in the next future.
My army is supposed to raid some English Dark Age village, so I wanted bases with wood planks (also good if the Viking are locked in combat on their Drakkars) and with stone roads – something like you could expect to find in towns like Lindisfarne or some Roman church in the Wessex. For the record, the Vikings are from the Gripping Beast plastic box.
Micro Art Studio Ready-made bases
The easiest way to give a unique look to your miniatures is by using ready-made bases. I began a few years ago to appreciate and use the , one of the first dealers focusing on bases, offering many different themes, and they are very good in sculpting quality and covering almost any style you would need. For my Vikings, I asked them to send over some Wood bases and Stone road.
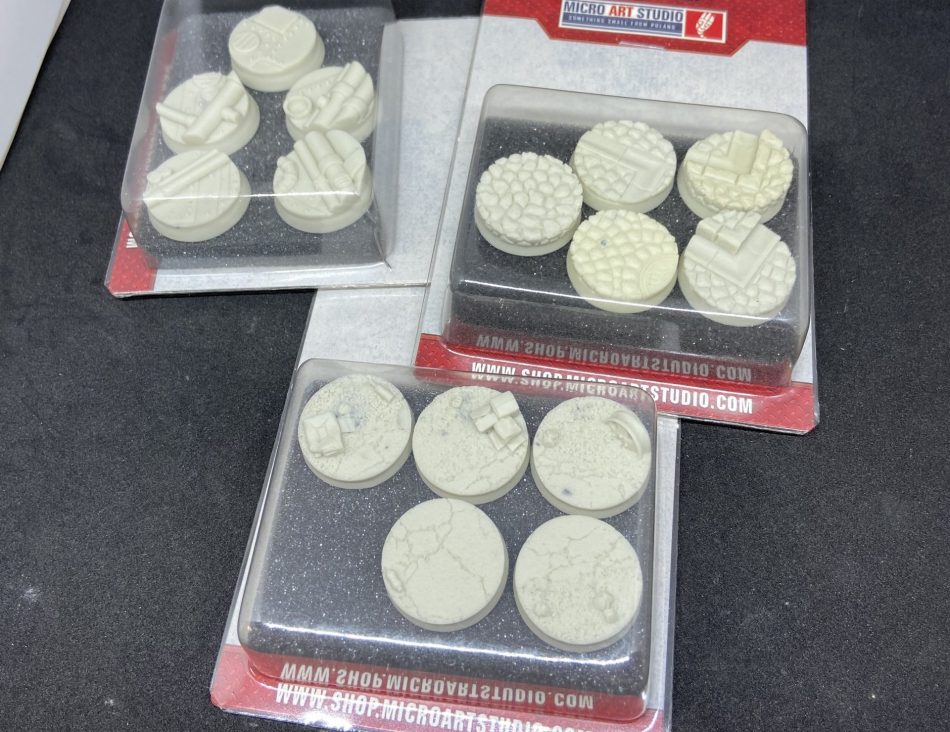 The Micro Art Studios blister freshly arrived at NoDiceNoGlory.
They are ready to be primed and painted: I suggest to use the same set of colors to give an “army” coherence look. On the Micro Art Studio site, you can find very good examples on how to paint them, and it’s very easy and quick. The “grey” stone can be done in minutes, dry brushing the black primed base with three layers of lighter greys, and adding some red-brownish tiles.
The “clear stone” (the one you could expect to find in old Roman ruins, for example) it’s likewise easy: just give a light pale sand color (I used the Games Workshop Ushabti Stone) and a wash with Agrax Earthshade (also from Games Workshop). When dry, a final drybrush with Ushabti Stone + white (50/50) to enhance the textures.
The wood bases can be done in two ways. The first, “traditional” one is a base of dark brown (like Rhinox Ride from GW) and a first drybrush with a lighter tone (as Mournang Fang, GW colors). If the wood planks are broken, you can add some “internal wood” color in the exposed part ( Desert Yellow from Vallejo, for example).
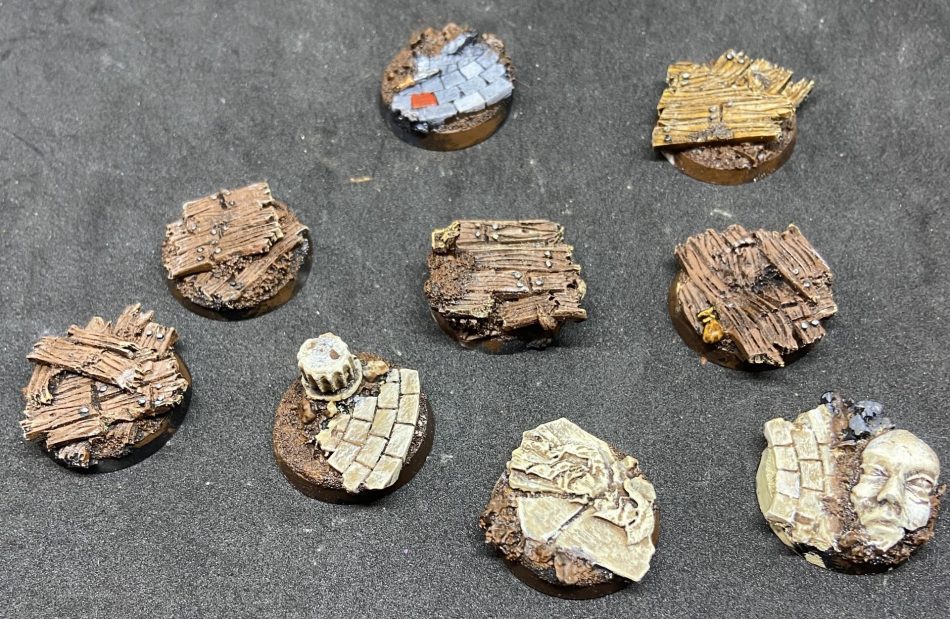 Micro Art Studio bases primed and painted (just missing some final touches like grass flock). The wood one in the top right corner has been painted at light speed velocity with Contrast colors.
The second way is to use the “magic” rom Games Workshop: the base on the top right of the photo with a lighter tone was made in literally 10 seconds. You need to give a white prime and once dry wash with Contrast Snakebite Leather. The Contrast colors are like a denser wash, with the final result one brush stroke is the equivalent of three color passages (base, medium and a level of drybrush).
Micro Art Studios has lots of ranges, from sci-fi to fantasy dark temples, and bases of any size and shape – round, square and oval. The cost is good: 1 Euro/Dollar for each round base (Warhammer size), in packs of five random bases taken from the range. If you want to have a special base for your champions or heroes, this is the best and quickest solution. There are a lot of other manufactures doing similar bases on more restricted ranges: I found, for example, some round bases specific .
Green Stuff World Rollers
is a Spanish shop with anything you could need for painting and sculpting your miniatures. One of the more recent addition are these Rollers . You just need to cover your 28mm bases with some green stuff or and roll over with the roller like my grandmother did in her kitchen for homemade pasta. Each roller has a different design: wood planks, stone pins (the ones they sent to us for this feature), but also very unusual ones like Mandala, Alien looks (echoing major factions from WH40K, like Eldar and T’au), Dutch bricks, medieval pavement, steampunk. They also have some 15mm scale Rollers, good for Team Yankee or FOW bases, for example.
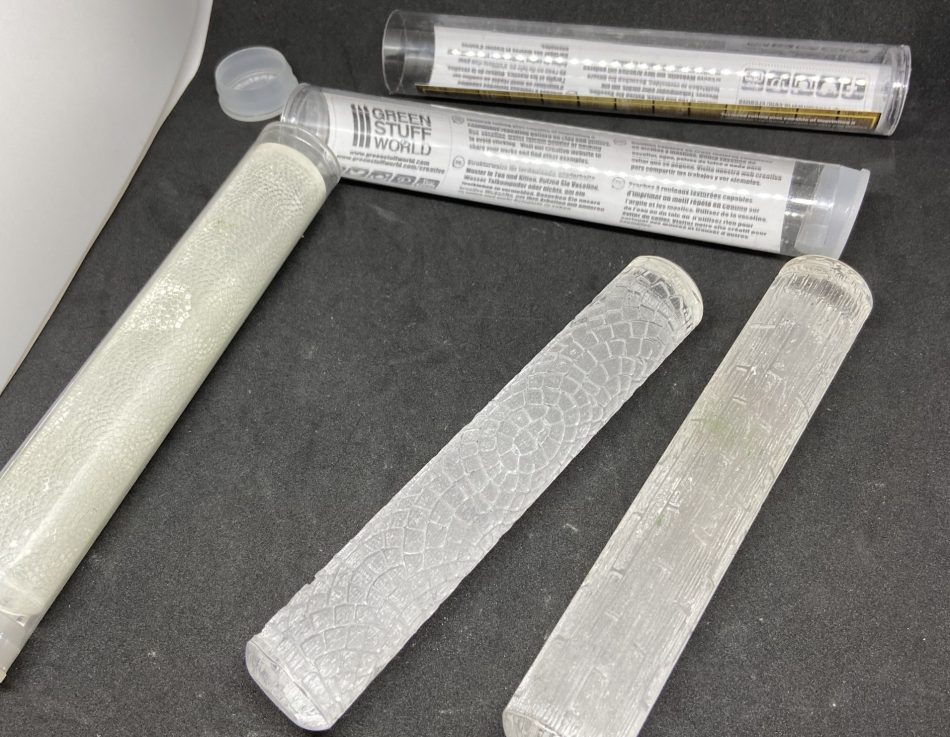 Three rollers (one is for 15mm) ready for action!
This video from Green Stuff World shows how it works. The most important trick, in my experience, is to put *lots* of talco on the green stuff before rolling over it otherwise, the roller will “tear” it.
Each roller costs 15 Euros (right now, 12 Euros for a Sale). Very convenient for your money pouch: with just 15 Euros, you can base an army with a unique look – with 30 Euros, you can have two platoons of the same troop with different bases and look, so it’s easier to identify them one from the other.
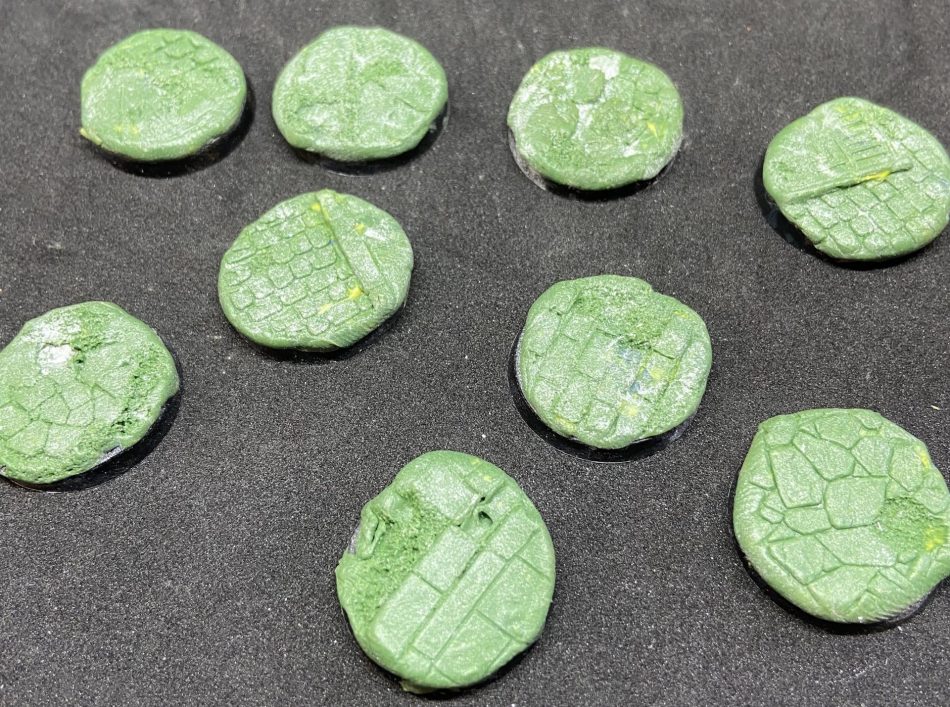
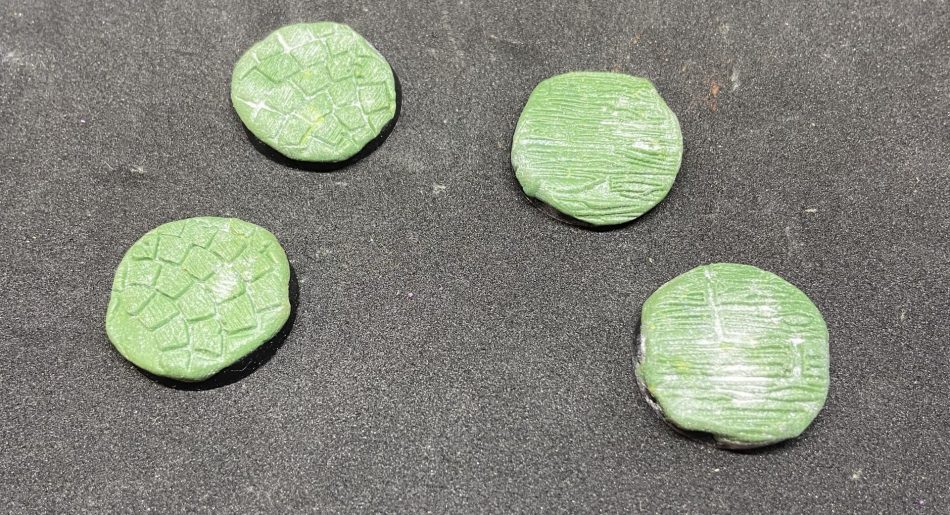 Some just made bases from the Green Stuff World Rollers. You need to carve out the excesses on the sided and they will be ready to be primed and painted.
And the rollers are forever: once bought, if you clean them after use, they will base all your future armies. However, the major drawback is that all bases from a single roller will look the same. If you want to vary or distinguish the leaders, you will need to add some small bits, like a broken wheel, a shield, or a small wall.
Basius Basing System
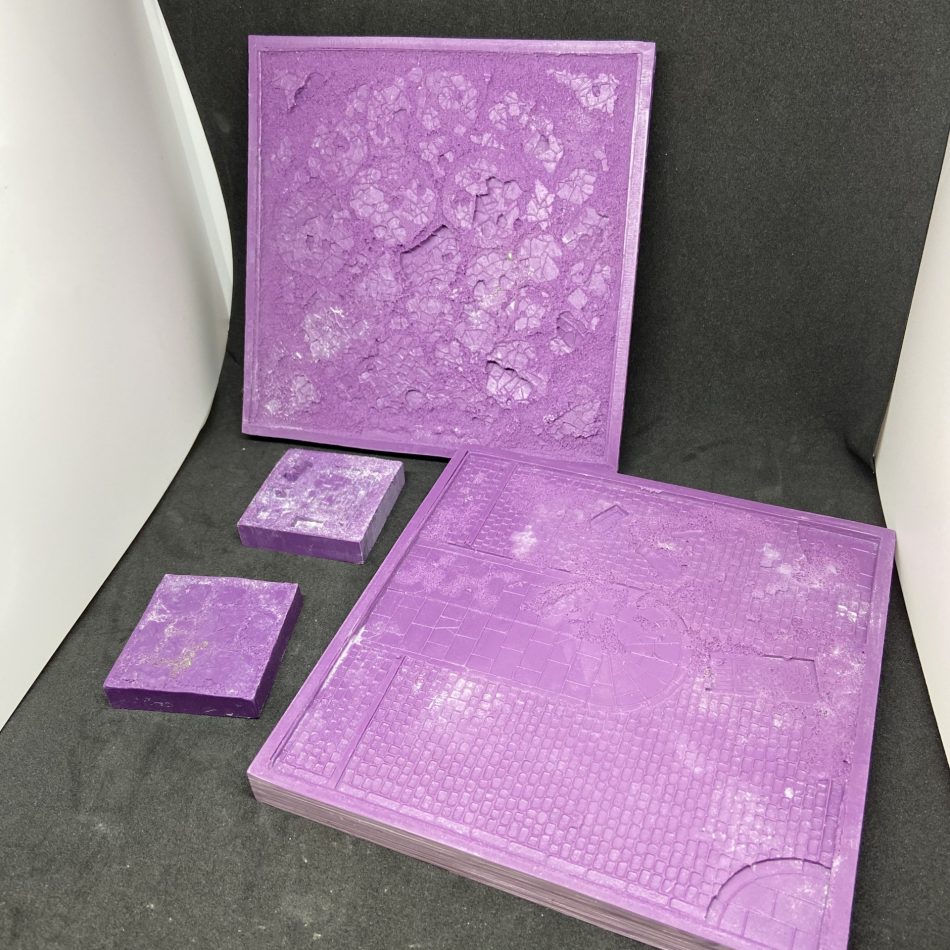
If you want more variety, is a very good answer. They are square pads with the “negative” thematic texture. They work in a similar way of the Green Stuff World rollers, but you need to “push” the base with Green Stuff on the Pad instead of rolling over it.
Basius has a lot of pads, with any style you can imagine or desire. They have also two kinds of squares: the smaller (5 x 5 cm) and the bigger (16 x 16 cm). The textured surface has a lot of variety, so you can choose any small part of it to have a different kind of base for each soldier, but still a coherent look. For example, one of the squares they sent to us is the “Urban” set – you can see the two “sides” here.
 With the Basius pads, you choose the square or the round bit you want for each of your bases, and “push” it hard on the Pad.
You just need to place the Green Stuff (or Milliput, or even cheap clay) on the surface of your bases, and “push” them on the area you like. You can have one base in the street, one in the corner, one with a grate in the corner. All Pads have a lot of “curious” spots – give a look to the “steampunk” one, with all the cogs and pipes, and imagine how many different Warhammer bases you could do.
 Some bases created with the Basius Pads: more expensive than the Rollers, but much more variety
I’d go definitively for a bigger pad or two, but you can consider the smaller pads for some “variation” without spending the same amount of money. This is the most expensive solution: each big Pad (with two different sides) is 30 Pounds, while the smaller is 7 Pounds (and single-sided).
The Vikings with a base
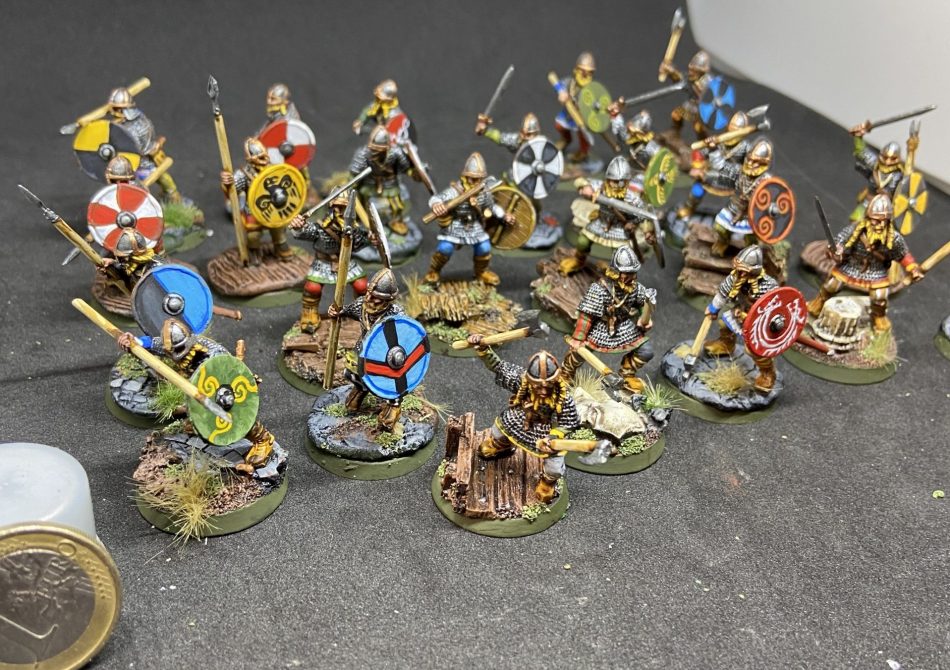
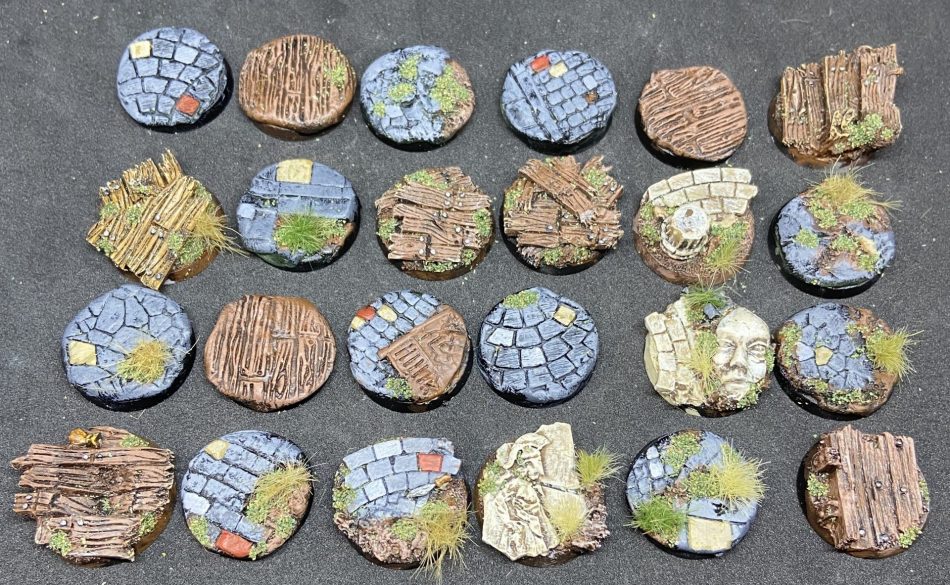 24 bases from different “sources”, but a unique “look”. I just added some grass flock and bush
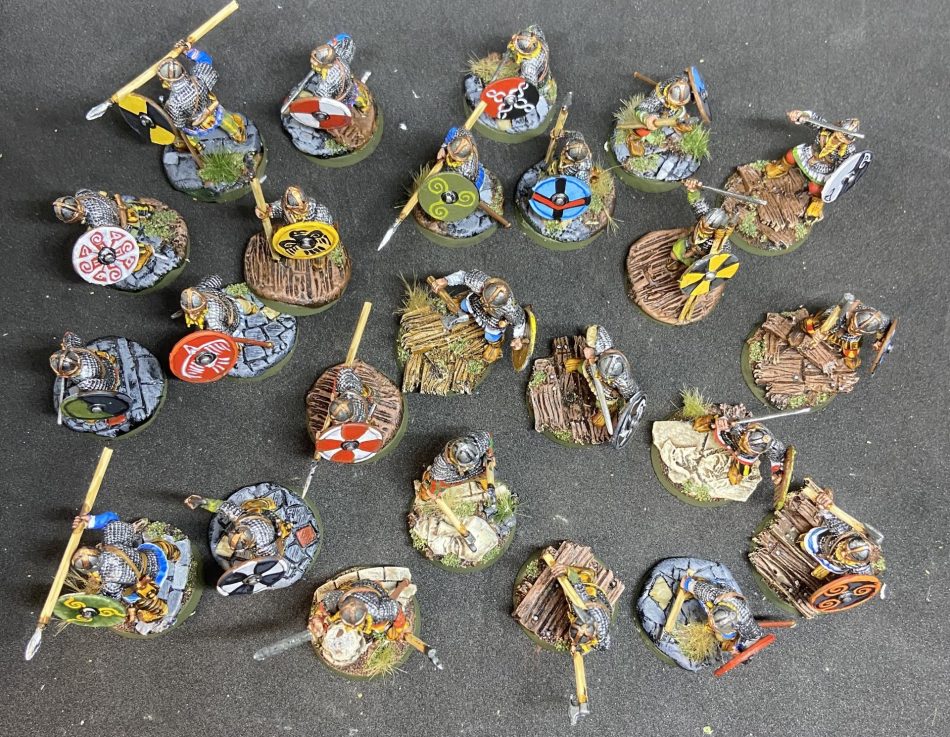 The Viking raiding party top view: can’t wait to have the chance to deploy and play with them!
This is the final look of my 24- strong Viking raid force. As you see, I mixed the three solutions, and the result is quite varied. Final advice: whatever system you will use for your base, spend 5 minutes to drill a hole in a foot of every miniature and in the corresponding spot on it base, and use a pin to fix it. You’ll save a lot of problems during your games, with miniatures losing the bases just before that charge!
 Dear Vikings, say “Raid!”: we are taking a photo!
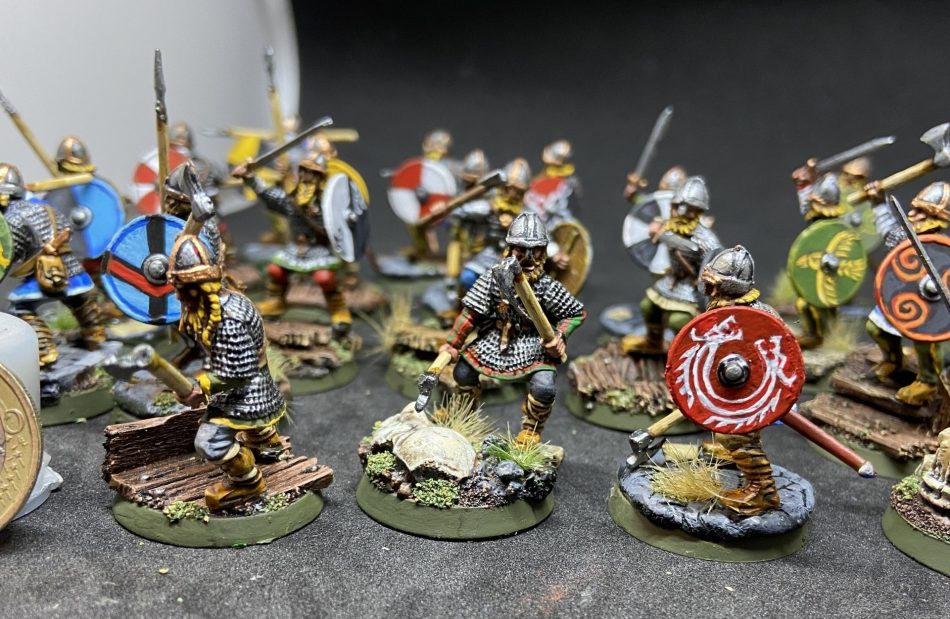
Great job!!!! Nice bases really finish the job.