Blood & Valor: All Quiet on the Western Front Project
It is no secret that I love and even before the game came out, I had a few armies ready to go for play testing and when the game finally came out. One of the things I pleaded with Rufus and Kai to make sure that the game was not all trench warfare. I have always felt that the Great War was under-gamed because many just think of static trench warfare. When I gave demos of the game, I stated that I have no plans to build armies for the western front. However, as I talked about the game more to potential players, I noticed that many of them wanted the mud and blood of the trenches and by picking up some great kits I gave in, well almost since I still do not have any trenches.
Well before development of the game started, I had a collection of Russian’s and German’s for the 1914-1916-time frame. I soon built British and Germans for East Africa and Ottomans and ANZACs for Gallipoli and the Near East, all forces I helped out with and heavily play tested for the game. Since the end of those projects, I really wanted to collect a Belgian force, since they are so good and those uniforms are just a classic.
 Part of building this force was not only collecting the models but making a good table to have them battle one another, when I made my decision to go for 1916-18 France, I knew my work was cut out for me.
The Troops
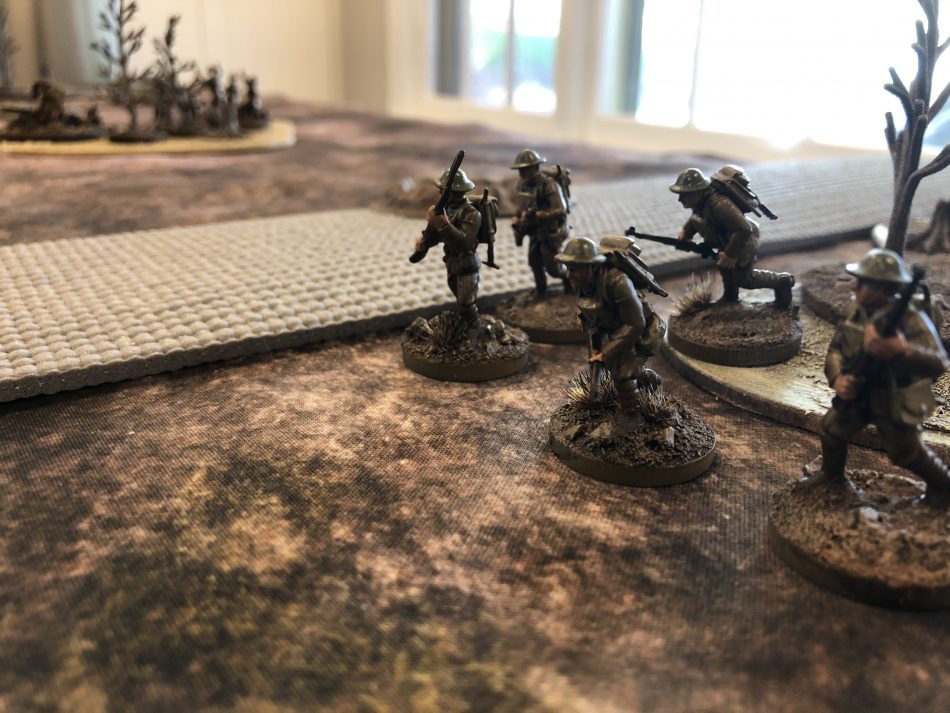
What started this project off was getting my hands on the from Chris at The which I detailed in a review over the summer. These gave me 150-points of US, French and German forces as a starting point. I say starting point because I wanted to be able to play at the 200-250 points game on a larger 4’x4’ table. I decided to augment this force with some extra four model packs which Chris started to sell right after I got my boxes. I added another US and French squad and another four Harlem Hellfighters from Phalanx.
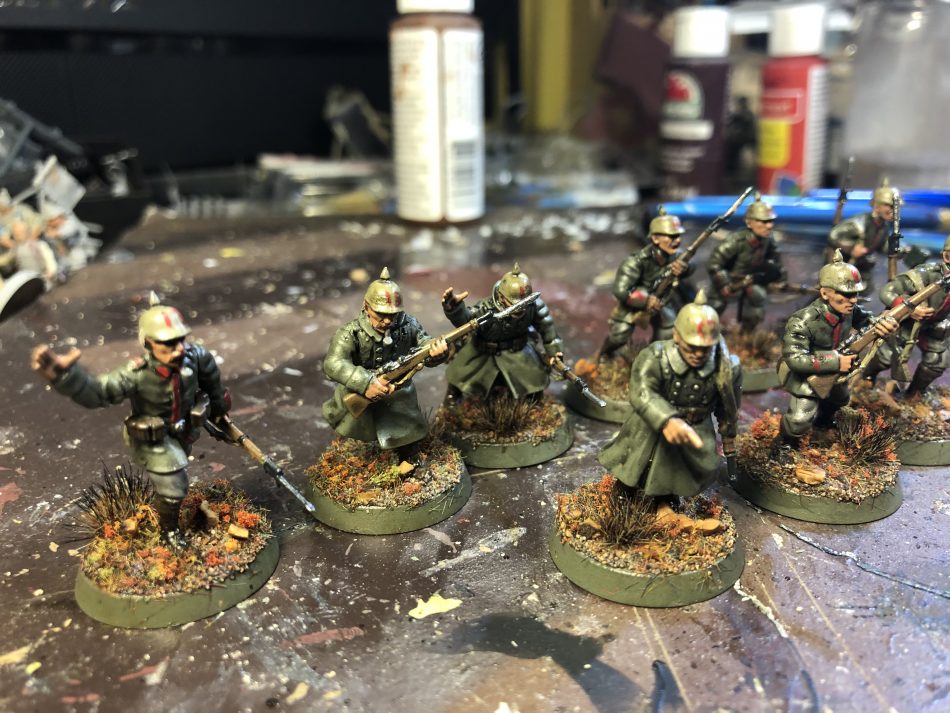
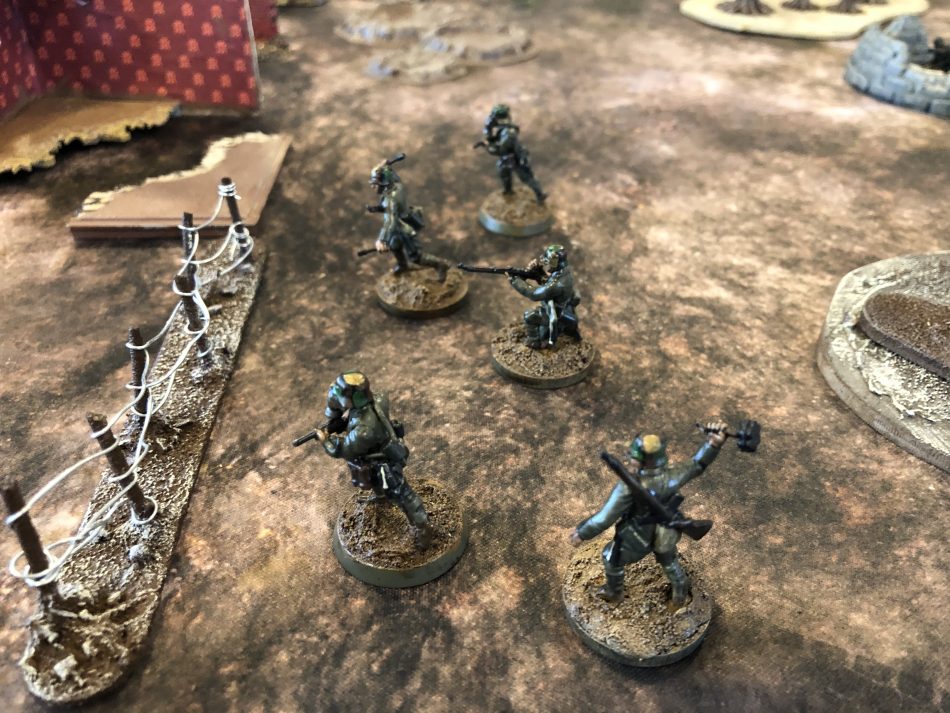
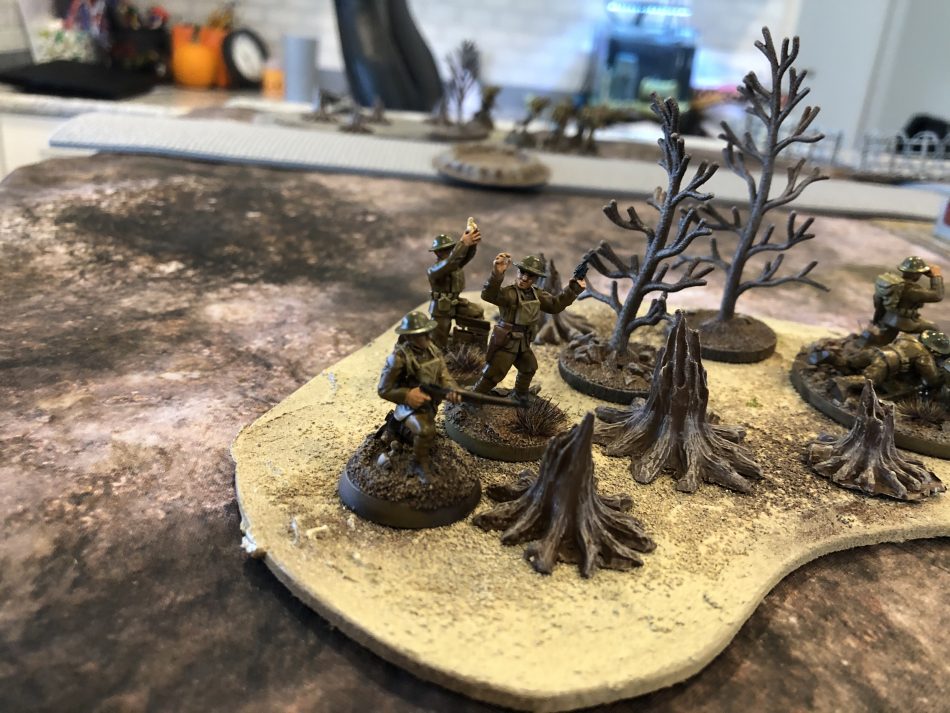
I also needed to expand my force of early war Germans and the folks at put out just the kit I needed. It comes with 30 plastic models which you can pose in multiple ways and most of all you can pick the stahlhelm, feldmütz or the pickelhaube head for your models so you can use them for any time during the war.
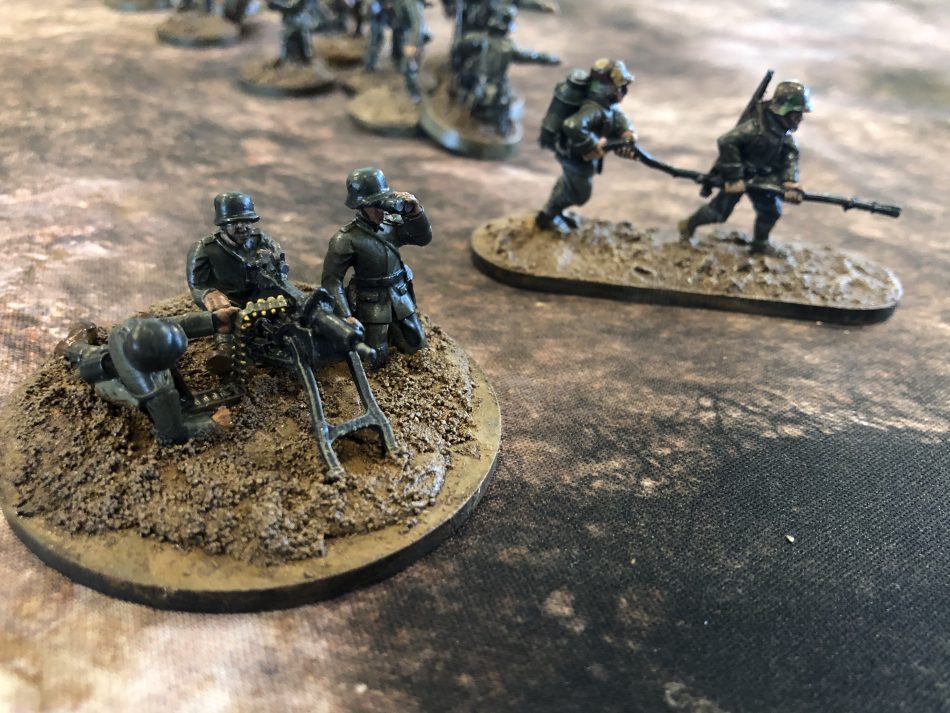
 I also decided to add some specialists to my German force, so I picked up the from Lon at . The pack comes with a flamethrower team, AT rifle, and a Granatenwerfer team. Knowing that the AT rifle is coming to the game I am just using that figure and the flame team. I also picked up an HMG from Lon since that is one of the most important units in the game and while the trench gun is good, the US HMG team, especially with the Dan Daley HMG unit is just something your force needs, in B&V shots count.
One other pick-up I made was getting a sprue of WW2 German troops in greatcoats. This was based on a post someone made on the B&V Facebook group and I felt it was a great idea. You cannot use these models as-is, you need to kitbash them with the extra pieces of the Wargames Atlantic sprues. I took the pickelhaube heads and some of the arms and made a squad of early war Germans.
Formations
In B&V you have some really neat ways to create your force. With each squad numbering from four to twelve models, you can make your teams as they were in the war or do some “min-maxing” to get more initiative points. My best advice is to make your teams strong enough to max out on shots whenever possible, so while “mix-maxing” may appeal to you, the smaller units just lack the firepower you need in this game. My core units will look something like this as a starting point;
Germans- Three 12-man quads with LMGs and HMG

French- Three 10-man squads with LMGs and HMG team
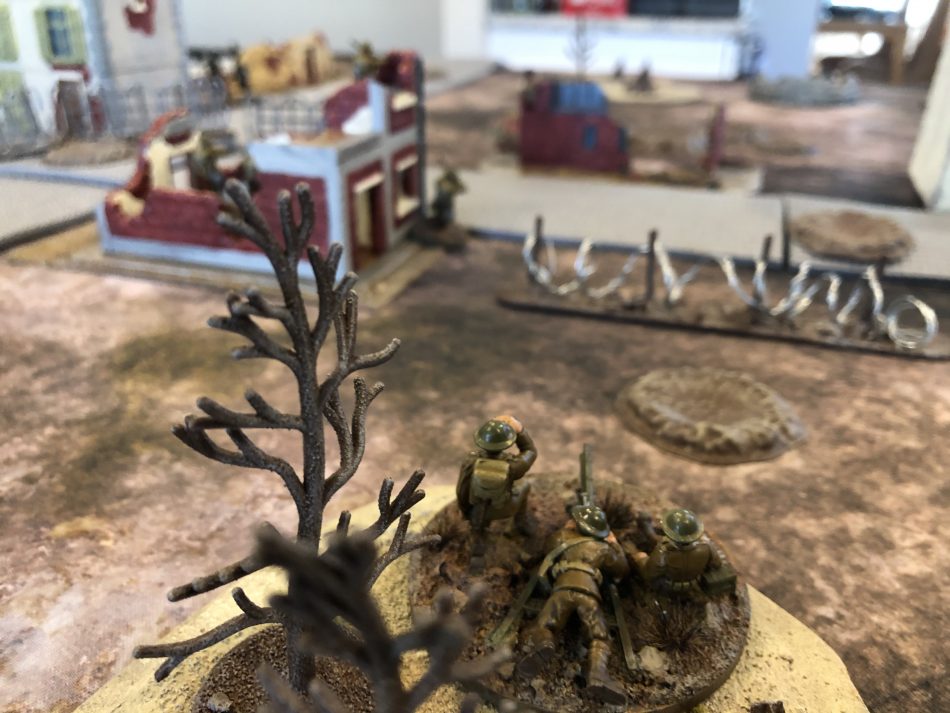
USA- Two 12-man squads with LMGs and a Rifle Grenades, HMG and trench gun teams
These combos with some assault troops thrown in for the Germans and French and maybe an artillery bombardment for the US gives me about thirteen initiative points for the Germans and French and about eleven for the US. These forces also give me a lot of flexibility on how to craft my army lists.
 Feldgrau and Horizon-Blue
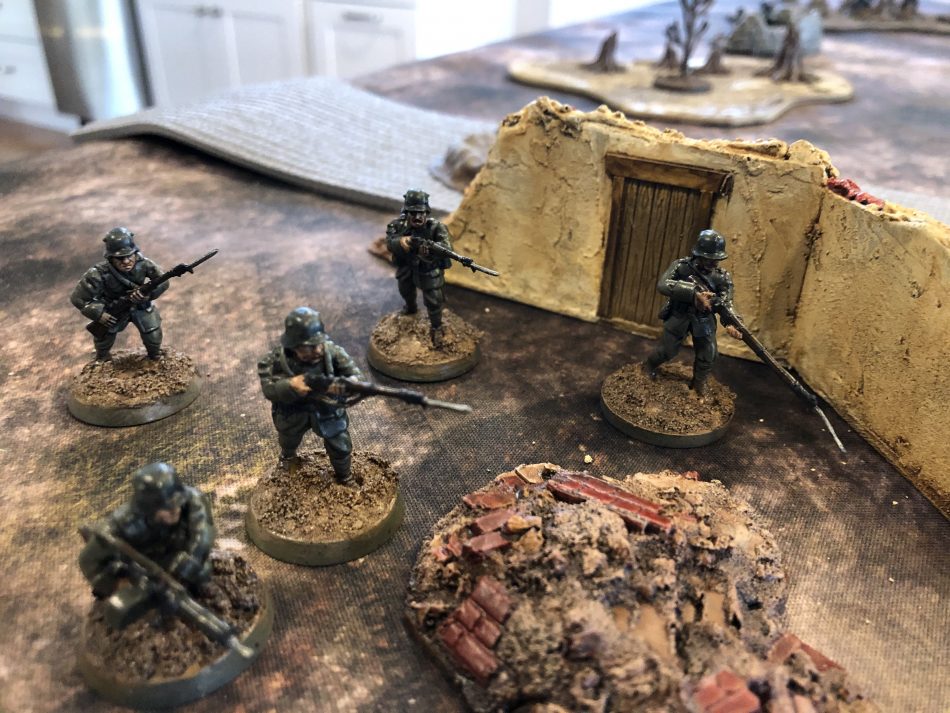
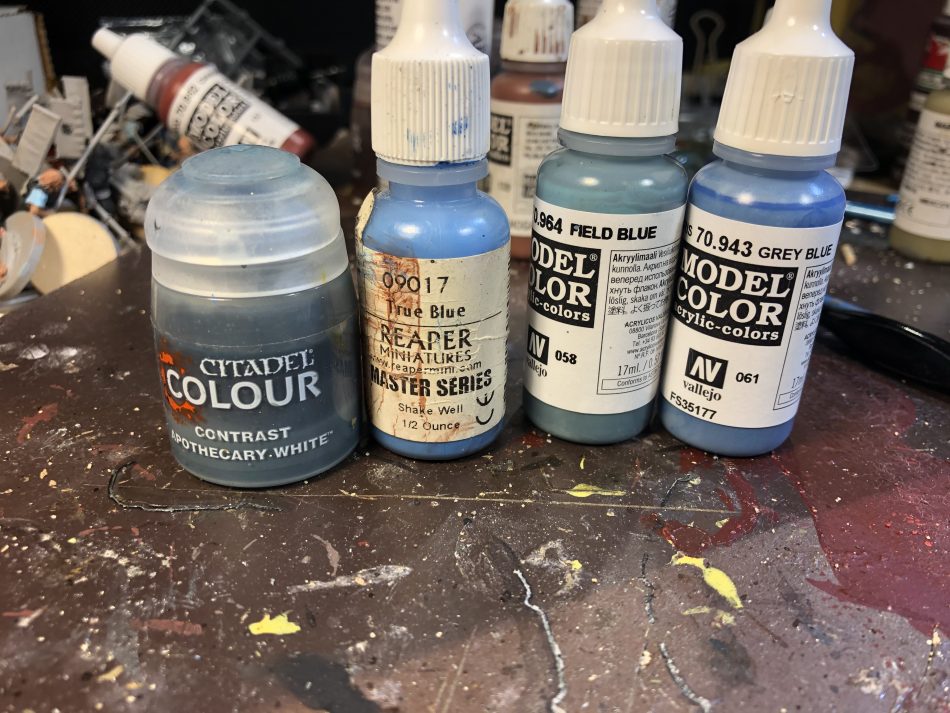
You do not have to look hard for gamers asking for or giving advice on what colors to use when painting the French and German troops of the Great War. All answers are right and the best answer is “it depends”. We here at NDNG adhere to the dictum of “Paint what you like and play what you love” and with these two hard-to-match colors as long as it looks close enough it should look good to you. The German uniforms of 1914-1916 were somewhat standardized in color, with the pants being a light shade of grey and the red piping on many of their uniforms. As the war ground on and the blockade hit the German industry the colors varied, so the later war uniforms were made up of many different shades of Feldgrau.
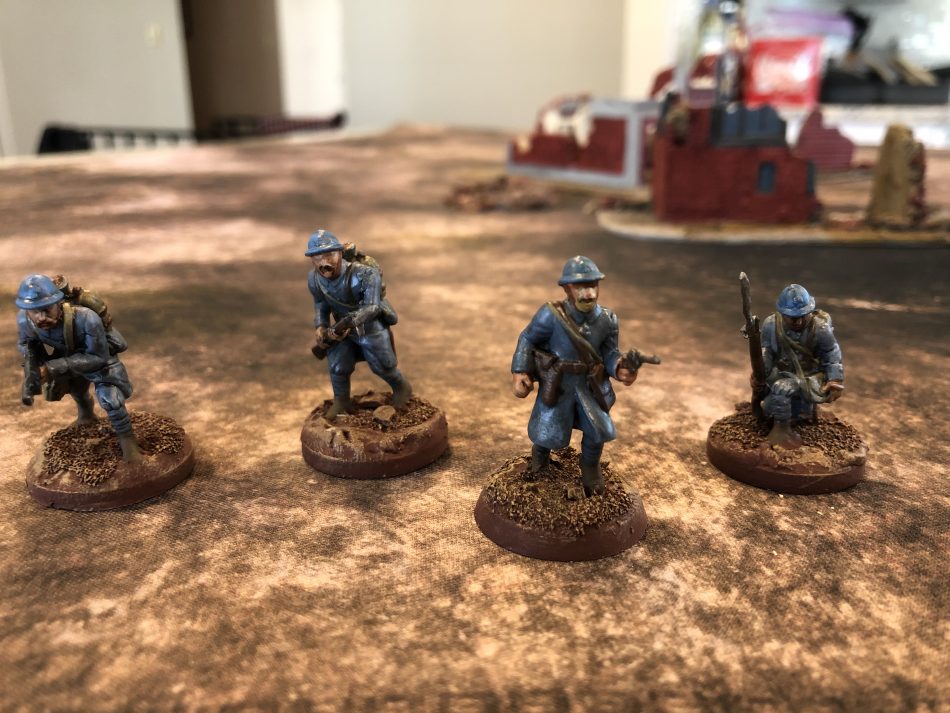
To get a good French Horizon-Blue on your models is actually easier than it seems. Gamers often do not realize how blue the uniforms were and even with that said they tend to go either too blue or too dark. My advice is to pick one and go with it. Also, remember to add a wash to adjust what you have painted to tone down a very blue model. I want my French to stand out and I go with a very blue uniform and somewhat of a brighter blue helmet. I like the way my troops turned out and remember I am the worst painter here at NDNG.
Brush to Model
I also cheat and I am proud of that fact. For the Germans and Americans (and French Harlem Hellfighters) I used a spray. For the Germans, the WW2 Plastic Soldier German Field Gray infantry spray works fine as a basecoat knowing that I can dry-brush and shade the models later on. For the US, the British Khaki spray works fine and matches the color of the US uniform. While many may desire to paint their US troops as Marines with a greener uniform (Vallejo Violet-Brown works fine for this), a close look at the uniforms show that the models have US Army uniforms and by late 1917 and most of 1918 the Marine Brigade wore Army uniforms as directed by their commander General Pershing.
Once the Germans had a good spray base, I did a dry brush of Vallejo Feldgrey and then painted the details on the uniform. I used a light coat of Vallejo Green-Grey on the puttees, khaki on the bread bag, brown on the water bottle, and Vallejo Dark German Green on the helmet and gasmask canister. For the late war Germans, the belt was black while the early war Germans had brown belts. Same for the boot color and I had to do a little mod work on the early war models which had puttees vice the full boot.
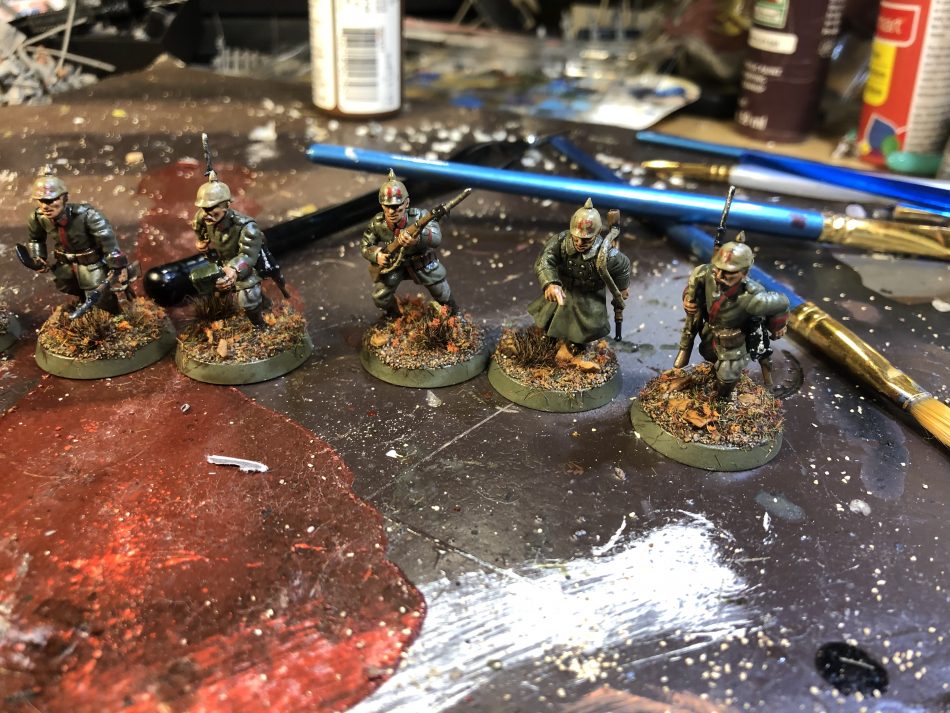
I took a file and smoothed out the legs on the early war troops and painted them as if they are wearing long brown boots.
The US troops were so easy to paint. The brown basecoat was augmented by some of the various browns in the Citadel Contrast Paints line. It gives the model a great finish and the equipment being all khaki made the models a simple task to finish. I used Vallejo Russian uniform for the helmets with a drybrush of Green-grey and they turned out great.
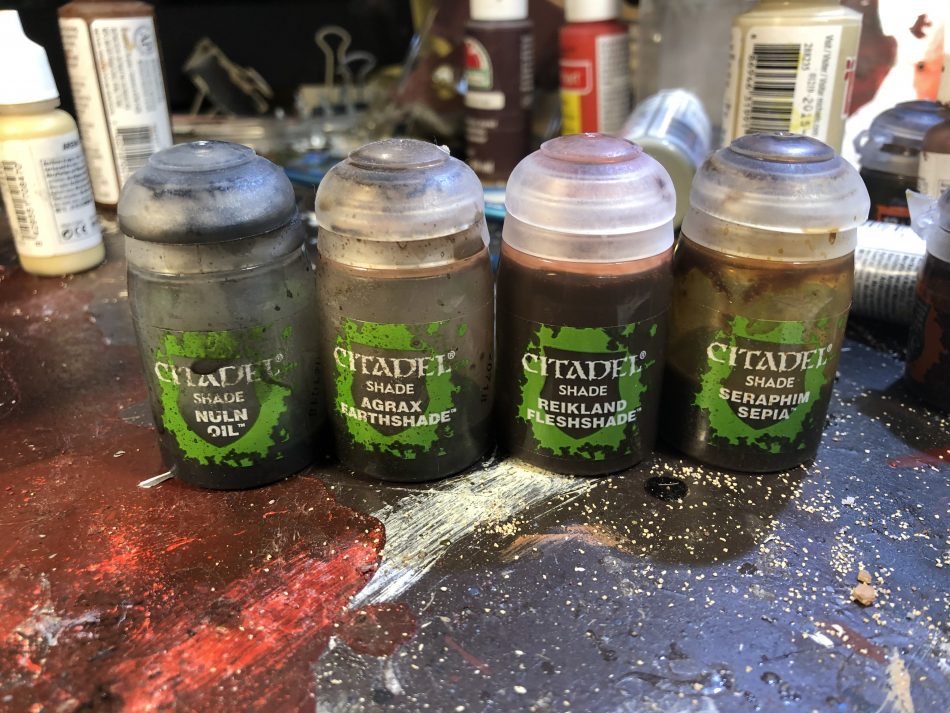
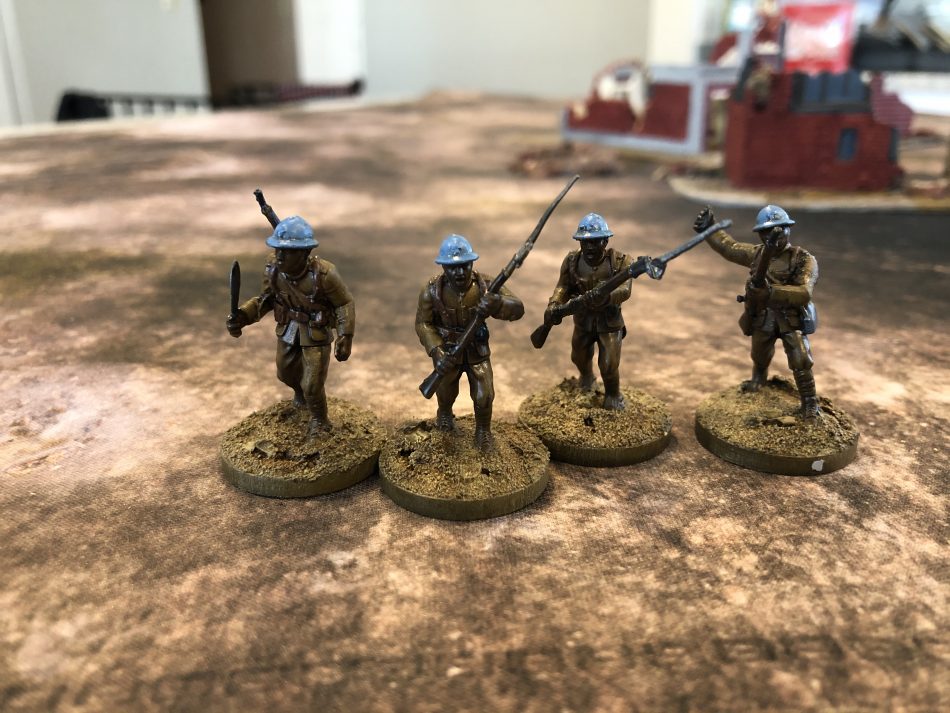
Now for the Poilu, and if anyone would make a good spray for these guys would make all of our lives easier. I used a flat black spray base coat and then used a combo of Grey-Blue and Field-Blue for the uniforms. I used a Citadel Contrast Apothecary on the models as a finishing touch. I did the huge water bottle in the same color as the uniform since it had a wool covering made of the same material as the uniform. For the webbing, I went with Vallejo Mahogany Brown and I liked the way it turned out. For the helmets, I wanted them to stand out, and to spot them in case of a blackout, so I used a brighter color than the uniforms the other pieces of equipment, such as rifles I played around with more brown contrast paints and they looked nice. I also started to use Vallejo Dark Sea Blue for the metal parts of guns and I like using it along with Vallejo Black-Grey. For washes, I used a red-based shade for the US, a green base for the Germans, and a black shade for the French.
Basing
The first thing I noticed about the Phalanx models was the thickness of the base. For my first few models, even with thick ballast and ground texture the model still looked odd. I used some JB Weld epoxy putty to “level out” the model on the base and if done right adds some great ground effect texture on the model. Since these models were all destined to fight on the Western Front (for now) I did not flock the bases and only put some clumps of dead grass on the US models only.
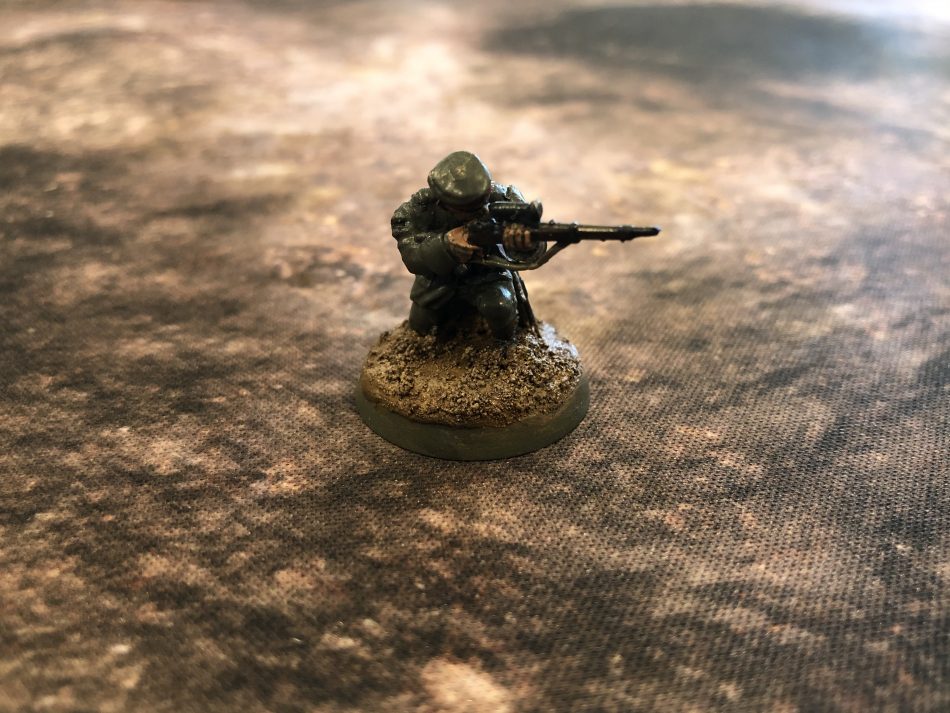
Another mod I made during this project was a sniper for my German army. I wanted the model to be used for both late and early war, so the soft-cap head from Wargames Atlantic worked nicely. I cut the bayonet off and took a round piece of sprue to make a scope and it came out great.
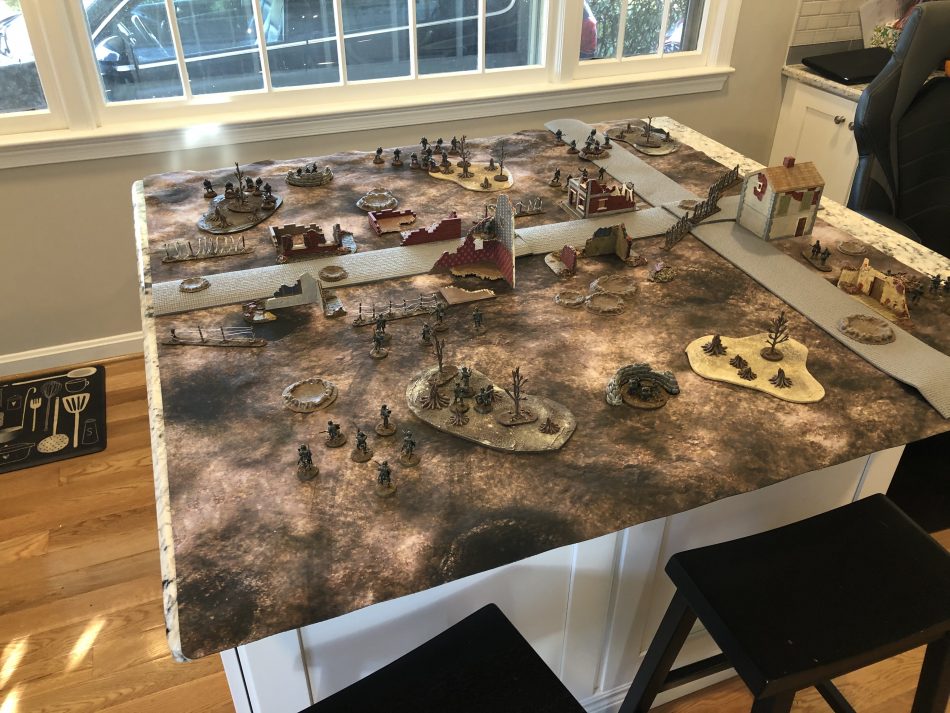
At this point, I called it “job done” and headed off to make my Table.
Mat Shopping
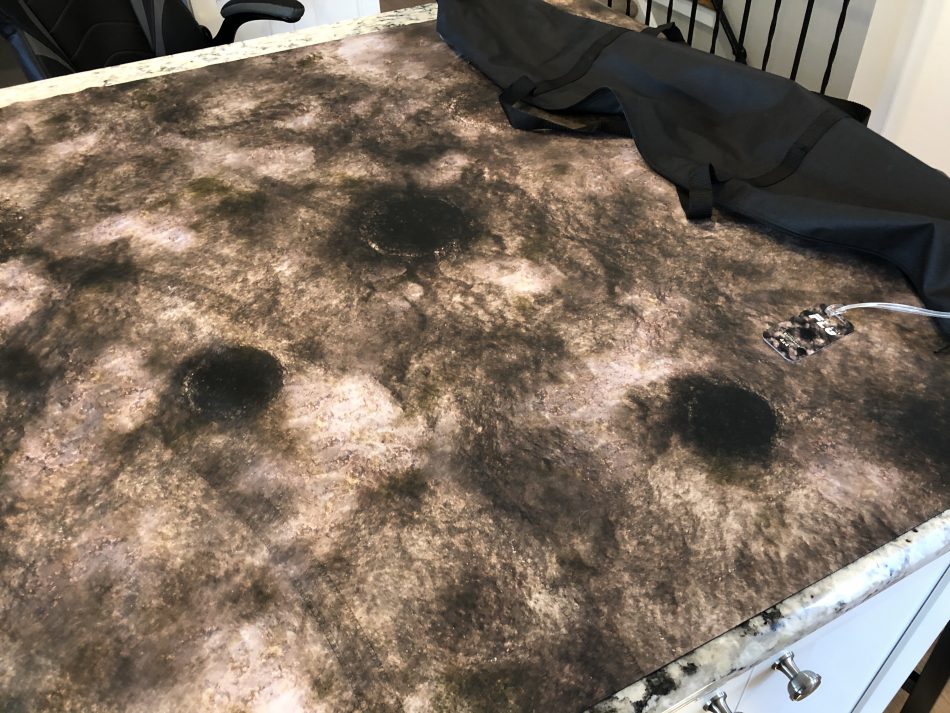
It seems I am only collecting terrain for 28mm fights. Maybe that is why I asked for a 4’x4’ island when my kitchen was redone in July. I have a bunch of 3’x3’ and 4’x4’ mats in my collection that I use for games such as Blood & Plunder as well as Blood & Valor. I have both green and sand themed mats that I use right now which I could have used for this project. I was able to grab a ‘battlefield” 4’x4’ mat from Front Line Games to change things up. After I ordered it, I soon realized that this new mat would have limited use as compared to the other mats I own. The very dark mat, full of shell holes (and tank tracks, oops) would only be used for those no-mans-land engagements for my new forces. If you can pick up an FLG mat during one of their sales you will never be disappointed, but pick one with the wisdom I lacked at purchase.
 Carnage
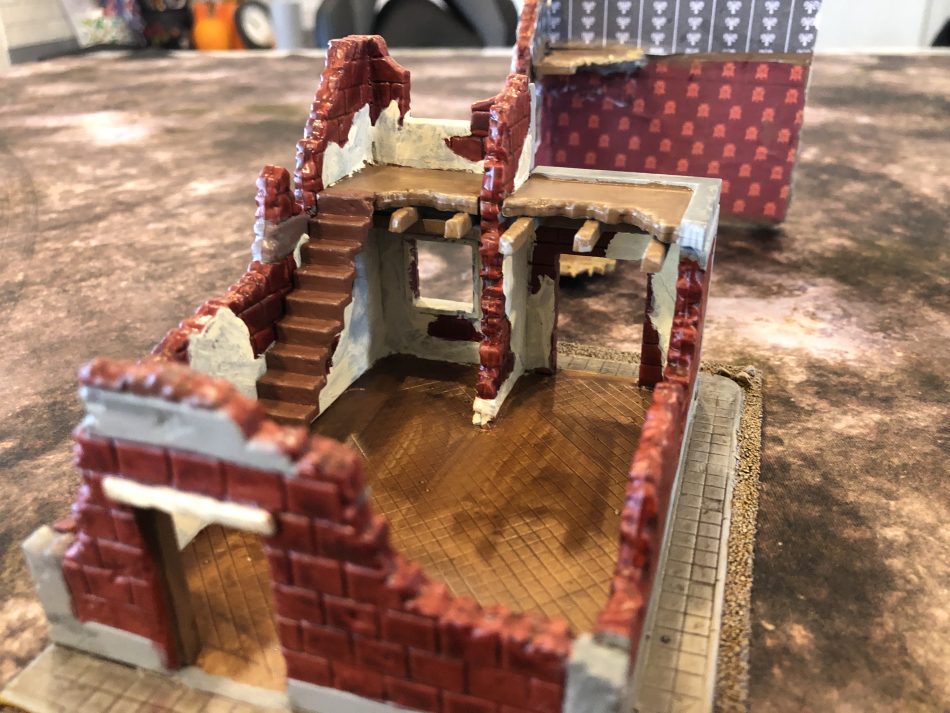
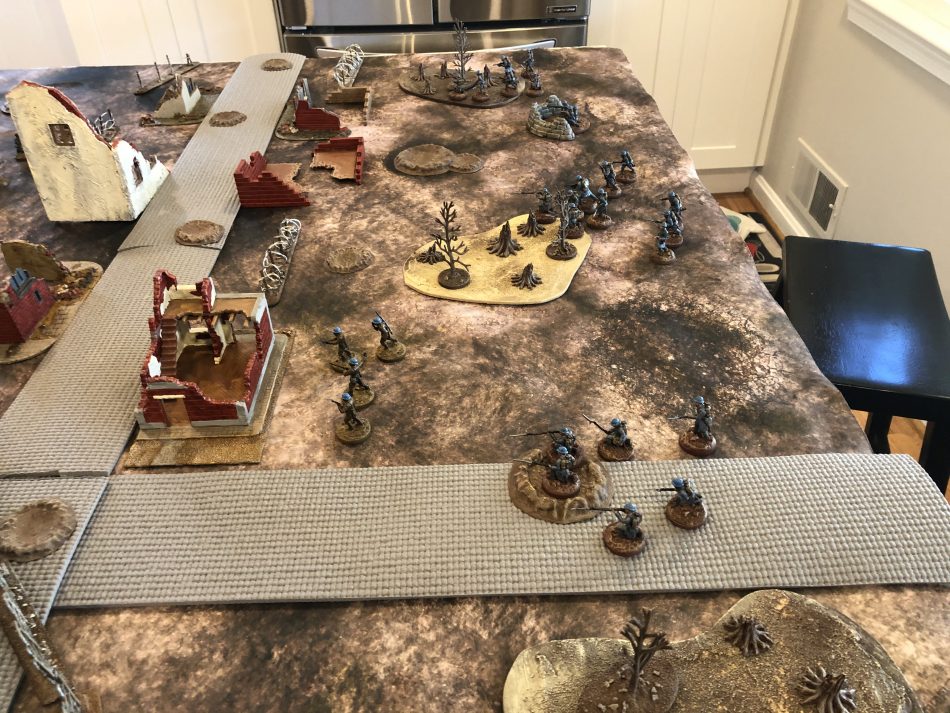
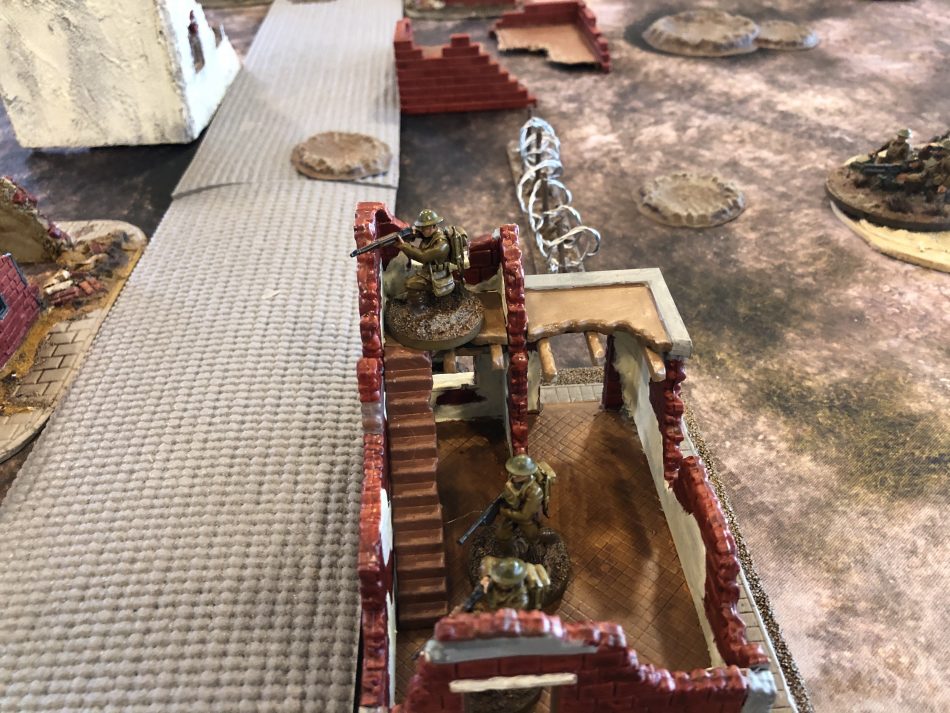
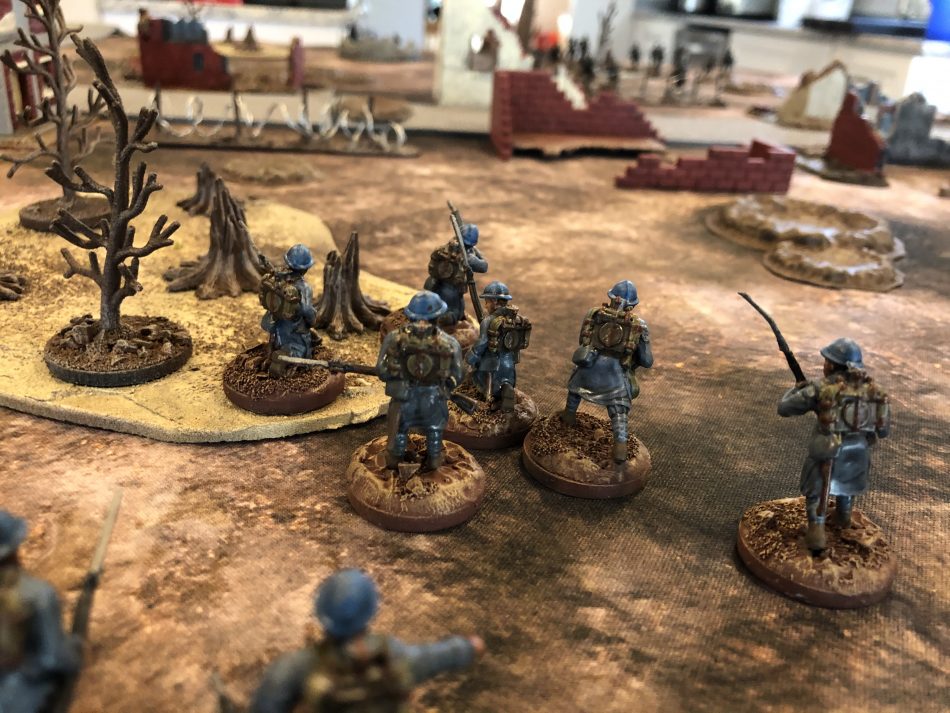
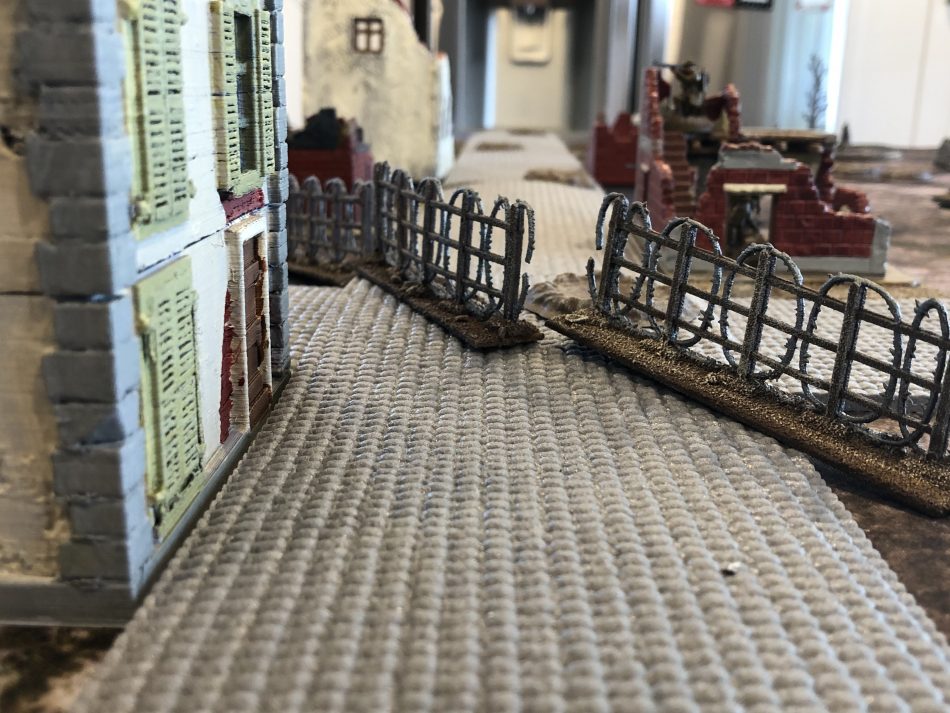
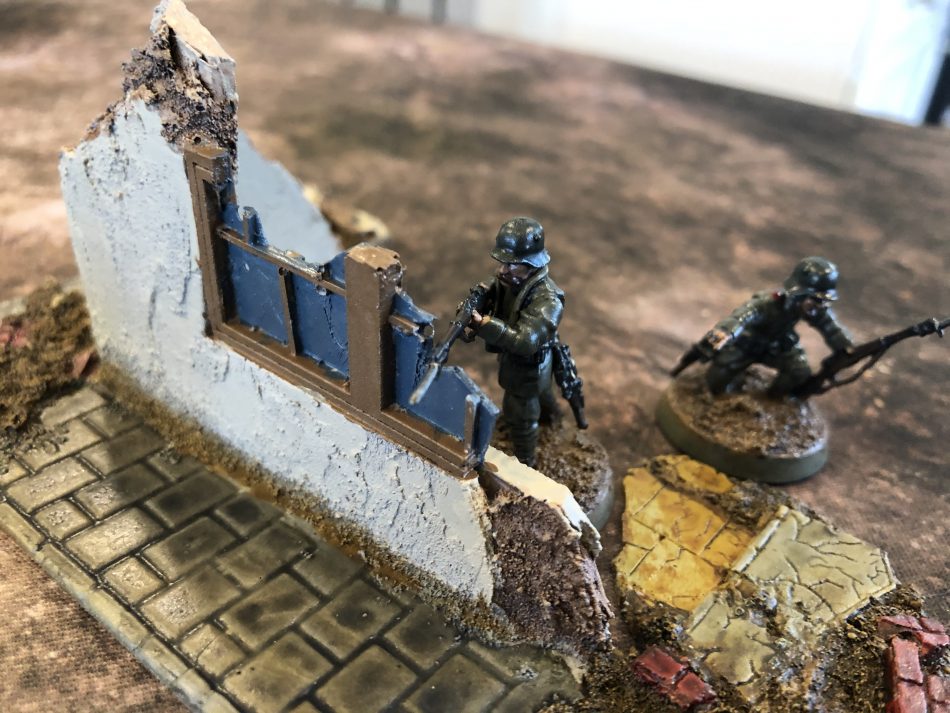
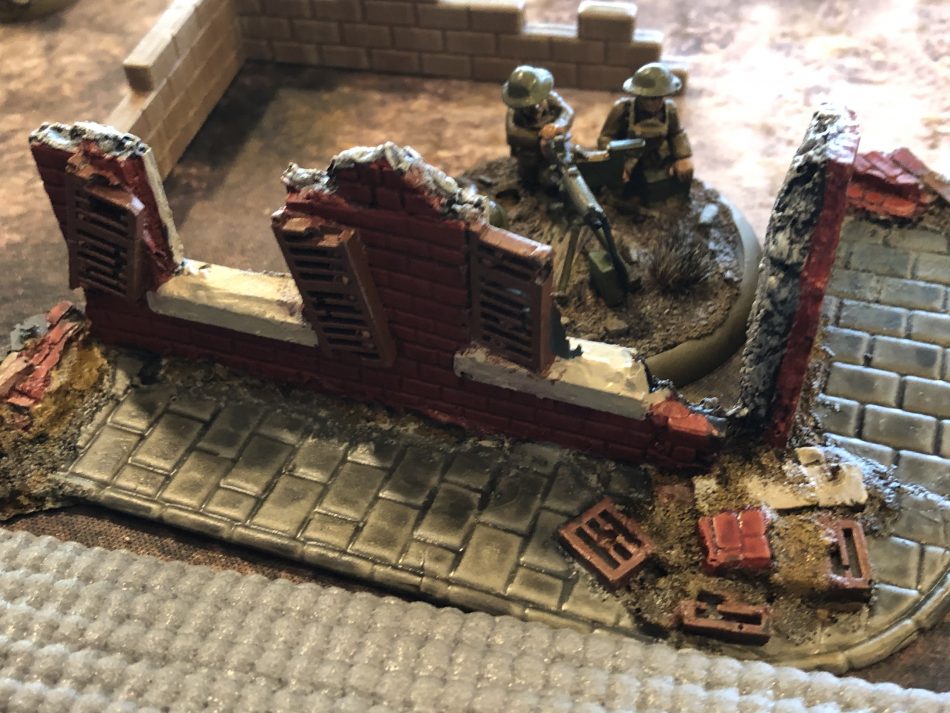
One misconception of the Great War was that the trench lines were in spitting distance of each other. While this was the case in some instances, it was actually less common than one would think. In some cases, the lines were up to a mile apart, which made no-man’s-land a huge distance to cover. What would an army find in this acreage between the lines? Well, this also depends, it could be anything from a village to just torn and muddy ground. I wanted to put a small village in no-man’s-land for a few reasons. First of all, they just look cool and who does not like to have their troops holding up in some neat looking destroyed buildings.
I picked up a few different shattered buildings from companies such as and got lucky with a great Kickstarter from that I found which had some good ruins. I also looked at places like Amazon and Ebay for cheap ruins. While they are not as quality of the aforementioned buildings, you can use you modeling skills to make them look great.
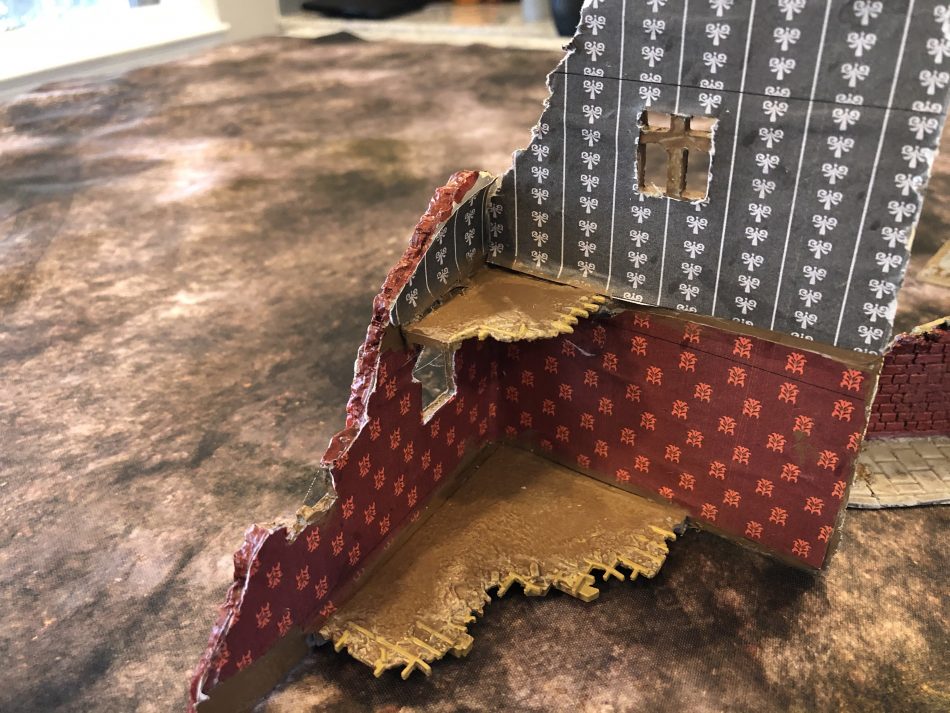
An example of this was a cheap corner ruin I picked up. I changed out the floor it came with some floors from another kit and added some Victorian wallpaper I found on Knuckleduster Games . The wallpaper was easy to use, white glue the wall, stick the paper on, wait until it dries and then use a knife to trim the paper and cut holes where the windows are, much like real wallpaper. I like how it came out.
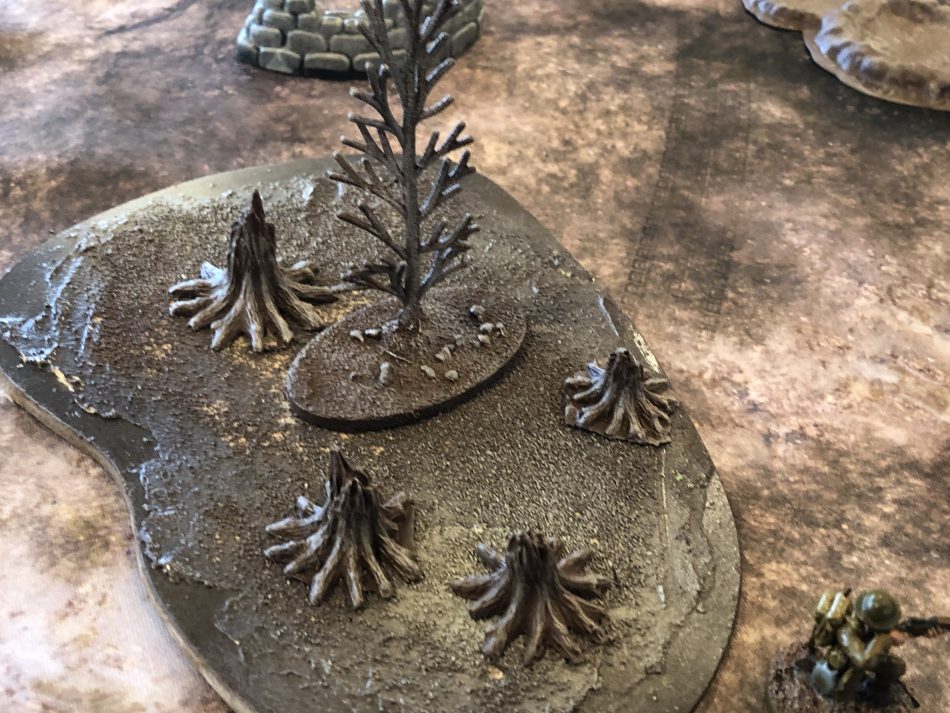
I also picked up some cheap tree stumps and shell holes online. These were obviously cottage industry 3D printer produced but they worked out fine. I also looked at what I had in my collection that I can repurpose for this project. I found some bare trees I stuck on bases and sprayed with a brown texture spray, some cobblestone roads and bases used for forests and rough terrain to finish up my scrounging.
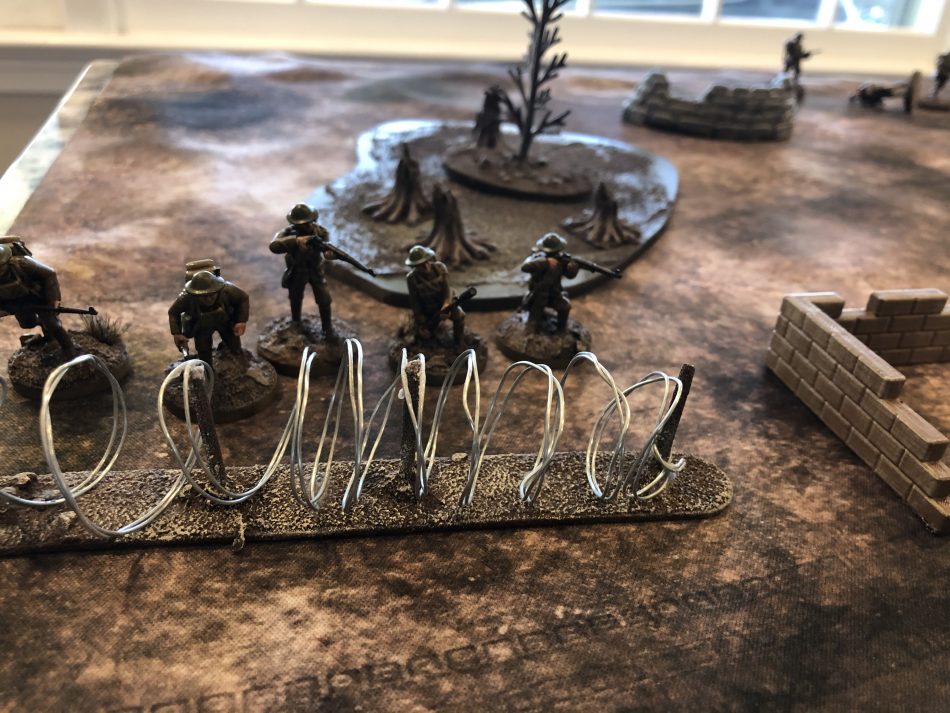
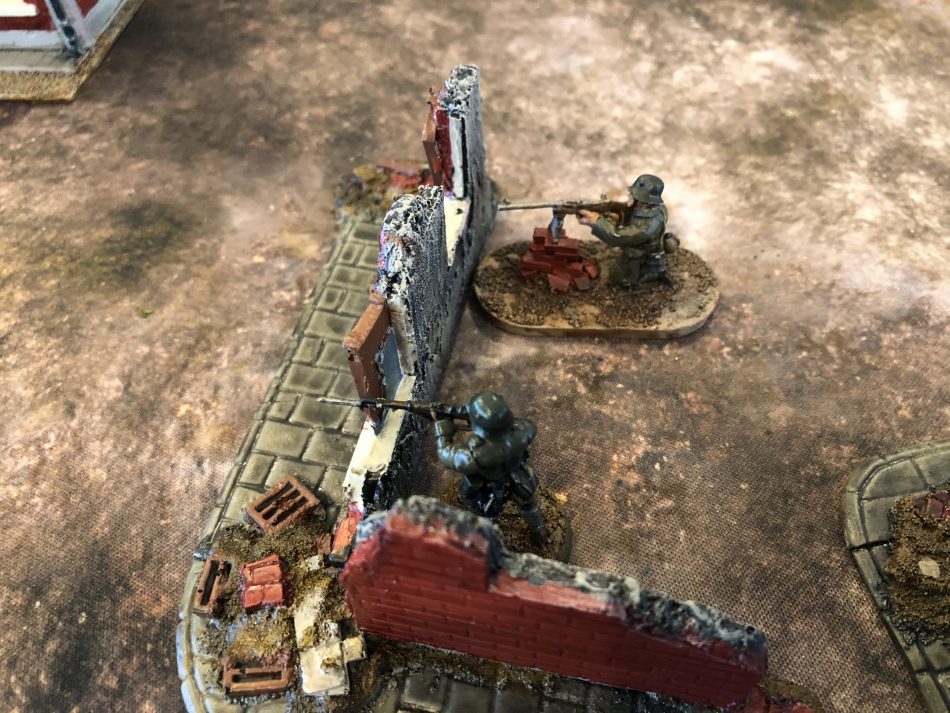
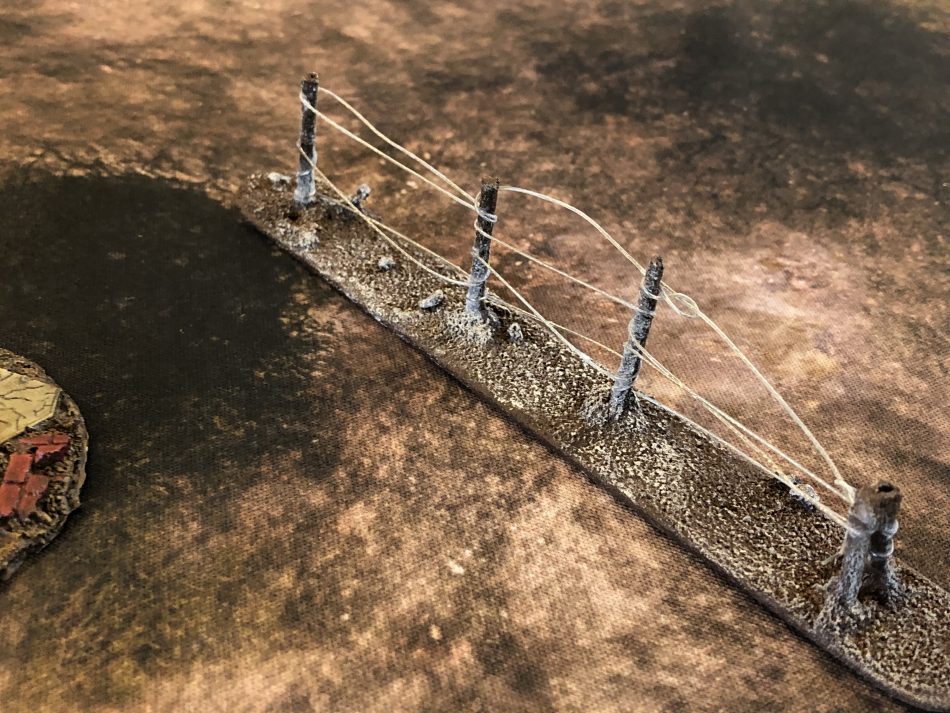
What would no-man’s-land be without barbed wire? Not only are they iconic, but they also play a role in the game. I have built wire obstacles for 15mm games before so I decided on this approach for my 28mm table. One thing to keep in mind about the wire that many gamers get wrong is the belief that all wire was placed in coils. This was done when throwing up wire quickly, however, a single coil of wire is not much of an obstacle as one may think.
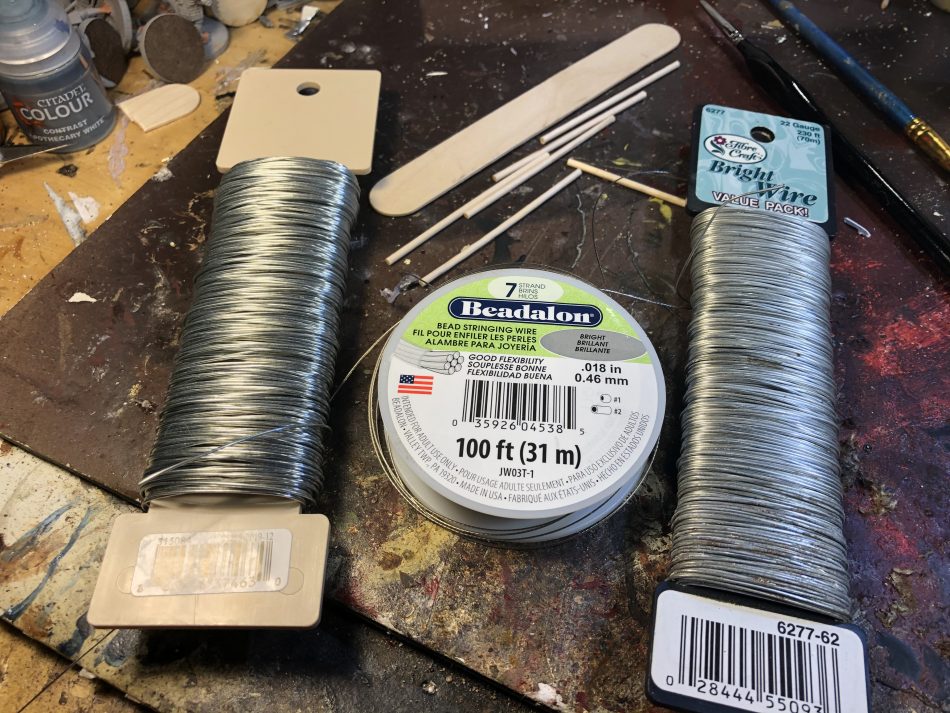
When time allowed, troops would but up either multiple coils in a pyramid or even better to use posts to make layers of wire entanglements. Use of the posts made it easier to see where the enemy was cutting or digging underneath the wire in advance of an attack. I decided to make a few of each and getting some wooden popsicle sticks, small wooden dowels and some craft wire to make my wire. I also “stole” some wire fences (and a sandbag strongpoint) from a box of toy soldiers my son no longer plays with. I love how these came out and they really make the table look nice.
Painting the Carnage
Contrast paints came in very handy for painting the buildings. The red contrast paint made the red bricks really stand out and I used that color where I could. The other keys to painting the buildings are having no fear of washes and dry brushing and to experiment as much as you can. Using a flat light grey spray paint for a base gives you an amazing pallet to work with. Even some dry pigment can be your friend here, which I did not use, but I can go back and put them on the buildings at any time.
Time, Money and Depression
I started this project at the end of this summer when I got the boxes of models and finished it just before US Thanksgiving. While I had other things going on (like work) during this time frame I feel that that this project did not take too long. In all, I painted around 150 models and a bunch of buildings, but it was not hard work. I lost my painting mojo last November, however, thanks to COVID-19 I was forced back to my painting table and I have cleared so many projects that I feel ready to perhaps start another army for one of the games I play.
As I write this article I am struck with a bit of melancholy. Being a huge fan of Kurt Vonnegut I am reminded of the main character from his book Mother Night. The main character Howard Campbell is a loner who whittles chess sets from wood in his self-imposed isolation. He realizes that he created the one thing that requires interacting with another person, which he does and events do not work out well for him. As I wrapped us this project I do not know when I can get this to a table for a friendly game or a demo because of COVID-19 which zaps one’s motivation to paint because we paint to play and let’s hope we can all safely play again together in 2021.
Mitch – Awesome article. Damn you – now I have something else to consider playing. At least the cost of entry is not too bad.
… and it is fun too.,.,,