Gamers have a variety of means of marking progress and mechanics in their games. The means of doing so range as wildly as the reasons we need to track them. Whether the game calls it stress, fatigue, or pins, we can use tokens, dice, or counters.
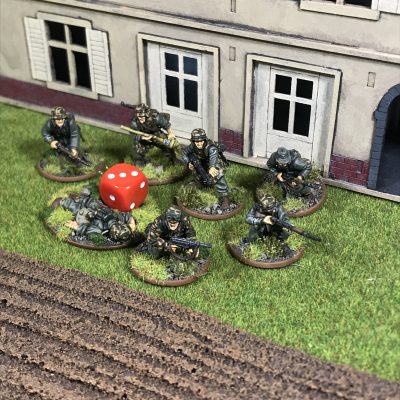
Players of Bolt Action deal with pins, a game concept that functions against a unit’s morale.
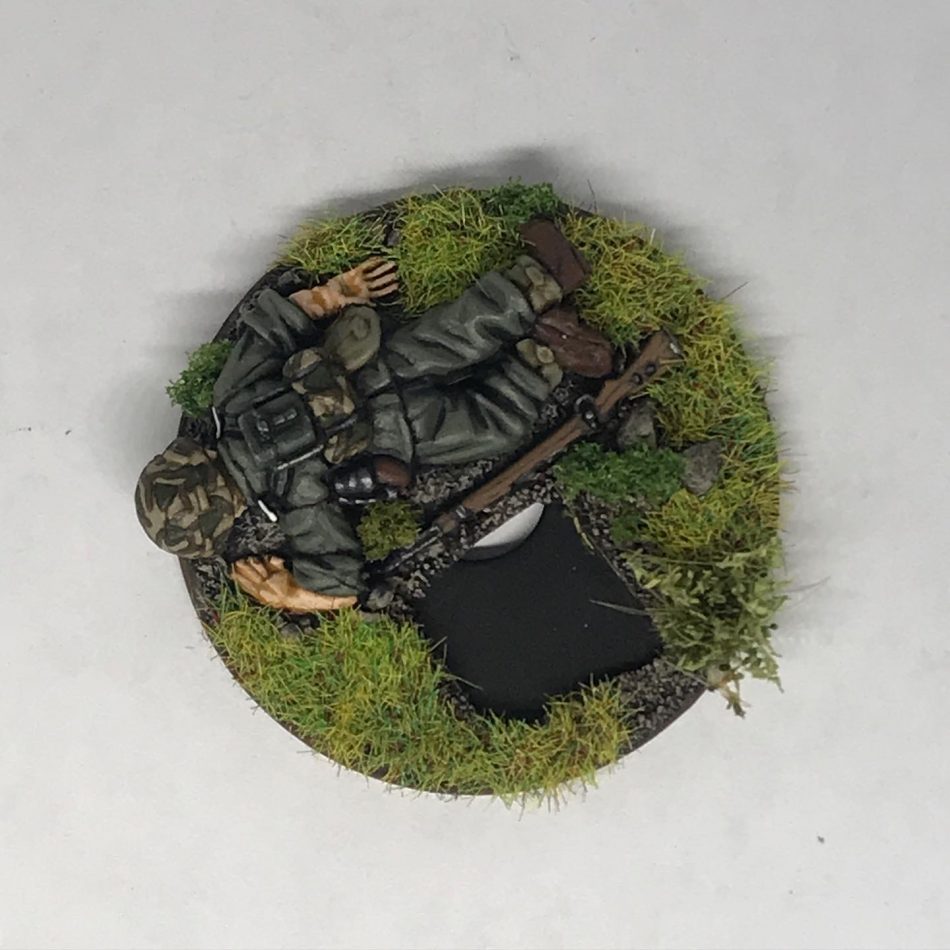
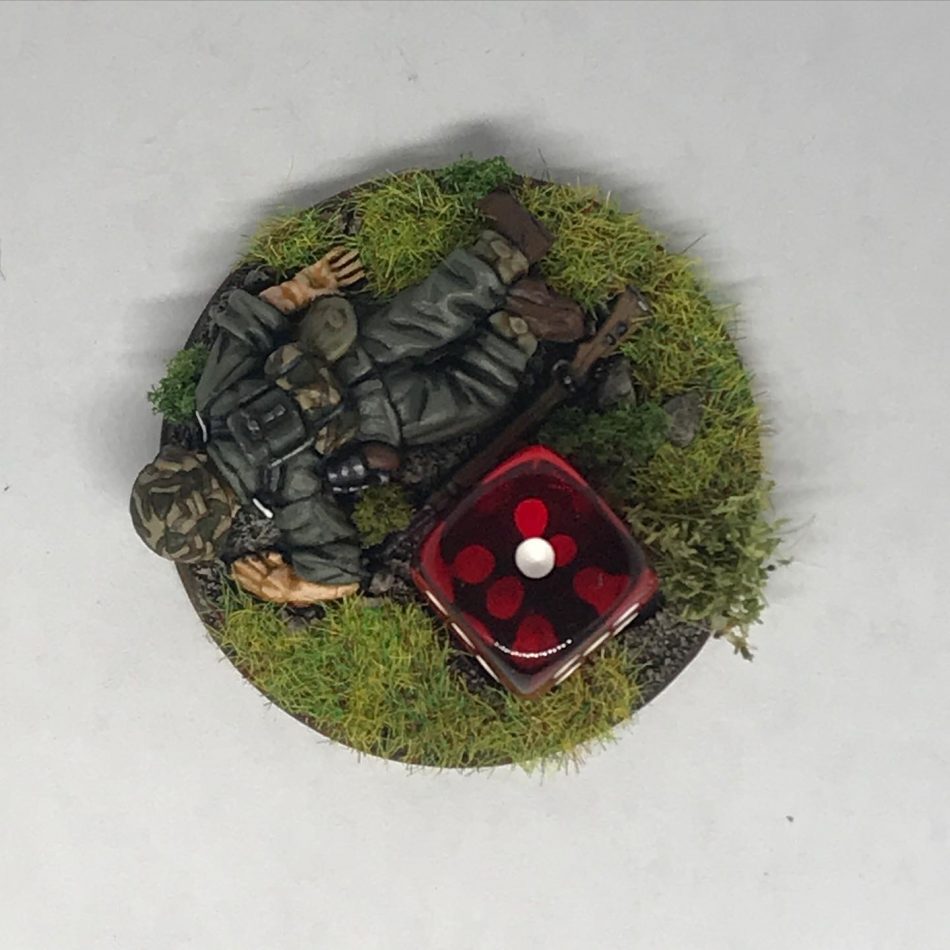
Marking pins on the table can be as simple or fancy as the player wants it to be. For my games, I decided that I wanted to create a way of tracking pins that would blend into the table and compliment the aesthetic as much as possible.
After some digging around I came across appropriate casualty markers from .
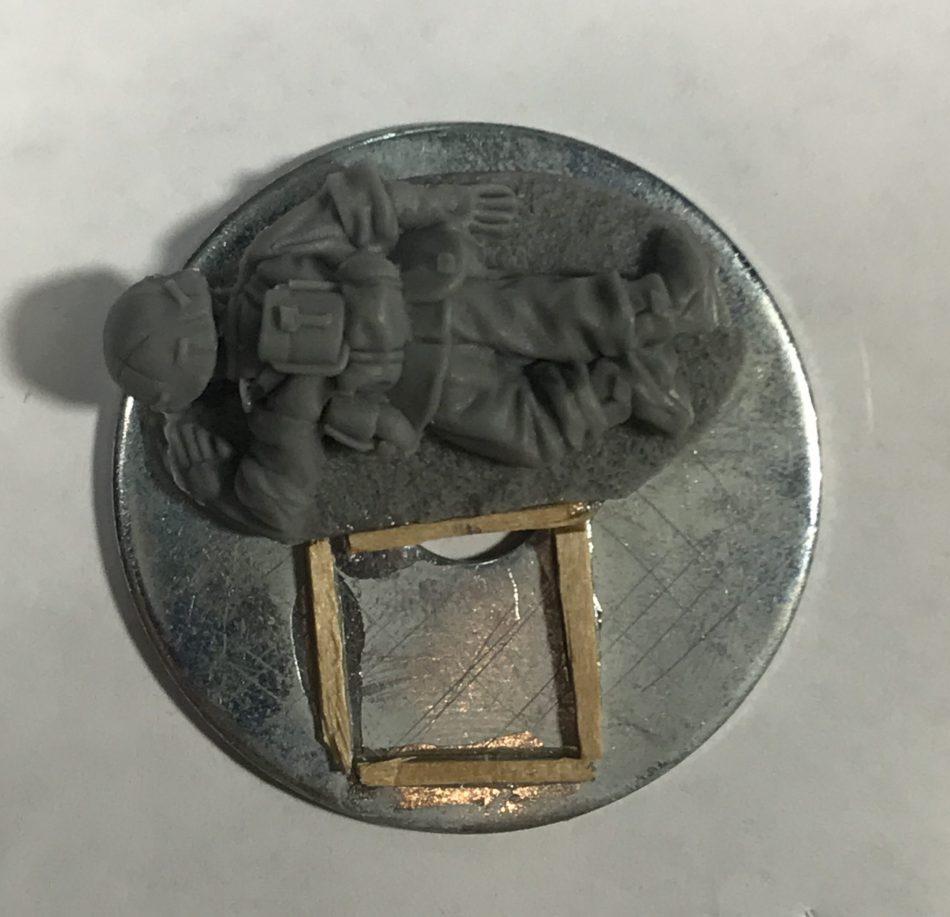
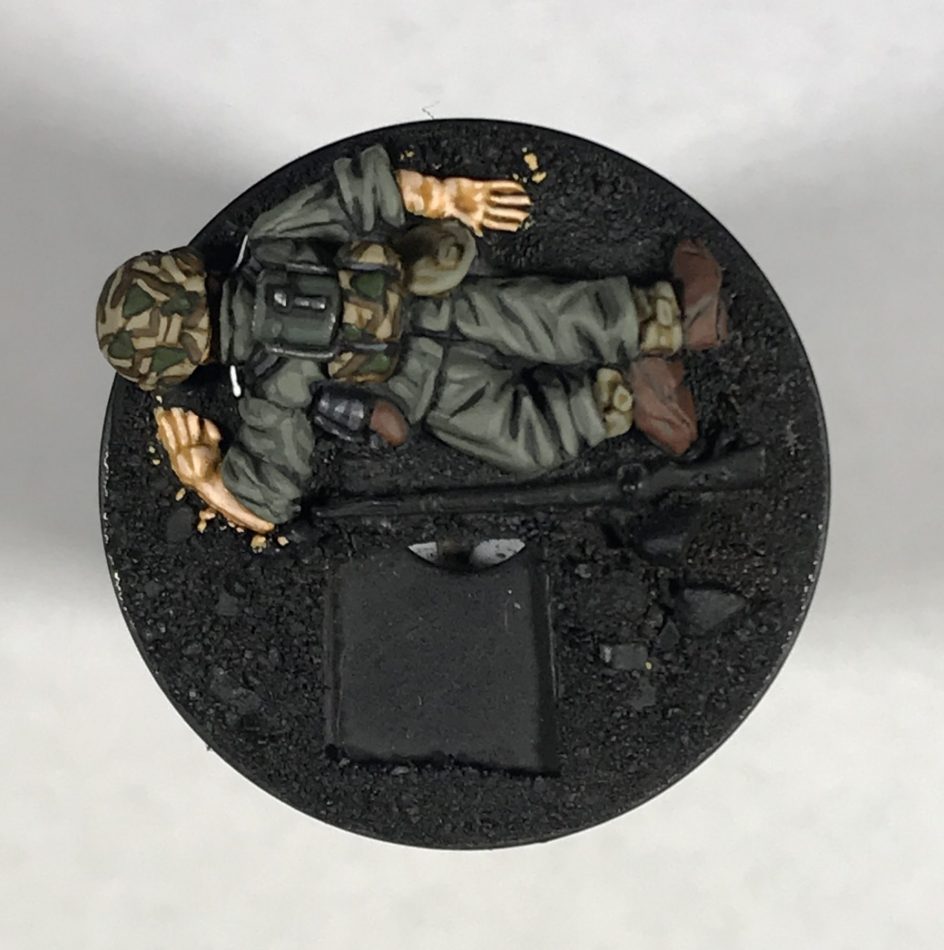
For this project specifically, I used a . The core idea here was to create a scenic looking marker combining a casualty model with a slot where a 9mm D6 can be turned to represent the number of pins on a unit. After completing the test piece shown below I’m committing to working on a set for personal use with my WWII German armies.
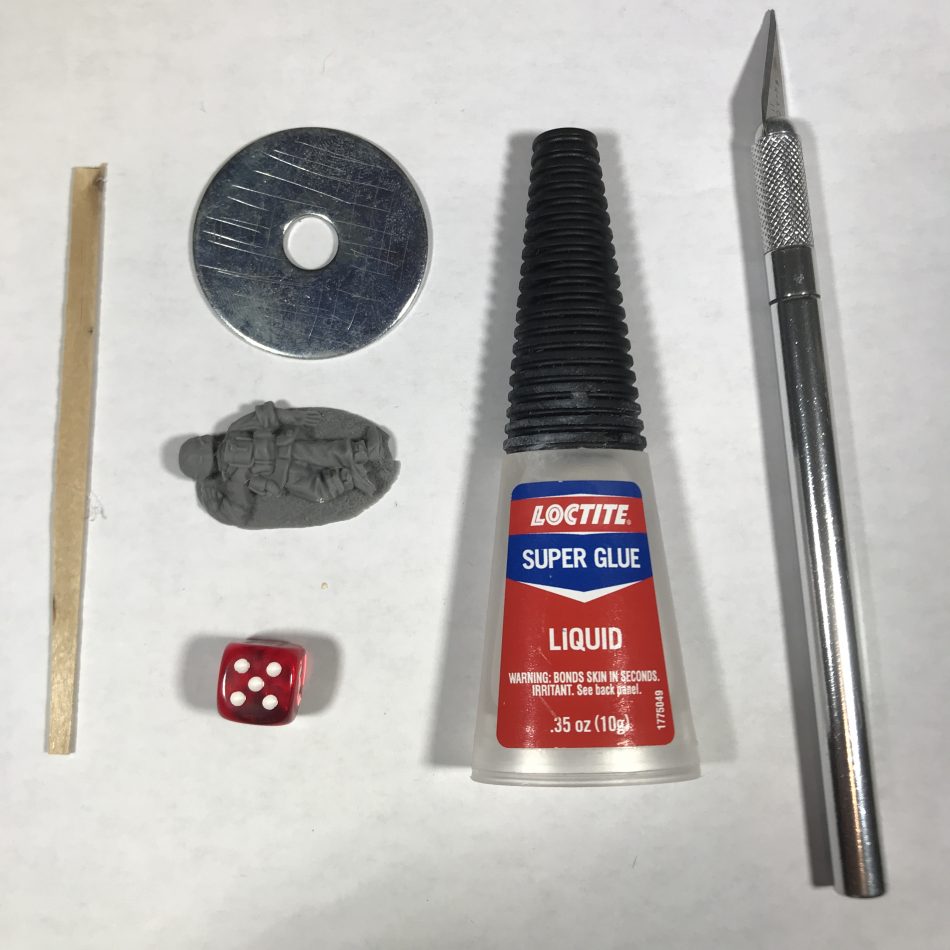
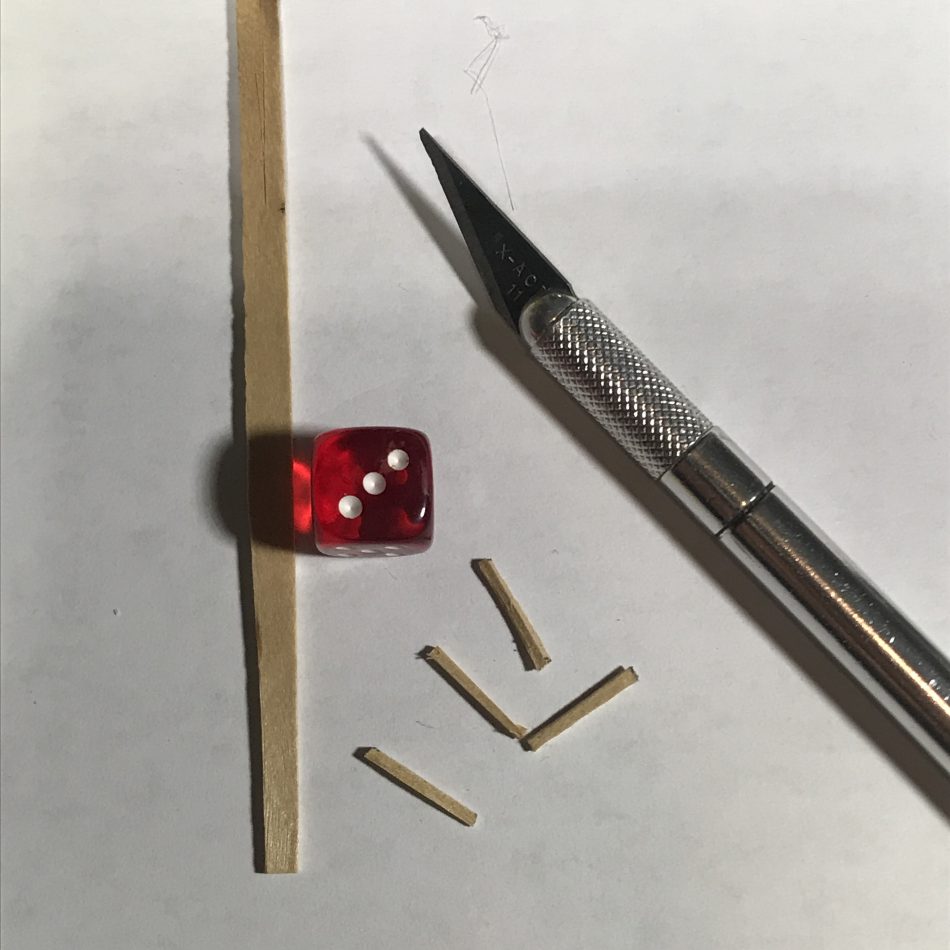
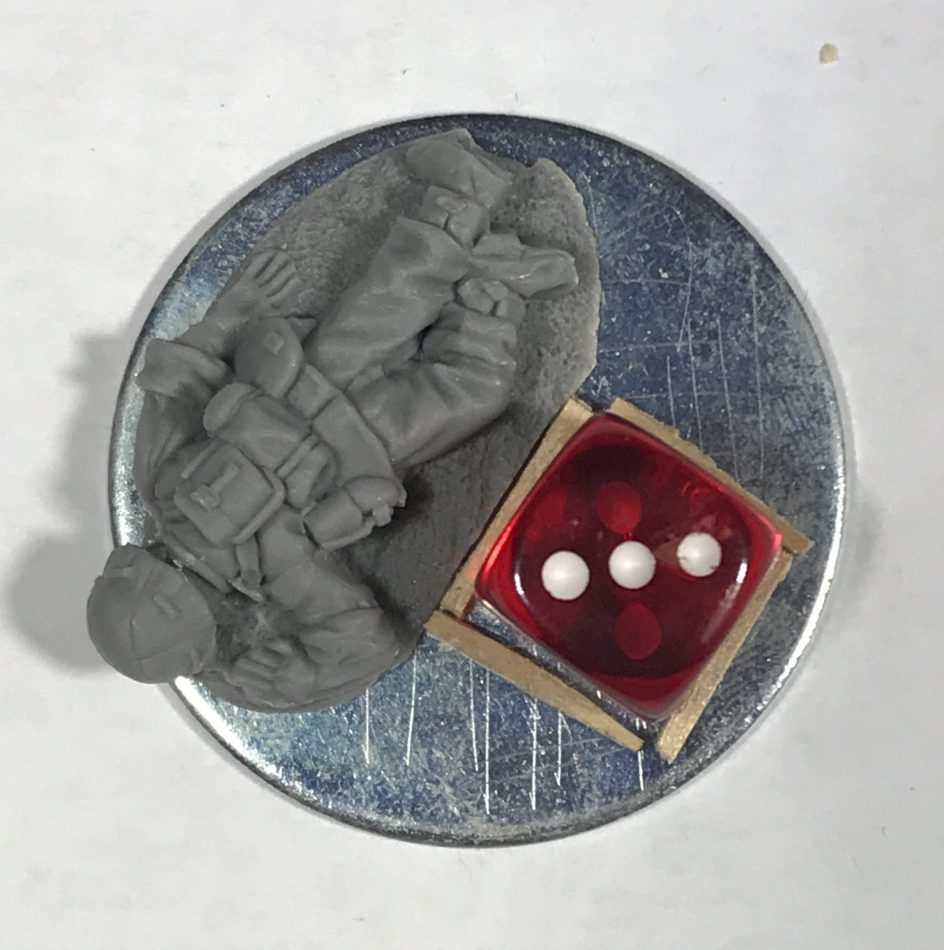
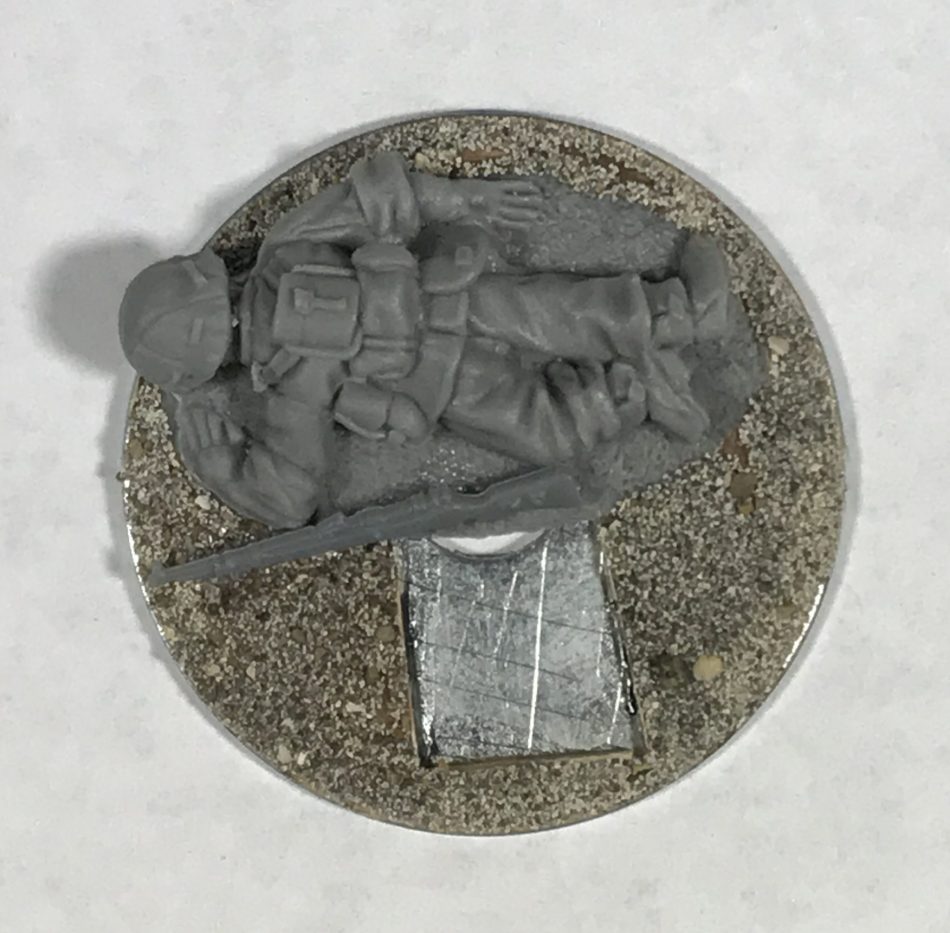
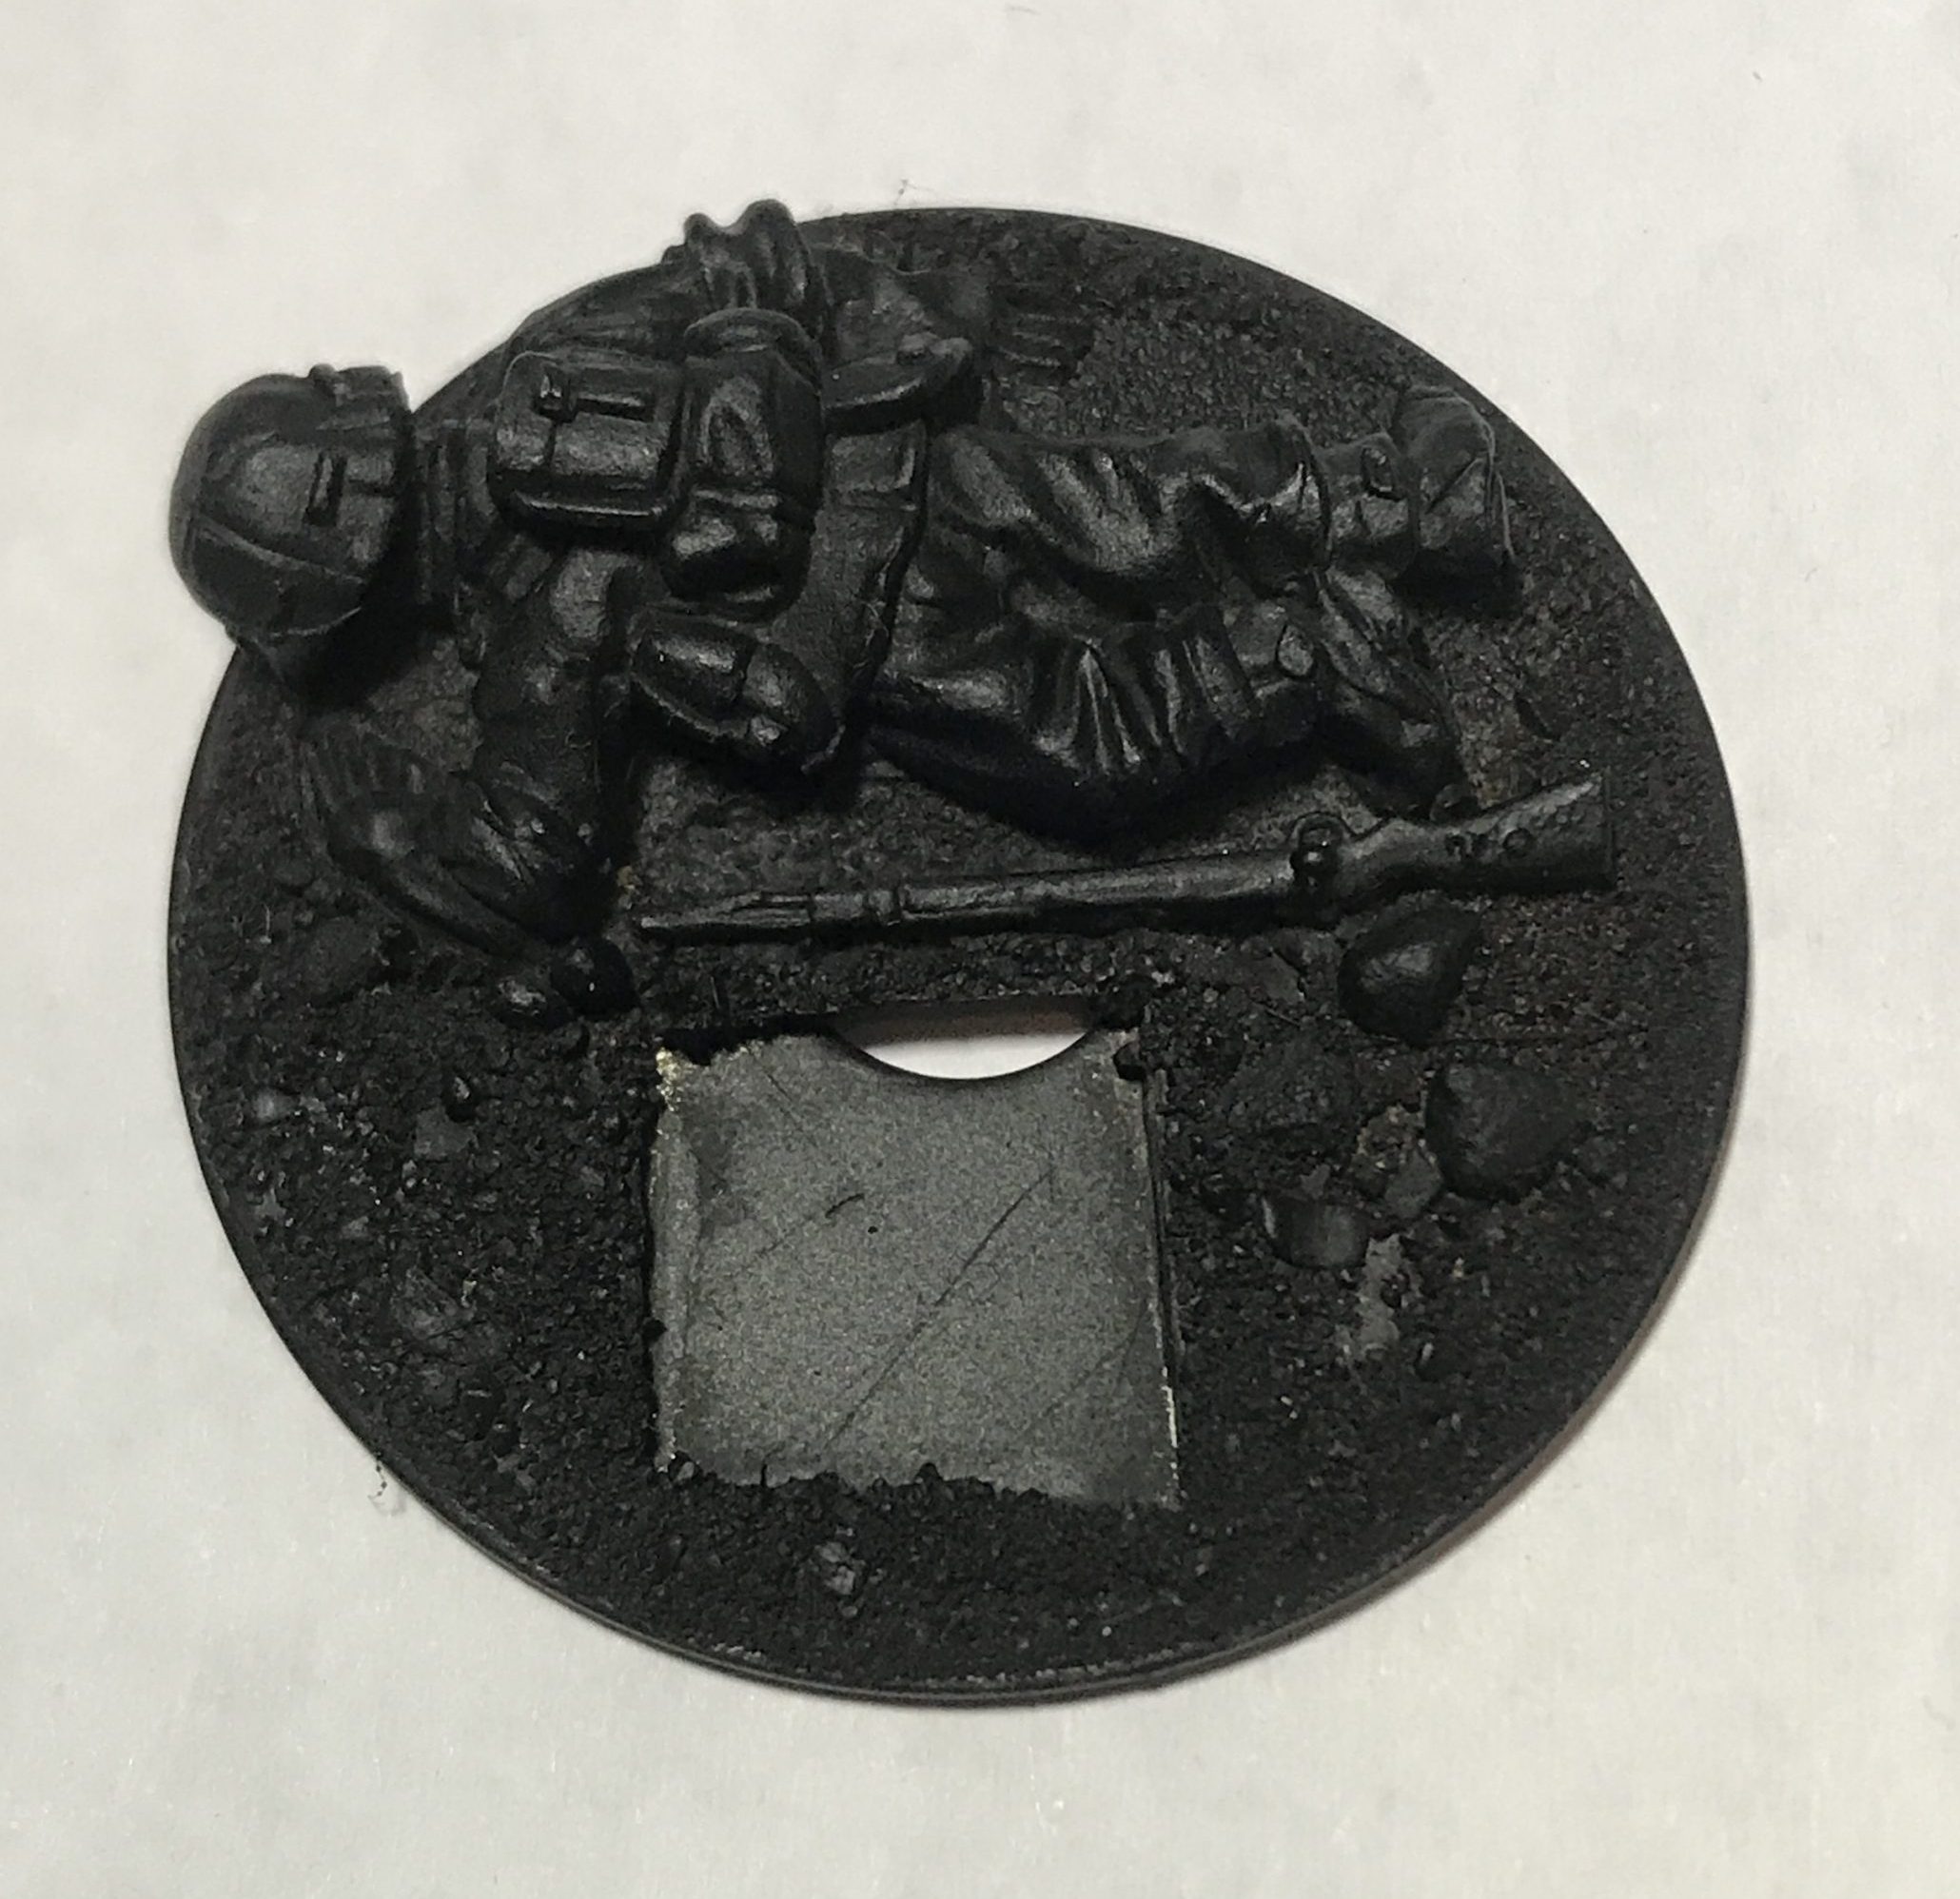
Assemble some tools for the marker. I used a coffee stirrer, a 1.5″ fender washer, super glue, an x-acto knife, the casualty model, and a 9mm D6 for reference.Using the D6 for reference, cut pieces from the coffee stirrer that match the length of the D6. I cut the strips of coffee stirrers into fourths giving me thin strips.Position the model, the D6, and the strips of coffee stirrer on the 1.5″ fender washer to accommodate all the components. Don’t forget to score the washer before gluing anything. The wood strips will form a frame to keep the putty from ruining a clean square the D6 will fit into.Once you have everything where you want them, glue it all together.Use some putty fill in the gaps of the base. I used Durham’s Rock Hard Water Putty and cleaned the edge of the washer with a paper towel. Apply ample time for the putty to dry.Combine a 1:1 ratio of PVA glue and cheap black paint and coat the base with the mixture. Apply a layer of basing sand to the wet paint and give it time to set. After the sand sets, clean off the loose sand, and at this point I added a spare weapon from my bits collection.Apply a base coat to the entire piece. I used black spray paint.Paint the casualty and clear coat your work to protect it.Base the model as you see fit.Happy gaming!