Painting Winter Armor

By Kreighton Long

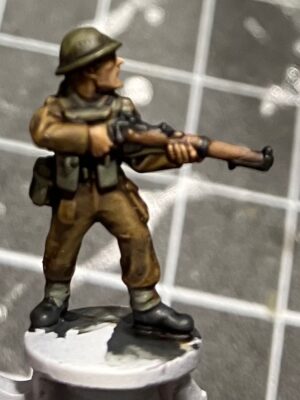
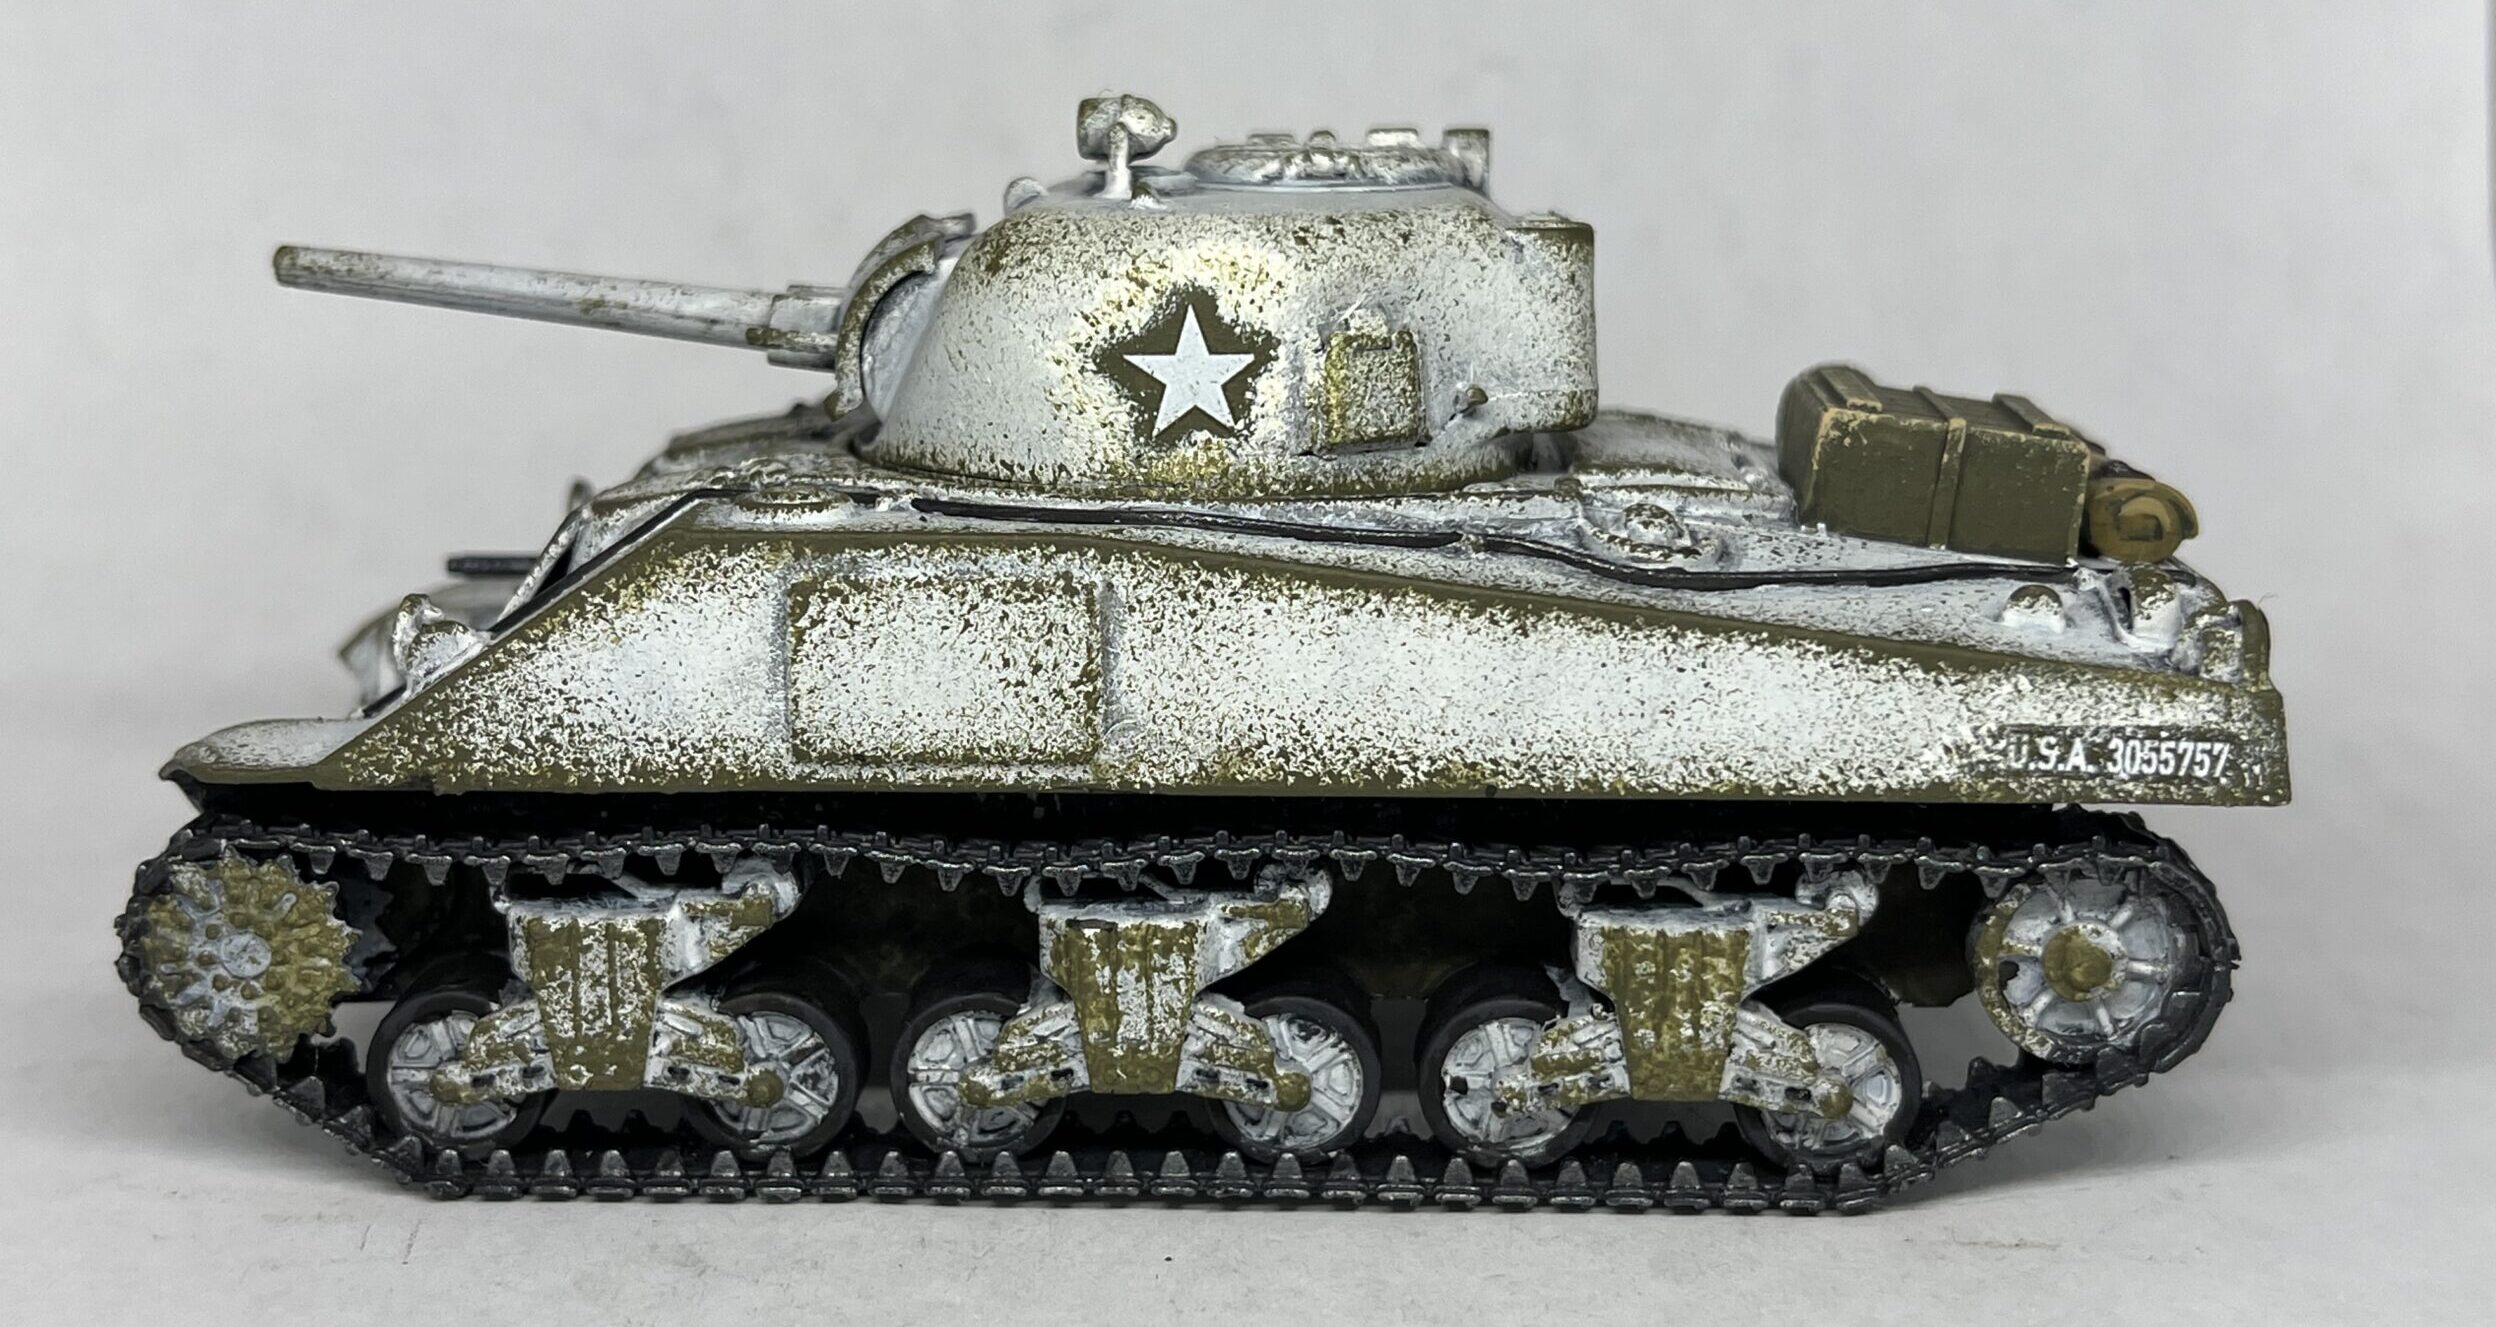
My Bolt Action army project of the year is a winter American army project.  While my infantry will advance through the snow on foot, they are in desperate need of armor support.  In order to fully commit to the theme I decided to paint the armor support in winter camouflage.  The general idea was to paint it white with the green undercoat showing through where the white paint rubbed off.

Painting BEF Infantry for Flames of War

A miniature of a British Rifleman from the Flames of War Early War range.

By Richard Steer

I’ve jumped into the Early-War period of Flames of War, and am in the middle of building the British half of the Dunkirk two-player starter set. I recently took a look at what is in the box, and now I’m painting the infantry.

The purpose of this article is to step through my process for painting FOW infantry, in the hope that this may be of use to players who are just getting into FOW and looking to paint their first figures.

Painting My First Battletech Set

By Kreighton Long

A former student of mine recently introduced me to Battletech.  We played a few games over the last year and it gradually grew on me.  At first, I was content to play with the models that my friend provided for our games, but that contentment did not last.

Perhaps it was rewatching Neon Genesis Evangelion over the summer, or older influences like Gundam or Pacific Rim, but either way I felt drawn to painting my own mech force.  As I have little experience with the lore, game play, or mechanics, I decided to prioritize which set I wanted to try my hand at by the rule-of-cool.

Running my First Bolt Action Demo Event

By Kreighton Long

This past December I was introduced by a friend to a new hobby store in Culpeper, Virginia — Brickhammer.  I quickly made a trip to the store and met the owner, Kevin, and offered my services as someone who knows a bit about Bolt Action.  He eagerly accepted my offer and we scheduled a demo game at the store in January.  This was my first demo game and I challenged myself to do quality work for a group of potential new players.

Building Urban Bases

By Kreighton Long

With my North African Italians finished it’s time to look forward to a new project.  After attempting desert bases with my Italians, I had the idea to challenge myself with new-to-me basing themes for my next few projects.

The next project will take me from the sands of North Africa to the ruined cityscape of Stalingrad.  If I said the German Veterans release from Warlord Games had nothing to do with this choice I would be lying.  Having never attempted urban bases before, I spent some of my prep time looking for different ways of creating urban bases and came up with three options to experiment with: Green Stuff, plastic mats, and sand.

Building a Desert Oasis

By Kreighton Long

While day dreaming about my desert terrain I had a vision, or perhaps a mirage, of an oasis on my future table.  As my palm groves came together I strategically left the largest of my bases in reserve for such a project.  With the first batch of my palm groves completed I felt confident in trying to put together a desert oasis.  This oasis will add a splash of color to a dreary desert table as well as could double as a fun objective for the two sides to fight over.


I started by priming the selected MDF base black.


Next I test fit different size pools using scratch paper.


I traced the pool template onto the base for future reference and then drilled holes for the palm trees with a 1/8″ drill bit.


I traced the selected size pool onto a piece of cardboard and then taped a flattened piece of plastic table cover on to the cardboard.


The three paints I used to paint the pool. I started by flicking some Vallejo Silver Grey onto the plastic then began layering mixes of Trail Tan and Olive Green on successive layers.


The first ring was a 1:1 mix of Trail Tan and Olive Green. The outline of the pool on the cardboard served as a guide as I sponged on the first layer of paint. The second layer was a 1:2 mix of Trail Tan and Olive Green and the third layer was Olive Green. I then added a few layers of Olive Green then Black to fully cover the bottom of the pool.


Once the paint dried I applied a layer of brown spray paint to the bottom. The photo here is after all the paint is dried and I removed the plastic from the cardboard and flipped it right side up.


I then traced the original pool template over the top of the pool to cut it to the desired size and shape with scissors.


I overlooked the fact that the pool was mirrored as the original template was at the bottom of the plastic. To fix this I flipped my base over to fit the two together as desired. I applied a 1:1 mix of PVA glue and hobby paint to the bottom of the pool and weighed it down under a stack of books to ensure it glued on flat.


Next I added 1:1 mix of PVA glue and craft paint before sprinkling on a layer of sand.


I painted the sand with a base coat of Black, then drybrushed a layer of Nutmeg Brown, then a layer of Trail Tan.


I then added a variety of tufts to the base. I chose to use the more lively, green tufts around the pool with the more brown tufts closer to the edge.


Insert the palms trees into the holes and the oasis is ready for the table.

Like my desert palm groves, the palm trees with this oasis can be removed to facilitate models moving through the terrain and to store and transport easier.

Happy painting!

Building Desert Palm Groves

By Kreighton Long

After completing my North African Italians I committed to building a set of desert terrain for them to fight in.  In addition to the standard dwellings and walls I wanted to build palm groves to add some soft cover and greenery to the table.  While wandering around a Michaels store I came across bags of palm trees on sale and decided the time to start the palm groves was now.

Building Cobblestone Roads

By Kreighton Long

As many a tabletop war gamer has learned, the winter holiday season is a wonderful time for terrain builders.  This past winter I stocked up on the three styles of Lemax mats in stock at Michaels with the idea of using them to build European style cobblestone roads for my urban tables.

I wanted to build 6 x 12″ sections of road that will allow me to easily stack and store the road sections as well as drop them down on the table as needed.  I found a pack of 20 basswood sheets measuring 6 x 12 x 1/8 inches on Amazon and added them to my cart.

Kreighton Paints a Bolt Action Third Edition Army

By Kreighton Long

With my first Bolt Action Third Edition specific army mapped out it was time to get out the sprue cutters, glue, and paints.  My first target was to test out how I wanted to build and paint my Bersaglieri infantry.

I prefer the look of the helmets rather than the XXX for the Bersaglieri, so I started with one sprue’s worth of infantry with helmets.  After considering available options I decided that my infantry would start with an NCO with a rifle, and LMG team, and additional riflemen.