100pt late war flames of war battle report
by Dennis ‘Matt Varnish” Campbell
Editor’s note: Dennis and Jon played this game over two months ago. But we’ve had enough FOW and TY news (books, tourneys, etc) happen that we left this report in the stack for a while. Or, we’ll blame the courier pigeons that took the lazy route from the front, and stopped off for a nosh, then a holiday enroute to NDNG HQ

Hey everyone, after a 9-month gaming hiatus, and honestly, we’ve played twice in the last calendar year (Napoleonics game and 1 Flames of War game) its good to be back in action and knock the rust off! Unlike most times, we are NOT at Scott’s basement of doom, instead Jon J graciously hosted us. Scott and Jon were finishing off a game when I arrived and then I would play Jon, 100pts Late War, his Soviets vs my British. Lists and our game below, but first some shots of the tail-end of their game:
Jon’s T-70s aggressively push into the German SS backfield, bearing the brunt of the ’88 fire.
With only a handful of surviving T-70s, the Soviet infantry attempt to flood the hill objective even with the loss of Jon’s IS-2s
Unfortunately for Jon, Scott’s Scattered & Delayed Reserve Tiger’s roll to arrive in the corner, where they can engage the T-34s and then assault the infantry to push them back. Scott would win this game at this point, where we reset the table, had a few drinks, and prepared for the second game.
Scott’s new SS army, Heavy Mortar with scratch built sandbags and boards. Incredible work as usual from Scotty.
Jon’s Force:
Forward detachment formation
Hq: 2 stands
Hero motor rifle coy w/ 2 hmg, 2 ptrd
T34 x4
T70 forward recce formation
3 pl of 3 t70
Hq t70
Support
5 IS-2
2 100mm AT
Sturmovik
My force was:
Desert Rats Motor coy HQ
Desert Rats Motor platoons x2
6pdrs x4
three units of 3x Universal Carrier Recce
Fortress Europe Churchill Sqdn HQ 3x Churchill
Churchill x3
Sherman / Firefly platoon
Sherman / Firefly platoon
Support 2x Typhoons
4x M10 Achilles
We wound up with Free For All on the below table
Deployment: I opted to try and spearhead on both flanks and up the middle using that big hedge as cover. Since the western (left) objective had a swamp in front, I figured I could advance my Churchills and so on up there, while I figured 1 motor platoon, the 6pdrs and 1 Sherman/firefly troop could hold/harass the eastern objective.
Jon deployed his 100mm AT guns centrally on the hill, and the Churchills lured the IS-2s into deploying west, and my final unit was then the Achilles behind the Churchills. Jon deployed the T-70 formation to the east, infantry and T-34s holding center.
Unscathed, the IS-2’s prove impossible for my Typhoons to even score a single hit. I got one bail out from the M-10 Achilles.
Jon’s midfield, not sending any vehicles up into those 100mm AT guns defended by the Infantry…
In the middle I advance my recce carriers to just behind the tall hedgerow, and on the eastern side my Sherman/Firefly platoon is hiding in the crop vs the entire T-70 formation and some lurking T-34s
Jon manouvers his T-70s up a bit and takes a few potshots at my Reluctant 6pdrs, but achieve little else on this flank.
The Sturmoviks show up and line up on my Achilles who now have open shots vs the IS-2s on the western side. They fail to range in however thanks to the ‘terrain’ +1 to range in penalty. The IS-2s shoot at my advancing Churchills near the swampy area, either missing or failing to get past my armour.
The Achilles fire at the IS-2s again, scoring a hit and a bail. I fruitlessly fire at the 45mm AT guns on the other side of the swamp. the RAF would never show up to the table again, by the way…
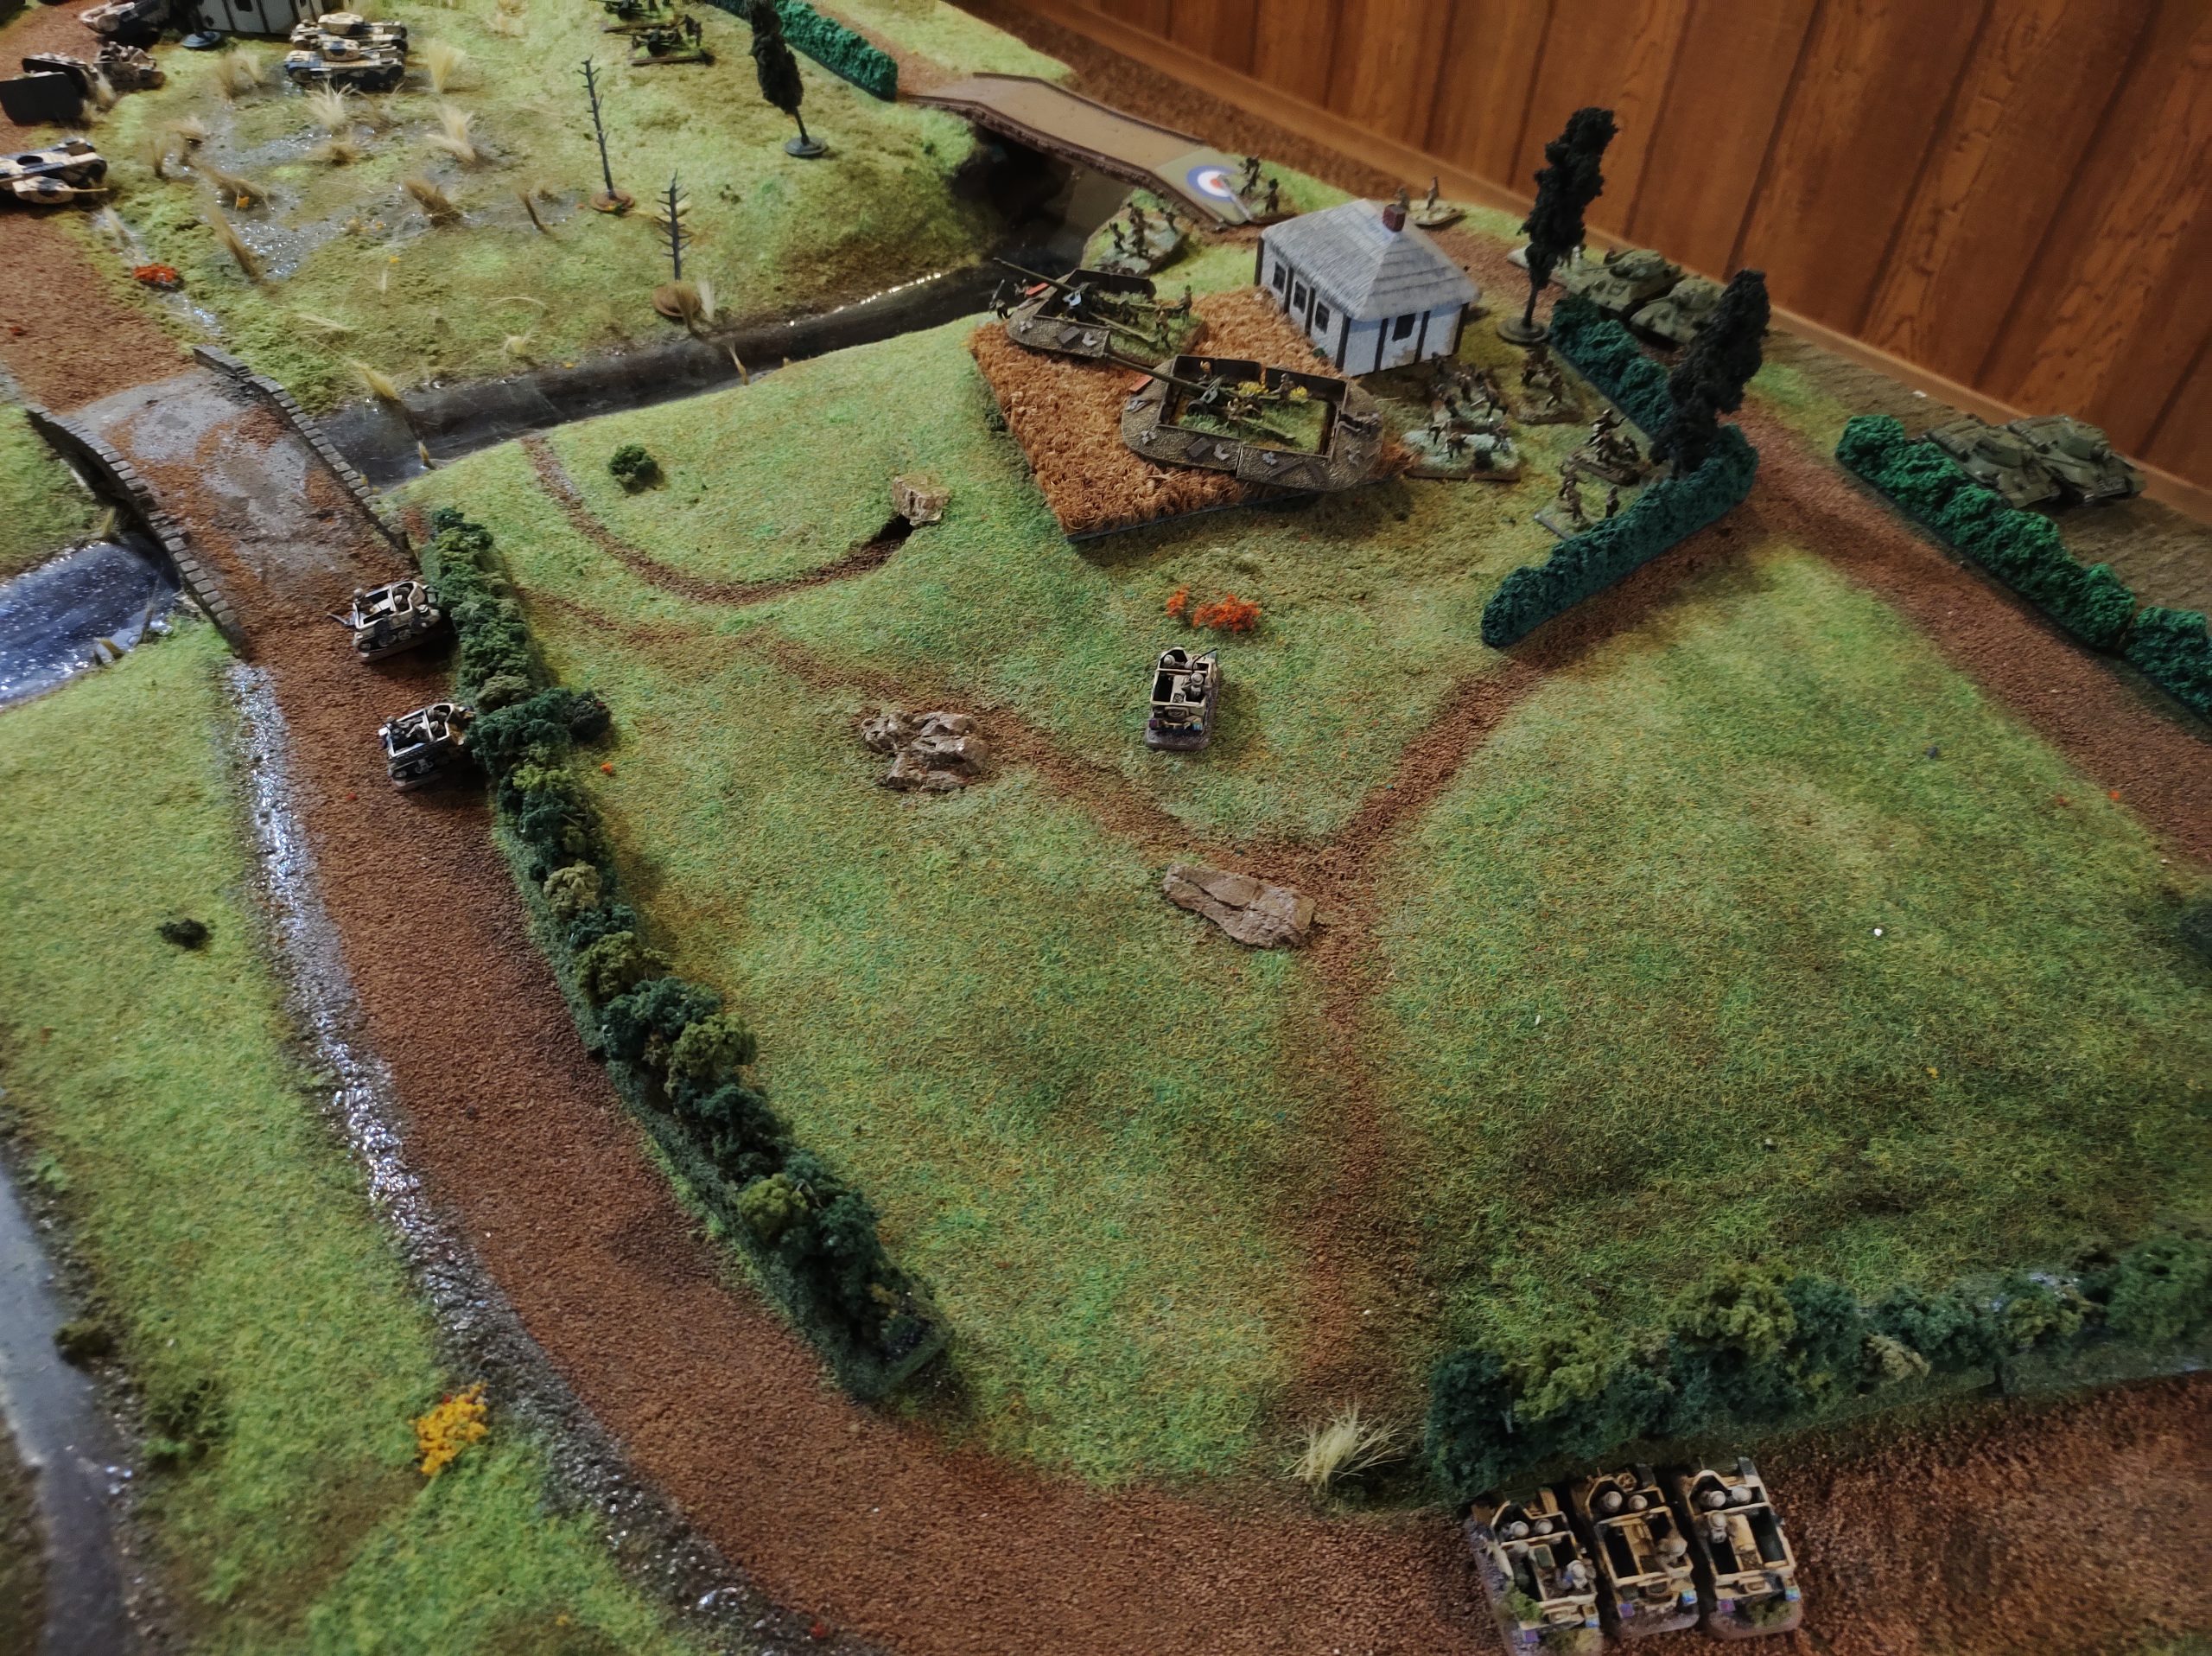
Overhead view from Jon’s side of the board,, my eastern flank is safe, the T-70s dare not press past my shermans who are staying out of LOS from the 100mm AT guns. After the battle, we concluded that at this juncture, Jon should have commited his T-34s somewhere.. either support his IS-2s vs my Churchills or press into the eastern flank. he kept them central another turn.
Jon fails to remount the Bailed out IS-2 defending the Western objective, and his Sturmoviks again line up for the Achilles…
.. but he rolls a 1 for armour save, and my 50 cal M-10 rolls a 6! Huzzah for the british morale! (not that one plane is any penalty when ranging in, only shooting direct fire shots)
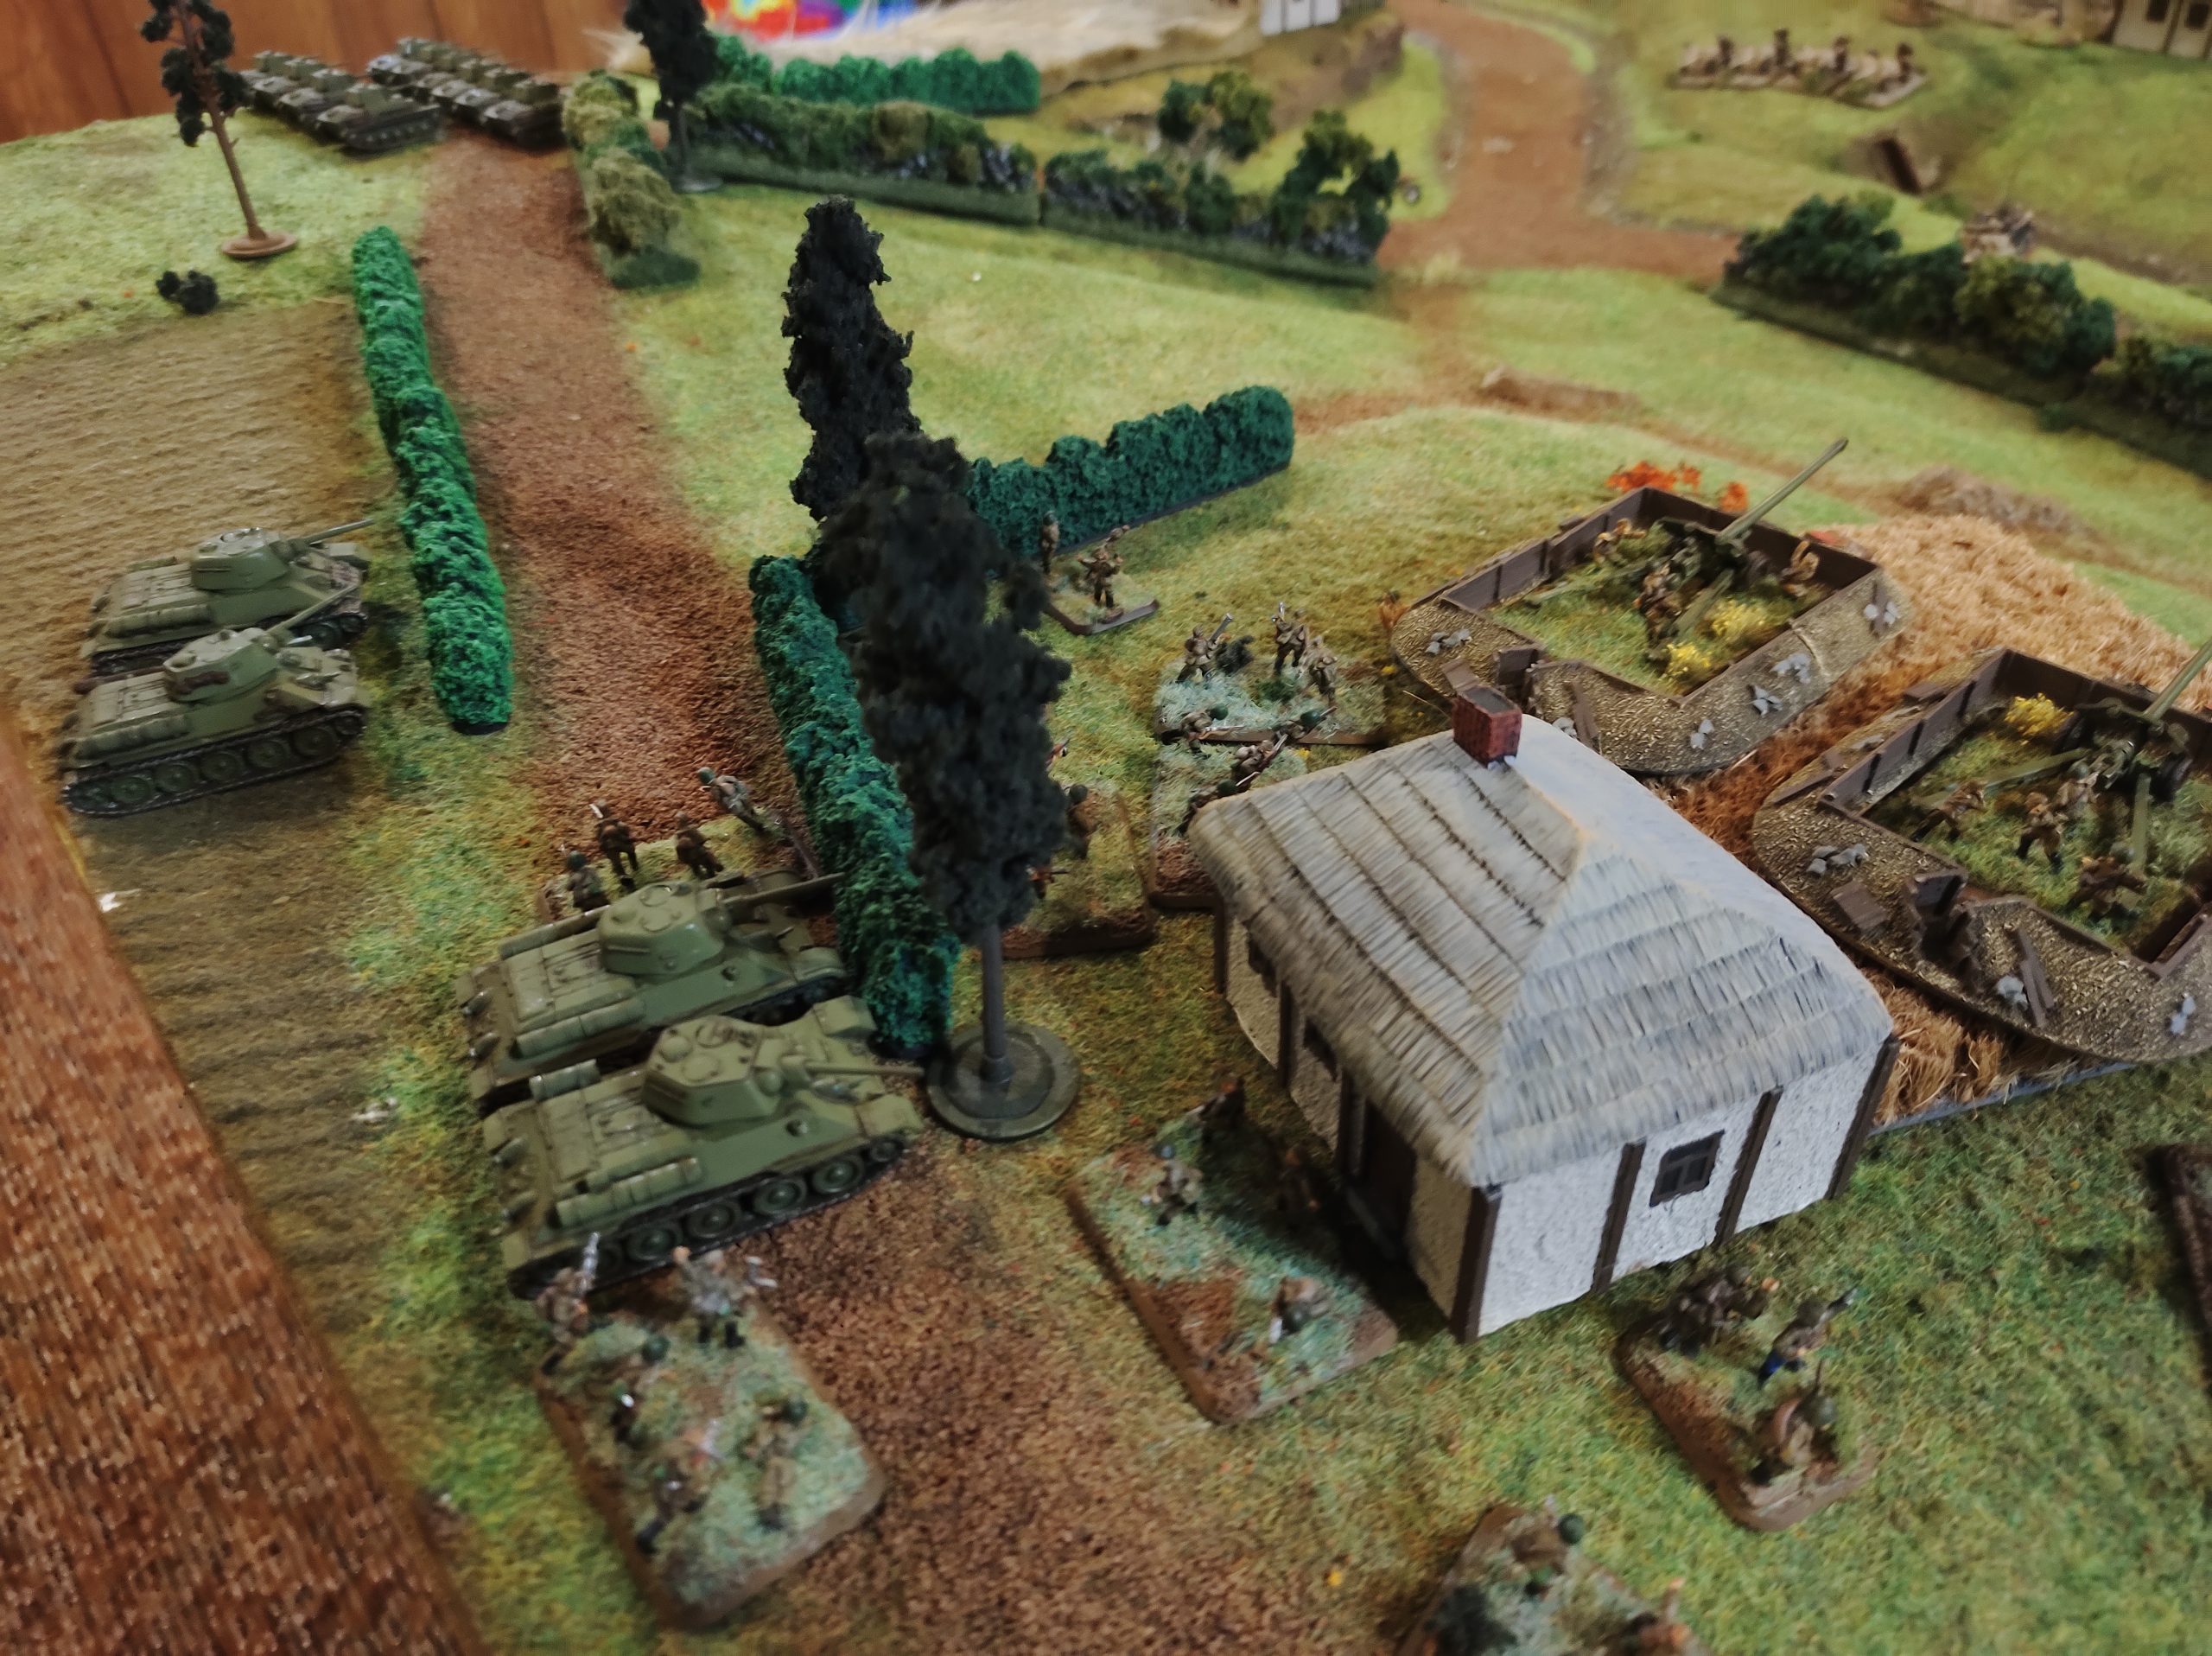
I continue my harassment of his 100m AT guns, which are turned facing my Churchills. The Recce carriers in the foreground are JUST within 16 of the AT guns, and I would pin them but not cause any further damage.
Another view of the central hill.. I start losing Recce Carriers to PTRDs, his T-34s have now relocated to the western objective.
I advance up to flank the remaining IS’2s, the T-34s and the 100mm AT guns inflict a toll on my Churchills. The lone Sturmovik kills off two more M-10 Achilles, breaking the unit. I have 2 Churchills left on the western objective. The Shermans/Firefly would take out the T-34s leaving me with a win.
6-3 win for the British. I wound up losing 2 units of Recce to PTRDs in the center, so while I had the win in the end, both my infantry formation and tank formations were down several units. My total losses were: Churchill platoon, M10 platoon, 2 of 3 Recce Carrier platoons. We did a quick AAR and determined that Jon should have repositioned all but a token defence force (infantry, AT guns and maybe 1 unit of T-70s) to the western objective, so that I would have had to chew through the T-34s earlier, and he could have had more blocking units to delay my taking of the objective. He also overestimated the smaller AT guns chances of doing anything to long range concealed Sherman front armour, and in hindsight would have been better suited defending the center.
I was a bit too optimistic of the Recce Carriers’ chances of pinning the 100m AT guns which are ‘Careful’ to hit, I had my very first LW RAF units show up ONCE and not range in then never come again, so a sternly worded cable shall be sent to the Air Marshall, but apart from that my plan of advancing with most of my force up one flank seemed to have worked. If British 3inch mortars weren’t so overpriced, a unit of them could have maybe sorted out the AT Guns instead of throwing two Recce units at them, but they provided enough of a distraction to keep his infantry in place… Jon ended up losing the light guns, T-34s, IS-2 and some T-70s.
Hope you guys enjoyed and we’ll do more regular games once Canada gets out of lockdown!
Great looking game and superb terrained table. Looks like a lot of fun.
Great table, great models. Thanks for the report.
Thanks for the write up! Loved reading it.
Nice Bat/Rep Matt and the table is a Major Wow!!!!!!!! Really nice figures and basing also. HW
Thanks everyone… was a fun game and I have another to post ‘sometime’ in between procrastinating from painting 🙂