3D printing the props of your Team Yankee / Flames of War bases
By Paolo Paglianti
I really like to have custom bases for my miniatures, as you can see and read here (), here () and here (), I normally try to have small dioramas for my Flames of War or Team Yankee infantry teams. When I began painting my new Iraq army, and I come to the three platoons infantry formation, I wanted something different. One of the three platoons would fight on rocky ground, the same I used for my “Sicilian” bases for my British WW2 Paras. Some great inspirations come from my friend Luca Papisca and his US bases!
For the other two platoons, I chose an “urban street” scenario and a “rural village” scenario, using my new 3D Resin Printer (). I think 3d Printing is a true revolution in modeling and in our hobby: not only because you can print the tanks you need, but especially since you can “create” almost everything you want, you just need some creativity.
You can find almost anything you need for free on websites like or . Having done some Kickstarter in the last months, I also have “premium” props and models.
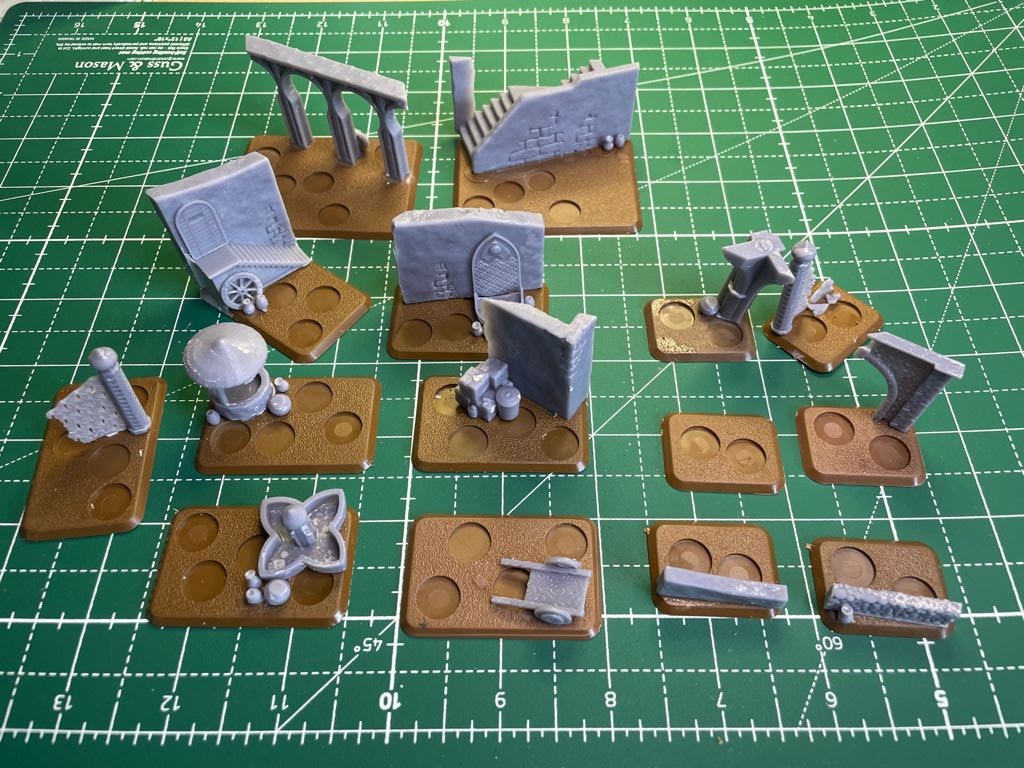
The first step is planning what to print. There is no sense in printing a 20 cm wall and cut it to the measure you need: you can print it directly exactly of the length you need. I found some FOW bases on Thingiverse, and I used them to do a plan of what I want to print. I just placed wells, walls, bricks, wagons, phone booths, garbage piles on the bases, cut them custom-tailored, and then I removed the FOW bases to print just the props I needed. Here is the plan on one of the two platoons I created in 3D Builder, and you can use to assemble your projects. I did this for 15mm miniatures for Team Yankee, but you can do it for any scale/ruleset/period.
 The “general plan” for the “Rural town” platoon. I placed the seven medium FOW/TY bases, two small ones and two big ones to have an idea of what I was going to print and the final result. The two soldiers are from 3DBreed.es and their excellent March to Hell WW2 products. I used them to resize props and walls.
If you search Thingiverse, you can find lots of models you can use for base props. I found some “zombie” setting crashed cars, or walls from a D&D “eastern” setting, and cut them. A small piece of advice: try not to place all walls “parallel” to the base sides. If you place them slanted, they will seem more “realistic”. I also found modern props like a shopping cart or fire hydrant.
This is the platoon’s bases with only the printed props. I also printed five different vases and added them near the well or on the some stairs, or some chariot wheels.
 Once printed the props, I glued them to the bases. I also added some small details, like the garbage pile, some vases near the fountain, a cart wheel near the stairs. The detail of the printed props is astounding.
Example on how to do a base
The idea is to have any base with a small diorama, something telling a small story. Here is an example of creating a unique base.
I got some models from Thingiverse. I normally download everything I find worthwhile on Thingiverse (it’s totally free) and save it in a special directory on my hard disk. The first advice, be neat and sort every file, so you can find it easily when you need it. You’ll come up with hundreds of files in no time. I have a directory “Scenics” where I place everything that could be interesting for scenarios and props, and another one named “Buildings” with every full building I find around.
I found “” that suited perfectly with my idea. Also, “City of Blanos” , made by the talented user Malkom1366 for a “Persian Style” D&D building.
I got the wall from the first file and place it on . I used the “virtual” base only to have the exact dimensions of the wall, as I don’t want to cut it once printed. I also “glued” the fountain from Blanos set.
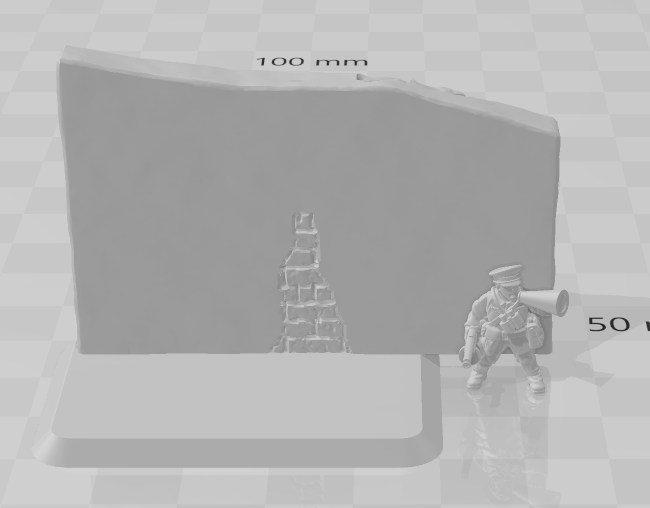 I used the FOW medium “virtual” base to have the exact dimension of the wall I was going to print. The Russian Kommisar is a 15mm model from 3dBreed.es I bought for my next USSR army, and I will use it for dimension comparison.
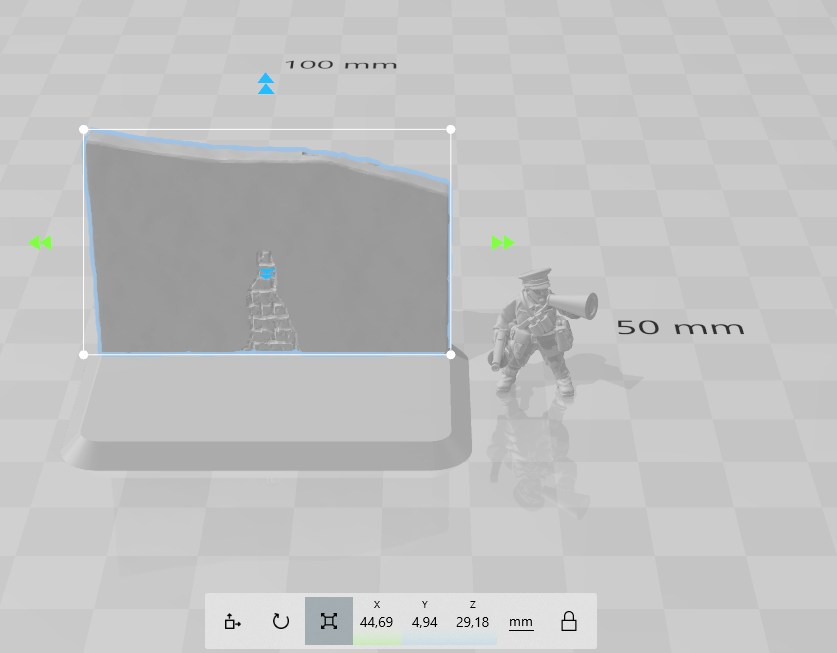 I reduced the size of the wall to the FOW “virtual” Base. You can scale down or up any building, miniature or prop, so you can use 28mm or even bigger models.
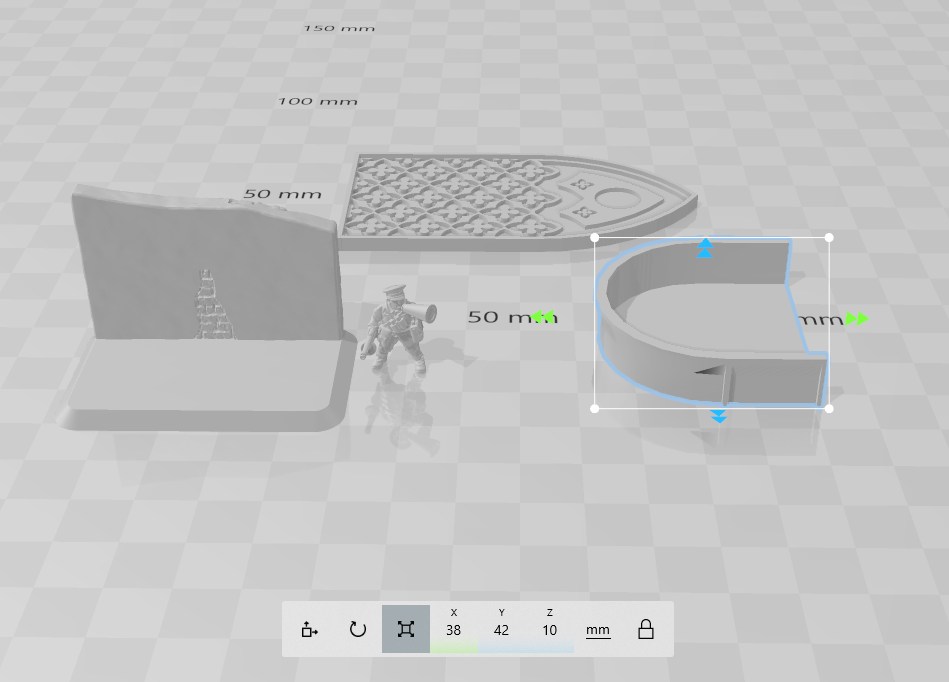 I got the fountain from the Blanos Set. It comes parted and bigger for my needs, so I had to rotate and resize both the wall fountain and the basin
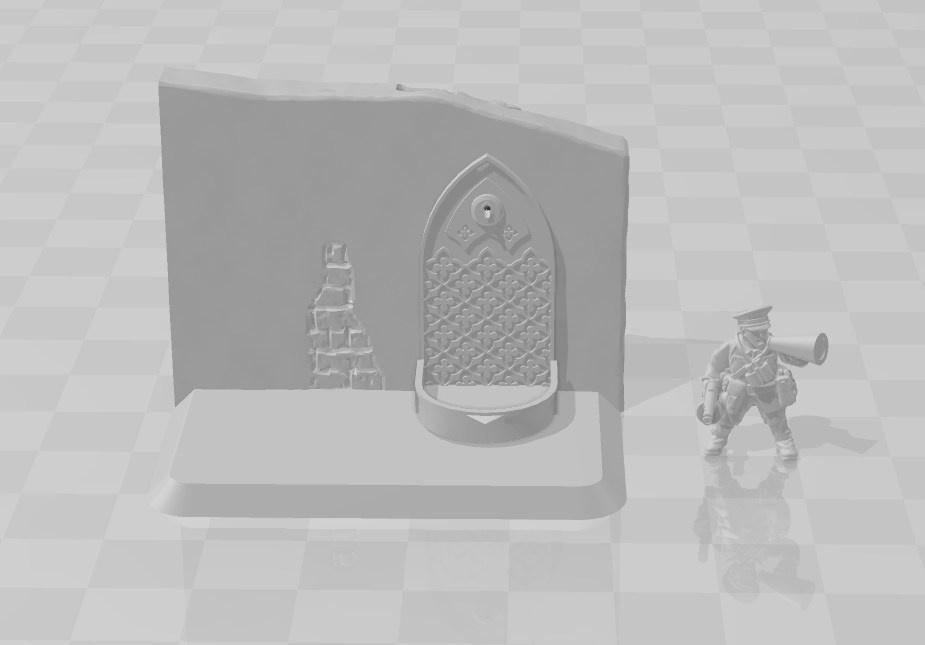 This is the finished model, ready to be printed. Now I just need to “glue” the wall, the basin, and the fountain and delete the FOW base and the model komissar.
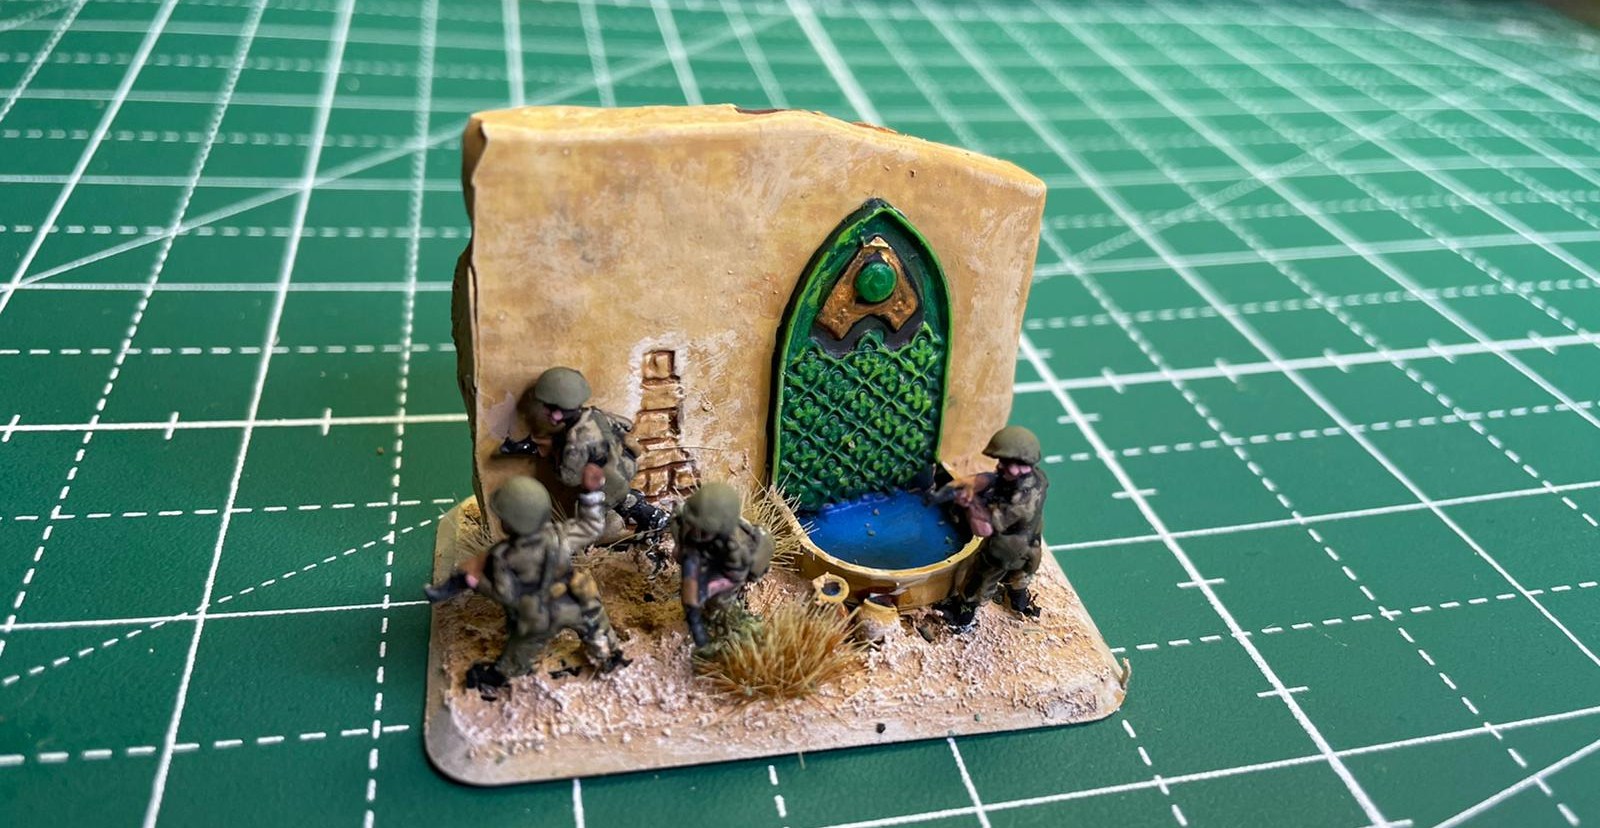 Here is the final base. The sand effect is from AK Interactive, the Iraqui soldiers from Battlefront. I prefer to paint the base and the soldiers on their own and assemble the finished ones.
A second example
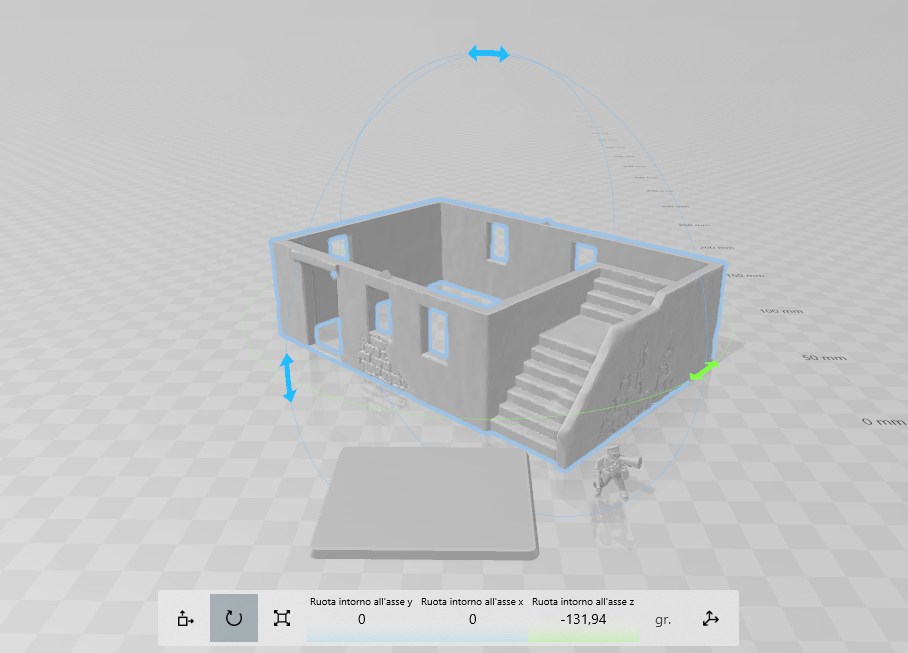 Another example. The bigger support infantry base gives us the chance to build something more elaborated. Here is the FOW virtual base for support weapons, and the full “Modular Arabic Building” from Thingiverse, first floor. And also our friend the Kommisar to check the dimensions.
 I angled the building having the part of it I wanted on the base. I really liked the big external stairs, so I wanted them on my Support base. I also had to scale a bit down.
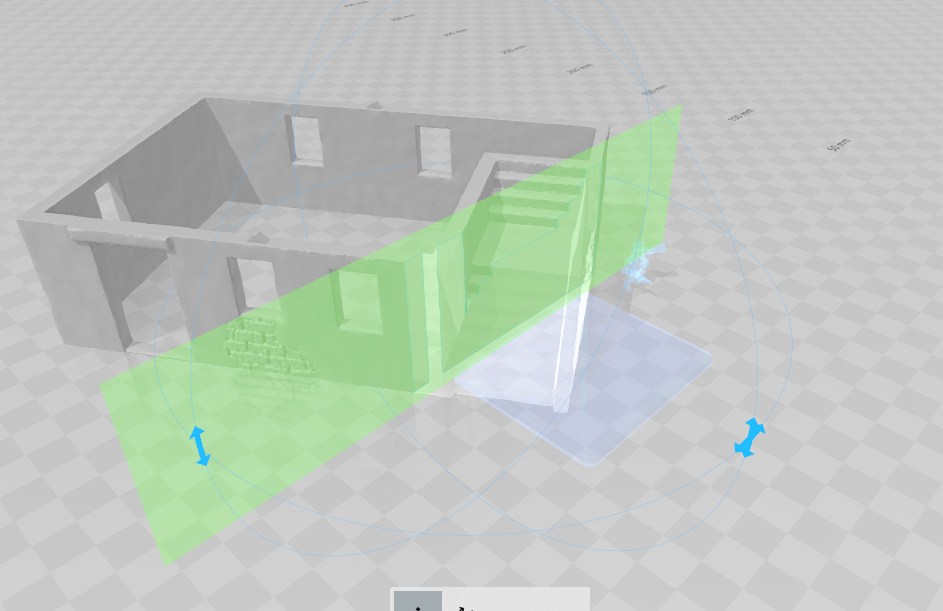
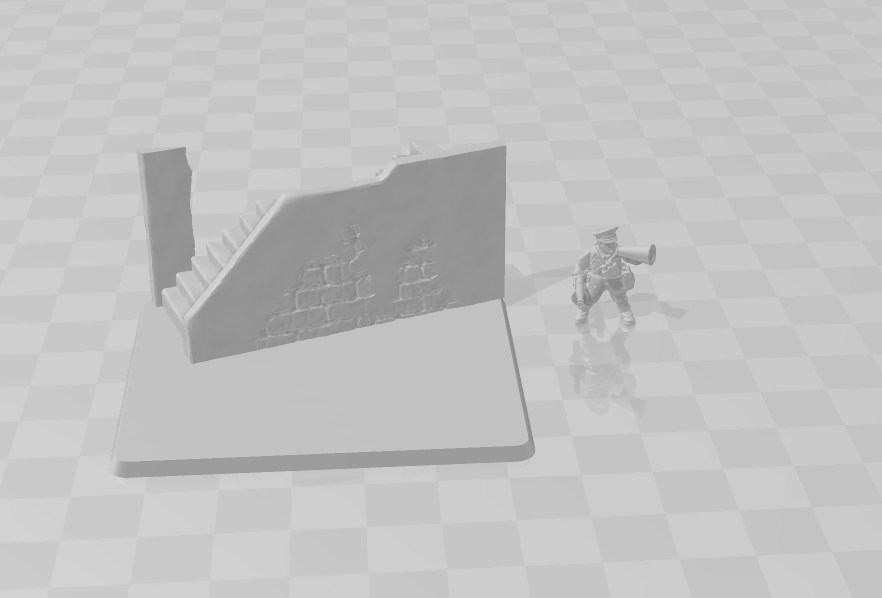 Here is the final “cut”. As before, I just need to delete the Kommissar and the virtual base and print the remaining model.
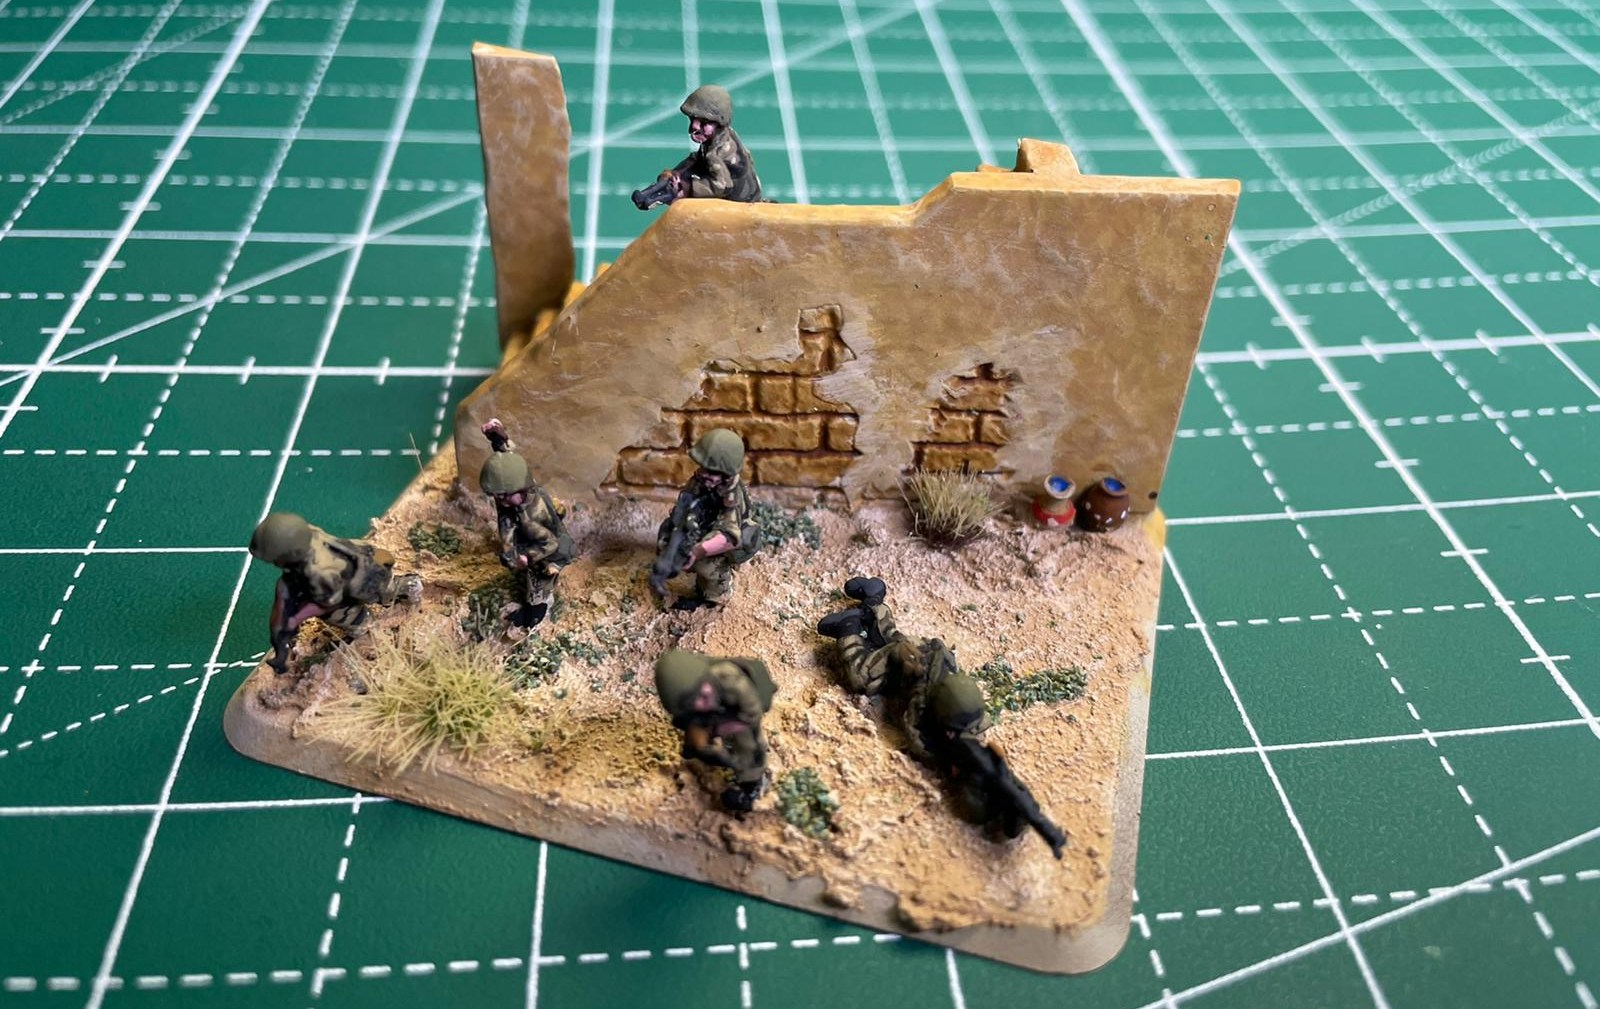 And here are my Iraqi PKM LMG team, ready to support the infantry advance! I really like to add some small details like the soldier on top of the stairs and the two painted vases.
I primed the bases with a dark yellow spray, and then I painted the bases’ props. I added the already painted Iraqi soldiers, trying to place the poses in a realistic way. For the “rural village” platoon, I wanted a desert “floor”, while for the “urban street” I was looking for an “asphalt” setting.
I used two AK Interactive products: and . You just need to water them down a bit and put them on the bases. This is especially good to cover the round bases of the soldiers, masking them completely. I did some light drybrush once dry, with light grey on the asphalt one and sand with pure white on the desert one.
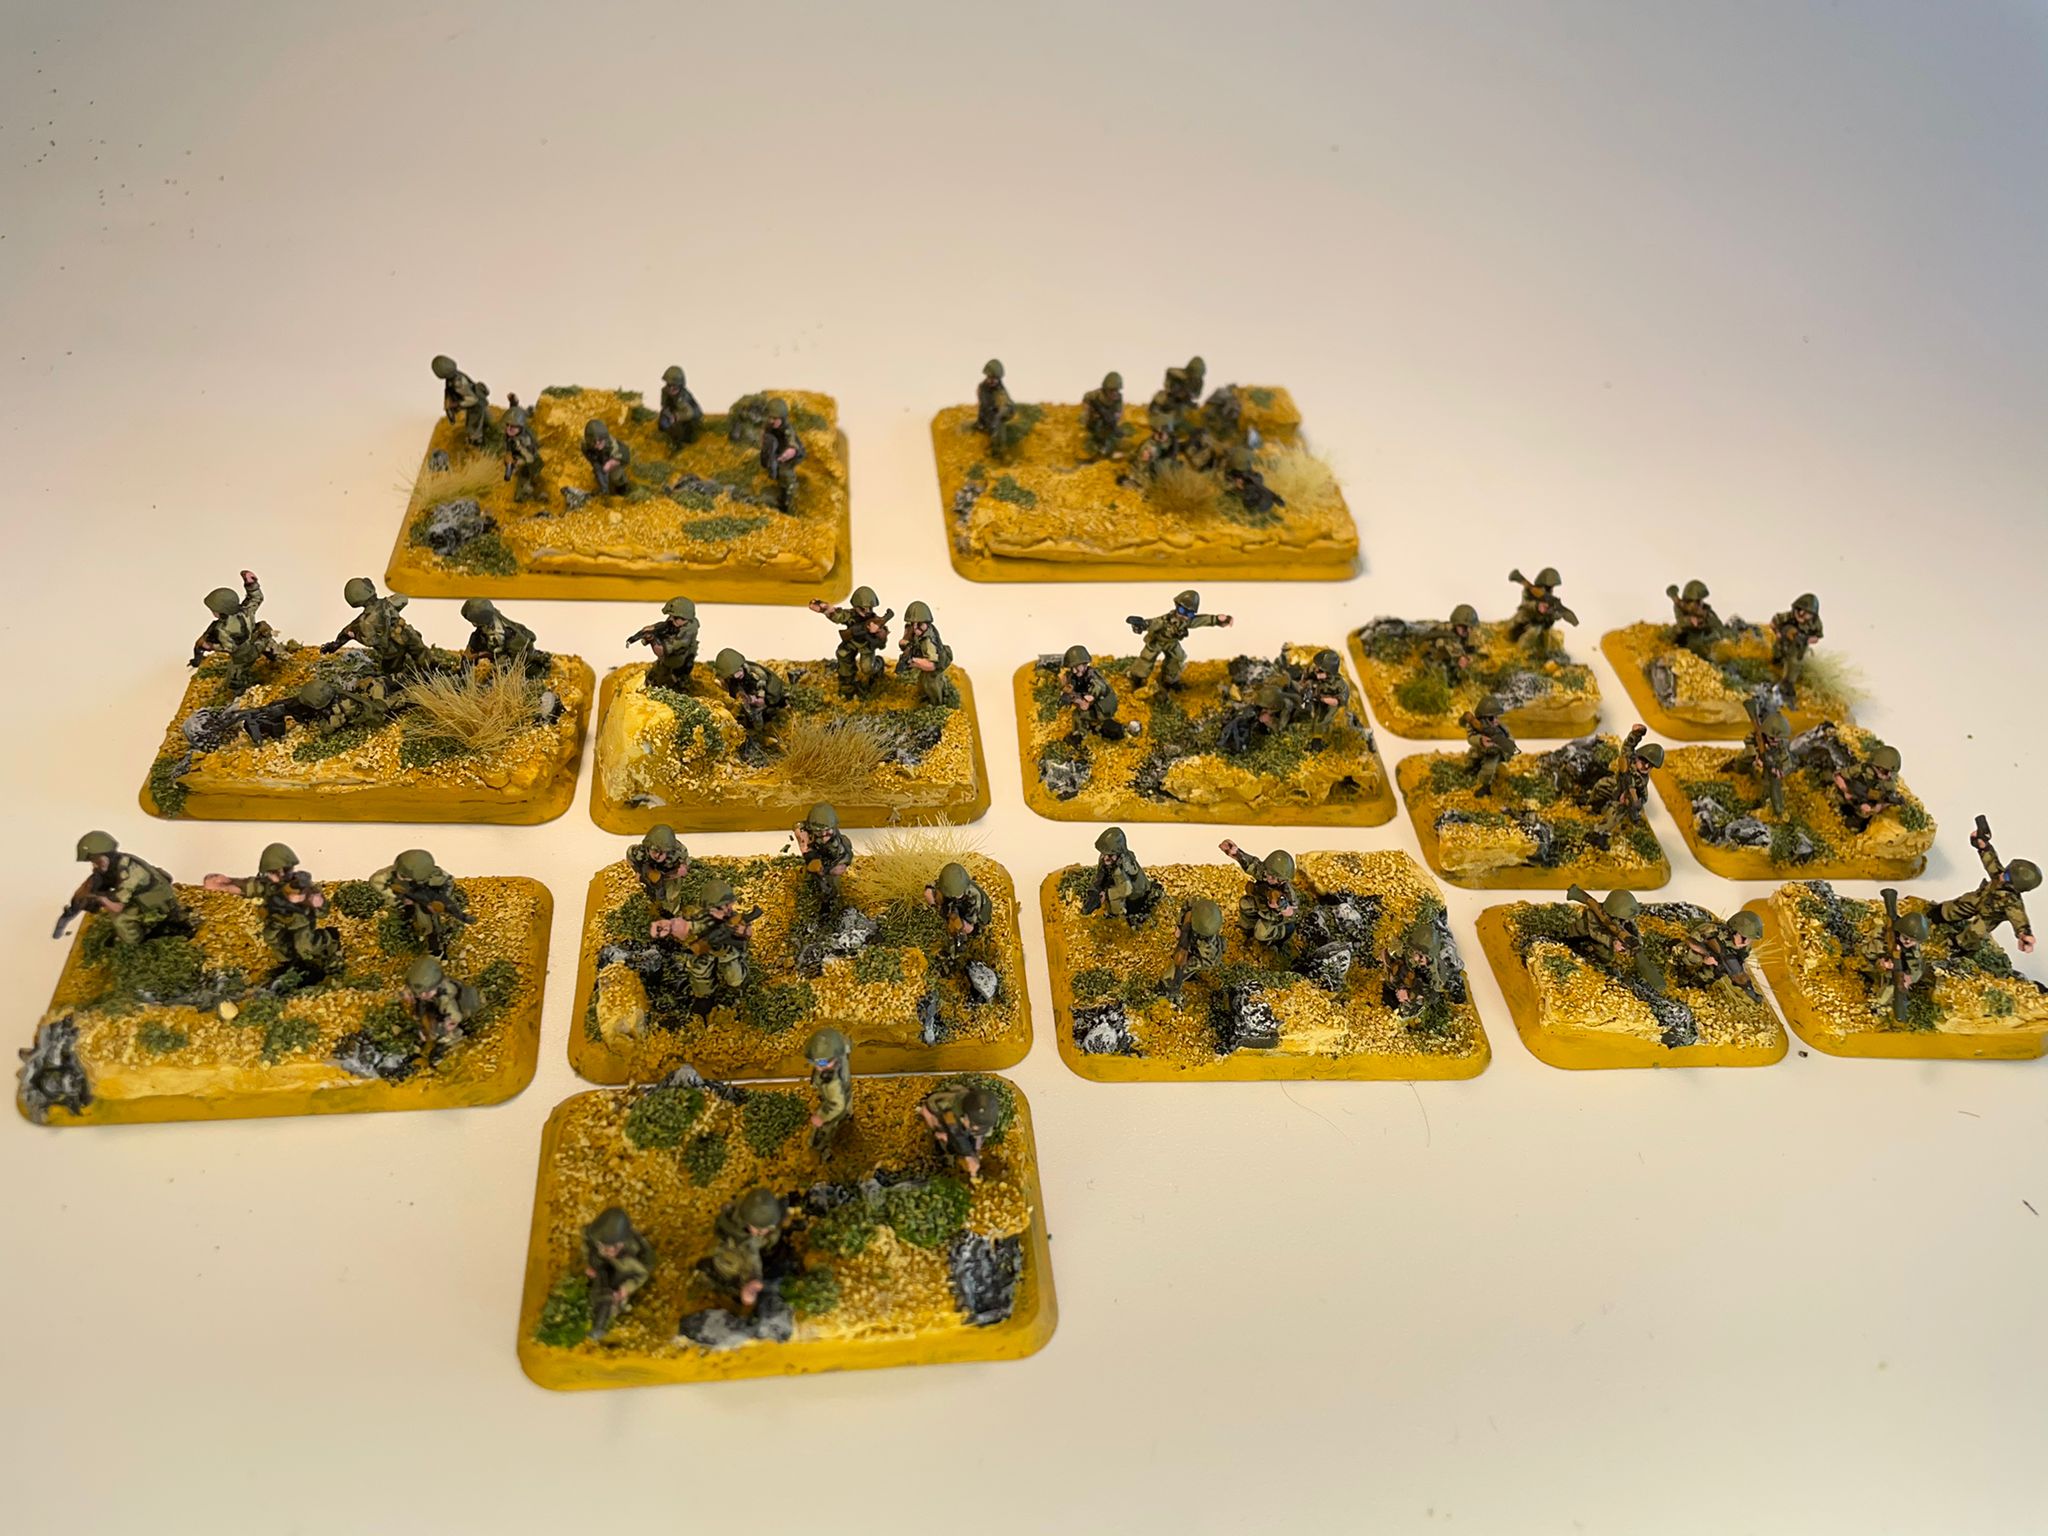
This is the final result of the Rural Town

And the Street Urban platoon

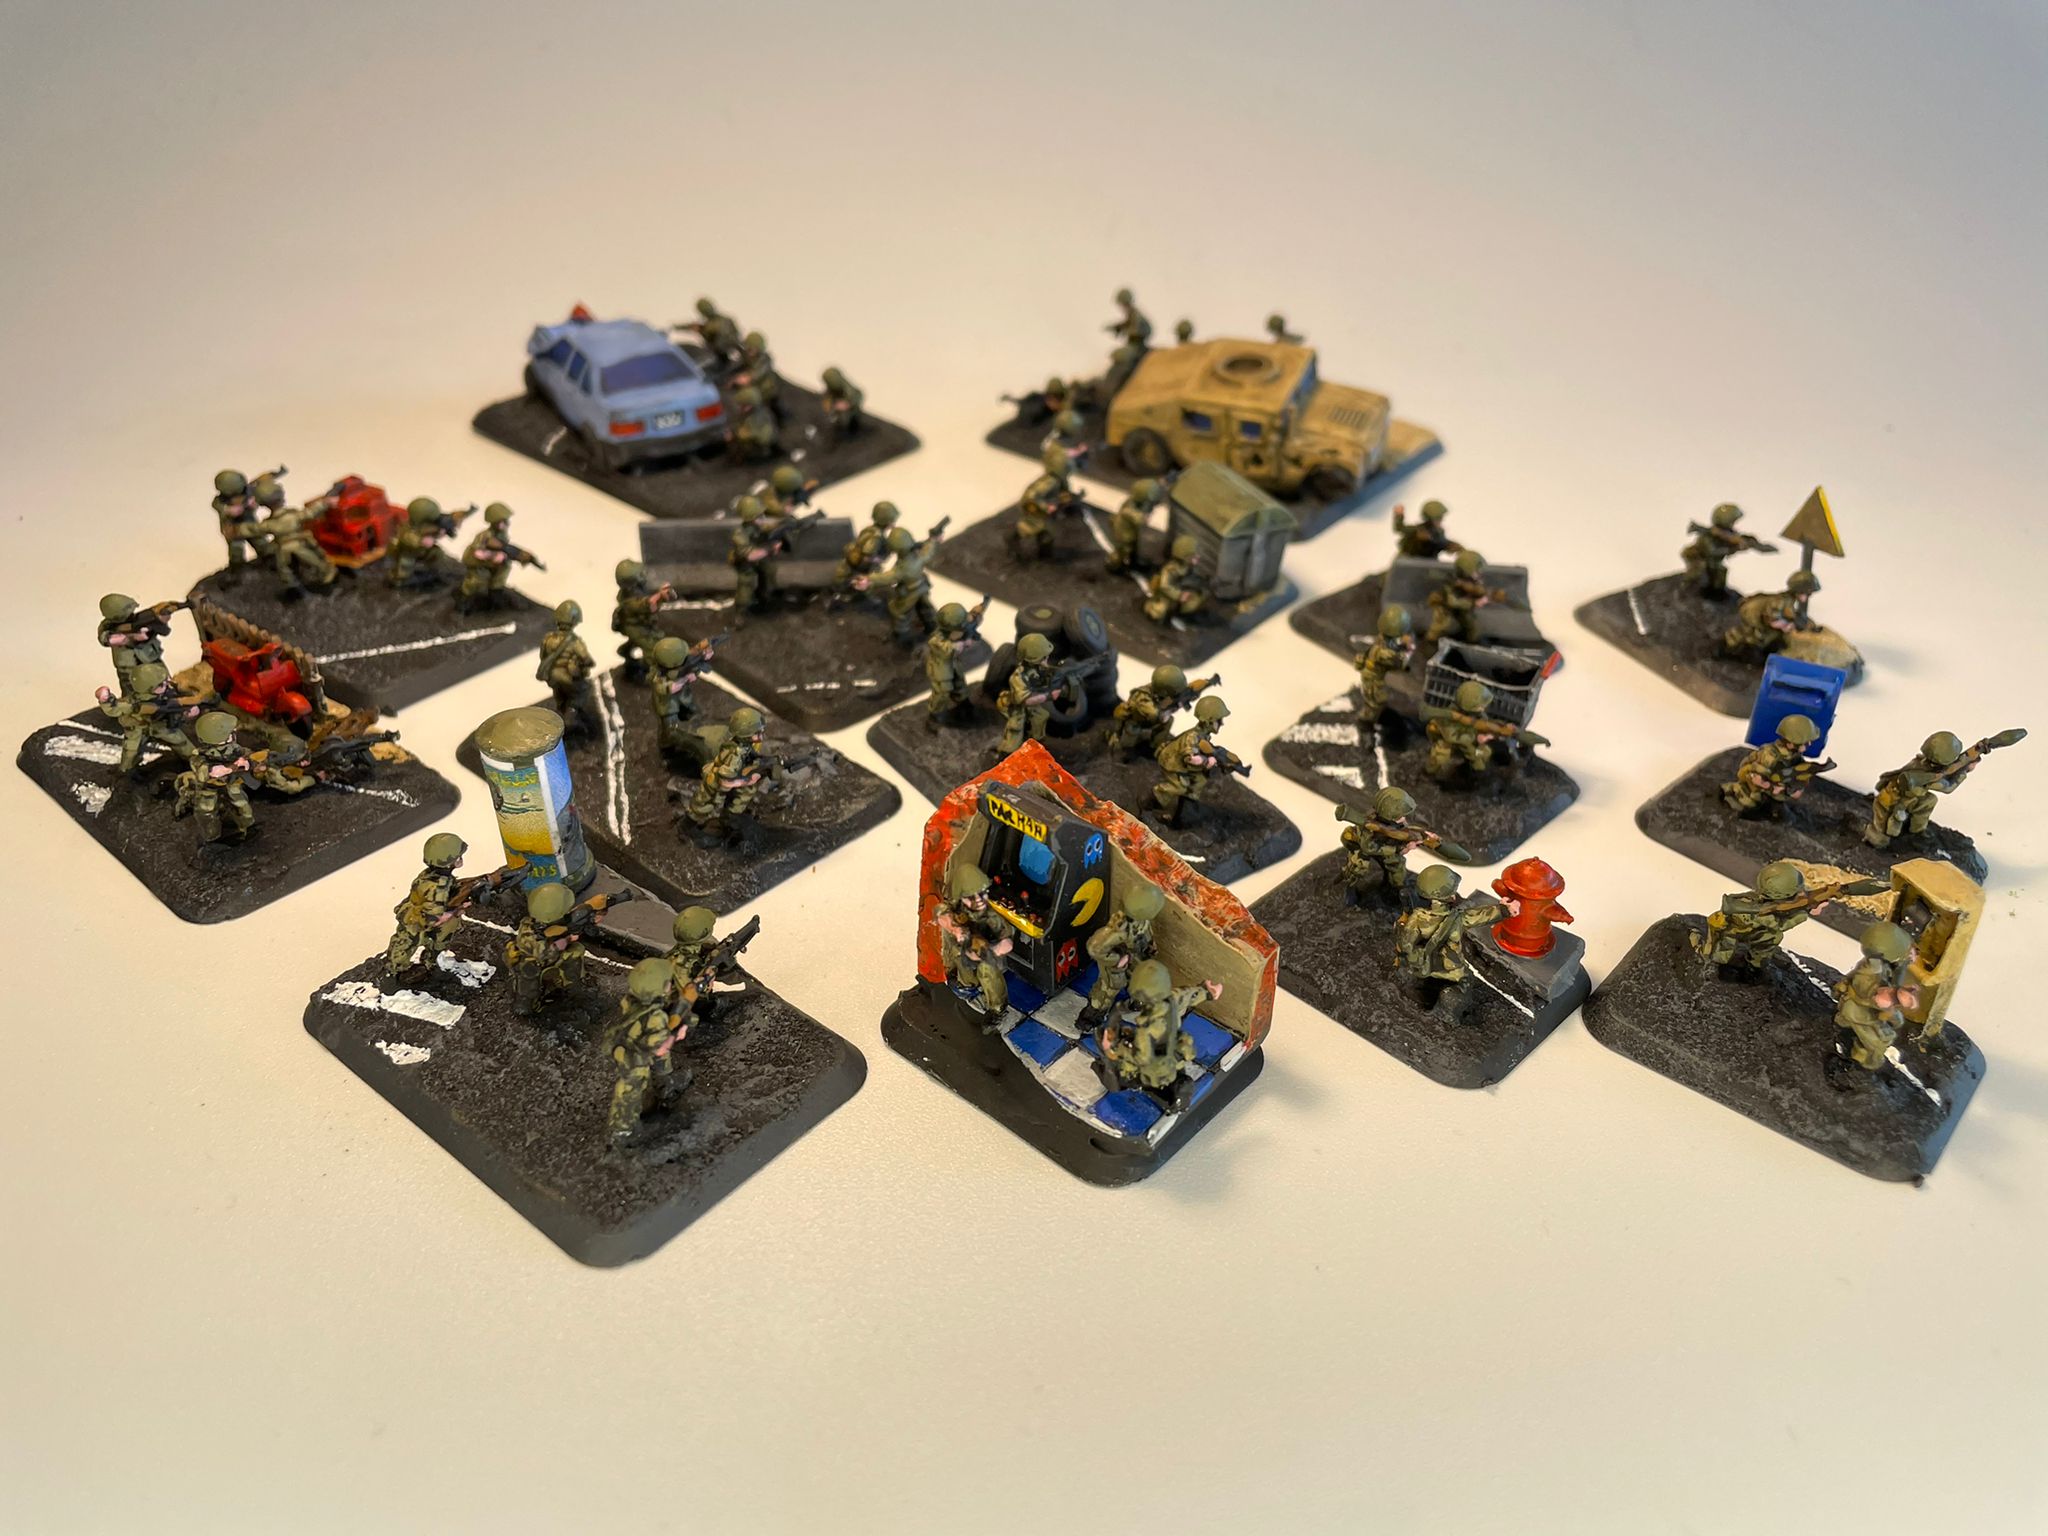
For the record, this is the third “rocky ground” platoon. They are coherent but quite different one from the other, so I can use them together without the risk of mix them up during the battle. Let us know if you like them!
Wow they are just superb and of cause 110% unique. Top job and great guide to how do it easy and simple. Thanks a bunch for sharing.
I wish I had the talent Paolo does,,, he is an artist
thanks Mitch 🙂 too good
Hi Soren,
thanks a lot!
P
These are simply awesome! Stunning work and great results.
Hi Alamo, thanks 🙂
Great job! Love the character they add to your models.
thanks, Tom 🙂
Absolutely beautiful work! I’ve always believed that outstanding basing is more important to the look of infantry on the table than the paint job on the infantry themselves. You prove the point in this article. Well done and thanks for pushing me to buy a 3D printer. What 3D printer stats do you recommend?
Hi,
thanks for the compliments 🙂
the base stats are good. I use the Water washable resin
Great work there, amazing stuff!
Thanks Thomas 🙂