Warfare 2023, other five games to remember
 By Paolo Paglianti
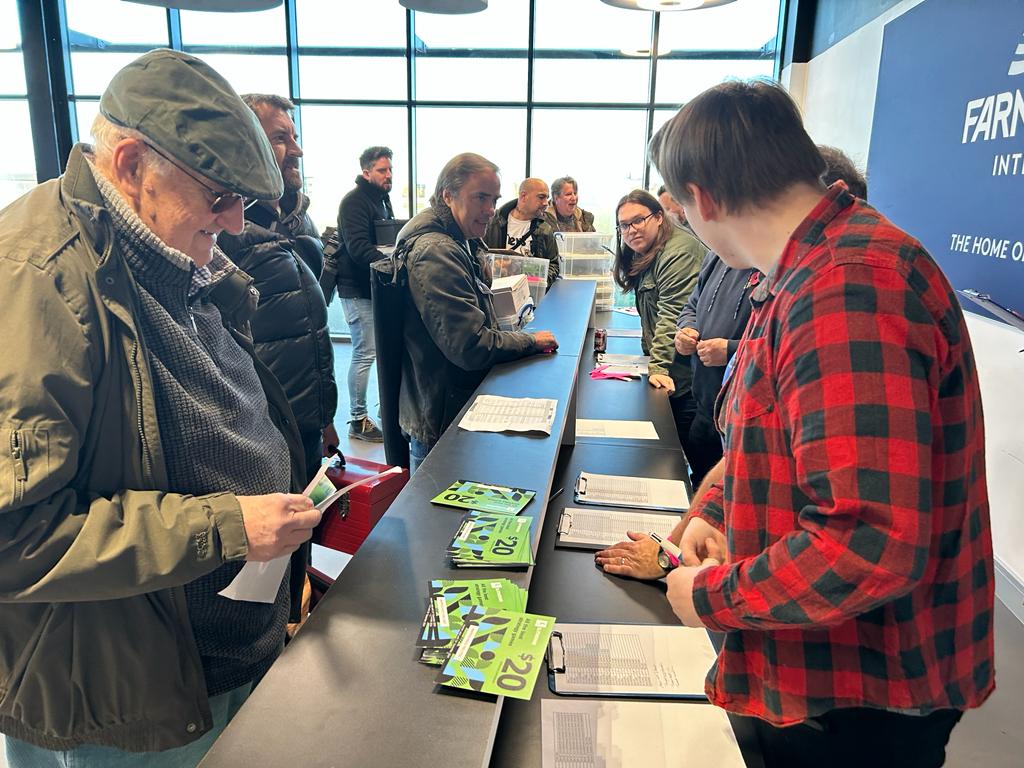
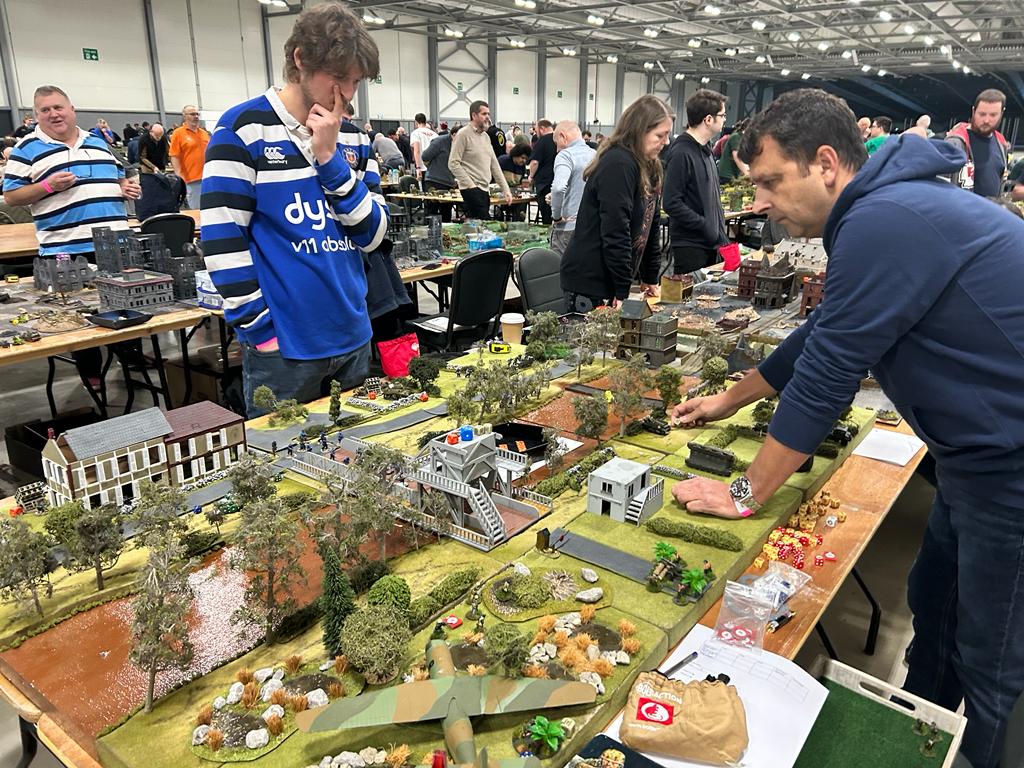
Imagine an airport hangar packed with tin soldiers: tin soldier shops, tin soldiers demo tables, tin soldiers tournaments. Well, that’s literally what happens at Warfare 2023, one of the biggest and most significant wargaming and modeling shows in the Old World, located south of London. Warfare is a heaven for every wargamer: there are lots of shops selling essentially anything you can imagine: books, miniatures from 6mm to 54mm, and terrain for any wargame from ancient to sci-fi.
It is organized by the Wargames Association of Reading and it’s simply excellent – I know how difficult is to organize an event so huge and complex, and David, Steve, and the Reading Team always do a fantastic job. I really recommend you pay a visit, if you’re in the UK next November.
This year, the company I work for – the videogame publisher Slitherine, focused on strategy games – chose to sponsor Warfare, and naturally, I immediately volunteered to attend the show by infiltrating it like a commando. Apart from spending a good portion of my savings in the Warfare stores, I participated in the Flames of War tournament.
Sixteen players, among the most formidable in the United Kingdom, practically featuring the entire UK Team that participated in ETC 2023 (and with whom we had an incredible meal in Belgium the night before the tournament). With fewer than two dozen players in the tournament, it was practically certain that I would encounter a good number of them while crossing swords, uh, rolling dice.
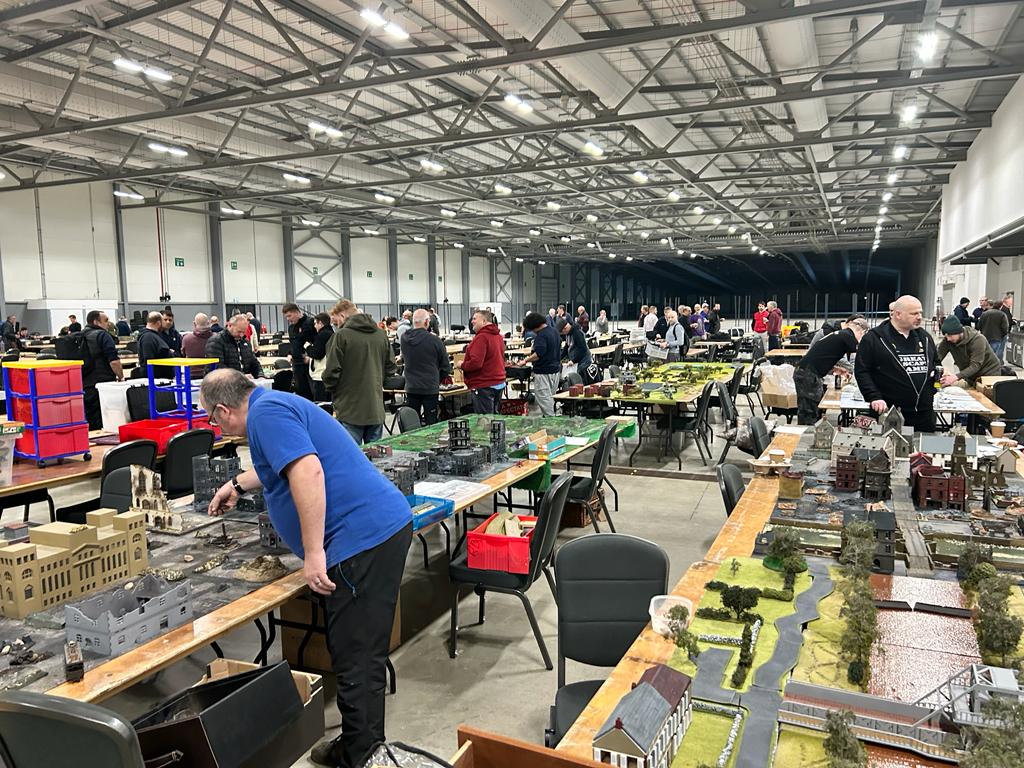
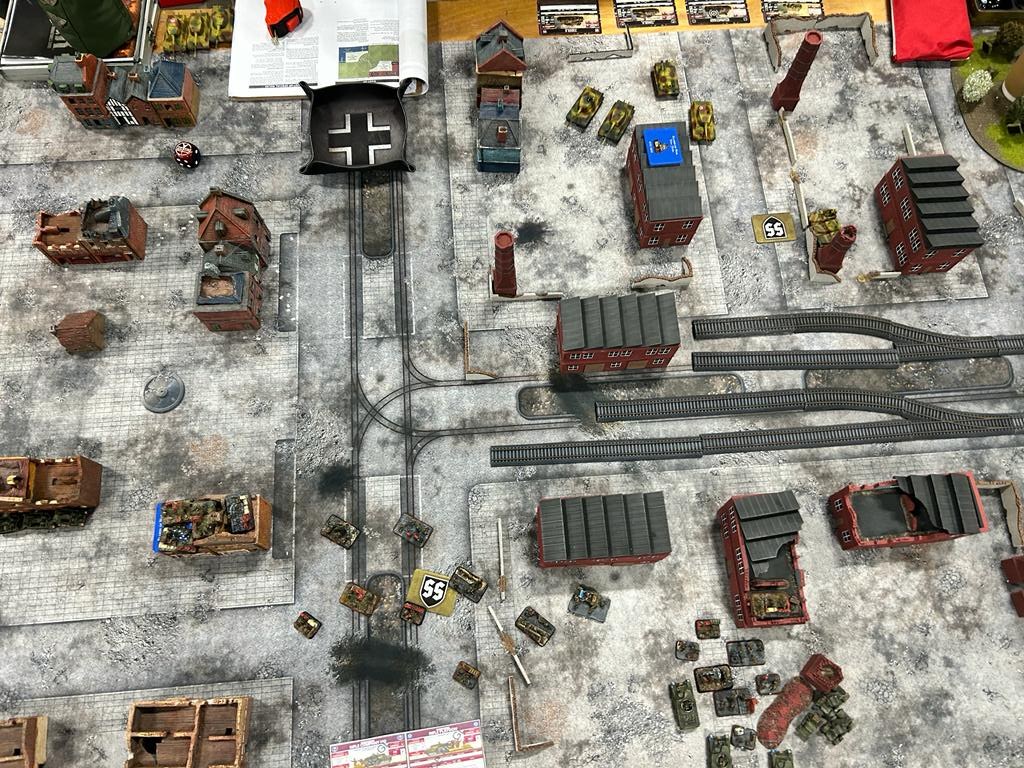
This is just half of Warfare, with the tables for tournaments. Any game you can imagine is here – including DBMM, Art de la Guerre, FOG, To the Strongest, Boltgun, Warhammer, and Warhammer 40,000.
THE LIST
With such a challenging tournament, I decided to use my favorite British list, tweaking it slightly since the Flames of War tournament was at 111 points while in Italy, we play ETC-style at 101. After hesitating a bit over various options and pestering my friends and trainers Claudio Tiso and Livio Tonnazo, I simply decided to convert a platoon of M10s into Comets.
They lose a bit of Anti-Tank (15->14), but at least they can assault without issues and have excellent remount capability. Moreover, I had recently won a pack of 5 Comet models from Battlefront, and I really liked the models. So, here is my list, very similar to the one used at ETC 2022 when I played on Team Iceland invited by my friend and Captain Søren Petersen.

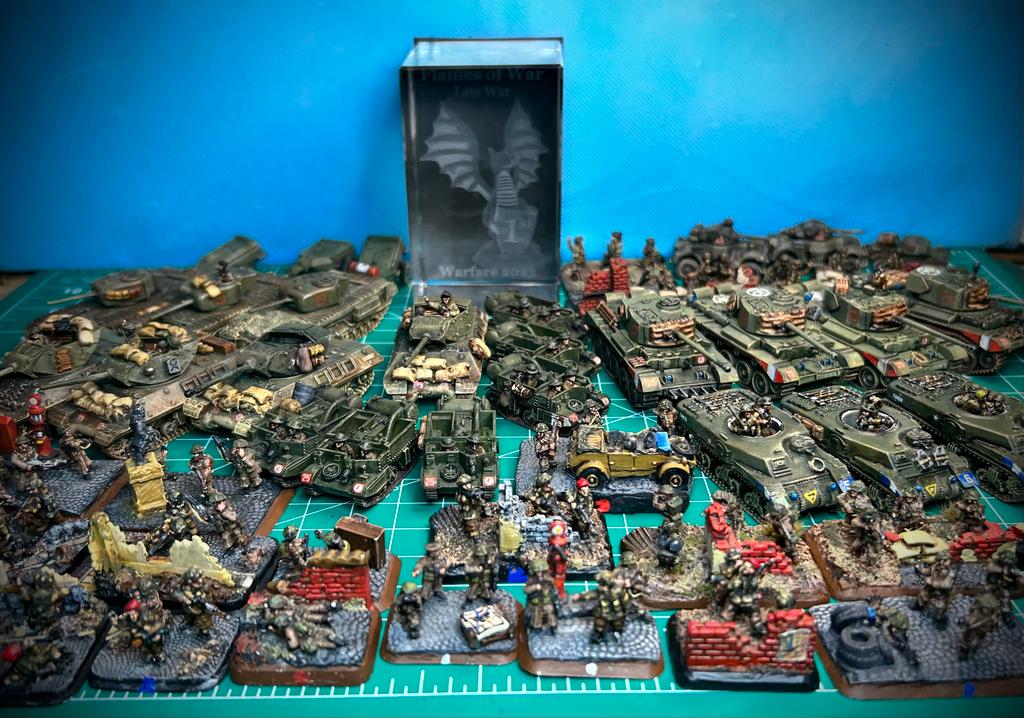
That’s my list. I usually have two M10 platoons of the D-Day kind, but thanks to the extra points in Warfare 2023 FOW tournament, I could field my brand-new Comets.
My brand new Comets, ready to face lots of Tigers II – actually on their flank. At least, this is the plan.
The underlying idea behind the list is quite simple. The Churchill Crocodiles and Wasp tanks have the duty to flame infantry and dug-in gun nests, while the two platoons of M10 and Comet tanks must keep any type of armored vehicles in check. AT 14 and AT 15 mean that any tank except the German Tiger 2 and its variants should be wary of Her Majesty’s bullets. The infantry formation with two platoons, one of which is mounted on the super cool Kangaroos, can defend or assault two objectives, forcing the opponent to stretch their defensive or attack line.
The weaknesses of the list lie in limited artillery (only one meager platoon of mortars) and just a single smoke screen. As for the cards, I’ve taken the invaluable and indispensable “Relentless,” which transforms the British Battle Weary into fearless Canadians with a morale of 3+ (except for last stands at 5+, but if there are only two soldiers left in the platoon, they have every right to fall back to the nearest pub), and a “Lucky” card, because luck may be blind, but misfortune always sees us perfectly well.
First Game, John Trenchard with German Bulge
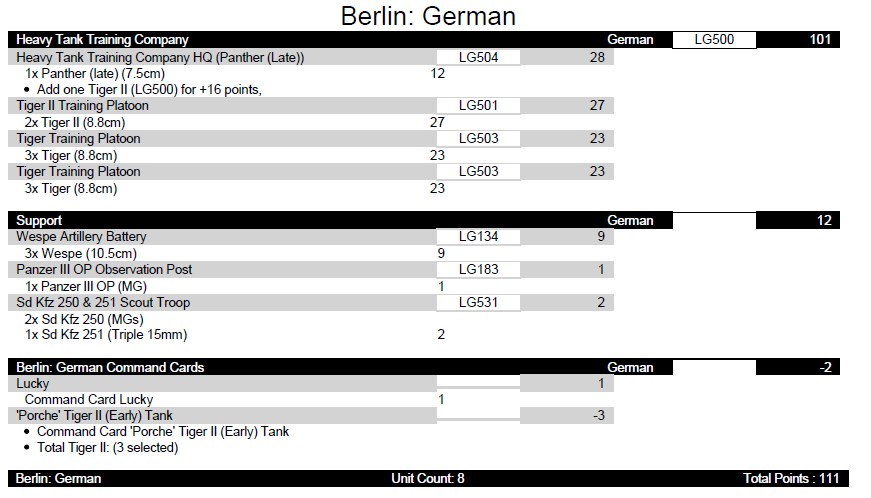
When you play a list with M10s and Comets, you can punch big holes in any enemy tank except the Tiger 2. How ironic is I started Warfare well with a match against John’s German tank company, with three Tiger 2s, a late Panther, and six Tiger 1s, along with a Wespe artillery with an observer? Here is John’s list.
We both attacked, playing the Counterstrike scenario. The dice roll decides that John defends and chooses the fourth area, with a nice, large grove just big enough for two King Tiger 2s and a strategically positioned hill overlooking the battlefield near the objective I placed in his quarter. He places the observer there to direct artillery fire.
Behind, there’s another grove where he positions the Wespes. The HQ, consisting of a King Tiger 2 and a late Panther, positions roughly in the center of the battlefield, scattering “confetti” (Italian nick for “bullets”) everywhere, and reserves two platoons of Tiger 1s.
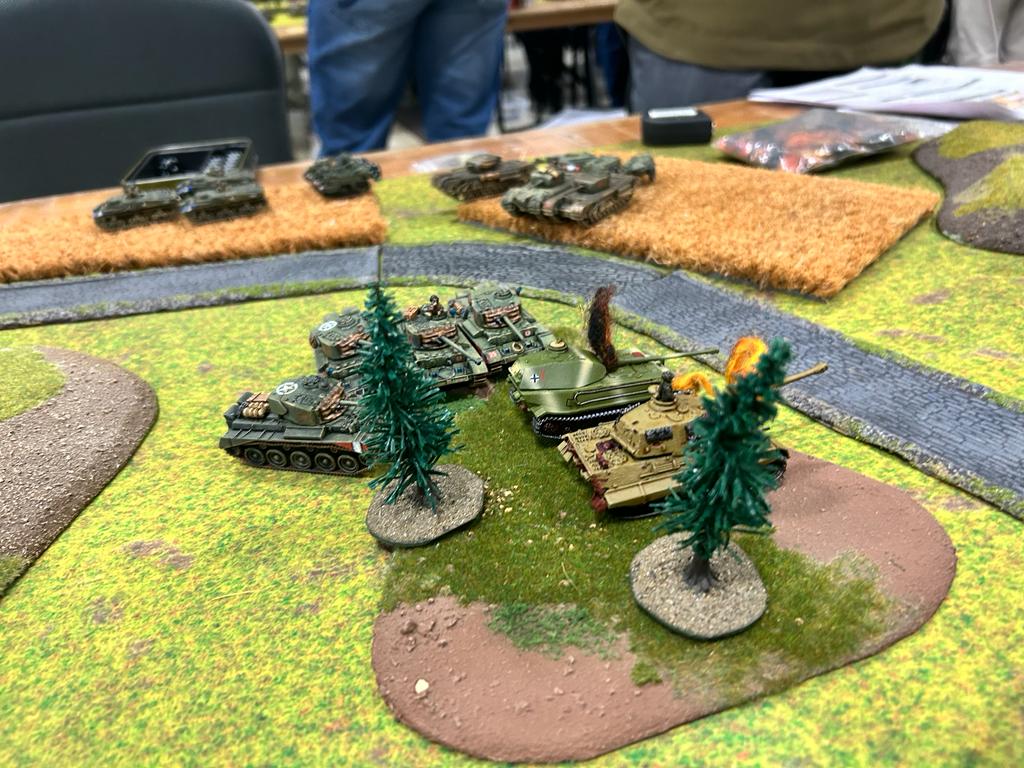
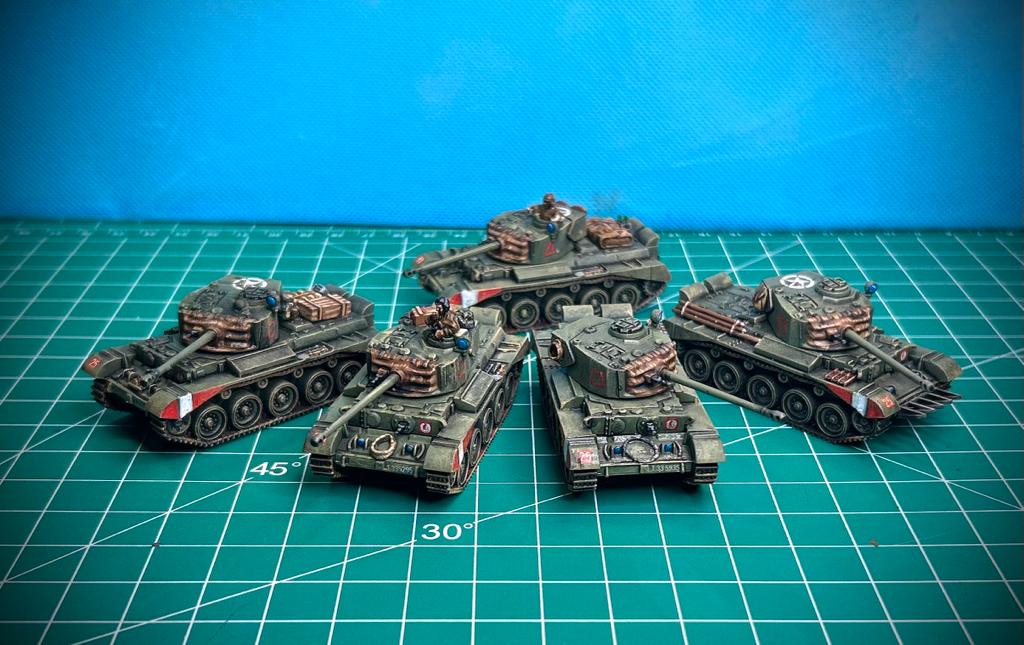
Unfortunately, in the rush of the tournament start, I forgot to take the usual top-down photo. I’m adding a loving picture of my Comets moving around Tiger 2s.
I deploy the largest infantry platoon and the M10s ready to assault the table quarter cleared of units, and the rest of the army in a 30 cm square on the edge of the table, 8 inches from John’s deployment. John’s first turn is a meeting engagement, so he fires 4 shots from the 88, blowing up an M10 on the other side of the table. However, he can’t bombard the massed units, which, on my first turn, rush towards the flank of the King Tiger 2s in the woods.
The four Comets earn their payroll by taking them out, and then focus in the following turns on the HQ, which continues firing from the center of the table wherever it spots an exposed olive-green tank. On the third turn, John’s reserves come in, targeting the infantry and M10s, confident in their numerical superiority. Seeing that only one platoon stands between his army’s rout, I concentrate the fire of the surviving Comets and M10s on a platoon of Tiger 1s. 8-1.
Second Game, Eddie Turner with German Bulge
What’s worse than encountering three King Tiger 2s in the first game? Meeting six in the second, led by General Eddie Turner, one of the UK’s most skilled players, part of Team UK at ETC, and the cause of my defeat at Warfare 2022. Moreover, the omens weren’t great, considering that the lists used in 2022 and today were practically identical. Eddie has a tank formation with an HQ King Tiger 2, a platoon of two King Tiger 2s, and a platoon of three King Tiger 2s totaling 49 points, perfect to be kept in reserve. A new addition is a lethal anti-infantry Sturmtiger and a scout platoon. All equipped at 3+, but that’s not a big problem when there’s no cannon that can bother you throughout the game! Here is his list.

I think I could print and paint this very short list on a weekend. Could be a paint challenge!
We both engage, and the scenario that comes up is Dust-Up. Fortunately for me, we’re at table 1, the only “citizen” table with many buildings where Eddie, lacking infantry, cannot enter. Cleverly, I placed an objective in a building, seemingly irking Eddie, who deploys an imposing amount of Teutonic steel around it. I position the “big” infantry platoon between the two objectives I have to defend, HQ and the small platoon + Kangaroo projected into the empty quadrant on my right thanks to my scouts’ Spearhead, and the M10 platoon on the far left.
The plan is to position the Comets on the right in the future, forcing Eddie’s tanks to expose their rear to either the M10s or the Comets. I hide the useless Wasps as far away as possible because Eddie is already skilled, and it doesn’t make sense to give him easy points.
The target is the Objective I subtly put inside a building where Ed can’t enter with his Tiger IIs, too big they are.
In the first turn, I launch the M10s on the left, a maneuver to which Eddie responds by moving the King Tiger 2s onto the field to present their fronts to my 17 PDR guns. On the right, I rush the infantry towards the first of three buildings that will allow me to control the objective cunningly placed in a house. Eddie catches on and makes a very intelligent move: he places the Sturmtiger’s range on the second building, where I plan to enter – according to the plan – in the next turn.
In my turn, I decided that instead of running under the lethal bombardment of the Sturmtiger towards certain death, it’s better to load the troops onto the Kangaroos and with an “L” maneuver position myself in front of the building with the objective. Naturally, I also deploy the only smoke barrage I have because otherwise, with a bit of luck, the Sturmtiger could have re-targeted the infantry platoon and wrecked them in one shot (with AT 5 and firepower 2+ with Brutal). At this point, Eddie decides to counter me, and with the HQ King Tiger 2 he surpasses the smoke barrage to emerge and shoot at the Kangaroos – just one shot, which also misses.
In my turn, the Comets arrive from reserves, and two of them manage to run far enough to aim at the vulnerable side of the HQ King Tiger 2: unfortunately, I only bail it, but the Kangaroos were lurking nearby, and a brave Canadian soldier disembarks from the transport and takes out the still dazed HQ – Eddie forgot that the British Bulge Kangaroos have a special rule that allows them to disembark infantry to assault after moving. Eddie’s defence line is now too short: the platoon of three King Tiger 2s that entered from reserves must position themselves in front of the objective in the house to prevent me from immediately winning the game, and the platoon of two KT2s must rush to the other objective to guard it.
The encircling maneuver of the M10s and Comets can then be finalized without the risk of Eddie trying to capture an objective: the M10s shoot at the platoon of three King Tiger 2s with no significant results, while the Comets, true British steel, flank the two exposed King Tiger 2s on the most exposed objective and blow them up. 8-1, and revenge, sweet revenge!
Third game, facing Harry Nicholson with Tank Formation British Bulge.
I had already played with Harry last year at Warfare, and it had been a very enjoyable game. Now, he’s using a very interesting list with a formation of British Sherman tanks, where each platoon boasts at least one FireFly with a 17 PDR AT15 gun, a support mortar platoon, the inevitable scout, and a Frost Para platoon that it’s better to stay away from. So, in short, 18 Shermans (including 6 Fireflies) against four M10s, 4 Comets, and three Crocodiles. I’m starting to feel a bit outnumbered! Here is his list.

Steel and AT15, with lots of Shermans. Still think the additional 4.2 inch mortars is not totally legal, but it’s allowed in Forces.
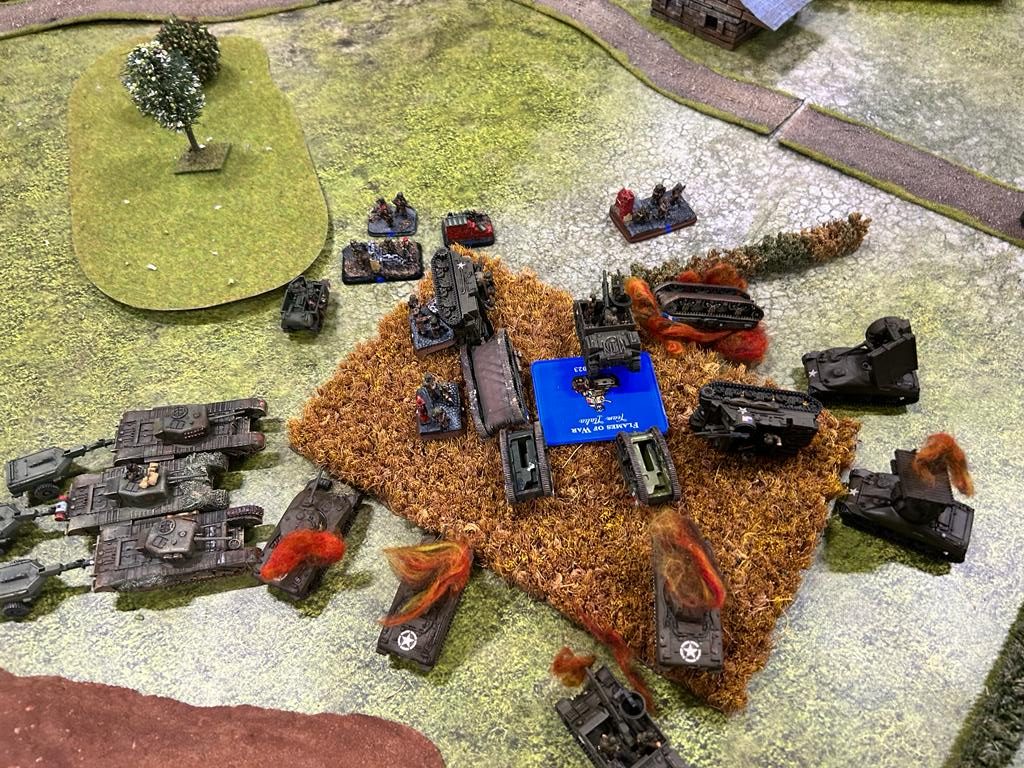
We both attack (again!) and play Free for All. We place the objectives – all somewhat exposed due to the lack of houses on the table. I position the M10s on the left flank, the Comets in the center, and the Crocodiles in the woods on the far right (horribly missed in my photo below). Harry seems to focus everything on my right side, where he concentrated three platoons of Shermans and the Frost’s Paras.

Uh-oh. Too many tanks around. I know we are allies but I should have taken more Rams and less flamers.
The tank duel sees the 4 Comets hidden by the row of trees dueling with eight Shermans in the open: fortunately, the armor of the Comets (7) is resilient enough against the AT10 shots from the Shermans, while those from the Firefly are lethal. To aid the Comets, I send the Crocodiles, whose three AT 10 guns against the English Sherman’s armor 6 are quite dangerous.
After two or three turns of exchanging fire, Harry gathers all the surviving Shermans and puts them behind the hedge, allowing them to shoot at me without protection against the two remaining Comets. One fails the armor save, and I save it using the Lucky re-roll – a wise decision!
In my turn, I send out a soldier on a potentially suicidal mission and place him on the flank of the outermost Sherman. I open fire with the two remaining Comets and the three Crocodiles, destroying one Sherman and bailing out three. I assault it with the soldier – of course, I positioned one of the shots on the tank closest to the soldier, which remained bailed out, and when I win the close combat, I automatically destroy the remaining bailed-out tanks.
Meanwhile, I launched the three Wasps toward the objective behind the Paras: on the way, I flame them to pin them down, and then head at full speed near the objective. Many players do not know that only the Crocodiles cannot secure objectives, while the Wasps absolutely can.
Harry realizes the risk and sends his last two Shermans in good condition towards the Wasps. He fires and bails out two, which don’t remount, but the platoon remains in place – brave Canadians! At that point, I group all the tanks that can shoot, target the two remaining Shermans presenting their rear side, and take them out. 8-1.
Fourth game, against Ian Brook with US Bulge.
I met Ian last year when he organized the FoW tournament at Warfare 2022, and we immediately got along well, so it’s a pleasure to play with him. On the other hand, he’s also one of the strongest English players, a regular presence at ETC, and consistently ranks well in the English championship, so it’s not an easy game at all!
He plays with a Tank US Bulge list: 14 Shermans with a 76mm gun and an AT13 upgrade card, and another four with 75mm guns. To fit all these tanks, however, he has to downgrade their morale to 5+ using the Ivy Spearment card. Completing the formation are two platoons of Priests, a mortar platoon on M4s, a Sherman Calliope platoon, which is a hefty four artillery units, and a Rifle Infantry platoon from D-Day, with rather decent morale. Also, a very good idea: the Creigh Abrams card, that allows every US unit in range to do two special moves and also grants the Spearhead trait to the HQ. Here is his list.

Really like this list. I’m already copying it to use in the next Italian tournament. Imitation is the best form of flattery, Ian!
We both attack (again!) and play the Probe scenario, where the die decides that I defend, and Ian attacks. My reserves are Delayed, while his are Immediate, which means I’ll have to play several turns with 4 tanks against 20. Fortunately, I can set one unit in ambush, namely the M10s. The Crocodile and Comet will have to stay in reserve.

I totally missed the left flank with this photo, but imagine a big hill and the rest of the big wood, and behind them three lines of Canadians. The real action is on the right.
On the left side, the situation is somewhat acceptable. The forest and hill behind which the objective I need to defend is placed form natural protection, also from the spotter of the artillery. I position there a large infantry and a well-hidden Wasp. On the right, on the opposite, we’re quite exposed. While it’s true that the objective is close enough to a couple of houses, excellent for my infantry, the rest is only a couple of hedges between me and 20 American tanks. Ian decides to deploy the Shermans in the field on the left – a platoon of 76mm and the HQ where a Jumbo dominates, and immediately attacks me.
As expected, I make my M10s appear behind the hill, placing 8 shots on the advancing Shermans. Unfortunately, only one blows up, while all the others survive. However, Ian has achieved his goal: to make me place the only ambush in the left corner, leaving the right one practically undefended. He withdraws the three 76 Sherman, waits for a couple of platoons of Shermans to come in from reserves, and in the meantime, positions all four of his artillery range-ins on the lone remaining infantry on the right.
I do some calculations and realize that this infantry, from the next turn’s repeat bombardment, has less chance of survival than a cat on the highway (a famous saying among Romans). Dead for dead, I load them onto the Kangaroos and launch them together with the Wasps towards Ian’s objective, which is in the middle of a wheat field protected only by the two units of Priests. Ian is undeterred and sends in the just-entered Sherman 75s towards the now abandoned objective, where he tries to cross the hedge with a cross-test.
Fortunately for me, the cross doesn’t succeed, and the tank remains more than 4″ away from the objective, granting me an extra turn. My reserves arrive – the Comets, but of course, from the wrong corner (and to bring them in, I have to use the Lucky card).
The four Comets run and shoot from the central hill and destroy one of the two advancing Sherman 75s towards the objective, leaving the commander alone as the other two stayed put to shoot at the Kangaroos from behind (Ian taught me a new English word – “your Kangaroo blooming things kept saving!). Ian performs the Last Stand test, but the “4” on the die is not enough – having downgraded them to Ivy Spearhead, and the platoon leaves the field. The two objectives are now safe!
The crowded situation on the objective at the end of the game. The job was done by infantry, the Churchills arrived just at the end.
The action moves to Ian’s objective, where my Canadian infantry + HQ assault the remaining Priests after the flames from the Wasps, but they are simply overwhelmed – evidently, the Priest’s commander was Patton’s cousin! Ian regroups everything around the objective he can: four Sherman 76s, three remaining Priests, the three Calliopes – they are just missing Captain America, but he was probably already in charge of the feisty lone Priest that won the first assualt.
I fortify the Canadians, and manage to repel the first charge. In the meantime, I regroup the Comets and M10s, which by now have defended the objectives, and shoot from a distance against Calliopes and Sherman: once again, I bail most of them, and Ian fails the remounts and last stand tests at 5+. Finally, I hit from afar the last unit remaining in the formation, the M4 mortar, and the formation collapses. 6-3 and a splendid game, one of the most dynamic and enjoyable I’ve played in recent years.
Fifth game, facing Graham Willmott with German Bulge.
What better way to conclude the tournament than facing off against the Captain of Team UK, one of the strongest players in the world? Graham plays an endless German Bulge list, with 19 units and two formations. Two platoons of Panzer IV/70, two batteries of 88s, a monstrous amount of elusive small scouts. A tough nut to crack. Here is his list.

19 platoons, 57 vehicles, and guns, and 14 infantry bases.To print and paint this list, I would need the entire Xmas holidays!
Obviously, we both attack and the mission is Free for All – no reserves and no special rules. Since I’m at 30 points and Graham at 24, he knows he must secure a total victory to win the tournament. Consequently, he massed 90% of his army on the left toward the most exposed objective, leaving the 88 batteries in the center to dominate the battlefield and two infantry units on the objectives.
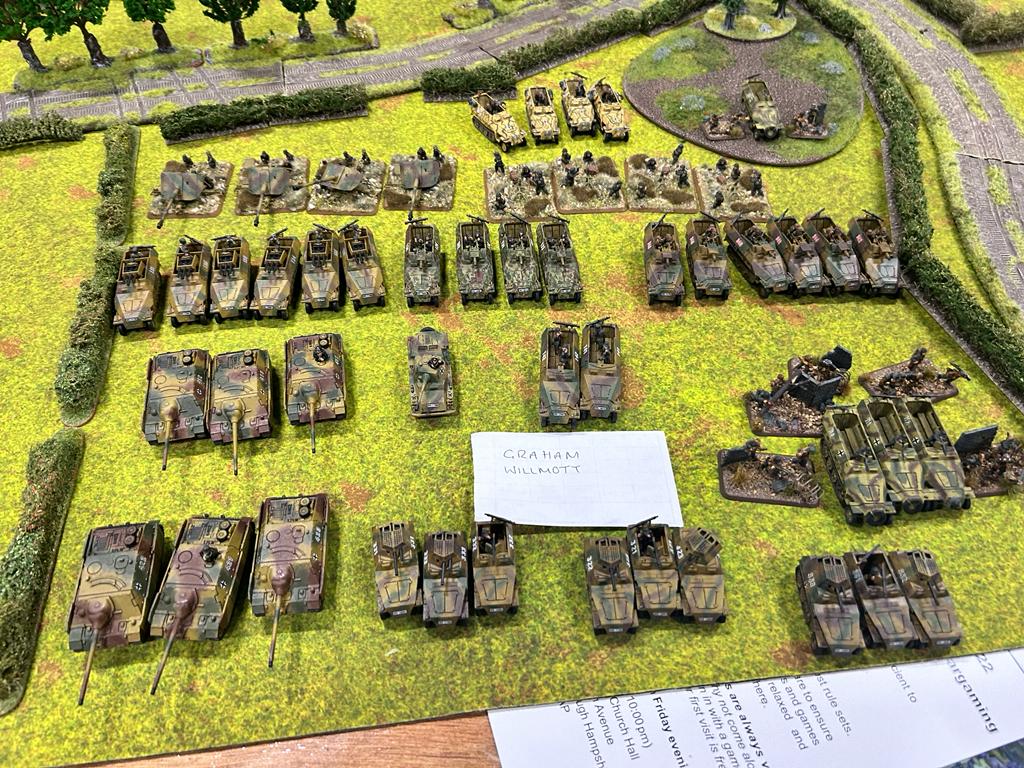
Forgot again to take a photo of the table. This is Graham’s army: just imagine all the tanks and the scouts against my M10s and Comets, with only the valiant Canadese infantry resisting this assault.
Seeing his deployment, I position Comets and Crocodiles on the left, along with the large infantry, M10s on the right with HQ and the ‘small’ infantry platoon on Kangaroos, and a platoon of Wasps on each side. On the first turn, Graham cannot launch smoke barrages, so he needs to wait in cover, and this allows me to reorganize. I swiftly move the M10s to the left side, giving a lift to the HQ that will certainly be more useful on the exposed side under attack, and prepare a welcome committee.
On the second turn, Graham orders a total assault, and my objective is immediately 10″ away from five or six platoons of SD KFZ with AT9 Gun, Scouts, and the two platoons of Panzer IV/70. I focus fire on the SD KFZ with Guns, which are particularly dangerous, especially on the flank, and on the triple AA unit, which poses a tremendous problem for the infantry (luckily, Graham lacks flamers).
Unfortunately, I make a mistake, and Graham manages to get a line of sight on my M10s, wiping them all out with a volley from the Panzer IV/70s. Then I’m forced to engage the Comets to repel the onslaught of German cars moving like a swarm around my objective, and I also lose those under the merciless fire of the Panzer IVs. Having cleared the objective of my tanks, Graham prepares to assault the nearly alone remaining infantry.
To assist them, only the Crocodiles remain, which alone have destroyed the remaining scout cars and an 88 platoon, also repelling the infantry. Their turrets turn and fire at the rear of the Panzer IVs, destroying three of them. In the final turn, I assault the flank of the remaining Panzer IVs with the infantry and either destroy or repel them (they only shoot frontally), but Graham manages to repel me with the last remaining Hetzer, as my HQ-assisted Canadians roll 1-2 for the counter-attack! Fortunately, at the start of Graham’s turn, the surviving Hetzer, the only unit close enough to contest the objective, fails the 5+ last stand, and the game ends in a Solomonic 3-3 draw.
And now, some photos!
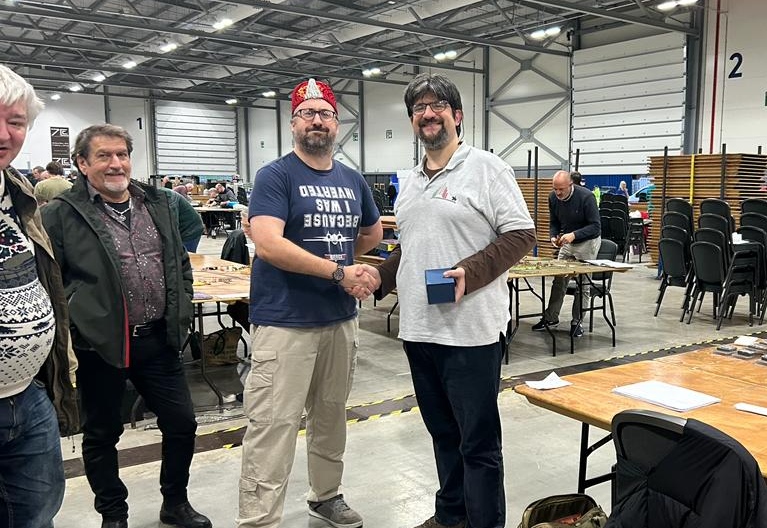
This is me, smiling like a teenager with a Warfare first prize in my hand! On the left with a Fez, my friend Eddie Turner, tournament organizer, regular writer on the splendid Breakthru Assault website, and unmissable voice of the Shoot and Scoot podcast, both unmissable if you enjoy FOW.
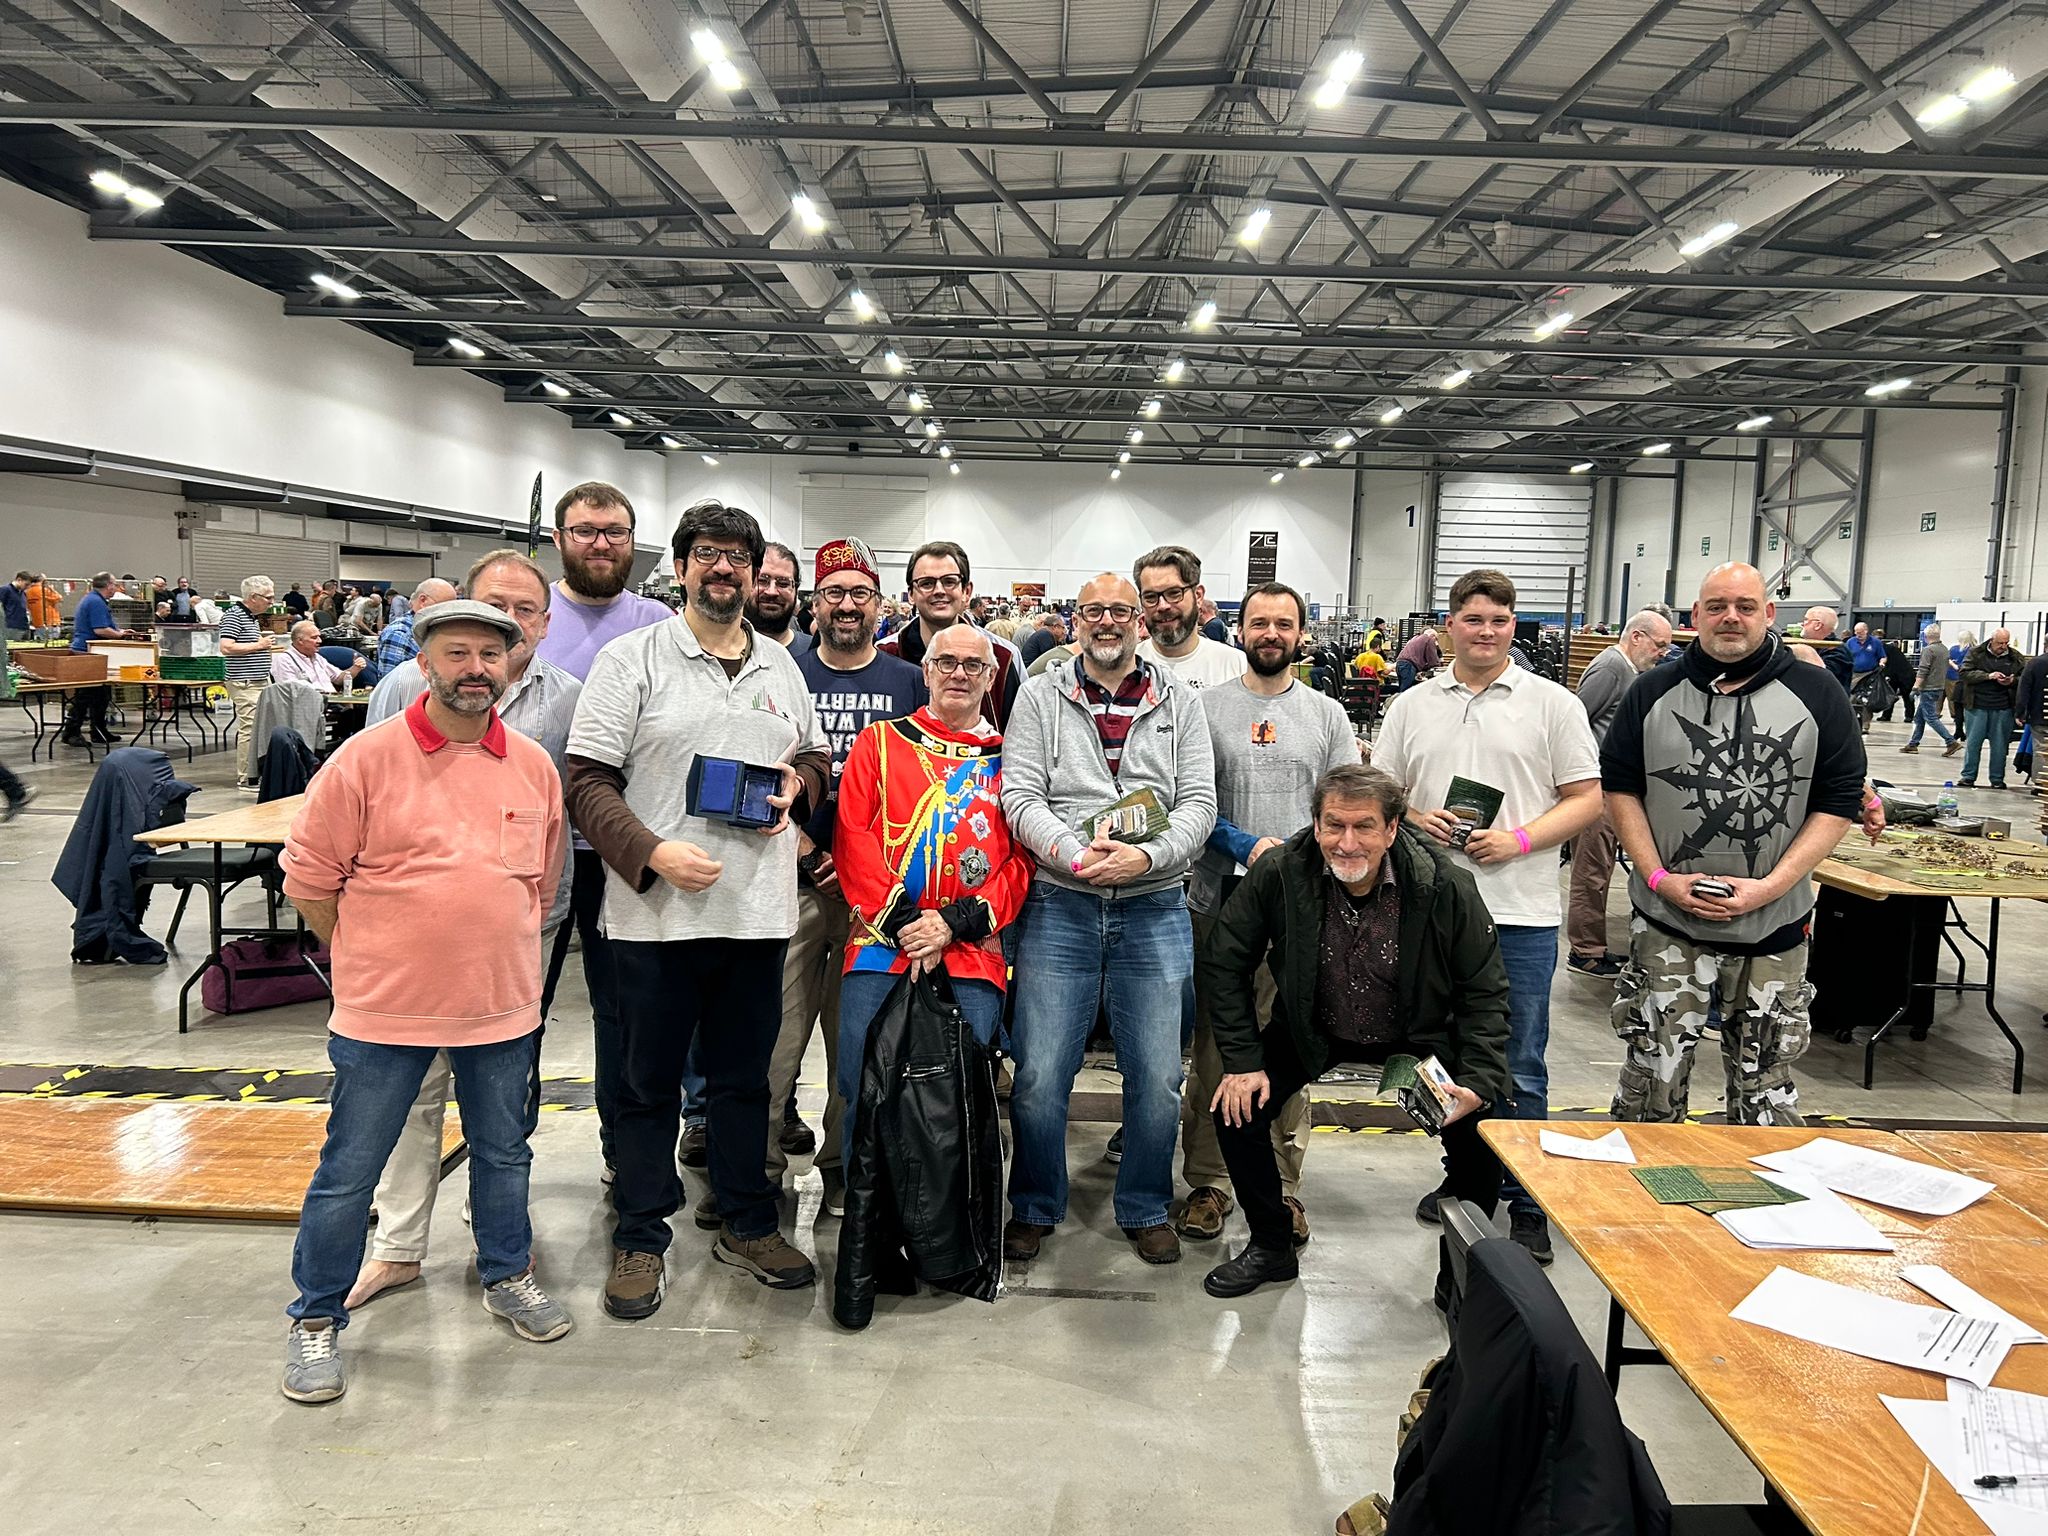
Some of the players taking part at the Warfare Tournament. Martin Turner was second and Graham Wilmott came up third. Alex Trenchard won the well deserved best-painted army award with his British Churchill army.
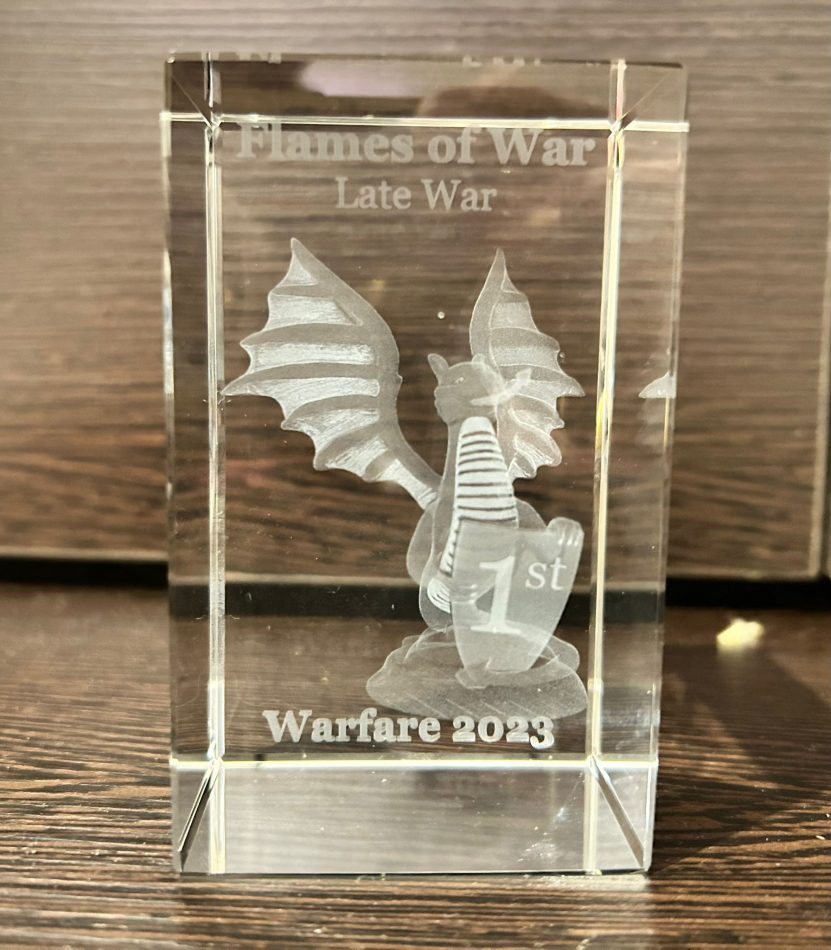
My prize, really happy and proud to have it at home!
Some of the armies on display

Martin Turner’s Hungarian force: Second in the top 3, and he is also a very nice chap.
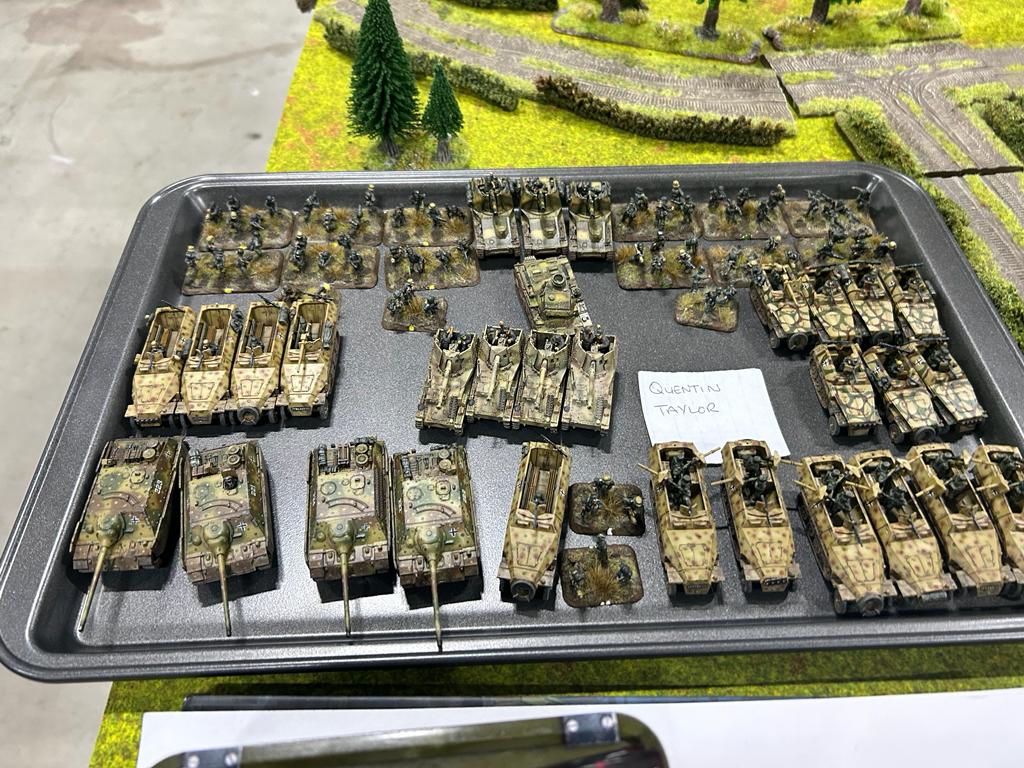
Quentin Taylor’s German force. Never played with him so far, too bad. I like this composition, happy to avoid his flamers.

Stefano Parlanti’s German force. We are friends since the 90s, and I met him here at Warfare!

Alex’s army is very interesting – I was also lingering on a Churchill formation. He chose the Guards from Bulge, I’d go with the cheaper Fortress Europe. He won the best painted army award.

Harry’s British force with an impossible number of Shermans. Really love this list, with many Firefly tanks.
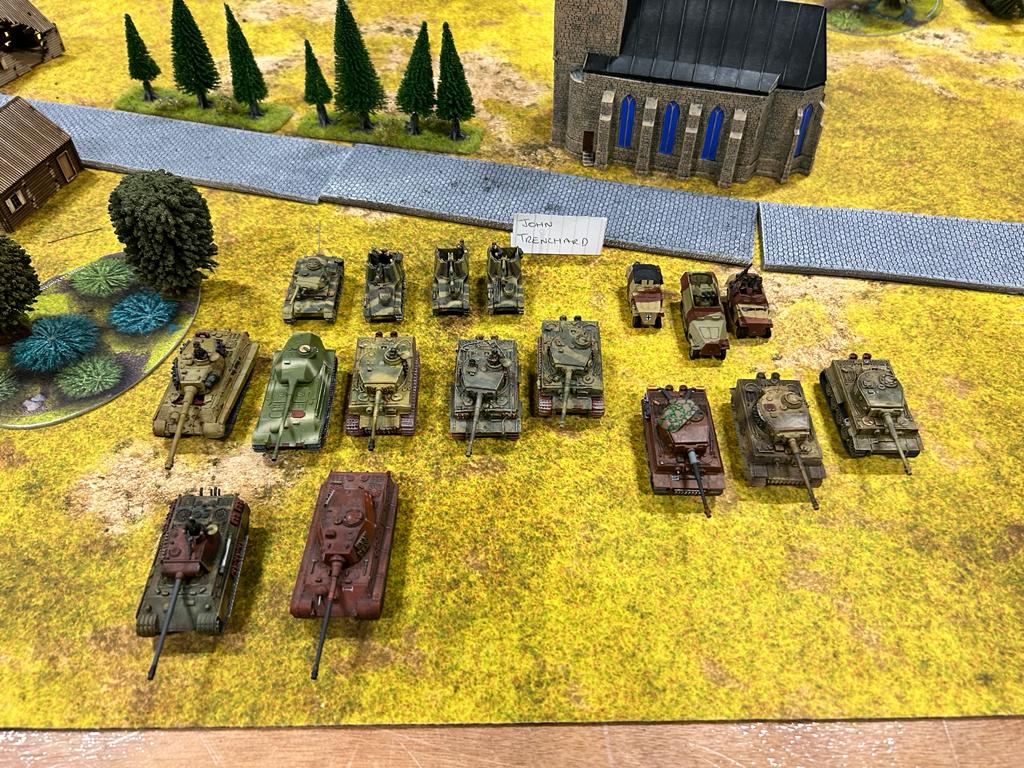
John’s impressive German tank force. Just need to sneak in some infantry and could work really well, in my opinion.

Harrison’s Comet Force: you can guess, I love it!
Some photos from Warfare


Paolo,
Great article. I really enjoyed reading about your adventures and how each game went. You’ve inspired me to put this event on my future international travels wish list.
Also you’ve done fantastic work on your models. Those new Comets are really top notch and the other models in your army a gorgeous as well.
Hopefully team Landsknecht we will be able to return to ETC 24 and we’ll be able to see you again.
Cheers
Jon Holland
Thanks Jon 🙂 hope to see you soon!
Sorry to correct you, but – while the standard of painting was generally very high, and I think I voted for Martin’s army myself – in the end, I snuck in with best painted with my Churchills. I think maybe on the strength of the Dutch Resistance, who were considered unusual, and my Panther Cuckoo objective?
Hi Alex, sorry for my mistake. Just edited and corrected.