Vehicle identification and standard markings on Danish Vehicles
By Morten
In this article I will talk about markings used on Danish Vehicles in the 80s and 90s.
Most of these have been in use since the 60/70s and are still in use to this day, although with some variations and updates.
For some markings there are Army standards that needs to be obeyed, and are generally placed on the same location on all vehicles, although slight variation in placement could occur, because they were put on the vehicle by either the crew themselves or the mechanic echelons on base.
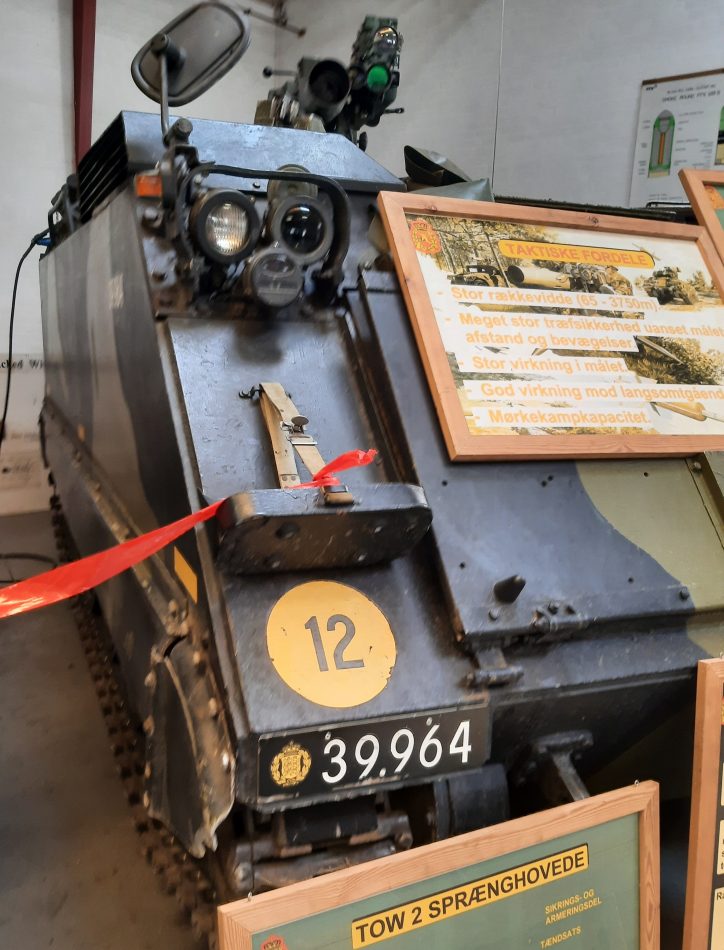
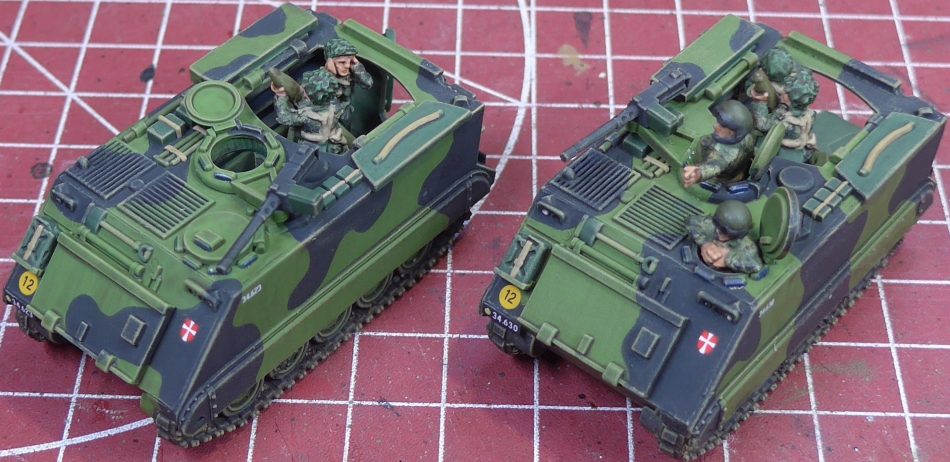
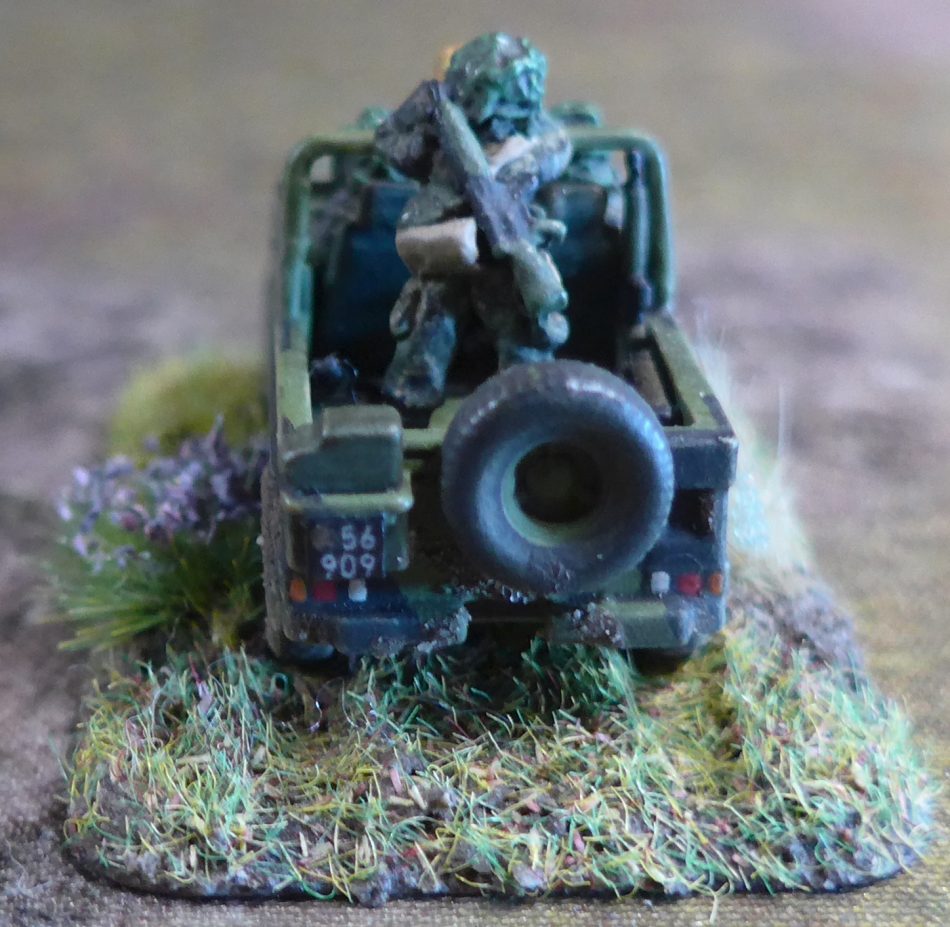
Let’s start with the “easy” parts that are present on all vehicles: License plates, Vehicle numbers and weight classification (for heavier vehicles).
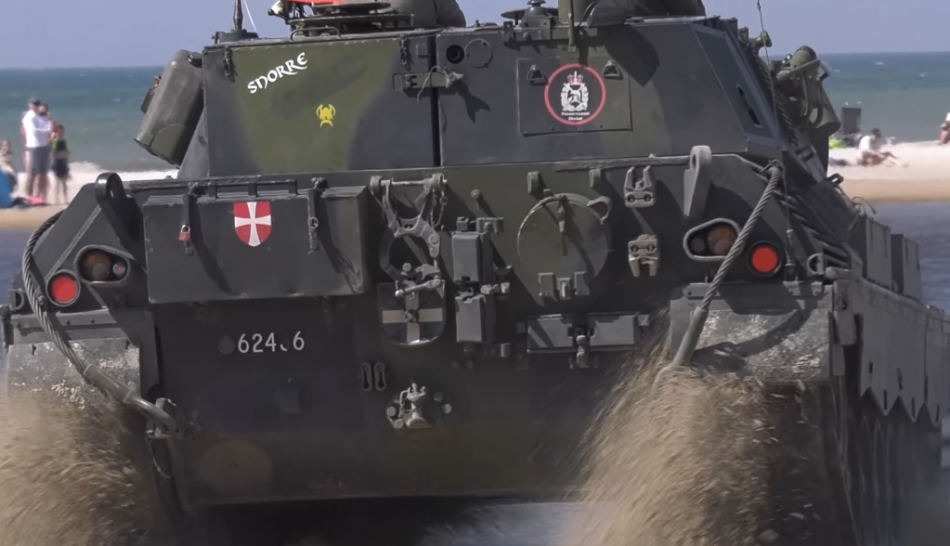
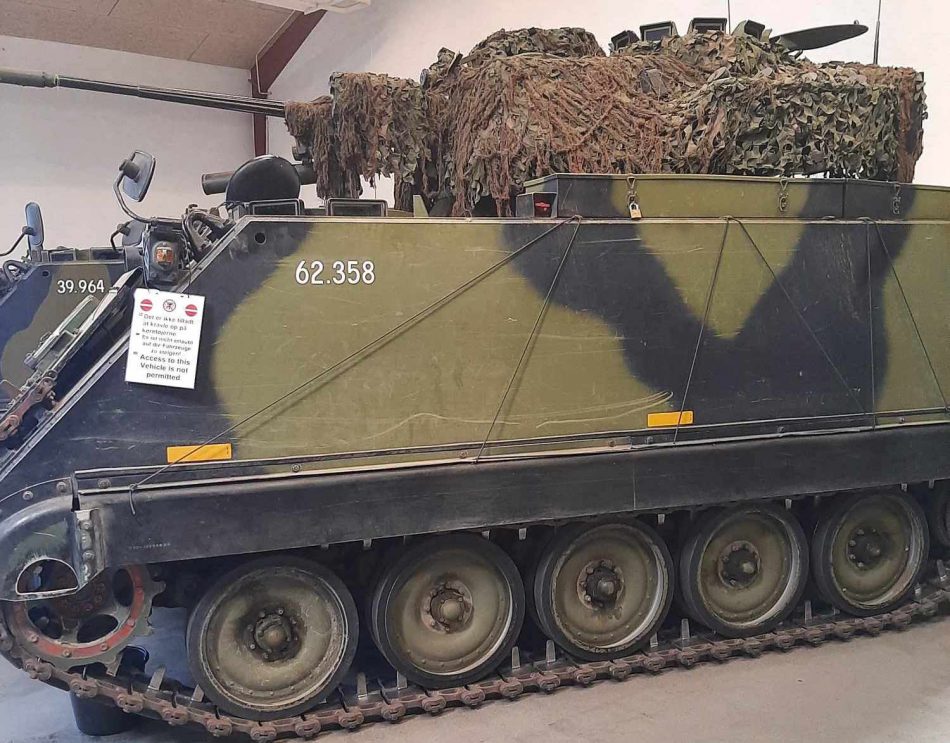
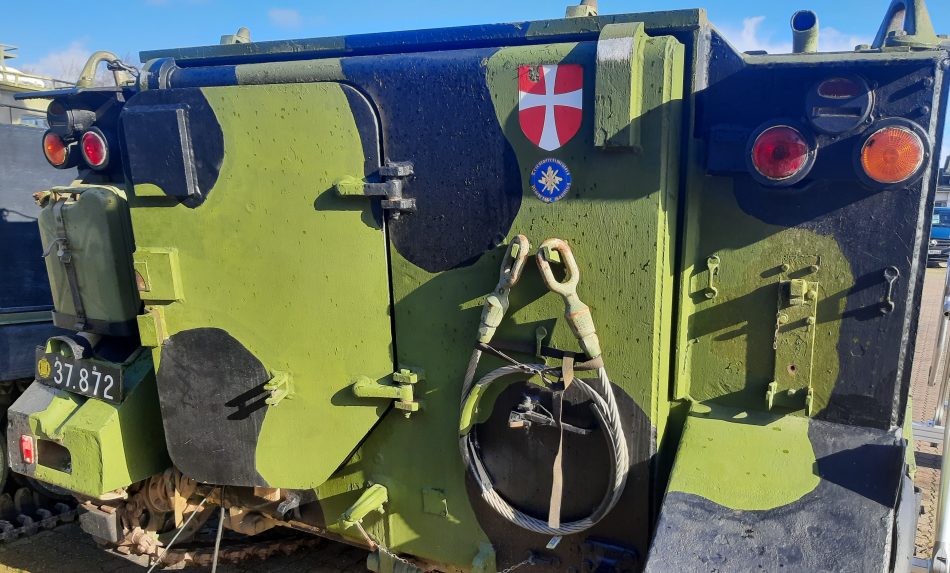
The license plates are mounted both front and back of the vehicle. Usually the right side front and left side rear on M113’s and its variants.
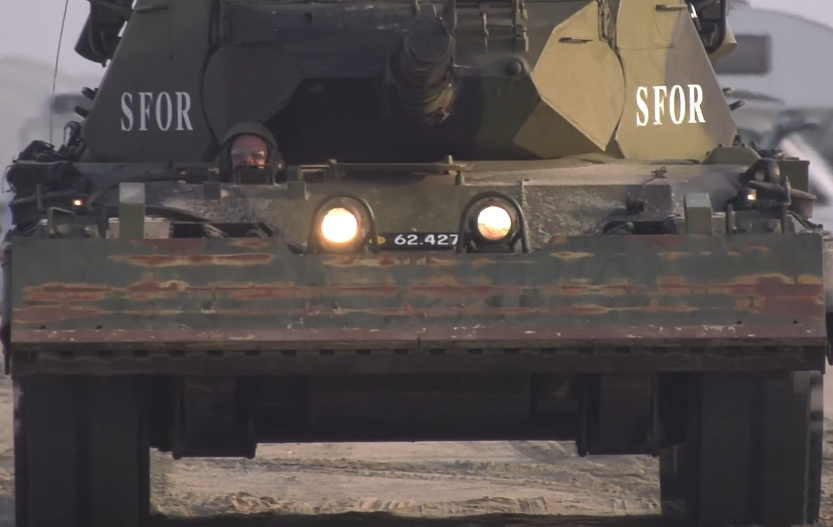
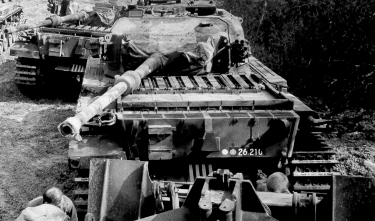
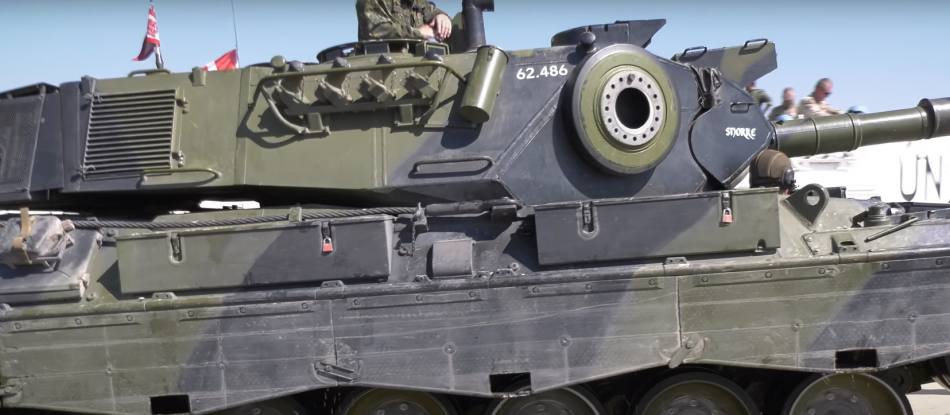
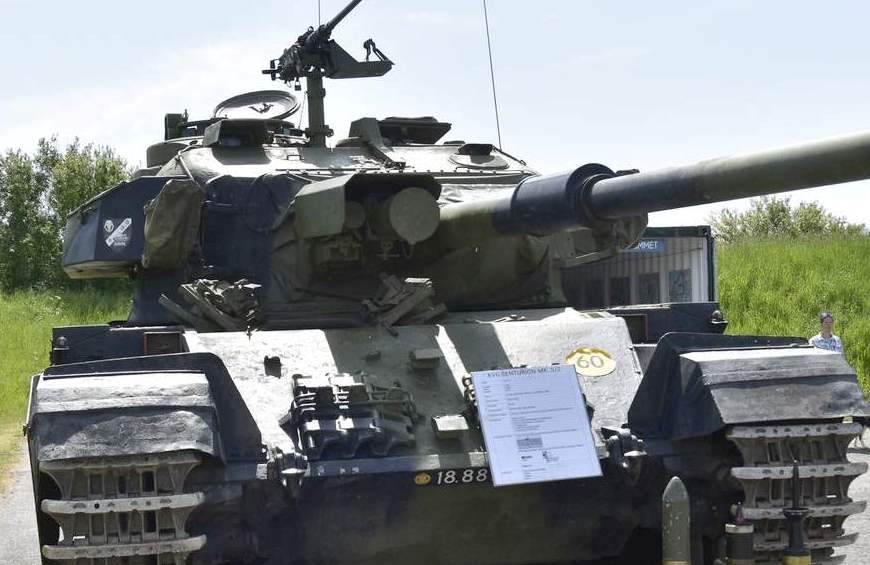
For the Leopards and Centurions it would generally be on the center front of the glacis plate, either high or low, depending on if it had a dozer blade or not. On the rear leopards had it on the left side and Centurions on the right, although I have seen a few rare examples of it being mounted in the center rear.
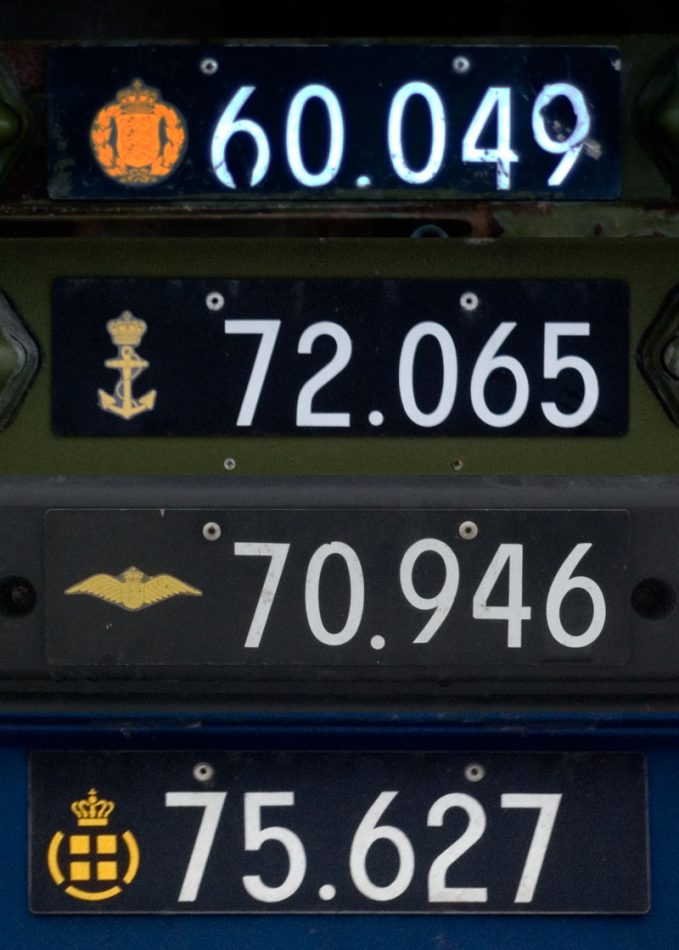
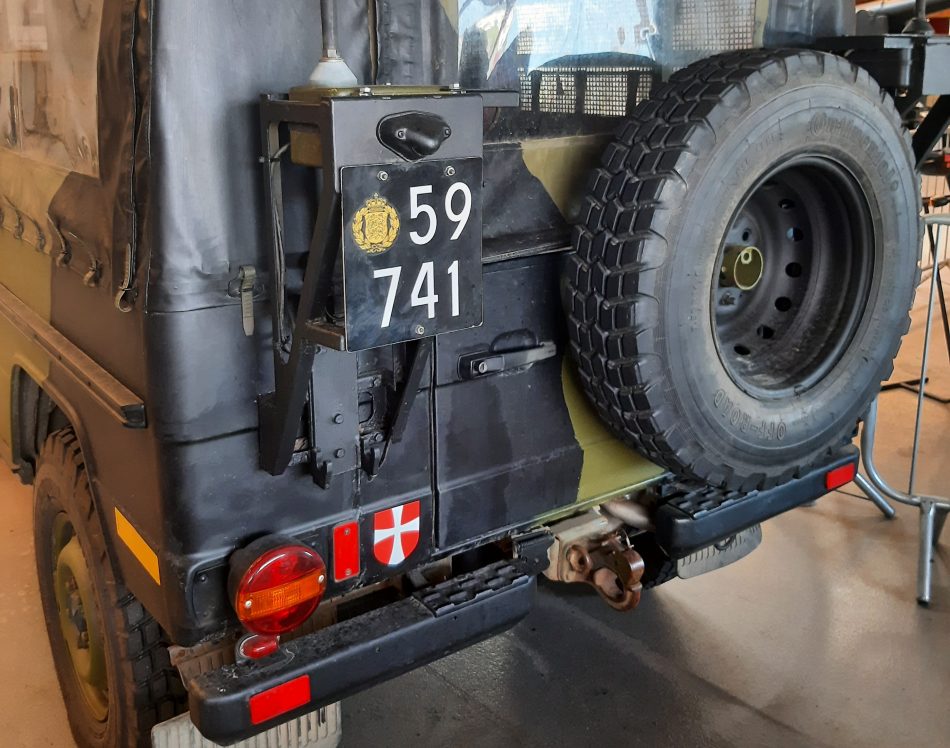
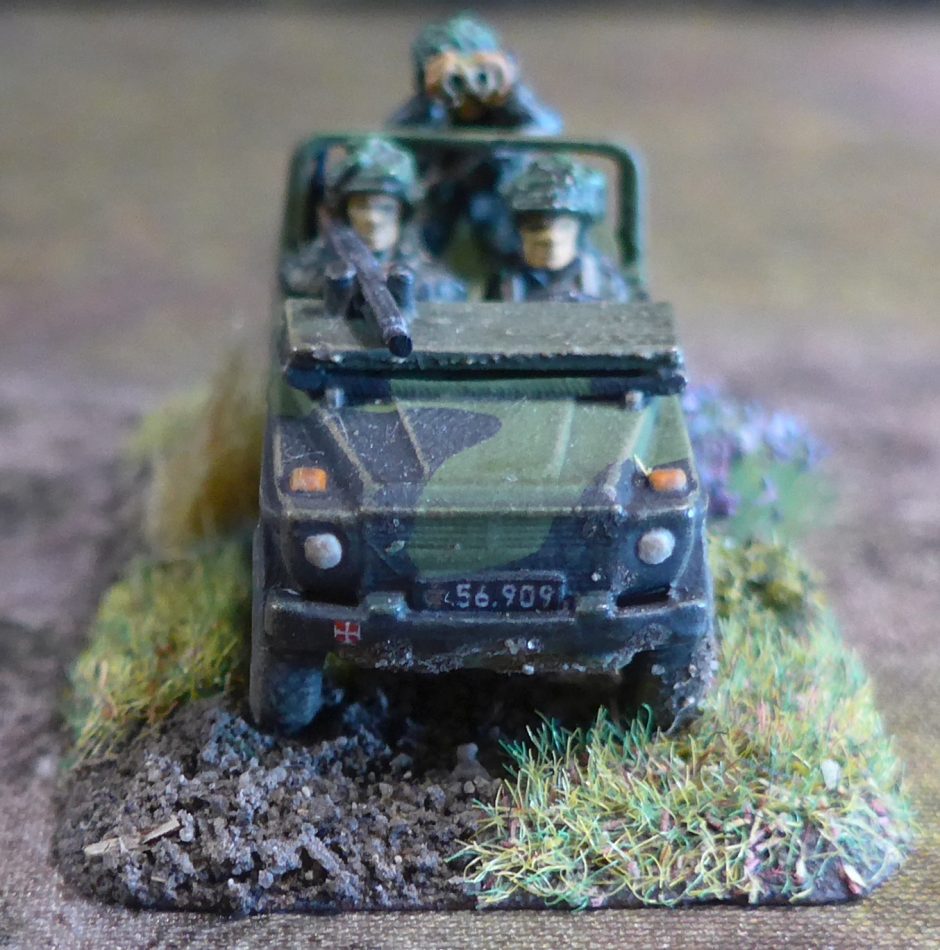
The license plate consists of a rectangular aluminum plate painted black with the Army crest in yellow on its left side followed by the vehicle numbers in white. These were all applied as stickers.
In a few occasions though, the army crest and numbers were applied directly to the tank, omitting the aluminum plate.
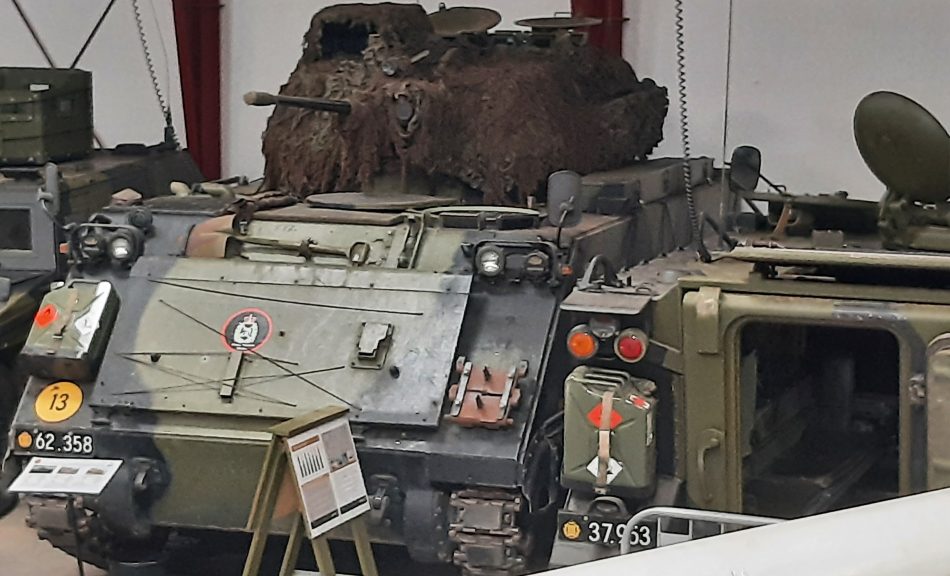
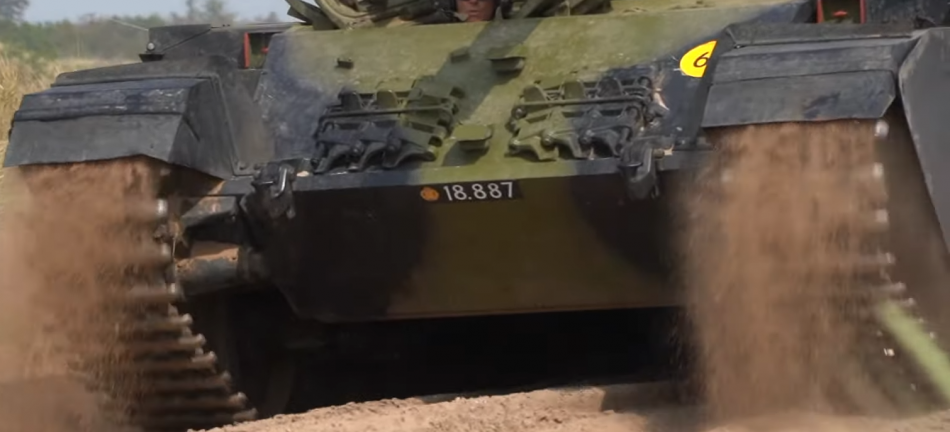
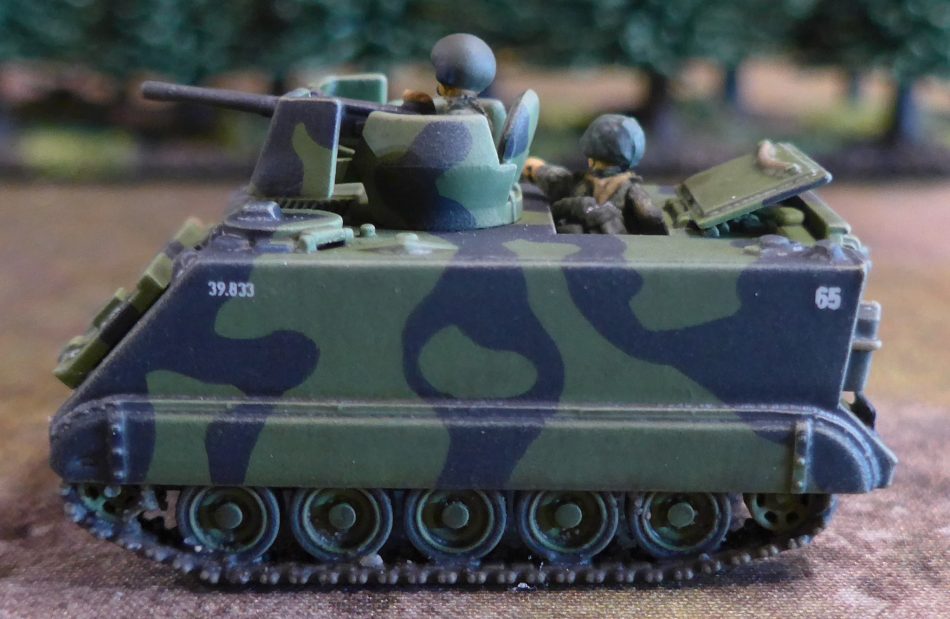
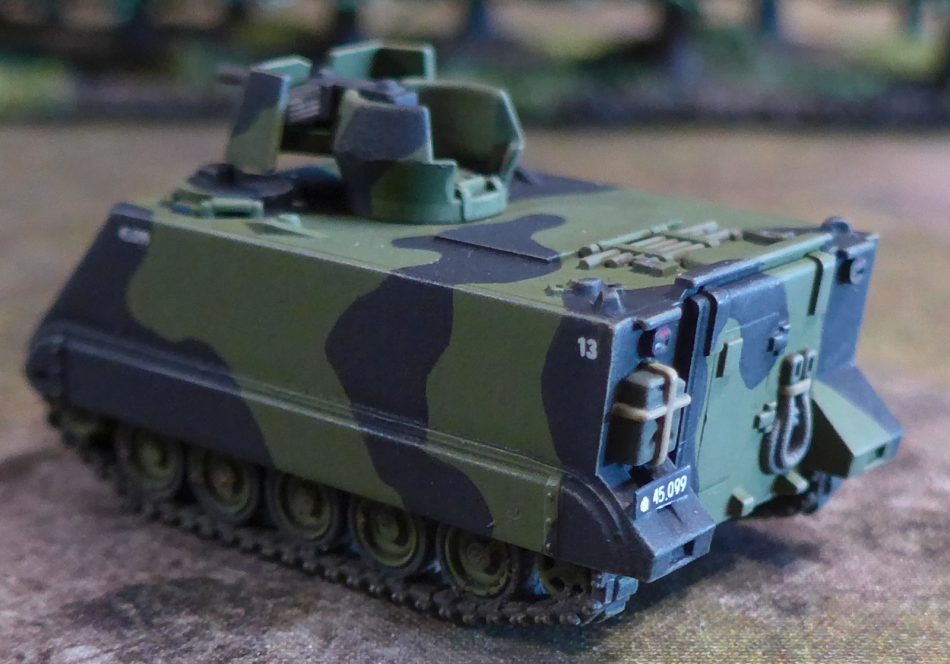
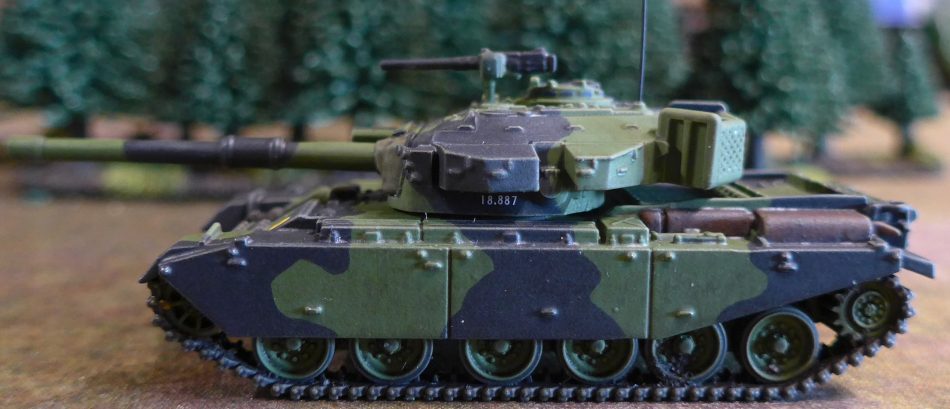
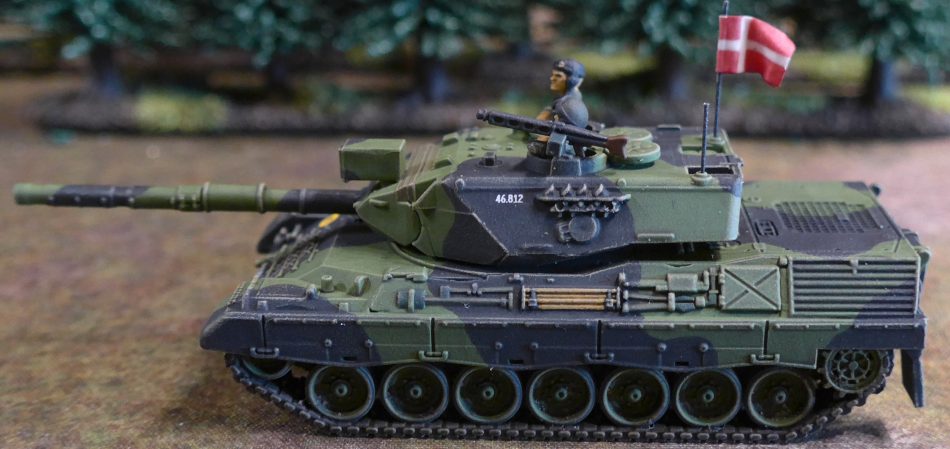
On the sides of the vehicle, usually to the front of the main body, would the vehicles number be applied with the same white number stickers, as on the license plate. For tanks, the numbers was usually applied on the turret sides, either to the front or rear.
As a rough “rule of thumb” the first two digits in the vehicle number +30 indicates the year the vehicle entered service. Eg. 92.358 entered service in 1992.
This system was introduced in 1971 and is still in use today.
Numbers starting with 99 is reserved as trial plates, for test vehicles.
NB: The Army, Airforce and Navy had their own crests on their license plates from 1971 up until 2008, where all crests were gradually replaced by the Danish Joint Services crest.
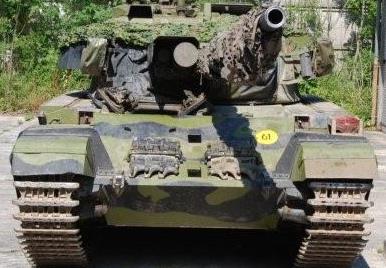
The weight classification markings was placed on the front of the vehicles, usually on the right front side, although it have been seen on the front left side as well, but mostly on the Centurion’s and light trucks.
This is a round yellow sticker with black numbers.
Here are some examples of the weight classifications:
- M113 and M106/M125: 12
- Leopard 1: 47
- M109: 25
- Centurion: 60/61 (I have tried to find a reason why the weight varies, but have been unable to come up with a consistent conclusion. Both the 105mm and 84mm versions have been seen sporting both weight classes)
- PNMK M/92 (M113A2 Wildcat): 13
The last thing, that a lot of vehicles have, is the Danish Mantova Cross.
There was no real standard as to where these were added or in what size (there were 3), but in general they would be added to either the front or back of the vehicles.
Be it fenders, turret baskets or whatever.
Now that we have gone over the standard markings, let’s dive into the more interesting and very diverse markings: Unit markings!
In Denmark, there was no definite rule on how the regiments and sub-units would mark their vehicles, but each regiment would find its own way to mark their vehicles so recognition in the field would be easier. As time went by many of these “homebrew” markings became more of a “standard” and would spread from regiment to regiment, but some still kept their own markings and some of these are even used today as homage to their origins.
The markings in the 80/90’s would vary from simple callsigns added to the vehicle, troop signature markings up to color coded shapes with numbers.
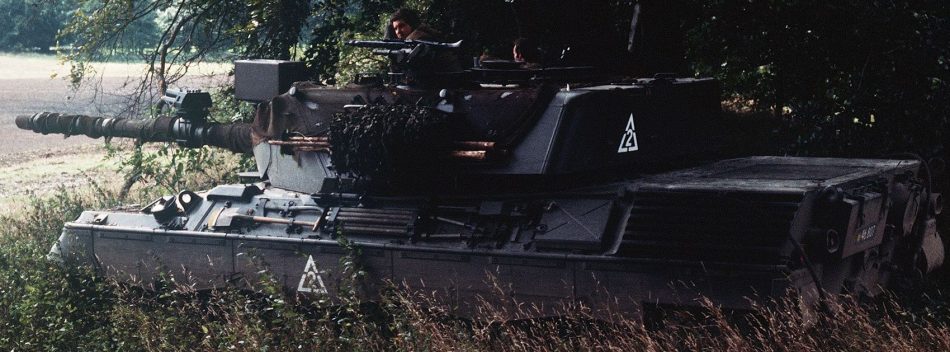
The most commonly known and used markings can be found on the Leopards of the Jutland Dragoon Regiment. This was an adaptation of the markings used on British tanks during WWII.
Below are some examples. Full credit goes to the book: The Leopard 1 in Danish Service, by Kim Hartvig Sørensen.
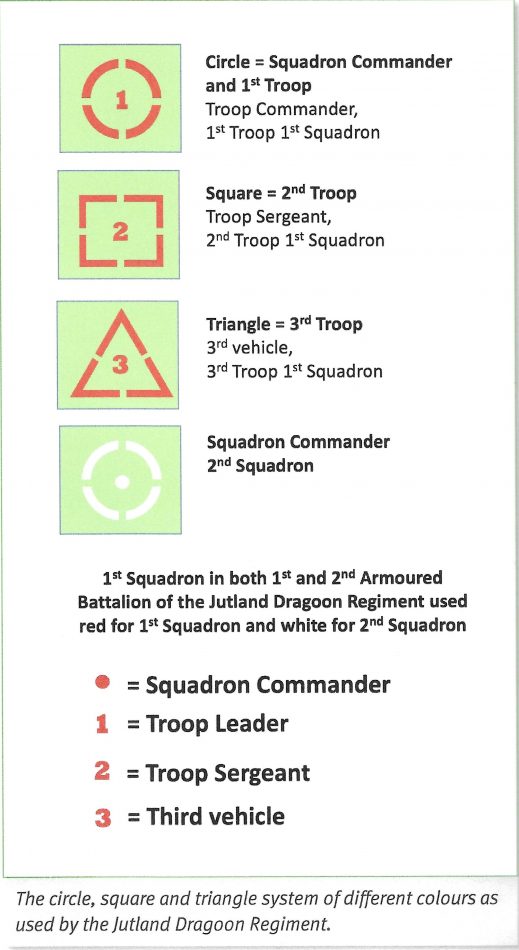
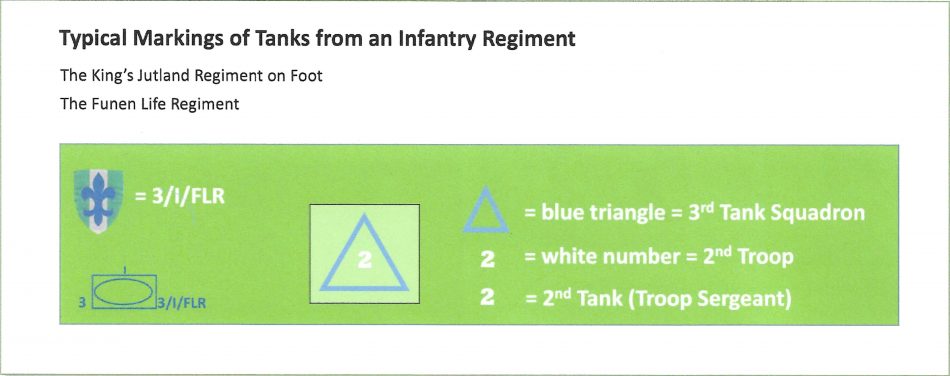
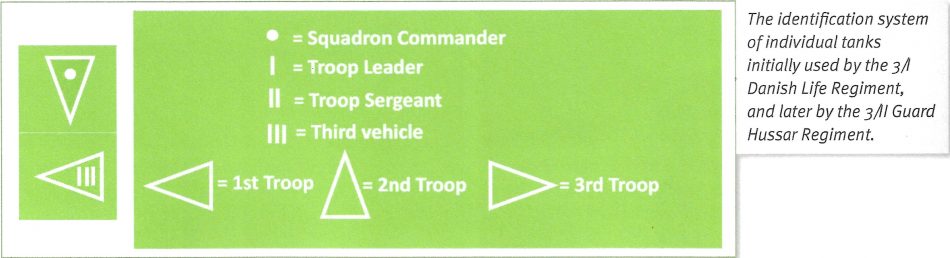
These identification markings would be placed on the rear of the turret, and in the early days on the side skirts as well.
Note the color codes as well. Denmark used colors to distinguish between units.
- 1st = Red
- 2nd = White
- 3rd = Blue
- 4th = Yellow
- 5th = Black
- 6th = Grey
- 7th = Green
- 8th = Violet
So lets say you see a tank with a white triangle, with the number 2 inside. This would mean it belongs to the Second Squadron, Third Troop/Platoon, and is the Second vehicle.
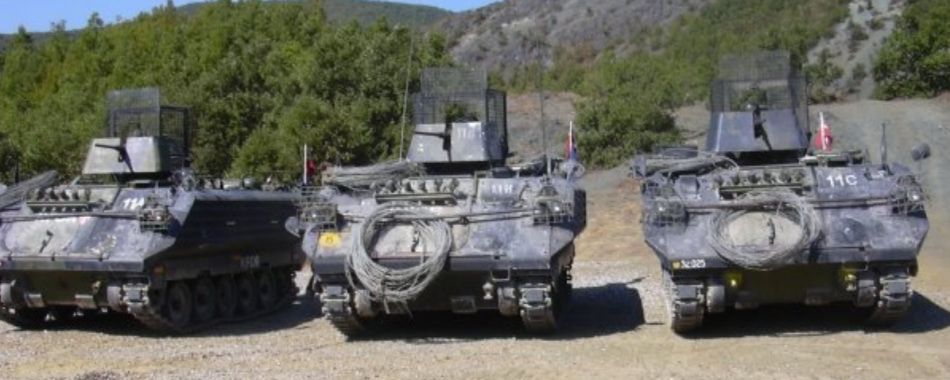
The most common identifying markings used by the Armoured Infantry companies, would simply be to add their Radio Call sign on the vehicle. This would vary from freely hand painted numbers, stencils and stickers, usually added on the rear or the sides, but could be added on other facings. Again, there was no real standard other than what the company or regiment had decided upon.
Most common Call signs used in Denmark at the time, thats relevant for marking your TY vehicles:
65 = Company Commander (HQ)
15 = 1st platoon commander (unit leader). Would usually ride along with 11
11 = 1st platoon 1st squad
12 = 1st platoon 2nd squad
13 = 1st platoon 3rd squad
And so on for the other platoons.
To distinguish between companies a prefix could be added in front of the call sign. This could be either a number representing the company itself, or a letter if it was a joint operation.
So again
113 = 1st company 1st platoon 3rd squad.
A12 = Alpha company 1st platoon 2nd squad.
Other variations of identification was seen as well.
My own unit back in 2007 in KFOR was called 11C for 1st company 1st platoon 3rd squad.
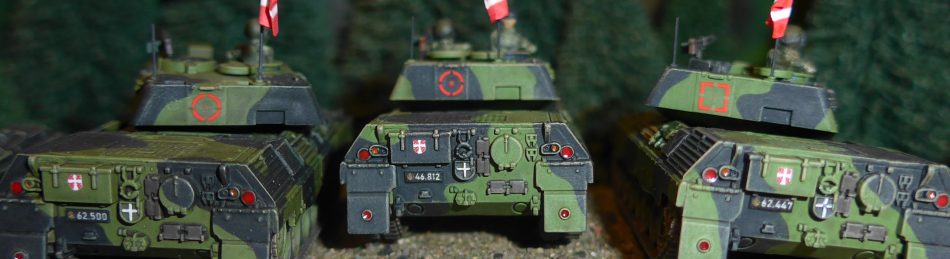
Now, let’s get on with how all of this information can be used to identify your units on the table, in a game of Team Yankee!
I have spent way too much time searching for the right decals to use on my own models, but I have finally come to a result I myself is very satisfied with.
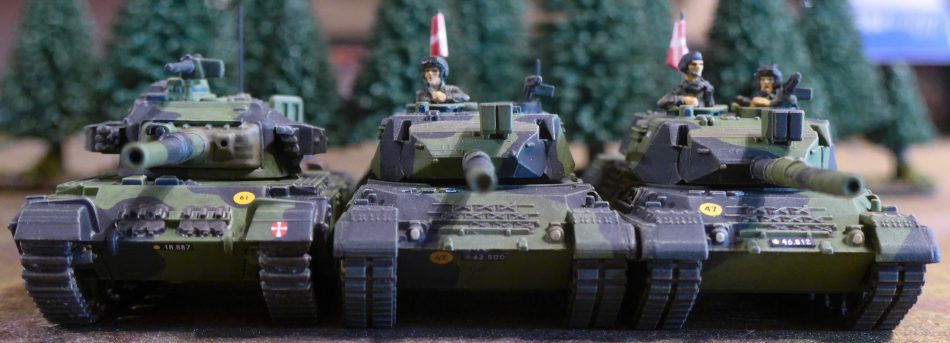
For my Leopard’s I followed the color, shape and numbers guide of the Jutland Dragoons Regiment.
The shapes I got from a company called Skytrex. They make decals for British tanks in WWII, so are perfect to use on my TY models.
The numbers though, was really tricky to get my hands on, as I needed them to be tiny enough to fit inside the shapes. These I happened to find on some old GW decals.
My first attempts at getting some License plates, vehicle numbers, Mantova Cross’s and weight classification, came from a local guy here in Denmark who goes by Skilteskove.dk.
He usually prints custom decals for model railroads in H0(1:87) scale as a side hobby, but was willing to try and make some decals for my 1:100 scale TY.
Other attempts, was to simply print the license plates myself on some thick paper and applying to the vehicles. This worked but details were a bit “fuzzy”
The decals worked well and especially the vehicle numbers were fantastic, but the rest suffered a bit in detail.
My latest decal experiment is truly amazing looking, albeit being slightly too big, as they are made for H0 scale, made by Lima November decals. A Norwegian guy living here in Denmark, who gets the decals printed by a professional company.
Only drawback to these decals, are the numbers, that I have to put on individually, which is a bit time consuming.
As of now, I’m using the vehicle numbers on the sides from Skilteskoven.dk, where the rest is the Lima November decals.
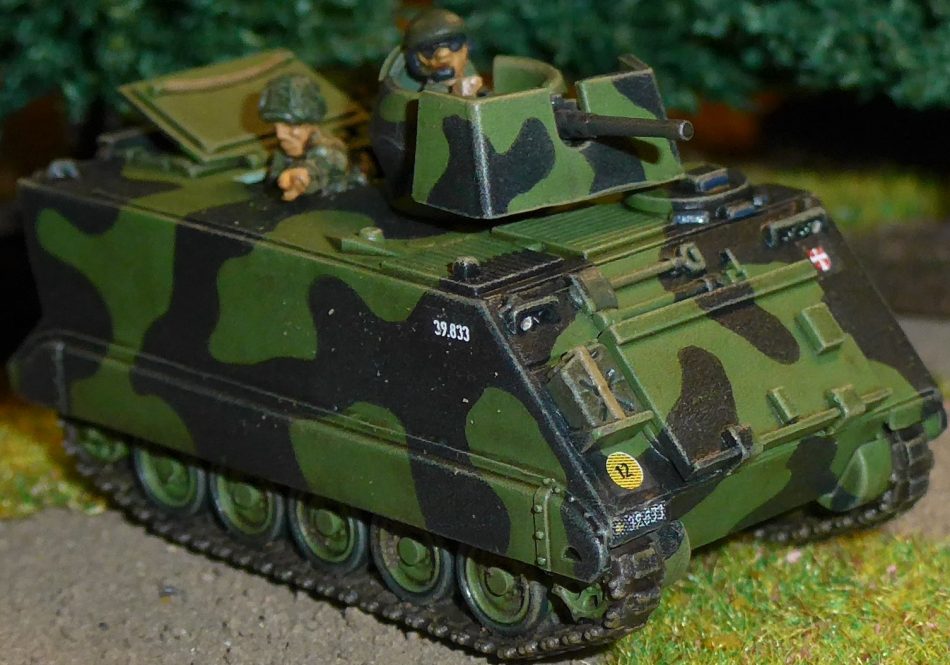
Lastly, is a gallery of some of my vehicles with the various decals applied.


And thats it folks!
Bear in mind that there are still a lot of different methods that the Danes used to mark their vehicles, this is just the top of the iceberg! The book, The Leopard 1 in Danish service, is a true treasure trove of others ways each squadron would mark their tanks.
Otherwise, just do a google search and you will find plenty of inspiration.
Take care and happy hobbying.
-Morten
BONUS: For anyone looking to make some F-16’s, Paulus Victor over on Ebay makes a fantastic set of decals in 1:144 scale for Danish F-16’s
