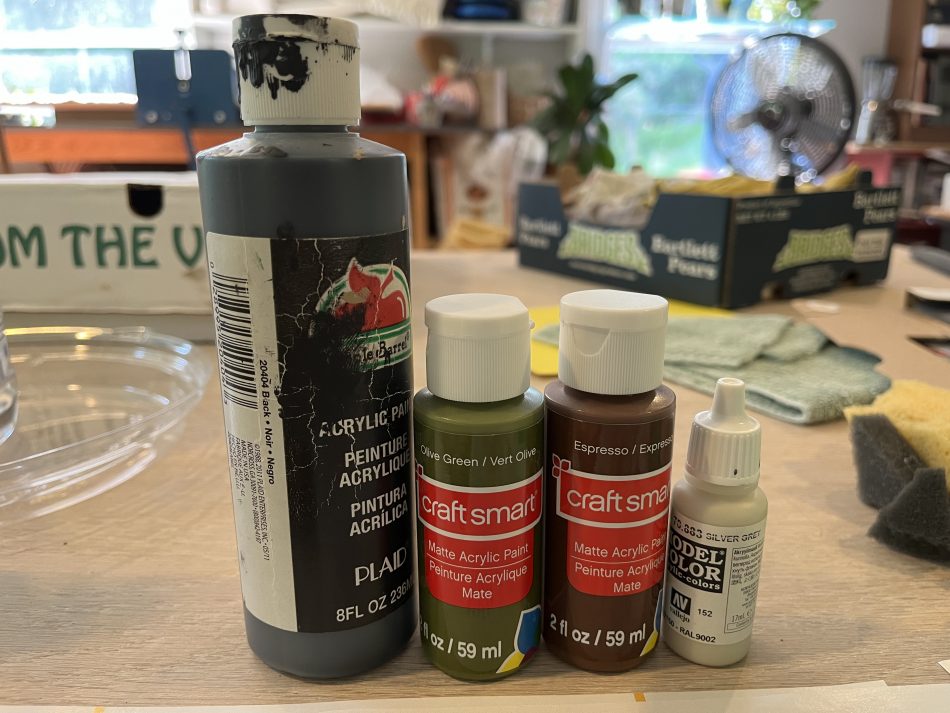
My summer of terrain projects continues with a set of homemade rivers. I set out to echo the method by which I created a set of ponds several years ago. The materials I used were chipboard for the base, plastic table covers for the river, Vallejo’s Silver Grey paint, Apple Barrel’s Black and Melted Chocolate paint, Delta Creative’s Trail Tan paint, Craft Smart’s Olive Green and Espresso paints, PVA glue, sand, and various basing flock and tufts.
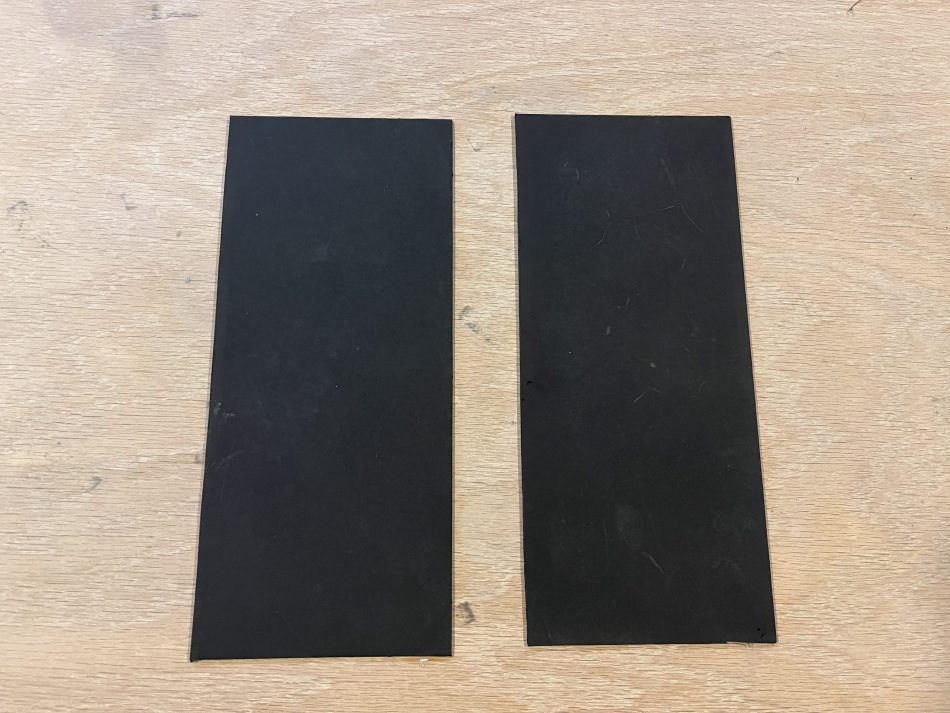
For the plastic table covers I used LovePads 1.5mm thick clear desk pads. I prepped the table covers by cutting them to size, ironing them under a t-shirt to smooth out the material, and cleaning them with glass cleaner.
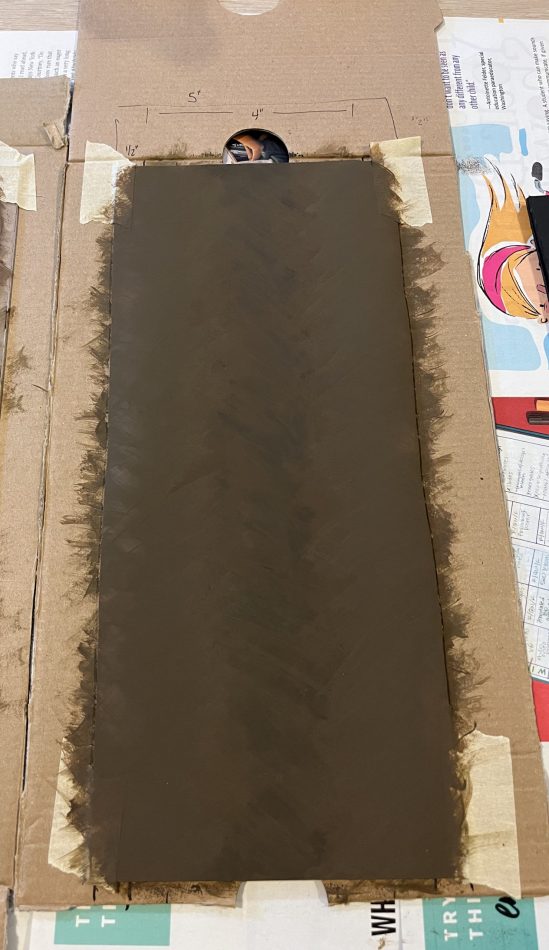
I started by cutting the chipboard to the size I wanted to base my rivers on and priming them with black spray paint. I determined that 5″ width was ideal as the bridge I have lines up nicely with river pieces designed to that width. I primed them in an effort to limit any warping that my occur when I glue on the river piece and base the edges.
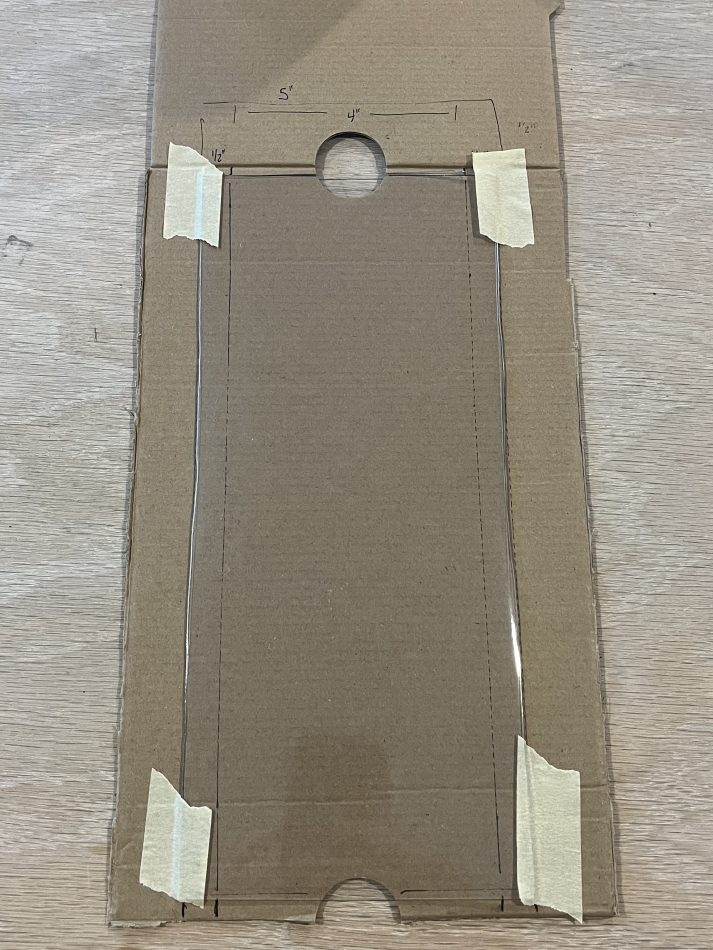
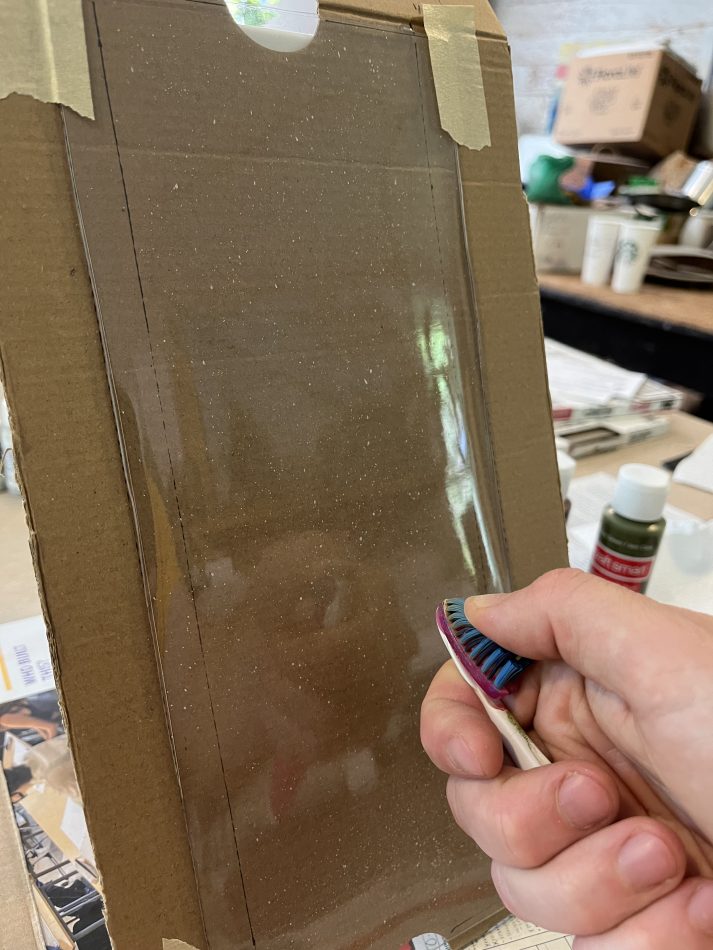
Once I have the desired size determined I shifted to the river pieces themselves. I prepared a piece of cardboard with the dimensions of the base and marked out additional outlines to help me paint the river in a uniform With the base being 5″ wide I decided to paint the river to a width of approximately 4″ which leaves 0.5″ on either side for basing to match my table. Knowing that my rivers will end up ebbing and flowing like a real river I made a mental not to try to keep the river at the edges of the base as close to 4″ as I can to help the transitions between river pieces. I cut a piece of plastic table cover and taped it down onto the template. Be mindful that the tape does not cover any of the area that you plan on painting. Taping the plastic to the cardboard will help keep the pieces uniform to the measured template and will give you something to hold so you won’t smudge the drying paint as you progress through the layers.
The paints I used to turn the plastic into rivers.
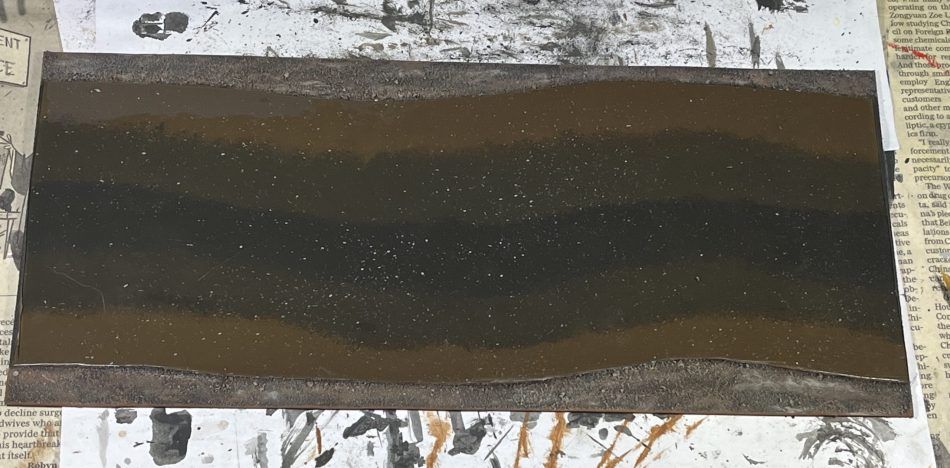
Using a toothbrush, I flicked small amounts of Vallejo’s Silver Grey onto the plastic. My goal here was to add artificial reflections of light to mimic water breaking as it moves downriver. It’s important to note that during this process I painted the layers of the river in reverse order (from the top layer being applied first to the bottom layer last). After we finish painting the river we will remove it from the cardboard, flip it over, and see the end result.
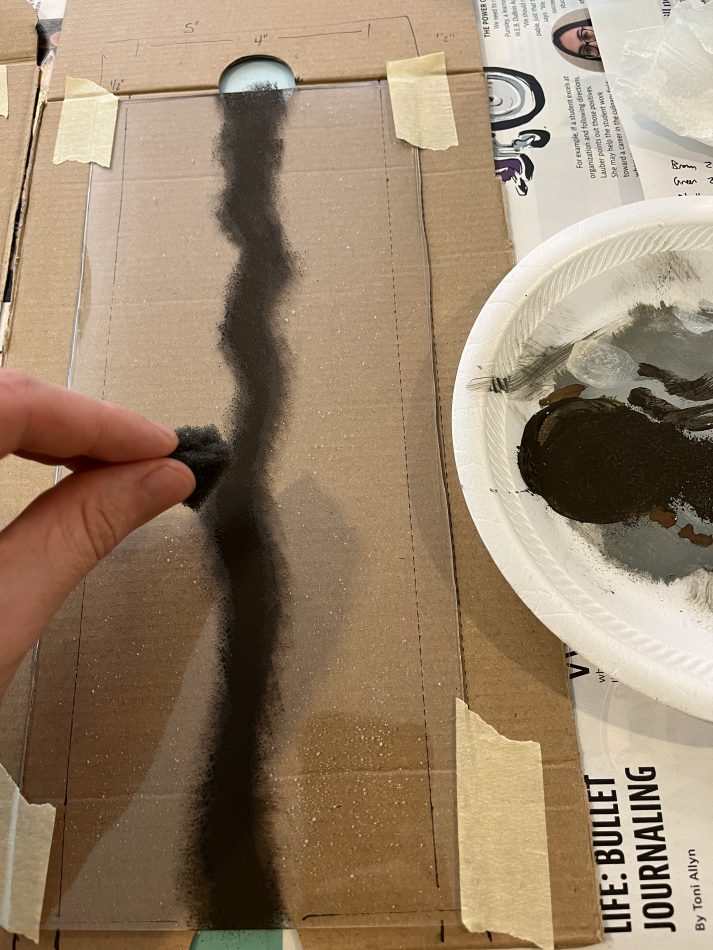
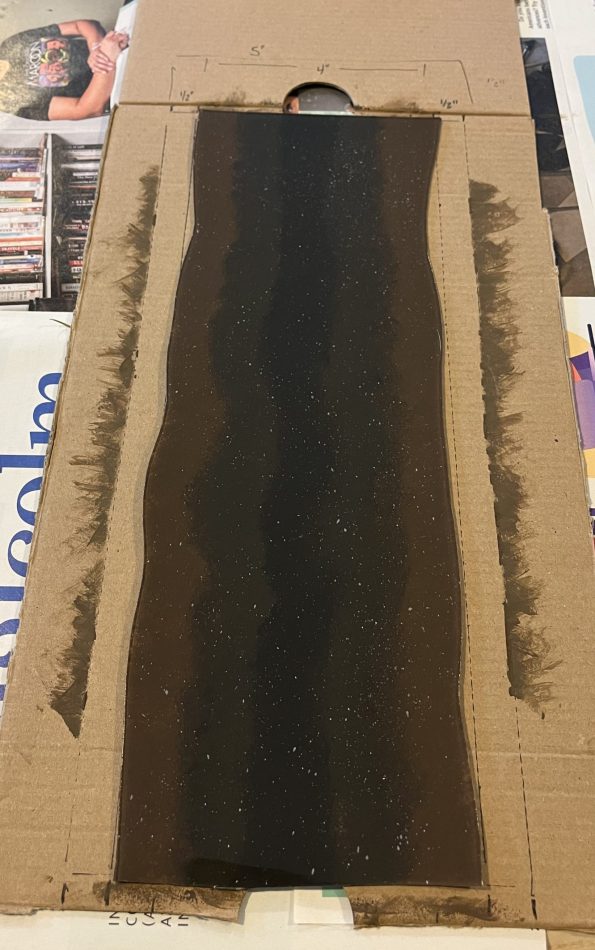
Using a piece of sponge torn from blister packing, I painted the deepest part of what will become the river in the center of the plastic. I mixed Craft Smart Olive Green, Craft Smart Espresso, and Apple Barrel Black at a 2:2:1 ratio.
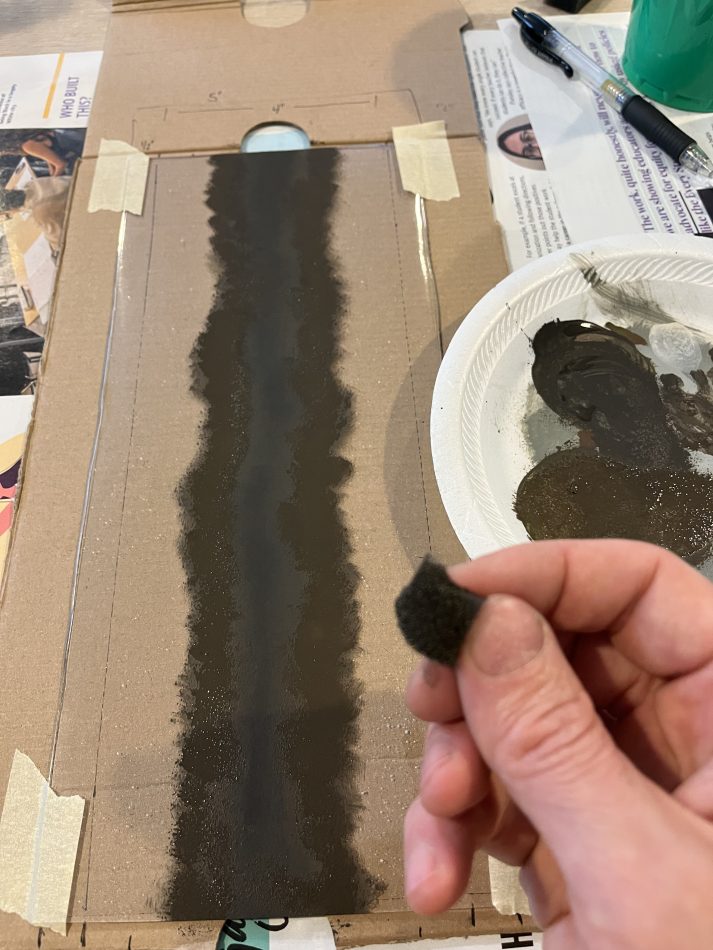
Then I sponge painted the medium depth of the river with a 3:3:1 mix of Craft Smart Olive Green, Craft Smart Espresso, and Apple Barrel Black.
Then the shallowest part of the river with a 1:1 mix of Craft Smart Olive Green and Craft Smart Espresso.
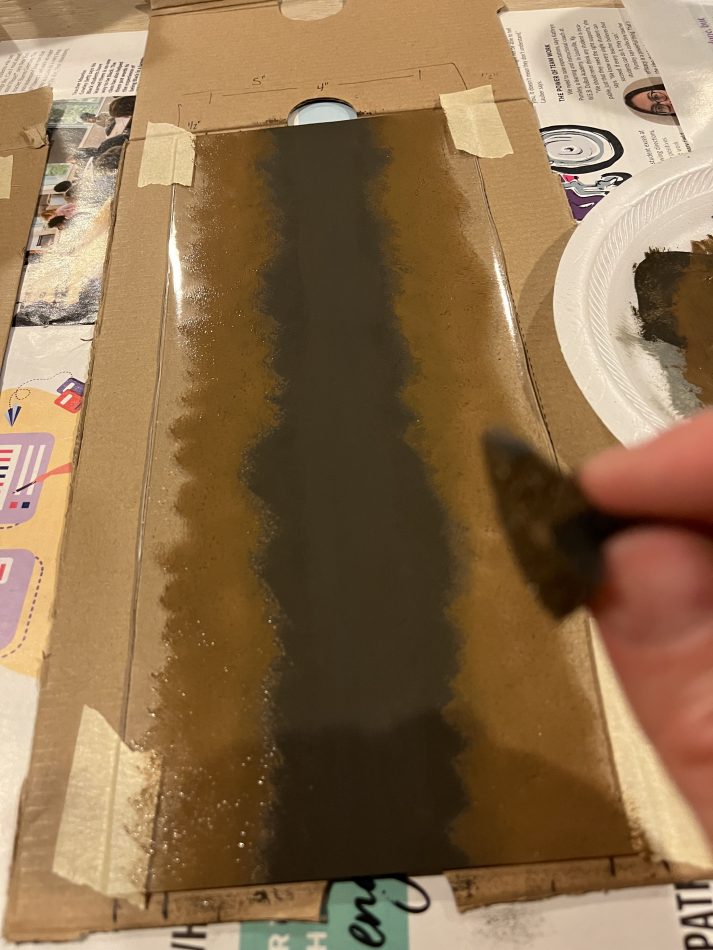
To make sure I didn’t miss any spots I painted a few coats of the 1:1 mixture over the plastic (pictured) before spray painting the piece with black spray paint (not pictured).
Now it’s time to remove the tape and flip over the plastic to appreciate your work. Realigning the plastic over the template on the cardboard I cut out the river to the desired shape being sure to allow the river width to fluctuate like a real river. I paid special attention to centering the darkest strip of paint and measuring the river to 4″ when cutting the top and bottom. Being mindful with a 4″ width will help the river pieces fit together more seamlessly once the river pieces are assembled on the table.
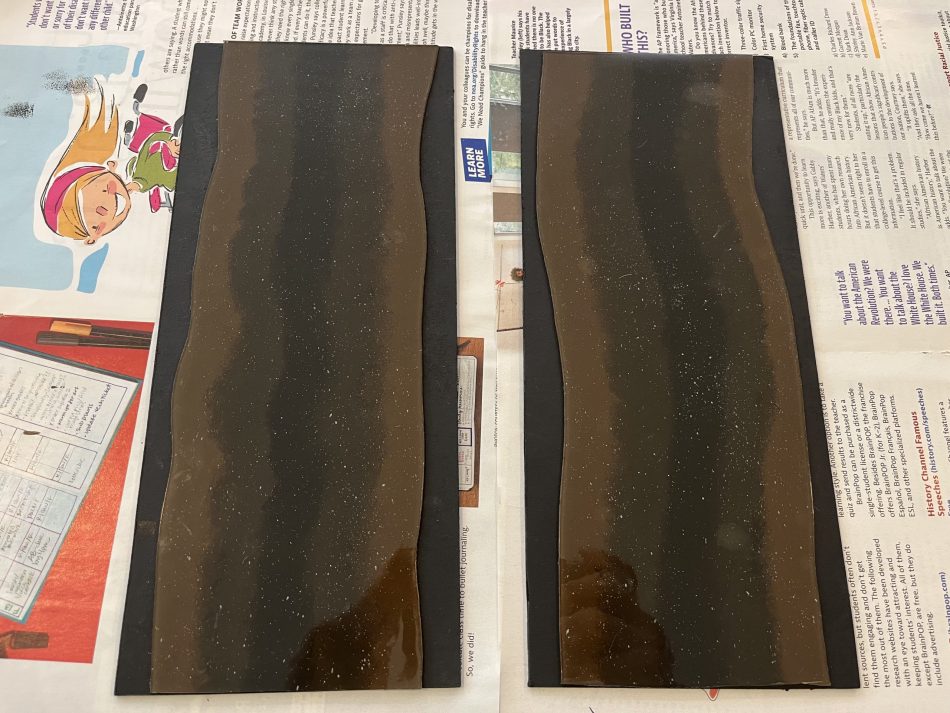
Using PVA glue, attach the painted river piece to the chipboard prepared at the beginning of the process. During my test run a few patches of PVA glue managed to bleed through the paint and were visible after the glue dried. To reduce this effect I intend to mix some black paint into the glue before attaching the plastic to the chipboard.
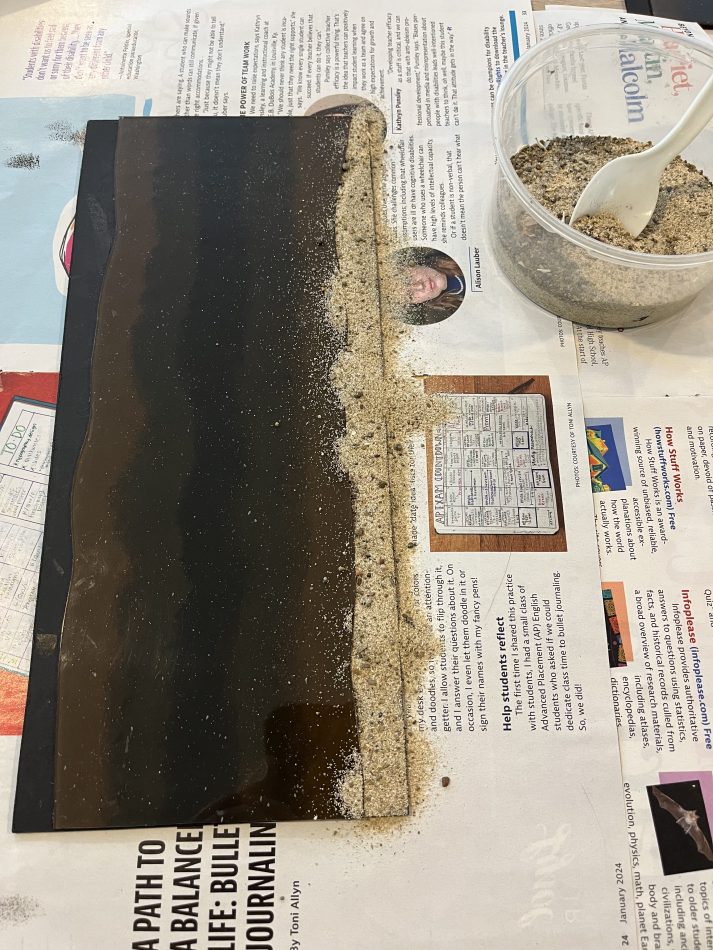
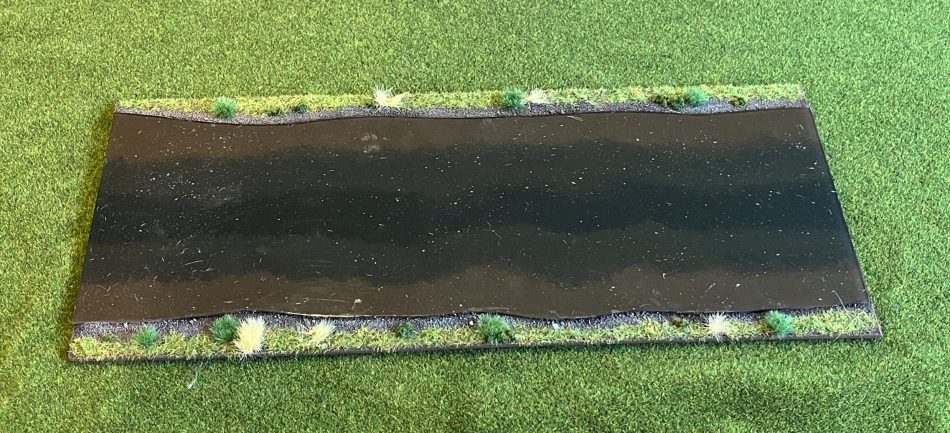
Now it’s time to start basing the river banks. If you have your own basing techniques I recommend using them so that your own rivers will blend better with your miniatures and terrain. My full basing process can be found here and for the river banks I skipped the water putty and used a greater variety of foliage tufts.
The river banks painted using my aforementioned process.
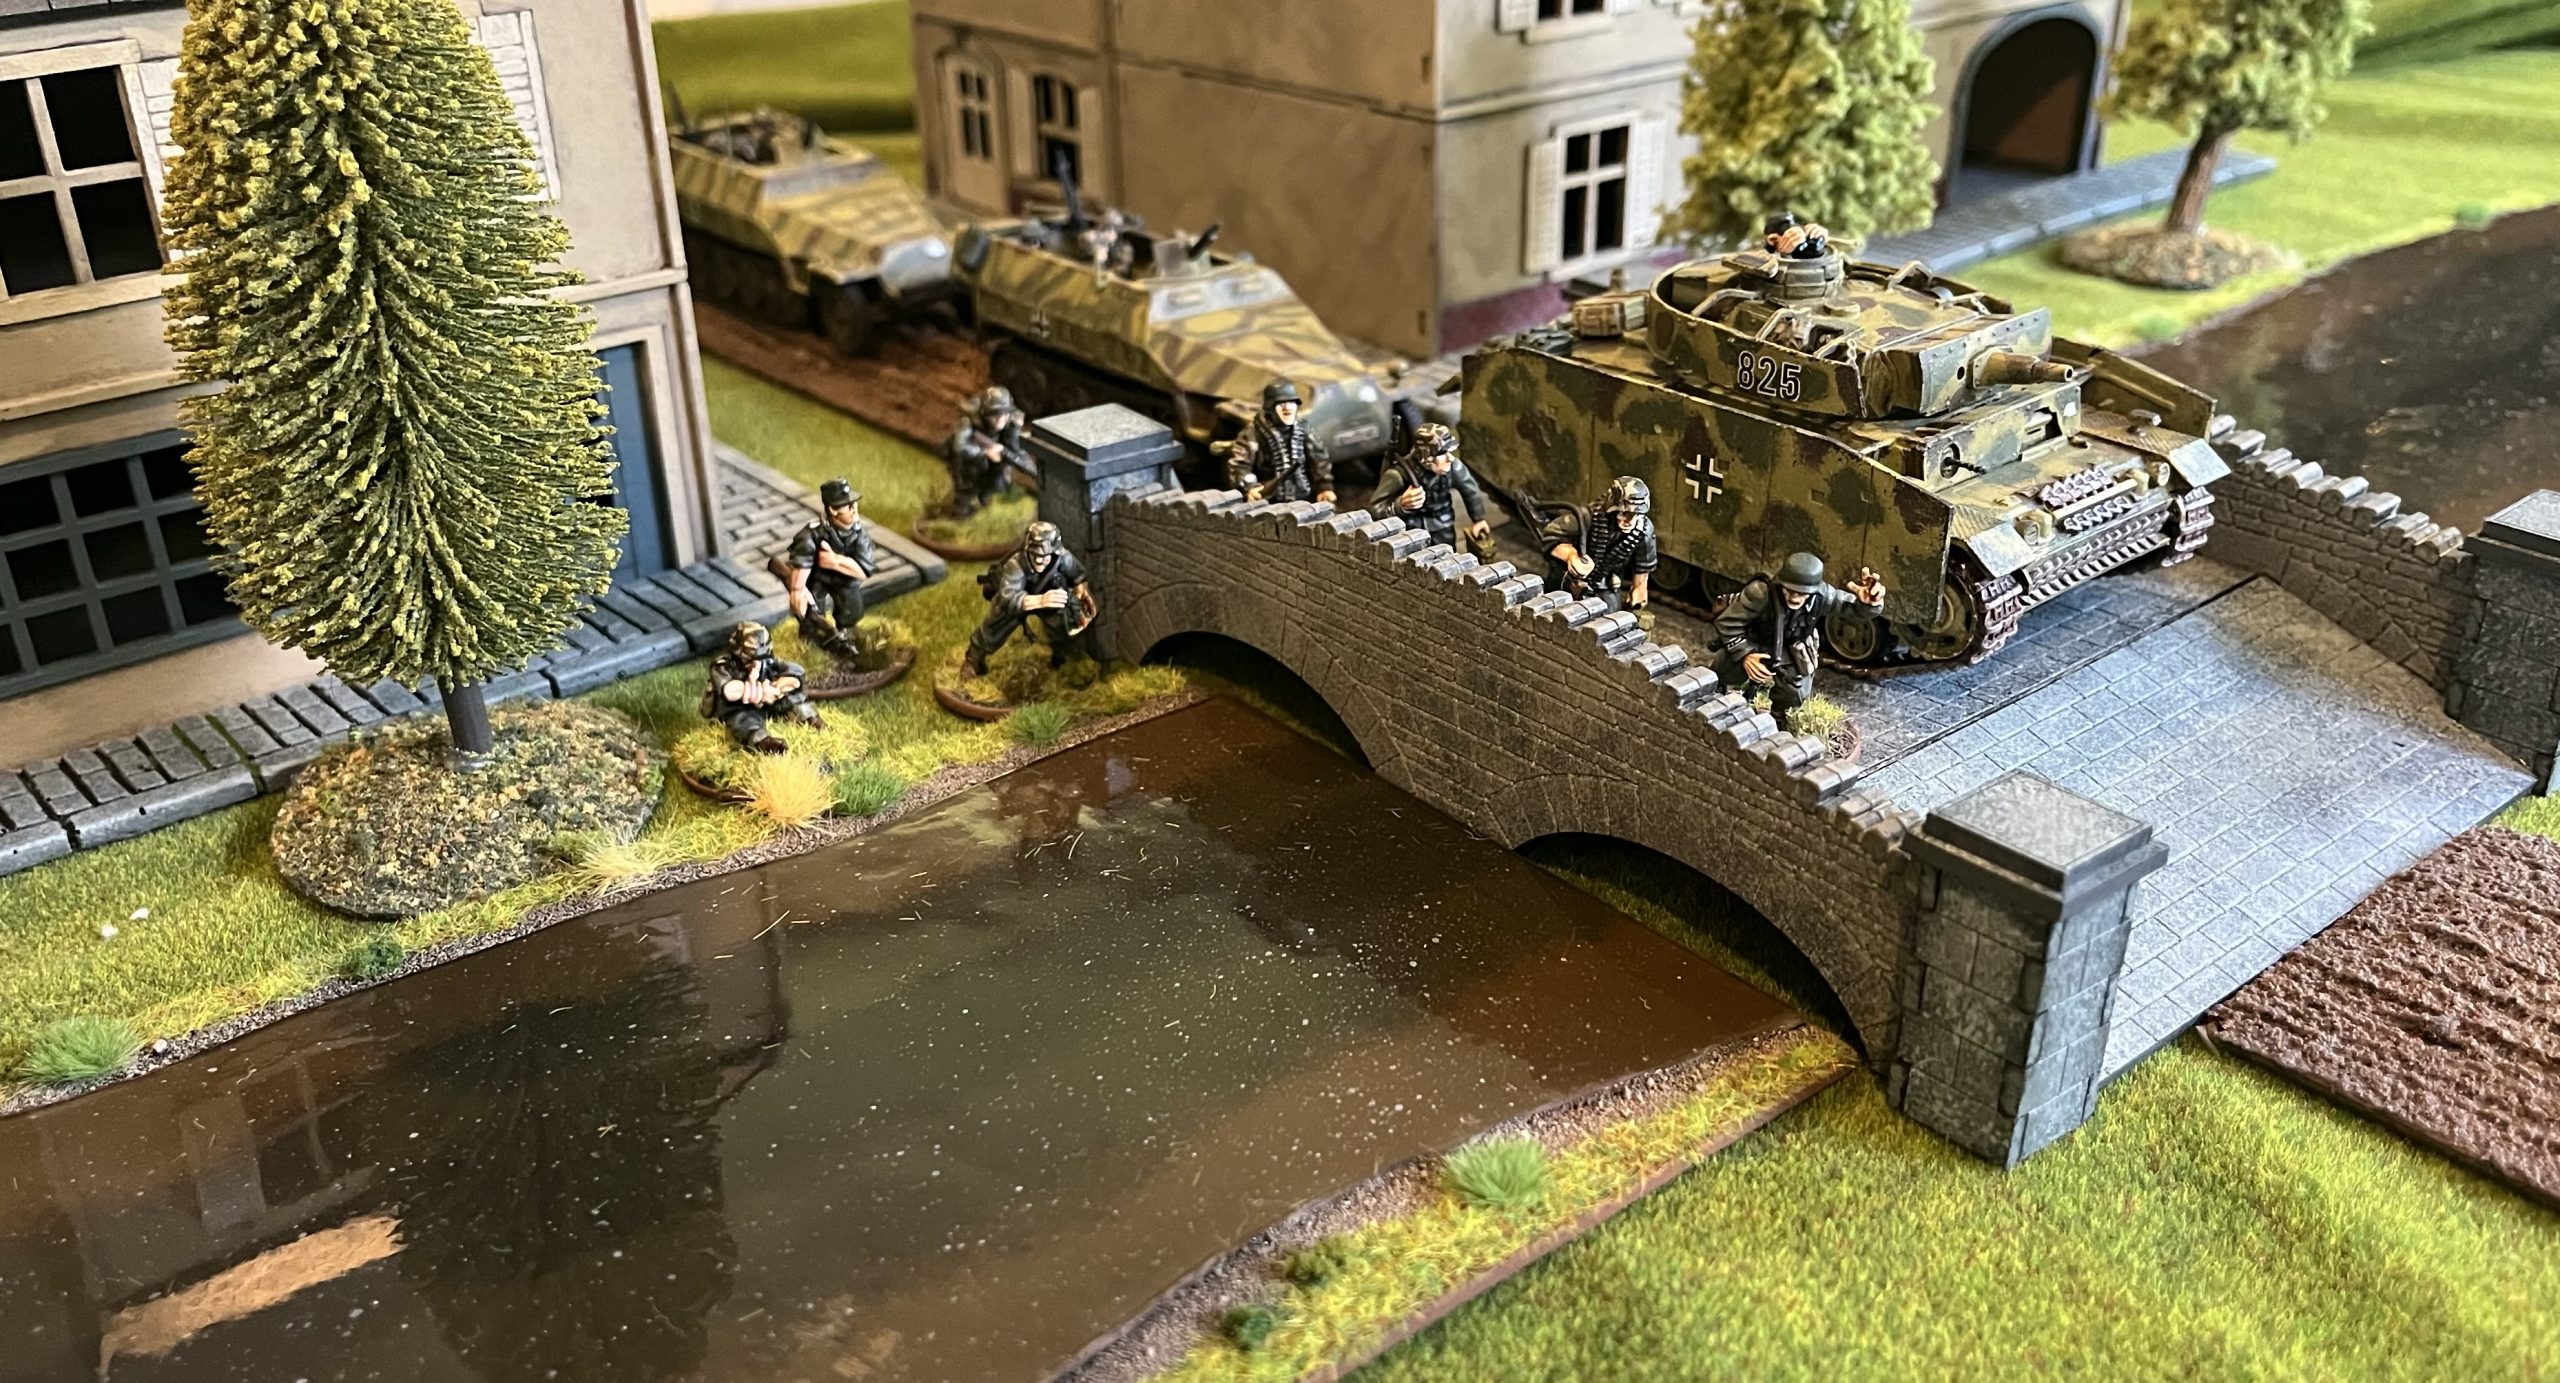
The river banks now with flock and foliage tufts to match my table and other bases. I chose to leave some of the dirt showing between the foliage and the river to represent a rocky river bank. And we’re done!
Looks great, I really appreciate the tutorial!