Painting Waffen SS Oak Leaf Camouflage

By Kreighton Long

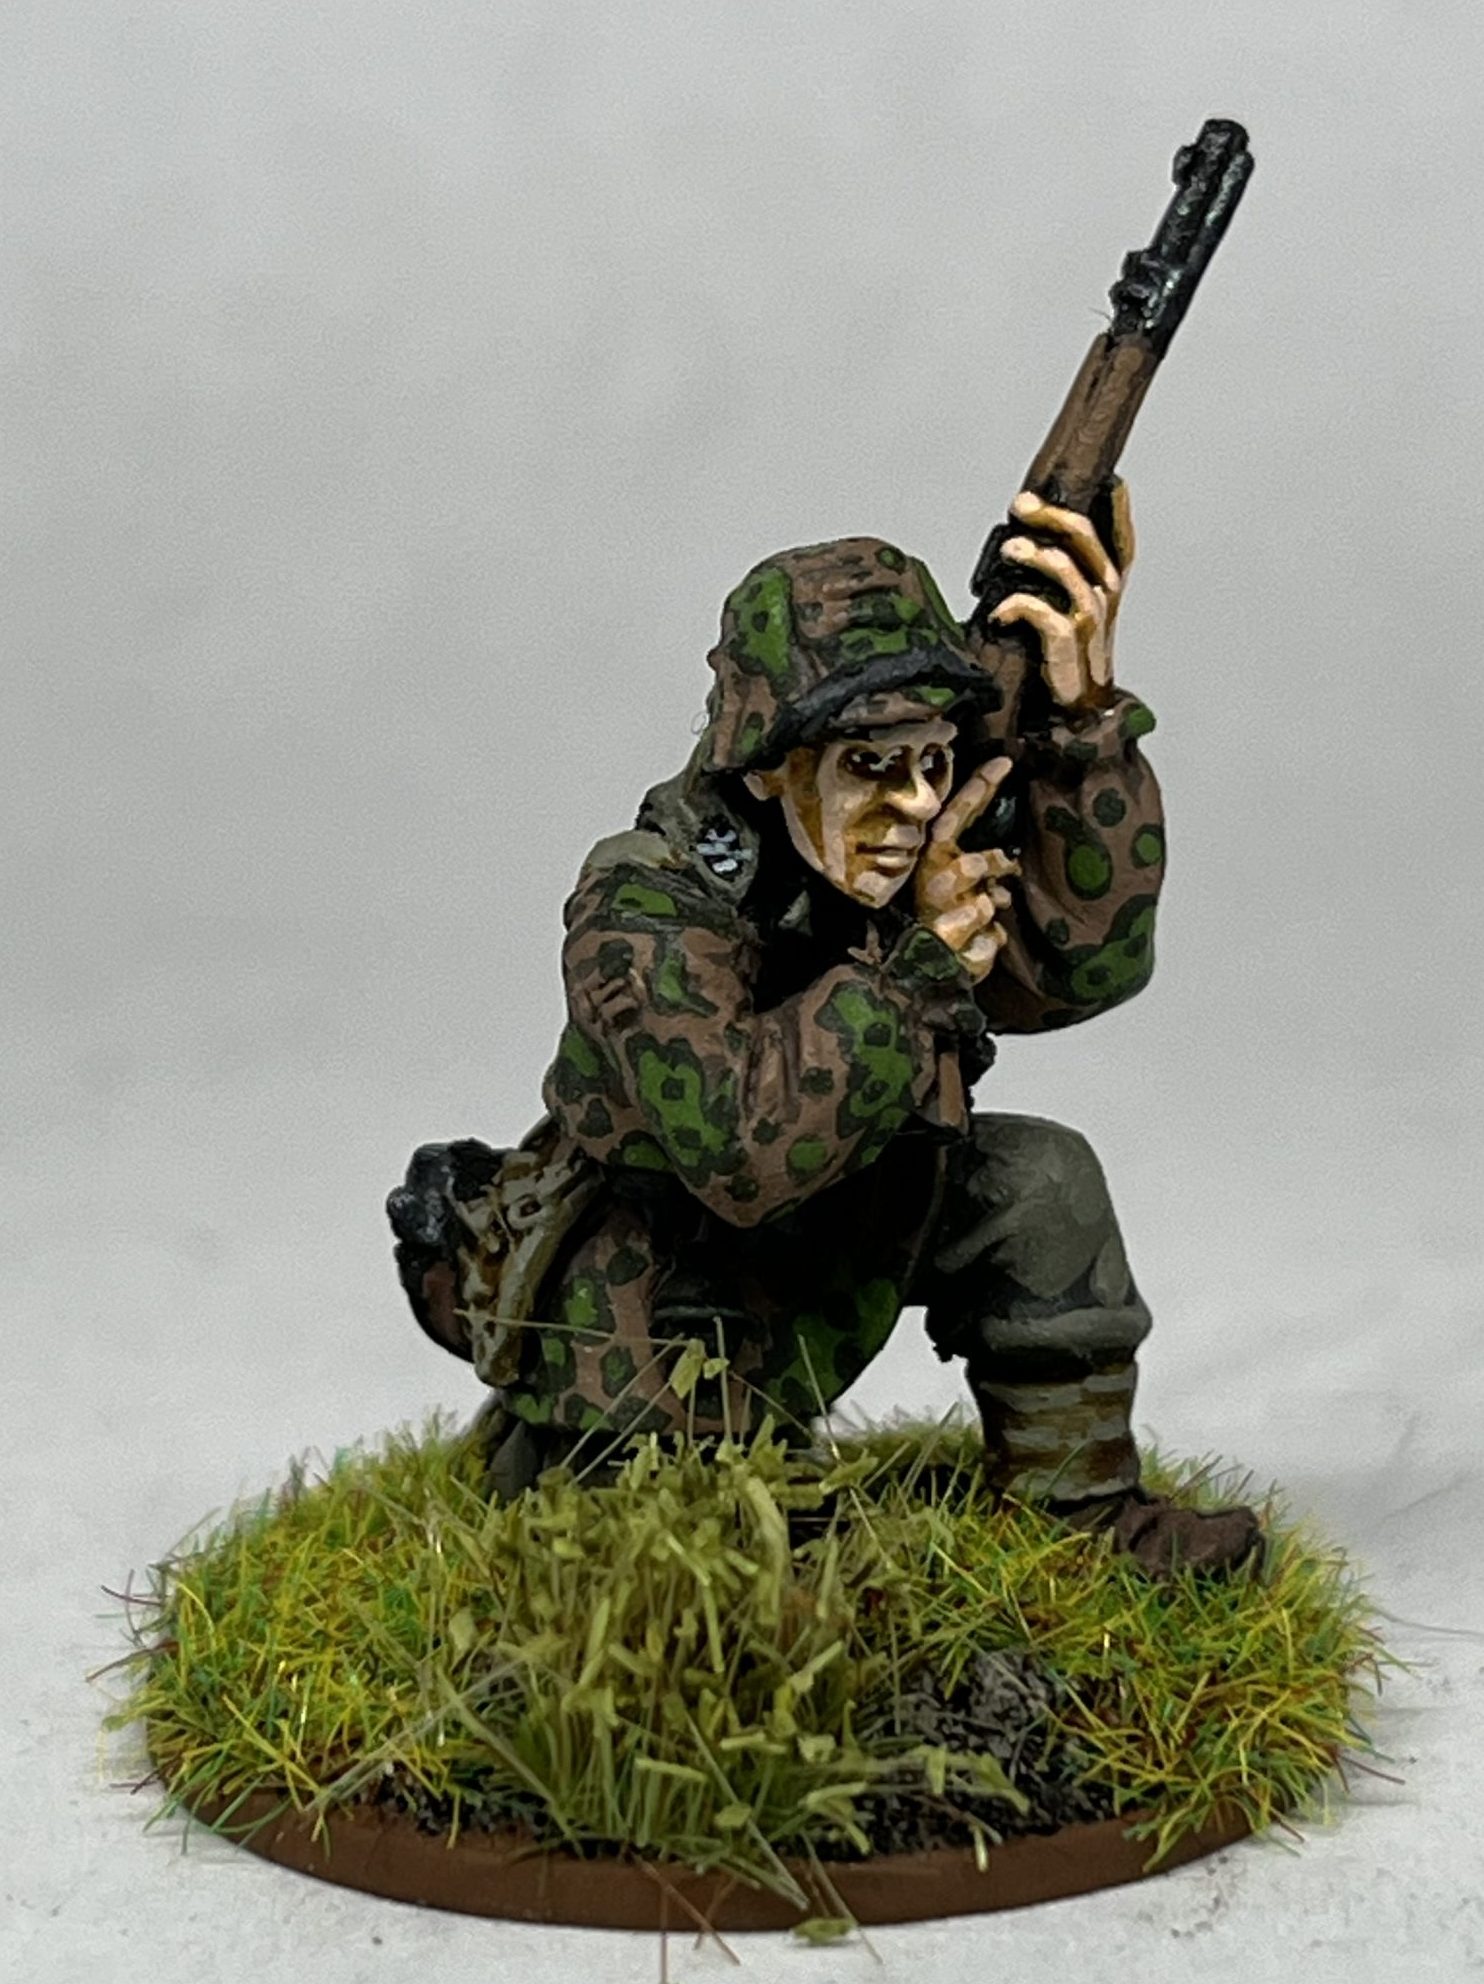
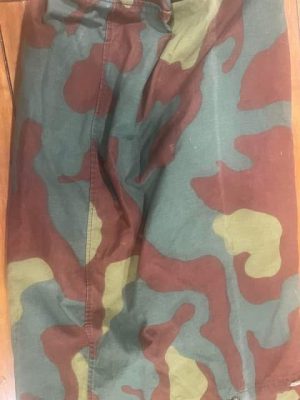
The German Eichenlaubmuster, also known as Oak Leaf, camouflage pattern began being issued in 1941 and was used by the Waffen SS until the end of the war.  Below are the steps I take when I paint Oak Leaf camouflage.  The paints I used are Vallejo’s German Cam. Pale Brown (825), German Cam. Black Brown (822), German Cam. Dark Green (979), and German Cam. Bright Green (833).

Painting Sidewalk Terrain Casts

By Kreighton Long

In my previous article, I described my first foray into mold making.  In this article, I’ll share how I took the cured casts and painted them to look like generic cobblestone sidewalks.  I spent some time looking at different cobblestone sidewalks on Google Images to try to find out how to paint mine.  In the end, I decided to go with a basic grey color as a safe neutral to fit most settings.

Creating Sidewalk Terrain Molds

By Kreighton Long

Over the years I’ve slowly been building up my collection of urban terrain and as my tables experience urbanization I’ve come to realize that the next step is to include sidewalks. Adding sidewalks to my terrain collection will help to fill in some void space in my town, and will help the town become a more aesthetically pleasing, lived-in, setting.

At first, I looked for simpler options such as printing cobblestones onto card stock or buying mousepad cobblestone rolls and cutting to size but none of those gave me the modeler look I desired.  Eventually, I rolled up my sleeves and declared, “Fine.  I’ll do it myself”, with my best Thanos impression.

Basing Artillery in Bolt Action

By Kreighton Long

What is a Bolt Action army project without some big guns?  Even partisans have access to lighter howitzers and anti-tank guns.  There’s probably at least one army that can’t take artillery options but I can’t think of one on my own.  As fun and good-looking as the big guns can be it can be challenging to paint and base the finicky things.  Speaking for myself, I struggled for a while on how best to turn these pieces of pewter, plastic, and resin into gaming pieces that were as aesthetically pleasing on the table as they were influential on the outcome of the game.

Painting World War Two Italian Camouflage

photo by Kreighton Long

By Kreighton Long

A sample of M1929 telo mimetico provided by fellow geek and co-conspirator of the author, Mr. Jeffrey Whitlock.

The Italian Army, or Regio Esercito, was the first military in the world to mass-produce camouflage equipment for their soldiers. The M1929 telo mimetico was utilized by Italian soldiers and paratroopers as well as by Italy’s German ally during the course of World War Two.

For my Italian paratrooper army project I knew I needed to commit hard to the camouflage pattern and after a few trial runs incorporating feedback I reached a scheme that was close to accurate while still being doable.

Painting World War Two Italians

By Kreighton Long

When it came time to purchase my Italians I decided to go with Warlord Games. Their plastics have been excellent over the last several years and I figured why not give these a go. I can honestly say I wasn’t disappointed. The kits are easy to assemble with enough variety to have minimal duplications in your platoon. The sculpts are clean with good lines and deep contours that make highlighting that much easier when painting. I picked up one box of plastic infantry and the support teams box to get the meatball rolling. When I get to it I’ll add some vehicles and heavier support to really flush out my Italians into a force ready to take to the table. But first, we need to put paint to plastic.

Miniature Wargaming Wedding Cake

By Tom Mullane

This winter, my sister got married in a small ceremony in NJ. I served as the minister, and it will have been the 8th wedding I have performed since being ordained in the Ministry of Life Church (certificates available online for 35$— includes parking pass) Every great wedding party needs a wedding cake, even small receptions for family and close friends like the one my sister and my new brother had planned. In an effort to make use of my wargaming skills in a non-wargaming capacity, I decided to make a winter-themed diorama for the cake and desserts my wife Angela was going to make.

Homemade Dug-In Emplacements

By Kreighton Long

Humans are squishy, fragile creatures who leak profusely when punctured. Knowing this, combatants typically are inclined to hid their more vulnerable bits away from the sharp pieces of metal flying through the air. While the First Industrial Revolution featured columns of well dressed fellas marching towards the sounds of guns and exchanging volleys with equally brave soldiers opposite them, there are instances of trenches and emplacements being used in sieges or to protect less maneuverable artillery pieces on the battlefield.

Moving into the Second Industrial Revolution, the descendants of survivors from the aforementioned battles fully embraced the value of fighting from holes in the ground during World War One. The topic of “digging in” continues to the modern era as any contemporary Soldier or Marine can attest to. On a typical wargaming table, dug in fortifications or emplacements are more of an exception than a rule. Players tend to prefer skirmishes and battles of maneuver rather than a bloody, typically one-sided siege or assault.

Painting Chevrons on WWII US Army Uniforms

By Kreighton Long

It’s not too hard to find decals to add rank patches to your GIs. The Warlord Games set of US Infantry even comes with decals in the box. For those of you who are gluttons for punishment or want the bragging rights of painting tiny lines on your already tiny toy soldiers here are the steps for how I add rank patches to my 29th Infantry Division army.

Painting Rank Symbols on WWII US Army Helmets

By Kreighton Long

[29th Infantry Division: Normandy landing]
Note the horizontal NCO stripe on the helmet of the soldier in the foreground. Photo from https://www.lonesentry.com/gi_stories_booklets/29thinfantry/
When playing Bolt Action I’ve run into the headache of trying to find an NCO who fell to a successful sniper or find an officer to see if he’s close enough to a unit to buff their order check. Taking an extra ten seconds or so to find the right model is a minor inconvenience at worst but there are means of expediting this step while adding fun historically accurate details to your painted toy soldiers.

The American GIs in World War Two painted a white stripe or bar on the back of their helmets so that soldiers they were leading, presumably from the front, could identify their leader and follow them into battle. American Officers donned a vertical bar while Noncommissioned Officers sported a horizontal stripe.

Below are the steps I took to hand-paint my platoon and squad leaders for my Bolt Action 29th Infantry Division army.