Kreighton Paints a Bolt Action Third Edition Army

By Kreighton Long
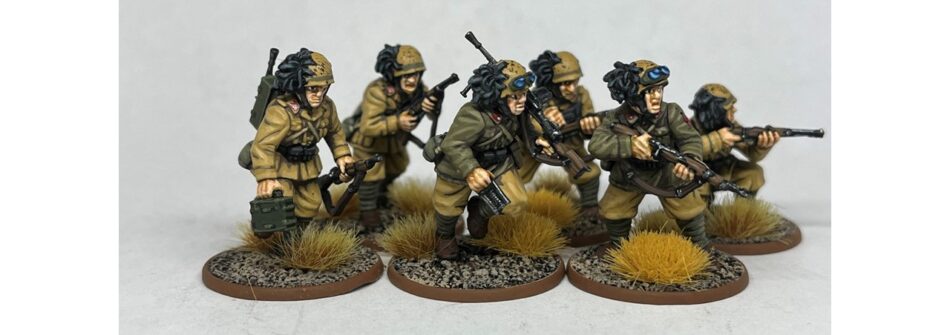
With my first Bolt Action Third Edition specific army mapped out it was time to get out the sprue cutters, glue, and paints. My first target was to test out how I wanted to build and paint my Bersaglieri infantry.
I prefer the look of the helmets rather than the XXX for the Bersaglieri, so I started with one sprue’s worth of infantry with helmets. After considering available options I decided that my infantry would start with an NCO with a rifle, and LMG team, and additional riflemen.
Down the road I will likely need to build additional LMGs as I’d like to add second LMG teams to some of my Bersaglieri squads to increase their rate of fire and to take advantage of the longer range the LMGs provide paired with there no longer being a long range penalty when shooting. With all that drafted I built one NCO with a rifle, one LMG team, and four riflemen to start with.
In-between gluing and priming sessions I flipped through my available resources and started planning how I would paint my Bersaglieri. After consulting a few books, to include the Battle Front Miniatures’ Colours of War, Osprey’s The Italian Army 1940-45 (1), and various Bolt Action army and campaign books, as well as the painting recommendations that came with the Bersaglieri box, I knocked out a test piece.
After some adjustments and finding satisfaction with the scheme, I painted and based the rest of the sprue. I have a fair amount of infantry left to assemble and paint but the way forward with them is clear.


Up next were the L6/40s. Warlord Games was kind enough to add Italian options to their November Madness sales the week my previous article was published, so I picked up three quickly.
Once more I looked through my available references and started with the recommended Green Ochre color. I found painting the L6/40s in desert theme was a straightforward process and my armored platoon came together quickly. The steps I go through to paint my vehicles are more numerous than they likely need to be but I feel the extra effort creates a better product.
I start by applying a base coat of 1:1 mix of Green Ochre and Black then drybrush on a layer of Green Ochre. Next I add a thin layer of black wash to reestablish any shadows that were covered up by the Green Ochre. Then I once more dry brush on a layer of Green Ochre but this round is lighter than the first before lightly drybrushing on a layer of Dark Sand as the highlight.
From there I sponge on some German Cam. Black Brown to give it some weathering and then move onto the tracks and accessories. If you’re in a hurry you could get away with base coating with the 1:1 mix of Green Ochre and Black, drybrush a layer of Green Ochre, then highlight with a light drybrushing of Dark Sand.

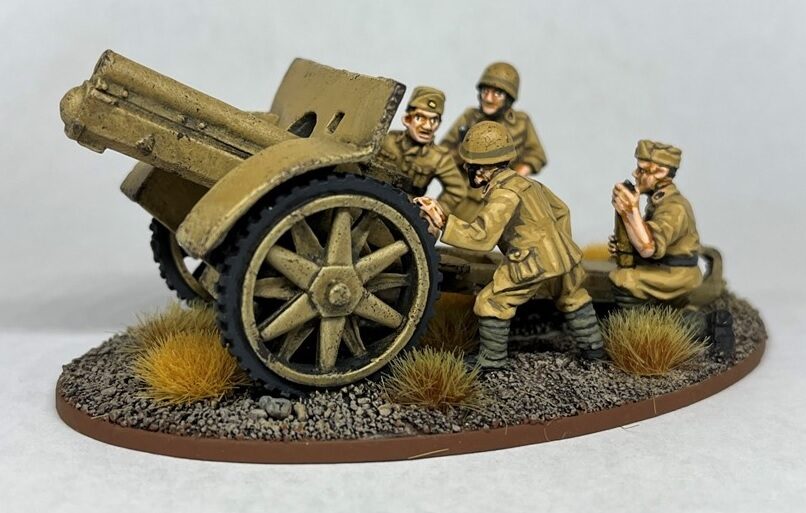
The last step was the Artillery Platoon. In keeping with historical accuracy I chose to go with the regular army medium howitzers. For the howitzers I painted the guns themselves similarly to the L6/40s and the crewmen like the Bersaglieri. See above for both. I based the gun and crew on a single base for ease of transport and aesthetics.

And that’s a wrap. With schemes tested and recorded the way-ahead is clear. I’ll be spending the next couple of weeks painting up this force and will aim to have this 1000 point list ready to take to the table by spring.
I’ll be adding a few more units and upgrades over time to bring the point value up to 1250 for larger games and to give myself additional flexibility as I adjust to the new rule set.
Happy painting!

Big guns go BOOM! Love your work on the howitzer, infantry, and the L6s; love little tankettes! Hope they do well for you!