Modifying the Danes in Team Yankee
By Morten A.
Before Battlefront decided to include Denmark in Team Yankee with the Nordic Forces book, I was fiddling around modifying the West Germans into the Danish army, by modifying the BF models to resemble units that were available to Denmark during the 1985-1995 timeline that BF is using for TY.
After the release of Nordic Forces, I continued modifying models and adding some 3D printed ones to either better represent the models in the Danish army or proxy units BF did not include in their list.
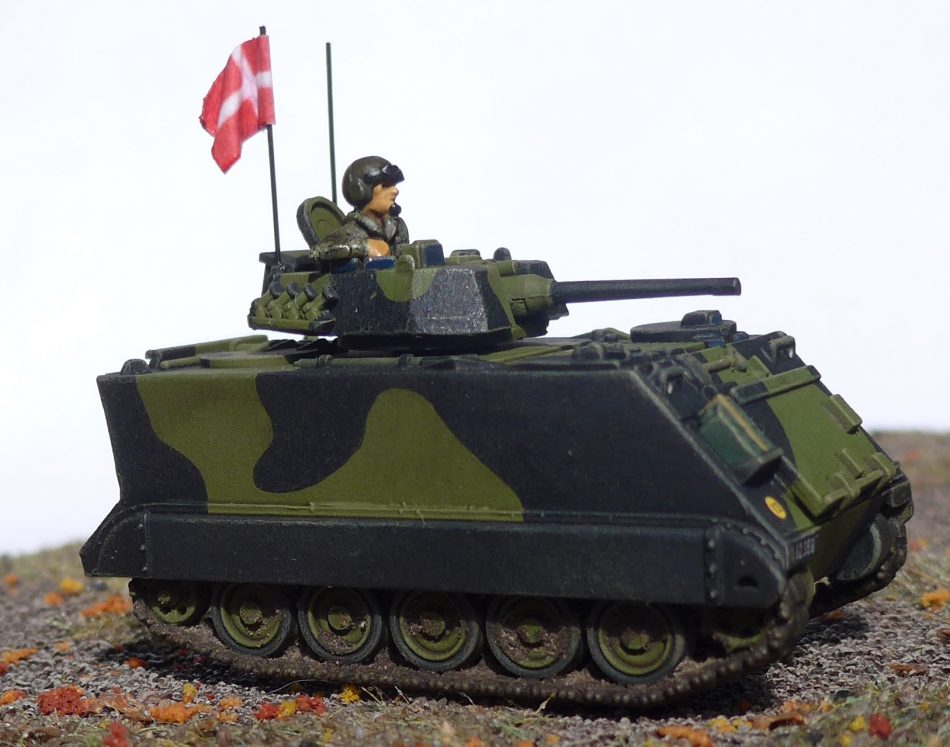
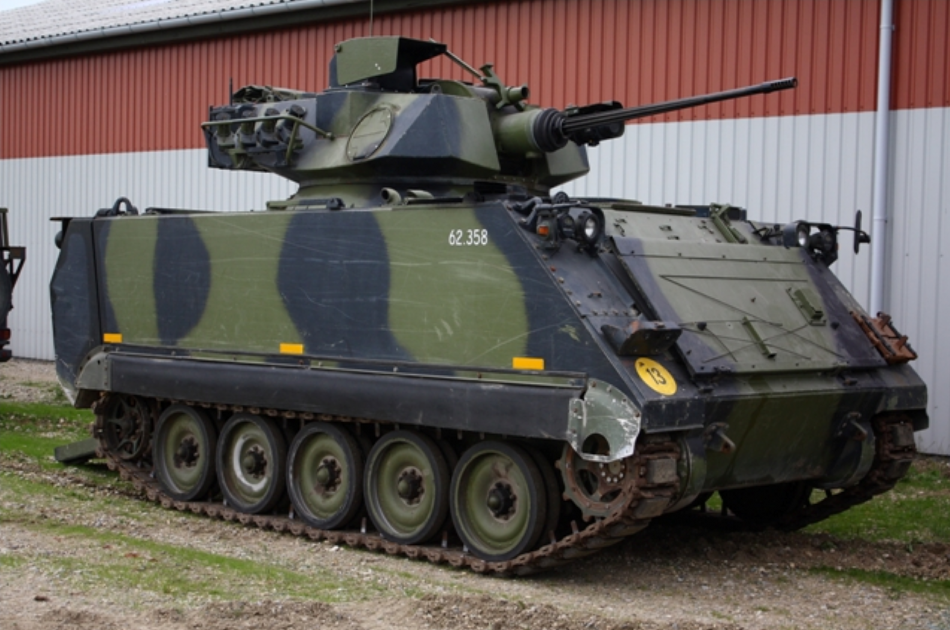
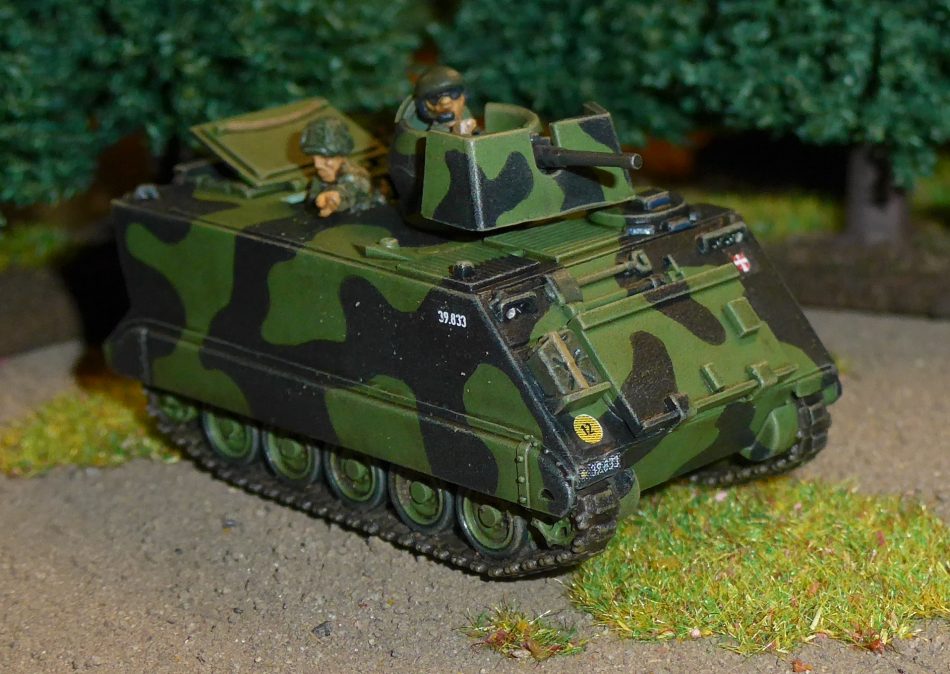
PNMK M/92 (Pansret Maskinkanon or Armored Machinecanon)
Some of my first mods was to make the PNMK M/92, to proxy for either the Marder 1 or the Luchs in a WG list, as they share almost similar stats, although the PNMK M/92 did not have a troop transport capacity, it was introduced to field as an Infantry support vehicle and not an IFV.
The M/92 came in to service in 1992 (same year the Danish Leopard 1’s was upgraded with Thermal sights and became Leopard 1A5DK)
The M/92 is based on a M113 APC with a 25mm turreted Oerlikon machine canon with a co-ax MG3. Very similar to the Australian M113 MRV that BF produces. In hindsight, I could have just used this model, to represent my M/92, but this was very early in my TY gaming and as I had some spare parts from other projects, I decided to scratch build the M92, rather than buy the Australian version.
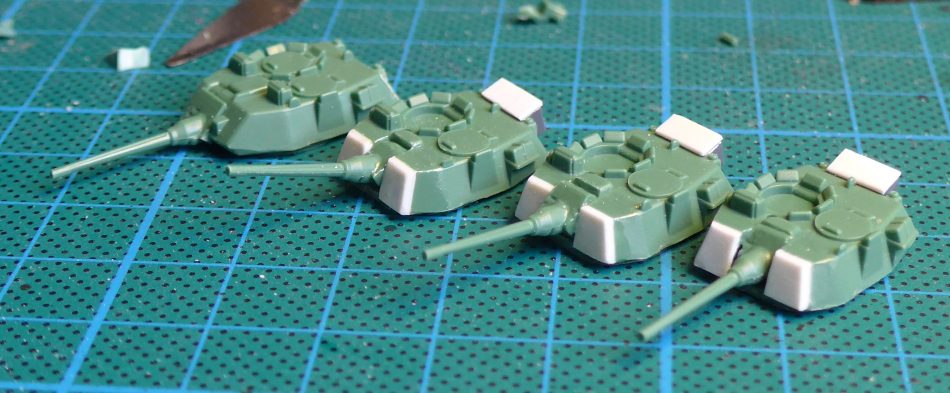
The turret I had came from the US LAV-25 box as I had these leftover from a project, I had made for a colleague before I even knew what TY was.
The LAV turret was chopped up in a few places. Notably, the front was “squared off” a bit and redone with plasticard. The rear basket was also removed and replaced with a stowage box, made from a piece of sprue and a plasticard lid.
Smoke launchers was also added to the side of the turret. These came from spare Leopard 1 cast iron turrets, as I did not need these for my Danish leopards.
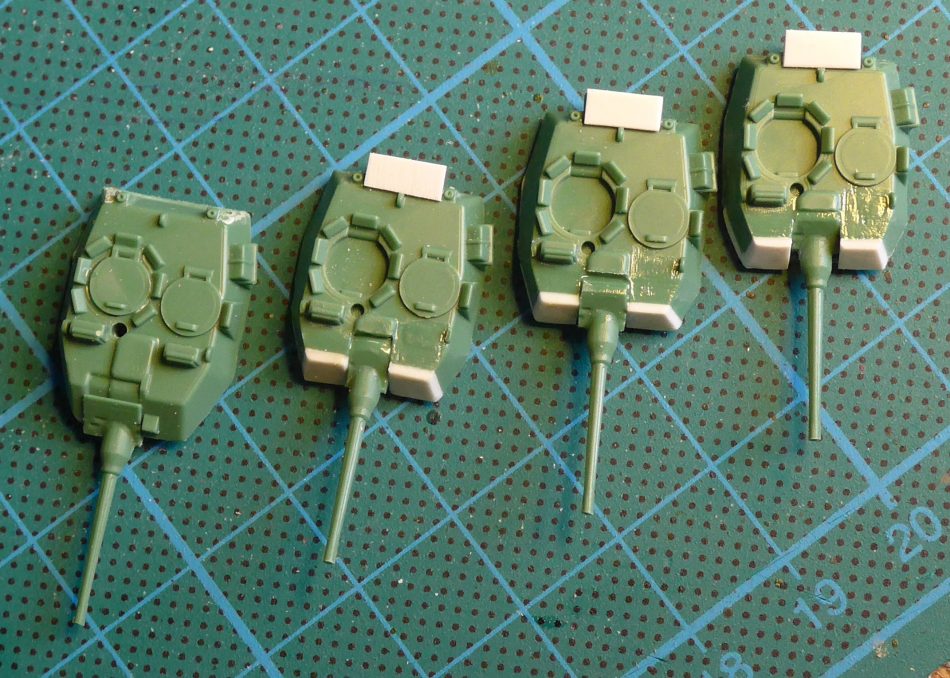
After these modifications, they resemble the turret of the M/92 quite okay, except that the commanders cupola is supposed to be on the left and not the right. (note: the smoke launchers are not present in the pictures).
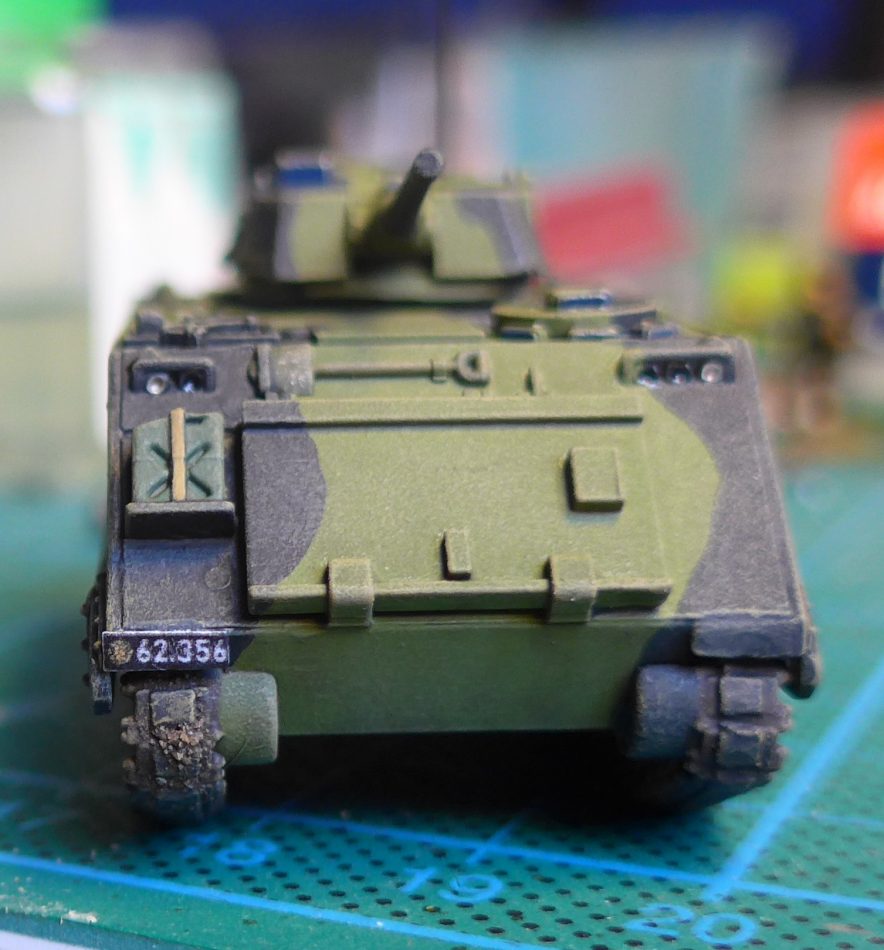
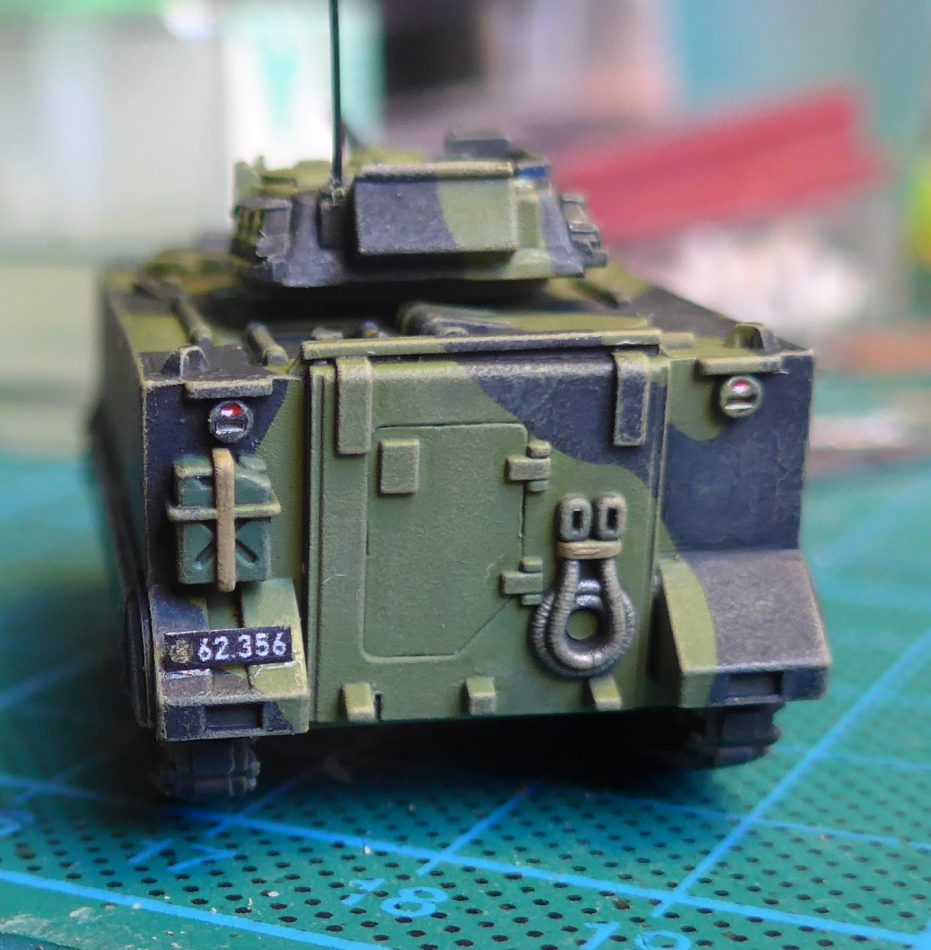
Some other minor mods I made, was to remove the rear left Jerry can from the model and adding a spare can to the front, as this was how all Danish M113’s was fitted.
On another note, the M/92 was based on the M113A2 and had external fuel tanks and after Nordic Forces was released, these became available in the Norwegian NM135 and I intend to add these at some point in the future.
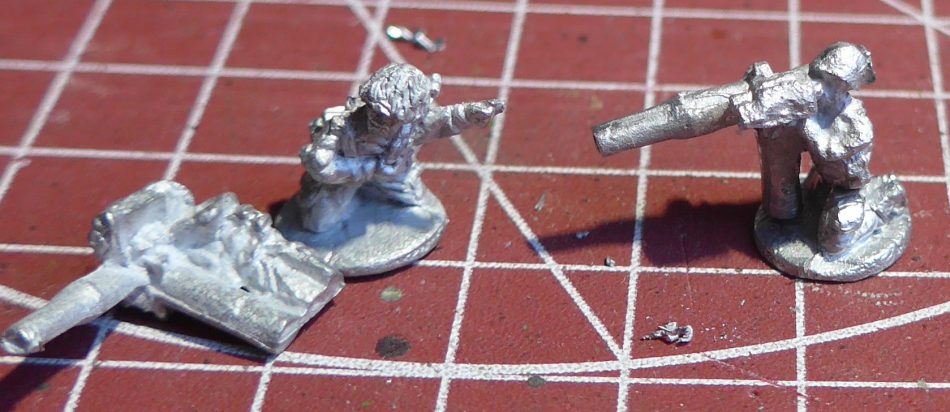
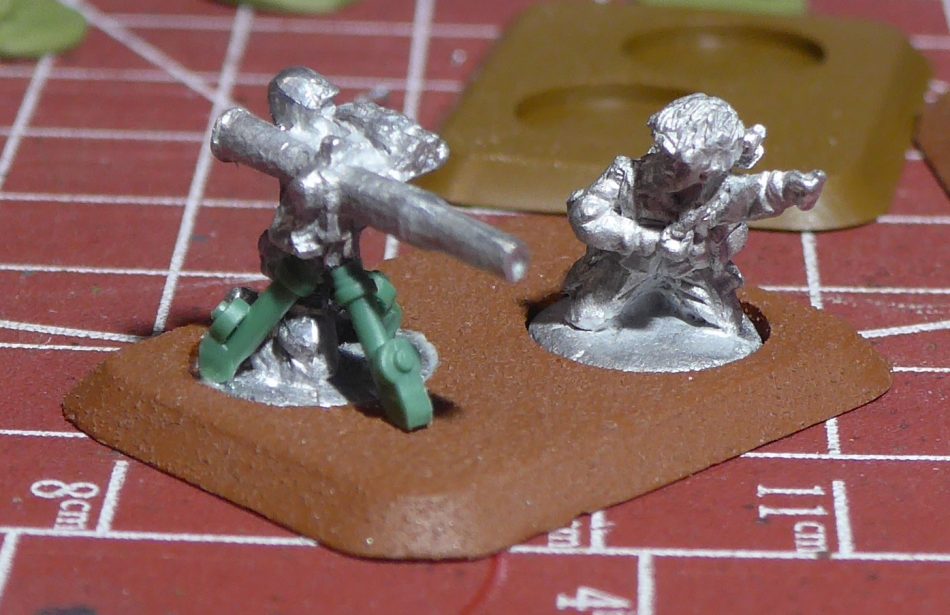
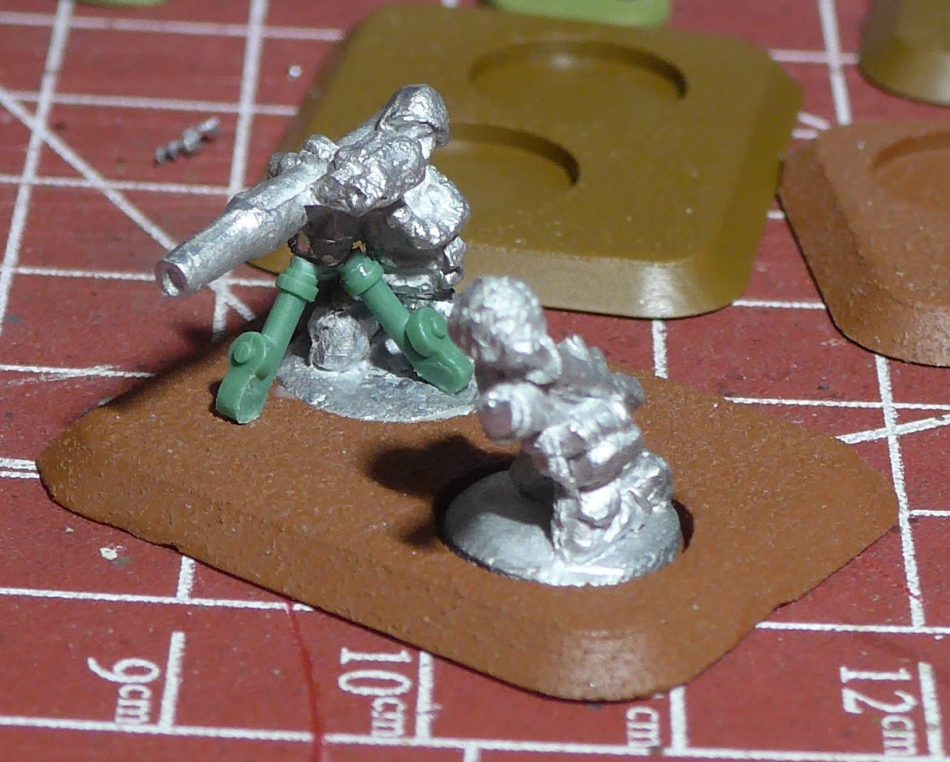
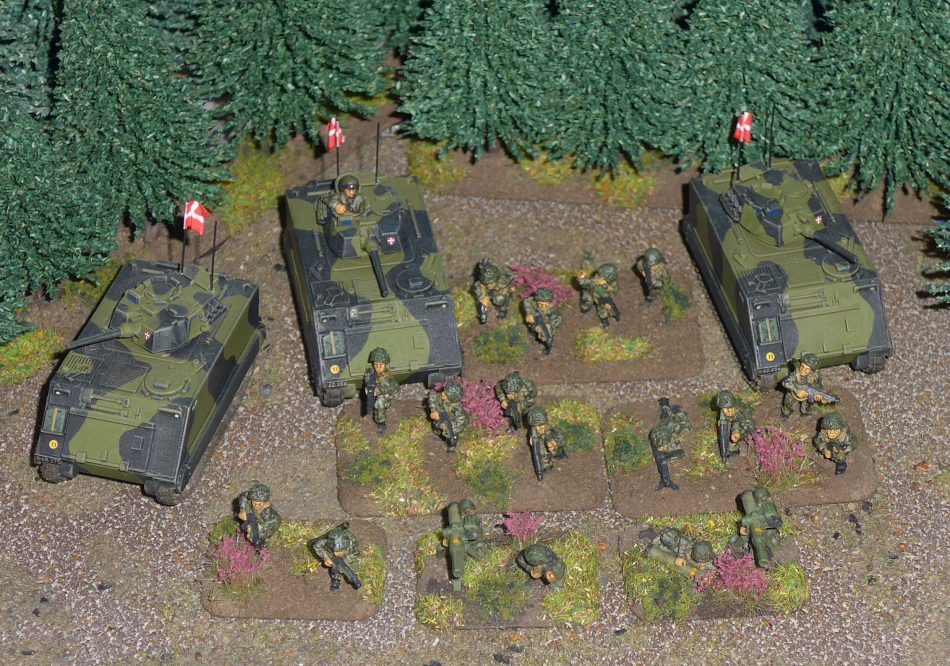
Since the M/92 is going to represent the WG Marder 1 support option for the Danes, I had to make some suitable infantry as well. The MG3 teams and Carl Gustav gunners are just plain WG models, painted like Danish Infantry. But to represent the Milan, I made up some TOW’s on tripods as these were available in Denmark, and was upgraded to TOW-2 with Thermal sights in 1983.
The conversion was rather simple. I took the TOW Gunners from BF’s GD240 Feltvogn box, the kneeling legs from a WG/DK Carl Gustav loader/helper, and for the tripod I glued on some plastic pieces that came from the 120mm mortar from the M113 box.
The Milan and the iTOW available right now for the Danes in game, share the same stats except the range, so it’s a suitable proxy.
PMV M113A1 (Pansret Mandskabsvogn or Armored Personnel Carrier)
Not a lot of conversions here, but like the M/92, I removed the rear right Jerry can from the M113 and added a spare Jerry can to the front right, and that’s basically it.
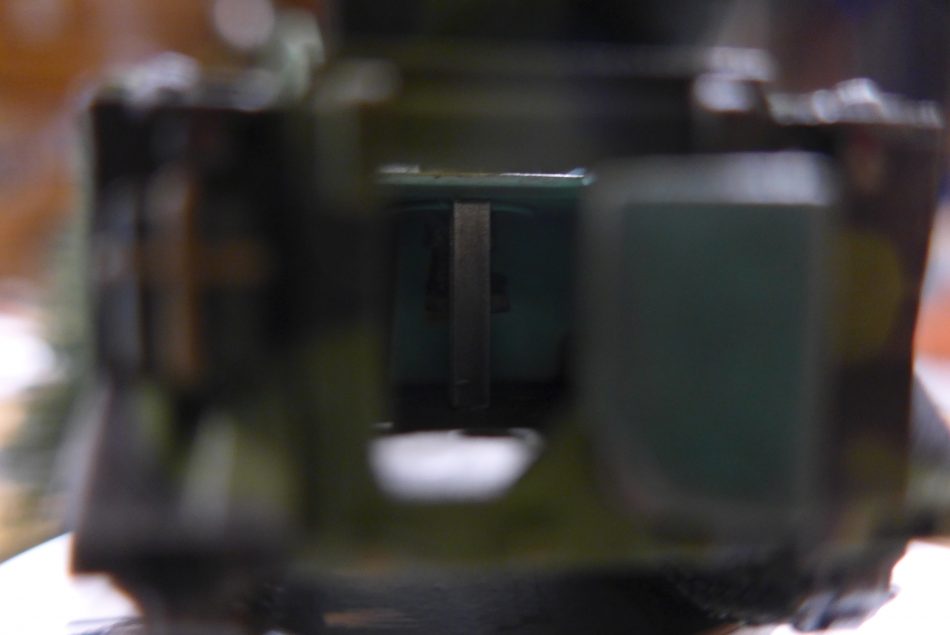
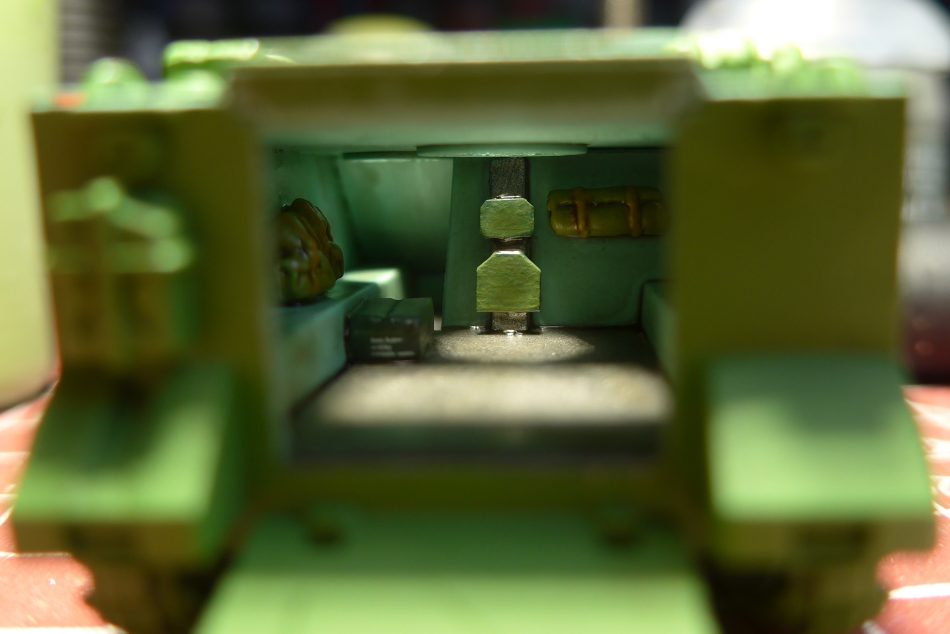
Although, for a few M113’s I added a bit of interior detail, when visible. Notably I added an H beam underneath the commander/gunners hatch and added a seat with some plasticard, for the commander/gunner to stand on.
Centurion MkV 2 DK
I was quite excited when BF announced in their Christmas video, that they would make a plastic Centurion kit for Nordic Forces and that it would include everything to make almost any type of Centurion version out there…well, except for the DK version, so of course I set out to make mods to the kit to make up for its shortcomings.
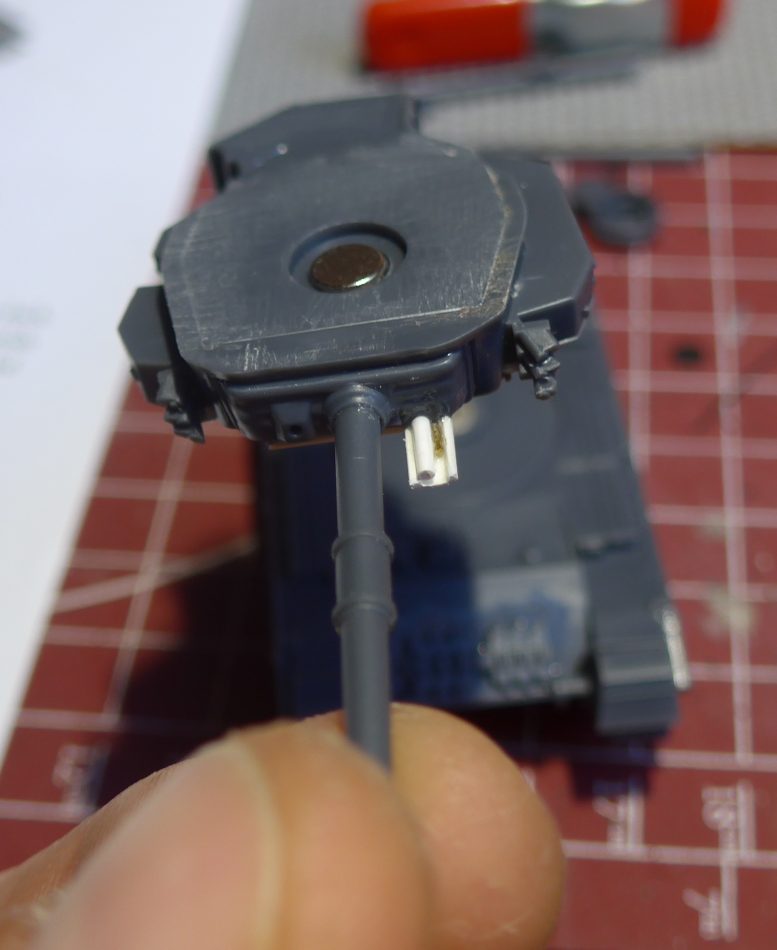
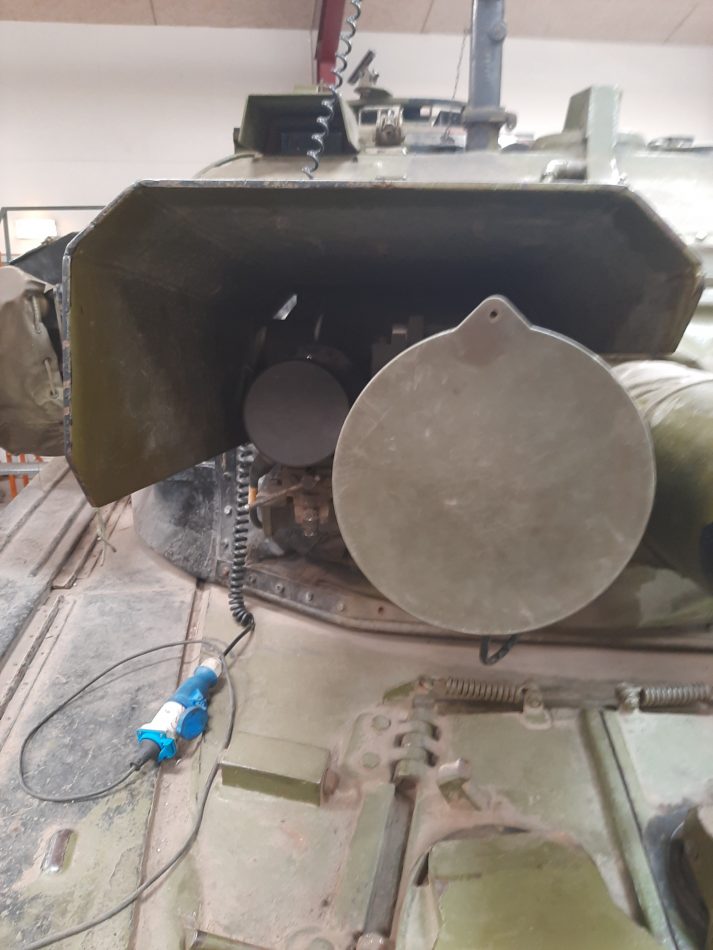
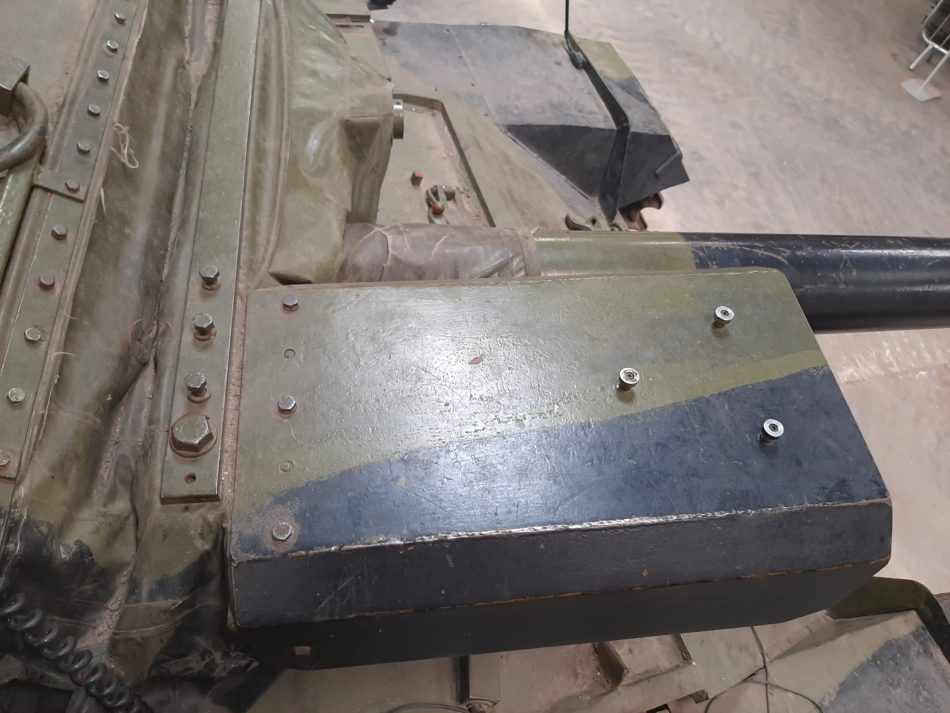
The most noticeable part that identifies the Centurion as a DK version is not really the gun, but its primitive Thermal sights (Thermal tracer) as this is a rather big chunk of optics that stick out of the gun mantle next to the cannon.
To make the sight, I started out by taking a piece of U-beam plastic profile and filed the edges a bit to angle them off. Then I added a piece of plastic and brass rod to the mantle and covered it with the filed down U-beam.
The top of the mantle canvas cover also got a strip of plasticard. Not really sure what purpose this serves, but the Centurion DK’s had them, so I added it.
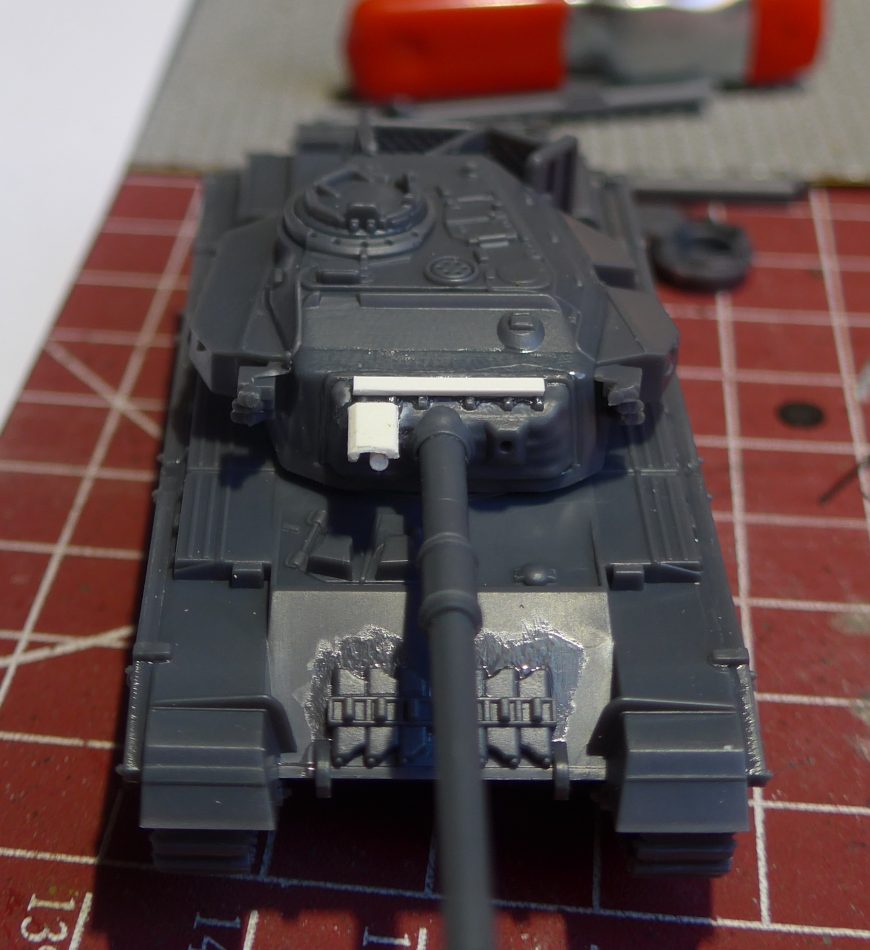
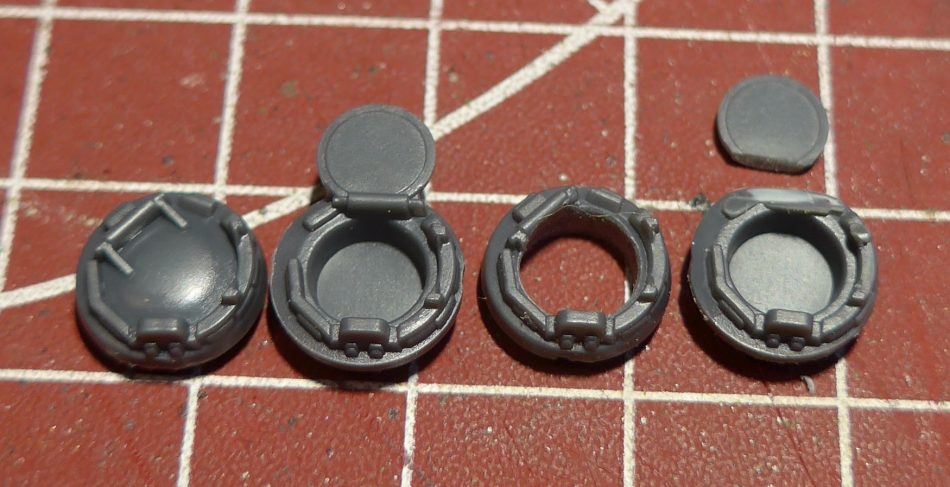
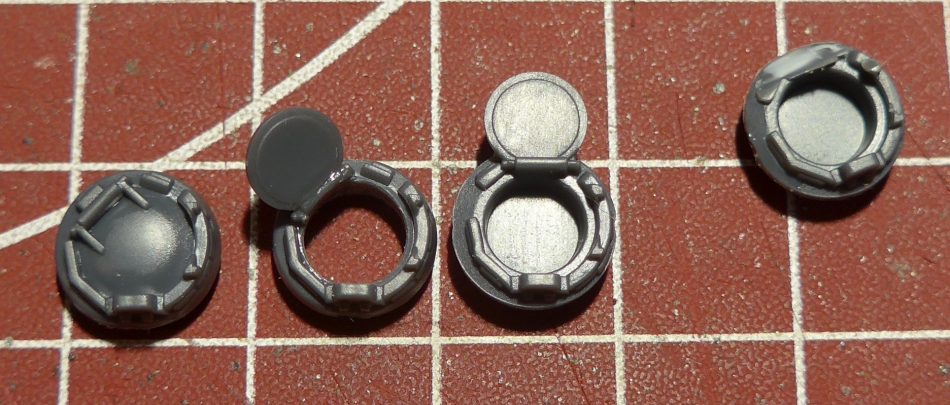
One of the obvious flaws of the Centurion kit, that most people caught on to almost immediately, was the open commander’s cupola. It was offset in an angle it should not be.
This is however an easy fix for me as I have plenty spare hatches because I only have open hatches on my Unit leaders tank to help me spot them on the table.
I started out by taking a closed hatch and drilled away the hatch entirely. Then I took another open hatch and cut off the open hatch and attached it to the drilled out cupola. Easy peasy.
The last modifications take a bit more cutting, filling and filing, but are also quite simple.
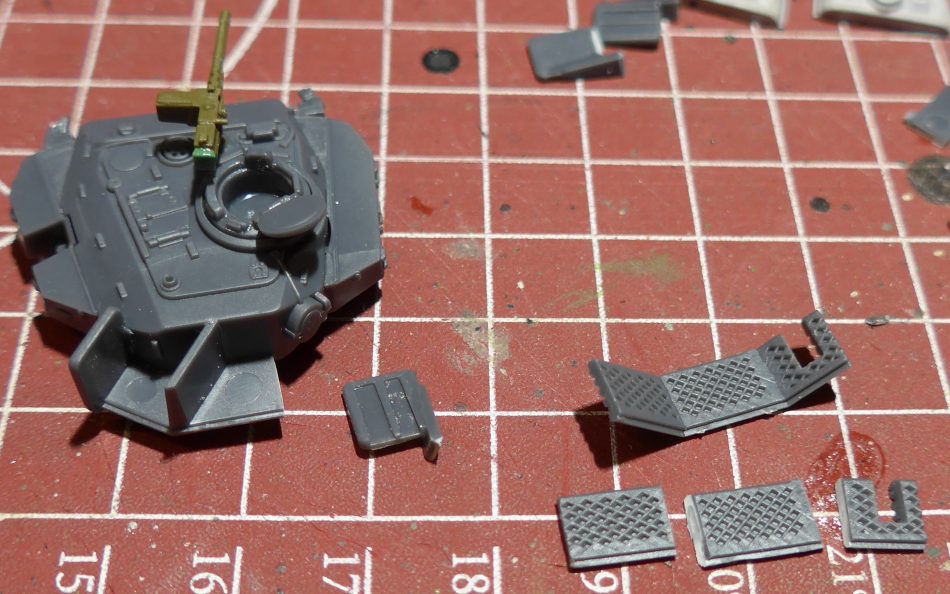
Turret baskets on Danish Centurions, be it DK or 20pdr versions, are shorter than the ones in the BF kit.
To fix this I chop up most of the basket parts, and simply glue them back together shorter than they originally were molded. The right most side of the basket has a curve that need filling so it will sit flush to the turret. For this I just glued in some cut offs and once dry filed them flush, and then glued the basket pieces on.
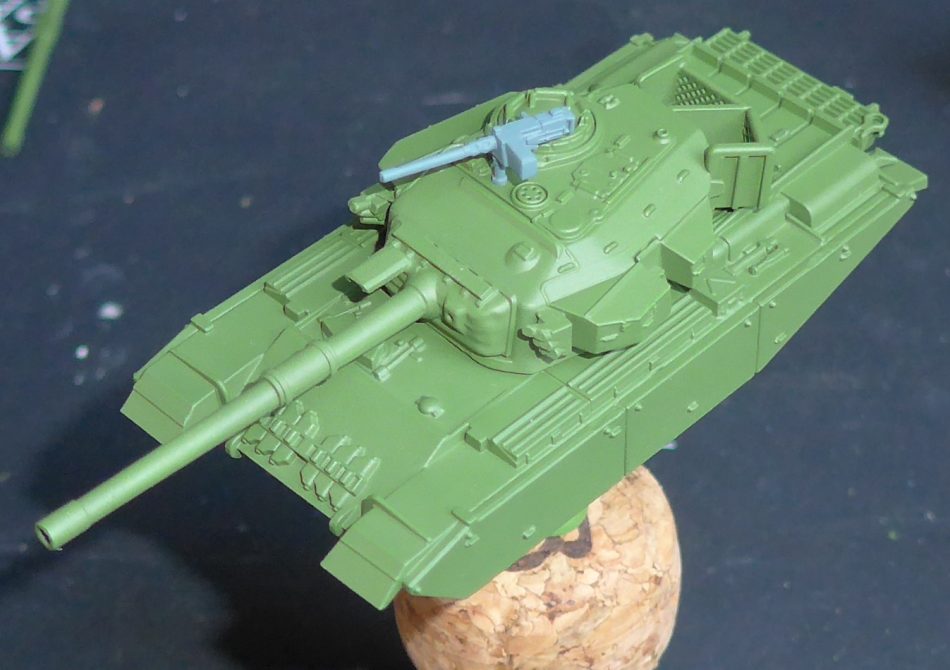
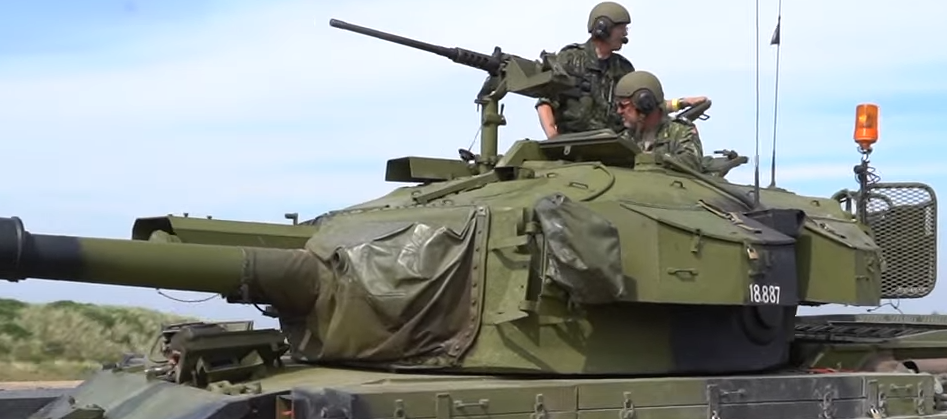
BF made a mistake when designing the Stats for the Danish centurions. For reasons unknown, they suddenly can’t tell the difference between a 50.cal Browning M2 and a 7.62 MG3, as the latter is what they decided to put on the Centurion… So time to fix this as well.
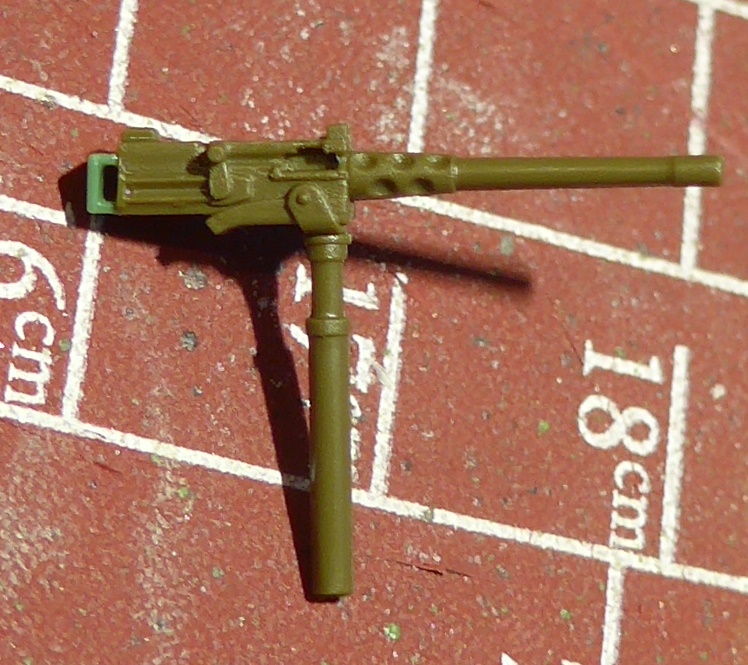
My first version was to simply take the 50.cal that came with the kit. Cut off the mounting and attach the gun to a plastic rod and this worked fine, but I later found out I had the perfect spare 50.cal from a FOW US Airborne Jeep lying around, I had bought for my GD240 build (coming up further down). It only needed a handle that I cut from the Centurion 50.cal and added to the Jeep 50.cal. Drilled a hole in the turret in front of the commander’s cupola and it was done.
GD240
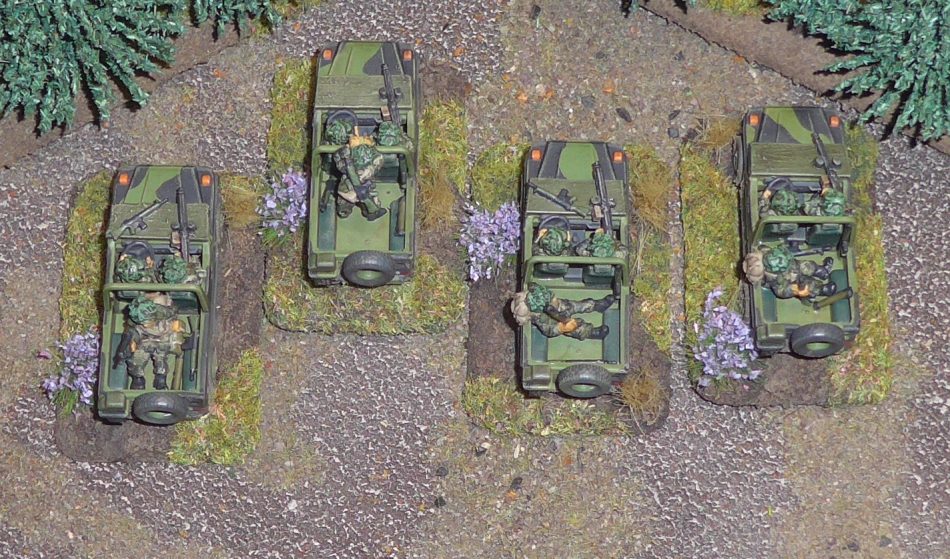
Another entry in the Nordic Forces book I was really excited about, but the model from BF is a huge letdown as it in no way resembles anything like a GD240 “feltvogn” used in the Danish army, although it do resemble the armored GD280’s Denmark got in the early 2000’s.
Normally I’m not a big fan of getting 3D printed models as I really do like to buy official models and support the companies that makes the games I play, but in this case BF didn’t give me much of a choice with what they released. But to be kind of fair, I did go out and buy a box of FOW US Airborne Jeeps, because the crew from that box was perfect for my 3D printed GD240’s, that I got from Germaniafiguren.de. It’s called “Mercedes Wolf” in their shop and I bought the STL file in 1/72 scale and re-scaled it to 1/100.
The model once printed, only needed to have the roll cage removed, but keep the main roll cage “beam” that goes behind the driver and gunner seats and the front windscreen frame have to be cut off and reattached to the hood of the vehicle.
The Danish scouts had a wooden top they laid over the folded down windscreen with rubber “dowels” by the gunner’s seat, for the MG3.
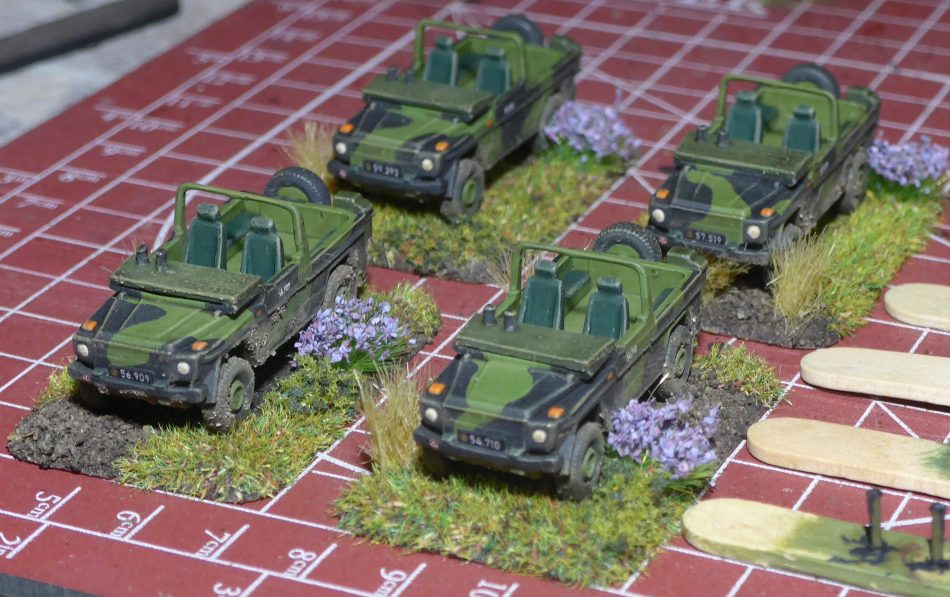
I made this by cutting a piece of plasticard that fit over the laid down windscreen and gave it a rough scraping to resemble wood grain and then added two tiny pieces of plastic rod, to hold the MG3.
The driver from the FOW Jeep kit fits perfectly in to the seat, so no mods are needed here.
The gunner fits almost perfectly as well, just need to cut off or reshape his feet a bit. The real tricky part is to make him hold the MG3.
The MG3 need to have some of its stock cut or filed off as well as removing the pistol grip. Take your time and it will fit. Not perfect, but looks quite fine if done right. The MG3 was a spare, from a BF Leopard 2A5 kit.
Danish Scout vehicles had 3 crew per vehicle. For this I use two different models.
The unit leader is a soldier with binoculars from the WG Redeye unit. I removed the base from the model and bent it a bit, to make him lean on the roll cage to “support” his elbows.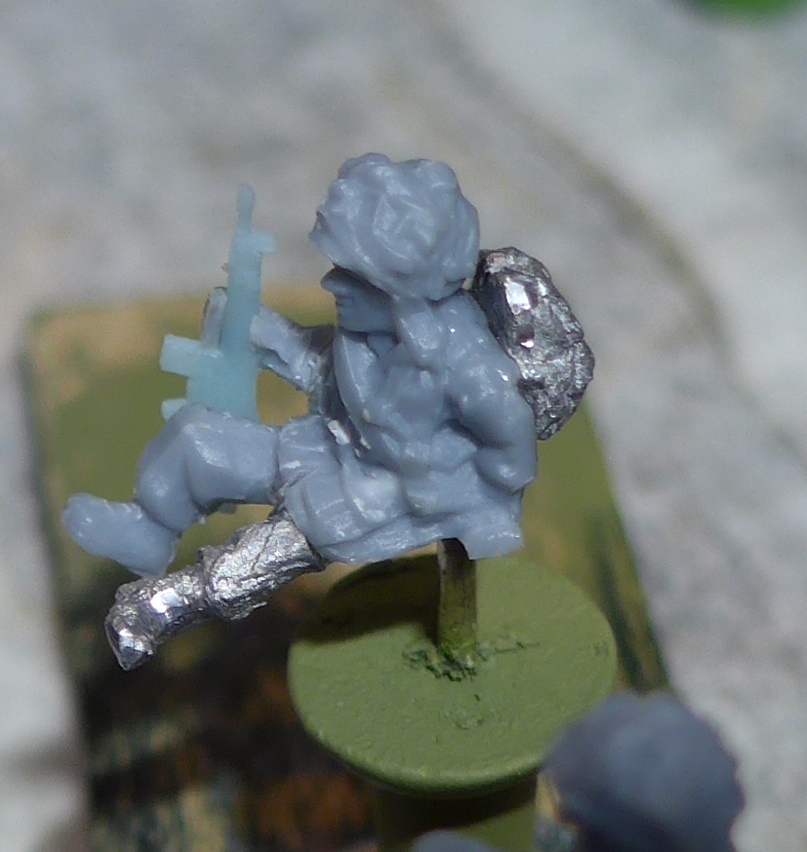 The other vehicles 3rd crewman had variations of the same US Jeep model with different weapons(again 3D print STL’s from Germaniafiguren.de), an added backpack to hide his missing back detail, coming from the BF US stowage set and as he was missing a leg, this was donated from some spare Mortar crew from the M113 kits.
Additional weaponry from Germaniafiguren.de was scattered here and there around the GD240.
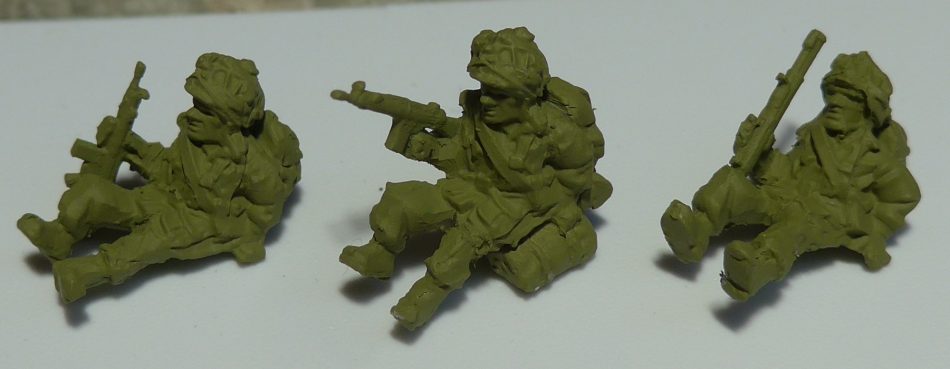
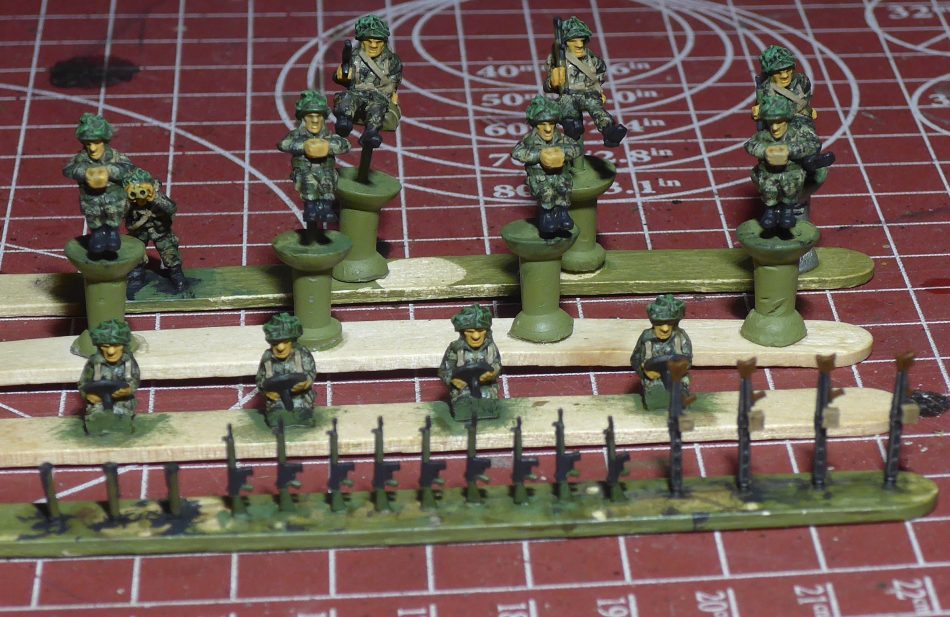
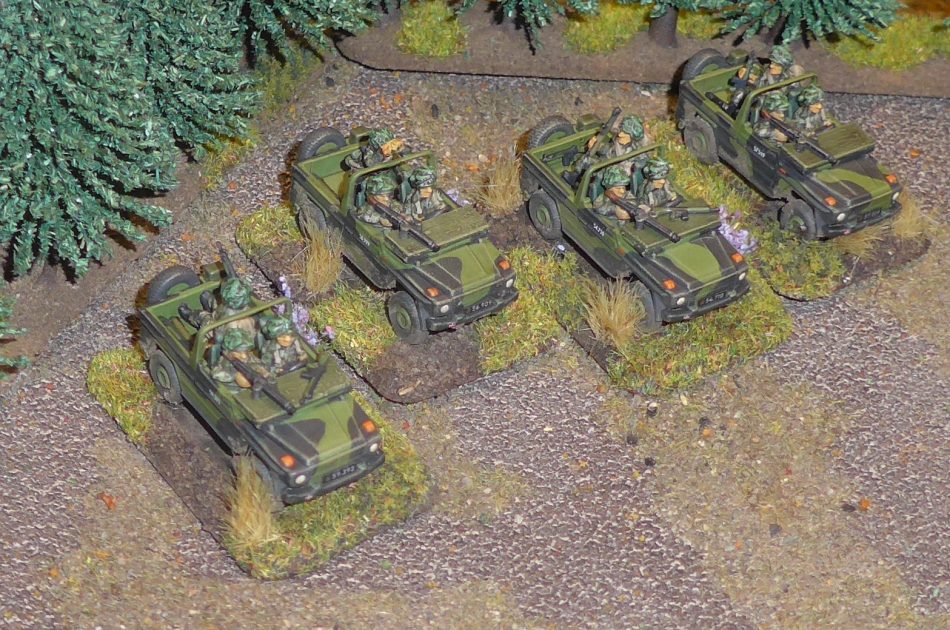
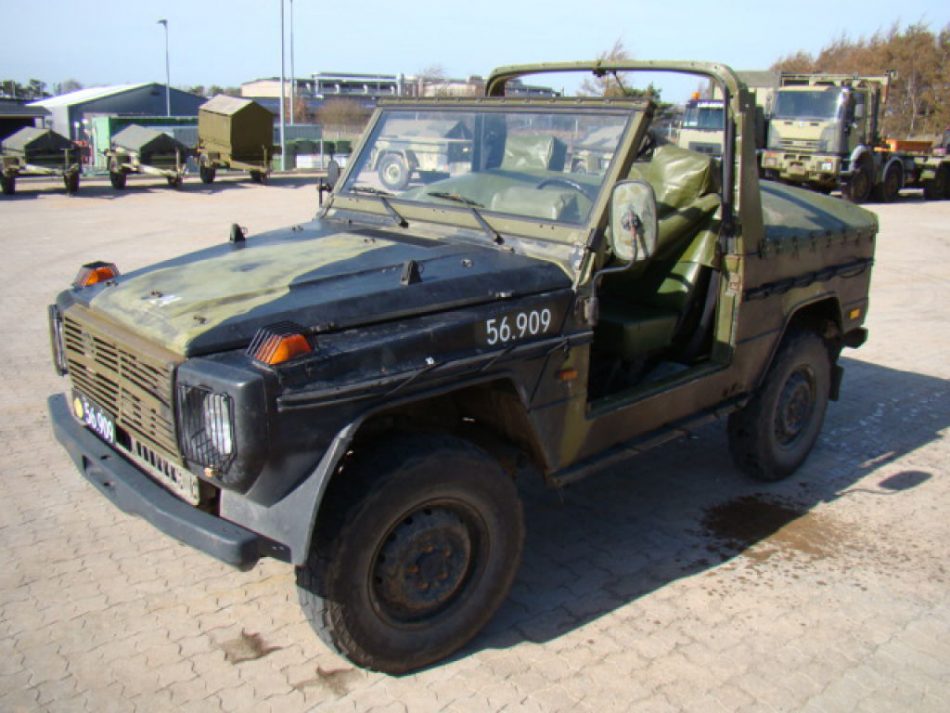
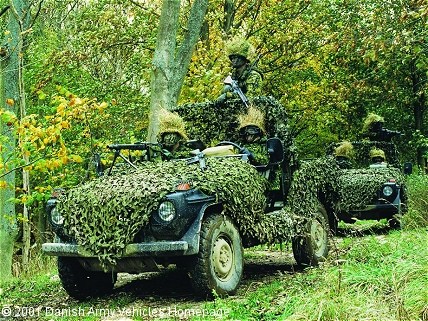
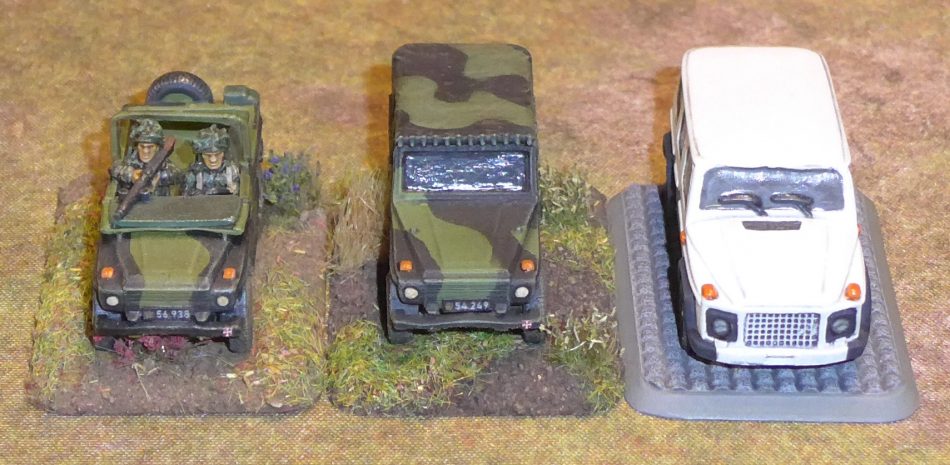
Denmark also had the GD240 in a hard top version, but more commonly with a soft top.
Here is a comparison between the two version next to the official model from BF, that I modified by removing the hole in the roof.

AS 550 Fennec
Again one of my early conversions for my Danes was to try and make the WG BO 105 helicopter look like the AS 550 Fennec that Denmark acquired between 1990 and 1991, armed with HELI-TOW.
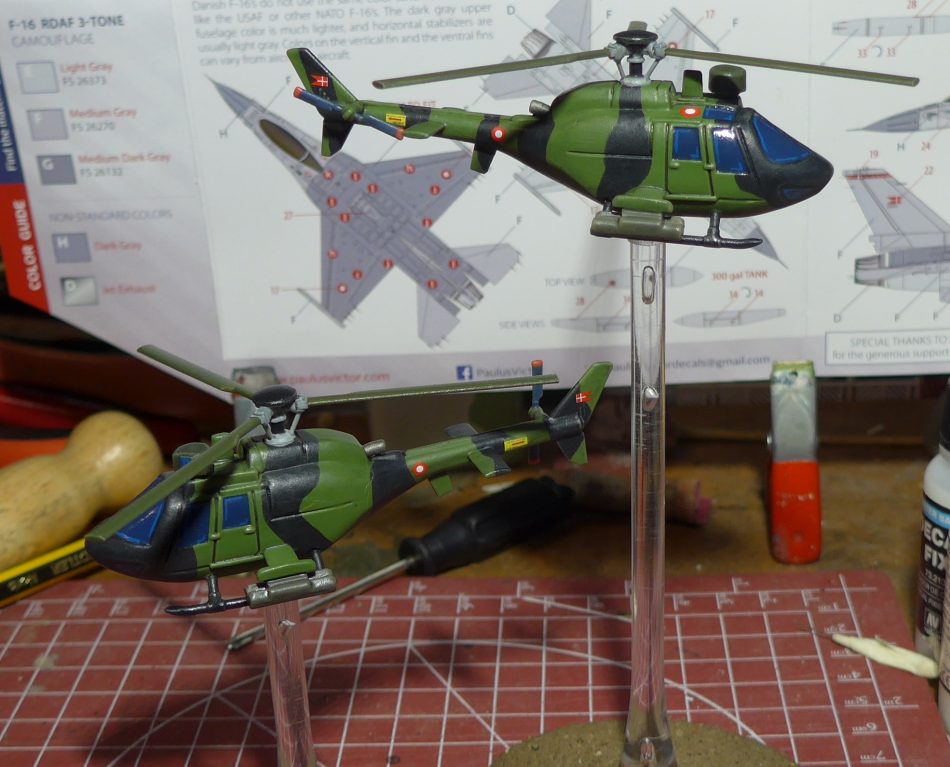
I call it a “Franken-Fennec” because of how it looks and the parts I used to build it. It’s not a perfect conversion, but I got the rough shape to resemble a Fennec close enough, although I do have plans to replace these in the future with 3D printed models.
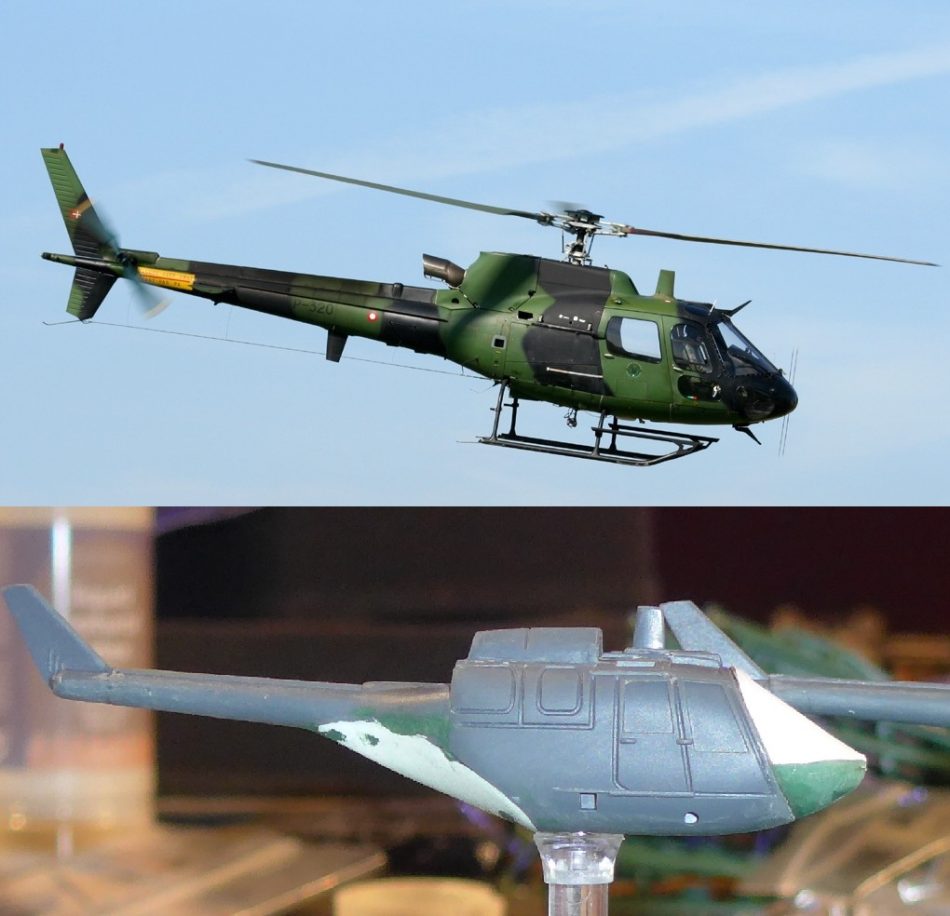
The biggest parts of the conversion, was to cut off the tail and mount it a bit lower than on the BO-105 and adding plasticard and greenstuff to reshape the fuselage and make it look like a whole piece again.The cockpit was also completely redone with the nose from a Huey and more plasticard.
I cut off and repositioned some of the stabilizer wings as well as added new ones, made from more plasticard. The HELI-TOW was made by removing one of the HOT missile tubes from the BO-105.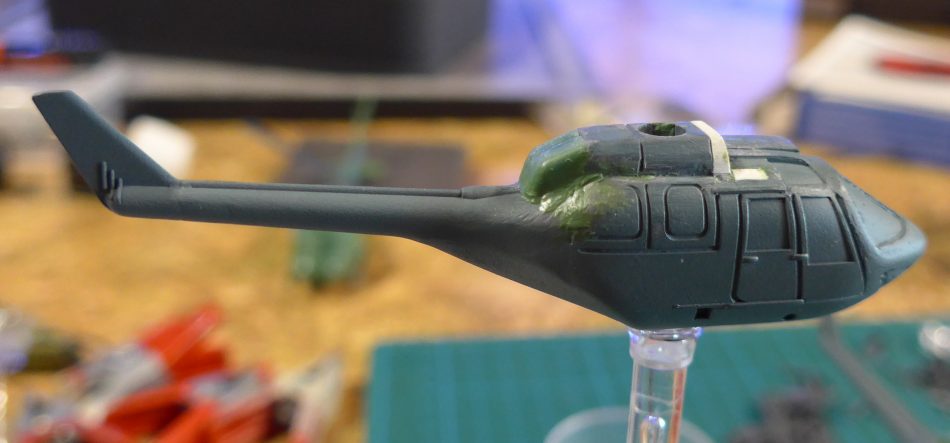
The targeting for the HELI-TOW on top of the cockpit was made from a drawing pin cut to size and an added piece of plasticard.

Lastly the four rotors were separated and three of them reassembled and topped off with a dome from another drawing pin.
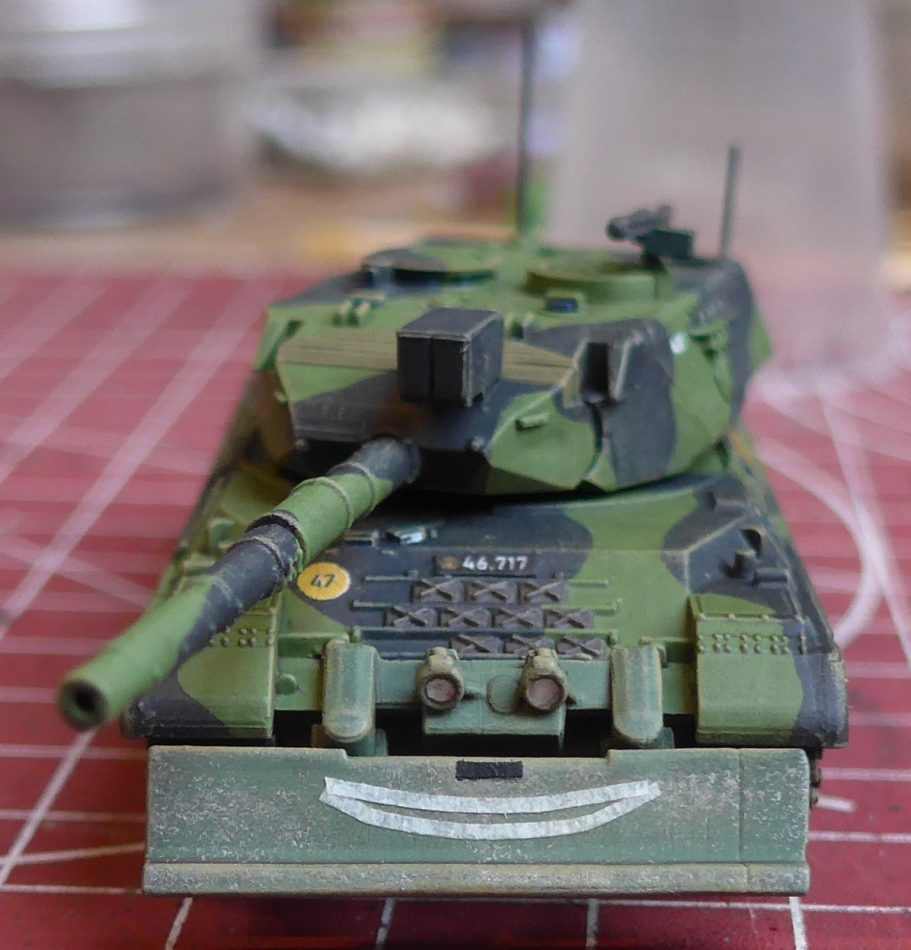
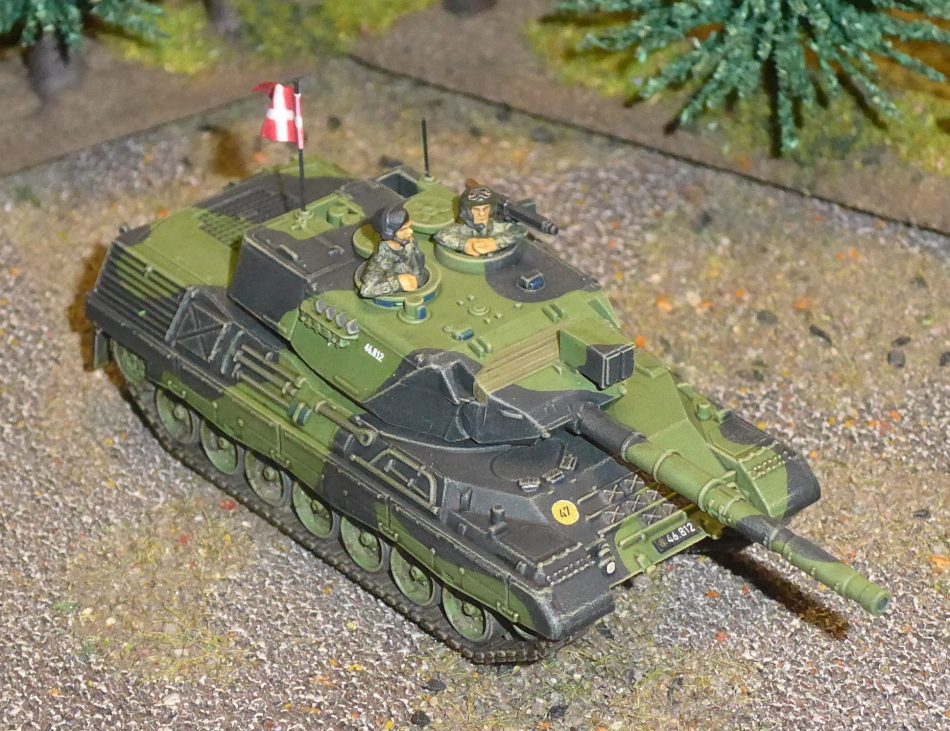
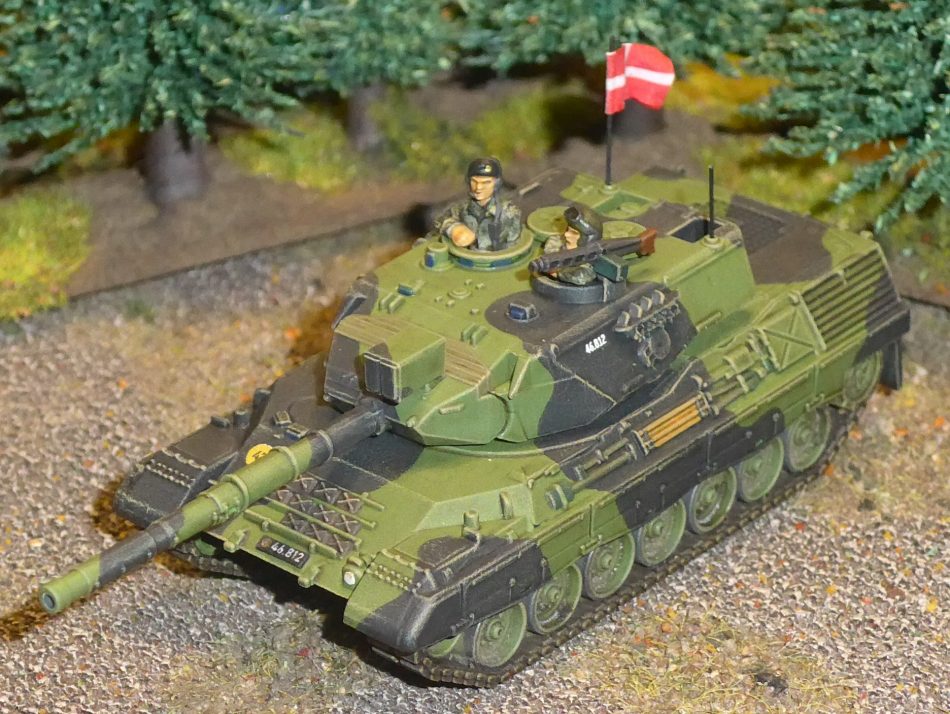
Leopard 1A3 (Danish Leopard 1’s was upgraded to 1A5DK in 1992 with new fire-control systems, Laser-range finders and Thermal sights)
I have a few regrets with my Leopards, as I really should have taken the time to add the side mounted toolboxes all Danish Leopards had installed between 1982 and 1984, but at the time I had found pictures of Danish Leopards without them, and decided it was not worth the hassle of filing off all the tools and build 4 boxes for all 20 Leopard tanks in my army. With the way the BF models are assembled, it would have been very easy for BF to simply make an upgrade kit to swap out the sides of the leopards for the DK version. Missed opportunity I guess.
So the only modification I have made to my Leopards is adding a Dozer blade to the front of the 3rd tank in every platoon, as this was standard doctrine for the Danish army. The dozer was not meant to be a mine clearing device, but was used to help remove obstacles and dig firing positions.
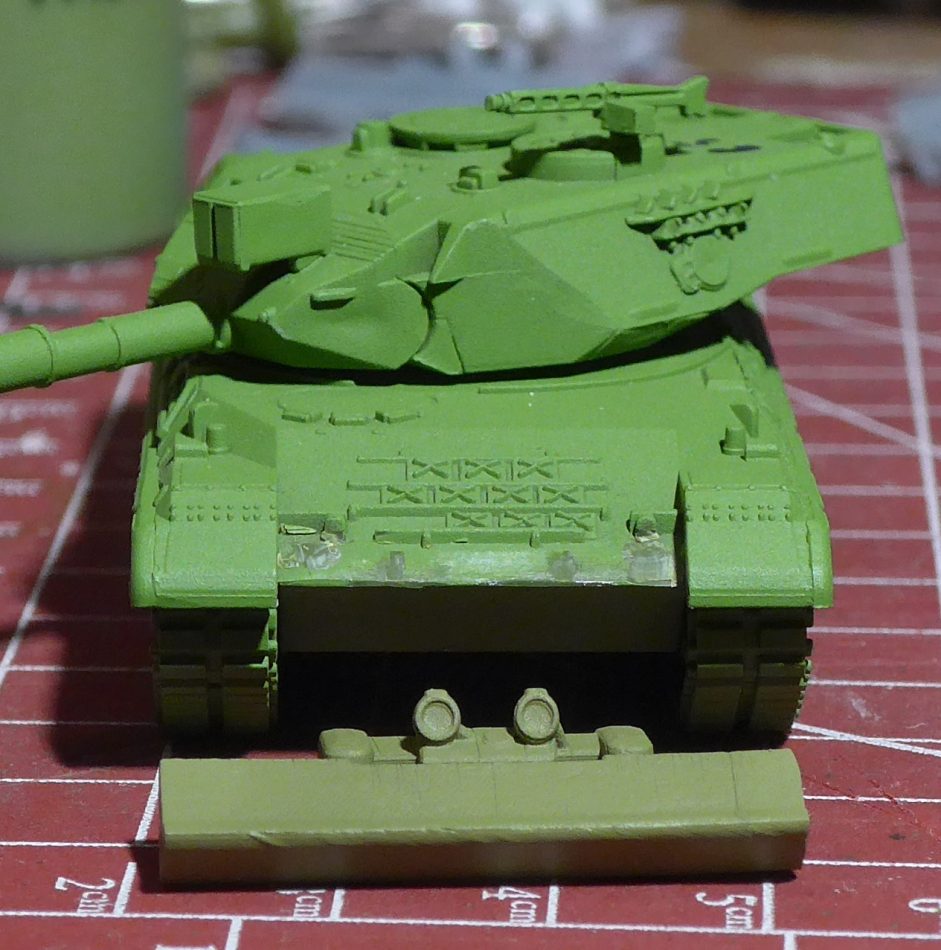
The dozer model was a free STL I got from Army-bits.co.uk, and to mount it, I only needed to remove the front headlights from the Leopard model.
Another small modification I made was to open up the loaders hatch on my HQ tanks, to make them stand out on the tabletop. This was easily done, by drilling out the molded hatch and taking a spare open hatch from a commander’s cupola and gluing it down.

WIP and future projects:
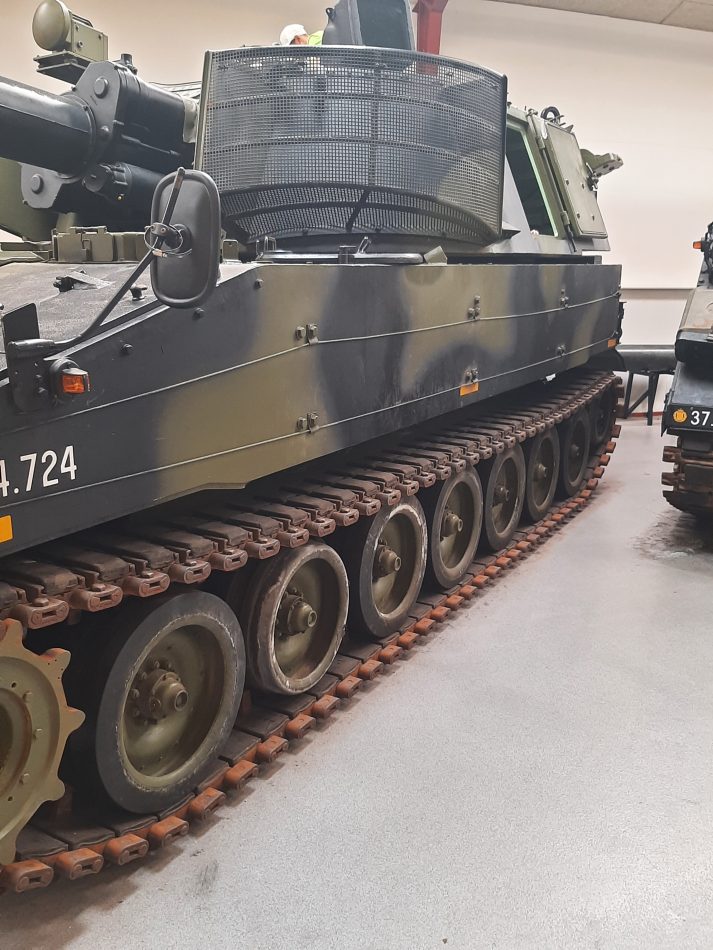
SKH M109 (Selvkørende Haubits or Self-propelled Howitzer)
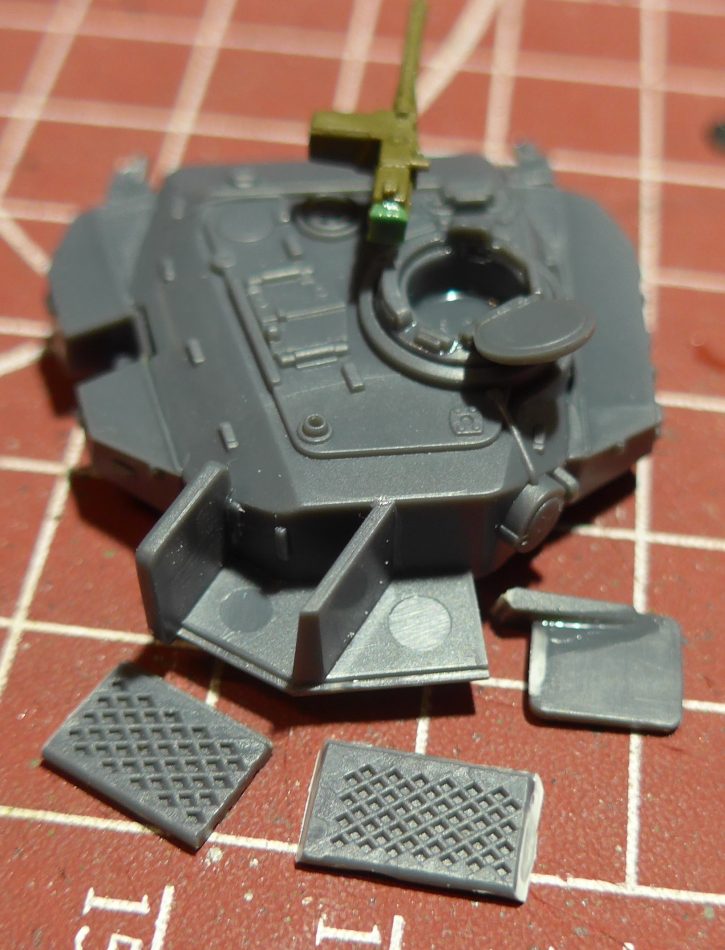
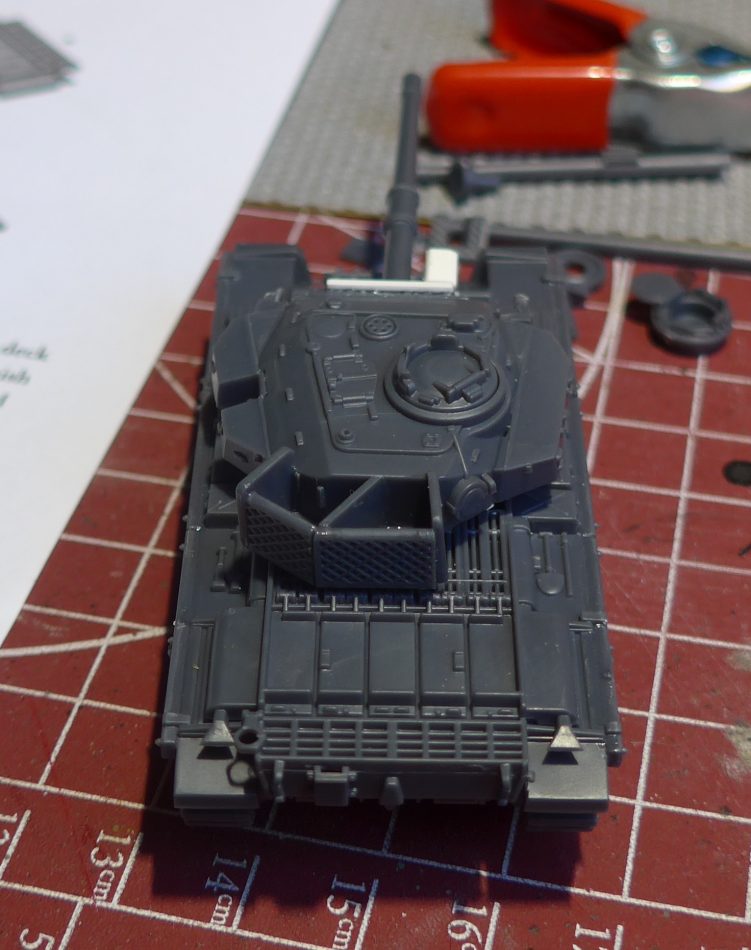
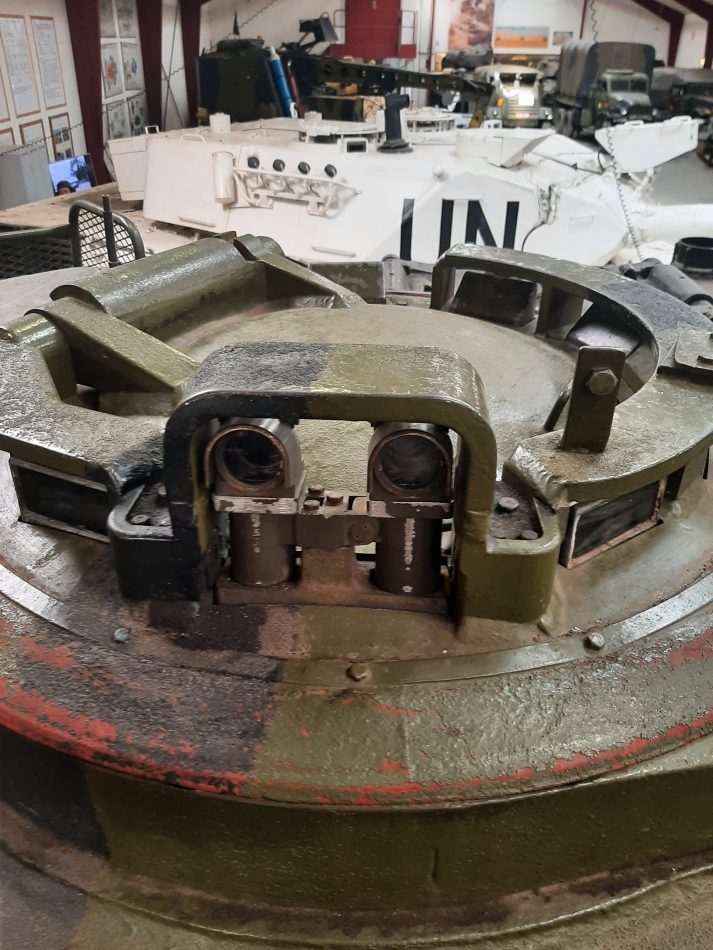
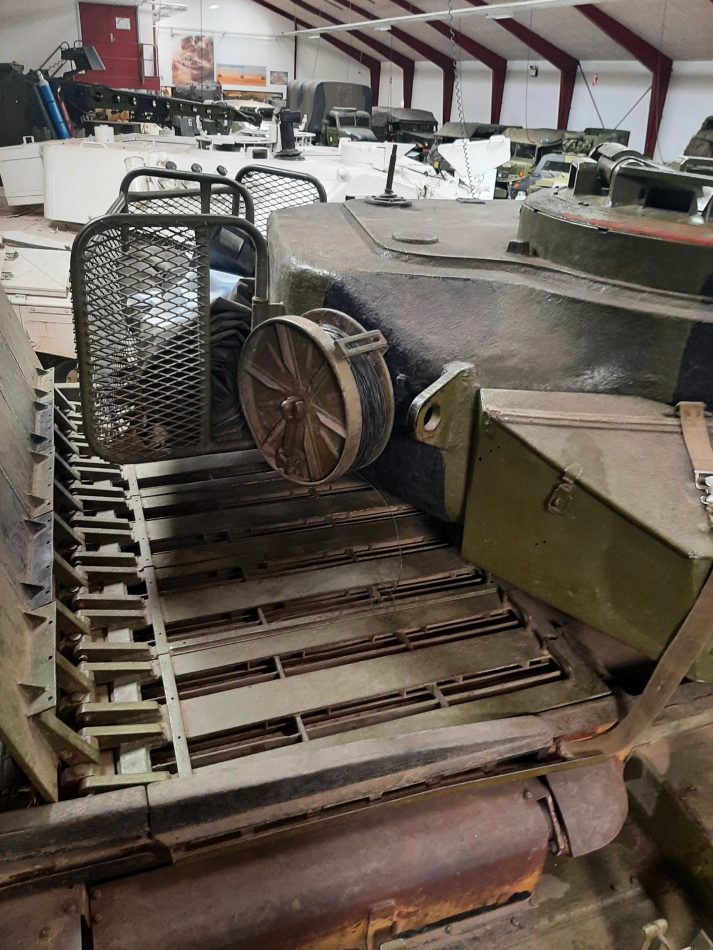
Not a lot I am going to do here, but the Danish M109’s had two baskets mounted in front of the turret, so of course I am going to add these. I have been visiting the Oksbøl Armor Museum here in Denmark, to get some good reference pictures and got some tiny mesh/netting from the train store.
M106/M125 Mortar Carrier
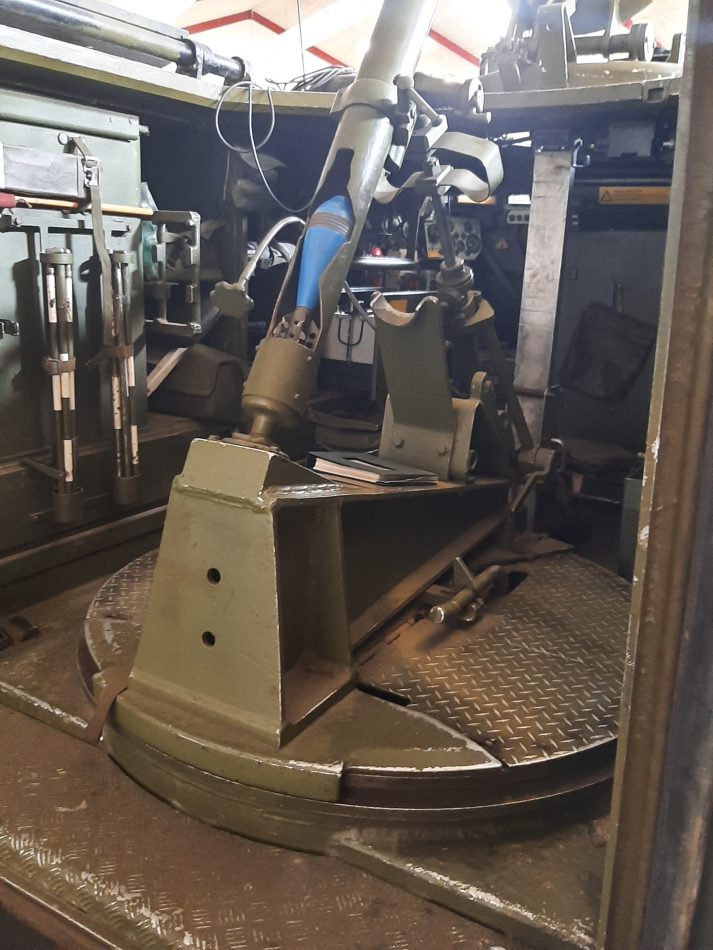
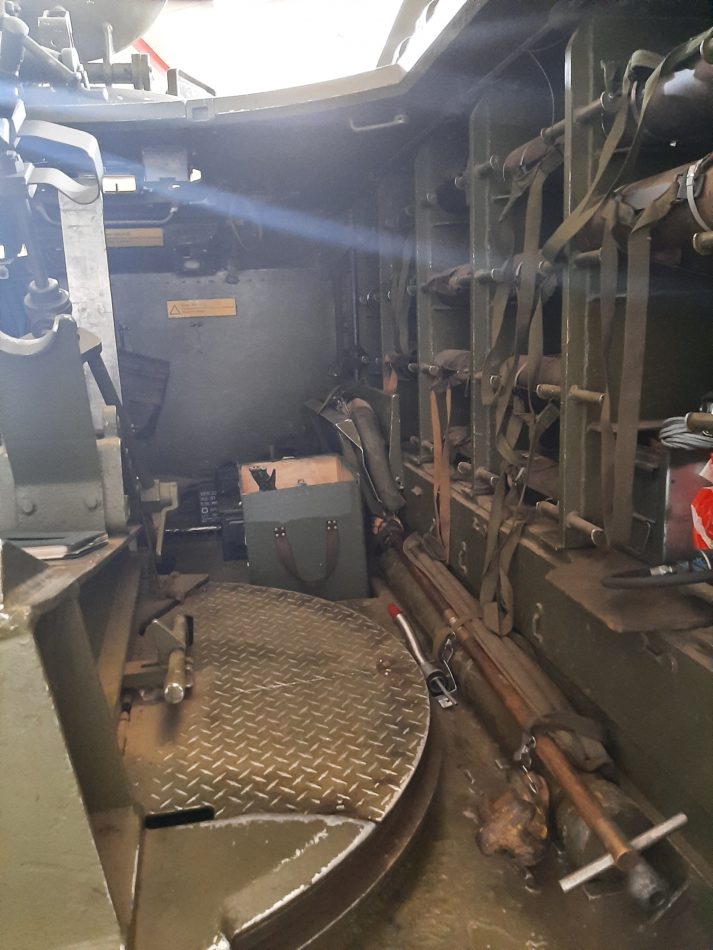
The Danish mortar carriers were fitted with the 81mm Mortar only, and not the 120mm as BF have put in the game. Tests was made in Denmark to try and fit the 120mm mortar, but the floor of the carriers would crack due to the added force of the 120mm firing and was never implemented into the army and as such only 81mm mortars was fitted and the 120mm would be deployed only on the ground.
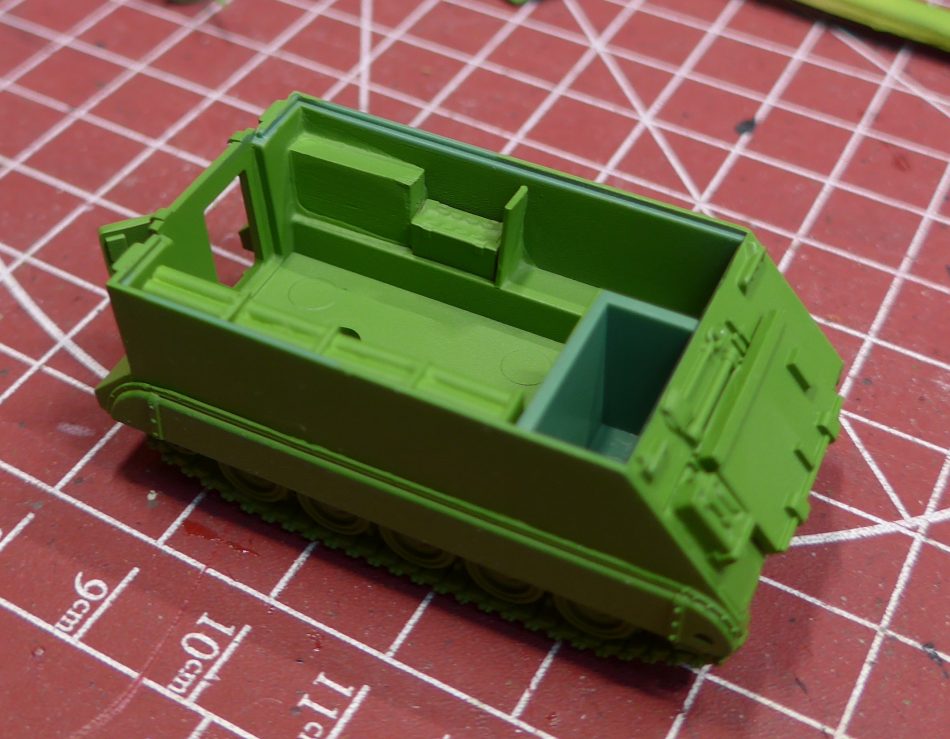
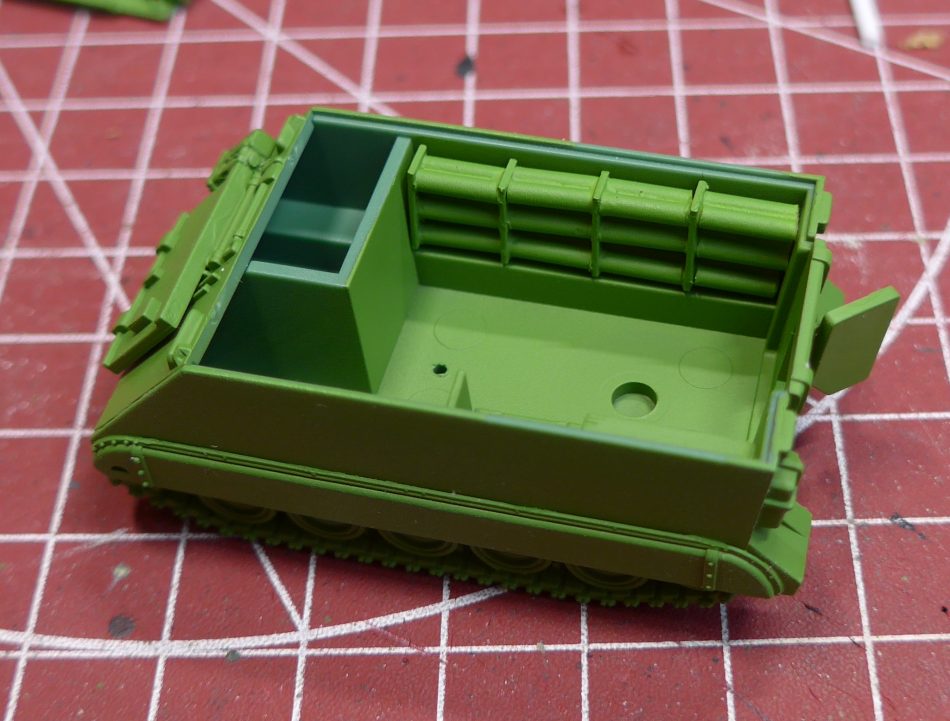
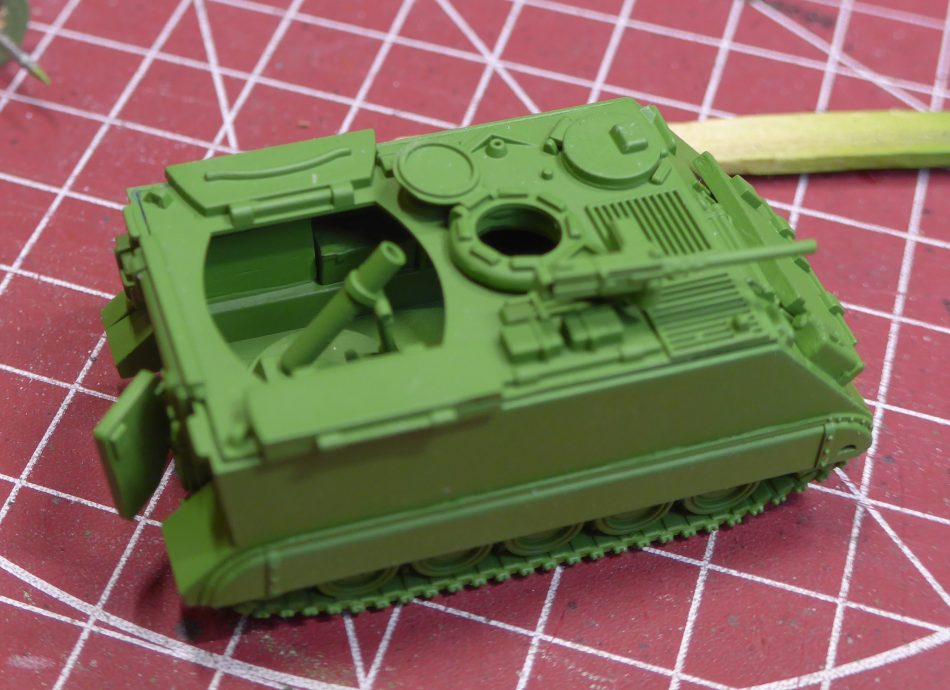
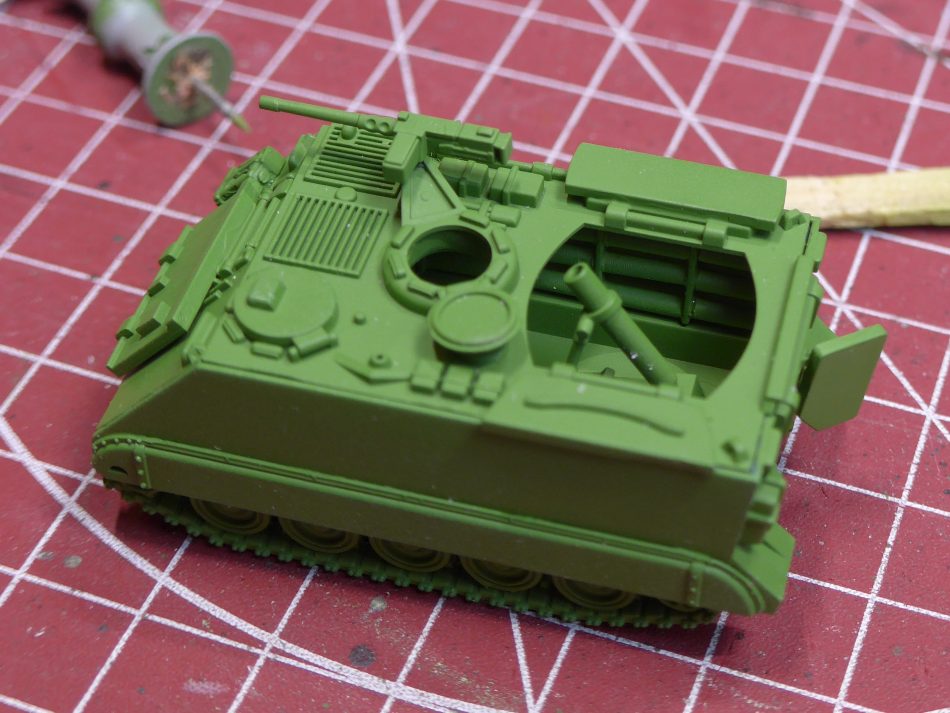
For my mortar carriers, I got the crazy idea of adding interior details, because they will be fairly visible with the open hatch. So far I have only done the initial testing. Its fiddly work, but I like how it turned out this far and will likely carry on doing it.
Ammo racks for the mortar rounds have been added to the right side of the interior made from plasticard and plastic rods. The left side have had the internal fuel tank added as well as some stowage.
Additional model proxies:
F-16
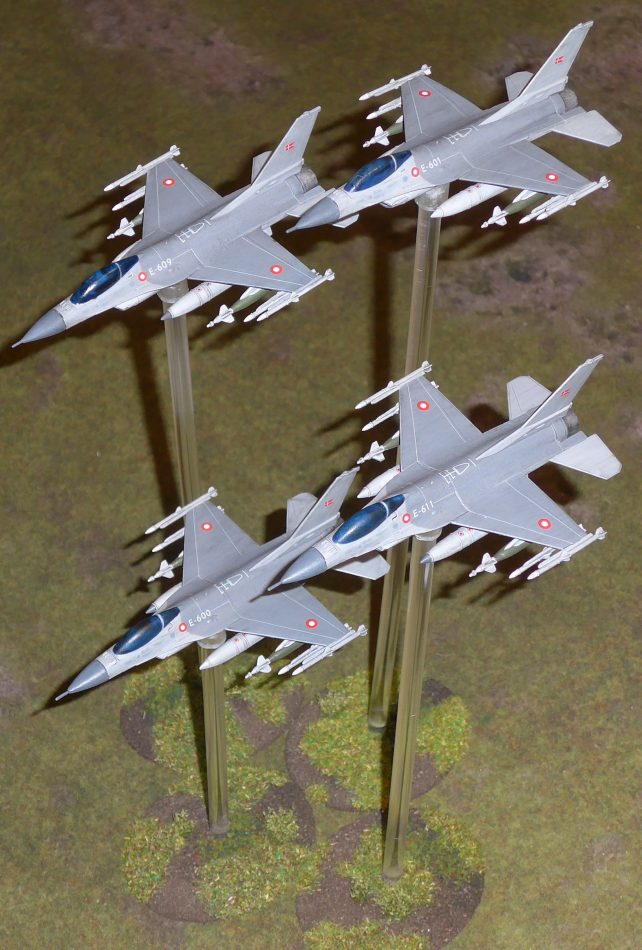
In 1982 Denmark acquired the F-16 fighter to support and later replace the older Draken.
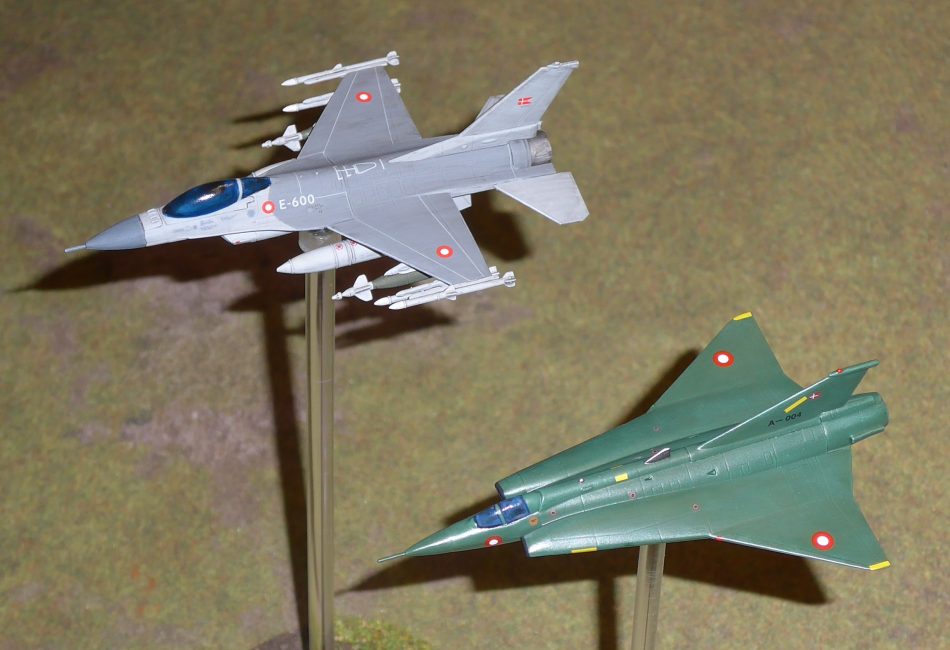
I simply got a Revell 1/144 F-16 model and painted it up in Danish colors. Decals I got from Paulus Victor on Ebay. These I use to proxy the WG Tornado or US Harriers in the game.
My knowledge about aircraft is very limited, so there might be some mistakes in choice of weaponry and other minor details I missed when assembling the model, but it works very well on the table.
Saab F-35 Draken
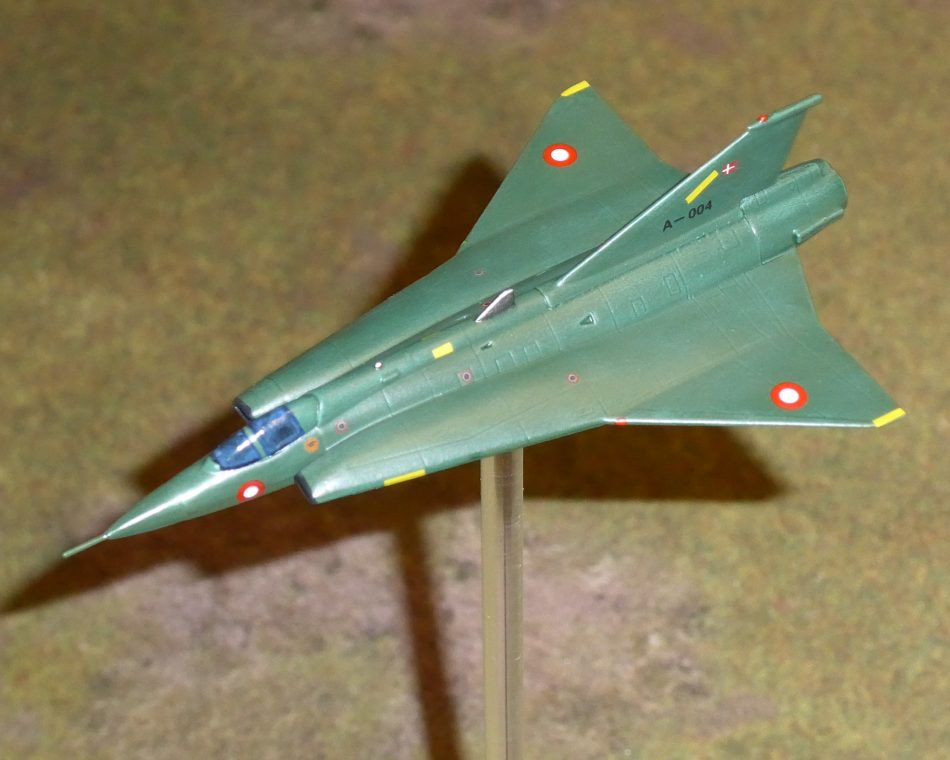
The Danish Draken’s was in service in Denmark from 1972 up until 1993. When Denmark acquired the F-16, the Draken’s primary role became that of Reconnaissance and bomber as it had better optics and ground radar than the F-16 at the time.
Just like the F-16 the Draken will be used to proxy either the WG Tornado or US Harriers in game.
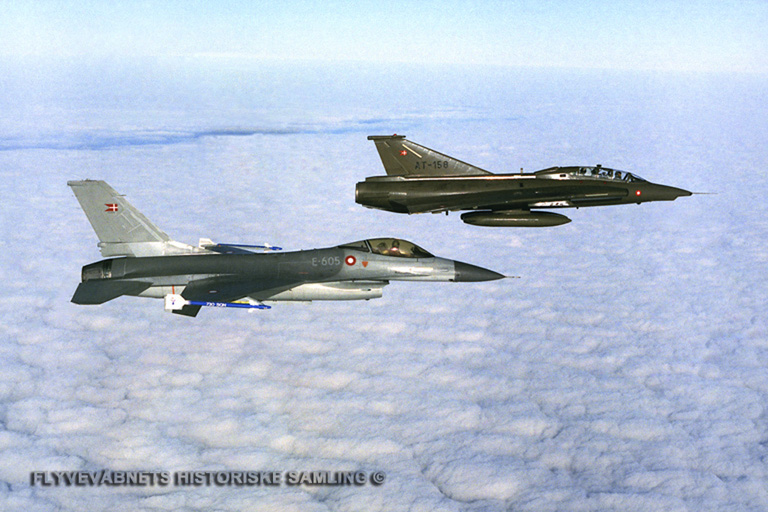
It’s a bit silly that I have both these aircraft, as I can’t use both of them in a game anyway, but I like the option I could make a mixed unit of both aircraft in a game, as both Draken’s and F-16’s have been seen flying in support of each other.
The model itself is a model kit oddity made by F-toys, and was apparently bought as random kits out of vending machines I Japan, although I bought mine on Ebay from a Canadian seller, and Robert Kelly was kind enough to help get them to Denmark.
As of now, I am still working on getting them painted. I have completed a test model and I have to say I’m not completely satisfied with the paintjob. The green looks like those green “army men” toys you can buy at the dollar store, but hopefully I will make the next ones look better.
The decals are a mix of leftovers from the F-16 made by Paulus Victor, some new decals from Lima November decals, and decals from old Warhammer kits that I cut to size.
M270 MLRS
My last proxy model I must admit is a bit of a stretch as to the TY timeline.
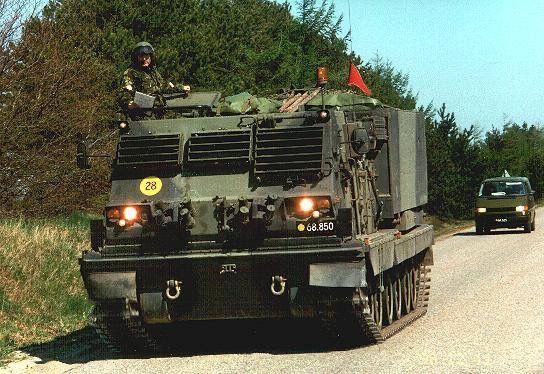
Denmark had placed an order of 8 launchers in 1995 and later 4 more was ordered. It wasn’t until 1998 that the first 4 was delivered with the last arriving a few years later. However all 12 launchers was taken out of service as early as 2004 and was kept in storage until they was sold to Finland in 2013.
The reason for the short-lived service of the M270 was due to Denmark’s decision to skimp on the ammunition and bought what was cheapest and also the most imprecise and Denmark couldn’t afford to buy the better and more expensive ammunition.
With that being said, I just thought it would be cool to have them as Proxies for the WG LARS rocket launchers in game. Not very accurate but sometimes the “rule-of-cool” has to be acknowledged as well.
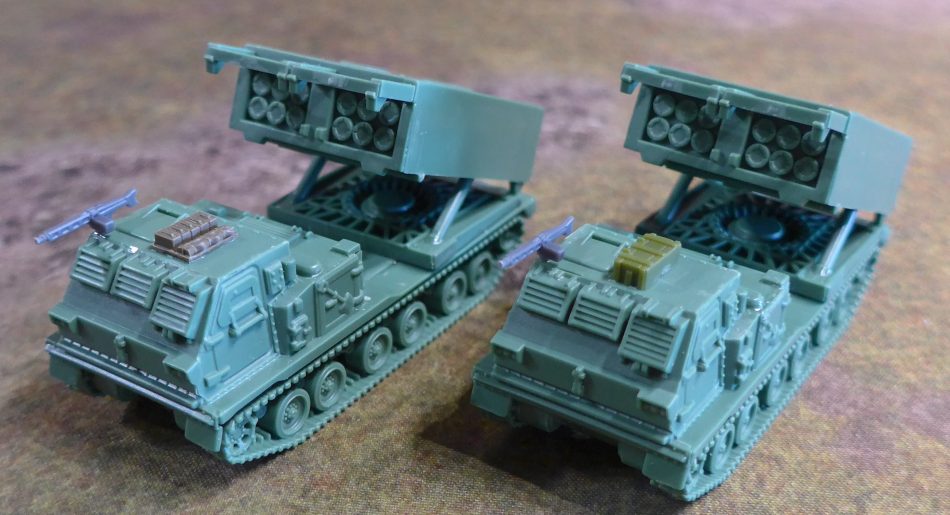
At the time of writing I only have two models and I will be picking up an additional box soon when my local store, get them in stock.
Not much conversion work is needed, although I have added an MG3 and some stowage to the roof of the crew compartment.
Future projects:
Following is some ideas I have to include homebrew units for use in friendly local games.
M10 Achilles: The M10 was in service in Denmark up until 1989 and was used in a supporting role with second line units, much like the Centurion 20-pdr tank hunter.
Bofors AA gun: In Denmark the Bofors 40mm AA gun was primarily deployed as stationary air defence around critical installations, like the naval defences at Langelands fortet and Bangsbo fortet, but could also be used in the field, towed by either Unimog or MAN trucks.
The gun was in service up until 1996.
120mm mortar: As mentioned earlier, Denmark never had the 120mm mortar mounted in carriers, but as infantry operated mortars. My plan is to simply take the M106 entry in the book and have the Mortar on an infantry base, with the M106 as an M113 transport.
M41DK: Why BF did not include the M41 officially still baffles me, as this was in use in Denmark up until 2000 and was upgraded several times with better ammunition, targeting, thermal sights and engines, and was used for reconnaissance in the armored battalions. Army-bits.co.uk is working on a 3D model that I plan to get, as soon as they release it.
And that is all for now.
Next, I will be talking about markings on Danish vehicles in the 80’s-90’s and what decals I have found works well with the models in Team Yankee.
-Morten

Same with Belgian 4.2″ mortars which were towed , not fired from the M113 . As BF make the mortar in the US NAM range , its odd with the amount of ground fired mortars now in TY , it was done that way .
Yeah its a strange choice. They made the Mortars for the Finns, the way Danes should have been.
One reason might be that there is no existing bf Soviet kit that could be used for Finnish mortars in the way the m113 kit makes an m106.
The finns missed out on stuff too, They didnt make a pasi although my understanding is that they were used much greater numbers than BTRs. And also no mtlb apcs which would do for many nations.
The Finnish 120 KRH 73 Mortar is the same as the WW2 Soviet 120mm Mortar obr 1938 , that BF already have a mold of .