Fog Of War LW/MW Tactics
By Benny Christiansen
Having played a number of Fog Of War battles, I often get several questions about the cards and how to play a game with them when I participate in events or tournaments. I’ll try to summarize it a bit, and give a “show and tell” of how I play and what I think is essential in the lists.
List building – relevant background info
In order to make list building make sense, I should recap how we make matchups. In general, it is either decided by the TO in advance based on the table or maybe all players play the same mission. This means that often we don’t know if we will play a Fog Of War match or not. This makes me make my lists so the lists are compatible for both Fog Of War games as well as “normal” missions. When we determine attacker/defender its often decided by the TO or Generals, so in “normal” missions, it is not Tanks attacks mech attacks inf attacks fortified.
List building – deciding what kind of list to field
SCOUT: In order to make a Fog Of War list work, it is required to have at least one unit with Scout. Several Scout units do not hurt, but at least one. The missions used for Fog Of War are Free For All and Dust Up. These missions have room for Spearhead during deployment, as well as some objectives, require the Scout special rule.
MOBILITY: I prefer to field mobile and durable units, such as veteran infantry units. In LW this can be any Veteran unit, preferably a Fearless unit. The Follow Me movement order can be quite relevant. The Fearless rating can help a unit hang around one round longer while you wait on your reserves to arrive. In MW, I like to field a large “blob,” such as the American Rifle Platoon, or a smaller Confident unit.
Tank units can be very important also, especially the Light Tanks, as their mobility is the best.
Claiming Objectives
We claim objectives using the method detailed in the . Stay within 10 cm/4 inches of an objective at the beginning of a turn and end it without any enemy units within10 cm/4 inches and you have the objective.
MW FoW Tactics
With Fog Of War objective cards, the center of the table becomes a hotspot of activity. There are several cards that provide you with decent points provided you control the center.
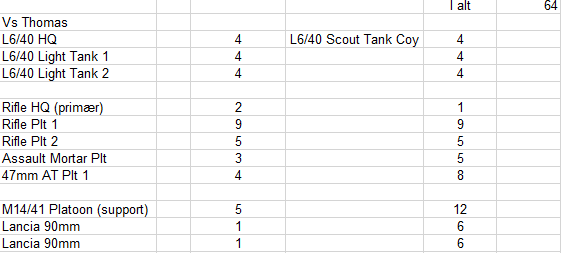
I have played British, American and Italian forces. I find it essential that you have at least 2 units with Scout/Spearhead and one infantry formation, as well as at least one platoon. I also prefer one formation with light tanks. AT guns were nice to have, but not really needed, as I wanted mobility above all, and the AT guns are still very stationary (ok not the Elefantino, but most of the other move slowly, hehe).
I use the AT guns, primarily, to ensure control of the center of the table. Here I found bazookas/elefantinos/recon tanks/light tanks more usable. If we play a scenario from the long table edge, I recommend deploying infantry in the center and then medium/slow tanks and then light tanks further and further away from the center. Scout as much as possible, as it could mean you could start your turn being in contact with a piece of terrain, that would give you a point or two.
LW FoW Tactics
As in MW the center of the table is essential. Either you decide to control it, or find out how you will prevent your opponent from doing so. In LW the softskin transports and their rule of allowing passenger saves makes AT guns much more usable than in MW. So here I recommend a mech list or an infantry list or possibly a light tank list, but my “go to” choice would be infantry. If I could choose any list in the LW books, I might use the French Triallieurs Light Infantry lists from Road To Rome, as they have incredibly nice special rules and cheap infantry at the same time. The lack of AT teams in their infantry is not even of a little concern for me, as I dont need to annihilate enemy tank platoons with them, I primarily just want to force them to retreat away from the objectives by going into close combat with them, and then counting on them to fail their Counterattack Roll before me.
The Fog Of War Cards one by one, but with a slightly different approach to tactic use
- Spread Disorder – Hidden – Good to have. When I can, I always try to keep in my hand. It can remove one of your opponent’s revealed objective cards.
- Hidden Intelligence – Hidden – A fun card. I use it when I have a very mobile unit available. I like to place it on the edge of the table forcing my opponent to scatter his forces, especially if he has a few expensive units (German DAK Tank formations – I’m looking at you!). There is a 50% chance you gain points on this card. Only you can score it. Since it is Hidden I recommend you play it at the end of your enemy’s turn, choosing the hill your tanks hide behind or something similar.
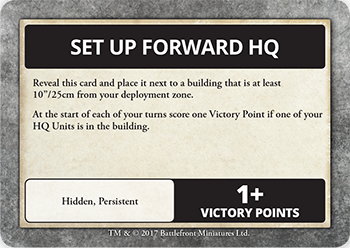 Set Up Forward HQ – Hidden – This objective is for infantry formations only. However, for infantry formations, it is potentially powerful. Read it carefully. It is Persistent, so you gain one point, every turn if you can keep your HQ in that building. Italian German and British infantry formations are particularly good at taking buildings. Americans can also, but if I saw my opponents HQ sprinting towards a building – they would be my primary target with all I could muster! (also see Knock Out Command Structure).
- Secure Major Objective – Reveal – I have had good luck with this objective in the past. Most opponents would place it in the middle of their own deployment zone. I only choose this when I am estimating that I have a good strong mid-field force. Do not choose this as your first card. If you estimate that it will take 4-5 turns before you 100% certain can take this objective, choose another card. If you choose it and you are mistaken, your opponent will be very making a very bad choice if he uses “Spread Disorder” on this objective.
- Precise Attack – Hidden – Unit Type version: If your opponent is fielding the DAK list with many armored cars, this is the one to use, and then go on the hunt for recon units! It gives you “permission” to be very destructive in your tactics and not so much about the movement and such nonsense! GO KILL!
- Precise Attack – Hidden – Unit Points version: If your opponent has put a unit too far away from support of other choices or if you finally have the unit close to going beneath the Good Spirit limit or if you in any other way can see that he has a unit that is relatively easy for you to take out. Use this card to gain points while doing it. Play it at the end of his turn, so you can get points in your turn, no discussion.
- Knock Out Command Structure – Hidden – It provides you with yet another reason to go for the top of the food chain. For me, this objective is more interesting if the enemy is Russian Tank formation (LW) or any MW tank list (except things like Italian L6/40 with 4 scout tanks), but unless I can see a clear and likely chance of actually taking the unit out, I would not be saving this card on my hand.
- Secure Minor Objective – Reveal – Oh, this is a favored objective of mine. By using this, you can stop an enemy from being too aggressive with his unit. Most times, “annoying” units must stop and defend this objective, as you otherwise will be able to gain 2 easy points. Consider not placing it as close to yourself as possible, but maybe as far to the side or as close to the center as possible, to further your own major agenda.
- Secure Objective – Reveal – This is one for the mobile lists. If you play on the long table edge deployment, this is a nice card. It is very likely, that you can place it somewhere in your opponent’s deployment, that would require that he repositions in his own area. The real force of the card lies here, in the frustration and mental pressure of having enemy units in your own backyard.
- Dual Objectives – Reveal – This one I have never seen work, to be honest. If you have your opponent where you can actually take an objective within 60cm of the center of the table, then you most likely already have won the game.
- Scout The Perimeter – Reveal – This one took me a bit to understand. It’s one of those cards I play at the end if I only need a few points to win. Four objectives, one in each corner. Spearhead special rule required and only 50% chance of getting points. The “Persistent” rule means the other objectives stay on the table after one has been removed. But in most games, this will give you at least 2 chances to score points. However, the last two objectives will make the card stay “in play” and thereby limit you in your chance to get more objectives. Choose carefully
- Scout Town Or Forest – Reveal – When you choose your tableside and/or quarter do keep in mind that buildings, forests and “towns” are essential to have at some distance to your deployment. This can actually be a big difference from how you normally would choose table sides. Here is an example of an objective that requires Spearhead special rule to claim it. Personally, I find this to be a wonderful rule. Both players can claim this objective!
- Line In The Sand – Reveal – Remember it has to be a Line, literally. Persistent means the other objectives will stay when one objective has been claimed. Potentially forcing you to keep the card active/”in play” longer than you would like.
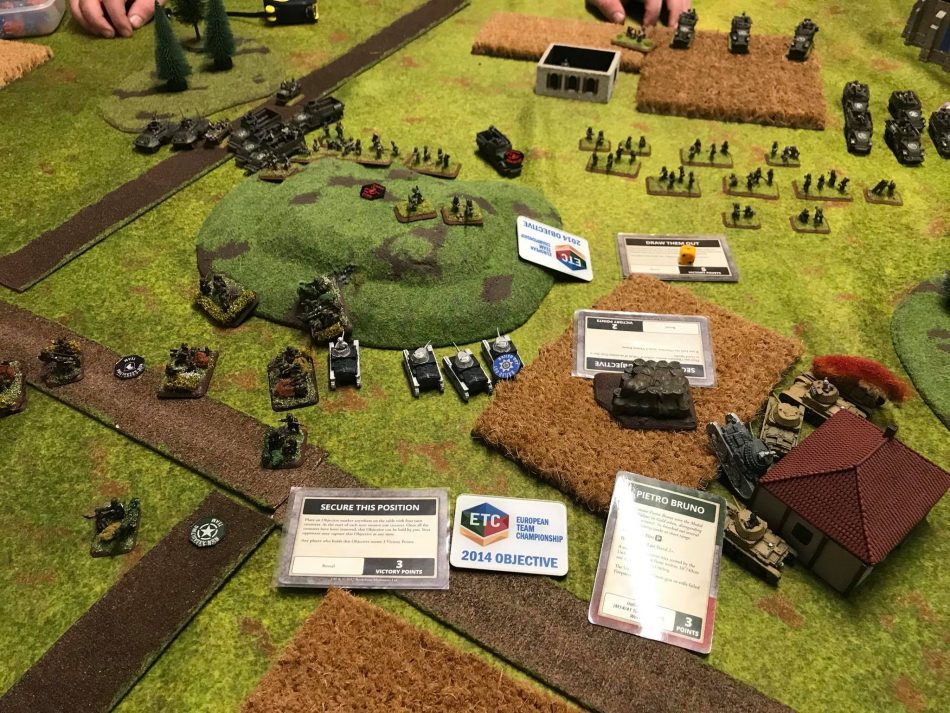
- Draw Them Out – Reveal – This objective is good to ensure a shoot-out, up close and personal. If you see yourself being able to tough it out with your opponent, this one forces him/her to go to the center. Both players can take this objective, so be certain you can take it and claim it! In my experience Americans (MW) dislike this one, as it requires them to potentially move out in the open, where they are very easy to hit, making the German have the advantage with higher ROF and AT values, ensuring a lot of dead Yankees.
- Secure This Position – Reveal – An easy way to score 3 points. BUT… be aware.. it takes four turn counters before you can claim 3 points. This card potentially blocks you from other cards for a long time. So before you start complaining how unfair this card is, consider what it must be like to play this card, wait for several turns, only to see the Spread Disorder card played in time to cancel this one. Remember that once you have three active objective cards (hidden or revealed), you don’t draw any additional ones.
-
Draw three cards and choose one…
Summary
As an experienced player, with both ETC and historic events behind me, I have found that more often than not, a Meeting Engagement is a game of “who loses a platoon first”. With the Fog Of War cards, the game becomes extremely entertaining and also very challenging. In my mind, the Fog Of War cards can also be used in tournaments.
For now, I strongly recommend that you try these cards out, in a friendly setting. Make sure to read the “how to use” part of the instructions, as well as the FAQ about them before you start.Then go out there, and have fun playing mind games with your opponent when you have hidden cards. Be warned, they’ll do the same to you.
Thanks for that, your comments echoe my experiences
SoundS like, it needs a lot of time to master. I’d like to use some in historical scenarios with historic objective settings and adept the H2 employ rules