Painting Canadian Infantry, the Proper Way
By Robert Kelly
follow up to : and .
As I am all about Canadian subjects in gaming and modelling I could hardly wait for my Canadian infantry to arrive in the mail. In fact, I ordered three platoons.
I opened the blisters up with Matt Varnish looking on. We were both quite impressed with the inserted guide that showed the painted troops and how to base them. The moulding was for the most part quite good and the sculpts were of Battlefront’s usual high quality.
About Canadian Infantry and Weapons
What I’m really happy about is that they look like Canadian infantry circa 1985.
When I received my new ’84 Pattern webbing back in 1985 it came with a booklet on how to assemble and wear it. And it’s obvious that BF got a copy of that booklet as the webbing on the figures reflects it.
However, what was in the booklet was not always how we wore it in real life. The booklet showed that if you wore the butt pack (similar to the US one) you did not wear the “utility pouch”. Yet we all wore both. On the figures, the utility pouch is missing. We actually called it the mess tin carrier, but we never put mess tins in it and instead that is where we stuffed our rain suits.
The booklet also showed an entrenching tool pouch worn on the back. I rarely saw this item and the troops in the mechanized battalions didn’t use it. It wasn’t very robust and they just used the shovels that they carried in/on their tracks (M113s). Curiously, they didn’t put the respirator (gas mask) pouches on the figures. I hope I don’t sound too picky as I really am happy with the way the figures came out. And after all, it is 15mm scale we are talking about.
Now onto the weapons.
Before the Canadian infantry came out, I decided to use the American Vietnam infantry. The only real differences being rolled up sleeves and bug juice bottles in the helmet band. We started to receive the C7 rifle (M16) in 1987, so I was comfortable with my troops carrying that weapon.
The helmet and the webbing were pretty much the same, so I figured it was no problem. When I put the new Canadians up against my Americans I realized how similar they are and I can easily mix and match the ones I already have painted. I would just have to paint the M16s to look like FN C1 anyways. And by the look on the castings BF merely removed the carrying handle off the M16 to create the FN. The FN was a much larger weapon but the BF FN is about (“aboot”) the same size as the M16 sculpt.
I appreciated that BF gave us all of our support weapons, like the C5 general purpose machine gun (think Band of Brothers re-bored to 7.62mm), the 60mm mortar and the 84mm Carl Gustav. One thing that struck me odd was that we had two FN C2s per section (squad), for a total of six per platoon, yet each blister only came with two. One prone and another standing (just look for a big magazine). I’m actually not fussed about this as I don’t like prone figures anyways. The C2 was a heavy barreled version of the FN C1 with a bipod and a 30 round magazine.
Canada also had the Sterling submachine gun. It was a handy little weapon and fun to fire, but none of the figures carried one. They would frequently be carried by tank crews, drivers and section commanders. Some figures with the Sterling SMG would have been nice.
Since I already had a bunch of Vietnam figures painted as Canadians but based as either Germans or Americans, I had to re-base them to the Canadian standard. The Americans and Germans didn’t have a 60mm mortar, so I made one out of some plastic rod and had it being held by a kneeling soldier and his sidekick on a small stand.
The three rifle/m72 stands were all ready to go, so nothing to do there. For the three rifle/Carl G stands I took out some riflemen and replaced them with the prone recoilless rifle figures that I had been using as Dragon or Milan teams.
For the C5 GPMG (general purpose machine gun) team I took a 30 cal mg from one of my Stuart/Honey sprues, mounted it on a tripod that I had from my QRF TOW launchers, added a prone gunner, a couple of other guys, some boxes and mounted them on a medium base. Now all I have to do was add some brown to the M16 riflemen and I had a Canadian platoon ready to go with minimal painting. For now, I’ll play them as late 80s Canadians with C7 rifles, but the FN option is still there.
For most of the photos, I set my camera to the Vivid mode which makes everything very bright but also shows the details well (too well as a matter of fact as it makes my brushwork look sloppy)
Painting
The Canadian platoons are large. This is good in the game as they will be hard to move off of an objective, but it means a lot of painting. Thirty-two figures to be precise. Each platoon blister pack comes with a formation commander stand.
Since I only need one formation commander stand I will have some extra figures that I can use to replace the prone figures– or as my grandson calls them – crawlies. I’m just not a big fan of prone figures, and only use them when necessary.
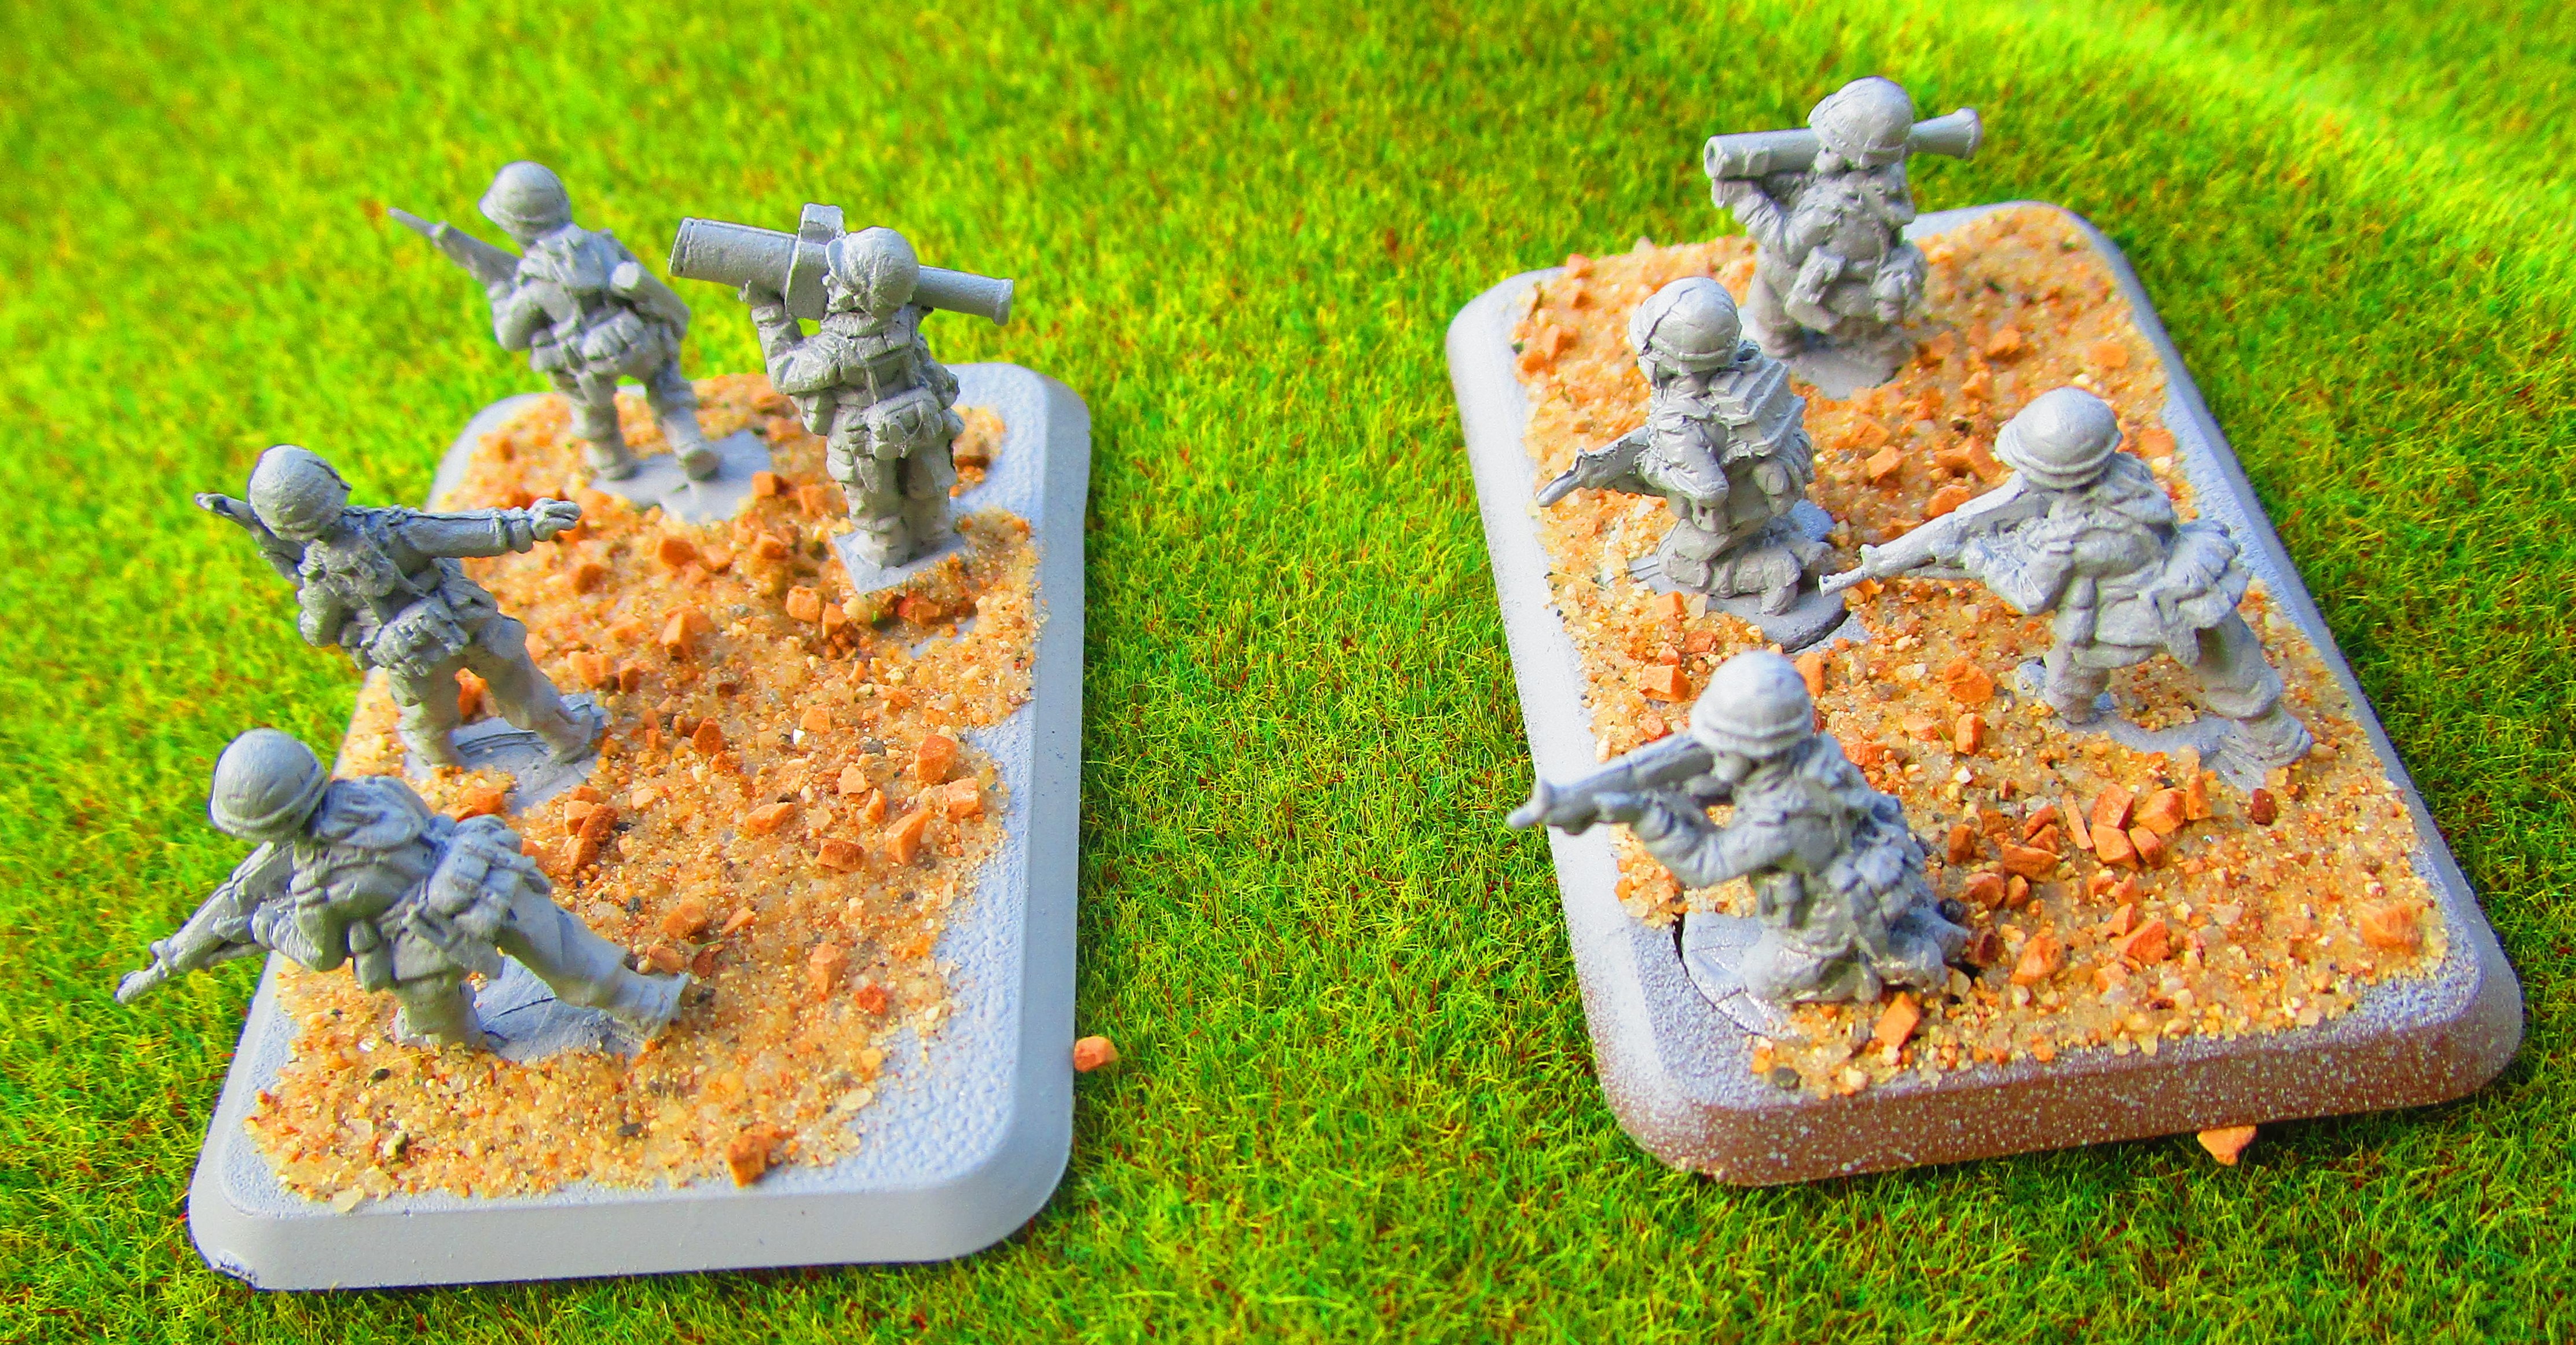
I used to put my individual figures on a golf tee to paint them (as I was afraid I wouldn’t be able to get the brush everywhere it had to go), but with Matt Varnishes’ encouragement, I am now able to paint them right on their bases. This time I gave them a coating of light grey Tamiya primer as I didn’t have black at the time. It was a good choice as you can really see the detail on the figures with the light grey paint. I then added some sand to the base.
The first step is Primer Coat in matte black. (For this batch, I sprayed on Tamiya Nato Black). I then give them a light layer of Vallejo Brown Violet 887 trying to leave some of the recesses matt black. I then give the figures a dry brushing of Vallejo Russian Uniform 921.
Another option would be to totally paint the figure in the Brown Violet, then give it a wash of GW Nuln Oil, then do a drybrushing of the Brown Violet or Russian Uniform. I then do the webbing in a slightly darker shade of the Brown Violet or Vallejo Olive Grey 888. I then use some Nuln Oil on the webbing followed by a light drybrushing of Olive Grey 888 if you wish.
The boots remain flat black as do the rifles. For the wooden part of the FN rifles use something like Vallejo Flat Brown 984 (same as the first flesh tone) for the wooden parts and I give a light drybrush of GW Lead Belcher on the black metal parts.
For flesh ,I use my friend Scott’s recipe: Vallejo Flat Brown 984, then a bit of Reaper Tanned Highlights 09045, followed up by a very small amount of Vallejo Basic Skin Tone 815 on the raised areas of flesh. Or any three progressively light flesh colours. Then I give the flesh a wash of GW Ogryn flesh.
For the helmets, you can choose to go with the US Woodland pattern or the Vietnam pattern. I find the Vietnam pattern is easiest. Plus, it was the first helmet cover I was issued with way back in 1978. For this pattern, I do the whole cover in GW Elysian Green. Then I add some blobs in GW Castellan green or Vallejo Dark Green 896, followed by a small blob of Vallejo English Uniform 921 and a squiggle of ether the English uniform brown or a darker brown like GW Mournfang Brown. The camouflage band can be done in black, though by 1985 we had gone to the US helmet band which you can paint in the Brown Violet.
No matter how good or how bad your paint job is, they won’t look like Canadians until you put the flags on the shoulders. Yes, impossibly small flags on the shoulders. It’s not as tough as it looks. First just put a drop of white, then a patch of red on either side. Then when it’s all dry, just a little line of red from top to bottom and a smaller line along the bottom and a bit of a scrape around the middle. Up close it doesn’t look like much, but from a few feet away it will look like a Canadian flag. You can also square it off with some Brown Violet if necessary.

If you are using the tank crew figures with berets, the uniform is the same. You can add some gold or bronze for the zippered areas of the crew suit and don’t forget those flags on the shoulders. For the berets, most Canadian Forces wear a rifle green beret. It’s generally the same colour as Sharpe’s of Napoleonic Wars fame. I use Vallejo Medium Olive Green 850 mixed with a small amount of black to darken it a bit. For the cap badge depending on the regiment, you can use gold or silver. For the RCRs use a blob of silver with a small blob of gold in the middle.
If you are using a crewman from an armoured regiment, make sure the beret is black. In the 70’s we did have a unit called the 3rd Mechanized Commando, which was part of the Canadian Airborne Regiment. Though they were not all paratroopers they all wore the maroon beret while riding around Germany in M113s. I think it might look kind of cool.
Basing
I have a standard recipe that I follow for all of my bases. I glue gaming sand and rocks using white glue, let it dry and then I paint English Uniform (or GW Steel Legion Drab) with a light dry brush of Iraqi Sand or GW Ushabti Bone. I then paint the larger rocks grey (sometimes with a high light). Then I add some glue to about 60 % of the area and add gaming flock by either GW or GF9. Any gaps are then filled in with some tufts. Right now I’m using various tufts from Army Painter.
(Above shot is taken with the regular setting to show what they look like to the naked eye).
To show the platoon command stands I found a source for 1/6 th scale cap badges, so I’ve glued them to the base to make them stand out a bit. For the formation commander, I’m considering putting a small plastic Canadian flag on the base like I’ve done with my Viet Nam Canadians.
I hope this helps you Canadians, and those who want to be Canadians, paint up your infantry just right. Maybe some decal manufacturer will take pity on us and make some very small flags for us.
Hi Rob,
Liked your article but you got one thing wrong……….there is only one Royal Canadian Regiment so when referring to the regiment it should be RCR not RCRs. Individual members of the regiment are referred to as Royal Canadians. You can buy me a beer in London………. two if you’re really in the mood….. The cap badge looks great though……… 🙂
…we Royal Canadians are sticklers for detail as you well know……but as a a mud gunner you’re forgiven…….I still want that beer though. Lol.
Luggs
a Royal Canadian for over 49 years.
I sub consciously do it just to annoy you. I’ll buy you a beer in London (if I remember my ID).