Bolt Action: DAK Army Part 1
by Troy A. Hill (Photos by the author, graphics courtesy of Warlord Games)
I’ve managed to get my US Bolt Action army into a playable state that I’m not embarrassed by. I do still need to finish my various vehicles for it (a few are still in boxes).
My sell-off of models from my previous games garnered me enough hobby dollars to hit up my Friendly Local Game Store (FLGS) for a new box from Warlord. Combine this with the new Western Desert book for Bolt Action, with some additional forces, and I’ll be good for the upcoming Duel in the that No Dice No Glory is sponsoring this February at Orccon in Los Angeles.
Switching to 28mm gaming from the past seven years or so of 15mm models has been challenging and rewarding at the same time.
As I built my USA platoon, I wasn’t thrilled with having to glue two arms and a weapon onto each GI’s torso. I ended up knocking heads askew every time I tried to move a figure before the plastic cement had set.
But, the detail I was able to see in the larger figures was a great change from the newer plastic 15mm figures, and even from some of the older 15mm metal figures. As the moulds get “tired” from being well used, detail always suffers. And 15mm just doesn’t have enough room in its level of detail for those imperfections to creep in and keep the model looking good. Twenty-eight millimetre, however, has some good wiggle room for such.
Unboxing the Afrika Korps Starter Army
First, there is a lot of value in this box.
Enough sprues to make 36 plastic infantry, a Pz III, the new desert version of the 8.8 Flak gun, 81mm medium mortar, and a metal MMG with crew.
It’s tough to beat that on value. I have to compliment Warlord on their starter army boxes. There are always popular models, in enough quantity to get an army on the table with just one box for a reasonable price ($120 USD).
In addition, there are odds and sundry items like vehicle stat cards (helpful for the Tank War variation), decal sheets, including one for the infantry, and damage markers for the vehicles.
The best part of the box? In my opinion, is the instruction sheet for assembling and painting the 8.8. It includes a painting guide with Vallejo paints and bottle numbers. This new sheet is mostly a step up from some of the older instruction sheets Warlord has produced. For instance, I had difficulty understanding the assembly of the M8-Greyhound for my American army. The order of the boxes shown didn’t match the flow of assembly that made the most sense.
However, as I remember from one of “old Man Morin’s” Warlord podcasts a while back, Paul from Warlord talked about a lot of Warlord goodies but mentioned how the new plastic 88 has an elevatable gun barrel with working pistons. This sounds both interesting and challenging to build. Looking at the directions, they seem to be fairly easy to get on with.
The crew for the 88 are metal, unlike the gun model. Paul explained to Brad on the podcast, this is done to keep the variety of theatre and nation specific crews avaible for the gun. Since the 88 was used by more than just the German army, they can keep crew for Italy, early war German, Late War German, etc. without the expense of creating the plastic molds. I’m happy with that, since there will be fewer arms I have to glue to torsos.
The infantry sprues were another piece Paul from Warlord mentioned. He said on the podcast that Warlord originally approached the design of their infantry with the goal of infinite pose-ability, and kept each figure’s torso, arms, and weapons separately. But, player feedback encouraged them to move weapons into at least one hand.
After I spent hours cursing as glue and arms on my US infantry slipped if I added the weapon too early in the glue setting process — or if I waited too long and didn’t have the arms positioned exactly right — I can appreciate the idea of having one arm holding the rifle already moulded.
The addition of decal sheets with infantry insignia and patches will be another challenge for my fat fingers, but one I welcome. I was never brave enough to try painting patches onto my 15mm figures. Although I was tempted with my 28mm American infantry, I didn’t get around to it. The decals remove my excuse for the DAK. They’re part of the kit, so I feel the responsibility looming to add them.
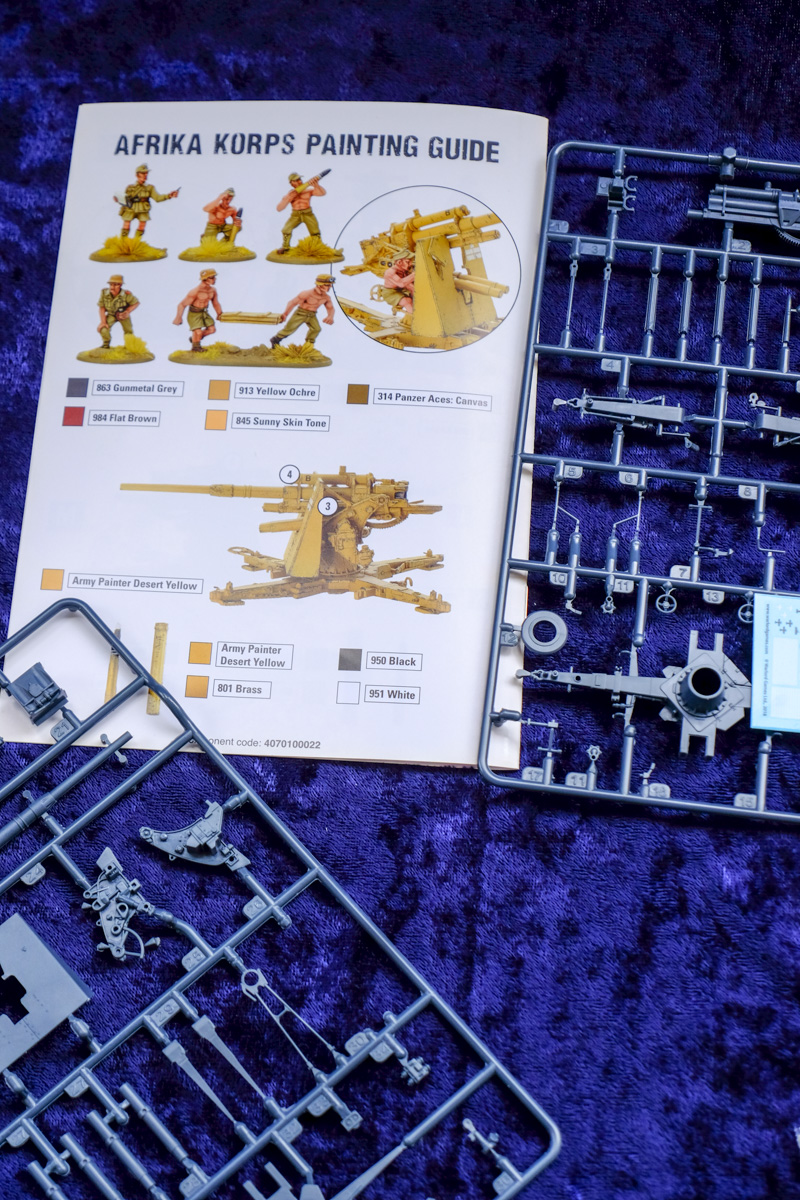
Finally, the inclusion of the painting guide in the 88 instructions will be helpful. I’ve found various painting guides online, or in theatre books for other games, and have many copied and in a binder ready to reference. This one will get added to the stack. I especially like this one since it references Vallejo colours and not a game company specific paint line.
In all, I find a good amount of value in the DAK box set. The changes Warlord has included seem to make sense. But, I’ll know more once I begin glueing arms and weapons to torsos, or pistons and tracks to guns and tanks.
Check back in a month or so for the first update on how the build is going.
When not being a grumpy-grognard at one of his friendly local gaming stores, he writes Arthurian Welsh Vampire Fantasy books. He and his cat cohabit with his wife in smoggy Los Angeles, but he still uses British English when he writes. Because his novels are set in Britain. Find more information on his writing at cupofblood.com
I would love to leave comments but there is no enter button to send them.
The first few comments are moderated and have to be approved. You’re always welcome to join our Forums and leave comments there. Just use the forum sign up Link above. Iron Tom usually gets membership to the forum approved in about a day.