God Saves the Queen: my first FOW tournament – Part 2
After a good start, I was in the top half of the classment. Now we need to fight some serious fight! (If you want to read the first part, just click here!)
Second Game
For the second game I met Alberto De Luca, the owner of (the Italian Battlefront official importer) and host of the tournament. After one year of tournaments and events on Team Yankee, I consider Alberto and his wonderful, tireless wife close friends even outside the hobby. Needless to say, Alberto knows the game very well and is one of the top players in Italy. He had a Russian list with two tank Formations, a Grant one and a mixed one with dreadful KV-1, Valentines (“Tovarish Dimitri, they are the tanks I lent to you and now you use them against me!”) and a 10 T60 tanks strong platoon. Also, he had two mortar troops to barrage the enemy line while the tanks march full forward.
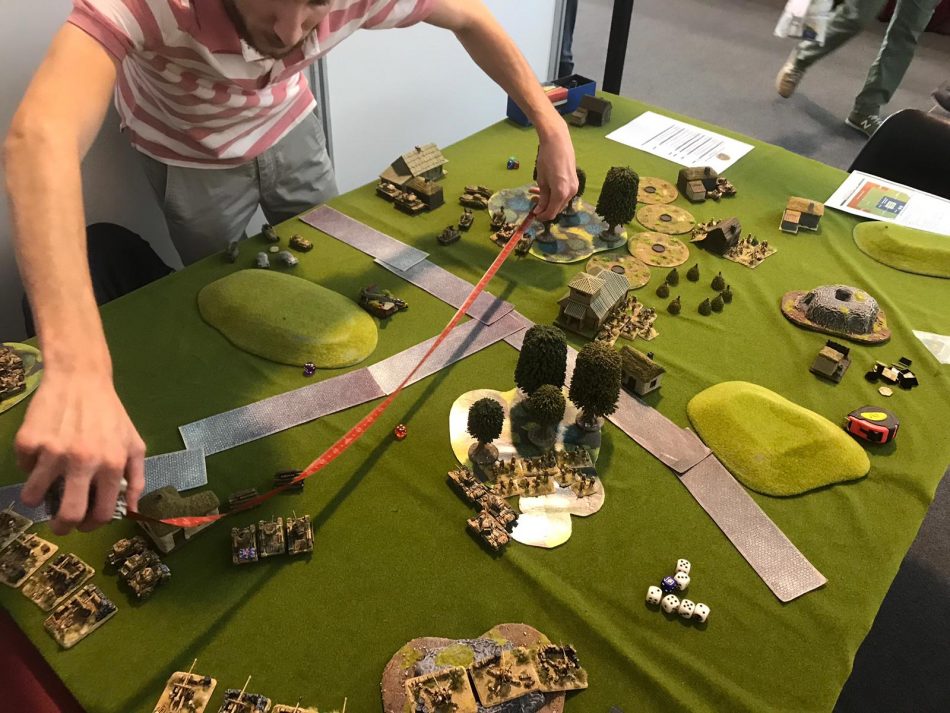
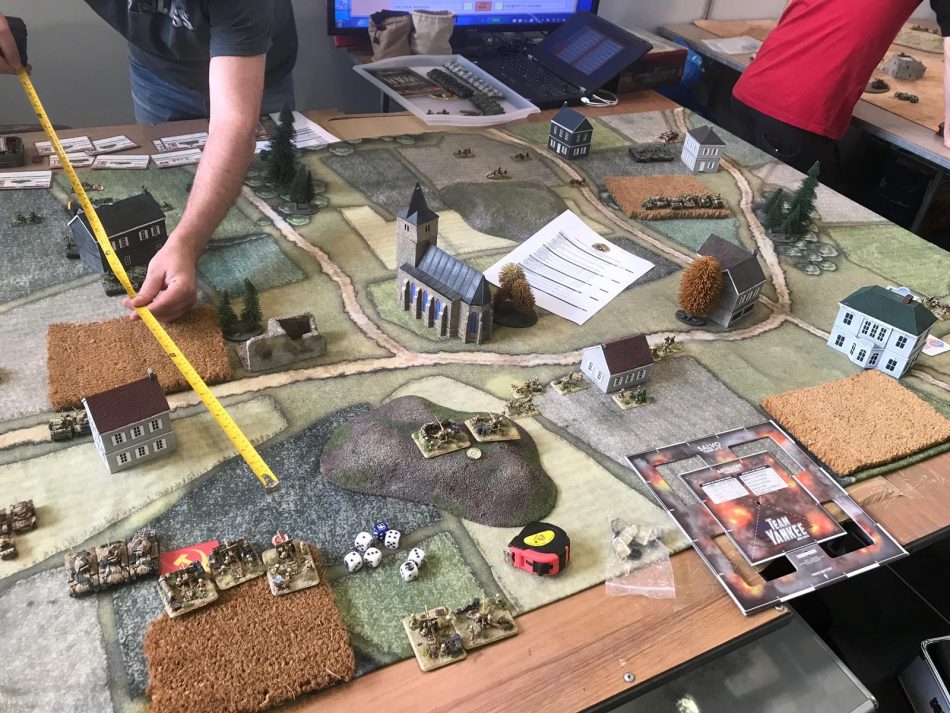 The initial deployment: Alberto is measuring the range of my justly feared 25 pdr!
I selected Attack and he selected Hasty Attack: we ended up with Hasty Attack scenario. We placed both our objectives in the other player’s deployment zone. He deployed first: on the left he had mortars, Ba-10 scouts and Valentines, in the centre a single formation of six mortars, and on the right the KV-1.
Since the objective on my right deployment area was really close to a house, I decided to attack on the left: thanks to my infantry and considering Alberto had no close combat infantry at all, I could stay in the house with my British Rats indefinitely. To counter the KV-1s, I placed my 17/25s, while the mortar platoon kept the centre. On the left, two scouts and the 25 Pdrs to cover the flank with the Bofors. I left in reserve the tanks and the infantry, knowing they could move fast where they will make the difference once entered.
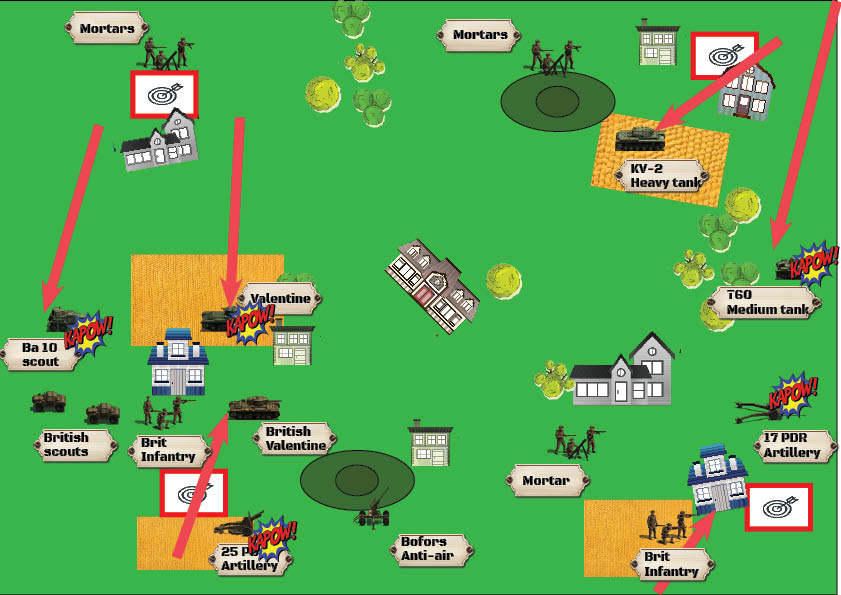 A map of the first moves: the vast majority of the Russian units are still outside the table, while on the left the British and USSR tanks engage in a mortal fight (all icons are from the video game from Slitherine, the company I work for)
Alberto advanced with his Valentines on the left, keeping the KV1s away from my 17/25s. I waited for my tanks (as the attacker, I had “immediate reserves”) and rushed forward on the left. My scouts and my Crusaders (also with “scout” trait) enjoyed a very good protection in the rough terrain, and from there, they cut to pieces almost all Valentines and the emerging Lee from the reserve. Alberto, as defender, had to roll to see where his reserves would appear, so statistically, he had his striking force divided.
He moved two platoons of medium tanks towards my right flank, killing off the 17/25s, who before being vaporized valiantly almost destroyed single handed the 10 T60s. Meanwhile, the first infantry platoon arrived from reserve and secured the house near the target on the right: Alberto could only place his tanks in front of the house, shooting to it over and over, but achieving almost nothing, since is very difficult to kill an infantry unit in a building.
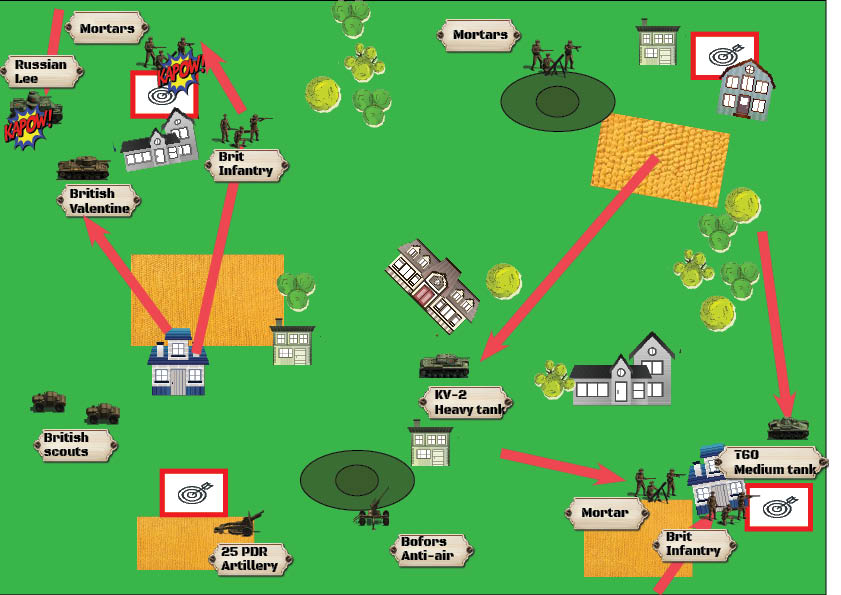 The British full attack on the left destroys Russian tanks and the hopeless Mortar detachment guarding the objective; meanwhile, the Russian main force is shooting pointlessy to the two British infantries in the building, guarding the left UK objective.
To improve my survivability, I decided not to shoot at all, going ground so he could hit me only with a “6”. Also, my mortal platoon, having countershot Alberto own mortars and killed almost all of them, moved hastily near the house and, when the infantry platoon suffered some losses, entered in the house to steadily keep the objective. Meanwhile, on the left, having destroyed the tanks, I sent the other infantry to assault the last two mortar bases keeping the objective and easily destroyed them in an assault. The final score was 1 Big Point, 6-3, 6 platoons killed.
Third Game
With only four players on twenty with 2 Big Points, I needed to win the final game to be sure to win the tournament. The third opponent was a good guy from Bergamo with a German all-armoured list. A Panzer III Formation, an Armoured Car Formation, a Scout Tank formation, with the support of the unmissable extra powerful Marders and the almost unkillable Tiger.
A list with too much armour and shooting power to face on the open table. So, I decided to Attack, while my opponent chose to Defend. This rolled up as another Bridgehead Scenario. He had to choose to keep in reserve 40% of his army: fielding the Tiger meant he had to field other 30 points versus my full army. He also placed four minefields to cover the right objective, using the Tiger to protect the other, more exposed one.
 Yes, my German-playing friend: my 17/25 Pdrs can hit almost your tanks! Having – once more – to attack, my opponent had almost half of his army outside the table in reserve. Since he deployed the invulnerable (but highly expensive) Tiger, he had only 30 points to deploy and defend two objectives
I deployed my 17/25 Pdrs on the right corner, targetting the center of his deployment area. I know he could use the left hill to cover his tanks, but sooner or later he would have to move something in sight of my AP 12 guns. Near them, I placed the 25 Pdrs and the Bofors, with both the tank platoons. On the other side, I placed my three infantries, for that side of the table was much more full of covers like woods and buildings.
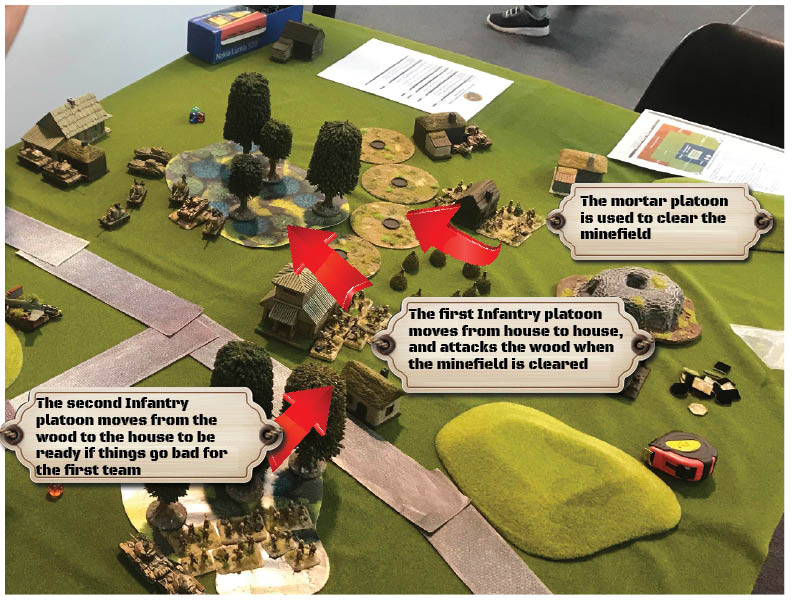
Since my mortar platoon was useless (this German list had nothing targetable with an artillery top attack with only AP 1), I ordered them to remove the minefield, saving the close combat infantry from the risks of blowing up in the process. This worked well, and in two bounds I cleared the minefield at cost of two mortar bases, but with the fighting infantry untouched, an I was in charge range of the objective in the wood.
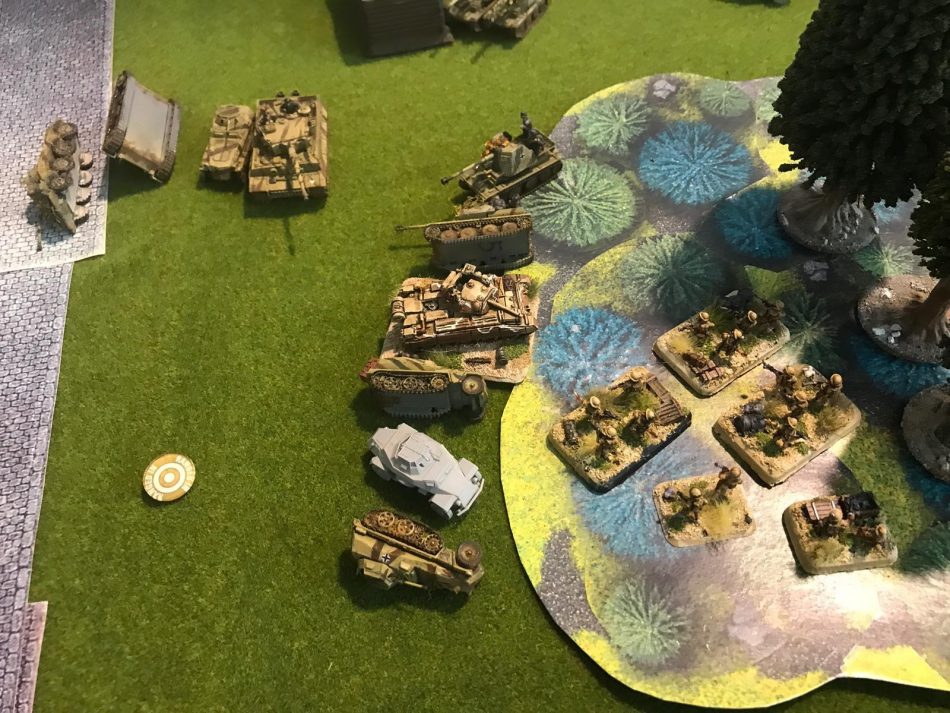
 The destroyed Valentine is the objective I conquered after few bounds: I destroyed the guarding German scouts and Marder with long shots from the 17/25s and tanks, ignoring the invulnerable Tiger. When they were all destroyed or bailed out, I safely charged them with the Infantry and won the game.
Meanwhile, I pushed hard on the left, killing the tank HQ and some scouts he tried to use to counter the infantry. He left two surviving Marders and three scouts to defend the “wooded” objective, knowing their machine guns could easily stop my infantry charge. However, I managed to move all my tanks in a position to shoot the Marders and scouts, together with 17/25s. In the end, my infantry charged the two survived bailed out Marders, easily killing them off and conquering the objective.
The final score of 1 Big point, 8-1, 5 platoons killed.
Conclusions
Come, go we in procession to the village.
And be it death proclaimed through our host
To boast of this or take the praise from God
Which is his only
Act IV, Scene VIII
Henry V, from Shakespeare
As Shakespeare wrote in Henry V, I can’t say I wasn’t helped by a fair huge amount of luck. However, let’s discuss if the tactics and the strategic choices were right.
The list worked very well: the Infantry Formation is solid and stout and can charge into any other infantry with good chances to kick their asses out of the target. However, you need to cover them until the final blow, since Infantry on the move in the open is the classical rat in the box: easy target, easy kill. The 6 bases mortar unity is very good to pin down enemy infantry and to counter-shot the opponent artillery. It has a top AT of only 1, but if you target soft units with a save it’s exactly the same as shooting with the much more expensive and powerful 25 Pdr – so you can save the latter for more armoured targets.
The scout Formation is like an insurance: if you keep a couple of units outside the enemy reach, your army can’t be demoralized and will fight to the last unit. However, once a scout unit loses the first tank, you need to retreat them because with a moral of 5+ they will flee the field if more hits are scored on them.
The 17/25 Pdr battery didn’t do that much in the three games, but the psychological effect was really effective: my opponents kept their best tanks away, and this neutralized them as well as killing them, without even shooting and rolling the dice. The tanks platoons did also very well: converting the Crusaders in Scouts proved really effective, and I managed to move them from cover to cover and shoot at maximum ROF once the best spot was reached without losing them.
Also, I think there are two major points I experimented in these games. First one: the British army is really good when it attacks. Lots of Brit players prefer to choose a defensive stance, but this means you give the opponent the initiative. In more than half of the tournament scenarios, the defender is in a very strong position but plays with half the army out of the table. If you attack with such a manoeuvrable army, with scouts on the flanks and moving fast the tanks where they can land their hits, you can strike effectively. You just need to “read” the table and the terrain and understand where you can deploy the artillery (17/25s): its position must be good to shoot when you are delivering the final attack, not on the initial moves.
Finally, lots of FOW players don’t understand this is a game where you need to conquer or defend objectives. There is no point in shooting to everything in sight. You need to have a good plan before deploying and search for the best approach for at least one the objectives you need to conquer. Obviously, no plan survives after contact with an enemy, but it’s a good start – like this tournament!
I approve this message. Well written. Well played.
Thanks Chris!! You have my vote!! LOL
Ross
Thanks a lot!
Have you got an extend limit for units inside a house? In that buildings… I don’t thing there are enough space for half a platoon.
It was a two story building. one element was left outside and promptly killed