Blood and Valor: Part 4 – Scenarios Preview
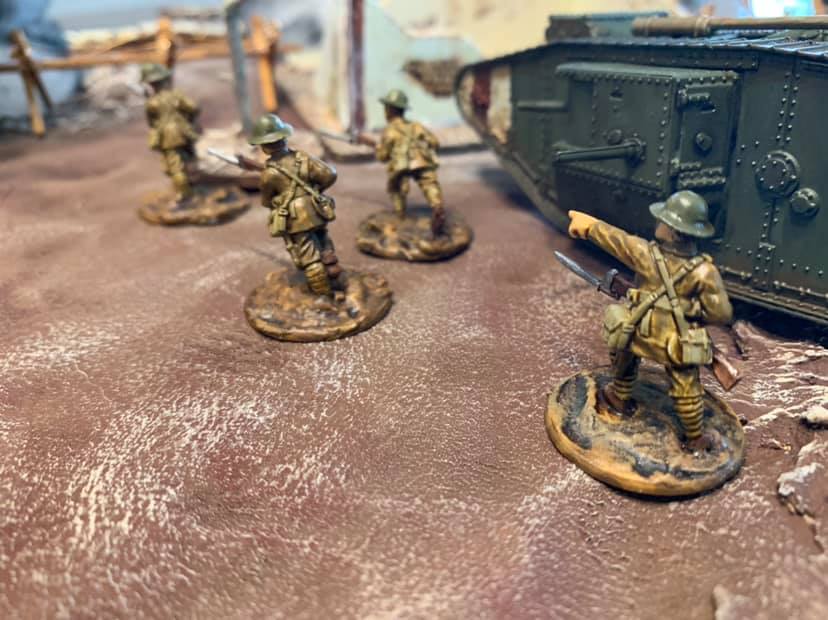
Our coverage of Blood & Valor isn’t done just yet! Over the last few weeks, the previews of ‘who’ will be storming the trenches and gun emplacements of Blood & Valor. This week, I’m here to look at the ‘why’ – or rather, to give you a look at the scenarios for the game. Oh, and also, some armored fighting vehicles. You can ‘tank’ me later.
Blood & Valor divides the scenarios in two sections; five general scenarios, and a further five ‘narrative’ scenarios. We’ll look at the general scenarios first, as that will likely be the most common way that players get to grips with each other.
 General Scenarios
All of the general scenarios are designed for equally-sized forces, and for players to randomly determine attacker and defender. You’ll need to select a well-rounded force; machine gun teams are going to have a rough go of it, if they find themselves tasked with taking objectives behind enemy lines! Mitch has already discussed the nuances of each force, so there’s not much more to be said on that front.
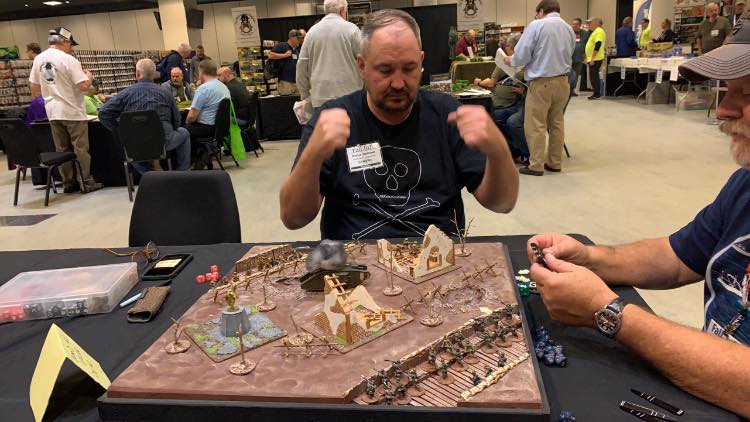
 With forces chosen, we come to the table. One of the things that I like the most about Blood & Valor (and its older sibling, Blood & Plunder) is that it can be played on a small table. A game of 100-200 points has a minimum table size of just 3’ square. Rufus and Kai set out to design a game that you can play on your kitchen table after a meal, and I don’t know about you, but I don’t have a 6×4’ kitchen table. If you do find yourself on a big table, all scenario rules for things like deployment zones are measured from the center line. This ensures that there will still be plenty of time for your lads to get stuck in with the enemy.
 While we’re on the subject of tables, I want to address something that has come up time and time again in discussions about Blood & Valor: trench warfare. While trench warfare is certainly iconic of WW1, it was by no means ubiquitous. The war began with armies in the field, marching double-quick on the Race to the Sea. Starting in February of 1917 until March, the Germans withdrew from their positions, back to the Hindenburg Line. This period marked the resumption of maneuver warfare, as advancing allied forces caught up to coordinated German rearguards and counterattacks. The new Universal film ‘1917’ covers this particular phase of the conflict. At the end of 1918, the Hindenburg Line would be overrun during the ‘100 Days Offensive’. On the Eastern Front, and in Africa and the Near-East it had been a war of maneuver right through to the very end.
The scenarios do not assume that the players are facing off across the churned mud and shell-scarred moonscapes of no-man’s land. Indeed, all but one of the scenarios emphasizes securing objectives on neutral ground.
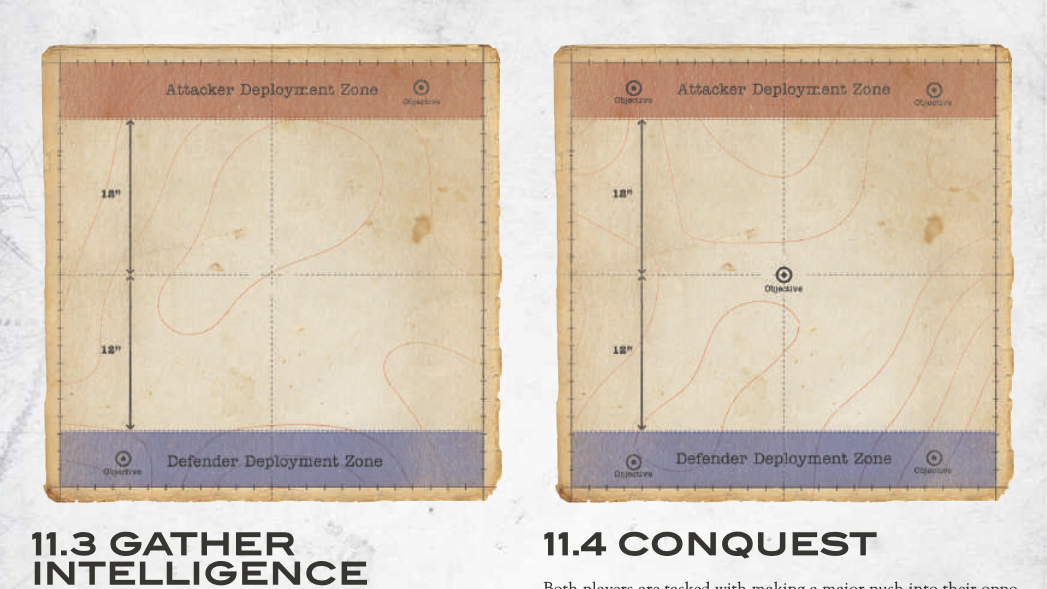
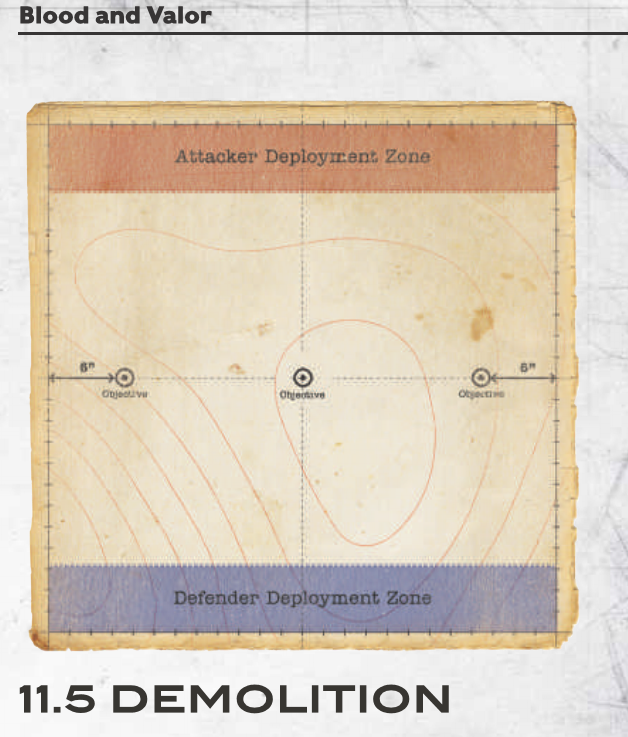
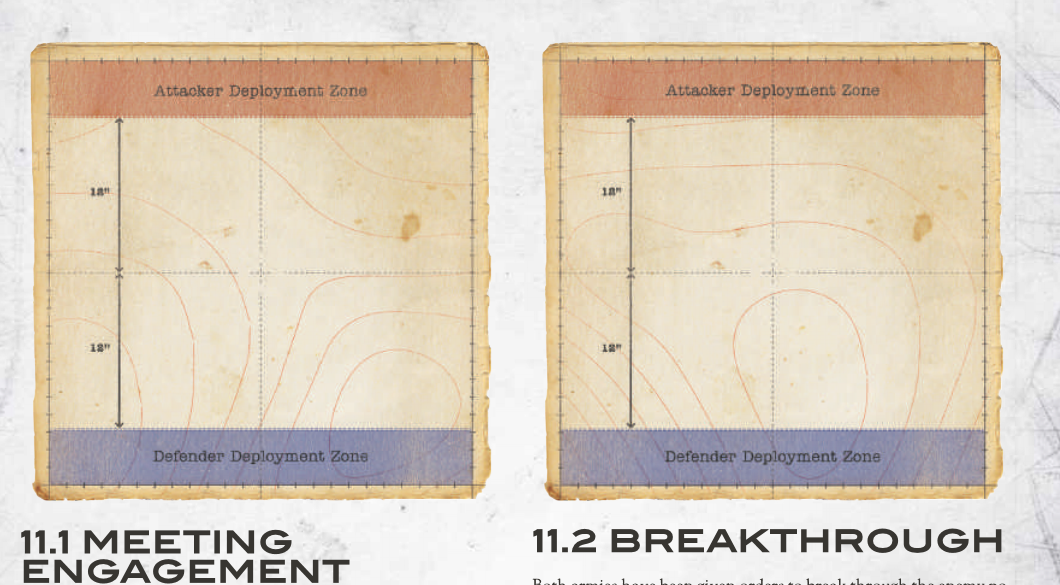
The objectives in question are the usual wargaming fare. ‘Breakthrough’ sees both forces seeking to get through the enemy deployment zone. ‘Conquest’ gives each player two objectives to defend, and a neutral objective in the center of the board. ‘Demolition’ is similar, but places 3 objectives along the centerline. ‘Gather Intelligence’ is probably the most interesting of the general scenarios. In it, players each have an objective in their deployment zone, and defend it against enemy raiders.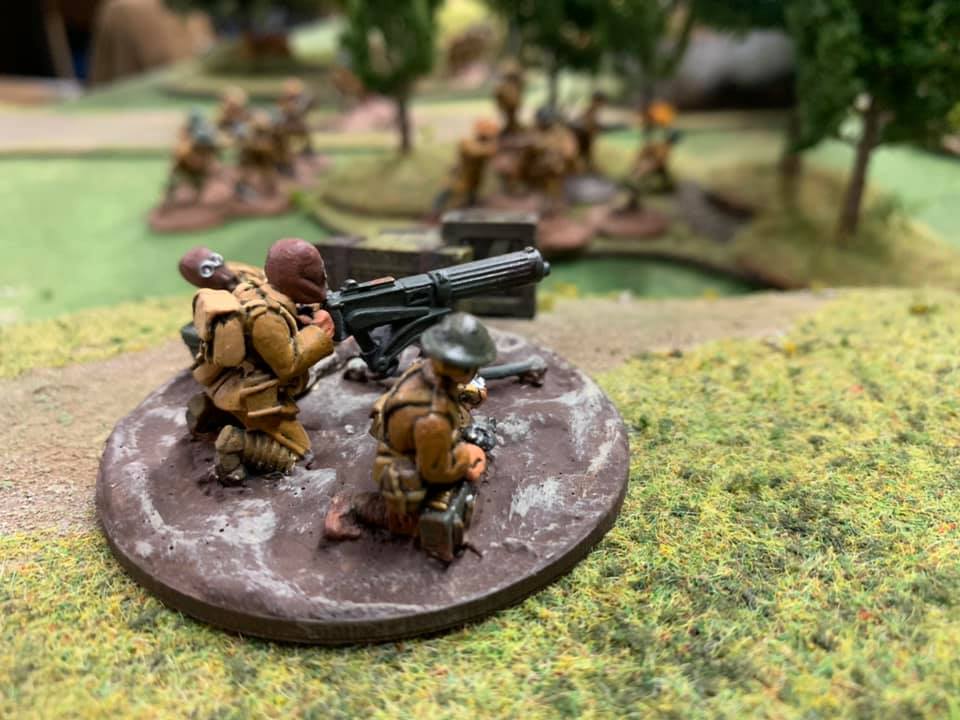
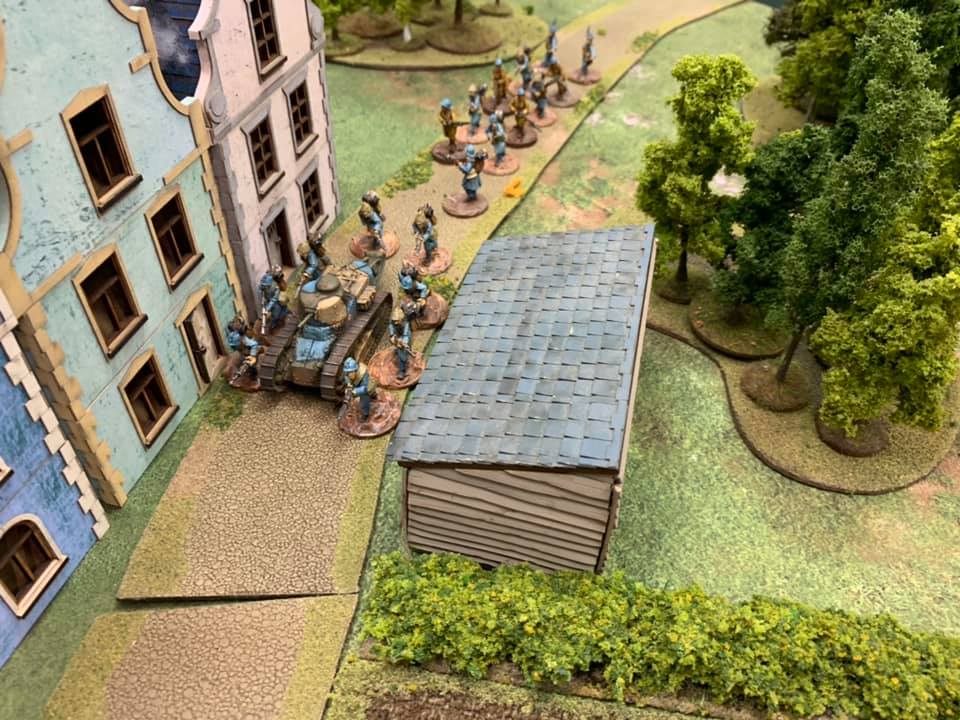
A British machine gun crew sweeps an open killing-field
Rounding out the selection is the simple ‘Meeting Engagment,’ which is the only scenario that does not force players to advance. It is a simple attrition based game, where each player is seeking to wipe out the other. If there is any argument against building an evocative trench board, it is probably the existence of this single scenario. But hey, you can always agree with your opponent to reroll it and get something a bit more interesting. Or…
Narrative Scenarios
If you’re looking for a truly interesting game, then the Narrative Scenarios are the ones for you. They follow the same conventions in regards to table dimensions, and still call for equal sized forces. However, the narrative scenarios are a little more advanced, and a LOT more interesting.
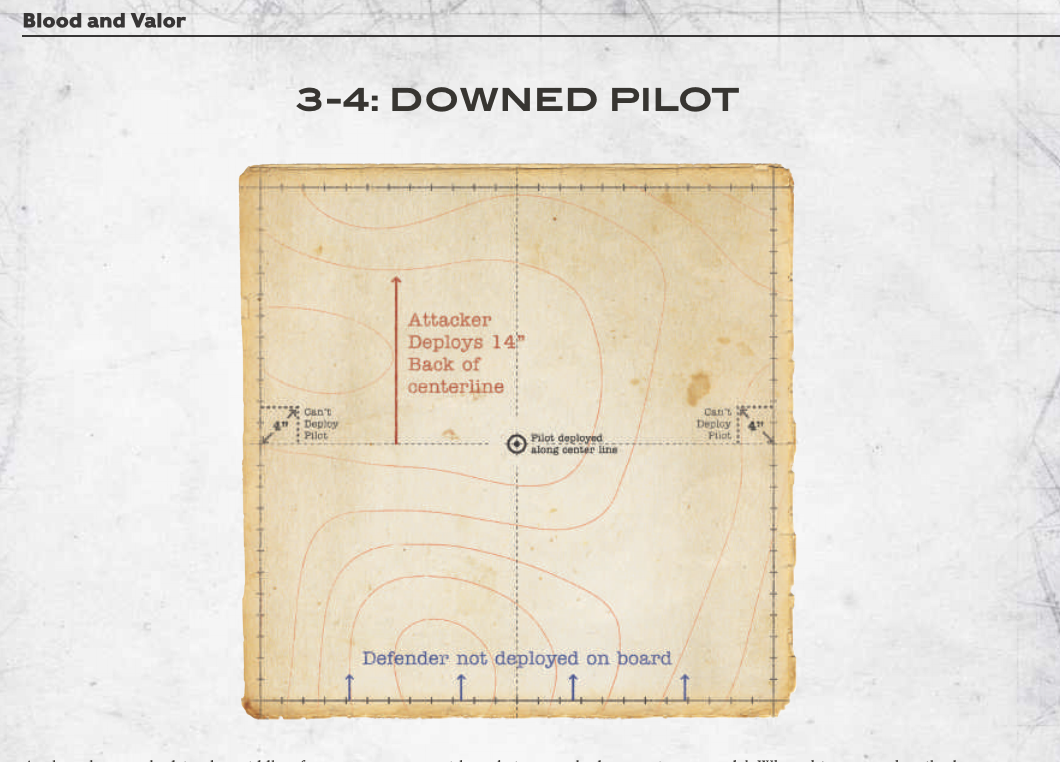
 The first scenario we’ll cover is ‘The Downed Pilot’. A brave airman has crash-landed between the two opposing armies. You can probably visualize the scene in your mind already, its classic WW1 fare. The wounded pilot has valuable intelligence, vital to both sides (perhaps the location of Maj. Whittlesey’s lost battalion?) The players are seeking to capture/rescue the airman. Mechanically, the scenario is “single flag capture the flag,” with the armies securing the pilot, and returning him to their own lines. This could easily have been one of the Generic Scenarios, and at my table we’re likely to replace ‘Meeting Engagement’ with this one.
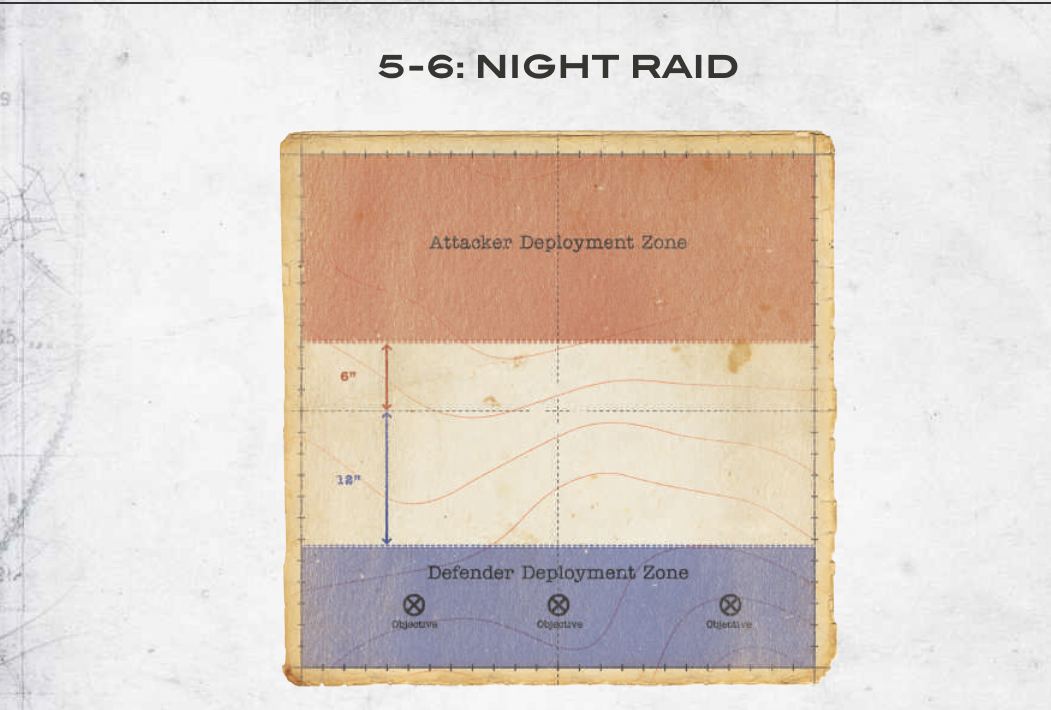 The second scenario is also iconic – a ‘Night Raid’ across the lines. This is a scenario which Lieutenant Tolkien would have been especially familiar with. On September 28, 1916, he led the Lancashire Fusiliers on a successful raid near Thiepval. The scenario tasks the attacker with creeping into the enemy deployment zone and capturing 3 objectives to return back across the table. This scenario seems like a vessel for the Night Fighting rules. Personally, I would have preferred to see these broken out as a scenario special rule to apply to any fight.
Finally, we come to the two scenarios you’ve all been waiting for: ‘Tank Assault’ and ‘Disabled Tank’. This is where you get to live all your landship dreams!
 ‘Disabled Tank’ is like the ‘Downed Pilot’ scenario. A tank begins mid-table, and both sides race to salvage it. The tank is very much disabled, it cannot move and only has 2 operational weapons, but it’s a FREE TANK! The tank can be shot, bombed, and assaulted as normal – but if either side destroys it, the game ends.
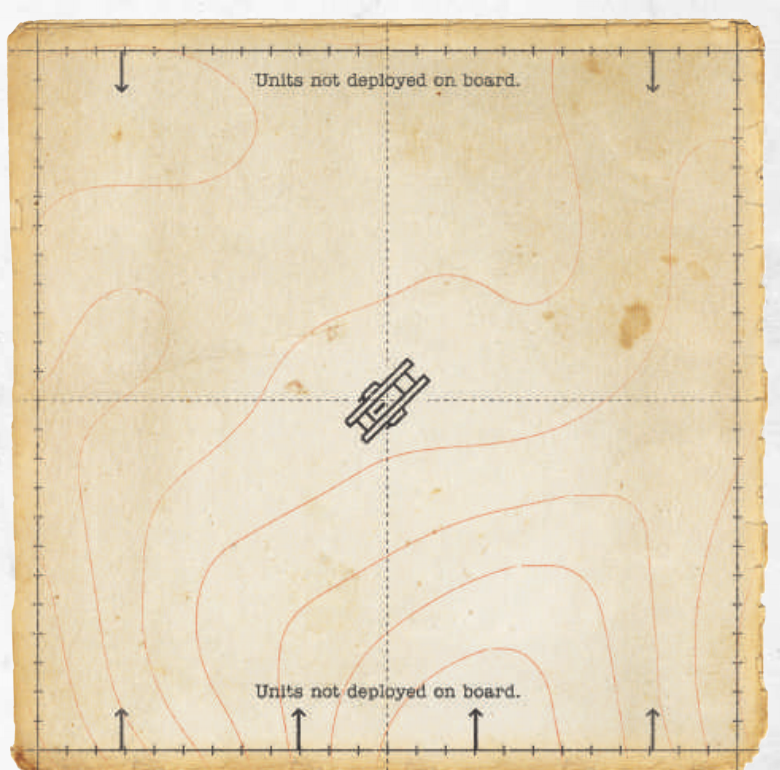 ‘Tank Assault’ is like the normal ‘Meeting Engagement’ scenario, except both players may include tanks in their force. This scenario exists on its own because historically, only one instance of tank vs. tank combat occurred during WW1. A trio of German A7V tanks came up against a British MkIV tank during the Second Battle of Villers-Brettoneaux. Only the A7Vs and lone MkIV Male had enough firepower to threaten each other; the two MkIV Females withdrew. The Male opened fire, causing only minor damage. It was enough to panic the German crew, who drove up a steep embankment and tipped their tank over. The other two German tanks subsequently fled; one crew abandoned their machine, and the other reversed out of the fight.
Fielding Tanks
The rules for tanks come in a section immediately after the scenarios. In it, you will find the general rules for the lumbering monsters. The rules really get the “feel” of these ponderous machines across quite well. They are slow, and can only turn in place. There is no ‘Tank Shock’ either, as the infantry have plenty of time to walk away. A tank can simply drive out of an assault if it chooses though.
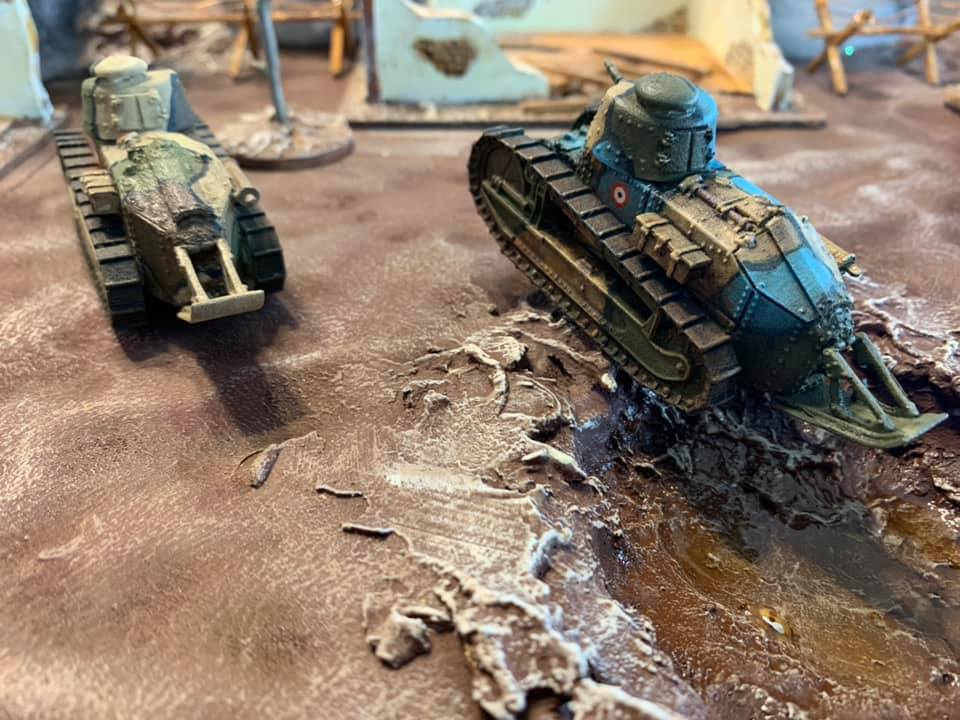
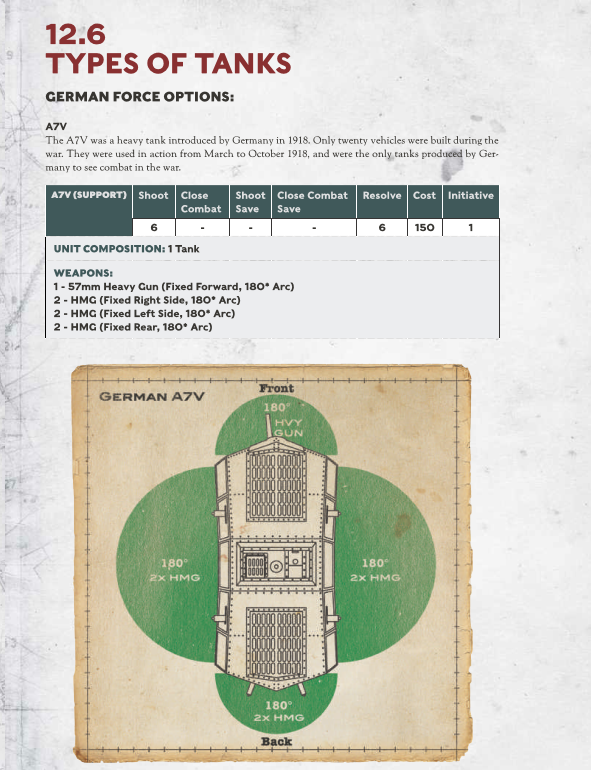 All the major tanks of the war are on offer. The Germans have their A7V, as well as captured British MkIVs (male and female variants). The British have their own MkIVs of course, as well as the ‘Whippet’ light tank. The French have the ridiculous Saint-Chammon landship, and prototypical Renault FT-17. To the disappointment of a young Captain George S. Patton Jr, the Americans do not field any tanks of their own. America had fielded a battalion of FT-17s in combat at the front. Could we see Old Blood’n’Guts in a future expansion?The rulebook for Blood & Valor is available for preoder now, at . Miniatures and quality marker sets by the awesome folks at are also up for pre-order, so you can get your boots in the mud as soon as possible. So tell me, what scenario are you must excited to get dirty with?
Great article Tyler. I’ve shared it with a few friends who are sitting on the fence. I reckon this will tip them over.