Black Powder Solo Wargaming: BatRep
By: Ron Winkler
After several weeks of lockdown occupied mainly with painting my accumulated inventory of figures, I felt the need to try a solo wargame. Since I haven’t had much practice with I decided on the Battle of North Point scenario in the book using my 15mm inventory of 1812 US and British Napoleonic figures.
The scenario came from the Black Powder main rule book page 144. The first picture on the page shows Continental Unit uniforms from the Revolutionary War. Subsequent pictures depict 1812 uniforms for both sides. The battle map shown displays all units deployed in line at the start of the battle. I decided to have the British march down the road then deploy for an attack to add a little variation.
With some adjustments, I was able to assemble units for both sides as provided in the scenario. Because I was using 15mm figures I felt using centimeters instead of inches for movement and firing was appropriate. Also, having no game table, I converted the dining room table for use with the consent of the WAR OFFICE (wife).
Solo Play Style
Regarding orders, I simply rolled for initiative at the beginning of each turn to decide which side started instead of devising some autopilot mechanism. I did this because the player that starts the turn still has to roll to activate units once they start their turn which may or may not happen.
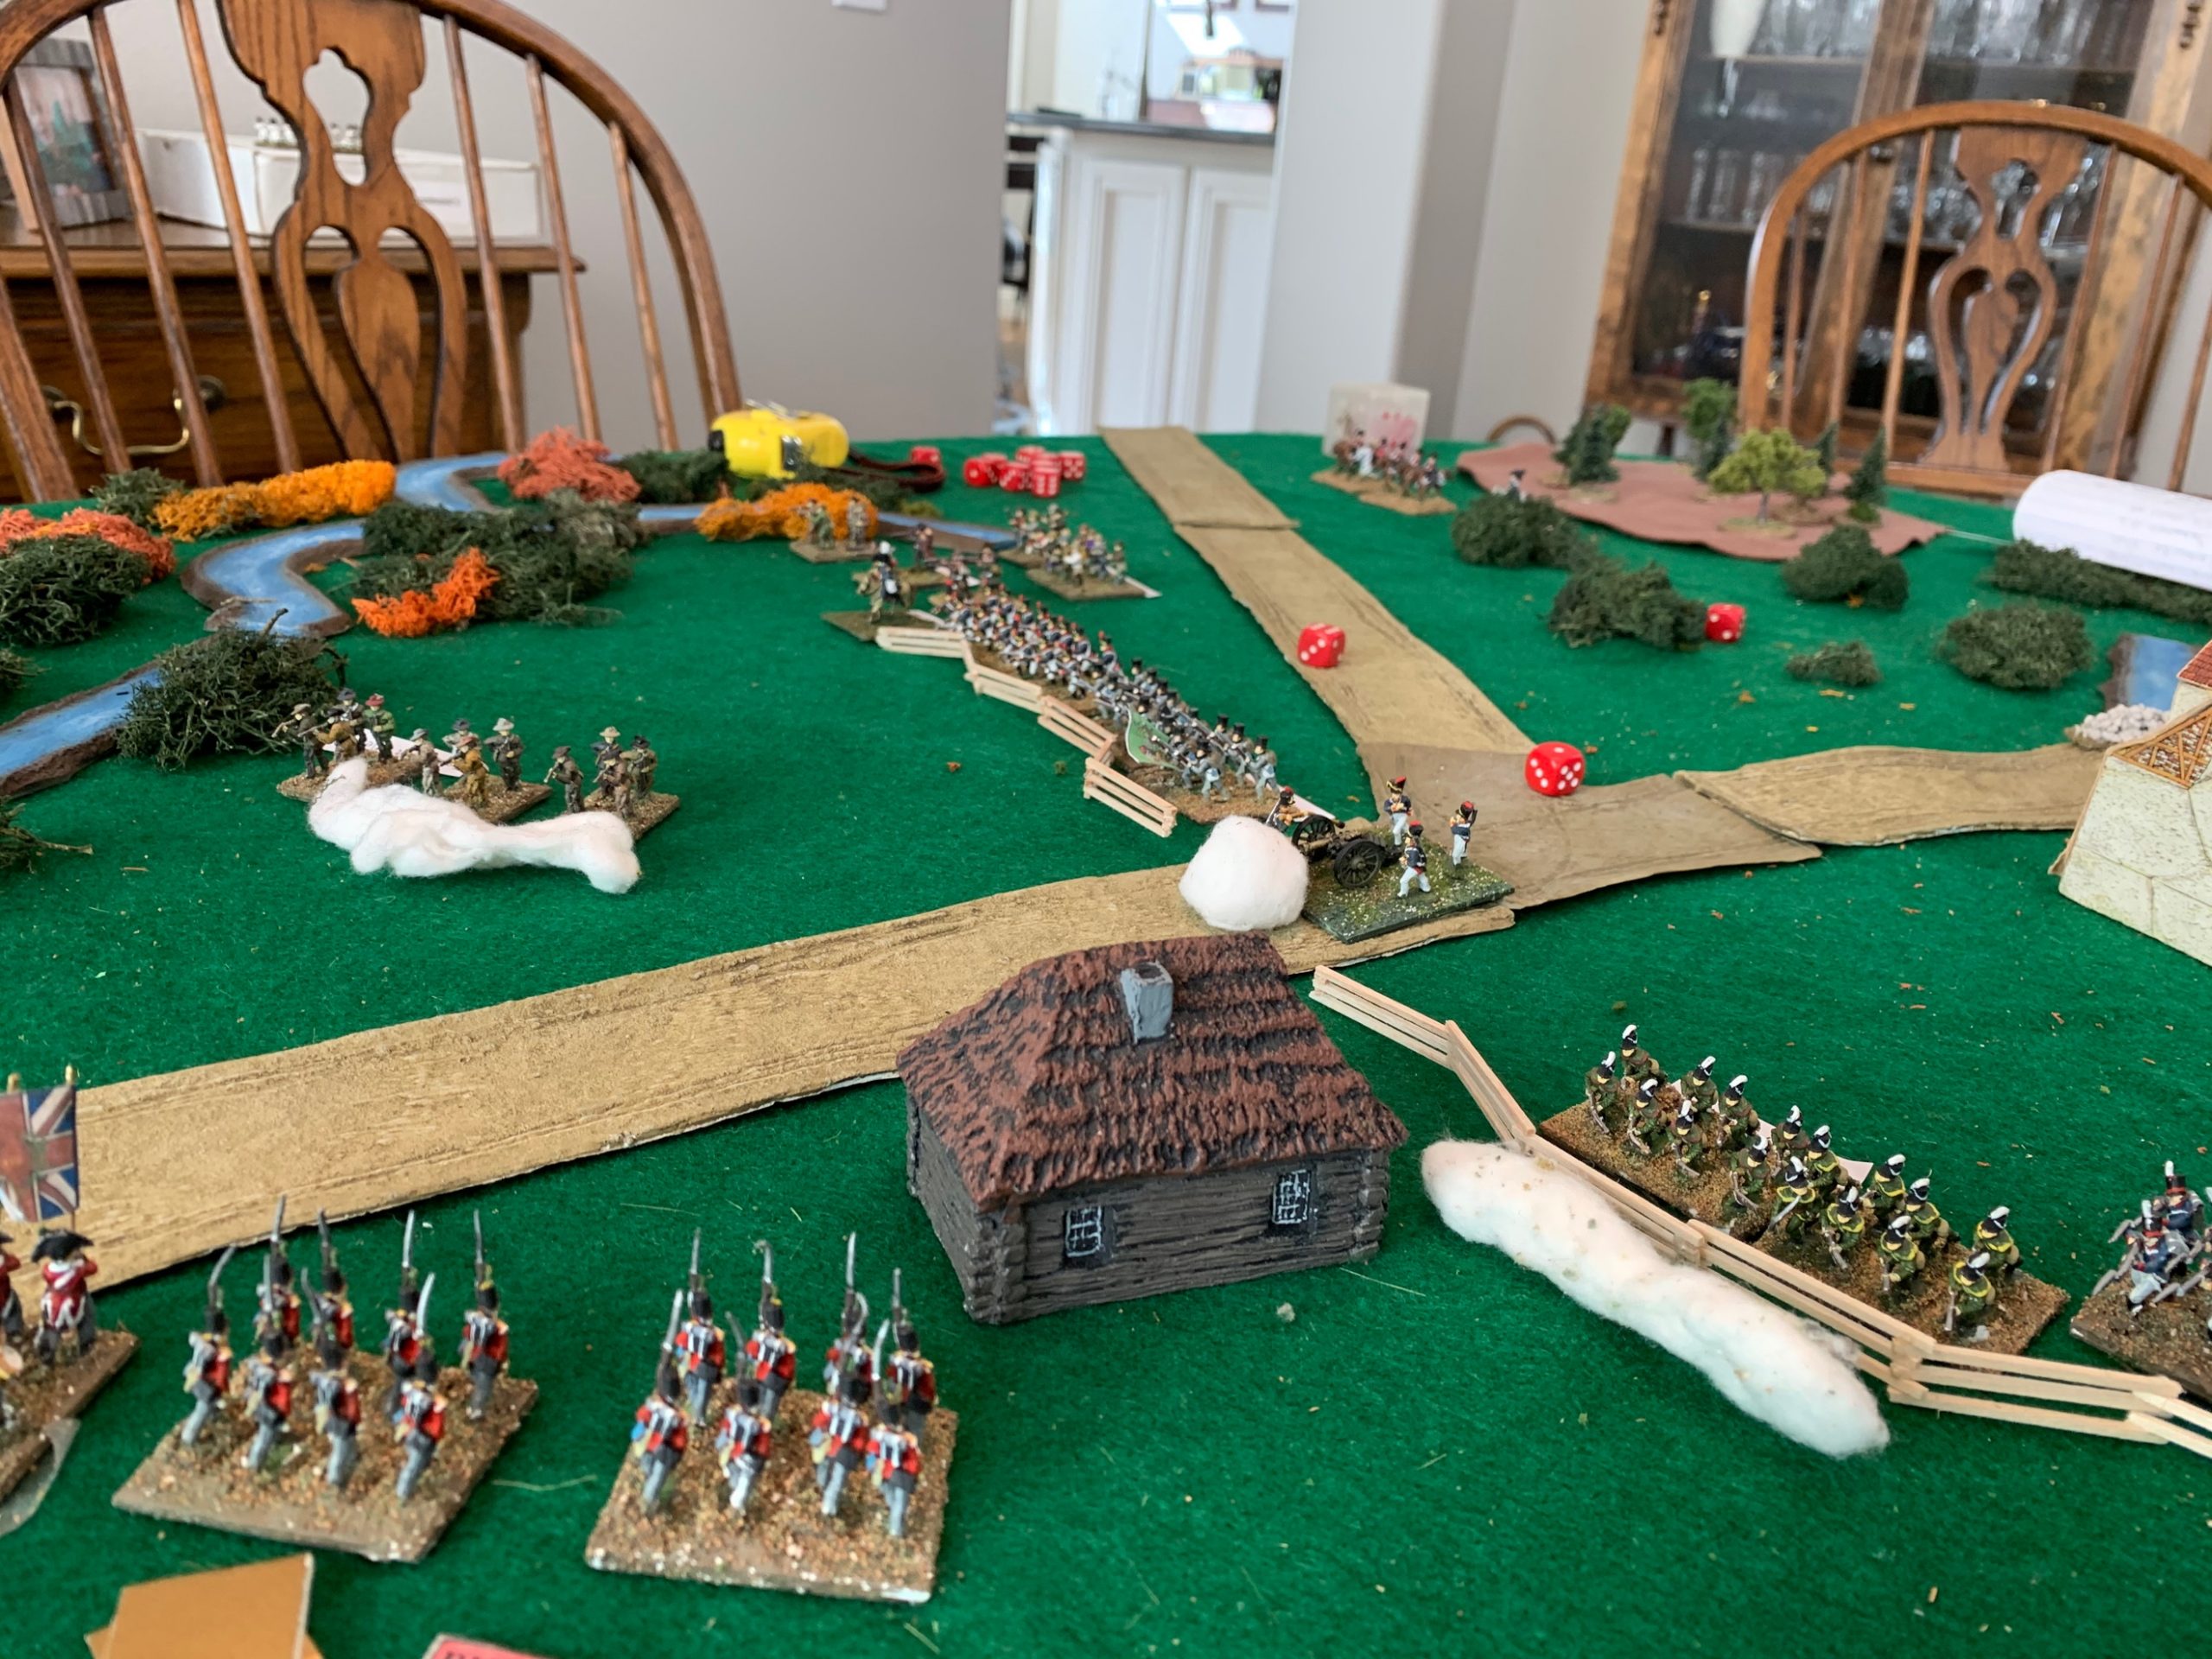
A view of the battlefield from the US side.I did have a different battle plan then was presented in the scenario. The scenario in the book starts with both sides deployed in battle line ready to engage. After reading the history of the battle I noted that the US sent a force of skirmishers forward to delay the British advance and they killed General Ross. So I altered the scenario to have the British advancing down the road in column instead of deployed as shown in the scenario map. This would allow the US skirmishers to advance as a delaying force per the original battle plan.
Turns 1&2
The British advance continues as the 85th Foot and Combined Light Battalion of the 1st Brigade deploy into skirmish formation. US General Strickler attempts to move the four units of rifles forward in skirmish order to harass and delay the British using their greater weapons range. Despite using the flat of his sword they refuse to move.
Baltimore Militia and Artillery under BG John Strickler deployed and waiting behind fence line for advancing British
British advancing to attack the American lines
The British 1st Brigade advance and deploy into skirmish formation
1st Maryland Rifles advance and fire into the 85th Foot.
Turn 3
The 1st Maryland Rifles advance and fire a devastating volley into the 85th Foot scoring two 6’s causing a disorder and casualty while the US artillery adds another casualty to the unlucky 85th. The British Light Brigade fails to advance but their artillery deploys and fires into the 1st Maryland Rifles without success. The British 2nd Brigade swings to the right and deploy to attack the American left flank while their 3rd Brigade deploys behind the stalled Light Brigade.
British Light Brigade advances, fires, and drives the 1st Maryland Rifles from the field.Turn 4
Both units of the British Light brigade advance and fire into the 1st Maryland Rifles driving them from the field. In response, the Fell’s Point Rifles advance and together with the US artillery and 39th Maryland Militia (as a Freshly Raised Unit rolls 6) firing a concentrated volley into the 85th Foot inflecting two casualties and a disorder marker.
Turn 5
As the 85th Foot attempts to reorganize, the British Combined Light Battalion charges and melees Fell’s Point Rifles. Despite the hand-to-hand combat advantage of the British, the melee is a draw. The Union Jagers advance and with the US artillery combine their fire on the battered 85th Foot causing a break test resulting in the 85th leaving the field. Fortunately, the British 3rd Brigade (21st Foot and 2nd Battalion Royal Marines) are in position to fill the gap.
On the British right flank, units of the 2nd Brigade (4th Foot, 44th Foot, Ship’s Company, and Provisional Marine Battalion) press an attack on the American right flank covered by the 39th and 51st Maryland Militia. As Untested Units the 39th rolls a stamina of 1 and the 51st a 3. During the British turn, the Provisional Marine Battalion charges the 39th Maryland but falls short. The Provisional Marines Battalion and 44th Foot face devastating volleys from the 39th and 51st Maryland Militia.
In the above pictures the British Combined Light Skirmish Battalion charge Fell’s Point Rifles while the Union Jagers Advance to engage the 85th Foot. The picture below shows the failed charge of the Provisional Marine Battalion and US volleys into the Battalion and 44th Foot.
Turn 6
The Combined Light Battalion and Fall’s Point Rifles are still locked in melee while the Union Jagers and US Artillery’s fire inflict further casualties and disorder on the 21st Foot. The British Artillery continues to engage in counter-battery fire without effect. Anticipating another charge the 5th Maryland Cavalry moves to provide rear support to the 39th Maryland Militia.
In the picture above Fell’s Point Rifles and the British Combined Light Battalion continue their melee while US Artillery and Union Jagers fire on the 21st FootTurn 7
The Provisional Marine Battalion and 44th Foot charge the 39th Maryland and 51st Maryland respectively. In the ensuing melee, the Provisional Marine Brigade is destroyed and both the 44th Foot and 51st Maryland fight to a draw causing both to withdraw. On the British left flank, the Combined Light Battalion push Fall’s Point Rifles back but are shaken themselves. This results in the loss of the British Light Brigade and a US victory.
Conclusion: Fighting a solo game can be interesting. One observation is that if you have an attachment to a certain nationality it’s probable best you don’t use that army. Another is that when you shift to the other side visualize another player opposite you and ask how do I counter what he just did.
As you can see from my report, General Stricker could not get the skirmishers to move forward for two turns then only one advanced. By that time the British had started deploying off the road for their attack. In a stroke of luck, the one skirmish unit that advanced rolled two 6’s on the British combined light infantry causing a kill and disorder marker and the American artillery scored a kill and disorder marker on the British 85th Light Infantry.
This picture shows the final battlefield and position of remaining units. As you can see there are two untouched militia units holding the US left flank and the 39th Maryland still holding the right flank fence line.
This tied up the British right flank giving time for the other American skirmish units to advance and engage the Brits. As noted in the ARR the British combined light battalion became involved in hand to hand fighting with one of the US skirmish units and the 85th continued to fare poorly in an exchange of shooting for several turns. This benefited the other US militia units on their right flank which were never tested. Further, the British attack on the US left flank never accomplish what was intended.
I favor the British and their allies when playing Napoleonic games, but, in this instance, I kept my preferences under control. Historically, a number of the US militia units fled while others retired in order avoiding a rout. Fort McHenry did not fall and the British land forces faced over 20,000 militia well-entrenched and withdrew. I was surprised that the US actually held the British in the game but they did have some better dice rolls overall.
Ron is a long-time gamer, currently residing in Southern California, but has spent time in the midwestern US, including Iron-Tom’s stomping grounds in Kentucky. Ron plays almost every miniature game imaginable in the historical table-top world.
Nice AAR Ron. And good job sending those Limeys back to Blighty!