Over the years I’ve slowly been building up my collection of urban terrain and as my tables experience urbanization I’ve come to realize that the next step is to include sidewalks. Adding sidewalks to my terrain collection will help to fill in some void space in my town, and will help the town become a more aesthetically pleasing, lived-in, setting.
At first, I looked for simpler options such as printing cobblestones onto card stock or buying mousepad cobblestone rolls and cutting to size but none of those gave me the modeler look I desired. Eventually, I rolled up my sleeves and declared, “Fine. I’ll do it myself”, with my best Thanos impression.
Committed to building my own sidewalks I moved on to how to do it. Feeling adventurous, I enrolled in YouTube University and explored mold and cast-making options. After multiple consulting sessions with my BFA spouse, I bought materials for my first foray into mold making.
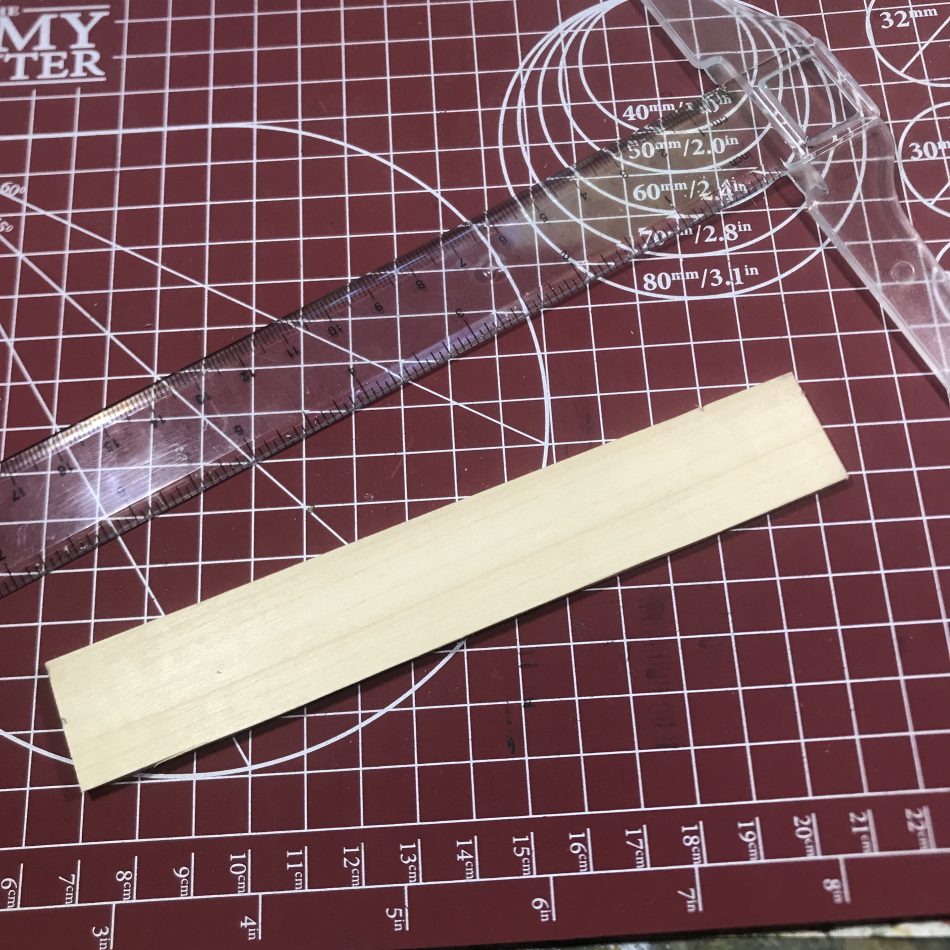
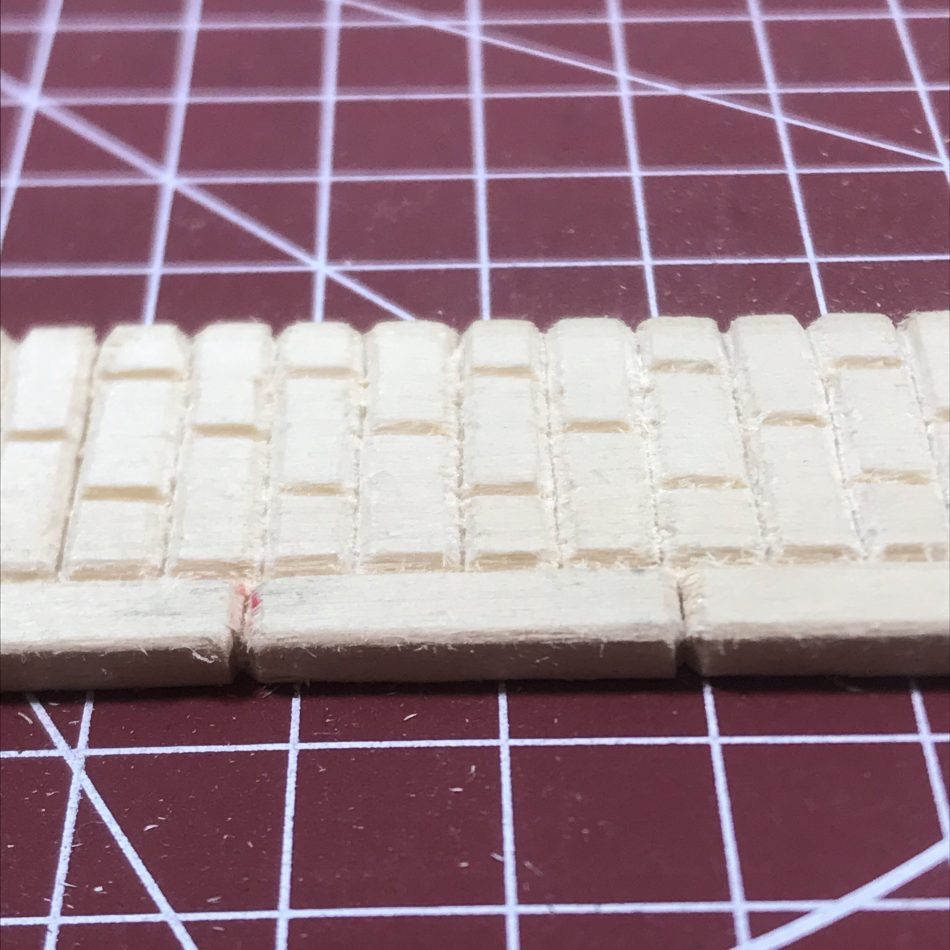
I started by creating a mock-up to check the dimensions of the sidewalk as well as the size of the cobblestones. The aim of the cobblestones was to make them small enough to impress upon the viewer a level of texture while keeping the number of etches I needed to make to a doable amount. Individual stones came out to be 1/2 x 1 cm while the stones forming the curb were 1/2 x 2 cm. I committed to make standard 1 x 6 inch pieces to be assembled to fit whatever urban table I end up setting up on game days.
I measured and cut a piece of basswood to my 1 x 6 inch goal to serve as the master for the first mold.
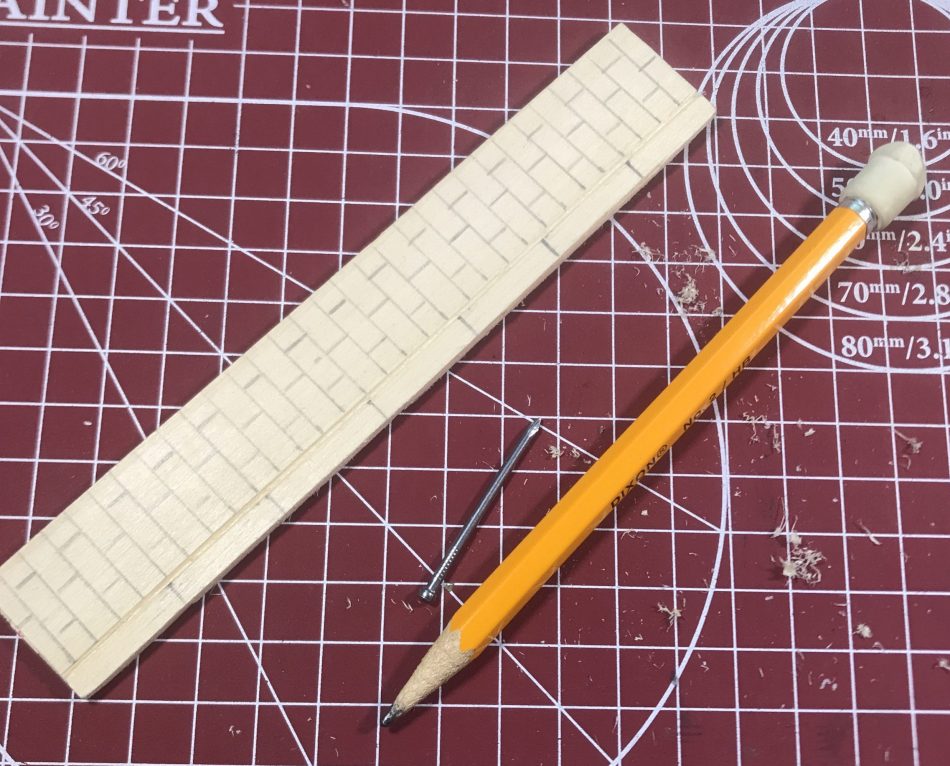
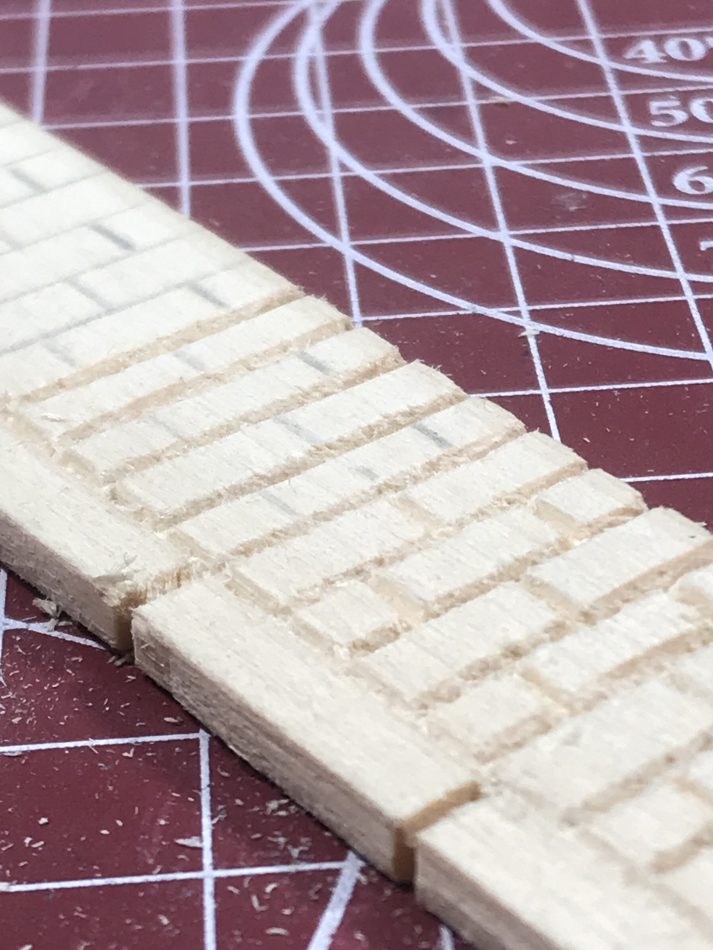
I traced what I wanted to etch and began scratching the lines with a nail and cleaning the etches with an X-Acto knife (not pictured).
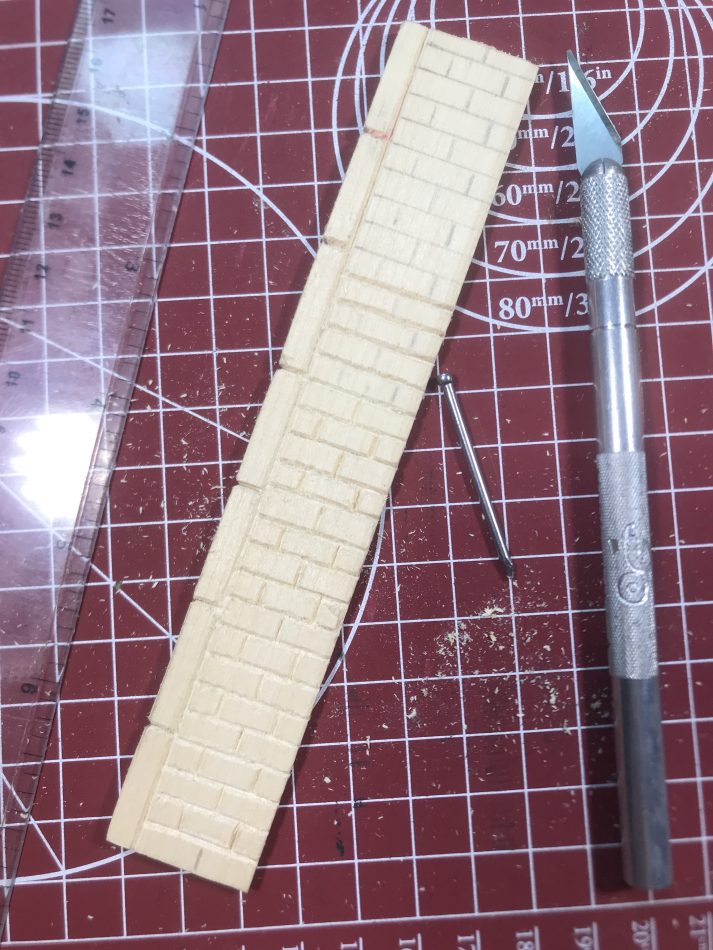
I continued etching with the nail and cleaning up with the blade until my hands hurt. I just kept telling myself I needed to make one master to get started. In hindsight the slow etching of the nail ended up creating organic and chaotic lines for the individual stones which I ended up liking, so as time-consuming as the nail was I think that tool is here to stay.
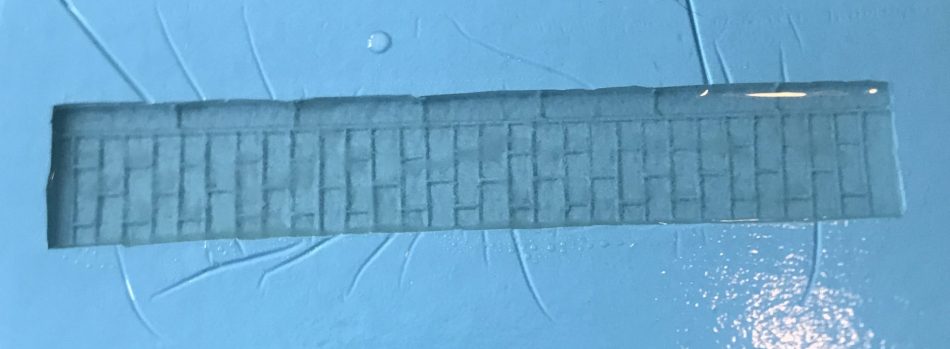
Close-up of the etchings. At the top left you can see the pencil lines, the center are the long lines etched, and at the bottom left the short lines are done connecting the long lines.
Another angle shows the depth I was attempting to go to. Knowing I wanted to make a mold from this master I made the cuts wider and deeper to help with the mold-making later on. A real mason may very well be fired for creating so many tripping hazards (at scale) but it should serve my purposes well.
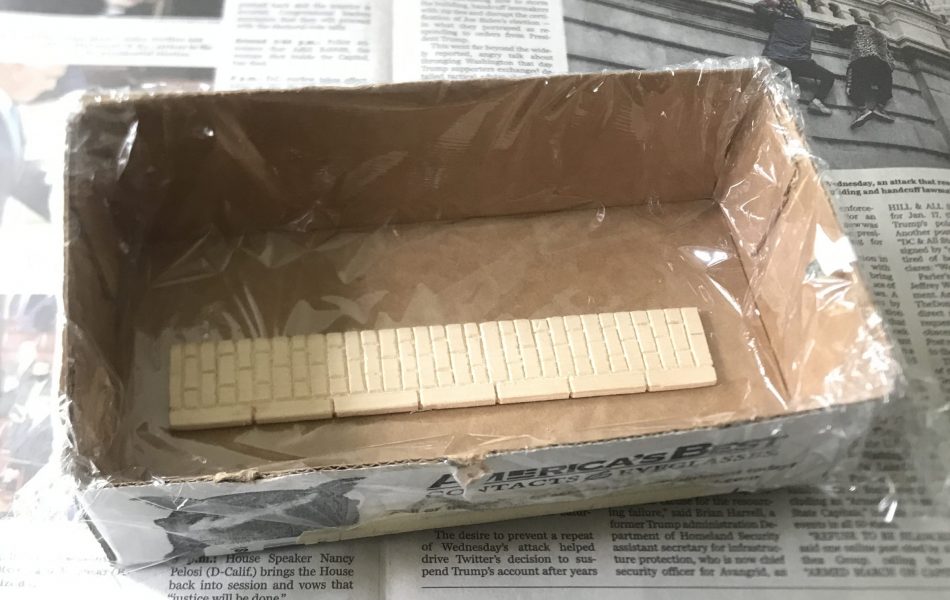
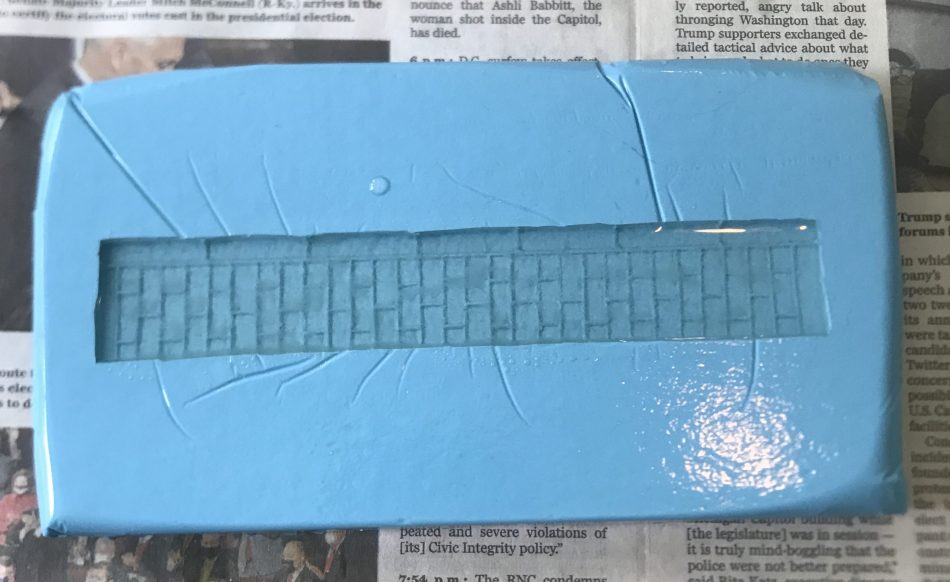
My homemade mold frame with the completed master taped to the bottom.
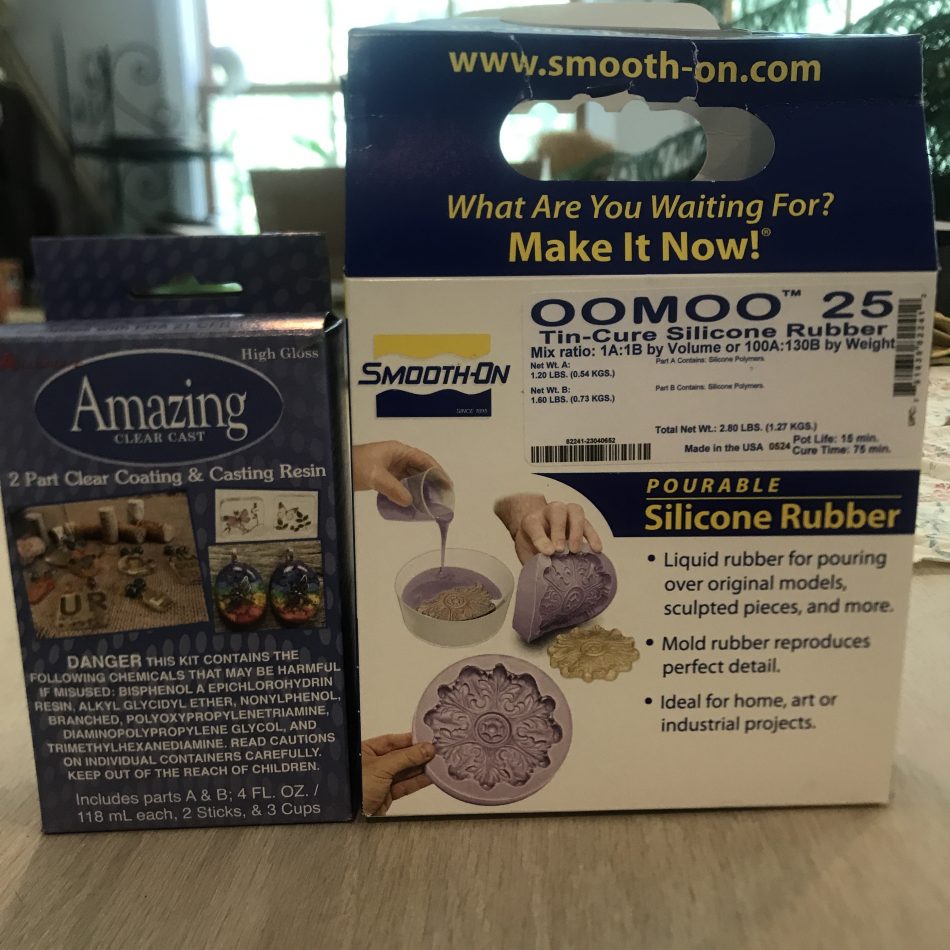
For the molds I used Oomoo 25 (right) and for the casts further down the article I used Amazing Clear Cast (left).
My first mold! My first attempt made apparent to me that my frame was much too wide and pouring the silicon to a depth of 1″ was far more than I needed. I made a note of those for my AAR.
The first resin cast curing.
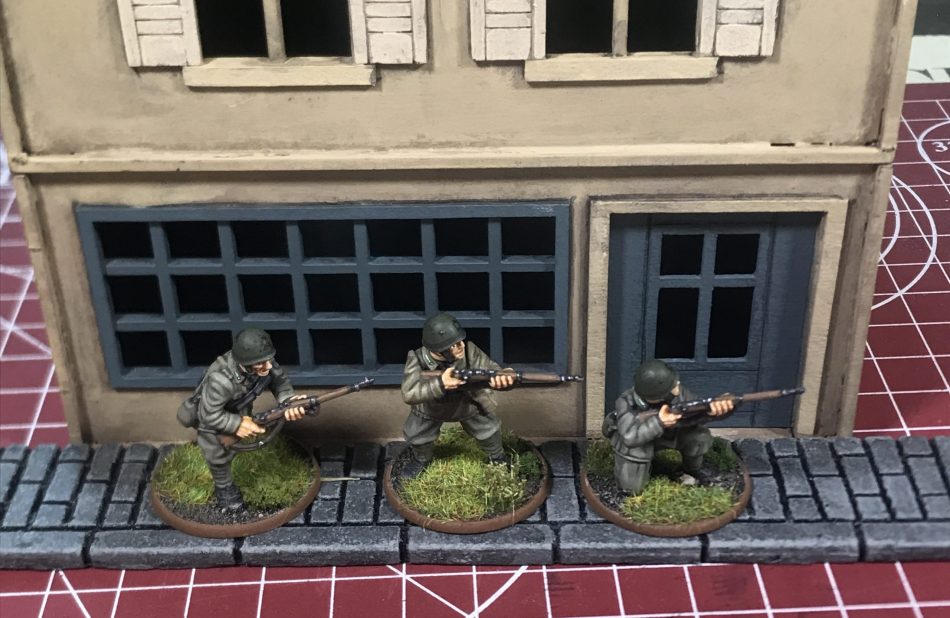
After the test piece cured I painted it up to see how it looked when complete. Here is my painted test piece in front of a shop guarded by some Italian infantry. My test piece turned out well enough that I decided to commit and began work on additional molds to cast a batch of sidewalks simultaneously.
Here I made some adjustments to bring in the sides for future molds. Nothing fancy with this operations. Just some cut up strips of cardboard, masking tape, and foam.
I measured and marked the height on one wall of the frame to tracks my pours. After my first mold was poured to an excessive 1 inch I adjusted to 1/2 inches and found that sufficient for subsequent molds.
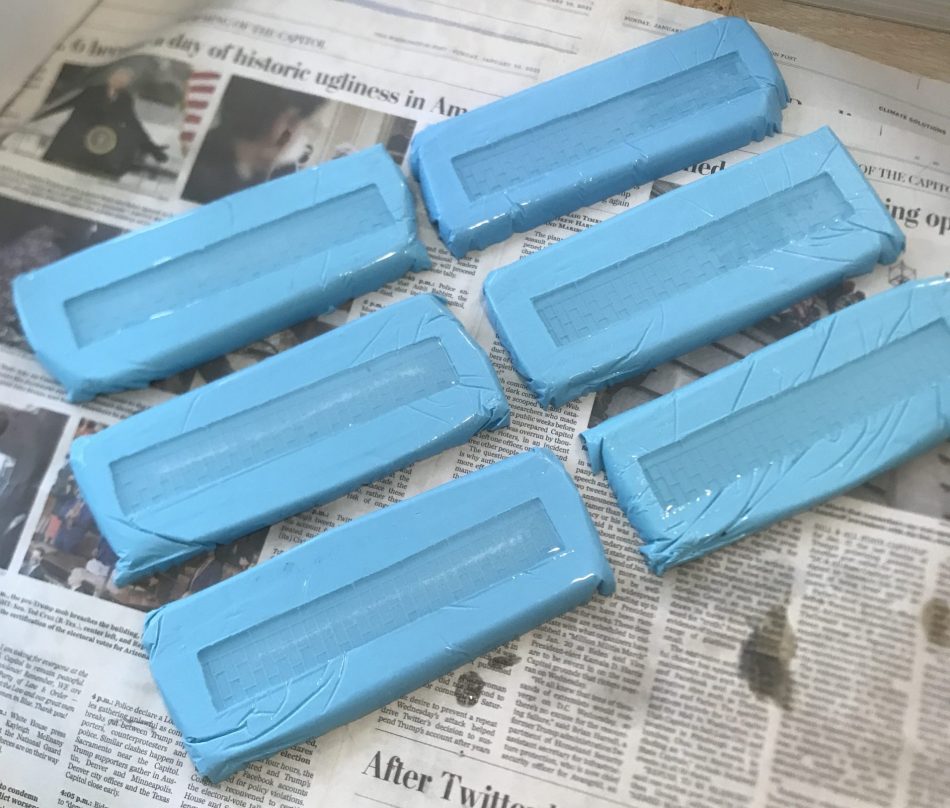
I found that reusing the uncoated basswood master failed in the second mold but luckily an extra resin cast could be used as a master to make more molds.
In my next article, I’ll share how I painted the castings and hopefully a picture of a block full of my sidewalks on the table.
Happy casting!
4 thoughts on “Creating Sidewalk Terrain Molds”
This is really cool. Do you think you could make road sections in a similar manner?
Making road sections is certainly a possibility as far as I can tell.
Great looking sidewalks !
Will you do corner sidewalks ?
Thank you! I do not intend on making sidewalk corner sections. I ended up making four different types of molds. One mold had curbs on three sides (one long and both shorts), the second and third molds had curbs on two sides (one long and a different short for each), and the fourth mold had a curb on one long side). The idea is to mix and match them around buildings to make corners without needing a corner piece. I’ll throw in a picture of my four forms in the next article.