Flames of War – The First Early War Tournament – Party PanHARD!
By Paolo Paglianti
If there’s one thing I didn’t like about ETC 2026, the World Team Championship our club organised in Milan last August, it was that many teams brought almost identical lists. That’s understandable: after years of playing and with the meta now well established, it was predictable that we would see plenty of similar lists, from American armies with hordes of Sherman Spearhead Companies to Polish armies with masses of infantry.
A breath of fresh air comes with the Early War lists. Battlefront has finally started publishing the Early War army books, allowing us to explore an entirely new world of list-building, with an unknown meta that is still waiting to be discovered. In addition, with this year’s ETC competitive cycle now over, we can finally move on to the new More Missions published by Battlefront in April, which haven’t been used at major tournaments so far because they weren’t available in time for ETC 2026. Major national tournaments generally adopt the same period and points limits as the following ETC, allowing players to test their armies in preparation for the World Championship.
Between the new Early War lists and the new missions, we can practically play a “new” version of Flames of War, full of fresh ideas and exciting new possibilities.
If you want to know more, you can find some of our articles on the Early War books released so far here.
Early War book “Blitzkrieg” review, by Paolo Paglianti
The French force in Early War book, by Tom Gall
The British force in Early War book, by Richard Steer
The German force in Early War book, by Michael Rafferty
The first Italian Early War tournament took place in Parona, just outside Verona, organised by Flaviano, my friend and teammate in Team Italy (and, in fact, he is now officially the captain of our team!).
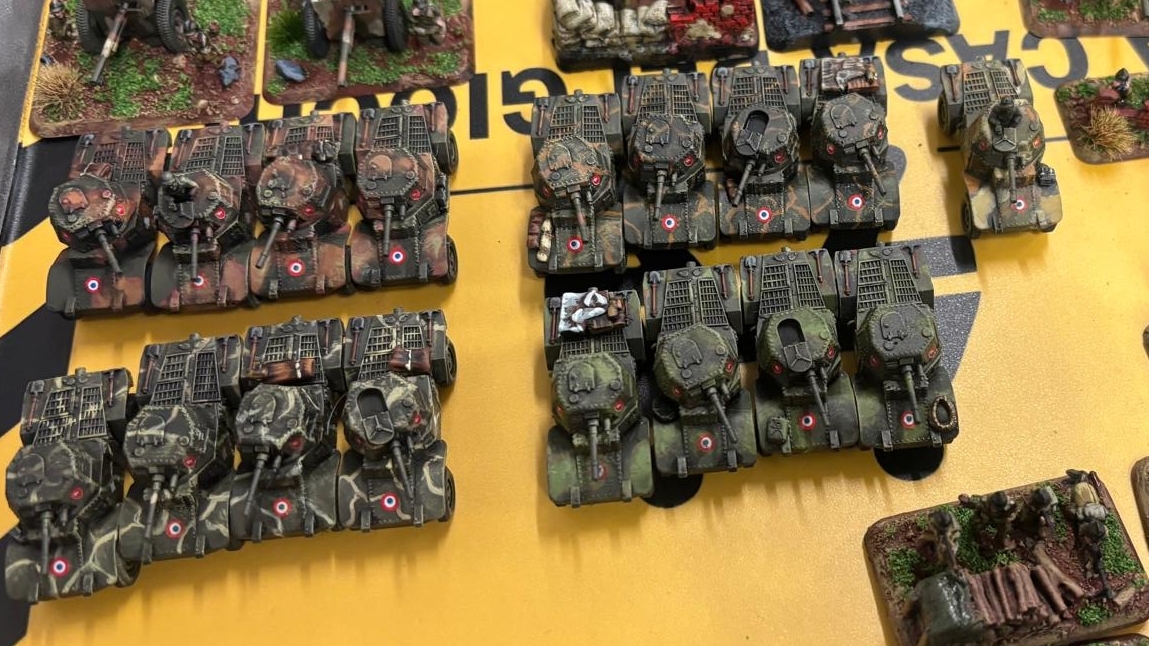
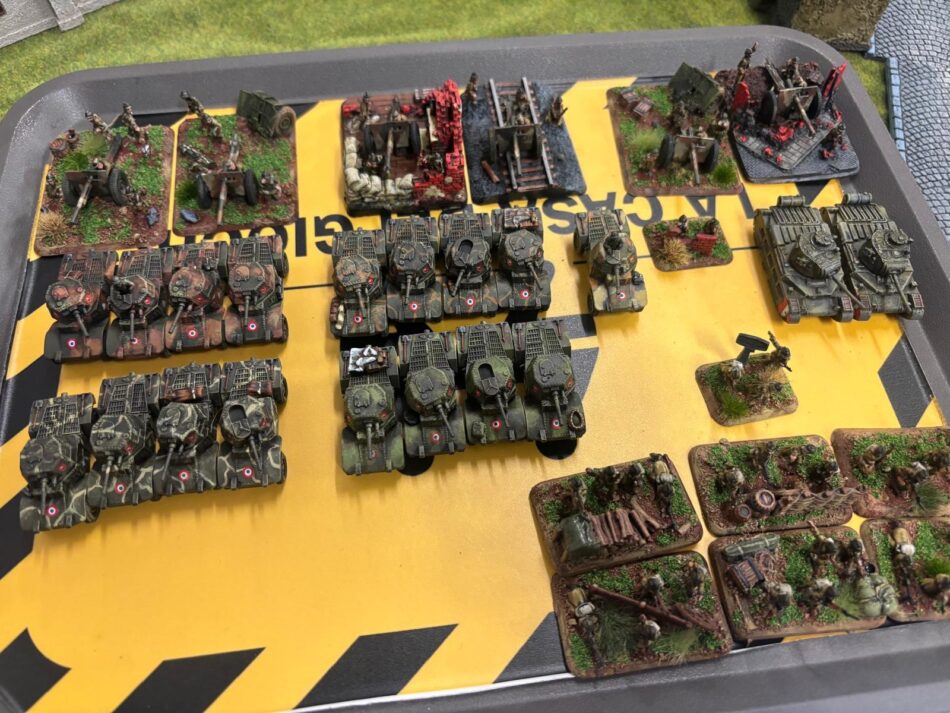
For this event, I painted a French army, which you can see below. I didn’t have any Early War miniatures, so it was quite a painting marathon!
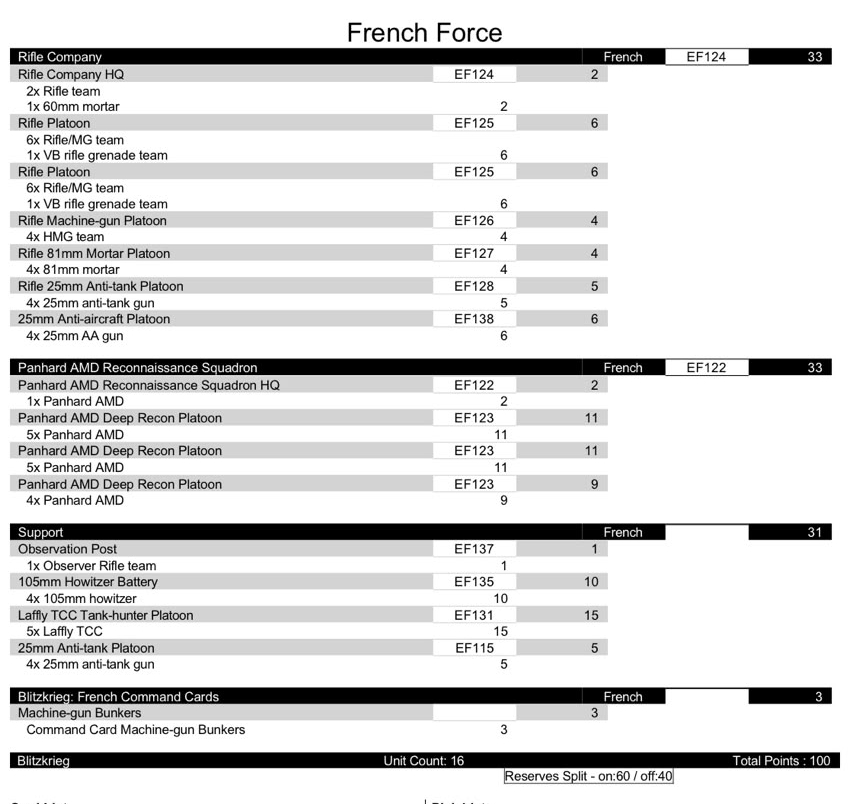
Here is my list
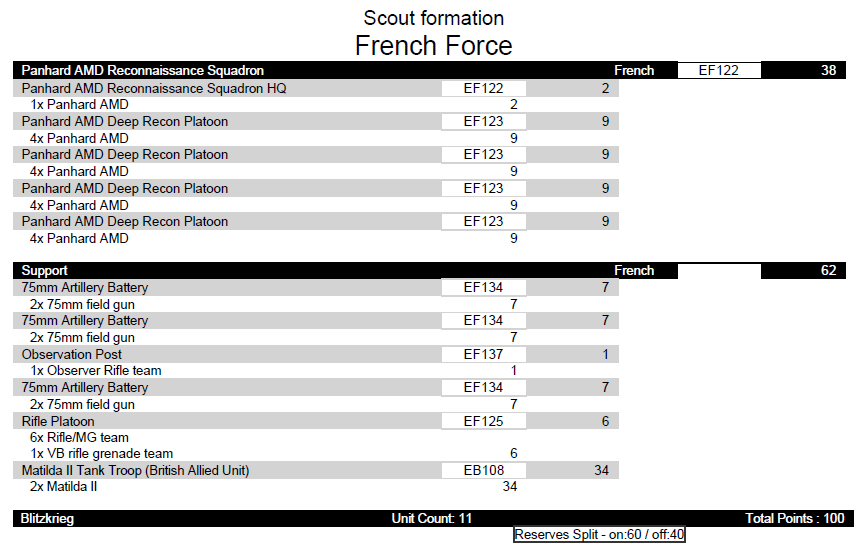
My list is built around a Panhard scout formation, supported by three artillery units, an infantry unit to contest or defend buildings, and the mighty punch of two British Matilda II tanks.
I see the Panhards as excellent ultra-light tanks. Their Front Armour 2 puts them almost on a par with Panzer IIs and IIIs, while their AT 6 gun is better than that of many tanks from this period. It isn’t Overworked and doesn’t have the HE rule, either, although it does have a Firepower rating of 5+.
On top of that, they have both Spearhead and Scout, so my plan is to race around the flanks of larger enemy tank formations and hide in terrain, allowing them to remain both Concealed and Gone to Ground even when they move. Then I can open fire on the vulnerable side armour of enemy tanks.
The French 75mm artillery will provide smoke cover when it isn’t busy trading shots with enemy artillery. I expect to see quite a lot of artillery in Early War, so having the upper hand in artillery duels could be crucial. Since a pair of 75mm guns fires like a full four-gun battery, I can afford to take three units. However, I’ll need to keep them well hidden, because if I lose one gun, the remaining gun will have to take a Motivation Test from the following turn onwards.
For this reason, I’ve found a position for my observer, whose job will be to expose himself to get the range while keeping the artillery pieces as well hidden as possible.
Rounding out the list are a pair of Matilda IIs. With Front Armour 7, Side Armour 6 and Top Armour 2, they’re practically miniature Early War Tigers! Most enemy tanks won’t even be able to scratch their paint, so their job will be to charge towards the objectives without worrying too much about incoming fire. They’re also an excellent reserve choice, costing more than 30 points.
At least, that’s the plan. Let’s see how it worked out!
Game 1 – Andrea Torta and His Germans
My first opponent is Andrea, who brings a beautifully painted German army built around a tank formation. Exactly what I need to find out whether my Panhards can stand up to a horde of German Panzers!
Here’s his list.
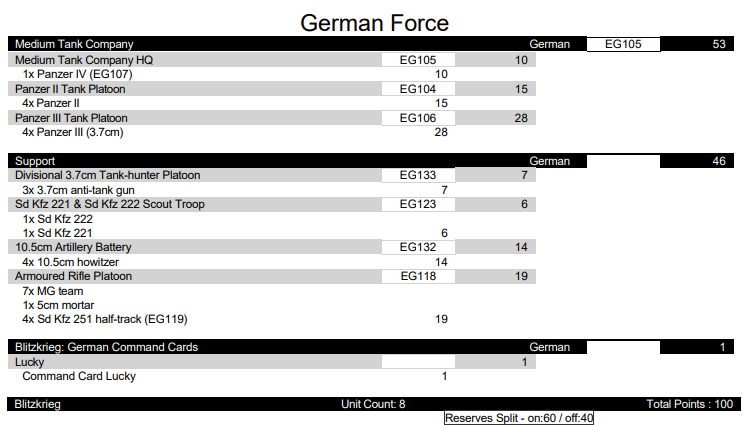
Andrea is the attacker, while I’m the defender. We’re playing the new version of Death Valley, where the attacker has no Reserves and doesn’t suffer from the usual Meeting Engagement restrictions, while the defender gets Immediate Reserves instead of Delayed Reserves and, most importantly, a very convenient Ambush.
Here’s the table. Unfortunately, I only remembered to take a picture after the game had already started, around Turn 2.
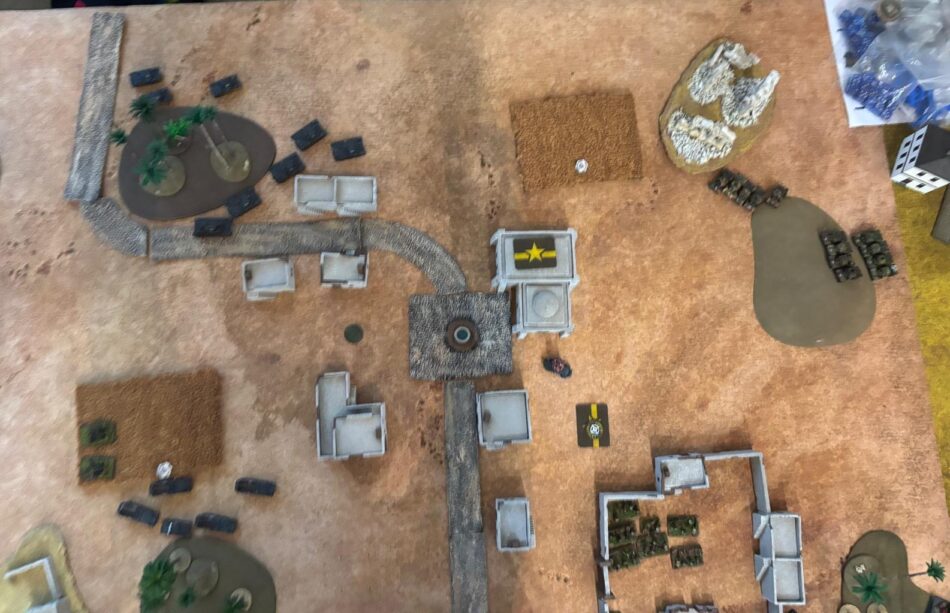
I deploy my infantry in the lower strip of the battlefield, where there’s a very useful Mediterranean-style villa that looks as though it was built specifically to protect French infantry. I place a Panhard platoon there as well. Their job is to defend the lower objective.
I deploy my other two Panhard platoons, together with the HQ, in the upper section. There’s no terrain to block line of sight, but at least I can rely on the penalties for long-range shooting, while keeping my vehicles Concealed and Gone to Ground even when they move.
I place two artillery units in the far bottom-right corner, well hidden, while the third remains in Ambush. Its AT 9 gun could prove very useful if I get a chance to fire directly at an enemy tank. In Reserve, I keep the Matilda IIs and another Panhard unit.
Andrea sends his tanks en masse towards the upper section of the battlefield, while his infantry advances towards the lower one. It’s the right move: his Panzergrenadiers are much stronger than my infantry, and his tanks are tougher than my Panhards.
He also sends his scouts racing towards the centre of the table at full speed, hoping to discourage my infantry from advancing towards the two objectives.
On my turn, I try to distract him with the scout platoon in the lower section, throwing it straight into the jaws of his infantry. They only have a single anti-tank rifle, so I’m not too worried, and I hope Andrea takes the bait. He does, and over the following turns his infantry gets bogged down in an assault against my Panhard scouts, where I also had the upper hand.
Things go less well in the upper section. I move one Panhard platoon, together with the HQ, behind the central hill. It’s a long way from the objective, but the position allows me to take potshots at Andrea’s scouts and any other tanks that emerge from behind the houses.
My shooting goes well, and the scouts are destroyed. However, I still have to find a way to stop the horde of Panzer IIs and IIIs (and even a Panzer IV!).
Andrea recognises his advantage and pushes forward with his tanks, getting dangerously close to the more exposed objective. Fortunately, the mission can be won from Turn 6 onwards. Otherwise, the game would already have been lost!
My Matilda IIs arrive on Turn 2, fortunately on the best flank: the upper one. They begin their inexorable march towards the objective, firing their AT 7 guns as they advance.
Andrea soon discovers that his tanks, armed with guns no better than AT 6, simply can’t hurt my Matildas, not even from the side. He therefore focuses on contesting the objective instead.
Two Panhard platoons converge on the exposed objective: one arrives from Reserve on Turn 3, while the other moves up from the rear. Together, they engage the surviving German tanks in a deadly dance of flank shooting. Andrea can rely on the superior German Skill rating for Blitz Moves, but numerical superiority is on the French side.
The game ends when, with a swarm of Panhards and the two Matilda IIs now on the objective, I manage to destroy three German tank platoons, breaking his formation. Final score: 8–1
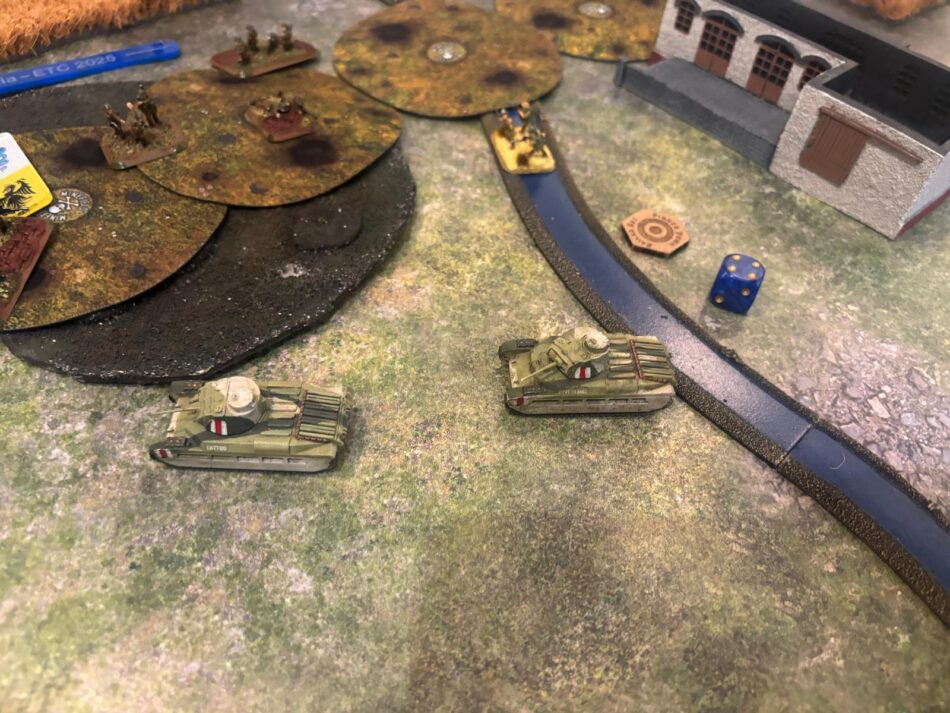
Game 2 – Luca Papisca and His French Civil War Army
Luca doesn’t attend many tournaments, but whenever he does show up, he tends to achieve surprisingly good results. He also often comes up with interesting ideas, as he does in this case.
A French defensive list built around bunkers! And these aren’t the small D-Day-style nests, but proper bunkers that are extremely difficult to destroy and immune to artillery fire.
Luca is the defender and I’m the attacker, so we end up playing the Toehold mission. Here’s the table.
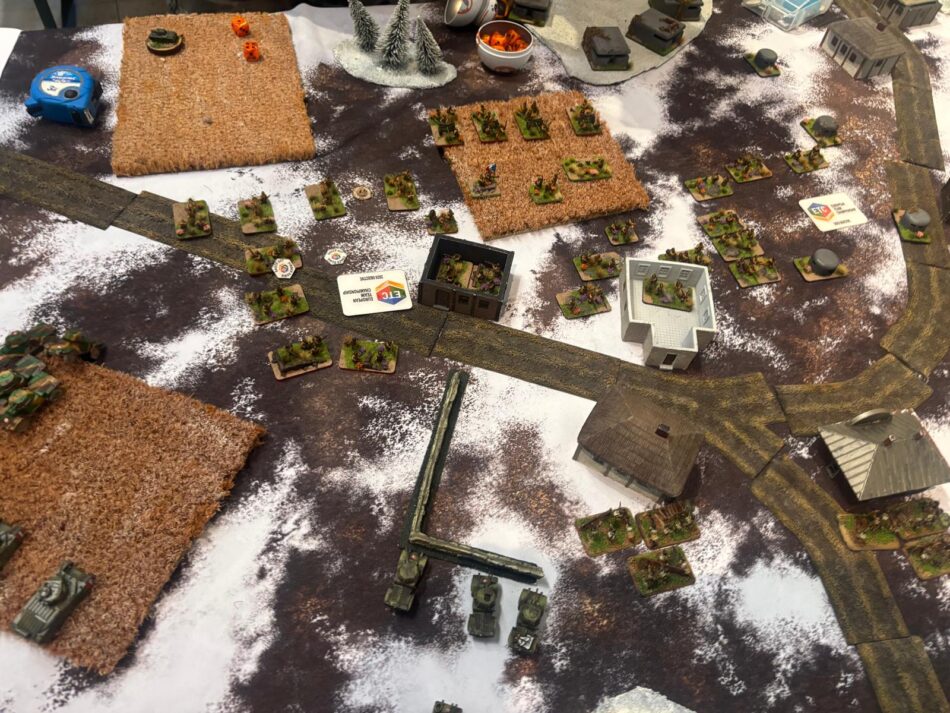
Luca deploys his bunkers to defend the right flank, supported by a few platoons. However, knowing how nearly impregnable this defensive line is, he deploys almost his entire army around the objective on the left. Two lines of infantry, AT 6 anti-aircraft guns, and AT 6 25mm guns. Quite a welcome committee!
He keeps his Laffly vehicles in Reserve, ready to deal with my Matildas, along with most of his Panhards.
Since destroying the bunkers would mean hitting them on at least a 5+, then rolling a Firepower test of 5+, and finally hoping they fail their 3+ save, I opted to focus on the left flank instead. I don’t have any hordes of flamethrowers in my army, after all!
I position my Panhards so that they remain Concealed and send the Matilda IIs towards the objective. Under the new More Missions rules, the attacker must get within 10 cm / 4 inches of one of the objectives they need to capture by Turn 6. Otherwise, it’s game over.
I also concentrated the fire of all three artillery batteries on the mass of infantry, AA guns and anti-tank guns around the objective, but the results are disappointing. Unfortunately, the 75mm guns’ 4+ Firepower rating doesn’t always guarantee success.
The exchange of fire between Luca’s guns, AA weapons and Panhards and my own vehicles doesn’t go particularly well for me. I make one mistake in particular: I leave one of my Panhard platoons unnecessarily exposed. I lose the exchange across all my platoons and am forced to disengage. I need to remember how fragile they are. The main weakness of my list is becoming clear. With only five platoons, one of which is a lone HQ, I have to be very careful not to risk a Company Break.
The two Matilda IIs reach the objective but fail to drive off the infantry. Their Counterattack rating of 4+, boosted by the nearby HQ, allows the French infantry to repel them for two turns.
Then the five Laffly vehicles arrive. They don’t achieve much in their first round of shooting, but on their second turn on the table, they move closer to my Matildas. Despite firing through a smoke screen, they manage to score two hits, and I manage to fail both of them!
The result? Both Matilda IIs are Bailed Out, and the ravenous French infantry promptly assaults and destroys them without a second thought. The game is practically over. While waiting for Turn 6, I concentrate on trying to destroy a few enemy platoons to salvage some points. Well played, Luca! Always a pleasure playing against you. Final score: 2–7.
Game 3 – Alessandro Bossi’s BEF
Alessandro is one of Milan’s most promising players, and we often face each other at our local club. Today, he brings a powerful British force packed with tanks heavier than my Panhards, plus an allied French platoon of Somuas. But no Matilda IIs! Here’s his list.
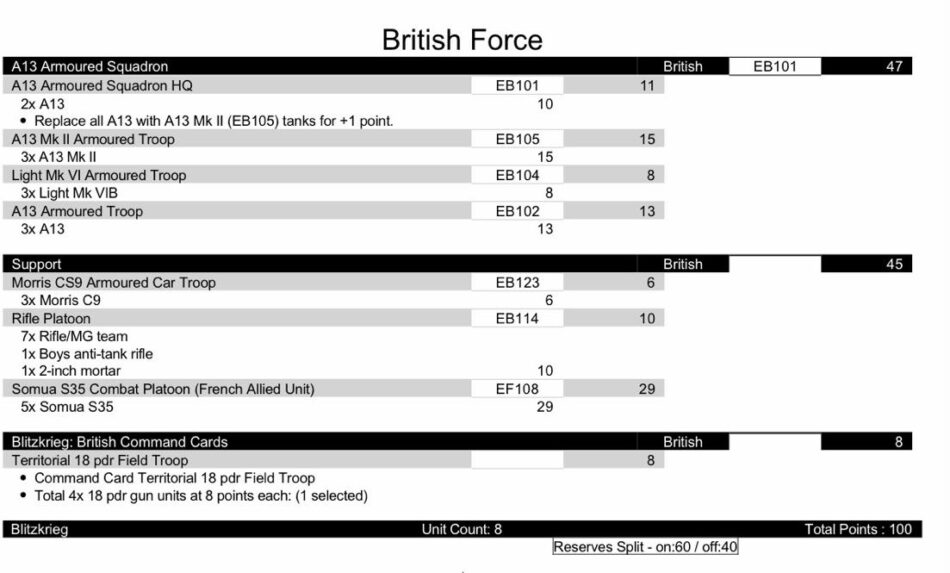
Once again, I’m the defender and Alessandro is the attacker, and we play a classic Counterattack mission.
Here’s the table.
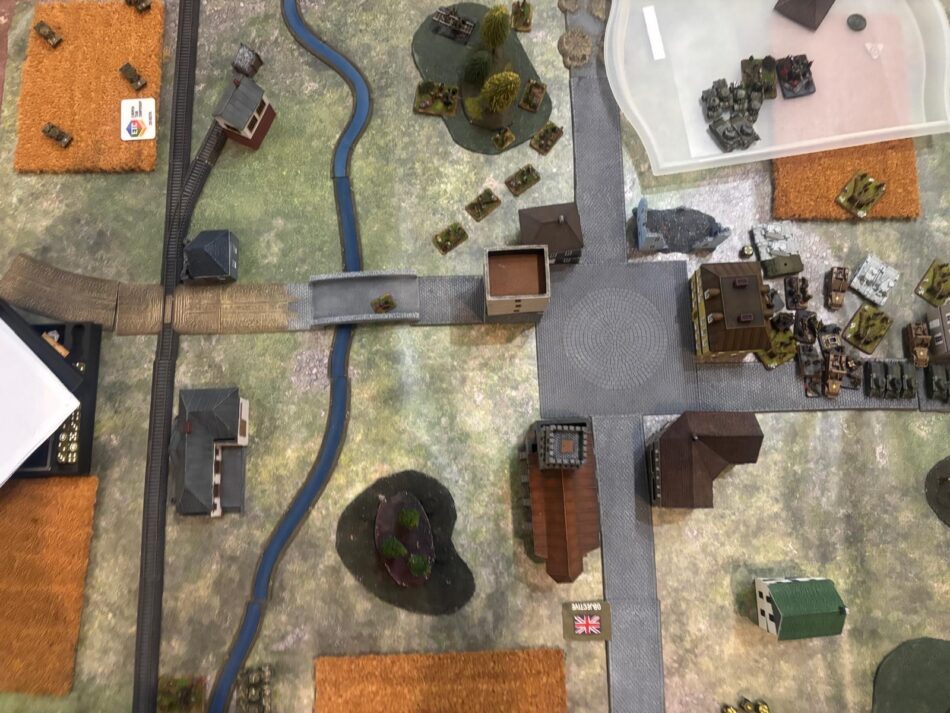
I deploy in the upper-left quarter and place my objective as far back as possible. My Panhards on the table perform a massive Spearhead move into the quadrant containing the second objective, the exposed one placed by Alessandro.
My opponent deploys practically his entire army in the corner of his deployment area, ready to jump down my throat at the exposed objective. Indeed, he advances with all his tanks, trying to use the houses in the centre of the map for protection. My Panhards move towards the objective through the wheat field and begin shooting at Alessandro’s lightest tank platoon, the Vickers. They destroy two out of three, which is a good result.
The Somuas come under fire from one of my 75mm batteries, which I’ve placed in Ambush in just the right position. After losing two tanks, they’re forced to withdraw from the centre of the table. Meanwhile, my infantry takes up positions in the village, hoping to block the quickest route for the British tanks.
A fierce tank battle erupts around the exposed objective. Alessandro’s A13s manage to destroy a few Panhards, although they’re spread across different platoons. My vehicles concentrate their fire on the platoon of early A13s, which have Front Armour 1, and destroy a couple of them. On Turn 3, my Matilda IIs finally arrive. They race towards the objective and then open fire on the remaining A13s.
After a couple of turns caught in a crossfire, Alessandro’s formation is reduced to a single A13 platoon: his HQ. Final score: 8–1
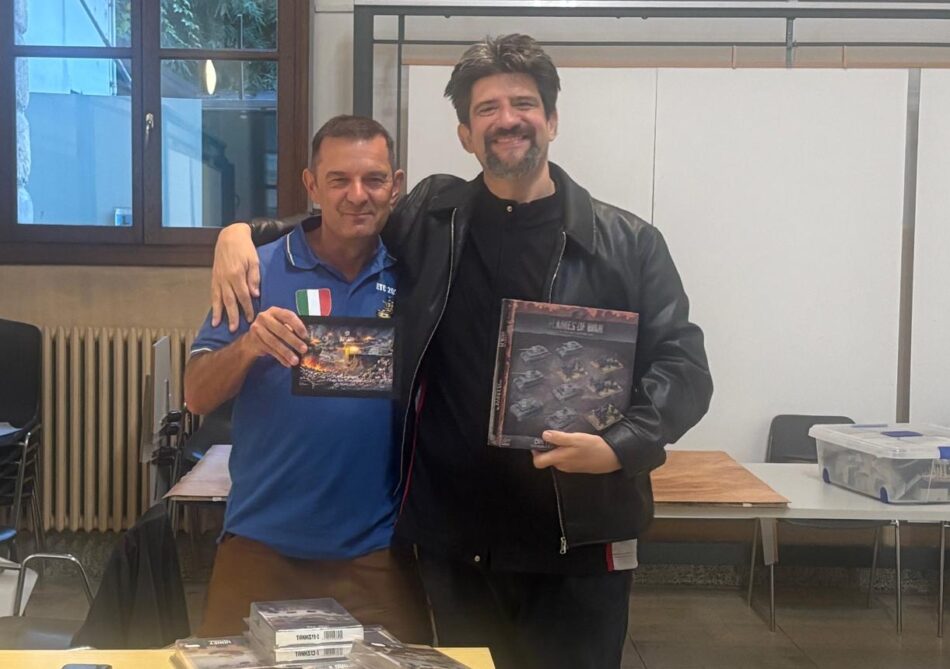
First Place Overall! Despite losing my second game, I somehow manage to finish first in the tournament!
Luca crashes out in his third game against Livio Tonazzo, former captain of Team Italy. They face each other in a Meeting Engagement between two defensive armies. Thanks to a few points and a healthy dose of luck, I manage to finish ahead of both of them.
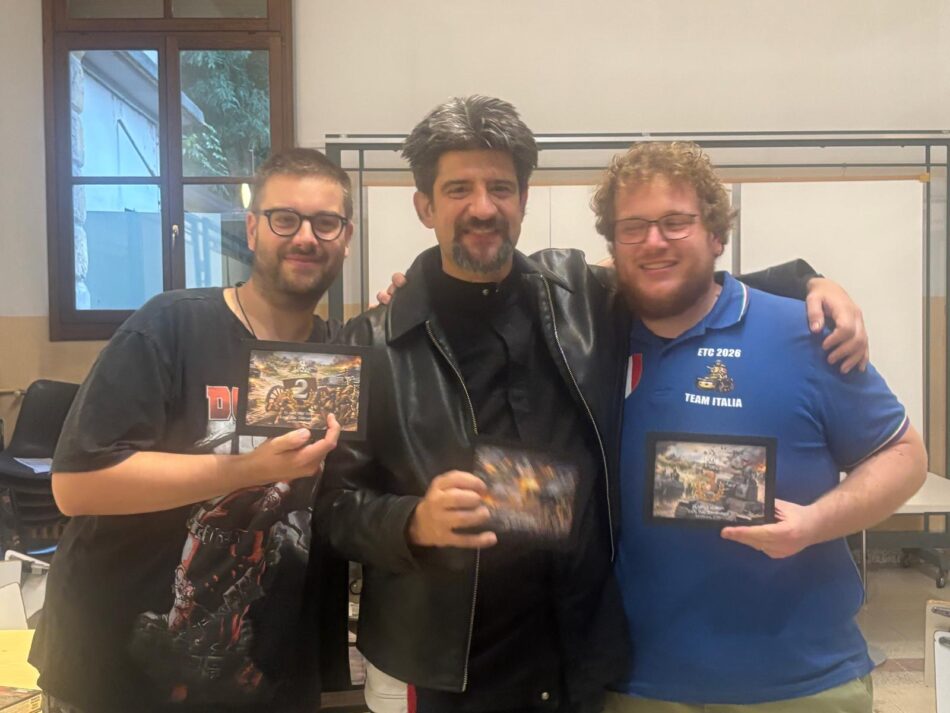
Beyond the wonderful day spent playing with friends, I’m extremely happy not only with my list (I’m already thinking about a few small tweaks), but also with the Early War period in Flames of War in general.
I expected it to be a game dominated by entrenched infantry, but instead, it places a strong emphasis on manoeuvring fast tanks, helped by the new mission pack, which has brought a breath of fresh air to the game. I can’t wait to do it all again!