Painting and Modelling – Canadians in WW3 Team Yankee
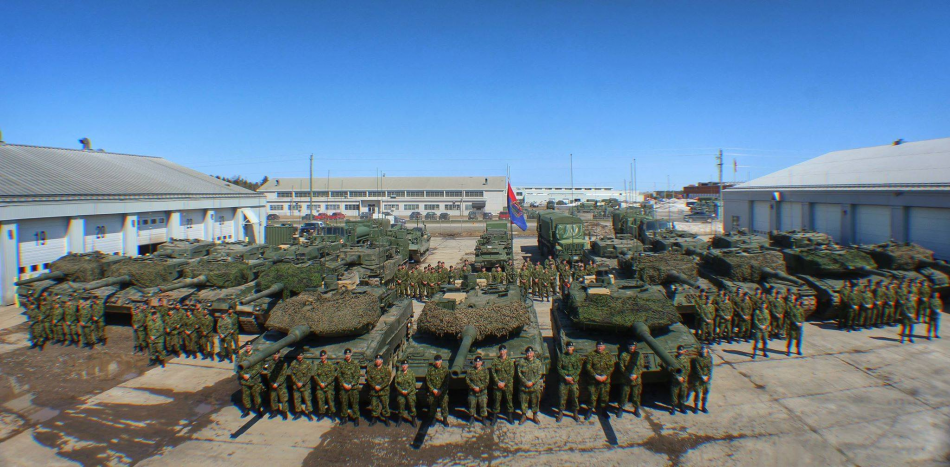
Royal Canadian Dragoons photos
In my previous article WWIII Team Yankee – NATO Forces Book – The Canadians – No Dice No Glory I discussed the new lists for Canadians in Team Yankee. The possibilities for Canadians in Team Yankee are now so exciting that many people are considering doing up a Canadian army. Battlefront has done a good job of showing Canadian camouflage patterns, but not such a good job of getting the colours right and some different ways of painting vehicles.
I realize that Battlefront wanted to come up with a common camouflage pattern for Canadian vehicles, but it’s not that easy. During the Cold War and beyond, Canadian vehicles had different paint schemes depending on the vehicle and when it was in service. The options were German Gelboliv, Canadian three-colour, NATO three-colour, or plain NATO green. I will discuss my recipes and recommendations for the different colours from the late 1970s onwards. Then I will discuss which colours and patterns to use on each individual vehicle.
Paint Colours
German Gelboliv
I airbrush this recipe onto the entire tank, 4 parts Tamiya XF-51 Khaki Drab, two parts Tamiya XF-74 JGSDF Olive Drab, and one part Tamiya XF-57 Buff. If you don’t like mixing, XF-74 by itself isn’t too bad. Another option is AK Real Colours RC087 – Gelboliv (Late) RAL 6014.
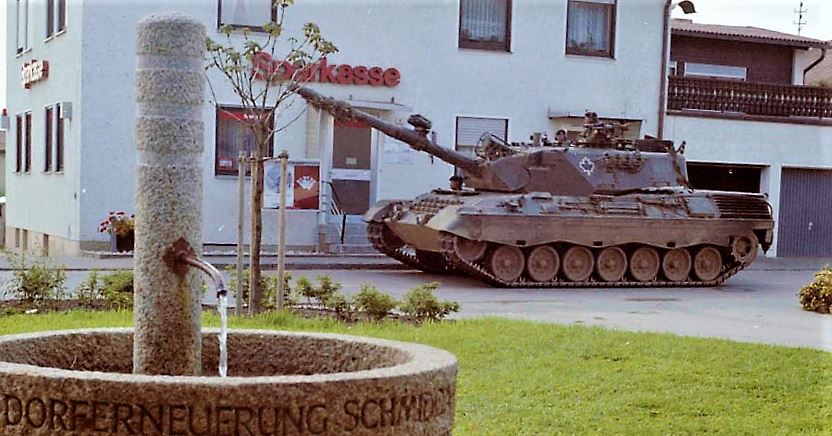
Could this be a scene right out of the modern remake of Kelly’s Heroes?
Canadian Three Colour
For airbrushing you will need these paints: Tamiya XF 69 NATO black, XF 65 Field Grey, and mix 50 % XF 62 Olive Drab with 50% XF 62 Desert Yellow until you get the right shade. It doesn’t have to be perfect as with aging, both greens tend to blend together. If you like your vehicles to look a bit older, I would add a bit of Tamiya XF-57 Buff(or white) to the XF 65 Field Grey. If you don’t have an airbrush, you can do the hand-painted version using Vallejo paints. 887 Brown Violet or a similar olive colour like 881 Yellow Olive, 830 Field Grey (lightened a bit), and 862 Grey Black (or black lightened a bit). These colours are a close match and we only started to airbrush our vehicles in the early to mid-80s anyways.
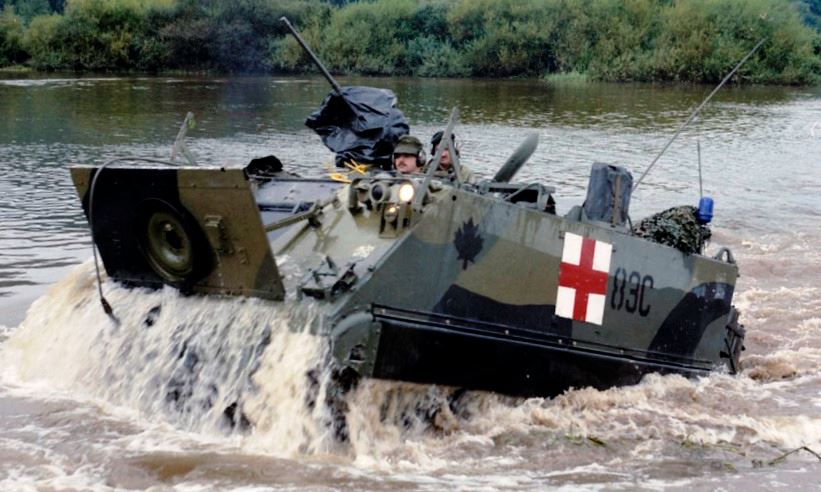
A rare shot of a clean M113 coming out of the water. You can clearly see the difference in the two greens.
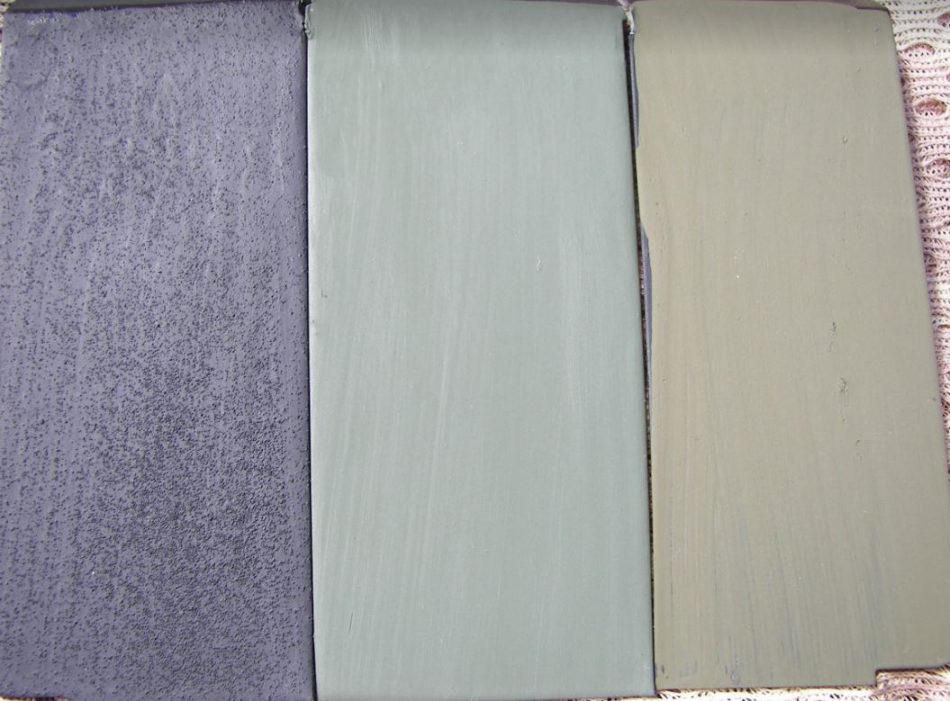
Paint chips courtesy of Anthony Sewards. Note how close the two greens are. A little bit of dirt or dust and they almost appear to be the same colour.
Nato Three Colour
I’m a big fan of Tamiya paints for airbrushing and I like to use their XF 67 NATO Green, XF 68 Nato Brown, and XF 69 NATO Black. Tamiya also makes these colours in spray cans for those without an airbrush. You can get very good results using the cans and the blue tac method. For hand brushing AK Interactive, make a line of Nato colours in Vallejo-like bottles.
I’ve not tried them, but AK makes good products, so I’m sure they will work fine. Another option is AK-Interactive Real Colors RC080 NATO Green, RC081 NATO Brown, and RC082 NATO Black. These come in Tamiya-like glass bottles. I used them once when my local shop was out of Tamiya and they work fine in an airbrush. One last option is to find out what colours the Battlefront studio uses as they seem to be spot on.

Nato Green
This is very straightforward. I would use whatever brand of NATO Green you are comfortable with. I would advise adding some Buff or White to the mix. Most paints are designed for use on 1/35 scale models. At the WWIII Team Yankee scale of 1/100, the Green can appear to be a bit dark, especially if you are just using one colour and not a camouflage pattern.
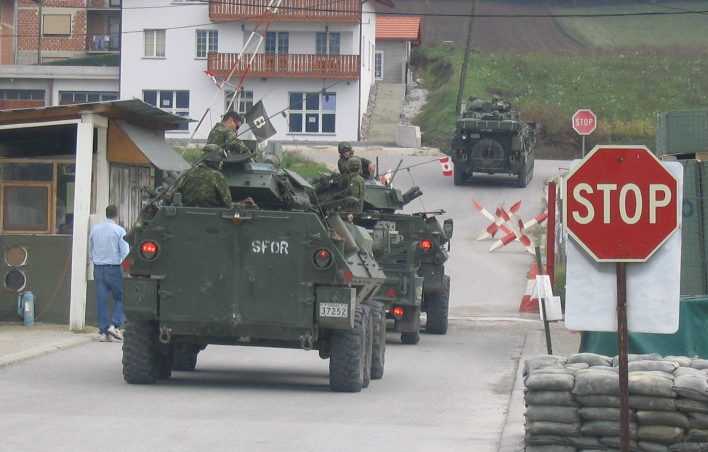
A pair of Grizzlies leaving Camp Black Bear in Bosnia. Author’s photo.
Winter Camouflage
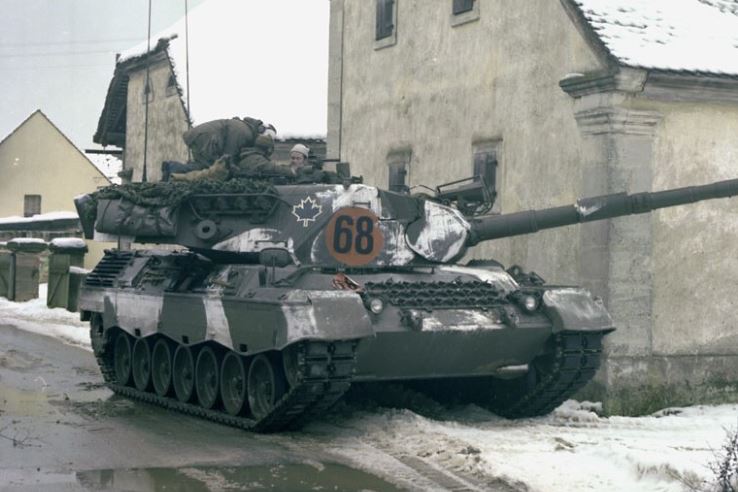
Back in the day, a simple whitewash would have been painted over the black-painted areas on any vehicle with Canadian three colour or NATO three colour. For the Leopard C1’s in German Gelboliv it was up to the troops to whitewash about a third of the vehicle. Of course, due to environmental restrictions, the whitewash is no longer in use.
Decals
I’m not a fan of the small decal sets that used to come with the Battlefront box sets, so I rarely use them. The new NATO sets that you have to buy look more promising. And the other NATO sets that you can purchase are good quality. One thing I don’t like is that they must have consulted an infantryman on the call signs, as you can only do up to three platoons or troops. And we know that you can have up to four troops in a tank squadron. The call signs look very well done, except that it almost looks like they have a white border. If this is the case, I would only use them on my Leopard C1’s. They also don’t have license plates.
I get my decals from TL Modelbau in Germany. Canadische Armee 1:87, 10,95 € (tl-modellbau.de) They are 1/87 scale which means they are a bit big, but that’s ok as at least they are visible. They are also the only company that I know that makes Canadian license plates. One drawback is that you have to purchase many sets if you are doing a full company/squadron or battery.
The other problem is that you have to apply each letter or number individually. So, for example, if your vehicle is “12C”, you are doing three decals on each side. That’s a lot of work. Peddinghaus Decals, Peddinghaus Decals – Peddinghaus -Decals 1/100 3557 Team Yankee Canadian 4. Mechanized Brigade 1980 also from Germany, produces that same “12C” as one decal and does it in 1/100 scale. Unfortunately, their black maple leafs all seem to be printed with a white border, so they are only good for tanks.
Canadian Vehicles
Leopard C1
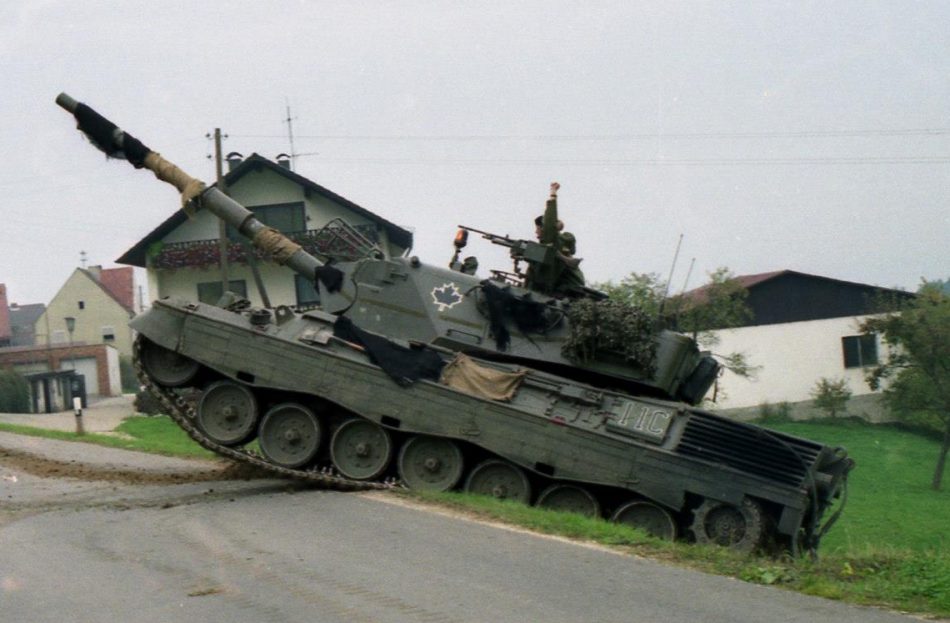
I will start off with the Leopard C1. I won’t say much here as I wrote an extensive article on the Canadian Leopard 1s a couple of years ago here. Canadian Leopard 1’s – No Dice No Glory As a quick summary you can choose to paint your Leopard C1’s in the original German Gelboliv, Nato three colour after re-fit, or just Nato Green later on in its service life. All will have the black maple leaf trimmed in white on each side of the turret.
Here is a Leopard C1 painted in NATO three colour with Mexas armour in NATO Green. These were deployed to Kosovo. You can get a complete tank here. 1-100 Leopard C1 with MEXAS by bonzai000 – Thingiverse with the Battlefront kit. I also added enough buff to the NATO green so that it’s not too dark in the small scale we game in.
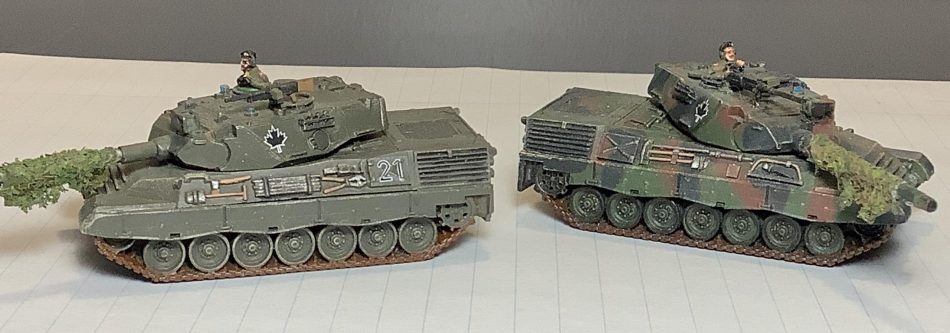
My examples of Leopard C1s in German Gelboliv and NATO three colour. I like a mix of both in my squadron.
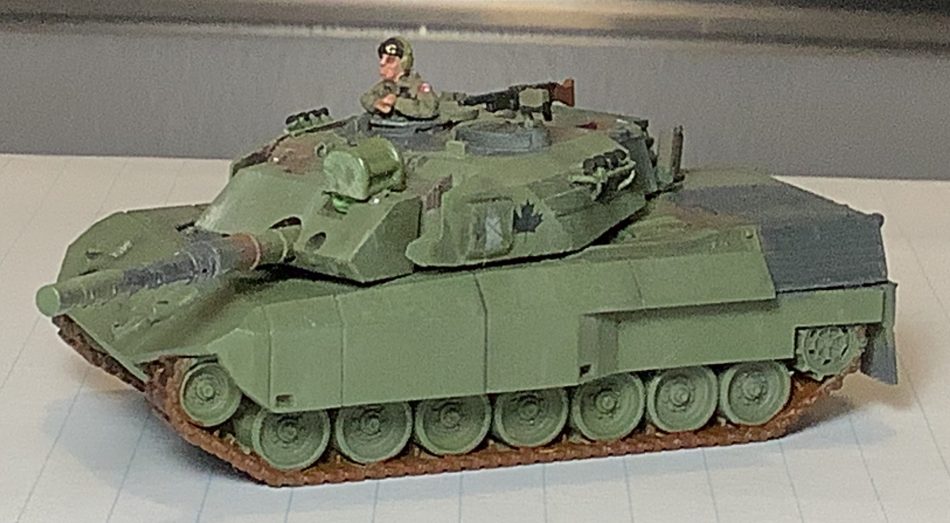
Leopard 2
I like the way that Battlefront explained how Canada got issued with Leopard 2s in the new book. It makes sense. It’s very similar to how we got our first Leopard 2s for use in Afghanistan. Twenty of the Bundeswehr’s stock of Leopard 2A6s were upgraded to 2A6M standard and loaned to Canada at no cost by the German government. They arrived by Antonov aircraft and within minutes of touching down in Kandahar the NATO three-colour pattern was almost totally covered in dust. So the Battlefront version of the Leopard 2A4 done up in NATO three-color with a black maple leaf with a white border on the turret is fine. We bought 127 Leopard 2 post-Afghanistan (Dutch, German & Swiss), 20 were bought as replacements for the 20 borrowed ones, which became the first upgraded German Leopard 2A7s.
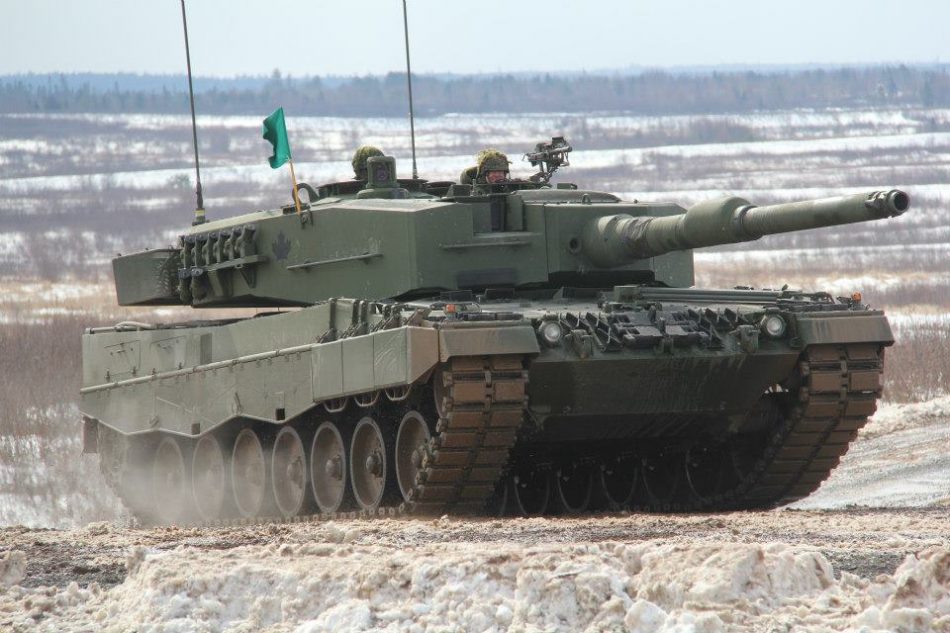
A modern-day Canadian Leopard 2A4. Anthony Sewards photo.
After Afghanistan, the Canadian Army bought used Leopard 2A4s from the Dutch. After refurbishing they were painted NATO Green with a black maple leaf (no white border) on the left and right sides of the turret. There are two easy conversions you can do to your Battlefront kits to make them look a bit more up-to-date and be different from everyone else. The first thing I did was to put a lid on the open basket at the back of the turret. Then I made some bins for the rear of the turret out of some styrene square tubing and trimmed off some of the smoke dischargers. You can also see that I didn’t add enough buff to this batch of NATO green.
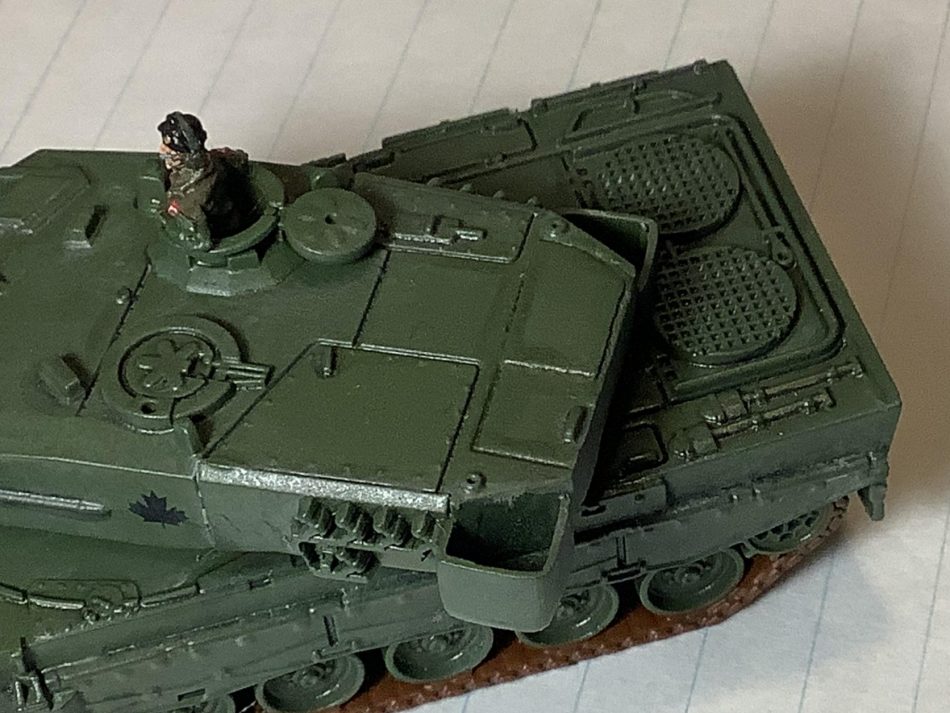
See how the rear bin on the left now has a cover. The black stuff is anti-slip material. You can also see the tops of the corner bins. Anthony Sewards photo.
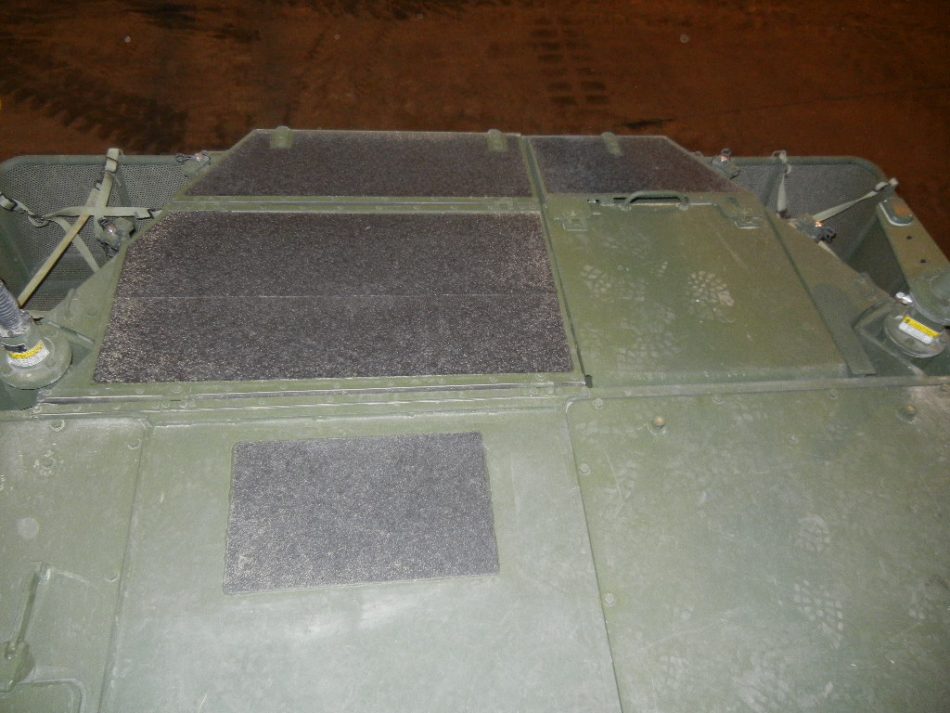
Another shot of the bins. Note that instead of a license plate the Canadian Forces Registration (CFR) number is painted on. Anthony Sewards photo.
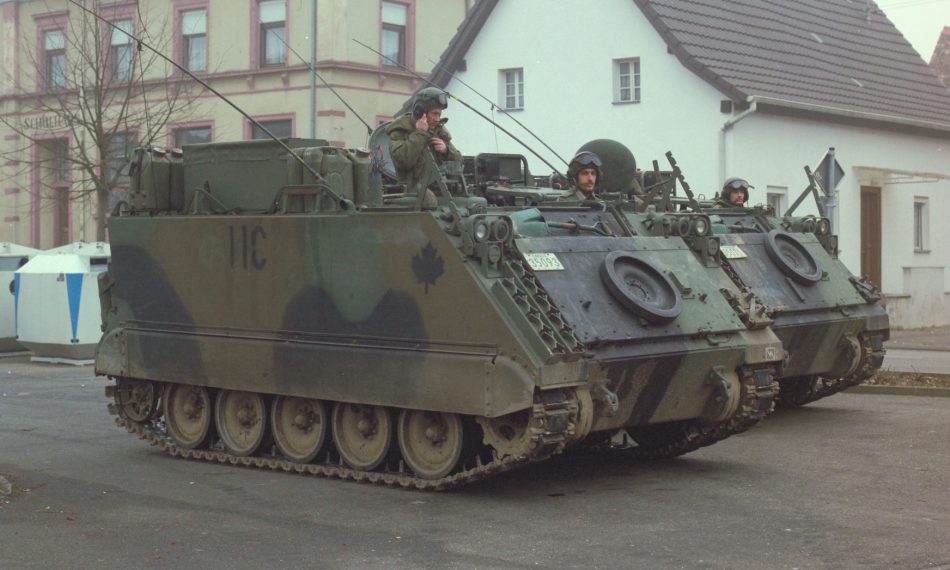
M113 and Tow Under Armour (TUA)
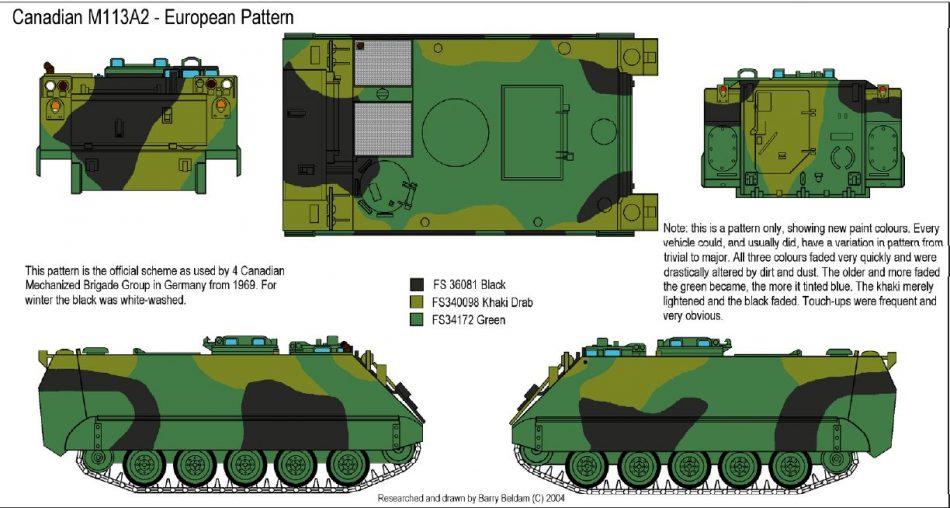
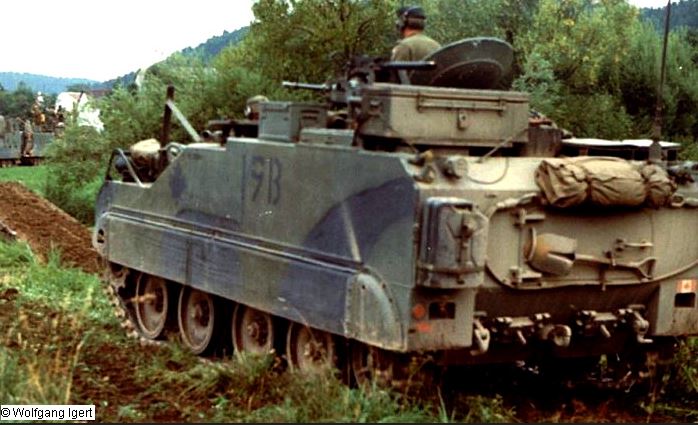
I wrote exhaustively on the M113 family in these two articles. Painting Canadian M113, the proper way – No Dice No Glory and Painting and Modelling Canadian M113 Family Part Deux – No Dice No Glory Unfortunately, most of the photos are no longer available on the first article, so I will put some here. For the M113 and TUA you have the option of painting it in the Canadian three-colour, NATO three-colour (after re-fit), and NATO green later in its service life.

Here is a brand new Tow Under Armour in NATO Three Colour. It’s so new that the call signs and black maple leaf have yet to be painted on. Anthony Sewards photo.
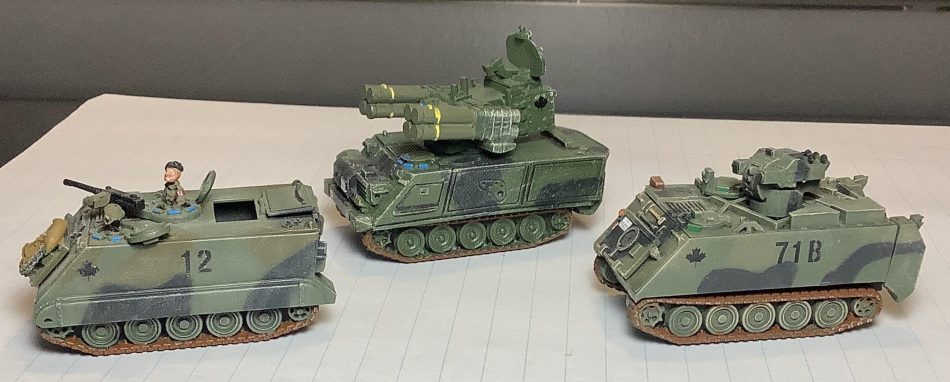
Some of my models showing the M113 series. Note that the ADATS pattern is close, but not quite the same as the M113 pattern.
Grizzly and Cougar
Again I have written an extensive article on this family of vehicles here The Canadian Armoured Vehicle General Purpose Family – No Dice No Glory . The main takeaway is that again the Battlefront painting guide is showing the correct camouflage pattern, but one of the greens is wrong. These vehicles were initially painted in the Canadian three-colour pattern and eventually, after refurbishing, most wound up being painted just plain NATO green. No black or white maple leafs were painted onto these vehicles. Having said that, if you wish to put a black one (no white border) on each side, I think it would look cool. Call signs would sometimes be painted on the side of the hull in black or on temporary placards on the turret sides and/or rear.

Here is a Grizzly in Norway filling up at the local gas station. The black areas have had a whitewash applied.
Here are some of my models that I had to scratch build as they were built a few years ago before the Battlefton kits came out. The “G” as in Golf (Guns) on the side of Grizzly shows that it is an artillery forward observation officer (FOO). You don’t put this on the M109s as they don’t mix with the other arms on the battlefield, but the FOOs do, hence the “G”.
Lynx
How to paint the Lynx is covered in the M113 Family Part Deux article. Painting and Modelling Canadian M113 Family Part Deux – No Dice No Glory Again, Battlefront has the correct camouflage pattern, but one of the greens is totally incorrect. From about the mid-70s onwards, the Lynx was only painted in the Canadian three-colour pattern. There are photos out there from the brigade in Germany with one of the greens looking like a brown. I’m told that it was just a bad batch of paint. But since it existed, no one can fault you for switching out one of the greens for brown. For Germany-based vehicles a black maple leaf would be painted on the sides of the hull along with black call signs.
This photo shows the markings for the Lynx. Black maple leaf and call signs along with the small flag, right rear. Based on the call sign, I believe it to be an engineer recce vehicle.
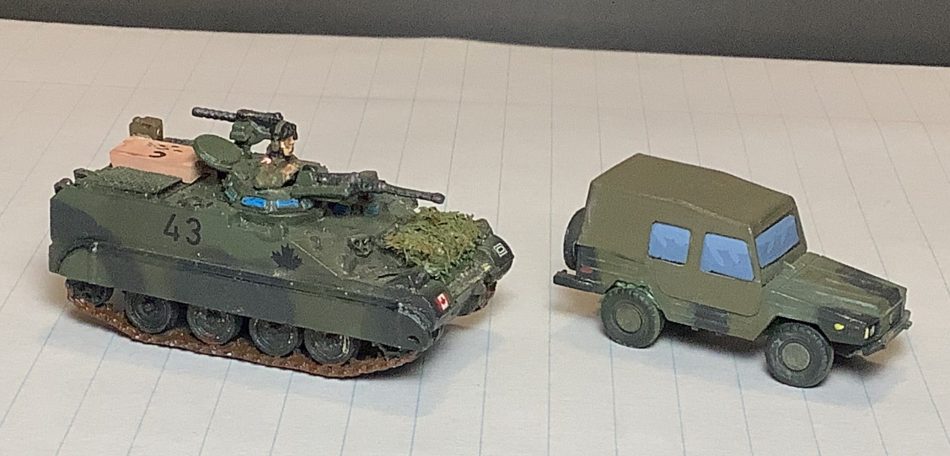
Here is one of my Lynx along with an Iltis. It is part of call sign 4 to designate the brigade recce squadron in 4 CMBG. Again, I did up the Iltis before the Battlefront kits came out. This one is made by Roskopf from back in the day and is in 1/100 scale.
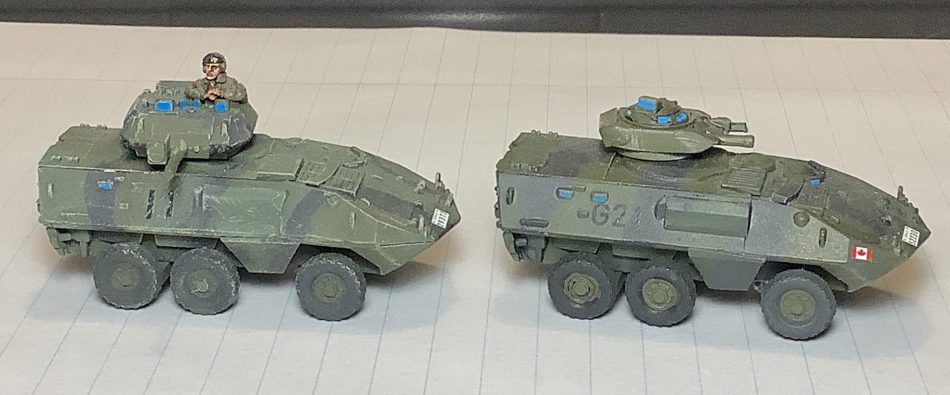
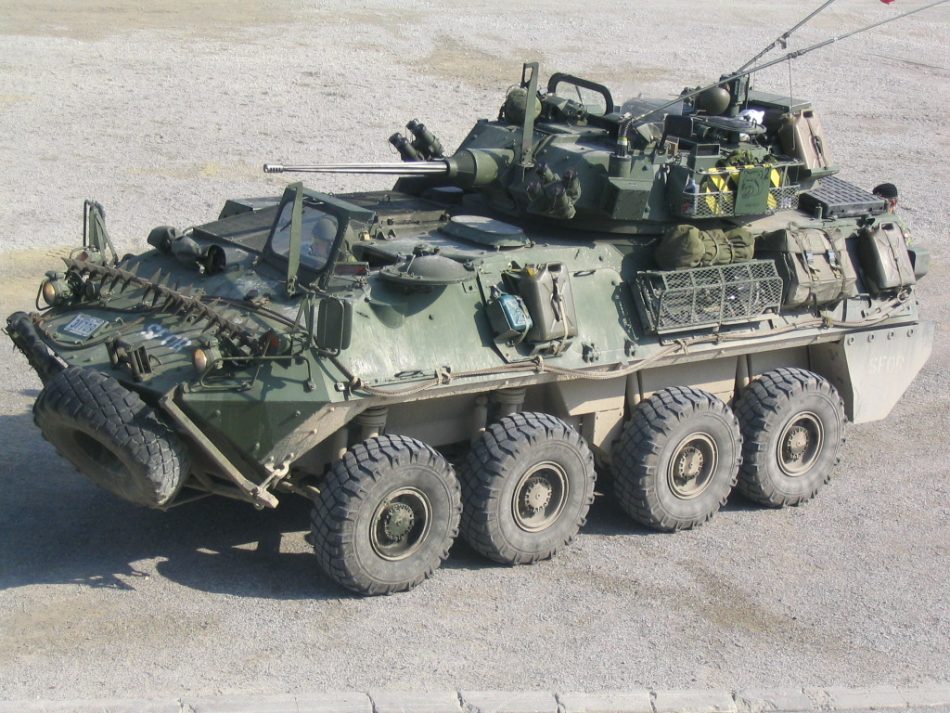
Coyote
The Coyote was only ever painted in NATO Green, except for a six-month rotation to Afghanistan in early 2002 where they were painted desert tan. Subsequent rotations of Coyote squadrons were painted in NATO Green, with the usual high amount of dust on them. I’m a big fan of Battlefront kits and try to use them as much as possible. Even if a 3D print version is available, I still prefer to use the BF kit. Where possible I might have extra parts printed and then glued onto a BF kit.
I like the BF Lav 25 kit, but to me, it just doesn’t look like a Coyote. Although the Coyote is basically a Lav 25 with Canadian modifications and surveillance equipment. The most visible differences between the two vehicles are the beefy turret bustles on the Coyote and the external stowage including that for the surveillance equipment. The Coyote usually had a spare tire and barbed wire on the front of the hull and fuel tanks in the rear where the Lav 25 had propellers. For those reasons I got mine printed from a friend who specializes in Canadian vehicles. 1-100 Coyote LAV by bonzai000 – Thingiverse
Having said that, no one is going to fault anyone who used the Lav 25 kit. As for markings, all one needs is a license plate front and rear. Black maple leafs were never painted on the sides of the vehicles. But, again, if you chose to put a black one on each side it would look cool. For call signs, normally they would be painted on a removable placard on the turret sides and/or rear.
A Coyote in Bosnia in NATO Green. Author’s photo. Note the license plate and the placard on the side of the turret. The spikey thing on the nose is for setting up roadblocks or vehicle checkpoints.

These are 3d prints from the same guy who produced the Mexas armour version of the Leopard C1, the tan one is a teaser for my Desert Storm “What If” Canadian Army.
Iltis
The Iltis was a neat little vehicle. As I mentioned in my previous article they were quite small. I recall how fast they were on the highway when we first received them. They also came with a roll bar and a roof that didn’t leak. They came in Canadian three-colour pattern and near the end of their life many were painted in NATO Green. The only markings would be a license plate front and back and small call signs on the sides just in front of the door. A small Canadian flag on each of the bumpers wouldn’t be out of place.
If you are not an Iltis fan you could get away with using Battlefronts’s new Feltvogn Mercedes vehicles. They are fairly close to the G-Wagons that Canada bought in 2004. Just paint them NATO green with small flags and license plates on the front and rear bumpers.
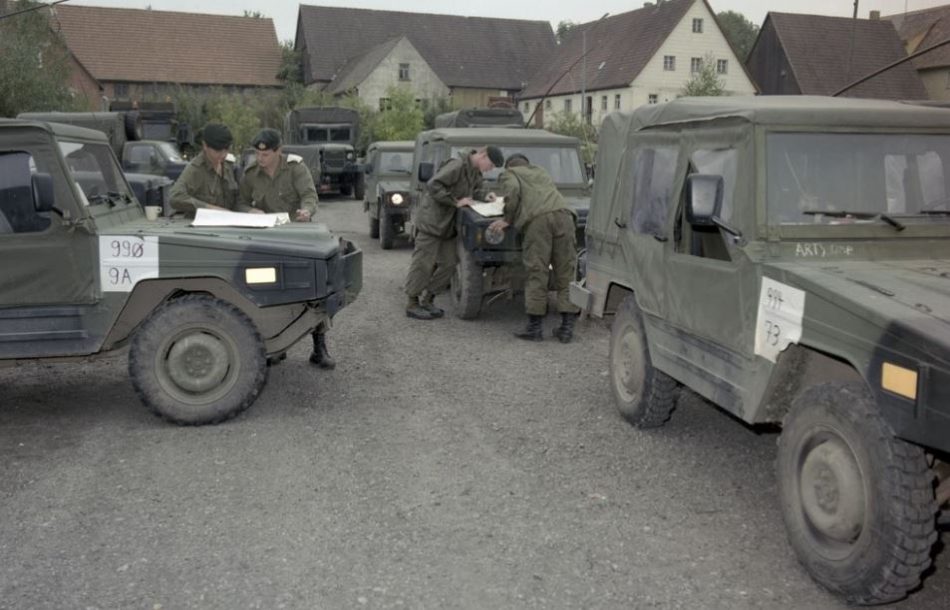
Umpire teams in Germany consulting their maps before heading out for the war.
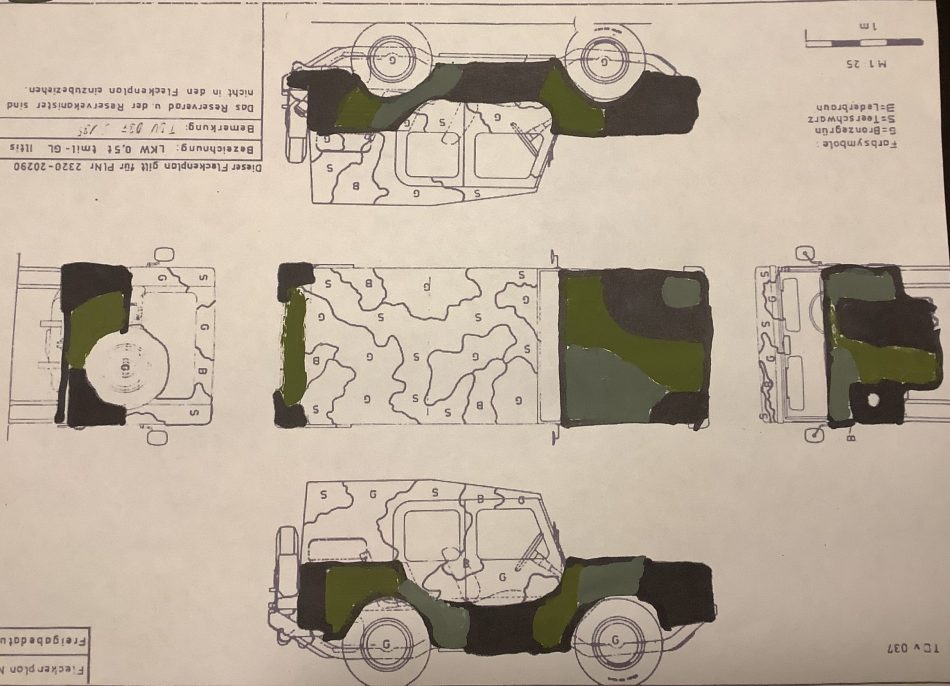
Here is my poor attempt at capturing the cam pattern over a drawing of the NATO three-colour pattern.
M109
In the latest book, you are able to take either the long-barreled M109 or the short-barreled version. I don’t know why Battlefront allows both versions as Team Yankee takes place in the mid-80s and Canada upgraded to the long barrels starting in 1976. But it does allow you to save some points by using the short barrels. Having said that the pattern will be the same. The M109s were painted in Canadian Three colour. Battlefront got the pattern correct, but again is using that mustard brown instead of an olive green.
Eventually, they were painted in NATO Three Colour after an upgrade. Near the end of their service life some could be seen in NATO Green. For service in Germany, they had a black maple leaf on each side of the turret and black call signs on each side of the hull. A small Canadian flag could also be seen on the front right of the hull and the right rear.
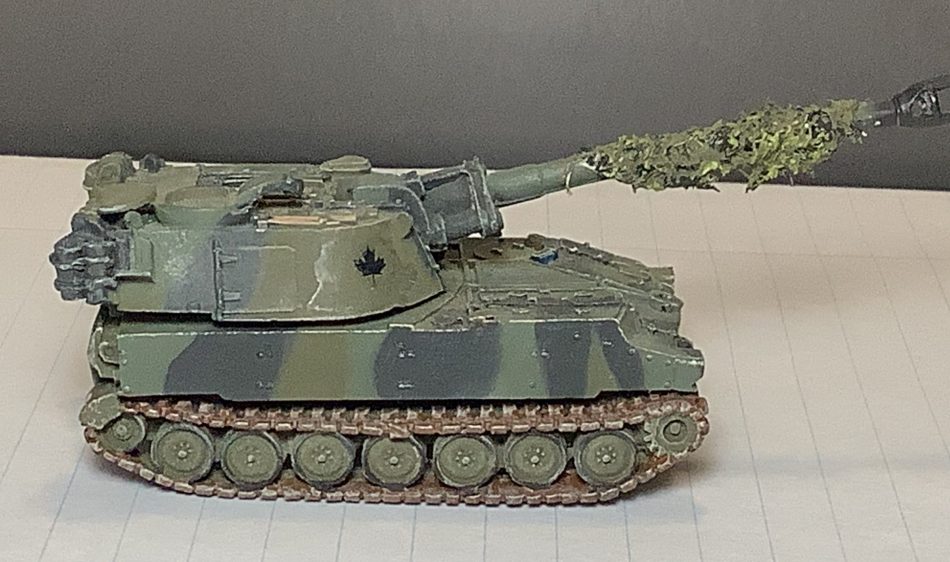
My own M109 with some extra camo netting on the barrel. I haven’t put the call signs on the sides of my guns as I ran out of numbers.
ADATS
I wrote about painting the ADATS in my M113 Part Deux article. https://nodicenoglory.com/2019/09/30/painting-and-modelling-canadian-m113-family-part-deux/ . What I said was that ADATS had a unique camouflage pattern and different shades of green compared to the M113. The pattern is close but not the same as the 113. Battlefront assumed they were the same and painted their models to reflect that. The correct pattern is in the article. The two shades of green are very close, so in this scale, I recommend just using NATO Green and NATO Black. On the turret would be black call signs and a black maple leaf. Like the M113 you can add license plates and small Canadian flags front and rear.
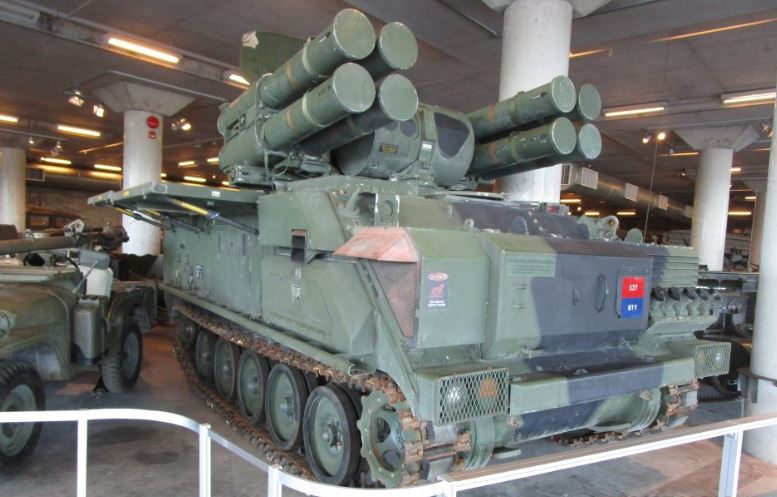
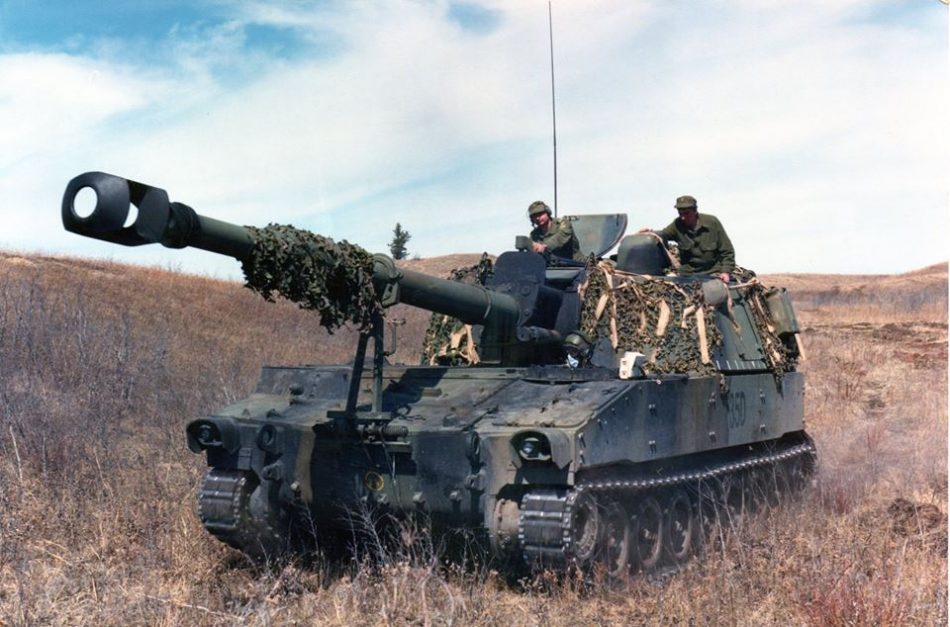
An ADATS from the Canadian War Museum in Ottawa.
Here is a quick reference chart to show the possibilities for each vehicle from the late 70’s to today. It was not uncommon to have a mix of patterns in the same company or even platoon. Oldest on the left, newest on the right.

This article has just been my two cents on how to paint your Canadian army accurately. I realize there are a lot of different options and might seem a bit confusing at times. It is impossible to paint up an entire army in just one pattern without leaving critical vehicles out of your order of battle, so embrace the diversity of patterns. If you want to paint up your army your way, that’s fine too. I just hope to see more Canadian Team Yankee armies out there. I’m being deployed to Latvia in February, so who knows what modeling inspiration awaits me there. I foresee doing up a modern Canadian combat team or maybe one of our allies.
In future articles, I’ll show how I did up my Desert Storm “What if” Canadian army, a winter army, how to make Canadian infantry with C7 rifles, and how to paint up those jump smocks as worn by the Canadian Airborne Regiment.
Well researched and once again well done. As a side, although the Airborne Regiment were the first to parade around in jump smocks, the entire SSF was eventually issued them in the late 70’s. Cheers
Luggs
This is a great article, definitely doing Canadian s next (especially now I know you can do 3 colour NATO which I didn’t realise before, so they can share a few M113s and Leo1s with the Boxheads)
I don’t know where BF gets their ideas for colours from…. at least they only got one of the Canadian greens wrong… they got both the Finnish greens completely wrong
(Idk if it will let me post links so I’ll reply with them)
Compare this…
https://en.m.wikipedia.org/wiki/File:T-55M.jpg
With BFs website…
https://www.team-yankee.com/Portals/0/all_images/NordicForces/Spotlights/WW3-08/Finnish-02.jpg
How common was it to have different marks of Leo 2 in the same troop ?
I believe it was quite common. We have three different models in our small Leopard 2 fleet.
Robert, outstanding work!
I read your previous articles over the years and all were well written informative reads. This one was no exception to thst trend. Well done.
Including links to the older articles was exactly the right touch. I used them to go back and re-read all the older articles with a renewed zeal after I finished the current one.
When TY first came out I played a couple of games but didn’t become a serious player until v2 when more nations were introduced. In those early days I took a stab at playing Canadians but my play style at that time, and the army, just didn’t click.
As time passed my play style changed and a few months before the new NATO came out I revisited the Canadians. This time with much better results I might add.
My Canadian forces Renaissance was, as one can imagine, even further enhanced by the arrival of the new book. Though I’ve yet to play an updated list in a tournament I’m excited to do so.
Inspired by the Nordic book, and the early 80s antics of the “Great White North” brothers, Bob and Doug McKinze, I decided I would convert my Canadian forces into a winter camo scheme. Now thanks to all your hard work producing these great articles, my Canadians will look more authentic in their winter patterns as they strive to save Toy Land from communism.
All the best, and thanks again
Jon Holland
Thank you for the kind words. For you infantry there are options for the white camo clothing. They are only nylon shells and are put on depending on the available cover and snow fall. If there are evergreen trees in the background we go with just the white pants over our green uniforms. Always use the white helmet covers. If its arctic we go all white. Sometimes you might see just the white jacket cover.