Bolt Action Basing Tutorial

By Kreighton Long

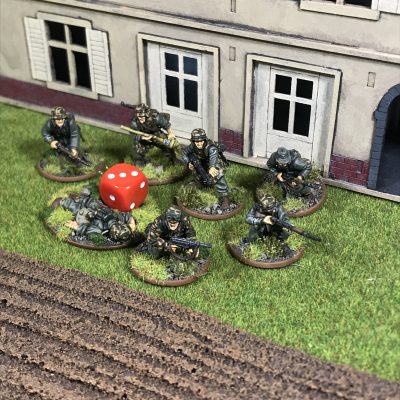
A little while back a follower of mine on Instagram asked me how I base my miniatures so I put together a little tutorial to share with anyone curious.

There are two parts to a painted miniature when it’s on the gaming table. There’s the miniature itself, then there’s the base.

Depending on the scale and how the miniature is represented in the game both parts are essential to a jaw-dropping gorgeous army. Most of us may be able to recall instances of walking around convention halls, tournament tables, or gaming clubs and seeing that almost gorgeous army. I say almost because every so often one of the two aforementioned parts is a bit below the standard set by the other part.

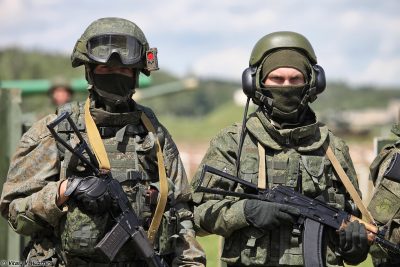
Painting Modern Russian Army Camouflage

Photo by Vitaly V. Kuzmin – http://www.vitalykuzmin.net/Military/4th-Kantemirovskaya-Tank-Division-Open-Day-Part2/

I’ll level with you. Looking at Google images of modern Russian army camouflage gave me a headache and trying to figure out how to replicate it at 28mm pushed the headache into migraine territory.

The easiest solution would have been to paint the camo in a solid bright green color since that’s what the camo looks like at a distance anyway but I decided against it and threw together a BDU-looking camo pattern.

I’ll take the hit for historical accuracy because I think what I came up with looks passable to those who don’t know what right should look like. Feel free to judge – I can take it. If you’re more committed to the crusade of historical accuracy than I was then I applaud your fanaticism and have fun. If you find success please send tips my way.

Dishdash Games Ultracombat Moderns: Modern Russian Army Review

By Kreighton Long

Following a successful campaign, is due to release additions to their in the coming months. These additions include a variety of US and Russian miniatures including nine-man fire teams for both nations.

The metal models come in a healthy variety of poses as they shoot, move, and communicate around the battlefield. This month we’ll take a look at the Russian miniatures.

Building Bolt Action Pin Markers

By Kreighton Long

Gamers have a variety of means of marking progress and mechanics in their games. The means of doing so range as wildly as the reasons we need to track them. Whether the game calls it stress, fatigue, or pins, we can use tokens, dice, or counters.

Players of Bolt Action deal with pins, a game concept that functions against a unit’s morale.

Marking pins on the table can be as simple or fancy as the player wants it to be. For my games, I decided that I wanted to create a way of tracking pins that would blend into the table and compliment the aesthetic as much as possible.

After some digging around I came across appropriate casualty markers from .

For this project specifically, I used a . The core idea here was to create a scenic looking marker combining a casualty model with a slot where a 9mm D6 can be turned to represent the number of pins on a unit. After completing the test piece shown below I’m committing to working on a set for personal use with my WWII German armies.

Painting Heer and Luftwaffe Splinter Camouflage

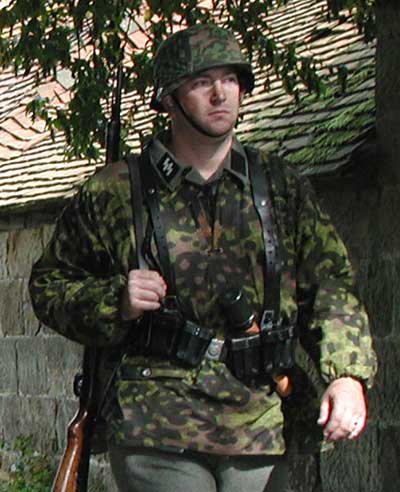
By Kreighton LongGerman WWII Tent Quarter & Poncho Zeltbahn Splinter Pattern Camouflage – International Military Antiques

While the Waffen SS made extensive use of camouflage uniforms, the German Heer incorporated its own pattern, albeit not to the thoroughness of their SS peers.

In this article, I would like to share my process for painting Splinter Camouflage. This pattern is applicable for both Heer as well as Luftwaffe Fallschirmjager who sported similar patterns during the mid and late-war periods.

I recommend finding examples of splinter camouflage in history books or Google Images and leaning on them to help form the shapes of the different parts of this pattern. We will be using the following Vallejo paints in this tutorial:  German Cam. Beige (821), Leather Brown (871), German Cam. Medium brown (826), Black (950), and Luftwaffe Cam. Green (823). We will also use Citadel’s Seraphim Sepia as a wash.

Dishdash Games Ultracombat Moderns: Modern US Army Review

Following a successful campaign, is due to release additions to their in the coming months. These additions include a variety of US and Russian miniatures including nine-man fire teams for both nations. The metal models come in a healthy variety of poses as they shoot, move, and communicate around the battlefield. This month we’ll take a look at the US miniatures.

Clean sculpt lines make painting them painless although even the best sculptor in the world can do nothing about the challenges of painting OCP camouflage. My one criticism is that the shoulder straps of the US load-bearing vests come off as noticeably high and cleaning the flash around fiddly-bits like the carrying handles of the US M249s can be precarious.

Mass for the Masses: building cheap Spanish church terrain

By Tyler Stone

The crew over at just unveiled their ‘Ports of Plunder’ range of scenery. These affordable MDF kits are the result of a collaboration with , and have all of the quality the community has come to expect from 4Ground’s scenery. As I type this, my fellow TotS podcaster Glenn van Meter is working on assembling and reviewing a few of these excellent kits.

Recon Report – Bolt Action: Campaign: Mariana and Palau Islands

By Kreighton Long

Last week Warlord Games made the new book available for pre-order. This latest addition to their inventory of Bolt Action supplemental materials provides just over 150 pages of new content for fans of the 28mm World War Two skirmish game.

Focused on two campaigns in the South Pacific, this book attempts to provide engaging scenarios and unique unit and theater options for players representing the Japanese and United States combatants of the war.

The battles for the Marianas and Palau Islands all occurred during the summer and autumn of 1944, half a world away from the violent crescendos of the Normandy landings and Operation Market Garden in western Europe and Operation Bagration in eastern Europe.

This Old Guard: Refurbishing my Victrix 28mm Napoleonic Old Guard Chasseurs

by Dennis ‘Matt Varnish’ Campbell

Everyone has that model or unit that is just… well… it’s not your best work. For my Napoleonic French army in 28mm, that unit is my battalion of Old Guard. Here is the story of how they are my worst unit and how I fixed the situation

First of all, in preparation for a big game of a while back, I had decided that I needed an Elite unit to back up my glorious Line infantry, and so painted all 24 figures in one day.  Naturally, the plan was to come back later and re-work them.. so its very basic.. main colours then a wash over the whole model with GW Nuln oil. My pot of Nuln Oil was bad so that it left pools of white residue everywhere and a super gloss finish.

I still used them for the game.  On my way back, I had to slam on my brakes for some lady in a white SUV who cut me off, and I could HEAR my boxes of miniatures in my trunk tipping over.  I could only imagine the carnage. Almost every single model that had rifles facing forwards were broken, and I had to re-glue so many bayonets, that I only used them in one other game after that,

Some ideas to base your next 28mm army

The 28mm size, if you ask me, is the perfect balance between playability and modeling/painting. You can buy and assemble pretty good armies for any ruleset from ancient warfare to sci-fi skirmishing without investing too much money or time to paint them, with striking results. So, even if I prefer 15mm when it comes to competitive games and recreating full-scale battles, I often spend some time to paint and play 28mm miniatures.

However, on gaming tables, I equally often see very good painted miniatures with anonymous green bases. I think bases are so significant for the final look of an army (by the way, here are for Team Yankee, and ).